Wednesday, November 28, 2012

Three Bean Chili


Here's another healthy recipe full of fiber that will make you feel better after eating it.  It's even vegan (if you don't add cheese or sour cream), but I always feel full after eating it.  I used to make this at church along with polenta for hundreds of people, and no one ever complained for the lack of meat (although more than a few didn't eat the polenta because they didn't know what it was).

I've taken the recipe from PETA and added three secret ingredients, adobo seasoning, liquid smoke, and chipotle peppers in adobo, to give it some real depth of flavor.  Well, I guess the ingredients aren't that secret anymore.  =)  Start with just a little bit of peppers, taste, and then add more because a little goes a long way.

PA283121
 
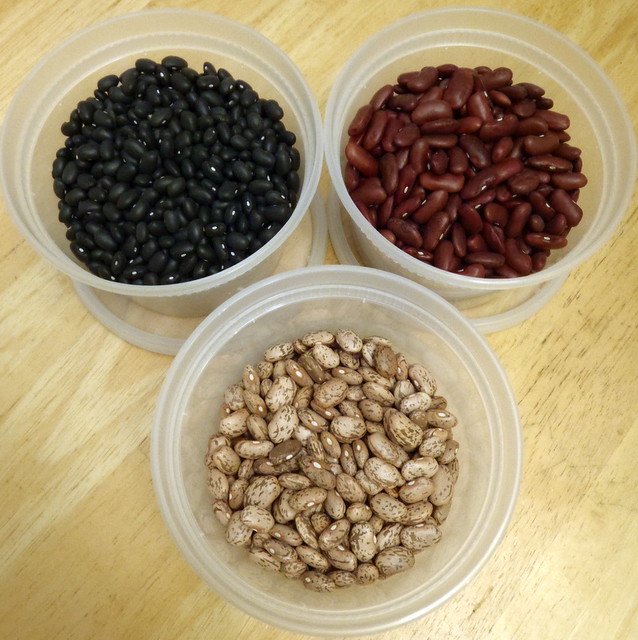
The recipe is pretty forgiving.  I've had to substitute crushed tomatoes and whole tomatoes for the diced tomatoes before.  Once I even used salsa instead of some of the tomatoes, and it still turned out okay.  I've made this with dried beans before, but it's a lot easier to make it with canned beans.  The original recipe calls for 2 parts kidney beans to 1 part pinto beans, but I substitute a can of black beans in for half the kidney beans to give it more color.


Three Bean Chili (adapted from PETA)
serves 6

2 tablespoons canola oil
6 garlic cloves, minced
1 cup chopped white onion
Red pepper flakes, to taste
1 tablespoon chili powder
2 1/2 teaspoon ground cumin
1 tablespoon adobo seasoning
1 teaspoon oregano
1 bay leaf
28-oz. can diced fire-roasted tomatoes
1 tablespoon soy sauce
1 1/2 cups vegetable stock
6 oz. tomato paste
1 tablespoon red wine vinegar
16 oz. can pinto beans, drained
16 oz. can kidney beans, drained
16 oz. can black beans, drained
1 teaspoon liquid smoke
Chipotle peppers in adobo, chopped, to taste

PA293128
 
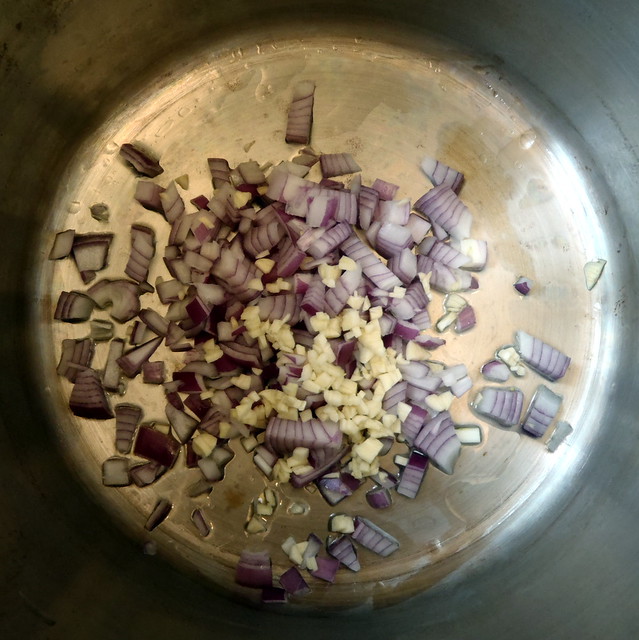
Heat the oil in a large pot over medium heat.  Add the garlic and onion and sauté until softened, about 5 minutes.

PA293131
 
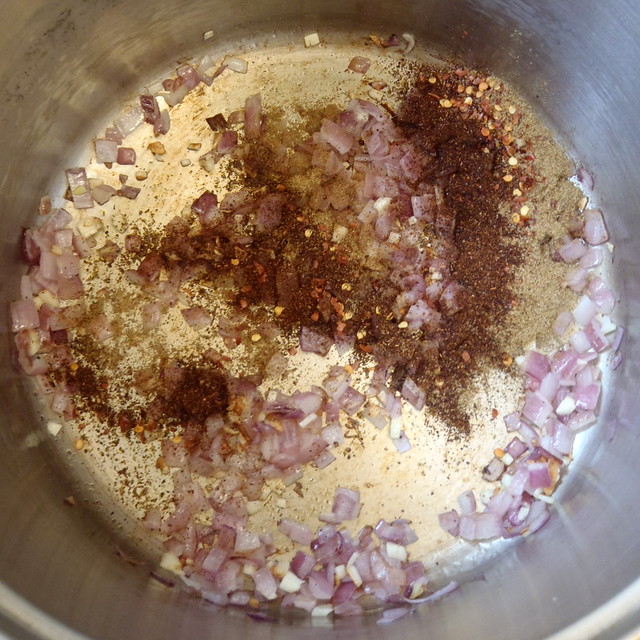
Add the red pepper flakes, chili powder, and cumin and cook for an additional 2 minutes, or until fragrant.

PA293132
 
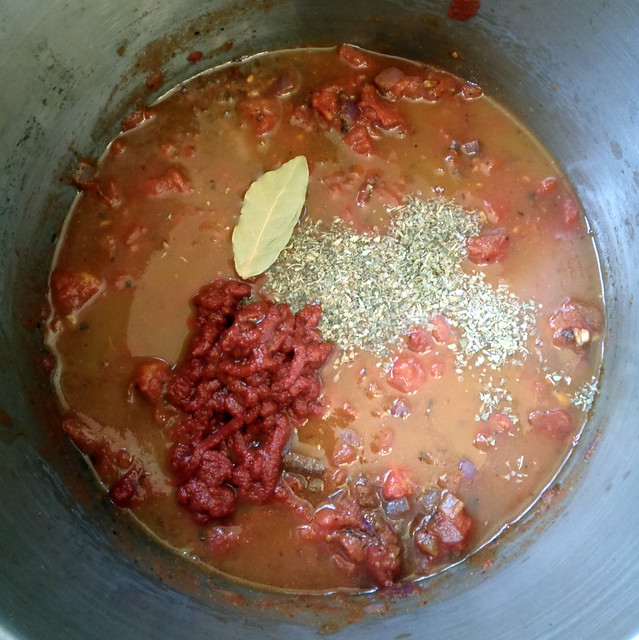
Add the adobo seasoning, oregano, bay leaf, tomatoes, soy sauce, stock, tomato paste, and vinegar, then bring to a boil, lower the heat, and simmer 30 minutes, stirring occasionally.

PA293142
 
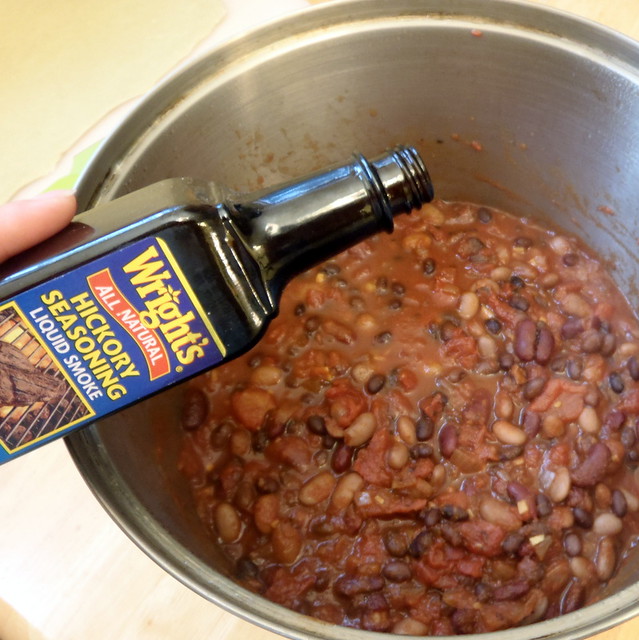
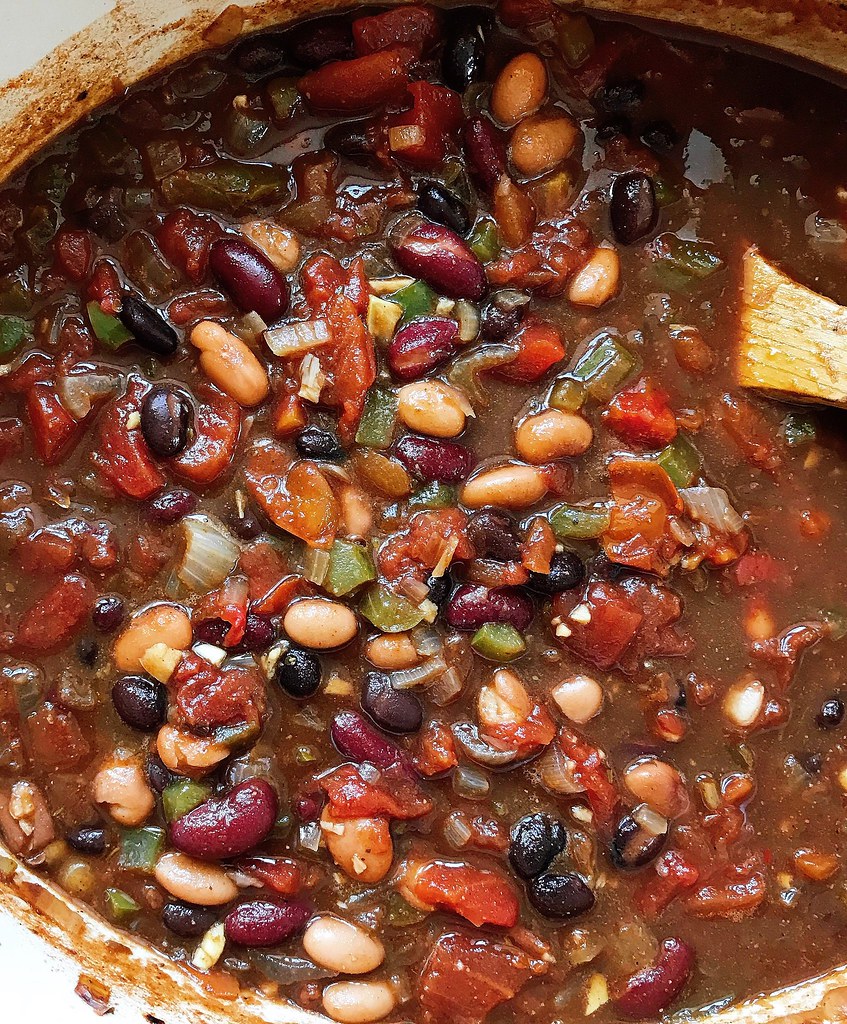
Add the beans and simmer 15 minutes longer to heat through and blend flavors.  Add more water, if necessary, or cook longer to reach desired consistency.  Add the liquid smoke and chopped chipotle peppers and stir to combine.

PA293141
 
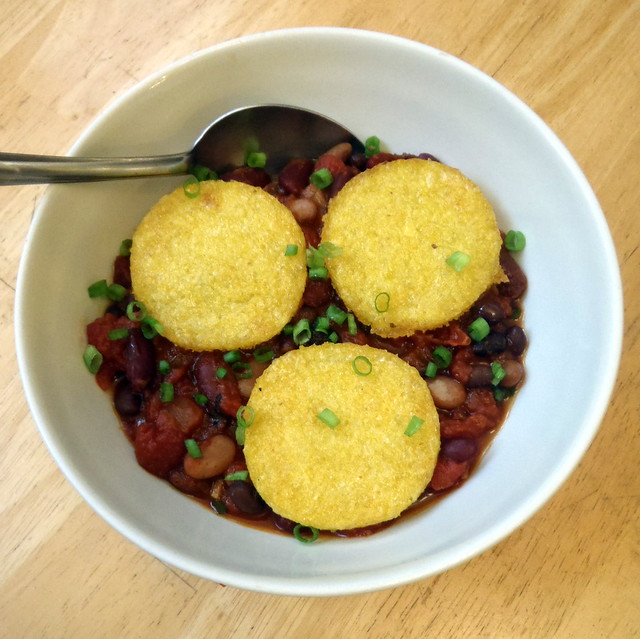
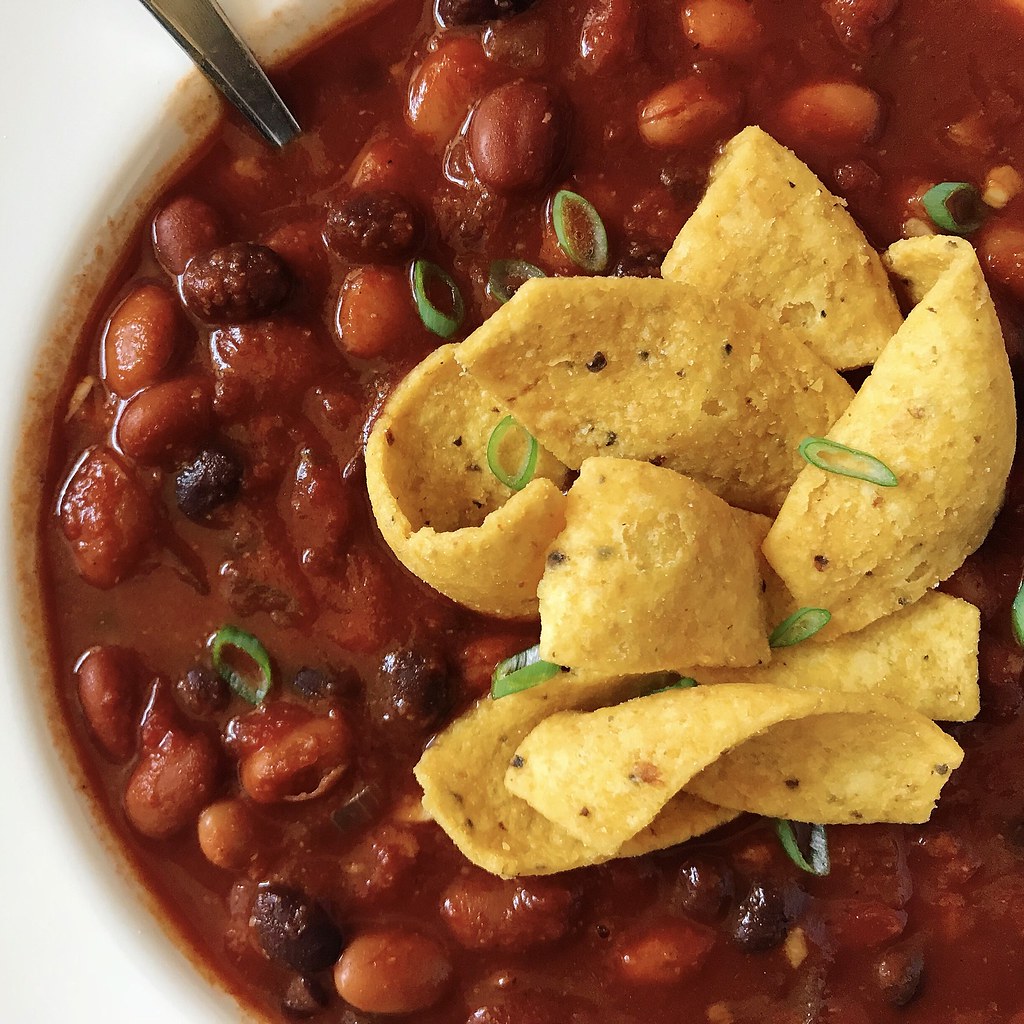
You can serve this with shredded cheese, sour cream, avocado slices, and chopped green onions.  I like to eat this with Fritos, brown rice and lime-flavored tortilla chips, or fried polenta. You can find tubes of pre-cooked polenta at Trader Joe's and just slice and pan fry it.  The chili freezes well, so go ahead and make a big pot!

Three years ago:  Kettle Corn

Monday, November 26, 2012

Green Smoothies

If you, like me, have eaten a little too many rich foods this past long weekend, try a cleansing green smoothie for breakfast or as a snack.  I discovered these over a year ago and love how good you feel after drinking one.  It packs a ton of nutrients and fiber, and even though it looks a little weird, is actually really delicious!

I recommend starting off with spinach as your leafy grean because I've found it to have the least strong "green" flavor.  In fact, if your eyes were closed, you probably wouldn't even suspect that there were any vegetables in the smoothie.  I've made these with lettuce, chard, and kale before, too, and while you will taste them more, it's still pretty yummy.

I get a bunch of bananas from Boston Organics with each delivery and usually let them ripen until they're a nice, evenly spotted brown, and then throw them whole and unpeeled into the freezer.  I used to peel them and cut them up into chunks before putting them in a freezer bag, but I found that the banana chunks would get discolored quickly that way.  When you freeze the bananas whole, the skin will turn brown, but once you peel them you'll see that the fruit itself is still unblemished.  It can be a little difficult to peel a frozen banana, so I usually let it thaw a few minutes, then lop off the ends, make a lengthwise cut, and try to peel it from the cut.  The advantage of using a frozen banana is that you don't have to add ice, which would just add volume and dilute the smoothie.

I've used a lot of different fruits before:  orange segments, kiwis, strawberries, grapes, apples, pears, plums, blueberries, raspberries, etc. and it always tastes great.  I started off using soy or almond milk as the liquid, but eventually found that I could get away with just using plain water, and it still tasted great.  If you have leftover coconut "water" from making coconut whipped cream, it makes an excellent liquid base.

I like to add chia seeds for some protein and omega-3 fatty acids, but if you don't have any, the smoothies are still good.  In the beginning, you may like to add some nut butter, like peanut butter or almond butter, for taste and protein, but I've found it's easier just to add sliced almonds since blended almonds is basically what almond butter is anyways.

I guess what I'm essentially saying is that as long as you have some greens, a frozen banana, and one or two other fruits, you're good to go.  Sometimes if I'm in the mood for something more chocolatey, I'll add some cocoa powder.  Have fun experimenting and seeing what your favorite combinations are!

PA023126
 
Green Smoothies
makes 1 large smoothie

1 large handful leafy greens (like spinach, kale, chard, or lettuce)
1 tablespoon chia seeds, sliced almonds, or nut butter
About a cup of cut up fruit (see the 4th paragraph above for suggestions)
1 frozen banana, peeled and chopped
1/2 cup liquid (water, almond milk, soy milk, coconut milk, etc.)

PA023110
 
Place the greens in the bottom of the blender.

PA023111
 
Add the chia seeds/almonds/nut butter and then the fruit.

PA023114
 
Top with the frozen banana chunks.

PA023117
 
Lastly, pour the liquid over everything.

PA023119
 
Start the blender off on low and quickly bring it up to high, making sure that everything is blending nicely.  If needed, stop the blender and tap the container to get rid of air bubbles.

PA023122
 
Blend for a minute or longer until everything is smooth.  Pour into a large glass and drink immediately.

PA023123
 
A note about blenders:  I have a Vitamix, which I love dearly.  It blends everything so easily, and it's really easy to wash!  Sure, it's pricey, but if you end up using it as much as I do, it's so worth it in the end.  I don't have any experience making a green smoothie in a regular blender, but hopefully it will work okay in those, too.

Next:  Three Bean Chili
Previously:  Mashed Potato Pizza with Roasted Garlic and Bacon
Three Years Ago:  Apple-Pear-Cranberry Crisp

Friday, November 23, 2012

Mashed Potato Pizza with Roasted Garlic and Bacon

If you have any leftover mashed potatoes from Thanksgiving, I highly recommend making this pizza.  I first had a mashed potato pizza at BAR in New Haven.  A few friends had raved about it, so I had pretty high expectations going in, and it exceeded all of them.  This pizza isn't quite as good as that one, but it's easier than driving down to New Haven.

From what I remember, mashed potatoes that they used at BAR were kind of loose and liquidy vs. thick and creamy.  While I probably wouldn't have liked that consistency in stand-alone mashed potatoes, it worked really well on their thin crusted pizza.  I usually add some bacon, garlic, and broccoli as toppings, and once the pizza arrives, top it with their signature salad, which is dressed with a light vinaigrette, for some acidity.  I used what I had on hand for this pizza, but feel free to experiment with other toppings!

Mashed Potato Pizza
 
Mashed Potato Pizza with Roasted Garlic and Bacon
makes 2 individual size pizzas

1 head garlic
Olive Oil
Kosher salt, to taste
1 sprig of fresh thyme (optional)
1 cup mashed potatoes
2-3 strips bacon
1 recipe pizza dough, divided into two balls
2 tablespoons scallions, chopped
2 small handfuls of shredded mozzarella

Preheat oven to 400°F.

PB163121
 
Peal off most of the papery skin of a head of garlic, but keep the last layer or two to hold the cloves together.  Slice off the top of the head so that the top of the cloves are exposed.  Check the cloves and discard any yucky ones.  Place the head of garlic on some aluminum foil, drizzle generously with olive oil, sprinkle with some kosher salt, and top with the sprig of thyme, if using.  Wrap the aluminum foil around the garlic, and roast for 30 minutes until soft.

PB163131
 
Once the garlic has cooled enough to the touch, squeeze out the cloves and set aside.  Reserve the garlic infused olive oil.  Increase the temperature of the oven to 500°F and place a pizza stone on a rack set in the lower third of the oven.

Place the bacon strips on an unheated frying pan.  Over low heat, fry the bacon until browned on the bottom.  Flip the bacon pieces and brown the other side.  Chop up the bacon, and reserve the bacon grease left in the pan.

PB163144
 
On a large piece of parchment paper, take one of the balls of pizza dough and stretch it out.  Spread half the roasted garlic, garlicky olive oil, and bacon grease all over the top of the dough.

PB163145
 
Spread half the mashed potatoes on top.

PB163147
 
Sprinkle with half the fried bacon pieces, scallions, and mozzarella.

PB163150
 
Slide the pizza (still on the parchment paper) onto a pizza stone.  Bake for 5 minutes, then rotate the pizza, and bake for another 3-5 minutes, until nicely browned.  Repeat with the shaping, topping, and baking second pizza.

Mashed Potato Pizza
 
Let both pizzas cool for about 5 minutes before slicing and serving.

Update:  I've made this pizza using Ken Forkish's Same Day Straight Pizza Dough.  That dough is so much better!


Next:  Green Smoothies
Previously:  Ramen Cabbage Salad
Three years ago:  Nanaimo Bars

Wednesday, November 21, 2012

Ramen Cabbage Salad

Here's another super simple dish that always gets rave reviews when I bring it to potlucks.  The first time I had this salad was at a church potluck.  The pastor's wife had brought it, and when I asked her what it was, she called it a Chinese salad.  I was like, "Are you sure?"  Because I was pretty sure that it wasn't Chinese in origin.  But regardless of the name, it's really delicious.  You get a nice crunch from the cabbage, instant ramen pieces, and almonds, and the dressing is enhanced by adding the seasoning packet from the ramen into it.

The secret to keeping the ramen and almonds crunchy is to dry toast them in a pan and mix it in with the rest of the salad just before serving.  And you'll want to heat up the vinegar and soy sauce a bit to make sure that the sugar dissolves into it.

Ramen Cabbage Salad
 
Ramen Cabbage Salad
serves 15-20

1 package instant ramen (I usually use Maruchan's chicken flavor)
1/2 cup slivered almonds
3 tablespoons sesame seeds
14 oz. bag of coleslaw mix (I like to get the kind with green and red cabbage and carrots for color)
4 scallions, chopped
3 tablespoons rice vinegar
1 tablespoon soy sauce
2 tablespoons sugar
1/4 cup canola oil
1 tablespoon sesame oil

PB103177
 
Crumble the ramen into small pieces (I find it easiest to do this while the bag is still unopened).  Save the seasoning packet for the dressing.  Toast the ramen pieces, almonds, and sesame seeds on a dry pan over medium high heat until lightly browned.  Set aside and let cool.

PB173170
 
Mix the coleslaw mix with the chopped scallions in a large bowl.  Set aside in the refrigerator.

PB103178
 
In a small bowl, mix the vinegar, soy sauce, and sugar.  Microwave for 30 seconds and stir until the sugar is dissolved.  Pour into a small jar.  Add the oils and ramen seasoning packet.

Ramen Cabbage Salad
 
Just before serving, add the toasted ramen pieces, almonds, and sesame seeds to the cabbage mix.  Shake the dressing and toss into the salad.

Next:  Mashed Potato Pizza with Roasted Garlic and Bacon
Previously: Corn Souffle

Monday, November 19, 2012

Corn Souffle

This is one of my favorite dishes to bring to a potluck, especially around this time of year, because it's dead easy to make, but everyone always raves about how delicious it is.  And the weirdest part is, almost all the ingredients come out of a box or a can.

PB173158
 
I wouldn't technically consider it a souffle, but if you bake it in a souffle dish, it will rise and fall like one.  If you don't have a souffle dish (like me), you can also just bake it in a regular 9"x13" baking dish, and it'll be just as delicious.  It's like a super moist corn bread, but to describe it like that is to do it a grave injustice.  It's just that little bit sweet enough where you'll keep taking another bite to try to taste it some more, and it's light enough that you won't regret it.

So make this dish, sit back, and wait for the compliments to roll in.

Corn Souffle
 
Corn Souffle
serves 15-20

2 large eggs
1/2 cup oil or 1 stick of butter, melted
8 oz. sour cream
16 oz. can whole corn kernels, drained
16 oz. can creamed corn
8 1/2 oz. Jiffy corn muffin mix

Preheat oven to 350°F.

PB173160
 
In a large bowl, beat the 2 eggs.  Add oil or melted butter and sour cream and combine (the sour cream will help emulsify the oil and eggs).

PB173162
 
Add the drained corn and creamed corn and mix.  Finally, add the corn muffin mix and stir until combined.

PB173163
 
Bake in a 2 quart souffle dish for 55 minutes or a 9"x13" baking dish for 45 minutes until golden brown.  Serve warm, if possible, but it's okay at room temperature, too.

Corn Souffle
 
If you like, you can also sprinkle on some shredded cheddar cheese when there are 10 minutes left to bake.  Other ideas for add-ins would be chopped peppers, scallions, and crumbled, cooked bacon.  Personally, I like it just as it is.  ^_^

Next:  Ramen Cabbage Salad
Previously:  Pretzel Ice Cream Pie with Homemade Magic Shell

Friday, November 16, 2012

Pretzel Ice Cream Pie with Homemade Magic Shell

Can you handle one more pie from Momofuku Milk Bar?  Because I think I've done the impossible:  I've improved a recipe from the Momofuku Milk Bar.  Yeah, I know, right?

This Pretzel Ice Cream Pie is pretty similar to the Cereal Milk Ice Cream Pie except that, you guessed it, you substitute the cornflakes for pretzels.  This time I actually followed the Preztel Ice Cream recipe from the Momofuku Milk Bar cookbook because I had all the ingredients, and the best part is, it didn't use any eggs.  Instead, it thickens the ice cream base with gelatin.

The only thing is, after tasting the ice cream, it tasted a little too salty for me.  Now I'm all for salty sweet combos, but this was just a little too much.  But then I thought, what if I added some chocolate, like chocolate covered pretzels?  (It's kind of funny because chocolate covered pretzels were my first introduction to salty sweet snacks, and now I add salt to almost every sweet, even chocolate ice cream!)

I remembered that an easy recipe for homemade Magic Shell, that liquid chocolate sauce you pour on top of ice cream which hardens into a "magic shell", had made it's way around the internets a while back and thought it would be a perfect topping for this pie.  And it was!  In fact, if I were to make this again, I might pour a layer of Magic Shell on top of the Pretzel Crunch pie crust before adding the ice cream because it would help keep the pie crust together better, I think.

Pretzel Ice Cream Pice
 
Pretzel Ice Cream Pie with Homemade Magic Shell (from Momofuku Milk Bar)
makes 1 pie

Pretzel Crunch Pie Crust
  • 2 cups pretzels (about 1/4 of a 16 oz. bag)
  • 1/4 cup light brown sugar, tightly packed
  • 2 tablespoons sugar
  • 1/4 cup milk powder
  • 1 tablespoon malt powder (if you can find it; if you can't, like me, substitute with flour)
  • 9 tablespoons butter, divided 
  •  
Heat the oven to 275°F.

PB013149
 
Pour the pretzels in a medium bowl and crush them with your hands to one-quarter of their original size. Add the sugars, milk powder, and malt powder and toss to mix. Melt 7 tablespoons of butter and add to the pretzel mixture, tossing to coat.

PB013153
 
Spread the clusters on a parchment- or Silpat-lined sheet pan and bake for 20 minutes.  Cool completely.

Using your hands (or a food processor if you prefer), crumble the pretzel crunch clusters to half their size.

PB013162
 
Melt the remaining 2 tablespoons of butter and toss into the crumbled pretzel crunch, mixing well. Using your fingers and the palms of your hands, press the mixture firmly into a 10-inch pie tin, making sure the bottom and sides of the pie tin are evenly covered.

PB013164
 
Pretzel Ice Cream
  • 6 cups pretzels (about 3/4 of a 16 oz. bag)
  • 2 cups milk
  • 3/4 teaspoon powdered gelatin
  • 1/4 cup corn syrup
  • 2 tablespoons light brown sugar, tightly packed
  • 1 1/2 oz. cream cheese
  • 1/2 teaspoon kosher salt
  • 1/8 teaspoon baking soda

Heat the oven to 300°F.

PB023110
 
Spread the pretzels on a sheet pan and toast for 15 minutes, until the pretzels have slightly darkened in color and your kitchen smells pretzely. Cool completely.

PB023112
 
Put the pretzels in a large bowl, pour the milk over them, and stir while steeping for 2 minutes.

PB023114
 
Strain the milk mixture through a fine-mesh sieve and discard the soggy pieces of pretzel.

Bloom the gelatin in 2 tablespoons of cold water.

PB023116
 
Warm a little bit of the pretzel milk and whisk in the gelatin to dissolve. Add the remaining pretzel milk, corn syrup, brown sugar, cream cheese, salt, and baking soda and use a hand or immersion blender to whisk until all of the ingredients are fully dissolved and incorporated.  Chill the mixture.

PB023119
 
Pour the mixture into your ice cream machine and freeze according to the manufacturer's instructions.

PB023120
 
Use a spatula to spread the ice cream into the pie shell.  Put the pie in the freezer to chill while you make the magic shell.

PB023121
 
Homemade Magic Shell
3 tablespoons chocolate chips
1 1/2 tablespoons coconut oil

PB023123
 
Combine the chocolate chips and coconut oil in a small bowl and microwave at 50% power for 30 seconds.  Stir, and continue to microwave at 50% power, stirring every 15 seconds until thoroughly melted.

PB023131
 
Drizzle over the pie and then freeze the pie for at least 3 hours, or until the ice cream is frozen hard enough so the pie is easy to cut and serve. Wrapped in plastic wrap, the pie will keep for 2 weeks in the freezer.

PB023134 

Next:  Corn Souffle
Previously:   Grapefruit Pie