Showing posts with label tart. Show all posts

Saturday, April 21, 2018

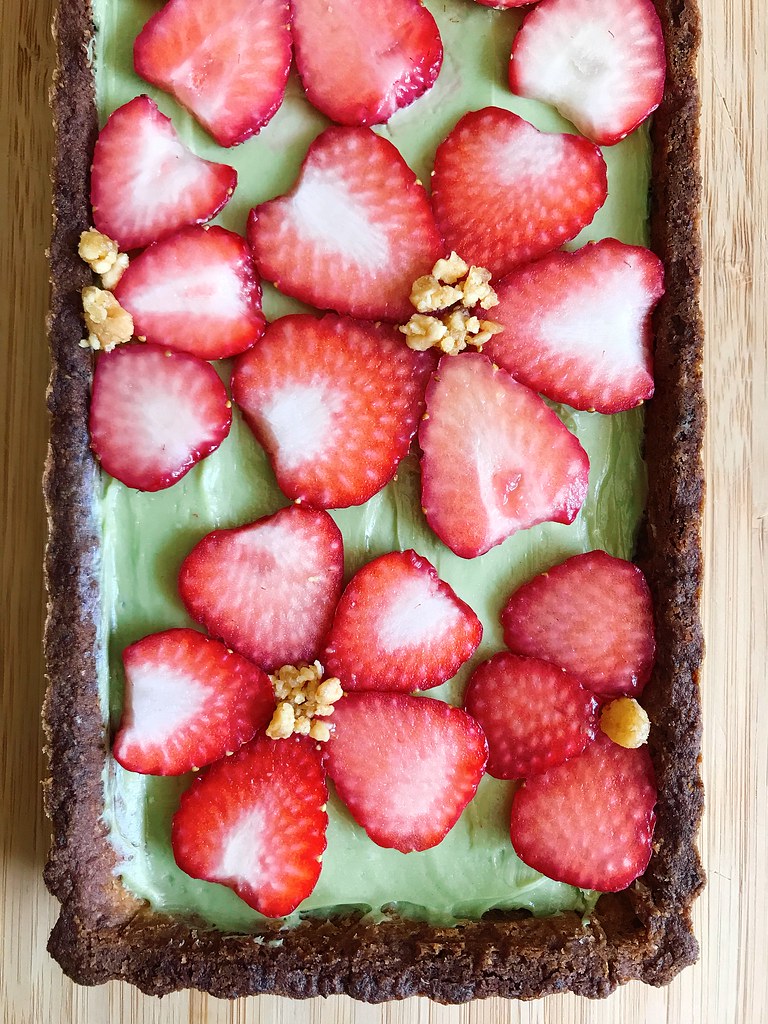
Strawberry Matcha Cream Cheese Tart


It's certainly taken its own sweet time, but I think spring is *finally* here, just in time for the #strawberriesarethejam collaboration!  I mean, it might've snowed last week, and it's snowed on Mother's Day before, so I'm not ruling winter completely gone either, but I'm just happy to be finally seeing the trees outside starting to bloom!

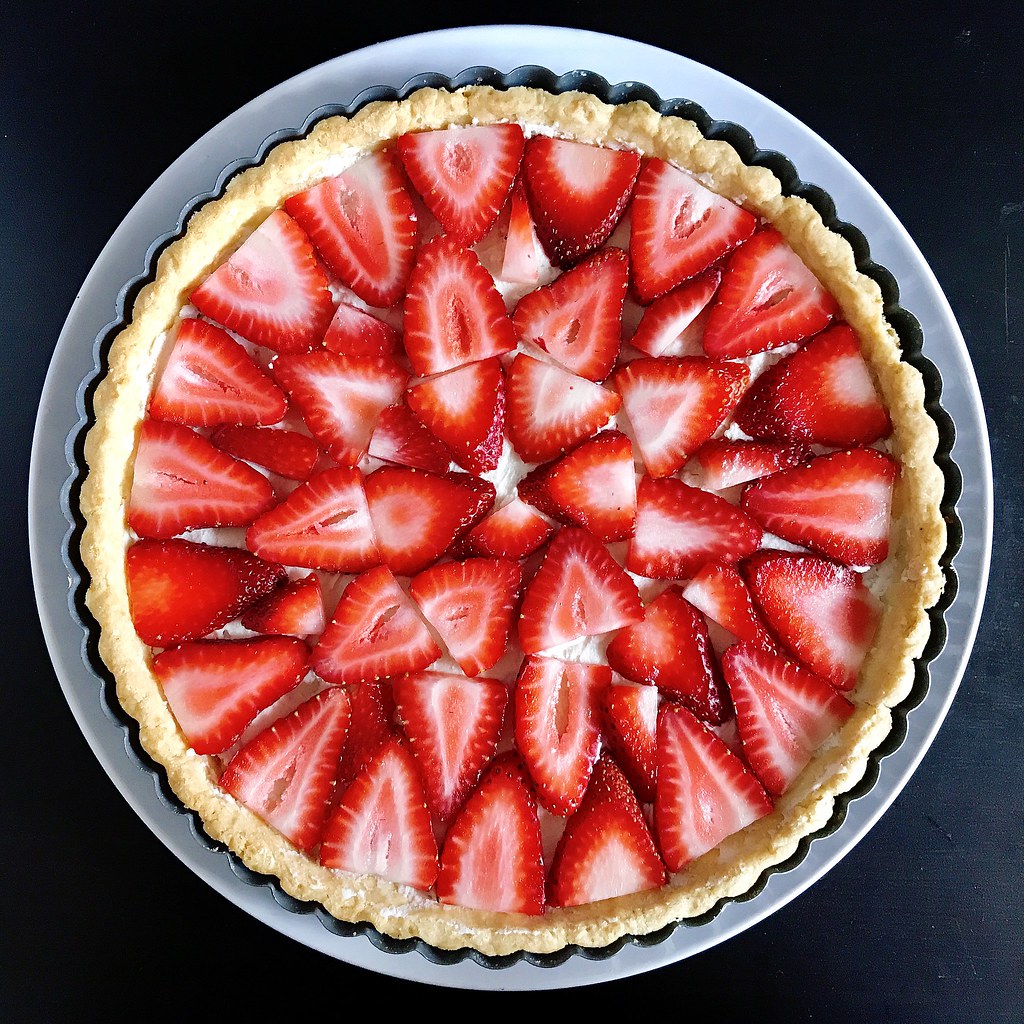
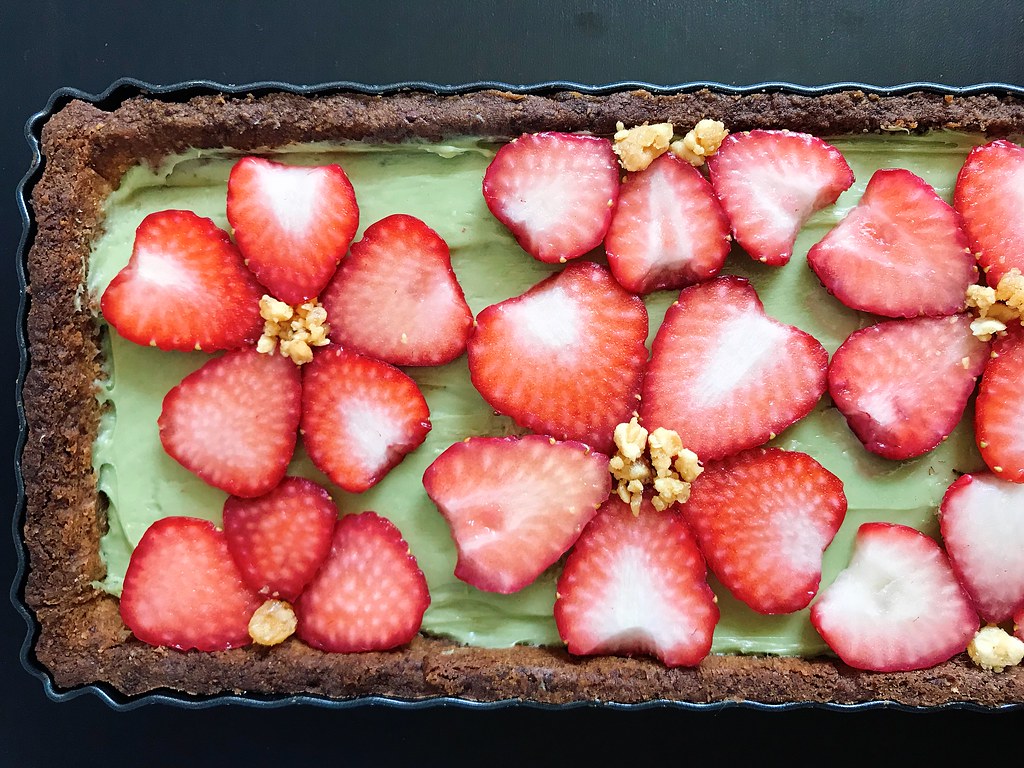
This tart was inspired by the sakura matcha Kit Kats I saw in the Narita airport on my way home from Taiwan this month.  While I don't have access to sakura (cherry blossoms) as an ingredient, I thought these sliced strawberries would add a nice, springtime sweetness.
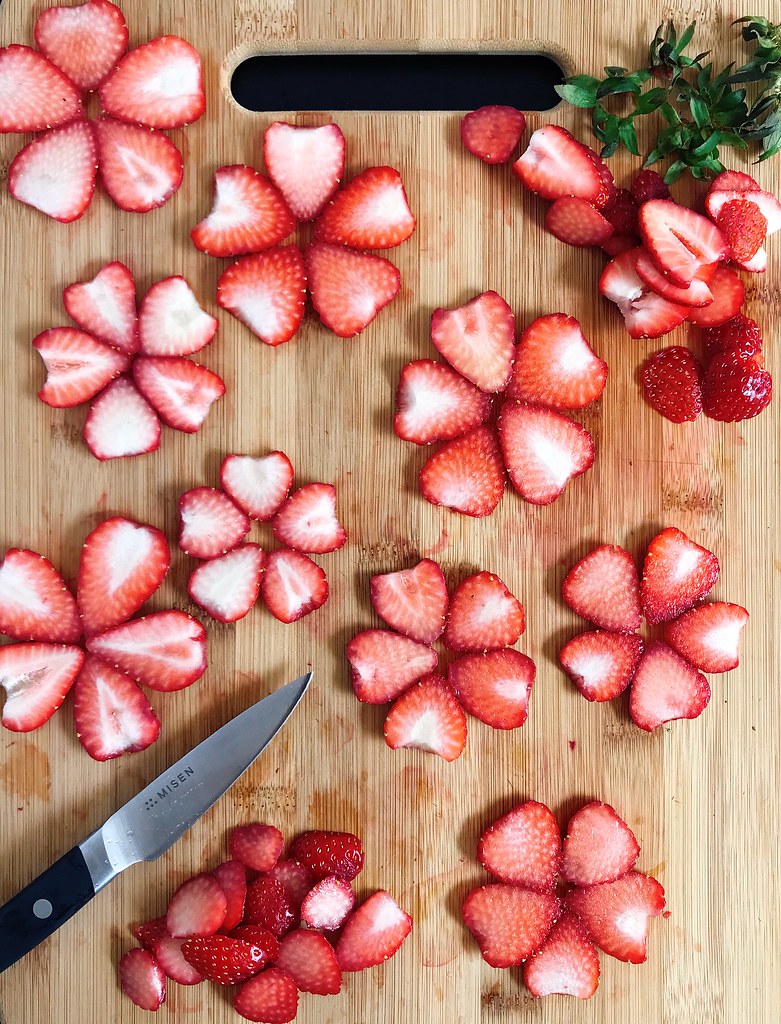

As a bonus, they can also be arranged into pretty flowers that remind me of sakura blossoms.  For this tart I used Dorie Greenspan's sweet tart dough with nuts, but her regular sweet tart dough would work as well.
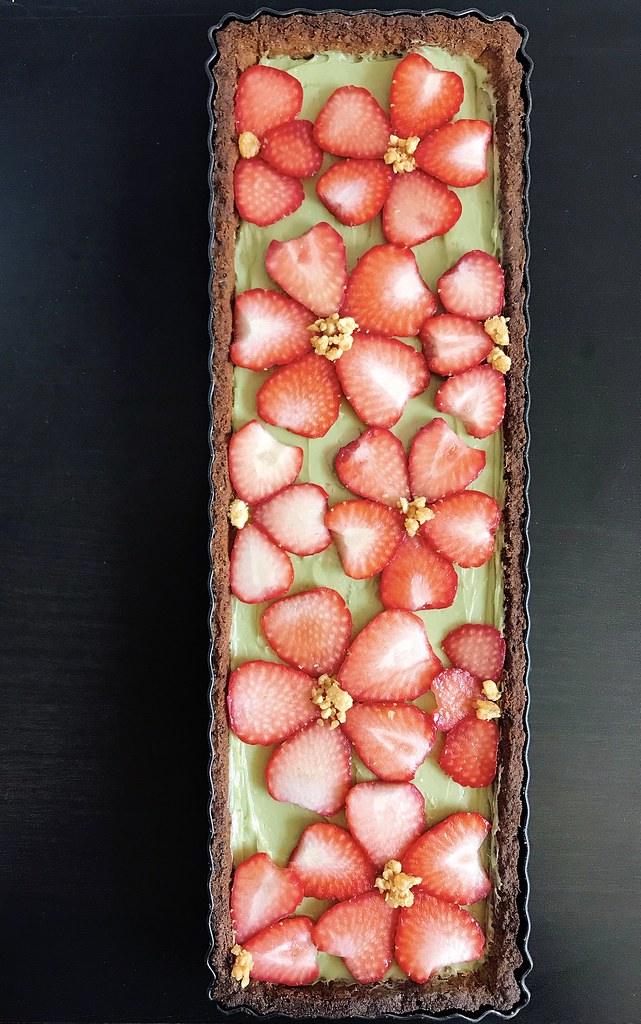

Strawberry Matcha Cream Cheese Tart
makes 1 tart

Your favorite sweet tart crust, fully baked and cooled
8 oz. cream cheese, softened
1/2 cup sugar
1 1/2 teaspoons ceremonial grade matcha powder
Sliced strawberries
Chopped nuts (optional)

Use the paddle attachment in a stand up mixer or a hand mixer to combine the cream cheese, sugar, and matcha powder until smooth and creamy.  Spread into the tart shell and chill while you slice the strawberries.

Arrange the sliced strawberries on top of the cream cheese in the shape of a flower.  Add a little sprinkle of chopped nuts in the center if you like.

Four Years Ago:  Nutella Mini Crepe Cakes
Eight Years Ago:  Lilikoi Malasadas
Nine Years Ago:  Moffles

Check out the rest of the bloggers that participated in the #strawberriesarethejam collaboration:

Square Meal Round Table’s Roasted Balsamic Strawberry Pavlova
The Cooking of Joy’s Strawberry Matcha Cream Cheese Tart
This Healthy Table’s Strawberry Tahini Shortcake
Flours in Your Hair’s Strawberry Milk Donuts
The Wood and Spoon’s Strawberry Icebox Pie
Smart in the Kitchen’s Rustic Strawberry Galette
The Herb and Spoon’s Strawberry-Jam Filled Brioche Donuts
Better with Biscuit’s Strawberry Cobbler
My Kitchen Love’s Strawberry Rhubarb Tart
Hot Dishing It Out’s Panna Cotta with Strawberry Jelly
Pie Girl Bakes’ Strawberry Ginger Pie
Crumb Top Baking’s Strawberry Chia Jam Oat Bars
The Gourmandise School’s Strawberry Pistachio Salad
Tiny Kitchen Caper’s Strawberries and Cream Pound Cake
A Spicy Perspective’s Fresh Strawberry Yogurt Cake
Easy and Delish’s Strawberry Brigadeiros
Katherine in Brooklyn’s Roasted Strawberry Balsamic Ice Cream
Sugar Salt Magic’s Strawberry Mousse Tart
Lemon Thyme and Ginger’s Strawberry Basil No Churn Ice Cream
Jessie Sheehan Bakes’ Strawberry Basil Turnovers
Bavette Meat & Provisions’ Pickled Green Strawberries
What’s Karen Cooking’s Strawberry Eton Mess
Farm & Coast Cookery’s Strawberry & Thyme Shortcake
Marianne Cooks’ Strawberry Madeleines
Prickly Fresh’s Strawberry Burrata Kale Salad with Pistachio & Lemon Vinaigrette
Baking the Goods’ Mini Strawberry Lemon Cupcakes
Fufu’s Kitchen’s Vegan Strawberry Ice Cream Sandwiches
What Annie’s Eating’s Vegan Strawberry + Basil Ice Cream
Katie Bird Bakes’ Strawberry Crumble Bars
Cosette’s Kitchen’s Strawberry Shortcake
It’s a Veg World After All’s Butter Lettuce Strawberry Salad with Poppyseed Dressing
Cooking with Cocktail Ring’s Basil Balsamic Strawberry Shortcake
The College Housewife: Mixed Berry Whiskey Crisp
Zestful Kitchen’s Strawberry & Pine Nut Brittle Salad

Thursday, February 1, 2018

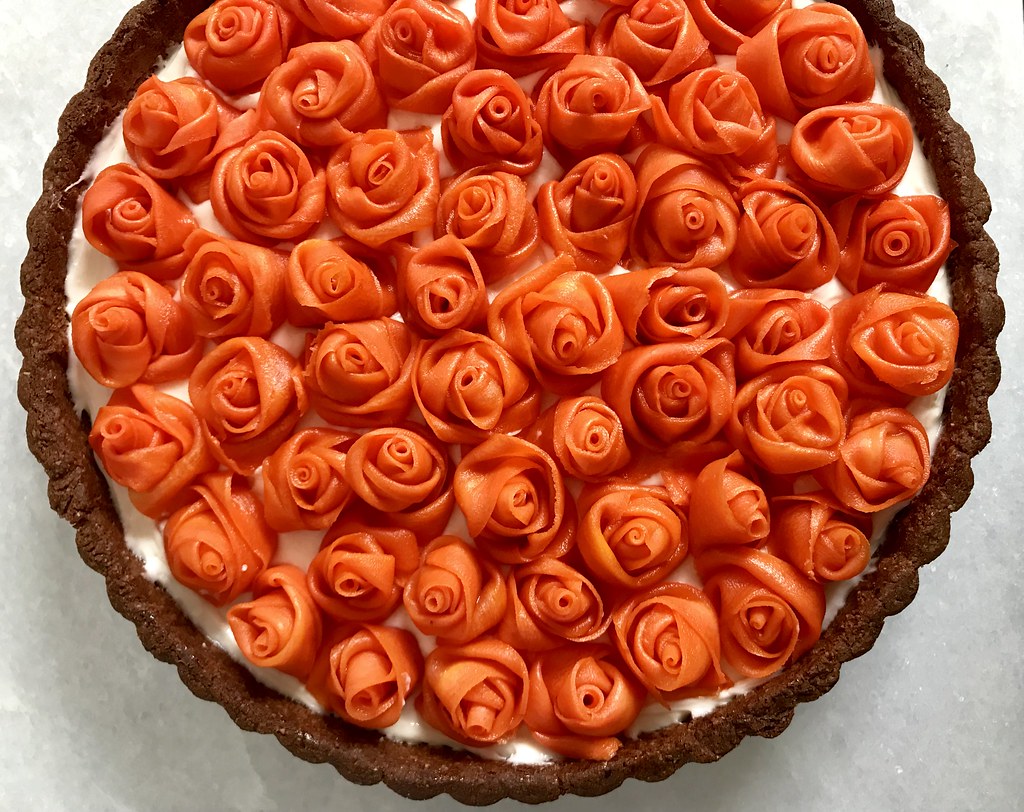
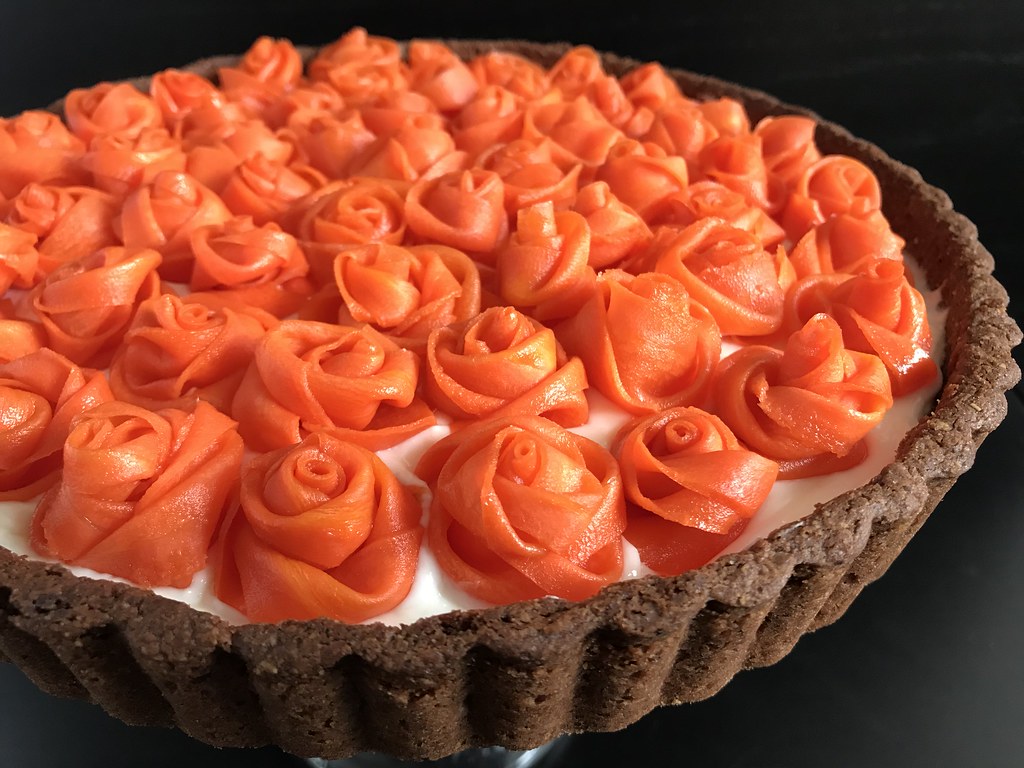
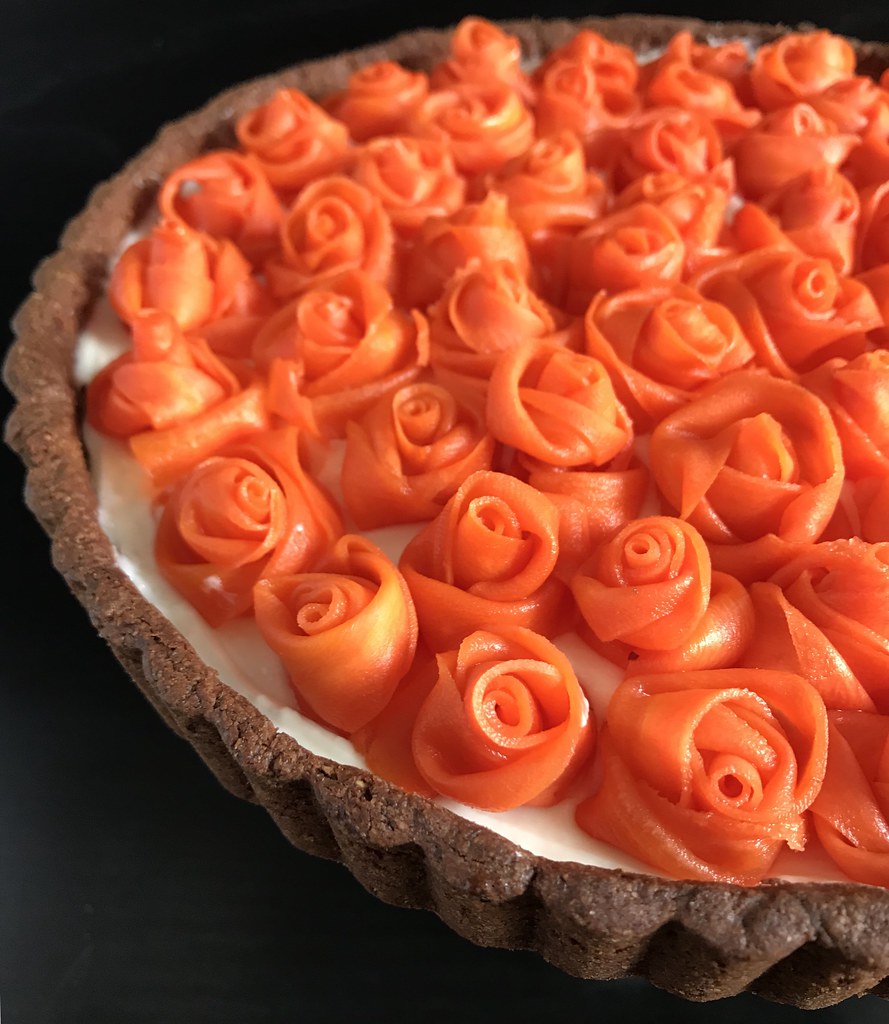
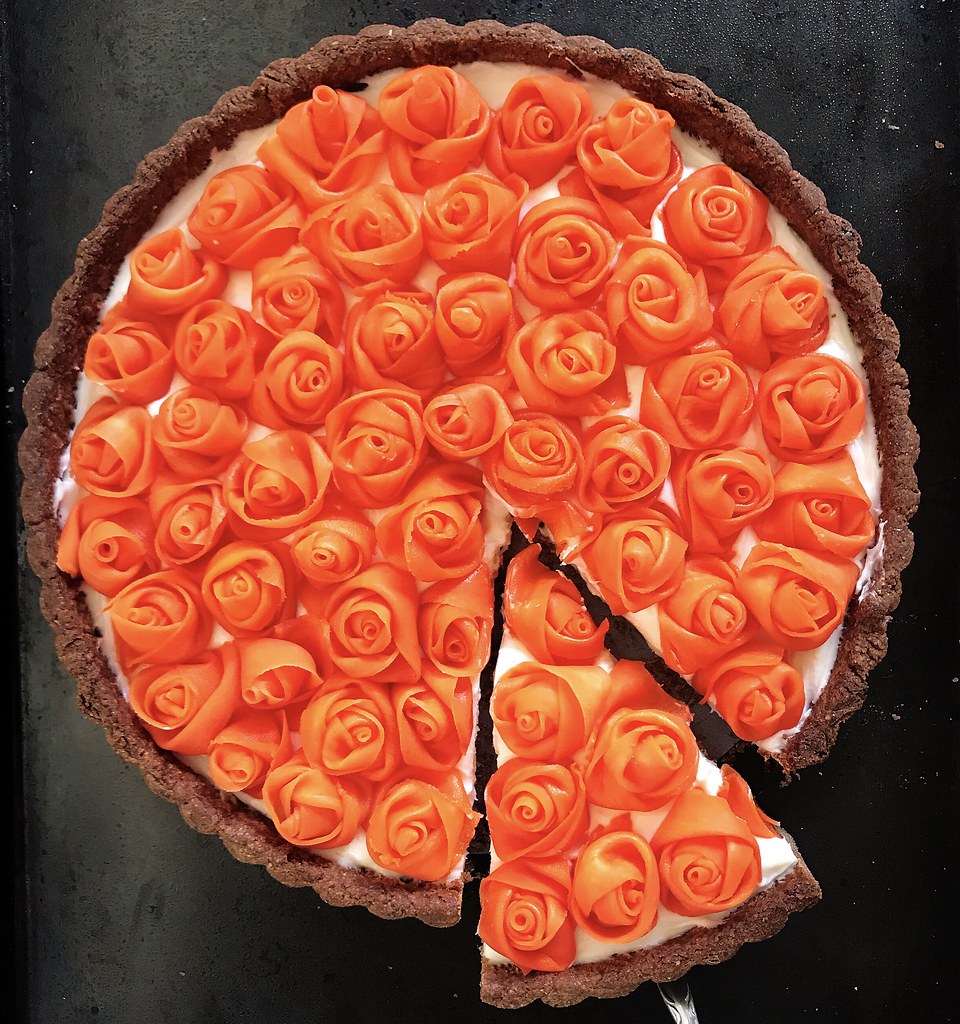
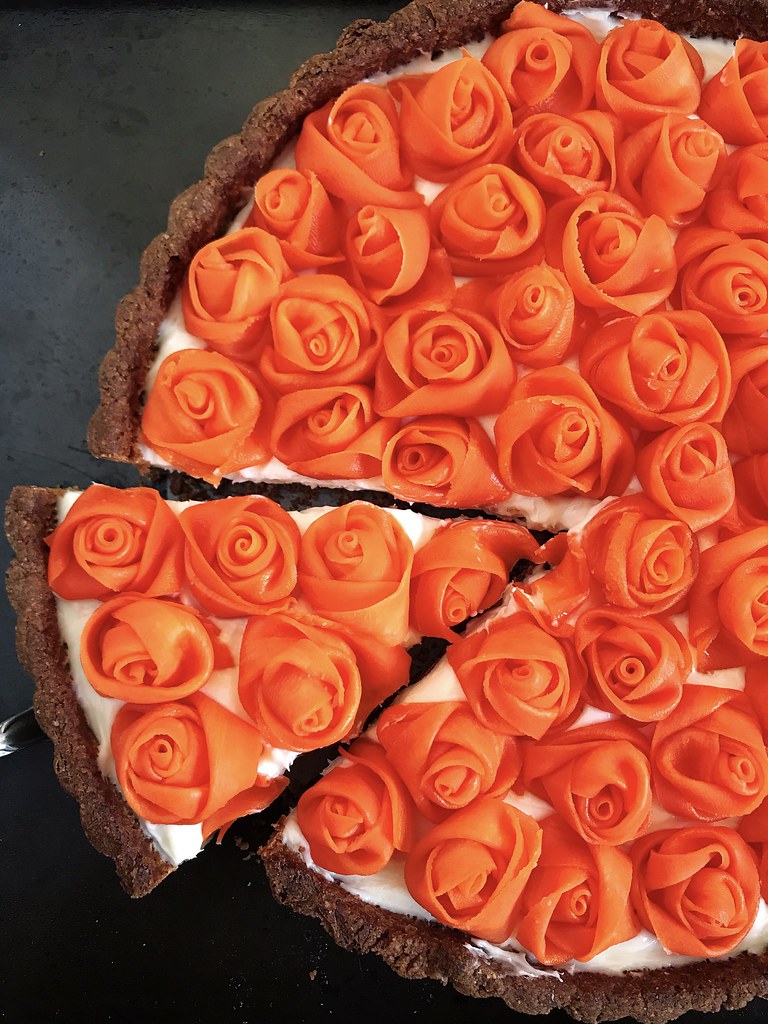
Candied Carrot Rose Tart


When I first found out that the ingredient for this season's collaboration was carrots, my heart sank.  Because, you guys, I hate carrots.  Always have, always will.  I'll eat them if I have to, but I would never go out of my way to make a recipe spotlighting them.  But the more I thought about it, the more I decided:  challenge accepted!

At first I thought about doing some sort of carrot cake, because that's the only way I like carrots--when I can't taste them.  But then I decided I could push the envelope a little farther and came up with this tart, which is basically a deconstructed carrot cake, cream cheese frosting and all!


I used Dorie Greenspan's spiced tart dough from her book Baking:  From My Home to Yours, the cookbook the Food52 Baking Club is going through this month.  It works well for this tart because it has the nuts, cinnamon, and cloves traditionally found in carrot cake.  The filling is just a simple mix of cream cheese, sour cream, and sugar.


But the candied carrot roses is probably what you want to know about.  I got that idea from Stella Park's Bravetart cookbook when the Food52 Baking Club went through that book a couple of months ago.  She covers the technique on Serious Eats and her own blog, so I didn't bother taking pictures myself (plus, sticky hands + taking pictures = not good).


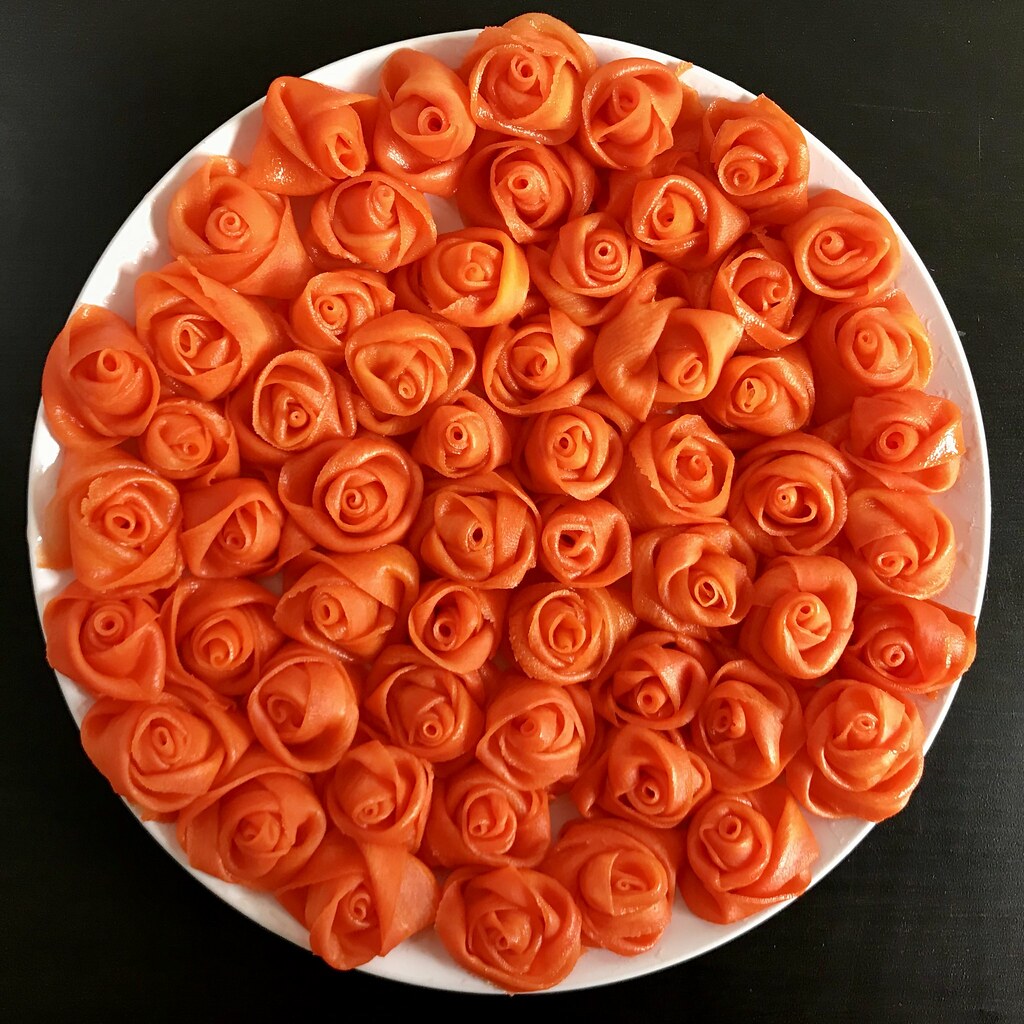
In order to make sure that I made enough roses to cover the top of the tart, I found a plate that was about the same size as the tart and kept making the roses until the plate was covered.  It took me a little less than 6 large carrots to get there, including a bunch of ribbons that were too short.  And I had to candy all the carrot strips in 3 batches since they wouldn't all fit into the syrup at once.  If you want some extra shine/sweetness, you could brush some of the leftover poaching syrup onto the roses just before serving.


Candied Carrot Rose Tart
makes 1 tart

Your favorite tart shell, fully baked and cooled
8 oz. cream cheese, softened
1/4 cup sour cream
1 1/2 cup sugar, divided
Juice from half a lemon
1 cup water
1/2 a cinnamon stick
6 long, thick carrots

Use the paddle attachment in a stand up mixer or hand mixer to combine the cream cheese, sour cream, and 1/2 cup of sugar.  Spread into the tart shell and chill while you make the carrot roses.

Combine the remaining 1 cup of sugar, lemon juice, cinnamon stick, and water in a medium saucepan.  Bring to a boil and then lower the heat to a simmer.

Cut off the carrot tops and peel.  Then, using the vegetable peeler, peel the carrots into long, thick strips.

Once all the sugar has dissolved in the syrup, add a third of the carrot strips.  Cook for about a minute, then turn off the heat and allow the strips to cool in the syrup.

Pick up one of the strips and squeegee the excess syrup off with your fingers.  Hold the thinner end with one hand and start twirling the rest of the carrot strip around it to form a rose.  Tuck the end underneath and set it down on a plate about the size of your tart pan.  Repeat with remaining strips until you have enough to cover the plate, and thus, the top of your tart.

Carefully transfer the carrot roses to the tart and return to the fridge until ready to serve.


Check out the rest of the bloggers who participated in the #24carrotgoals collaboration below:


Square Meal Round Table’s Rainbow Carrot and Ricotta Tart
Better with Biscuits’ Carrot Souffle
This Healthy Table’s Beet and Carrot Galette
Figs & Flour’s Thai Peanut Pizza
Flours in Your Hair’s Carrot Pecan Cookies
What Great Grandma Ate’s Paleo Carrot Mug Cake
More Icing Than Cake’s Spiced Quinoa & Roasted Carrot Salad
Hot Dishing It Out’s Vegan Carrot Whoopie Pies
Katie Bird Bakes’ Carrot Cake Scones
Easy and Delish’s Carrot Spaghetti
Smoothies and Sundaes’ Carrot Cake Sourdough
Cosette’s Kitchen’s Sumac Carrot and Feta Salad
Measuring Cups Optional's Carrot Curry Soup
Rezel Kealoha’s Turkish Yogurt Carrot Dip
Pies and Prejudice’s Carrot Pie with Maple & Cardamom
Rumbly in My Tumbly’s Chai Carrot Pie
Cook Til Delicious’ Mini Carrot Cake
It’s a Veg World After All’s Zesty Sunflower Carrot Spirals
Butter Loves Company’s Iced Carrot Cake Cookies
Smart in the Kitchen’s Curried Carrot Ginger Soup (Whole30)
Cocoa and Salt’s Classic Carrot Cake
A Modest Feast’s Pomegranate-Molasses-Glazed Carrots With Crispy Chickpeas and Feta

Next:  My Mom's Taiwanese Zongzi
Previously:  Pork, Cabbage, and Tofu Dumplings
Last Year:  Salted Egg Yolk Mochi Ice Cream
Three Years Ago:  Burmese Coconut Noodles with Tofu
Four Years Ago:  Grilled Cheese Egg in a Hole
Five Years Ago:  Passion Fruit Marshmallows
Eight Years Ago:  Kalua Pork
Nine Years Ago:  Tomato and Eggs over Rice

Monday, April 24, 2017

Rhubarb Strawberry Coconut Cream Tart


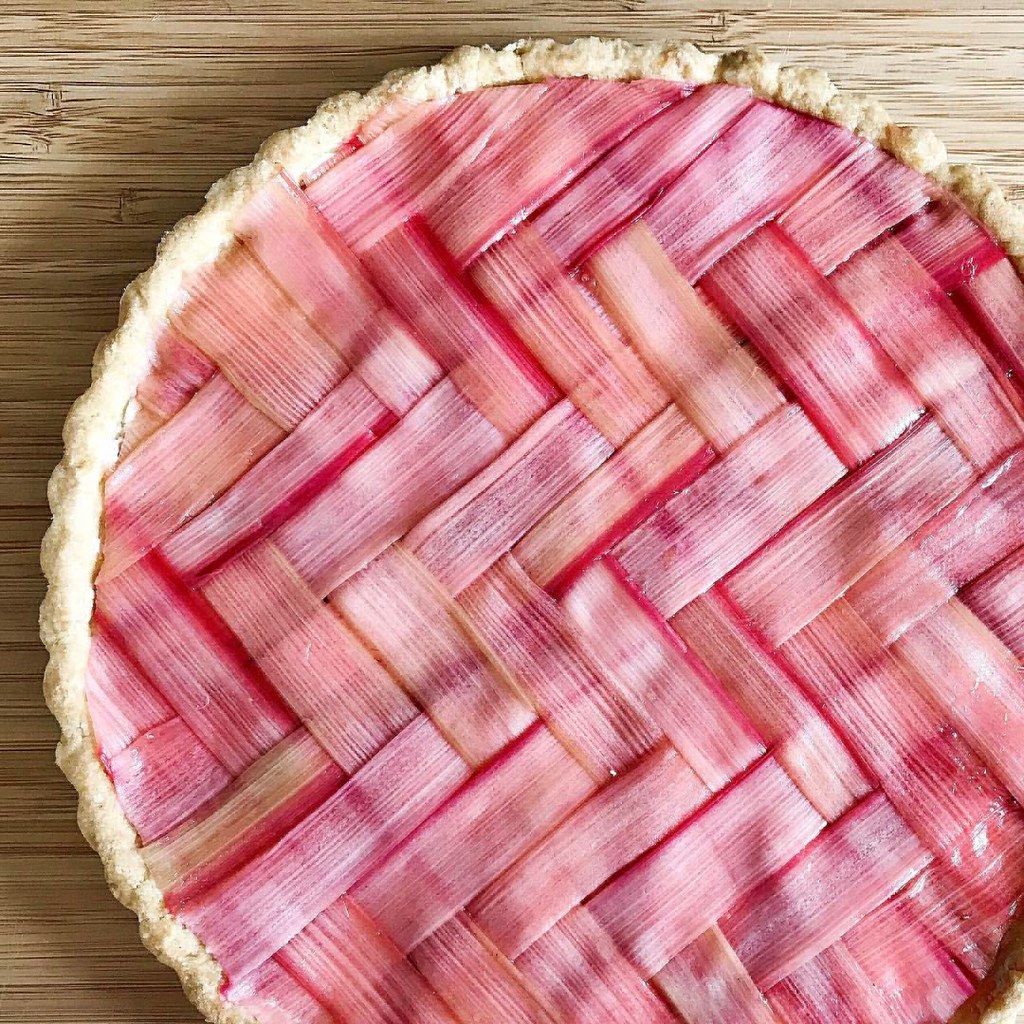
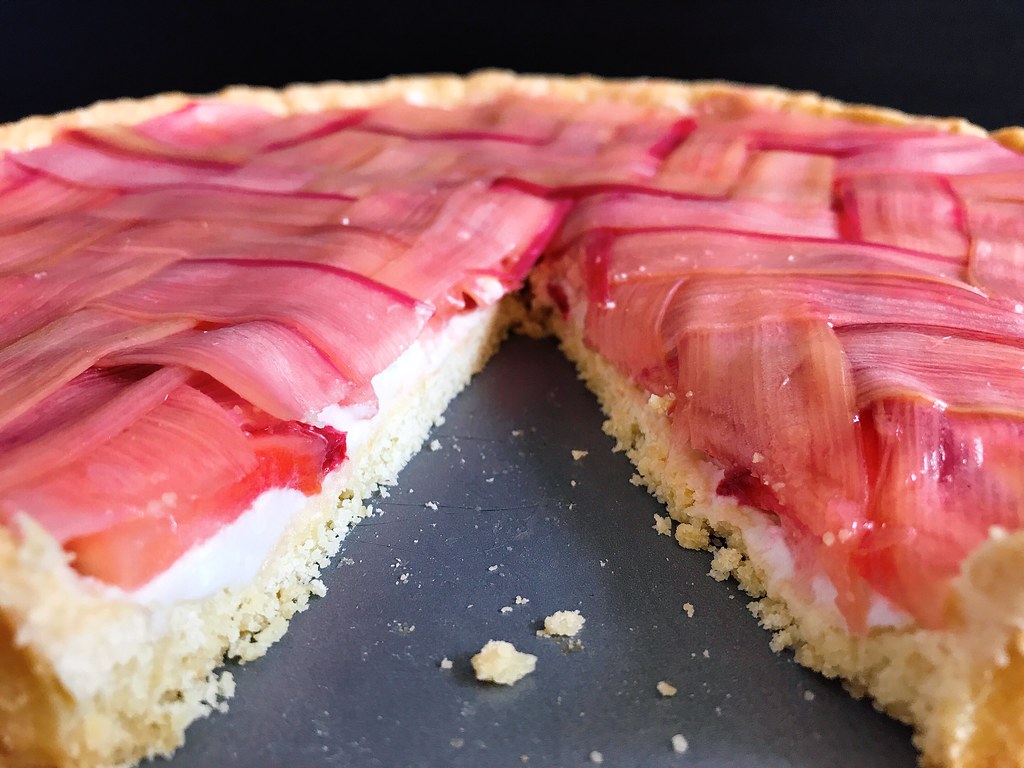
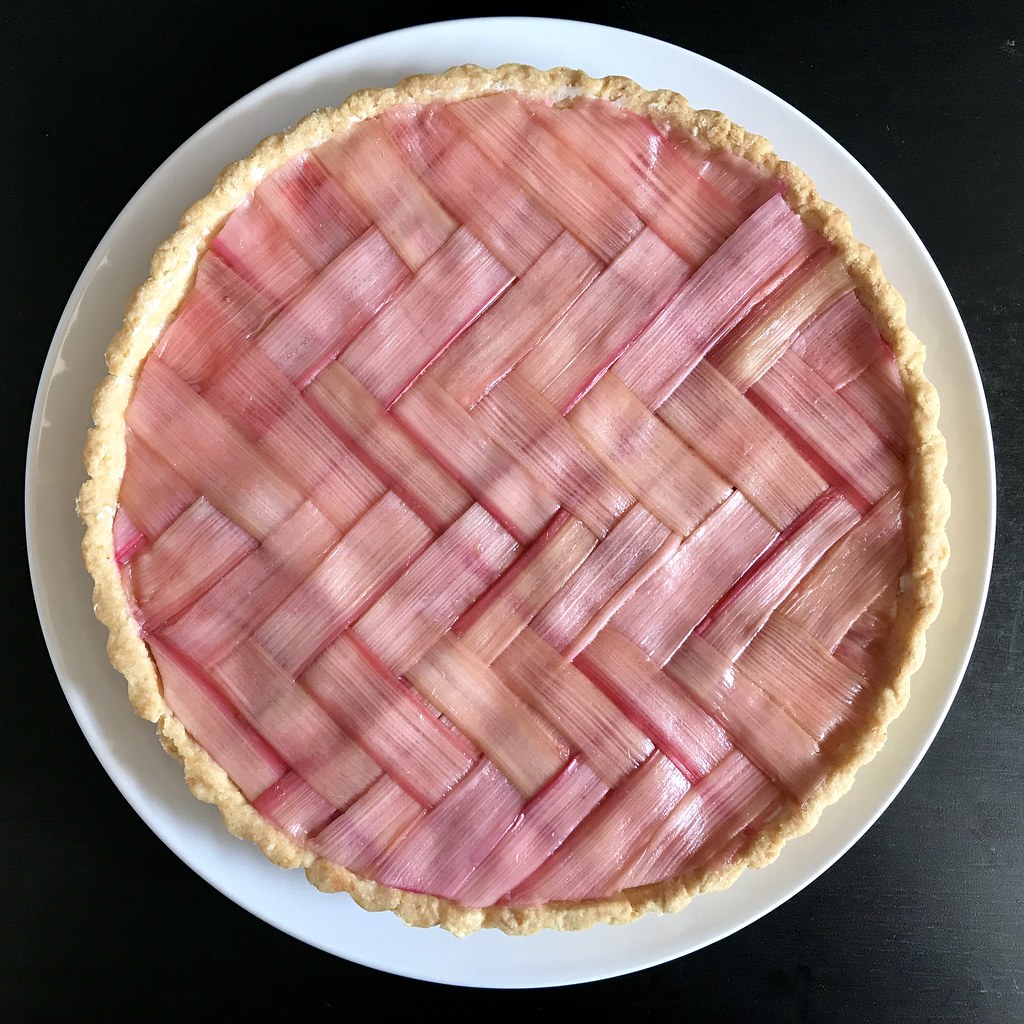
Ever since I attempted the herringbone lattice pie crust a few months ago, I've been wanting another shot at getting it right.  So when I saw rhubarb being sold at my local grocery story, I figured I'd try to make a tart and top it with a herringbone lattice made of poached rhubarb strips!

When buying the rhubarb for this, try to get ones of equal width so the lattice will look nice and neat.  I pretty much followed the instructions for poaching the rhubarb from Baking a Moment's beautiful post on making a rhubarb tart with a (regular) lattice top.  Instead of using a mandolin, I used my vegetable peeler which, honestly, was a labor of love.  I probably had to ditch a third of my attempts at getting nice long thin ribbons.  Luckily, I bought a couple more rhubarbs that I thought I'd need exactly for this reason.


For the tart crust, I used the recipe for a sweet tart crust from Mark Bittman's How to Bake Everything.  I also followed his suggestion to use sweetened whipped coconut cream as the base.  I originally wasn't going to add the layer of strawberries, but my friends Celine and Alex were over this weekend and left me some beautiful strawberries.  I'm so glad I added them because they have a natural sweet-tartness which perfectly complements the flavor of the rhubarb.  The nice thing about this recipe is that if you use a vegan and/or gluten-free tart crust, the rest of the pie is also vegan and gluten-free!


Rhubarb Strawberry Coconut Cream Tart
makes a 9" tart

Your favorite 9" sweet tart crust, blind baked and cooled
14 oz. can of coconut milk, refrigerated overnight
3 tablespoons powdered sugar
1 tablespoon vanilla extract
1 cup sliced strawberries
6-8 rhubarb stalks of equal width
1/2 cup sugar

Before you fit the tart dough into your tart pan, remove the bottom and trace it on a large piece of parchment paper.  Then proceed to line the pan with the dough, chill, and blind bake until golden brown all over.

Place the can of coconut milk, a large bowl, and the metal beaters of your electric beater in the fridge overnight.  The next morning, open the can and spoon out the solid white coconut cream into the chilled bowl.  You can discard the leftover liquid or save it to add to smoothies or overnight oats.  Add the powdered sugar and vanilla extract to the bowl and use the chilled beaters to beat the cream until it is light and fluffy.  Spread it evenly across the bottom of the tart crust and chill in the refrigerator while you wash and slice the strawberries.

Arrange the strawberries on top of the coconut cream in an even layer.  Cover and return to the fridge to chill while you prepare the rhubarb.

Use a vegetable peeler or mandolin to peel long, thin strips from the rhubarb stalks.  Roughly chop any leftover red parts and add to a large pot along with any leftover strawberry pieces.  Add a cup of water and the sugar and bring to a simmer.

Prepare a rimmed baking sheet with a couple layers of paper towels.  Poach the strips of rhubarb in batches for about a minute or so until softened.  Remove with a slotted spoon to the paper towels to drain.  Reserve the poaching liquid.

Use the parchment paper with the outline of the tart pan to lay out half the rhubarb strips vertically.  Then, fold the first strip halfway down, skip 3, then fold down the next 3, and skip the next 3, following this pattern until you reach the end.

Lay a long strip down horizontally across the middle, then, leaving the 1st vertical strip folded over, fold down the 2nd vertical strip over the horizontal strip you just laid down, skip the next 2, fold the 5th strip back up, leave the next 2 as is, and fold down the one after that, etc.  Lay another strip down horizontally above the first one you laid down.  Continue to repeat this pattern until you've covered the outlined 9" circle.  This post from Serious Eats is also a great resource (with pictures!) on how to create the herringbone lattice top.  You can also just do a plain checkered lattice crust which would still look very nice.

Remove the tart from the fridge and carefully flip the woven rhubarb lattice onto the tart (it will seem quite scary but because the strips are still wet, they will adhere to the parchment paper pretty well).  Peel the parchment paper away and re-adjust the lattice as needed.  Use a sharp pair of kitchen shears or paring knife to cut away any extra rhubarb.  Brush some of the poaching liquid on top, being careful not to disturb the herringbone pattern.  Chill until ready to serve.


Next:  3-28 Slab Pie
Previously:  Rainbow Crepe Cake
Last Year:  Will It Puffle?
Two Years Ago:  Gordon Ramsay's Sublime Scrambled Eggs - Two Ways
Three Years Ago:  Nutella Mini Crepe Cakes
Seven Years Ago:  The Best Scones in the World
Eight Years Ago:  Bacon and Egg Bunny Buns

Tuesday, December 13, 2016

Cranberry Curd Tart


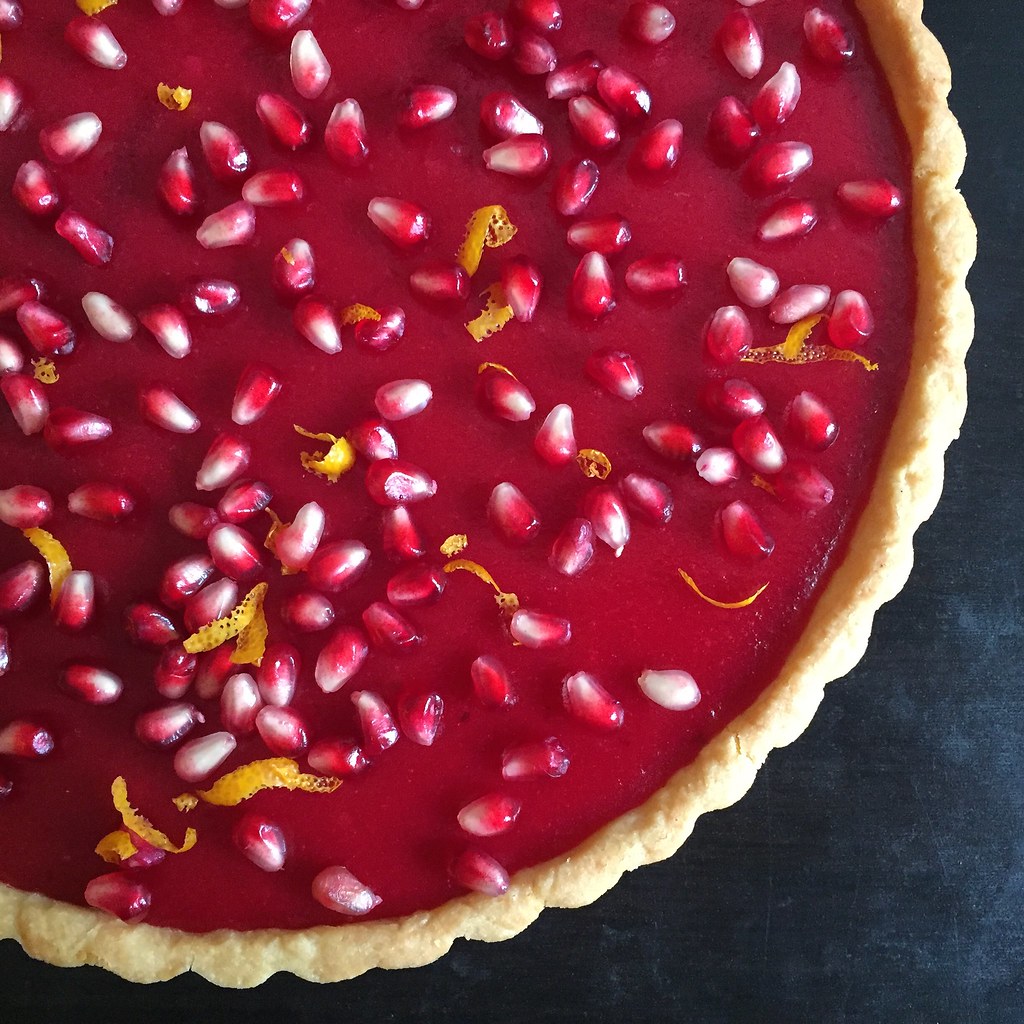
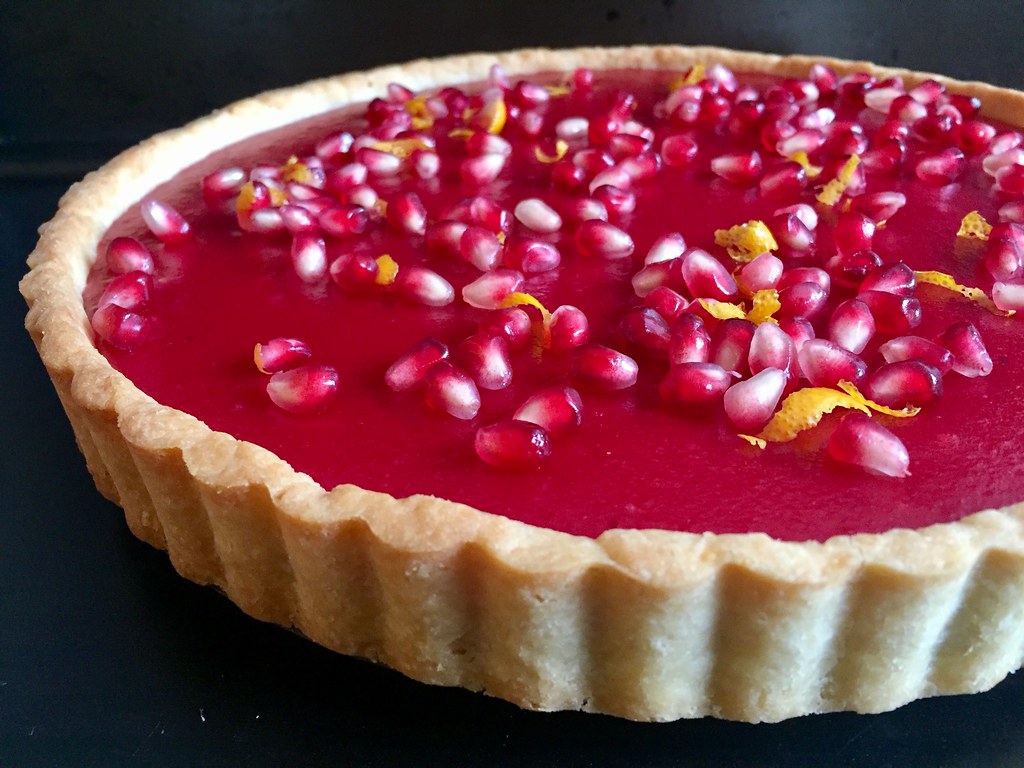
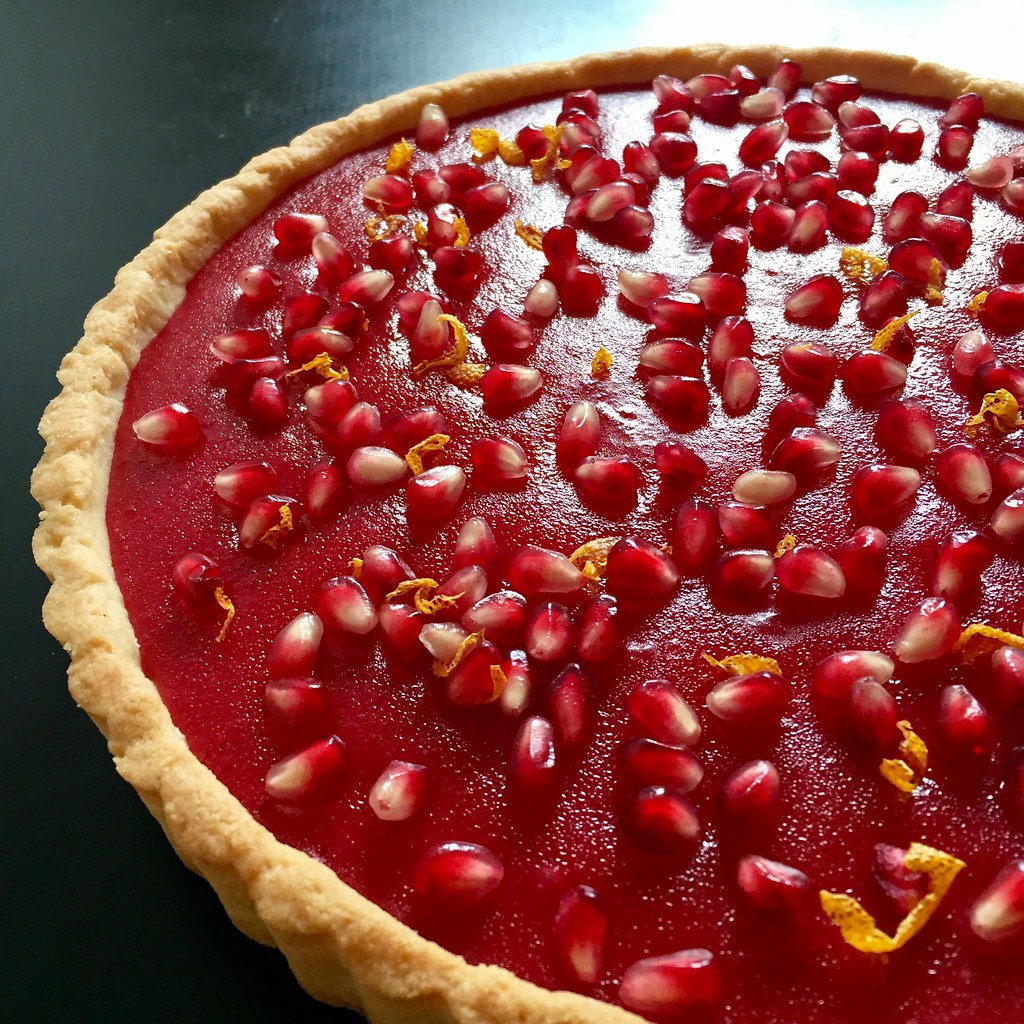
When I first saw NYT Food's Instagram post featuring a cranberry curd tart I knew I needed to make it if only because of how gorgeous it was.  But each time I made it I couldn't figure out how to photograph it so that the picture would do it justice.  Which meant I just kept making it over and over again.  Awful, I know.  Then this last time I got a pomegranate in my Boston Organics delivery and decided to try sprinkling some on top of the tart for some contrast, and it finally looked as good as it tasted!  They also give the tart a little crunch and freshness to cut all the richness.

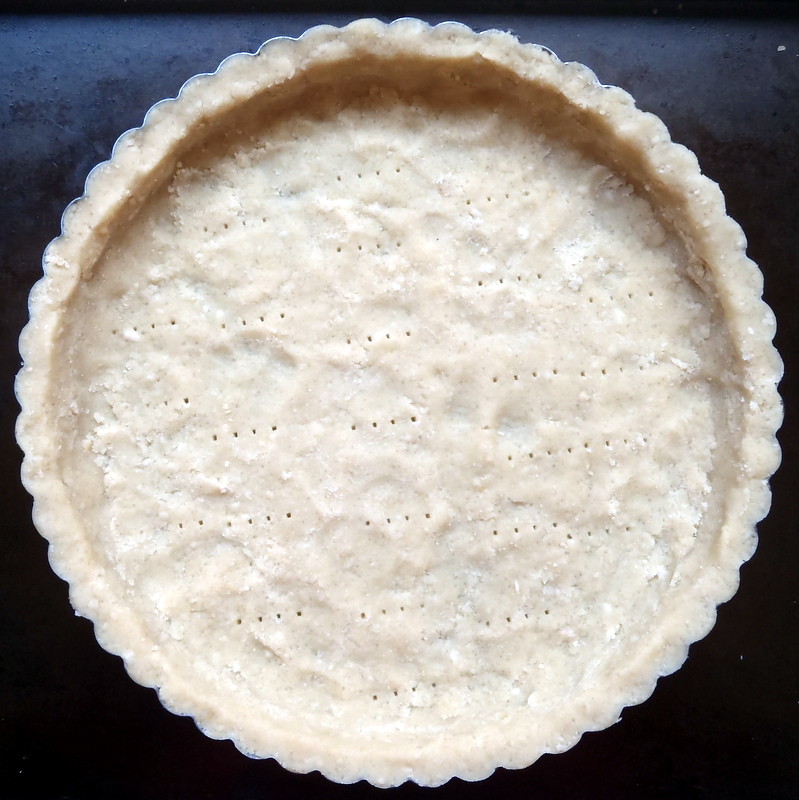
For the crust, instead of the using the hazelnut crust in the original recipe, I used Smitten Kitchen's "great unshrinkable sweet tart shell" because hazelnuts are expensive and it's pretty much a no-fail recipe.  To save time and effort, I usually end up just pressing the dough into the tart pan right after making it (starting with the edges), docking it, and then freezing it for 30 minutes before blind baking it with the buttered aluminum foil on top.  Feel free to use whatever tart crust you prefer, though, as long as it's blind baked beforehand.  I can see Thomas Keller's pine crust tart crust being amazing for this recipe.


For the cranberry curd, make sure that you don't overcook it after adding the eggs, because the egg whites curdle really easily if the mixture gets too hot.  Since it's kind of hard to tell when it starts to thicken, the sign I look for is when steam starts rising off the top.  You definitely don't want the mixture to start bubbling, and it helps to keep stirring to distribute the heat.


Cranberry Curd Tart (adapted from The New York Times)
makes a 9" tart

Your favorite 9" sweet tart crust, blind baked
12 oz. cranberries
1 cup sugar
Juice and zest from 1 orange
1 stick unsalted butter, cut into pieces
2 eggs plus 2 egg yolk
Pomegranate arils, for garnishing (optional)

Heat the cranberries, sugar, orange juice, and zest in a large saucepan over medium heat.  Cook until the cranberries have popped and softened, about 10 minutes.  Transfer to a blender and blend until smooth.  Strain the mixture through a sieve back into the saucepan and add the butter.

Whisk the eggs and egg yolks in a bowl, then add a couple of ladlefuls of the liquid into the bowl and whisk to temper the eggs.  Pour everything back into the saucepan and cook over low heat, stirring constantly, until slightly thickened and steam just starts coming off.  Cool to room temperature, then transfer to the fridge to cool completely, preferably overnight.

Preheat the oven to 350°F.  Pour the cooled curd into the blind-baked tart crust.  Bake for 15 minutes to set the curd.  Allow to cool completely before garnishing with pomegranate arils.


Next:  Pull-Apart Scallion Swirly Bread
Previously:  Pear Apple Cranberry Slab Pie
Two Years Ago:  Pull-Apart Thanksgiving Leftover Stuffed Bread
Three Years Ago:  Thai Coconut Sticky Rice with Mango
Four Years Ago:  Vanilla Passion Caramels
Seven Years Ago:  Wah Guay (Taiwanese Rice Cake with Meat Sauce)

Tuesday, February 24, 2015

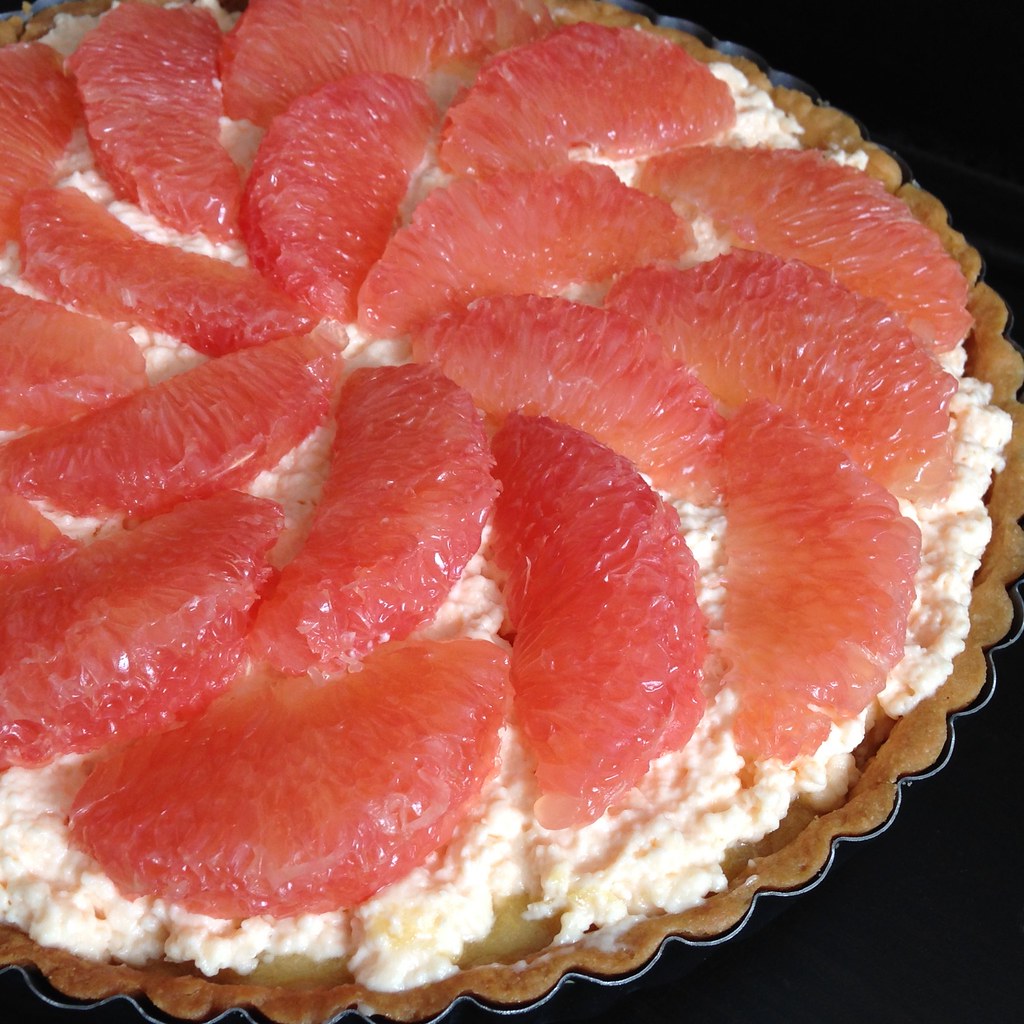
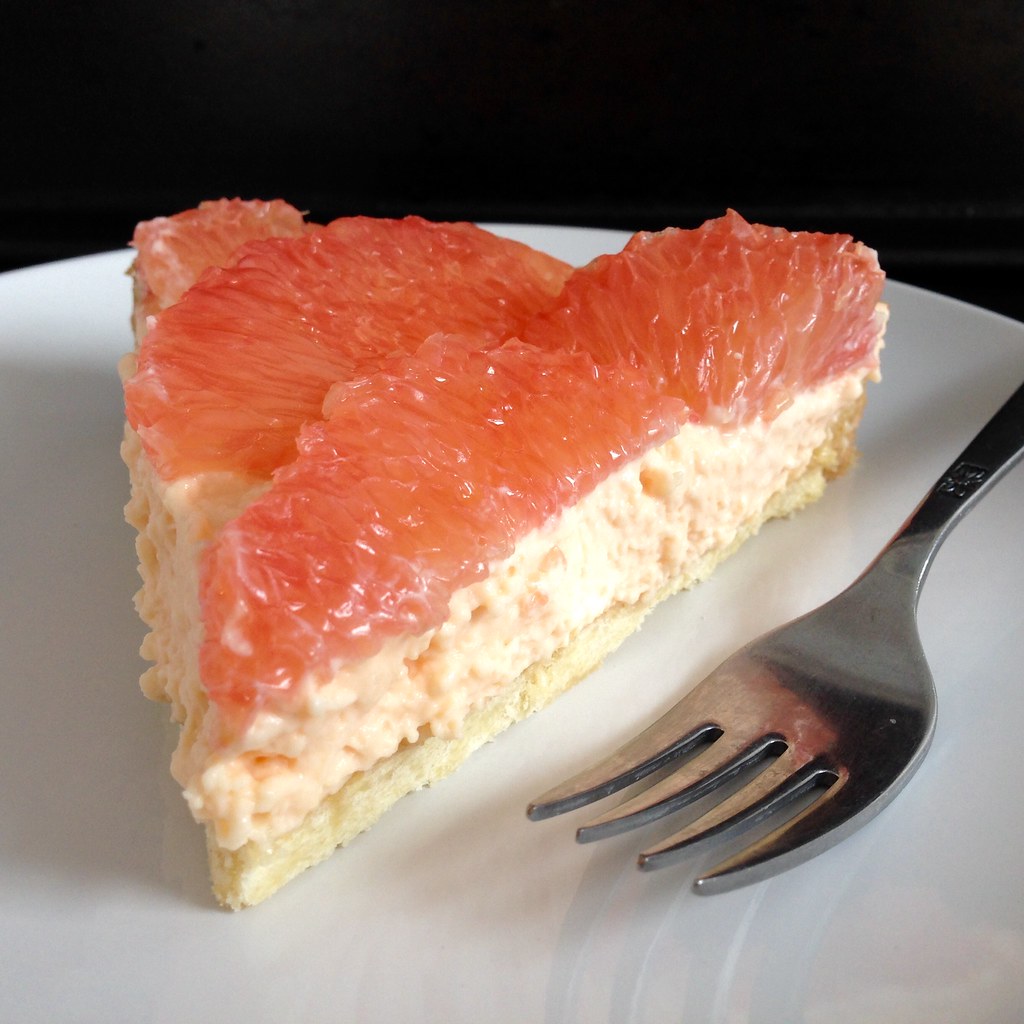
Hugo & Victor's Pink Grapefruit Tart

https://www.flickr.com/photos/joyosity/16345472420/

There are two things I tell my friends to get when they go to Paris:  the mango passion caramels from Jacques Genin and this pink grapefruit tart from Hugo & Victor.  So when I saw a recipe for the tart in Dorie Greenspan's Baking Chez Moi, I was ecstatic!  I even bought a $25 bottle of Campari just so I could have the 2 1/2 tablespoons needed to make the grapefruit crémeux because I wanted to follow the recipe as close as possible.

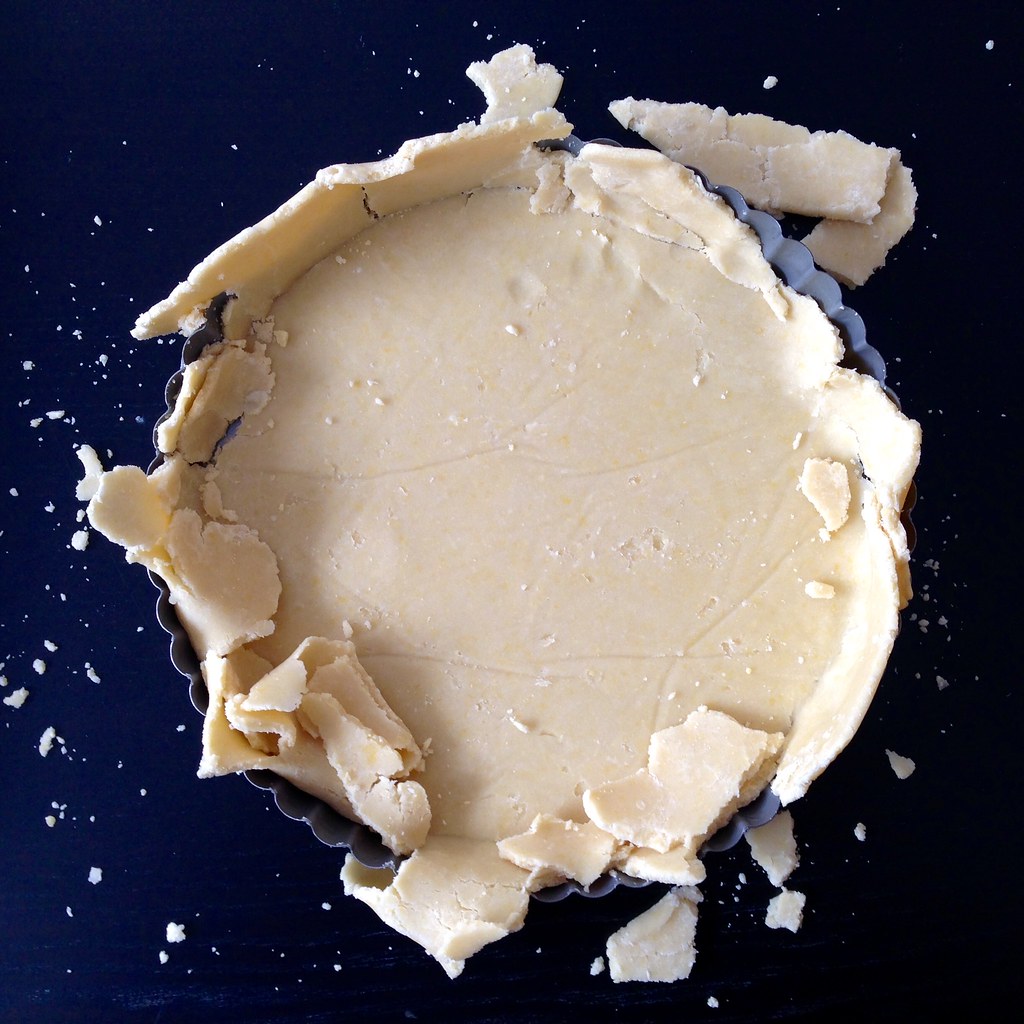
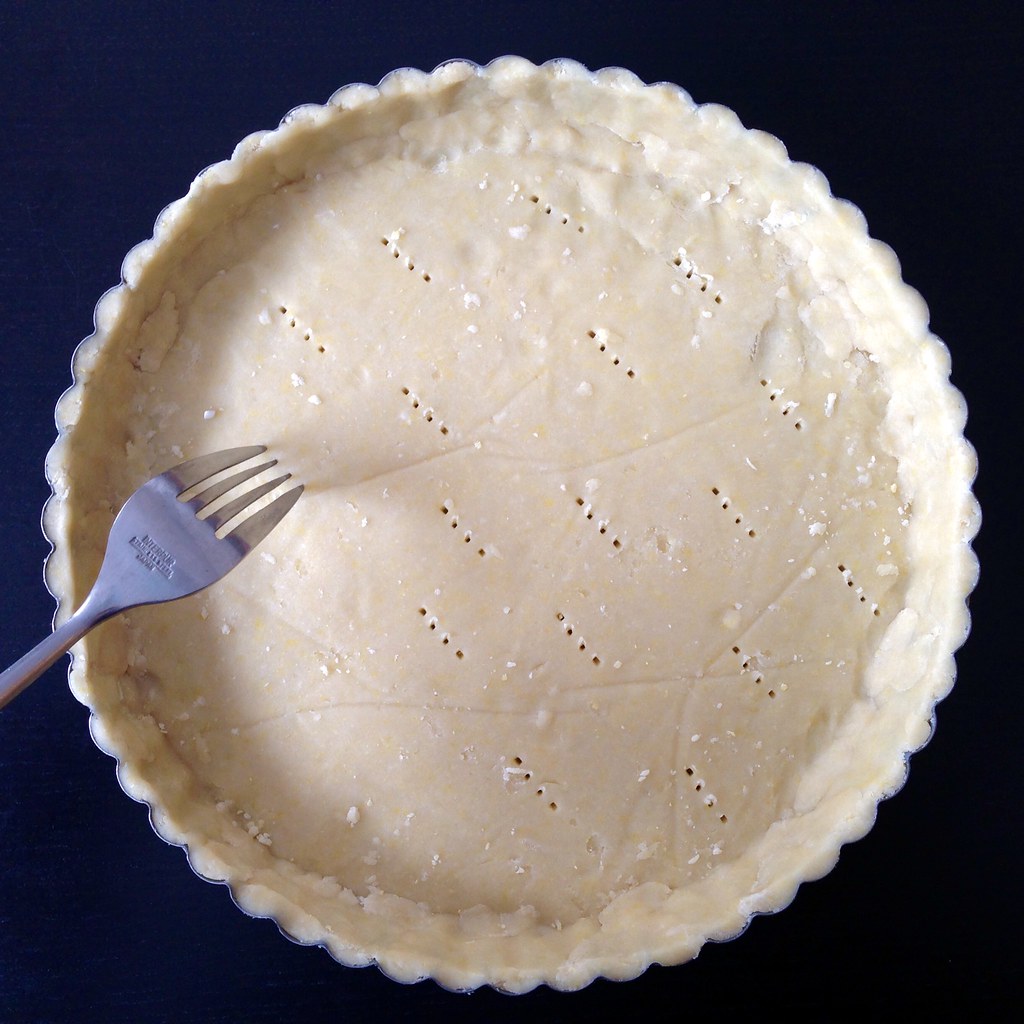
And yet so many things went wrong, mostly because I was impatient.  First the sweet tart dough shattered when I tried to fit it into the tart pan because I hadn't waited long enough for it to warm up a bit after letting it chill in the freezer.  Luckily, this was pretty easy to fix because you could just patch up the cracks but pressing the extra dough in.  (next time I'll just fit the crust into the tart pan after rolling it out and then chill it, which is how I wrote the recipe below.)  

https://www.flickr.com/photos/joyosity/15914120964/

Then, when it was time to add the grapefruit crémeux (which I think is just a fancy French word for gelatinous cream), I didn't whisk it long enough so it was still kind of curdy when I spread it on.  Again, I was kind of fortunate because the grapefruit topping hides most of it, and the texture doesn't affect the taste at all.

That said, please learn from my mistakes and take plenty of time to make this tart.  I'd definitely start the sweet tart dough and maybe the grapefruit crémeux the day before.  There's lot of chilling the dough, then blind baking it, then cooling it, then baking it again (with the lemon-almond cream), and cooling it again before topping it with the crémeux and grapefruit topping and then chilling it one last time to set before serving.  

https://www.flickr.com/photos/joyosity/16531880732/

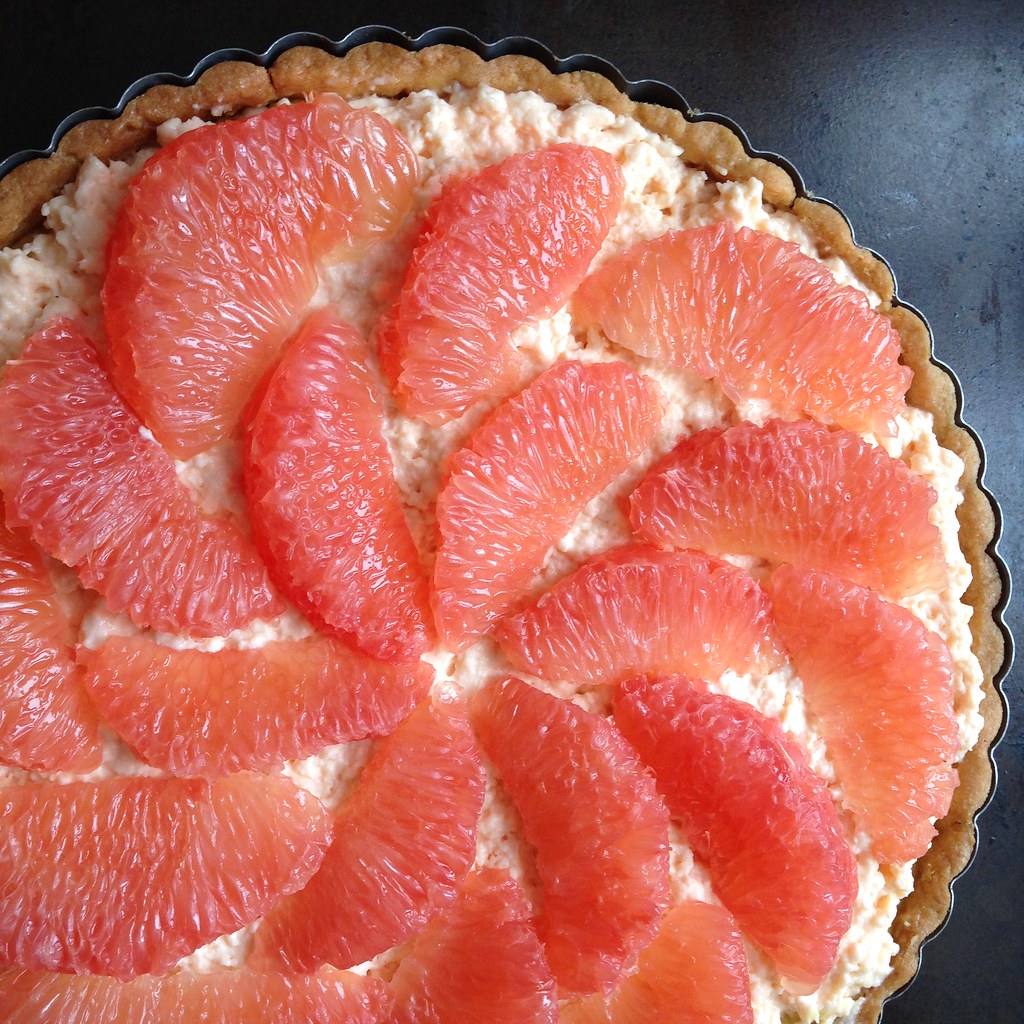
But it's worth it!  Not only is it totally beautiful to look at, it tastes incredible.  Even people who don't like grapefruit love this tart!  I think it helps that you've done some of the hard work by removing all the membrane from the grapefruit segments already so that all you have to do is take a bite, and you get the tartness of the fruit, a hint of bitterness from the Campari, sweetness from the fillings, and lots of buttery richness from the snappy crust.

https://www.flickr.com/photos/joyosity/16345473930/

Hugo & Victor's Pink Grapefruit Tart (adapted from Dorie Greenspan's Baking Chez Moi)
makes 1 tart

For the sweet tart dough:
1 1/2 cups (204 g) all-purpose flour
1/2 cup (60 g) confectioners' sugar
1/4 teaspoon kosher salt
9 tablespoons very cold unsalted butter
1 large egg yolk

Put the flour, confectioners' sugar, and salt in a food processor and pulse a few times to blend.  Cut the butter into small pieces and scatter over the dry ingredients.  Pulse until the butter is cut in coarsely.

Stir the yolk just to break it up and drizzle over the rest of the ingredients.  Pulse until the egg is incorporated, then process in longer pulses, about 10 seconds each, until the dough forms clumps and curds.   Finish blending the dough by turning it out onto a work surface and smearing small amounts across the surface with the heel of your hand.

Shape the dough into a disk and place between two sheets of parchment or wax paper.  Roll the dough out evenly until it is about 12" in diameter.  Carefully fit into a buttered tart pan and trim the excess dough.  Chill in the refrigerator for at least 2 hours, or if you're short on time, for 1 hour in the freezer.

Preheat the oven to 400°F.  Prick the crust all over with a fork.  Butter the shiny side of a piece of aluminum foil and fit snugly on top of the crust.  Fill with pie weights (you can use dried beans, rice, etc.).  Bake the crust for 25 minutes, then carefully remove the foil and weights.  Bake for another 7-10 minutes, until firm and golden brown.  Cool the crust completely.

https://www.flickr.com/photos/joyosity/16349217450/

For the grapefruit crémeux:
2 teaspoons powdered gelatin, bloomed in 1 1/2 tablespoons cold water
3/4 cup (150) g sugar
2 large pink grapefruits
3 large eggs
14 tablespoons unsalted butter, at room temperature
2 1/2 tablespoons Campari

Put the sugar in a 2- to 3-quart heavy-bottomed saucepan and grate the grapefruits over it.  Rub the sugar and zest together with your fingertips until the sugar is moist.  Squeeze the juice from the grapefruits into a measuring up until you have 3/4 cup of juice.  Add the eggs to the sugar and start whisking immediately.  Continue to whisk as you add the juice.

Place the saucepan over medium heat and continue whisking.  Eventually, after 7-9 minutes, the custard will start to thicken.  When it reaches 180°F (or when the first bubble pops at the surface), remove from the heat and strain into a blender.

Allow the custard to sit in the blender for about 5 minutes, pulsing a few times to help the cooling process.  Heat the bloomed gelatin in the microwave for 15 seconds to liquefy, then add to the blender.  Blend on high, and start adding the butter, two tablespoons at a time.  After all the butter has been incorporated, add the Campari and blend until homogenous in color.  Scrape the crémeux into a bowl, press a piece of plastic wrap to the surface, and refrigerate for at least 6 hours.

For the topping:
2 large pink grapefruits

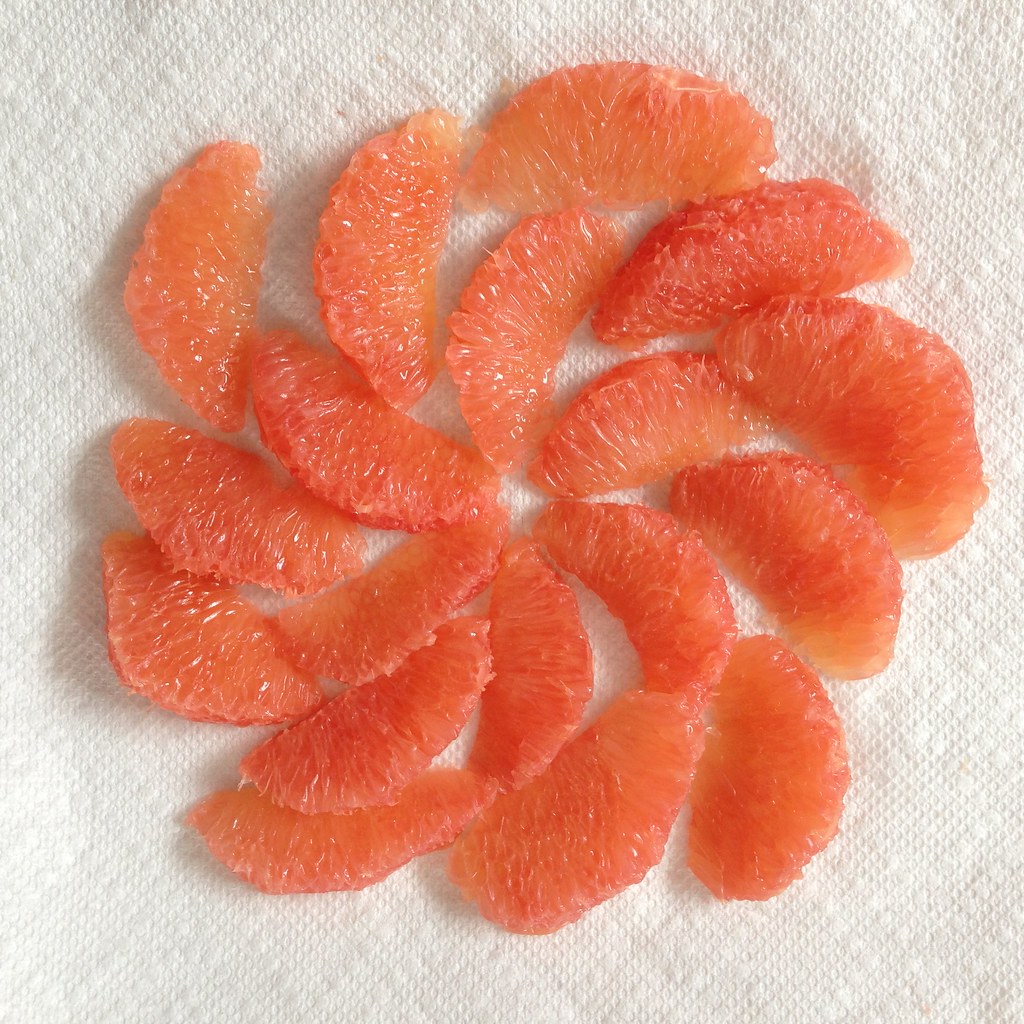
About 3 hours (or up to 8 hours) before you want to serve the tart, cut off all the peel and pith away from the tart.  You want to carefully cut through the outer membrane of the grapefruit, too.  Then, using a small paring knife, cut on either sides of the membranes in between each section to release each section.  There should be no membrane left on the sections.  Place the segments on several layers of paper towels, cover with more paper towels, and allow to dry at room temperature.  At this point, you can try arranging the segments to see if you'll have enough to cover the surface of the tart.

https://www.flickr.com/photos/joyosity/16531880912/

For the lemon-almond cream:
3 1/2 tablespoons unsalted butter, at room temperature
2 tablespoons packed light brown sugar
1/2 cup (50 g) almond flour
Finely grated zest of 1 lemon
1 large egg, at room temperature

Beat butter until smooth and creamy, about 3 minutes.  Beat in the brown sugar for a minute, and then beat in the almond flour and grated zest until smooth again.  Add the egg and beat until fully incorporated.  Refrigerate for at least an hour.

Assembling the tart:
https://www.flickr.com/photos/joyosity/16345473530/

Preheat the oven to 375°F.  Whisk the chilled lemon-almond cream until it is spreadable.  Spread the cream over the bottom of the tart crust and bake for 6-7 minutes, until the cream is set.  Cool the tart completely before the next step.

https://www.flickr.com/photos/joyosity/16579322545/

About 2 hours before you want to serve the tart, whisk the grapefruit crémeux until it's smooth (unlike the picture above).  Spread over the lemon-almond cream.  Arrange the grapefruit segments on top of the crémeux.  Chill the tart for another 2-8 hours before serving.

https://www.flickr.com/photos/joyosity/16506924976/

Next:  Matcha Financiers with White Chocolate Centers
Previously:  First Night in Florence Spaghetti
Two Years Ago:  Cauliflower Steak with Cauliflower Purée
Six Years Ago:  Boston Cream Cupcakes