Showing posts with label garlic. Show all posts

Monday, September 19, 2016

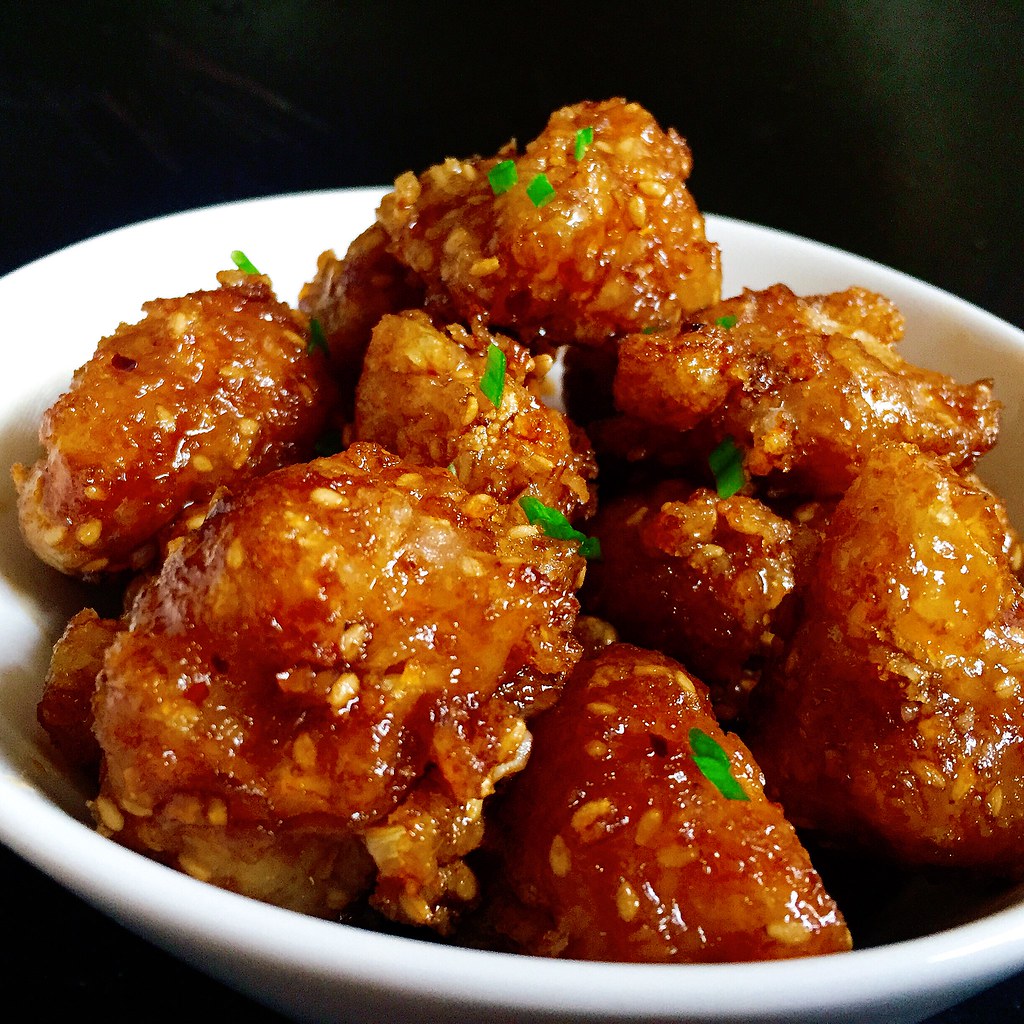
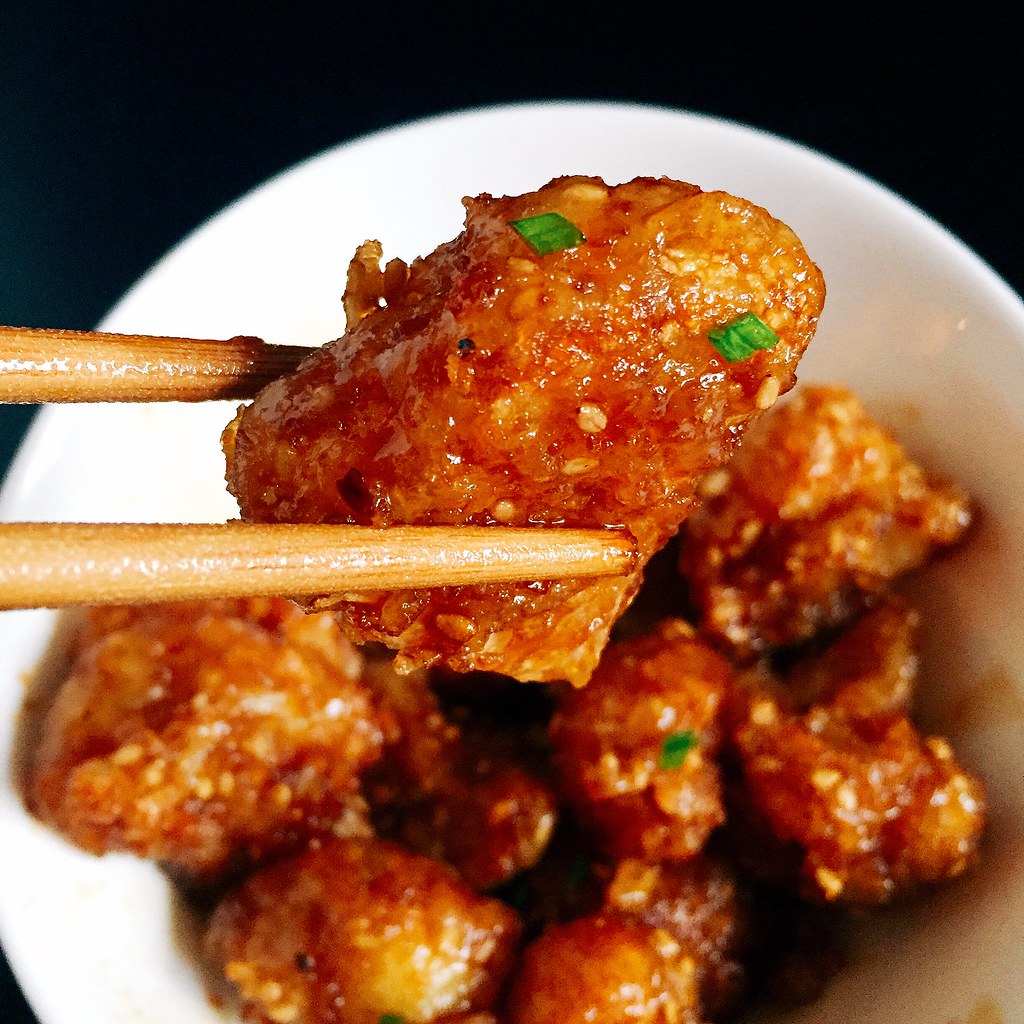
Soy Garlic Glazed Korean Fried Cauliflower


During my stint as a vegan (which became vegetarianism and then pescetarianism until I finally gave up this year and became an omnivore again), I would often crave Bon Chon chicken.  That gloriously crispy, thin-skinned chicken with the amazing soy garlic glaze would haunt me, and I'll admit that I sometimes gave in.  It was just too good to give up.

I wish I had had this recipe for Korean fried cauliflower back then, but to be honest, this substitute is so good, I might even prefer it over the real thing.  I adapted the recipe from Serious Eats' well researched recipe and just reduced the amount of vinegar and upped the garlic in the glaze according to my own taste preferences.  If you don't have the sesame seeds and/or finely shredded coconut to add to the batter, you can omit them, but they add some great texture to the cauliflower.

Even though they're meant to be an appetizer, I ended up eating them with rice like I would with sesame chicken.  And if you want to save any as leftovers, I would refrigerate the cauliflower after they're fried and drained.  The next day, heat them up in the toaster oven and then toss them with the sauce; that way they will still be crispy.

Soy Garlic Glazed Korean Fried Cauliflower (adapted from Serious Eats)
serves 4-6 as an appetizer or 2 as an entrée

For the Soy Garlic Glaze:
1/4 cup soy sauce
1 teaspoon rice wine vinegar
2 tablespoons mirin
6 tablespoons brown sugar
1 1/2 teaspoons mince garlic
1/2 teaspoon freshly grated ginger
Pinch of red pepper flakes
1 teaspoon toasted sesame oil
1 1/2 teaspoons cornstarch

Combine everything except for the cornstarch in a small saucepan and heat over medium heat.  Make a slurry with the cornstarch and 1 1/2 teaspoons water.  Whisk into sauce and bring to a boil.  Cook until the sauce is reduced and slightly thickened, about 3 minutes.

For the Korean Fried Cauliflower:
Vegetable oil, for frying
1/2 cup cornstarch
1/2 cup all-purpose flour
1/2 teaspoon baking powder
1/3 cup toasted sesame seeds
1/3 cup unsweetened finely shredded coconut
2 teaspoons kosher salt
1/2 cup cold water
1/2 cup vodka
1 head cauliflower, cut into 1/2" - 1" florets

Pour enough oil into a Dutch oven or large pot for it to reach at least 2".  Preheat the oil to 350°F.

Combine the cornstarch, flour, baking powder, sesame seeds, coconut, and salt in a large bowl and whisk until homogeneous.  Add the water and vodka, and whisk to form a smooth batter.

Add the cauliflower to the batter.  Fry the cauliflower in batches, letting the excess batter drip off each one before you lower it into the oil.  Remove with a slotted spoon when golden brown and let drain on a paper-towel lined plate.

Toss the fried cauliflower with the soy garlic glaze and serve immediately.


Next:  Pear Apple Cranberry Slab Pie
Previously:  Caramelized Honeycomb Ice Cream
Two Years Ago:  Hokkaido Milk Bread Three Ways (Traditional, Braided, and Taro Swirl)
Three Years Ago:  Salted Butter Caramel Apple Pie with Vodka Pie Crust

Tuesday, July 26, 2016

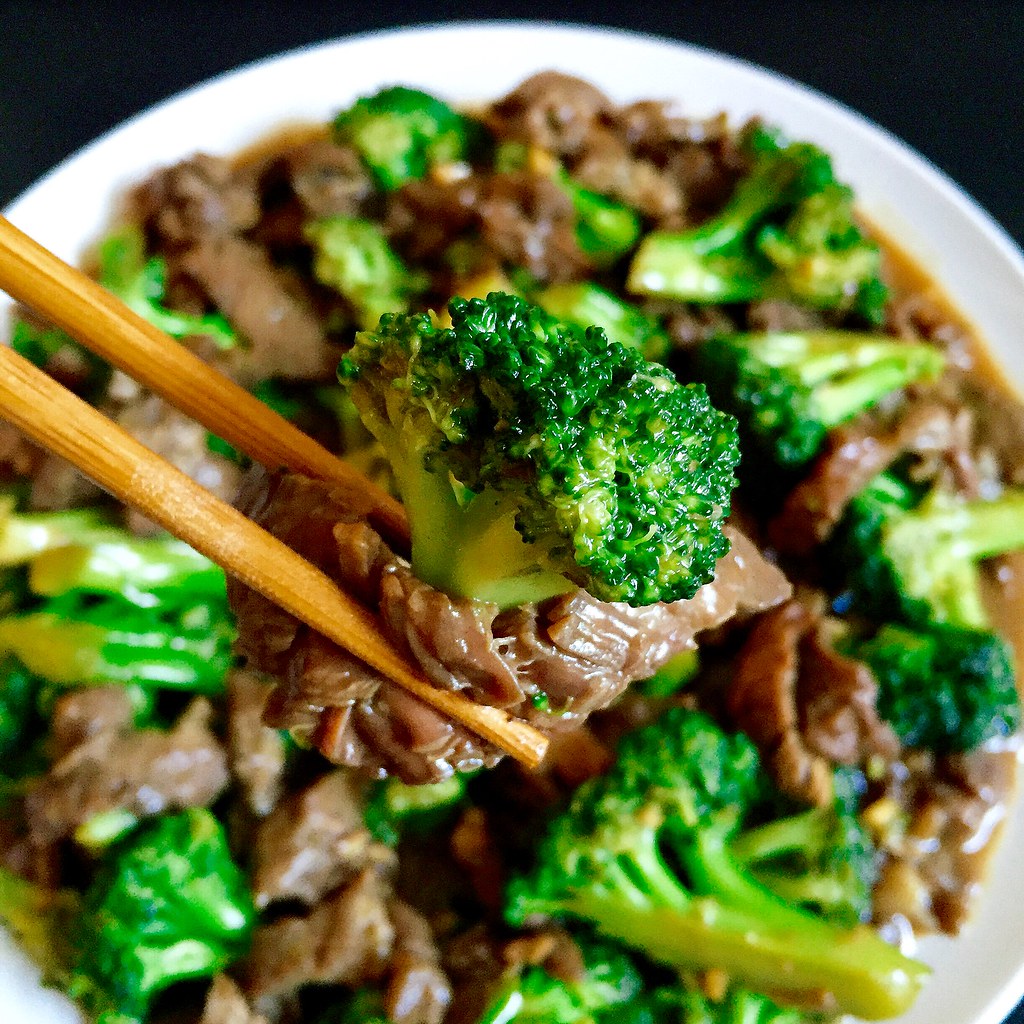
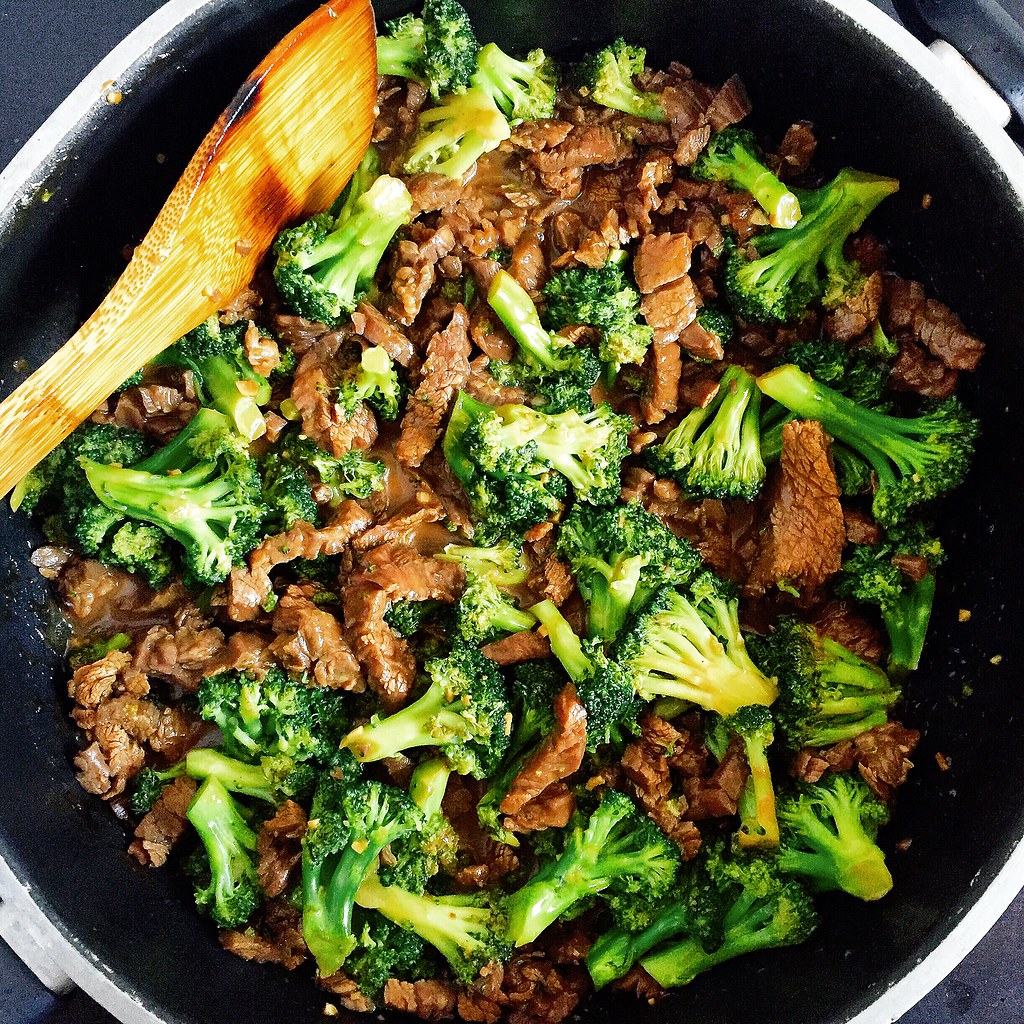
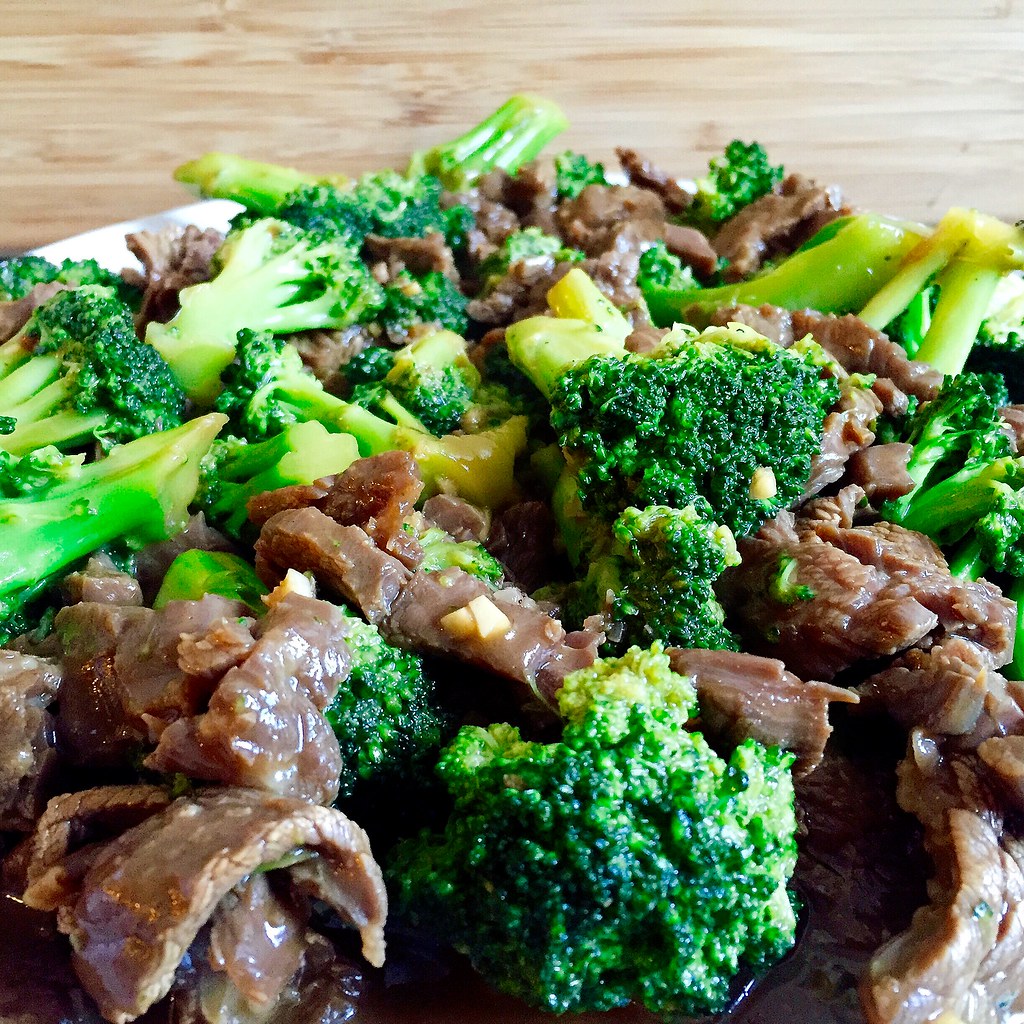
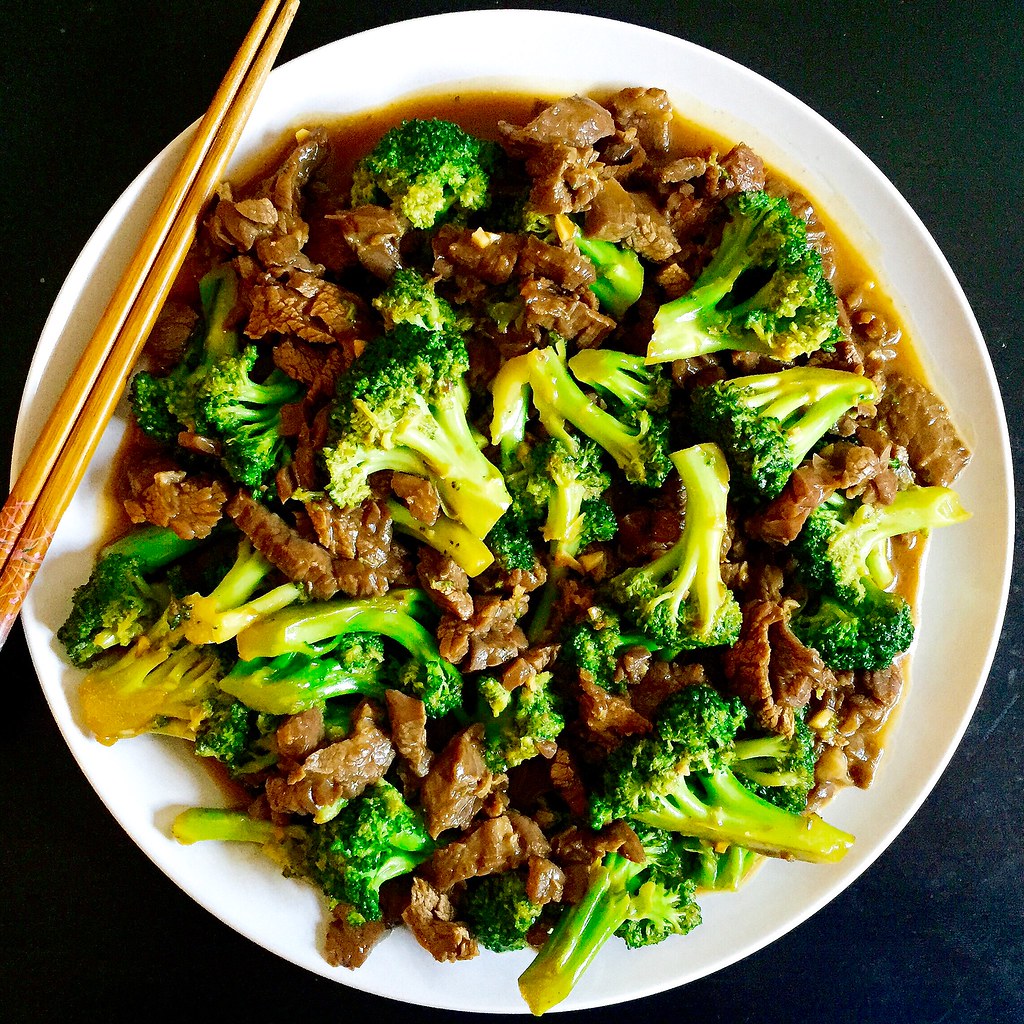
My Mom's Beef and Broccoli Stir Fry

https://www.flickr.com/photos/joyosity/27932366904/in/dateposted-public/

This is one of the original recipes in the cookbook that I made for my mom's Christmas gift 8 years ago.  I would've shared it earlier, except I thought I'd shared it already!  It's a classic dish to order from a Chinese restaurant--velvety strips of marinated beef stir fried with tender crisp broccoli in a flavorful brown sauce--and perfect served over steamed white rice.

To keep the beef tender and not chewy, it's important to slice the strips against the grain.  The addition of cornstarch in the marinade further helps improve the texture of the beef.  Since the broccoli takes a lot longer to cook than the beef, it is cooked separately while the beef is marinating and then added back in at the end.  You'll want to use a large pan with a lid so that you can steam the broccoli after a quick stir fry.

https://www.flickr.com/photos/joyosity/28421948532/in/dateposted-public/

My favorite part about this recipe is the marinade which ends up becoming the sauce upon stir frying with the beef.  It is already quite fragrant due to the soy sauce, garlic, and sesame oil, but my mom adds a secret ingredient that really brings it over the top:  cinnamon!  Only a tiny amount is added that you can't really taste it, but the aromatic spice somehow boosts all the other flavors in the sauce in a way you wouldn't expect.

https://www.flickr.com/photos/joyosity/28549364325/in/dateposted-public/

My Mom's Beef and Broccoli Stir Fry
serves 4

1 lb. flank or sirloin steak, sliced thinly against the grain
1/4 cup soy sauce
2 tablespoons cornstarch
1/4 cup rice wine
1 teaspoon sesame oil
1 1/2 tablespoons sugar
2 garlic cloves, minced
1/4 teaspoon ground cinnamon
3 tablespoons vegetable oil, divided
6 cups broccoli florets
Salt, to taste
1 cup water, divided

Whisk together the soy sauce, cornstarch, rice wine, sesame oil, sugar, minced garlic, and cinnamon.  Toss with the sliced steak and marinate for at least 30 minutes.

In a large wok, heat 1 tablespoon of oil on high and add the broccoli florets.  Season with salt and stir fry until bright green.  Add 1/2 cup water and cover.  Steam until the broccoli is done.  Transfer the broccoli to a bowl, and wipe down the wok.

Add another 2 tablespoons of oil and heat on high again.  Add the steak and marinade to the wok.  Rinse out the container you used to hold the beef with 1/2 cup of water and add to the wok.  Stir fry until the beef is just done and no longer red.  Add the broccoli back into the wok and continue to stir fry for another minute or two to combine.  Serve hot.

https://www.flickr.com/photos/joyosity/28265304420/in/dateposted-public/

Next:  Zucchini Pizza
Previously:  How to Make an American Flag Cake
Two Years Ago:  Cleveland Cassata Cake (Bonus:  In a Jar!)
Three Years Ago:  Backyard Mint Ice Cream with Dark Chocolate Freckles
Six Years Ago:  Slow Cooker Bolognese Sauce
Seven Years Ago:  Curried Carrot Soup

Wednesday, June 10, 2015

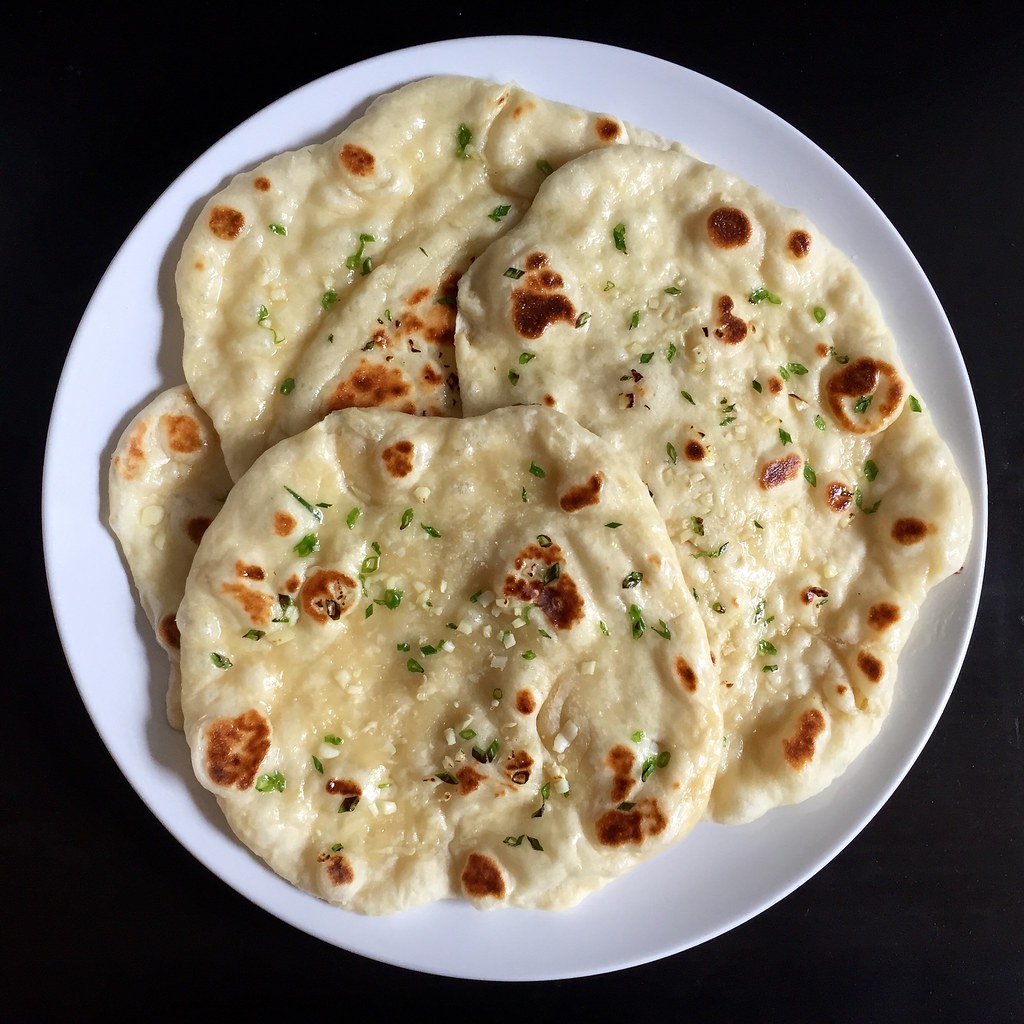
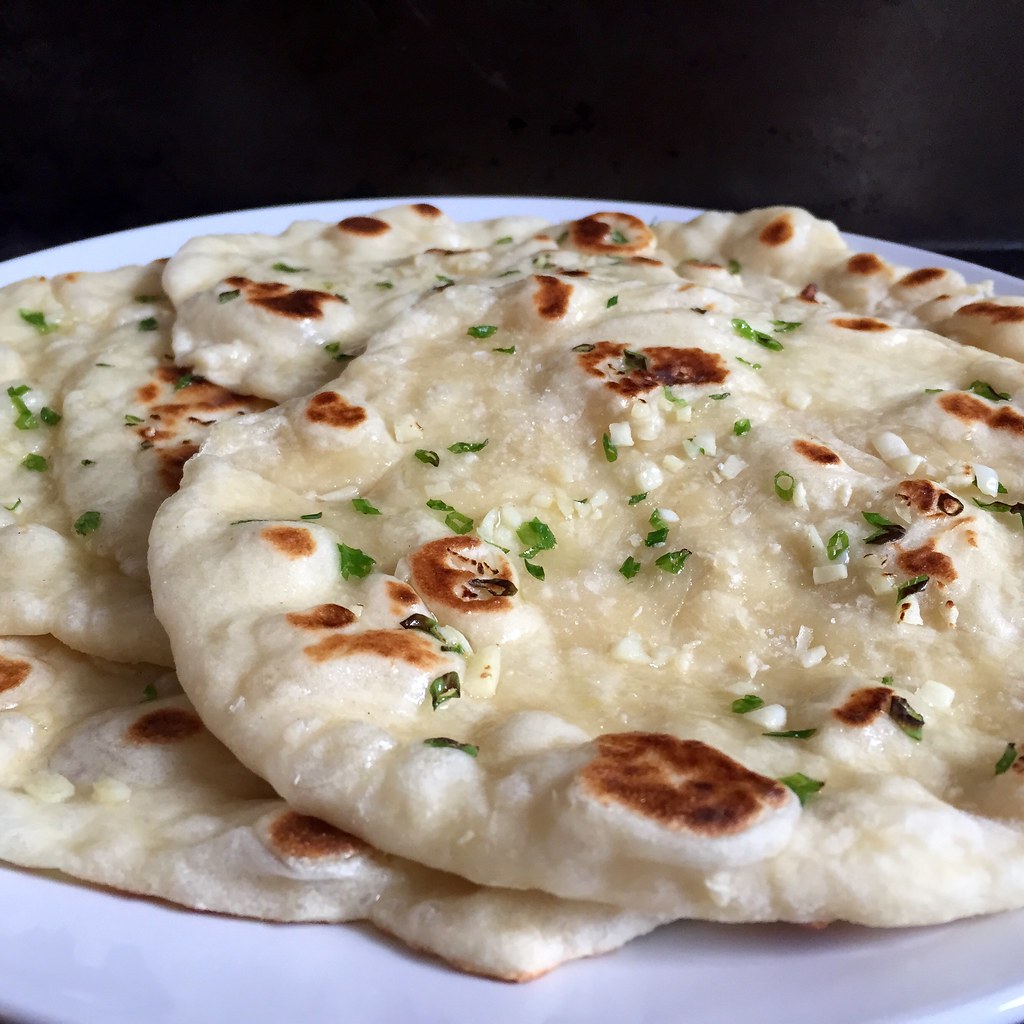
Garlic Naan

https://www.flickr.com/photos/joyosity/17916638533/in/dateposted-public/

What's the point in making tikka masala if you don't have any naan to swipe up the leftover sauce?  If I had known how easy it was to make naan on the stovetop, I would've made it a long time ago!  Since I had some garlic and scallions lying around, I decided to make the garlic version, which let's face it, is so much better than the plain version.

I found the dough to be on the wetter side, so make sure you work it on a floured surface and use a floured rolling pin or else it'll end up sticking everywhere and to everything.  Sadly, naan does not keep well so I would suggest eating it the same day it is made.

https://www.flickr.com/photos/joyosity/18537358545/in/dateposted-public/

Garlic Naan (adapted from Saveur)
makes 4 pieces

6 tablespoons water heated to 115°F
1/2 teaspoon honey
1 heaping teaspoon active dry yeast
1 cup all-purpose flour
1⁄4 cup plain, full-fat Greek yogurt
1 tablespoon canola oil
1⁄4 teaspoon kosher salt, plus more for sprinkling
1 tablespoon minced garlic
1 tablespoon chopped scallions
Melted ghee or butter, for brushing

Stir water and honey in a bowl.  Add the yeast and let sit until foamy. Add the flour, yogurt, oil, and salt and stir until dough forms. Knead the dough in bowl until smooth, about 5 minutes. Cover and let sit in a warm place until doubled in size, about 1 hour.

Transfer dough to a floured work surface and divide into 4 balls. Working with 1 ball at a time and using a rolling pin, roll dough into a 7" circle about 1⁄4" thick. Sprinkle with garlic and scallions and press into dough.

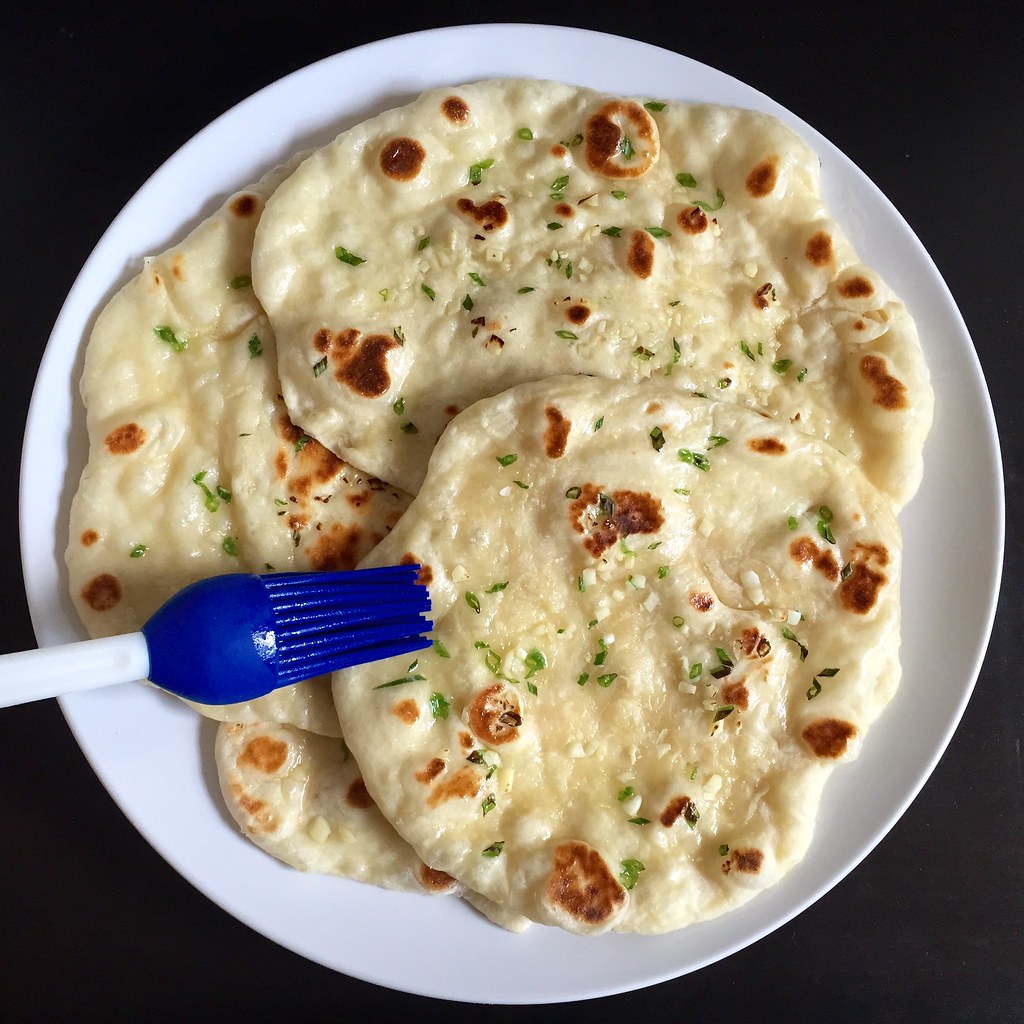
Heat a 12" nonstick skillet over medium-high. Working with 1 piece dough at a time, cook dough, plain side down, until bubbles appear over the surface and brown spots appear on the bottom, about a minute. Flip the dough and cook until the bottom gets browned in spots as well. Transfer naan to a plate and brush with ghee.  Sprinkle with more kosher salt and serve hot.

https://www.flickr.com/photos/joyosity/18349548778/in/dateposted-public/

Next:  Pasta con le Sarde
Previously:  Tofu Tikka Masala
Last Year:  Vegan Almond Joy Ice Cream and Bon Bons
Two Years Ago:  Spaghetti Carbonara for One
Five Years Ago:  Elote (Mexican Grilled Corn)
Six Years Ago:  Black Sesame Ice Cream

Tuesday, February 17, 2015

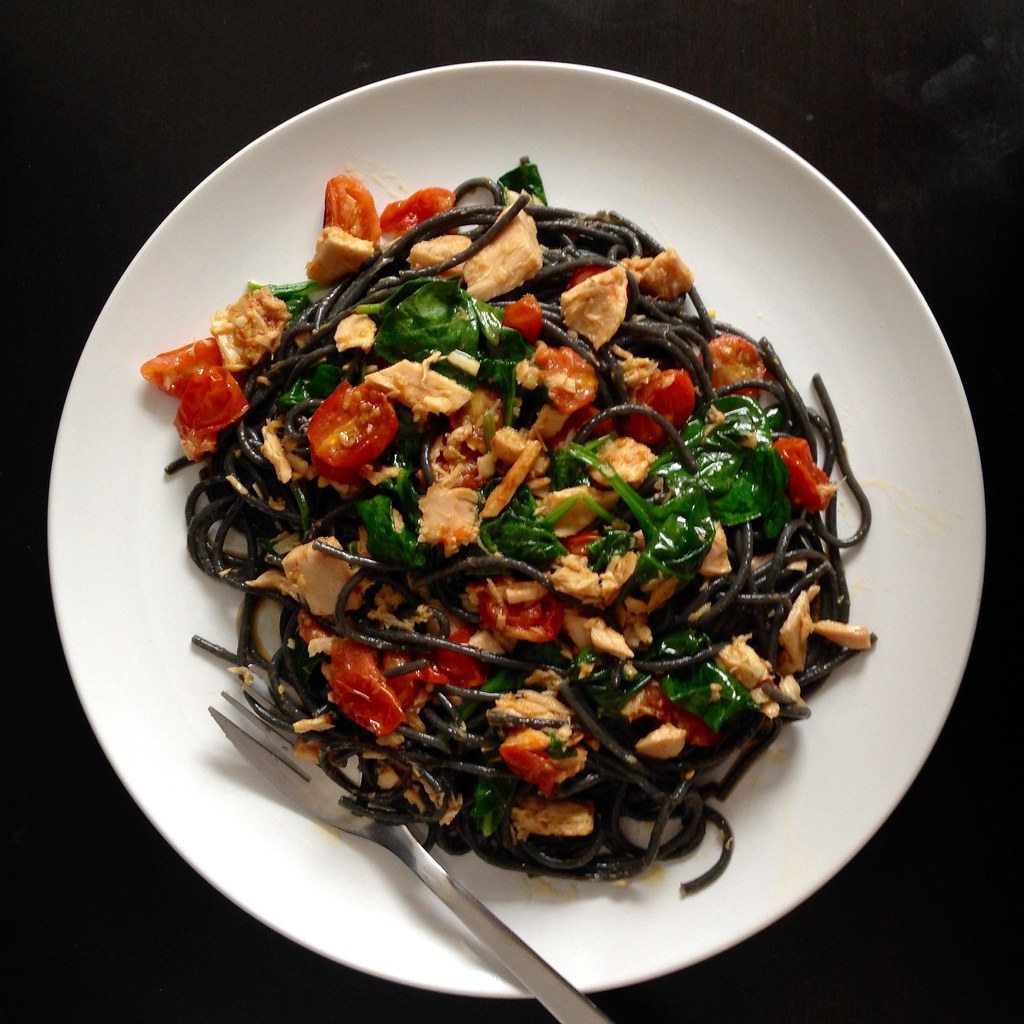
First Night in Florence Spaghetti

https://www.flickr.com/photos/joyosity/16300798869/

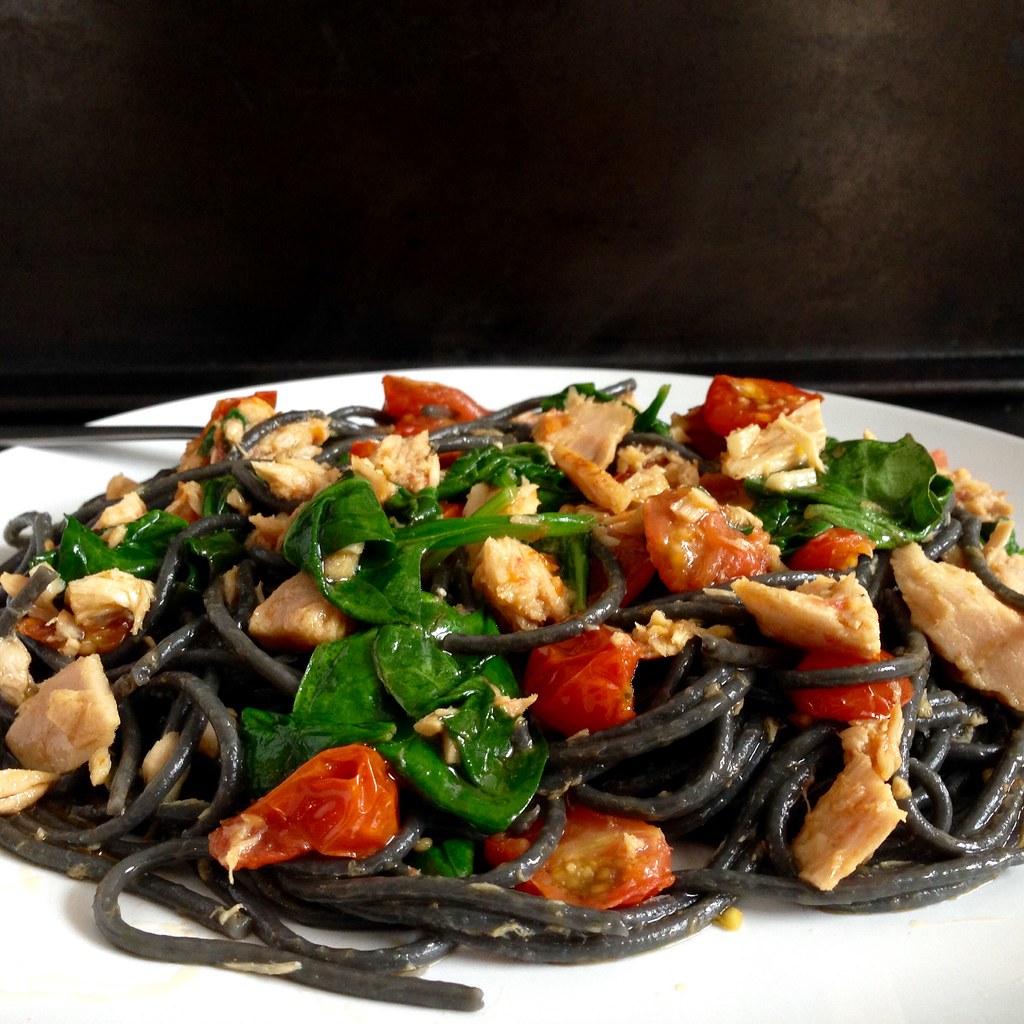
I have made this dish four times in as many days since I first discovered it.  Maybe it's because I'm feeling nostalgic for Italy and wanting to get out of this crazy New England snow.  Maybe it's the way the olive oil, tomatoes, and lemon juice come together like magic to make this unbelievably fresh tasting sauce.  Or maybe it's the way the tuna and garlic linger on the tongue and then in my dreams.  Whatever it is, you need to make this pasta stat.

This dish comes together quickly; while the pasta is cooking, you'll be starting the sauce so that by the time the pasta is almost al dente, you toss it into the pan that the sauce is in to finish cooking it.  So I usually start cutting up the tomatoes and mincing the garlic while I wait for the water to boil.

For this recipe, make sure you use the tuna that's packed in olive oil, not water.  And don't pour out the oil; add it to the sauce.  Speaking of olive oil, you'll want to use a good one, and lots of it.  I used the last of the olive oil I got from Tuscany for this, and it was worth it.  I also used the last of the squid ink pasta I got from Venice since I figured the brininess would go well with the tuna (and because it's photogenic).  All this just means I'll have to go back to Italy soon to stock up again!

https://www.flickr.com/photos/joyosity/16301169797/

First Night in Florence Spaghetti (adapted from The Solitary Cook by way of Food52)
serves 2

1/2 package of spaghetti
Kosher salt and freshly ground pepper, to taste
Good olive oil, and lots of it
1 pint grape tomatoes, quartered
3 cloves garlic, minced
1 tin of tuna packed in olive oil
A few handfuls of spinach or Swiss chard leaves
Juice of 1/2 a lemon

Get a large pot of salted water boiling.  Add the pasta and start a timer to cook for 3 minutes less than what the package calls for (i.e. if the package says to cook the spaghetti for 10 minutes, cook it for 7).

In a pan large enough to hold all the pasta, add 5-6 generous glugs of olive oil heat on medium-high (it should be at least twice what you think you'll need).  Once the oil starts to shimmer, add the tomatoes and a generous pinch of salt.  While the tomatoes soften, you may want to (carefully!) smoosh them to help release their juices.  When there are 2 minutes left on the pasta, add the minced garlic.  When there is 1 minute left on the pasta, add the tuna plus the oil it's packed in, breaking up any large chunks of fish.

When the timer is up on the pasta, use tongs or a pasta spoon to add the spaghetti to the pan.  Add some of the pasta cooking water to the pan too (the original recipe calls for a few ladlefuls, but I like a little less than that).  Add the greens and lemon juice and toss everything around, cooking until the leaves is just wilted.  Taste the sauce and season with salt and pepper as needed. 

https://www.flickr.com/photos/joyosity/16301169597/

Next:  Hugo & Victor's Pink Grapefruit Tart
Previously:  Odile's Fresh Orange Cake
Last Year:  Okonomiyaki
Six Years Ago:  New England Clam Chowda with Homemade Oyster Crackers

Thursday, July 17, 2014

Taiwanese Style Street Corn

https://www.flickr.com/photos/joyosity/14403935820/

I have to admit that I've never actually had this when I was in Taiwan, but that doesn't really matter.  When I read about Tiny Urban Kitchen's Taiwanese grilled corn, I knew I had to make it.  I already had all the ingredients for the sauce, and corn was on sale for 12 for $1.97 at Stop and Shop!  All I was missing was a grill.  Luckily, my friends Evie and Santi had a cookout at their place over the weekend, so it all worked out.

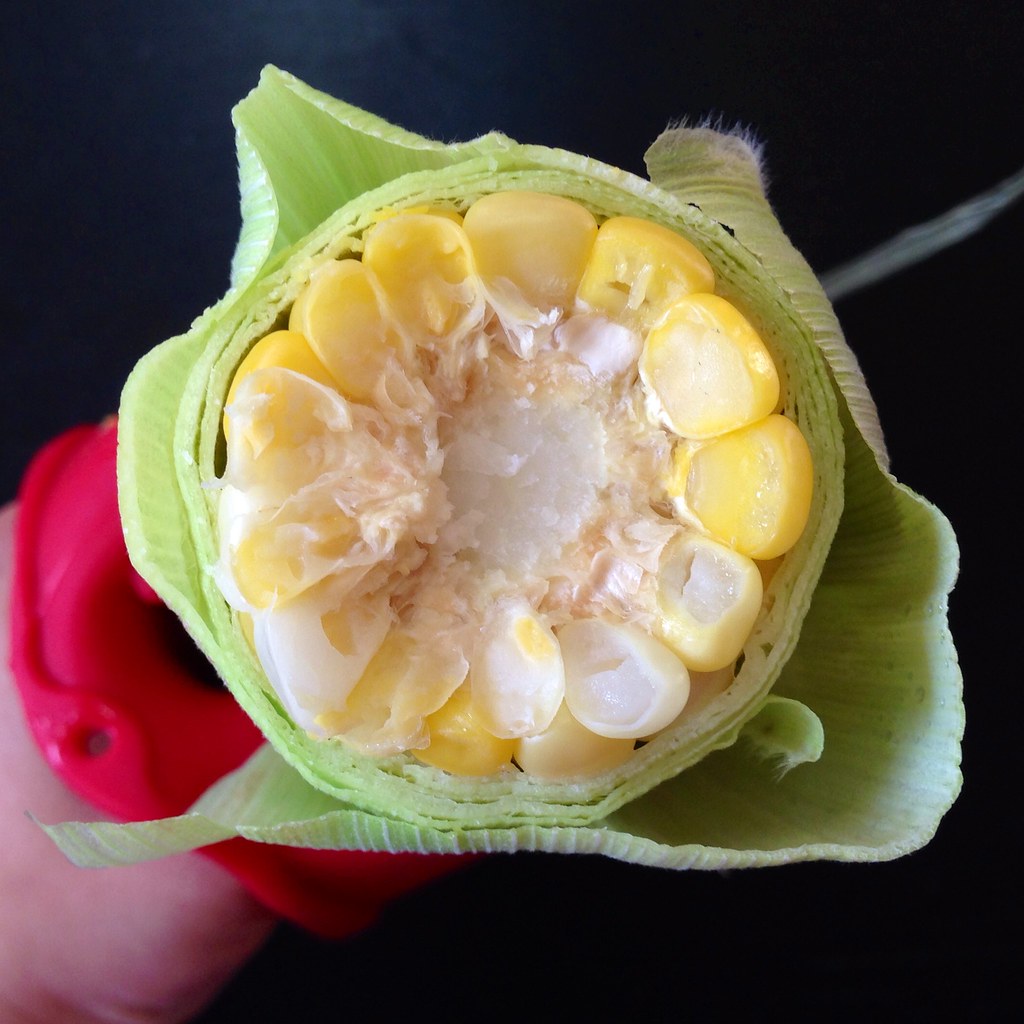
After my experience with making Mexican grilled corn, I decided to par-cook the corn before grilling it.  I've wanted to try the microwave shucking method ever since I saw this video, so I figured I could use the microwave to kill two birds with one stone.

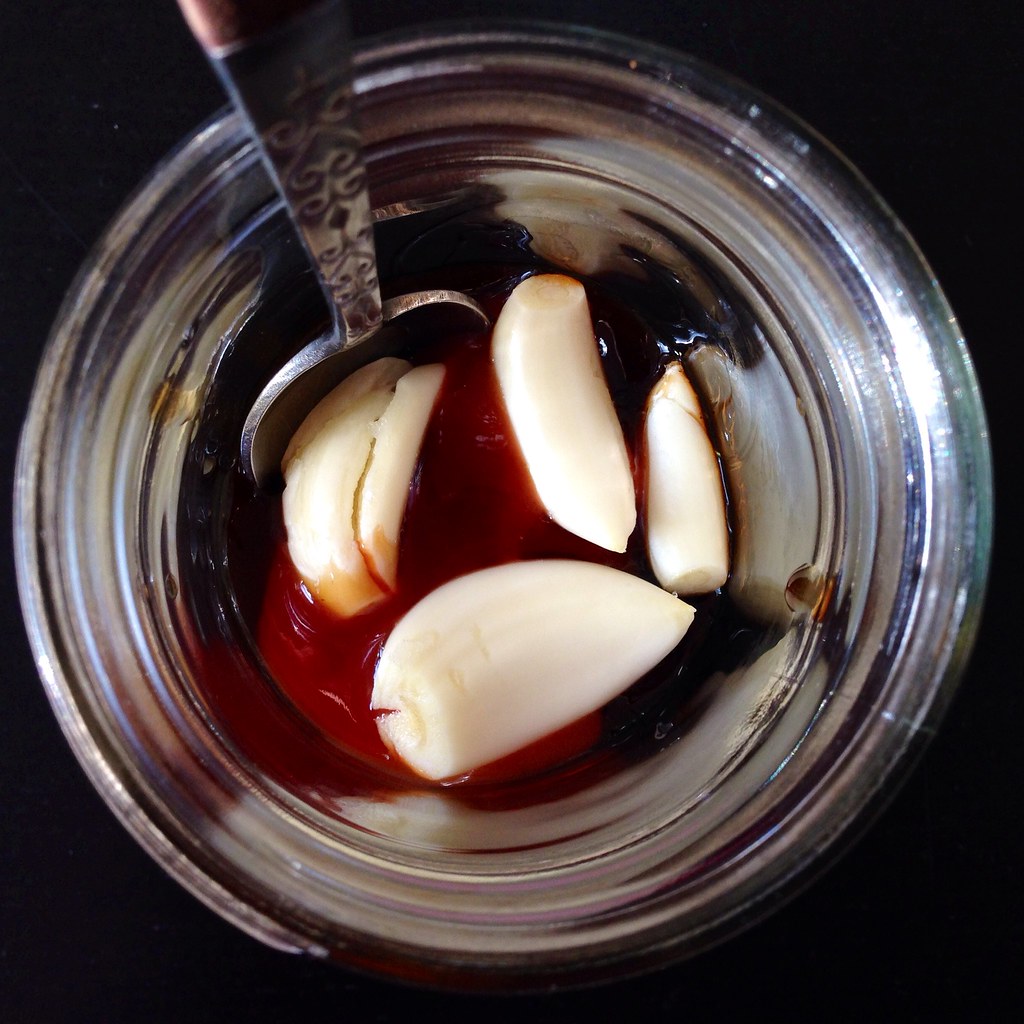
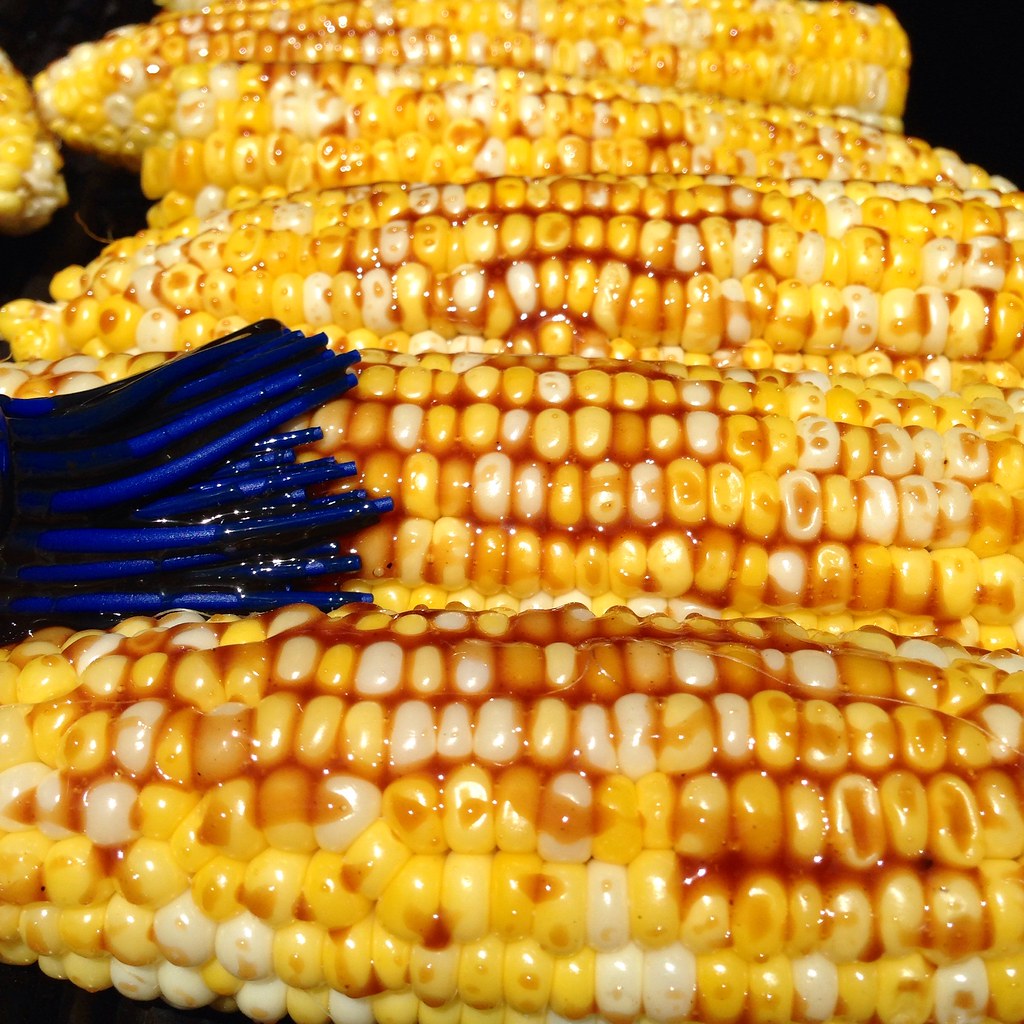
I like to make the basting sauce the night before so that the garlic has time to really release a lot of its juices.  Make sure you use soy paste and sweet chili sauce, not soy sauce or another hot sauce.  (See this picture from Tiny Urban Kitchen for the brands we both used.)  You really want the thickness and sweetness from using those two specific sauces for this recipe.

https://www.flickr.com/photos/joyosity/14403934080/

Taiwanese Style Street Corn (adapted from Tiny Urban Kitchen)
serves 6-8

4 tablespoons soy paste
1 tablespoon sweet chili sauce
4-5 garlic cloves
6-8 ears of corn
Butter (optional)

https://www.flickr.com/photos/joyosity/14589882852/

Mix together the soy paste and sweet chili sauce.  Smash the garlic cloves, remove the skin, and add to the sauces.  I like to mash them a bit more in the sauce to really release their juices.  Let sit in the refrigerator overnight, if possible.

https://www.flickr.com/photos/joyosity/14590569565/

Cut off the stalk end of each ear of corn.  Microwave one or two at a time for 90 seconds to 2 minutes per corn.  The corn will be really, really hot so make sure you use a dependable oven mitt to remove from the microwave.


Holding the stringy end of the corn (and still using oven mitts!) shake and squeeze the corn out of the husk.  It should slide out pretty easily, and you should be able to get it out without any corn silk attached, but if there is any left on the corn, just remove it once the corn has cooled a bit.  This can also be done the night before; just store the par-cooked corn in the refrigerator and bring back to room temperature before grilling the next day.

https://www.flickr.com/photos/joyosity/14403999179/

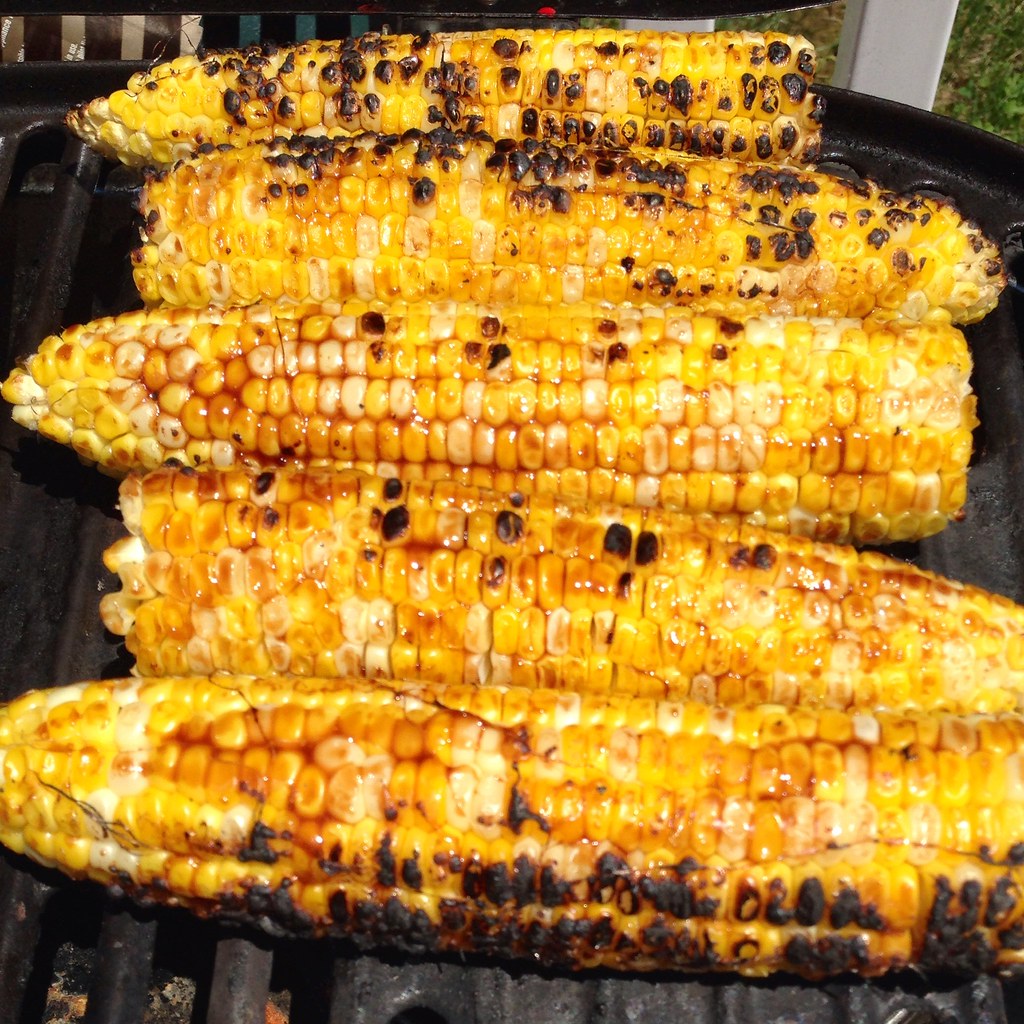
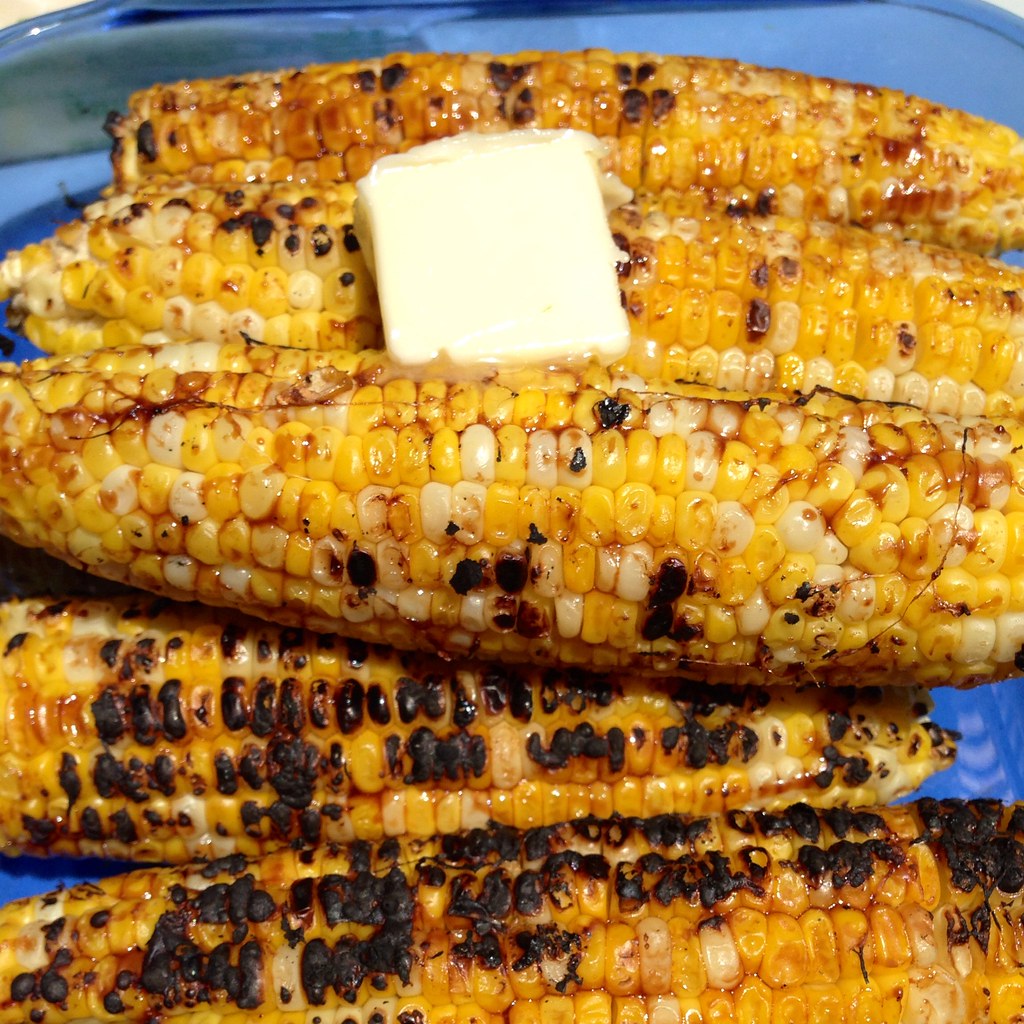
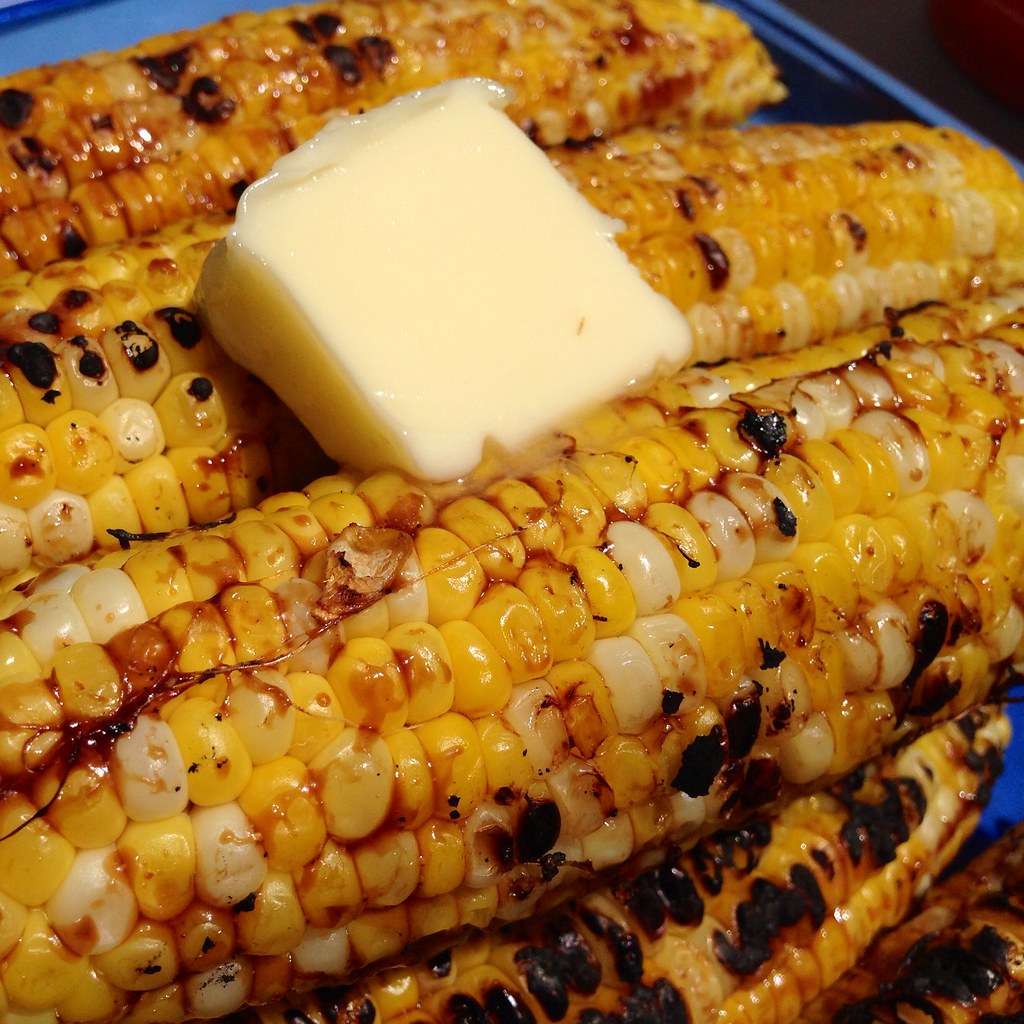
Grill the corn on a hot grill until it starts to char.  Start basting the corn with the sauce and turning them with tongs to get a nice glaze and char all around.  Continue basting until all the sauce is used up.  You can use less, but why would you want to?  Slather with butter before serving, if desired.

https://www.flickr.com/photos/joyosity/14590585465/

I actually started basting the corn as soon as they were on the grill instead of waiting for them to char first.  I'm not sure if it made a difference, especially since the corn was already par-cooked so it didn't take too long for it to start charring.  The end result was exactly what I imagined:  sticky, salty, spicy, smoky, garlicky, crunchy, buttery sweetness.  I totally want to try using this sauce on all the things!

Next:  New England Clambake at Home
Previously:  Homemade Choco Tacos
Last Year:  French Toast Face Off

Friday, February 14, 2014

Squid Ink Spaghetti Aglio e Olio

Last year for Valentine's Day I celebrated by making jjajungmyeon (Korean black bean noodles).  This year, I stayed with the color scheme but went Italian and made squid ink spaghetti aglio e olio, inspired by my trip to Venice.

http://www.flickr.com/photos/joyosity/12505268373/

After our time in Rome, my cousin Leslie and I took the train up to La Serenissima.  Despite being colder and rainier than Rome, Venice was amazing.  At just about every bridge we crossed, I felt like I had to stop and take a picture; it was so picturesque! 

http://www.flickr.com/photos/joyosity/12505624834/

We spent the first half of our trip either using the complimentary hotel shuttle boat to St. Mark's Square or trudging through the rain on foot to get around.  The city wasn't that big, so we were able to see St. Mark's Basilica, the Doge's Palace, the Accademia, and Rialto Bridge pretty easily this way. 

http://www.flickr.com/photos/joyosity/12505161015/

It wasn't until we decided to get a pass for the vaporetto (the public water bus), though, that I really began to feel like more than just a tourist.  At last we were able to see Venice from the Grand Canal as it was meant to be seen.  It didn't hurt that we were usually surrounded by locals commuting back and forth from work, either.

http://www.flickr.com/photos/joyosity/12505153025/

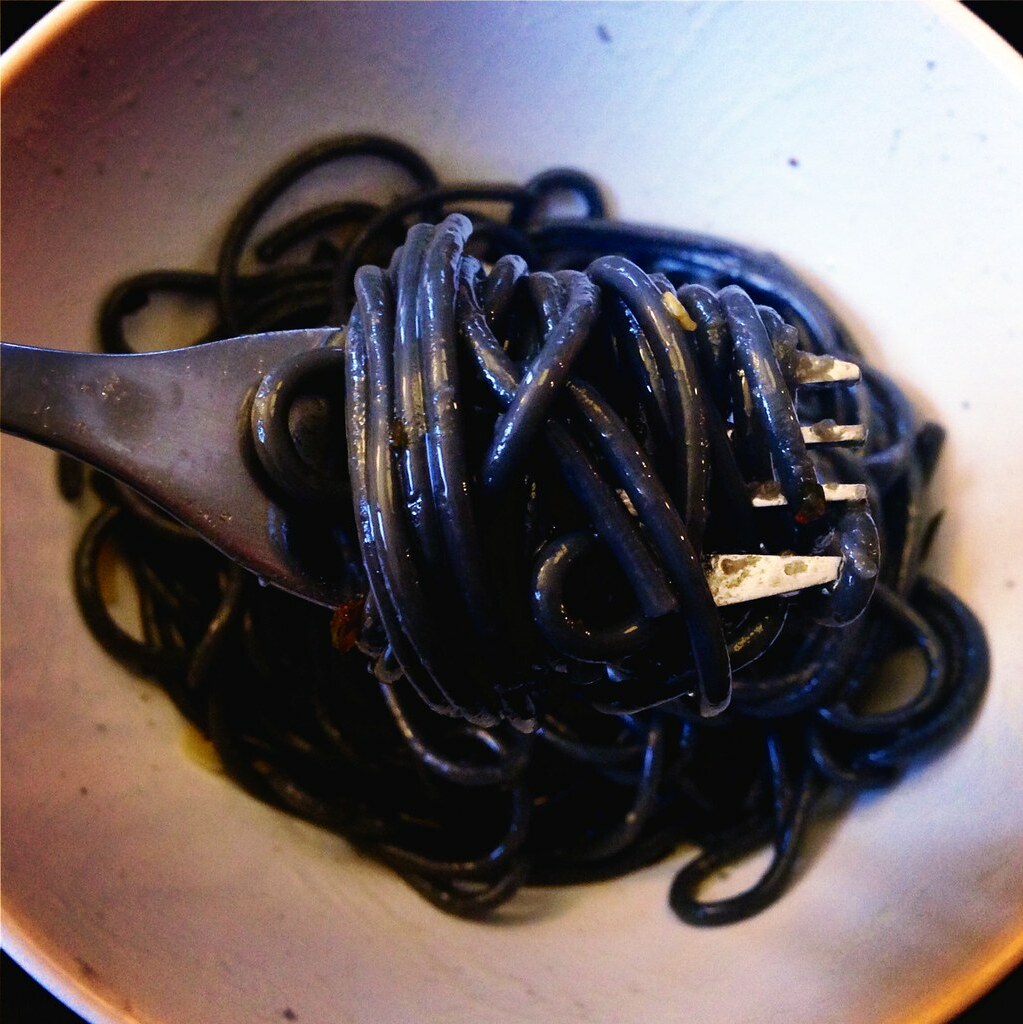
While scouring the grocery store on the last day for edible souvenirs to bring home, I found a package of spaghetti al nero di seppia, or squid ink spaghetti.  I had ordered spaghetti with cuttlefish ink sauce a couple of times in Venice a couple of times and really enjoyed it, so I decided to buy the pasta and try to make it at home.  Unfortunately, I haven't been able to find any actual squid or cuttlefish ink to make the sauce with, although in my search I did find squid ink pasta at a local Italian store, so you probably don't have to go all the way to Venice to find the pasta.  Without any ink, I decided to prepare the pasta simply, aglio e olio, with garlic and olive oil and a pinch of red pepper flakes.  This recipe is even easier than spaghetti carbonara and you're almost certain to already have all the ingredients (you can use regular spaghetti if you don't have any squid ink pasta).

http://www.flickr.com/photos/joyosity/12508839434/

Squid Ink Spaghetti Aglio e Olio
serves 1

A small fistful of squid ink spaghetti
A few glugs of olive oil
1 garlic clove, thinly sliced
A pinch of red pepper flakes
Sea salt 
Chopped parsley or basil

Bring a pot of salted water boil.  Add the spaghetti to the pot and cook according to the packaging (mine says to cook for 10-12 minutes).

In the meantime, add the olive oil and sliced garlic to a small saucepan and set on low heat.  Once the garlic starts to sizzle, add the red pepper flakes and sea salt to taste.  Continue to heat while the spaghetti is cooking, but do not allow the garlic to brown.  If this starts to happen, remove the pan from heat.

When the spaghetti is done cooking, use a pasta scooper to add it to the saucepan.  You want a little bit of the pasta water to go along with it so don't worry about draining it first.  Toss the spaghetti with the olive oil until it is well coated.  Plate and garnish with some chopped parsley or basil.  Serve immediately.

https://www.flickr.com/photos/joyosity/12505985415/

Next:  Okonomiyaki
Previously:  Homemade Tagliatelle with Shaved Truffles
Last Year:  Jjajungmyeon (Korean Black Bean Noodles)
Four Years Ago:  Nutella Ice Cream
Five Years Ago:  Tomato and Eggs over Rice

Friday, November 23, 2012

Mashed Potato Pizza with Roasted Garlic and Bacon

If you have any leftover mashed potatoes from Thanksgiving, I highly recommend making this pizza.  I first had a mashed potato pizza at BAR in New Haven.  A few friends had raved about it, so I had pretty high expectations going in, and it exceeded all of them.  This pizza isn't quite as good as that one, but it's easier than driving down to New Haven.

From what I remember, mashed potatoes that they used at BAR were kind of loose and liquidy vs. thick and creamy.  While I probably wouldn't have liked that consistency in stand-alone mashed potatoes, it worked really well on their thin crusted pizza.  I usually add some bacon, garlic, and broccoli as toppings, and once the pizza arrives, top it with their signature salad, which is dressed with a light vinaigrette, for some acidity.  I used what I had on hand for this pizza, but feel free to experiment with other toppings!

Mashed Potato Pizza
 
Mashed Potato Pizza with Roasted Garlic and Bacon
makes 2 individual size pizzas

1 head garlic
Olive Oil
Kosher salt, to taste
1 sprig of fresh thyme (optional)
1 cup mashed potatoes
2-3 strips bacon
1 recipe pizza dough, divided into two balls
2 tablespoons scallions, chopped
2 small handfuls of shredded mozzarella

Preheat oven to 400°F.

PB163121
 
Peal off most of the papery skin of a head of garlic, but keep the last layer or two to hold the cloves together.  Slice off the top of the head so that the top of the cloves are exposed.  Check the cloves and discard any yucky ones.  Place the head of garlic on some aluminum foil, drizzle generously with olive oil, sprinkle with some kosher salt, and top with the sprig of thyme, if using.  Wrap the aluminum foil around the garlic, and roast for 30 minutes until soft.

PB163131
 
Once the garlic has cooled enough to the touch, squeeze out the cloves and set aside.  Reserve the garlic infused olive oil.  Increase the temperature of the oven to 500°F and place a pizza stone on a rack set in the lower third of the oven.

Place the bacon strips on an unheated frying pan.  Over low heat, fry the bacon until browned on the bottom.  Flip the bacon pieces and brown the other side.  Chop up the bacon, and reserve the bacon grease left in the pan.

PB163144
 
On a large piece of parchment paper, take one of the balls of pizza dough and stretch it out.  Spread half the roasted garlic, garlicky olive oil, and bacon grease all over the top of the dough.

PB163145
 
Spread half the mashed potatoes on top.

PB163147
 
Sprinkle with half the fried bacon pieces, scallions, and mozzarella.

PB163150
 
Slide the pizza (still on the parchment paper) onto a pizza stone.  Bake for 5 minutes, then rotate the pizza, and bake for another 3-5 minutes, until nicely browned.  Repeat with the shaping, topping, and baking second pizza.

Mashed Potato Pizza
 
Let both pizzas cool for about 5 minutes before slicing and serving.

Update:  I've made this pizza using Ken Forkish's Same Day Straight Pizza Dough.  That dough is so much better!


Next:  Green Smoothies
Previously:  Ramen Cabbage Salad
Three years ago:  Nanaimo Bars

Friday, October 5, 2012

Garlic Thyme Popcorn

I still had a lot of fresh thyme left after making the Caramelized Onion and Swiss Chard Quiche so when I saw this recipe on Gilt Taste, I got really excited.  I already had all the ingredients, and I love popcorn!

PA013110
 
Well, I had all the ingredients except for the duck fat.  =(  But I remember reading somewhere that popping corn in coconut oil was really delicious, so I used that instead for the popping oil and used substituted butter for the dressing.  You can't go wrong with butter on popcorn, right?

PA013119
 
Garlic Thyme Popcorn (based on Francis Lam's recipe)
Makes 2 quarts, enough for 2-4 people as a serious snack
3 tablespoons butter
7 fresh thyme sprigs, leaves stripped and chopped (about 1 tablespoon leaves)
1-2 garlic cloves, smashed (1 is lovely and balanced, 2 is more heady)
1 1”x2” strip orange peel
3 tablespoons coconut oil
1/3 cup popping corn
Fine salt, to taste
Grated orange zest, to taste, for garnish
In the smallest saucepan you have, melt the butter over very low heat. Add about 2/3 of the thyme leaves, the thyme stems, garlic, and orange peel and gently infuse for 12-15 minutes. If the butter gets hot enough to start sizzling more than just a whisper, take it off heat for a minute or two, then place it back on the heat.
Heat the coconut oil and 4 kernels of popcorn over medium-high heat in the 3-quart saucepan. Cover the pot.
Once the tester kernels have popped, add the rest of the corn and shake the pan so that they’re laying in one layer. Add a few pinches of salt, cover the pan, take it off the heat, and count to 30.
Put the pan back on the heat, and wait for some hot popping action. As it starts to go, gently shake the pan to let the unpopped kernels fall back to the bottom, and every few seconds lift the lid ever so slightly to let some steam escape. Once the popping slows to a few seconds between pops, turn off the heat and uncover the pot.
PA013114

Taste a few pieces for salt. Sprinkle on some more salt, if needed. Remove the garlic cloves, thyme stems, and orange peel from the butter, and evenly spoon the “dressing” onto the popcorn, stirring and tossing to get an even coat. Taste the popcorn 2/3 of the way through the dressing; you may like it less dressed. Add remaining dressing if you’d like.
 PA013117
Finish popcorn by sprinkling the remaining thyme leaves all over the top. Grate on a little more orange zest (I used a Microplane for this), and serve. It keeps in a covered container for 2-3 days. If you like, you can refresh it in a warm oven for a few minutes before serving.

PA013118
I'd like to repeat that you should taste the popcorn after dressing it with 2/3 of the butter.  I forgot that step and added all the butter to the popcorn.  It was definitely too much for me, which is saying a lot, considering how much I like buttered popcorn.

Wednesday, April 7, 2010

Jean-Georges Vongerichten's Fried Rice

Jean-Georges Vongrichten's Fried Rice

When I first saw this recipe on Bitten, I knew I had to make it the very next time I received leeks in my Boston Organics delivery. Finally, my patience paid off. This fried rice recipe is familiar in some ways--using day old rice and eggs--but quite novel in others. There are no vegetables other than the leeks or any chopped, leftover meat. Instead, minced fresh garlic and ginger are fried until crisp and then sprinkled on top to dress the rice along with a drizzling of sesame oil and soy sauce.

Thinly sliced leeks

In the article, Mark Bittman writes that Jean-Georges uses rendered chicken fat; since I had duck fat leftover from making the duck fat fries, I used that instead. Also, instead of using day-old cooked rice, I used rice that had been cooked a month ago and frozen in the freezer. Whenever I have leftover cooked rice, I always divide it into first-sized portions and wrap them in plastic wrap and stick them in the freezer when they're still warm. That way I can just heat it up in the microwave for a minute to thaw, and none of the moisture is lost. Of course, after sitting in the freezer for a whole month, some of the moisture is lost, which makes it perfect to use for fried rice.

Jean-Georges Vongerichten's Fried Rice (from Bitten)
makes 2 servings
1/4 cup duck fat
1 tablespoon minced garlic
1 tablespoon minced ginger
Kosher salt
1 cup thinly sliced leeks, white and light green parts only, rinsed and dried
2 cups day-old cooked rice, preferably jasmine, at room temperature
2 large eggs
1 teaspoon sesame oil
2 teaspoons soy sauce

Leeks, ginger, and garlic

In a large skillet, heat 2 tablespoons duck fat over medium heat. Add garlic and ginger and cook, stirring occasionally, until crisp and brown. With a slotted spoon, transfer to paper towels and salt lightly.

Reduce heat under skillet to medium-low and add 1 tablespoon duck fat and leeks. Cook about 10 minutes, stirring occasionally, until very tender but not browned. Season lightly with salt.

Raise heat to medium and add rice. Cook, stirring well, until heated through. Season to taste with salt.

In a nonstick skillet, fry eggs in remaining tablespoon of duck fat, sunny-side-up, until edges are set but yolk is still runny.

Divide rice among two dishes. Top each with an egg and drizzle with 1/2 teaspoon sesame oil and 1 teaspoon soy sauce. Sprinkle crisped garlic and ginger over everything and serve.

Jean-Georges Vongrichten's Fried Rice

I added a sprinkle of toasted sesame seeds and chopped scallions on top as well just for a little more texture and color. I was a little scared that the ginger might be too strong for my liking, but it was a lot more mild after frying, and the crunch it delivers is a real highlight to the dish.

This recipe is truly inspired. There are very few ingredients, but because each is an aromatic, and you keep using the same fat to cook the ginger, garlic, and leeks, you end up building a lot of flavor in the final dish. At the same time, I finally know what they mean on Top Chef when they talk about simple, clean food. Thank you, Jean-Georges and Mark, for sharing this recipe. Now I really want to go to one of Vongerichten's restaurants. Luckily, he's opened one in Boston, and it's also participating in Taste of the Nation Boston tomorrow!

Next:  Alphabet and Rosemary Cheddar Crackers
Previously:  The Best Scones in the World