Sunday, December 30, 2018
Bacon Fat Scallion Pancakes
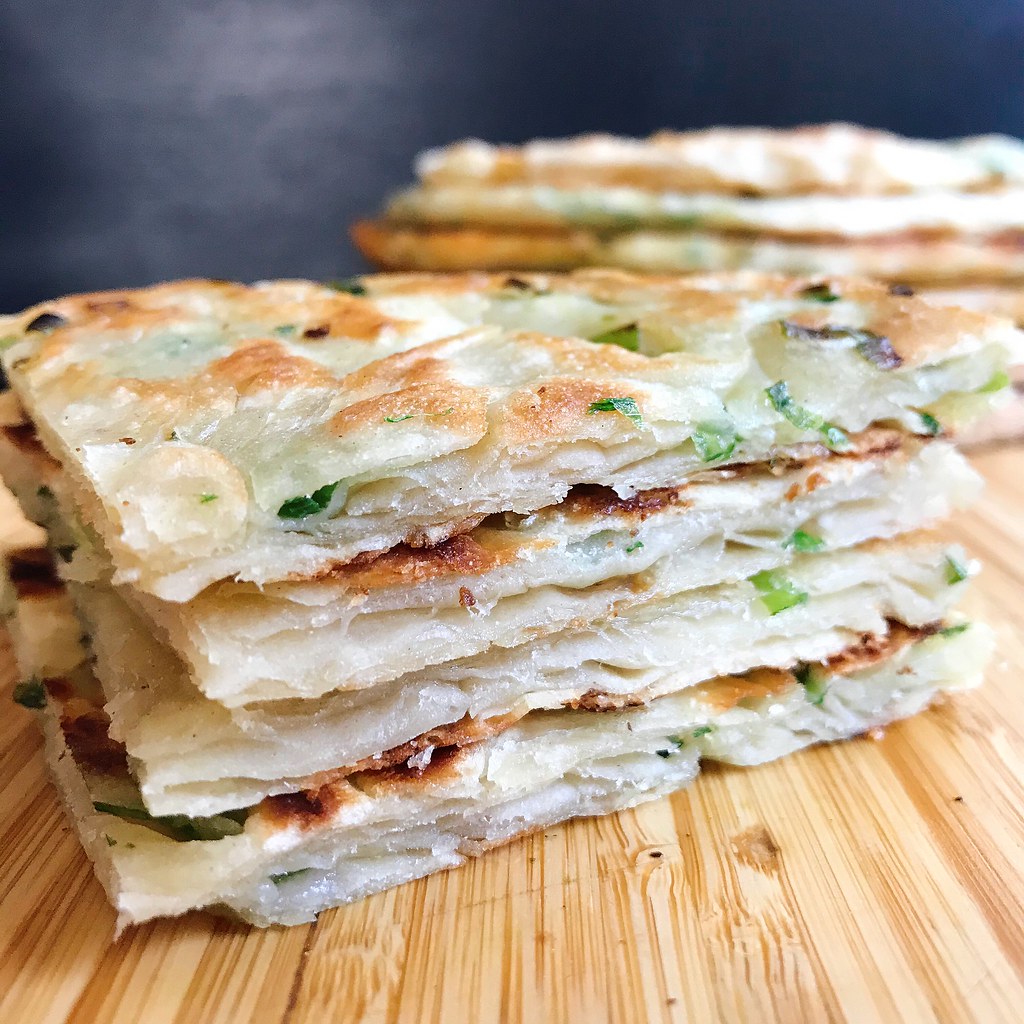
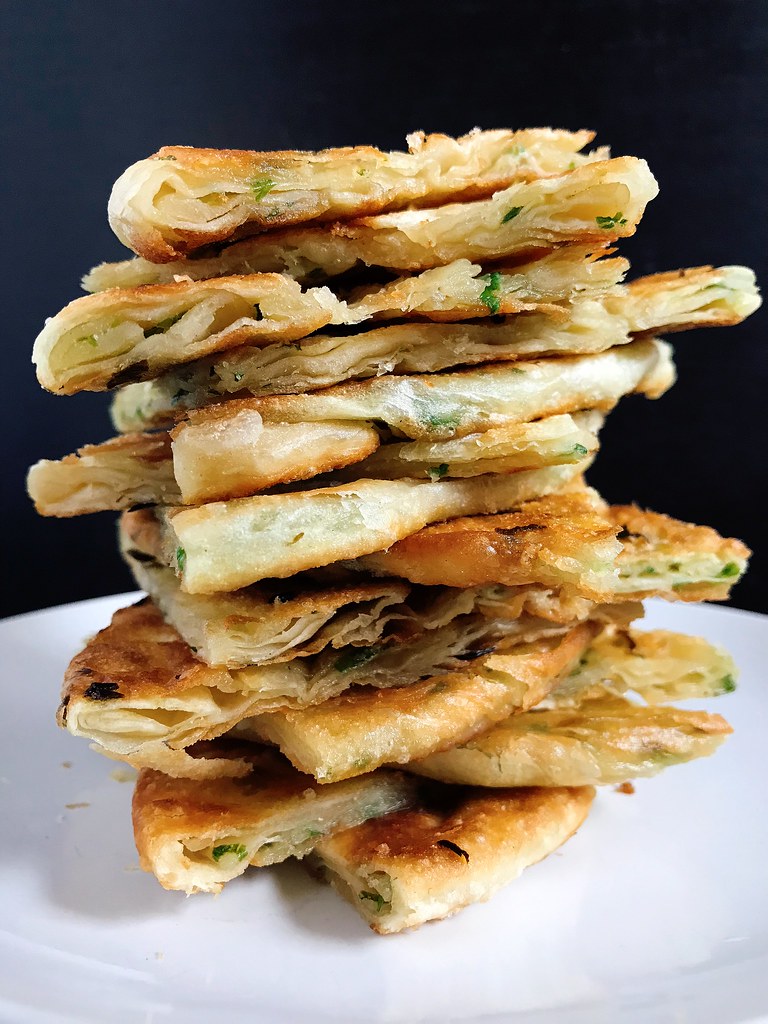
I've been making scallion pancakes the same way for years using a recipe I got from one of my chef friends, but recently I tried a different recipe based on a recommendation from the same friend and discovered this one makes just as good, if not better scallion pancakes in a lot less time!
One of the main ingredients for the recipe she sent me was lard, but since I don't usually have that in stock, I tried substituting with bacon fat. I'm surprised no one else came up with this combo before because it's basically combining two of the greatest tasting things in the world into one. I fiddled around with the other ingredients a bit to balance out the extra flavor from the bacon fat and ended up with this recipe. I think it's flavorful enough to not need a dipping sauce, but if you really want one, you can mix up some soy sauce, rice wine vinegar, sesame oil, and hot sauce to your liking.
Bacon Fat Scallion Pancakes
makes 5 pancakes
300 gram all-purpose flour
6 grams kosher salt, divided
10 grams sugar
175 grams warm water
30 grams chopped scallions (about the amount from 1 bunch of scallions)
50 grams bacon fat, melted
Vegetable oil for frying
Mix the flour, 2 grams of salt, sugar, and warm water together and knead for 5 minutes until it forms a cohesive ball of dough. Cover and let rest for 30 minutes at room temperature.
In the meantime, chop the scallions, melt the bacon fat, and measure out the remaining 4 grams of salt.
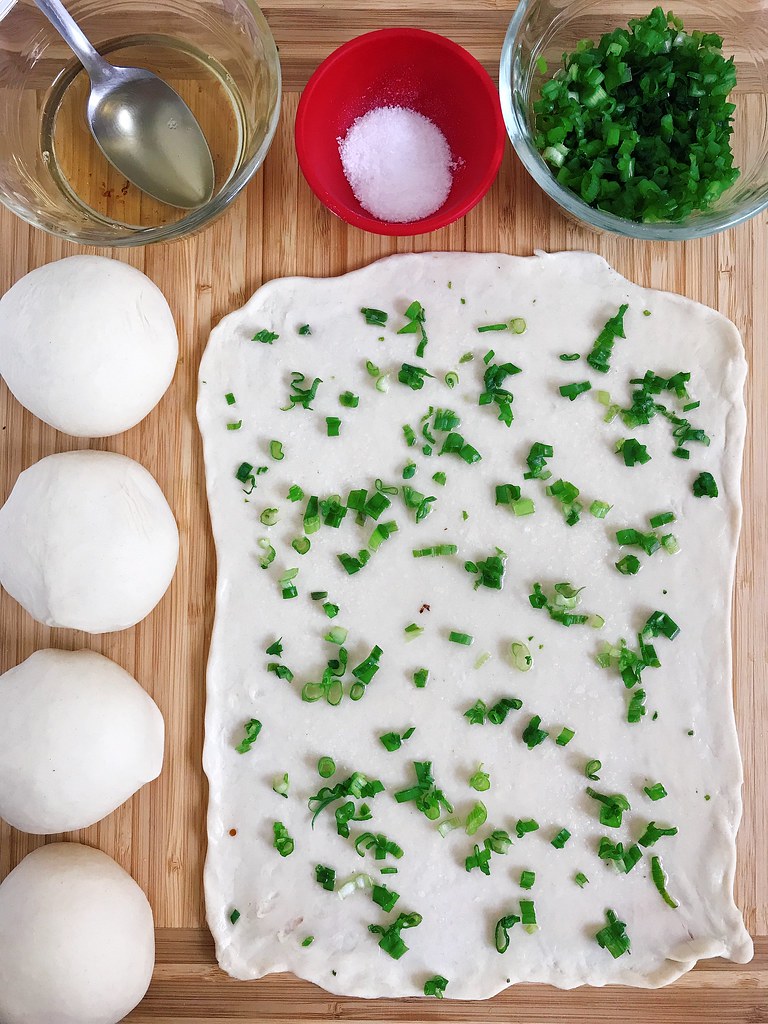
Divide the dough into 5 equal portions (I like to use the scale for this). Roll out one of the portions into a rectangle. Flip the dough occasionally to prevent it from sticking to the work surface. When it won't get any thinner with a rolling pin, gently stretch the dough out with your hands to get it even thinner, but stop if the dough starts to rip.
Spoon a fifth of the melted bacon fat on top of the dough and spread it all around with the back of the spoon. Sprinkle a large pinch and a half of salt all over and then do the same with a fifth of the chopped scallions.
Starting from the long edge, roll up the dough to form a long rope. Don't worry about making a tight coil; focus on making the dough as thin as possible by continuing to gently stretch it out as you roll it up. Once you've formed a long rope, coil it up into a spiral with the seam side down and tuck the end underneath. Use your palm to squash the coil into a flatter disc. Set aside and repeat with the other 4 pieces of dough.
Heat up a frying pan over medium high heat with enough oil to generously coat the bottom. If you have any leftover bacon fat you can add it to the oil. While the oil is heating, use your hands or a rolling pin to flatten one of the discs even more. Aim for the pancake to be a little less than 1/4" thick, but don't flatten it completely or else you'll lose all the layers.
Fry the pancake until golden brown on one side and flip. It's okay if you need to flip it a few times to get it evenly browned on both sides. While you're waiting for it to cook, go ahead and flatten the next pancake. When the pancake is done, transfer it to a wire rack. Make sure you have enough oil left in the pan and fry the next one.
If you have any leftovers, I like to quarter and freeze them so that I can use my compact air fryer to reheat them.
Next: Mochi Waffles
Previously: My Communion Bread
Last Year: Pork, Cabbage, and Tofu Dumplings
Two Years Ago: Cranberry Curd Tart
Four Years Ago: Puppy Chow Pie
Five Years Ago: Miso Pumpkin Soup
Six Years Ago: Thomas Keller's Lemon Tart
Nine Years Ago: Tim Tam Slam Ice Cream
Ten Years Ago: Curry Turnovers
Tuesday, September 25, 2018
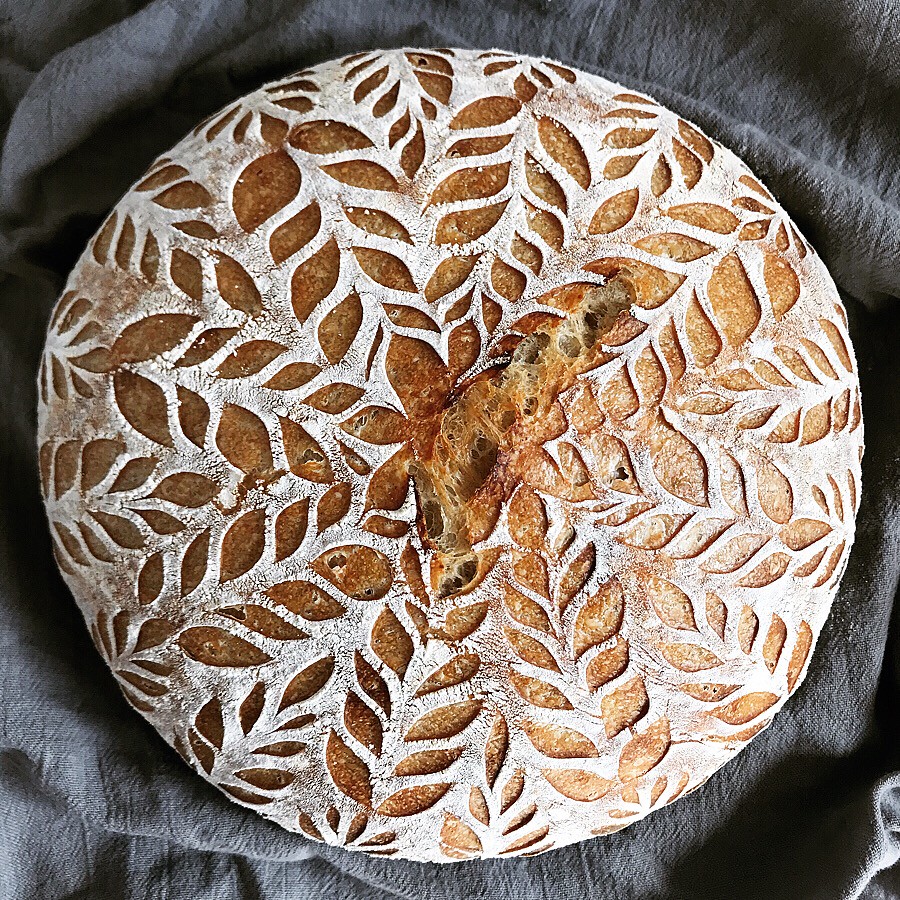
My Communion Bread
I've been making sourdough bread for one of my church's services every week for communion for a while now and figured it was finally time to write up how I make it. This is loosely based on the country loaf from Tartine Bread, a wonderful book that goes a lot deeper into the methods involved. I highly recommend picking up a copy and reading it through at least once to not only understand how sourdoughs work but also to be inspired by the process.
I was lucky enough to get a sourdough starter from a friend instead of having to start one from scratch. The first thing you should probably know about a starter is that you'll need to feed it periodically. This means discarding the majority of it* and adding some more water and flour to the remaining bit and letting it get all bubbly and doubled in volume. I feed my starter with a 50/50 mixture of all purpose flour and whole wheat flour and an equal amount of water by weight (e.g. 25 g of all purpose flour, 25 g of whole wheat flour, and 50 g water). Some people do this daily, or even more than once a day, but since I really only make bread once a week, I keep my starter in the fridge and just feed it the day before I want to bake it. If I happen to be traveling and can't feed it for more than a week, I'll do a few rounds of feeding until it starts smelling and acting like I'm used to before I use it.
Some of the equipment you'll want to invest in are a food scale (to weigh the ingredients with), digital thermometer, bench scraper, banneton (to hold the shaped dough for its second rise), parchment paper, a lame or razor blade to score the loaf with, and a Dutch oven or cast iron combo cooker to bake the loaf in. The only Dutch oven I own is actually an oval one and not wide enough for the round loaves I make, so I came up with another solution for trapping the steam in: I bake my bread on a pre-heated baking stone and invert a stock pot over it.
Timing wise, I feed my starter the morning of the day before I want to bake. It takes about half a day for it to get fully active. Then I add the rest of the ingredients and do a few rounds of folding over the next 3-4 hours. I'll shape it, place it in a banneton, and let it do its final rise overnight in the fridge. The next morning I'll preheat the oven and take the dough out when the oven is ready, score it while it's still cold, and bake it. So it takes about 24 hours from start to finish but could be shorter if you do the second proof at room temperature or longer if you leave the dough in the fridge.
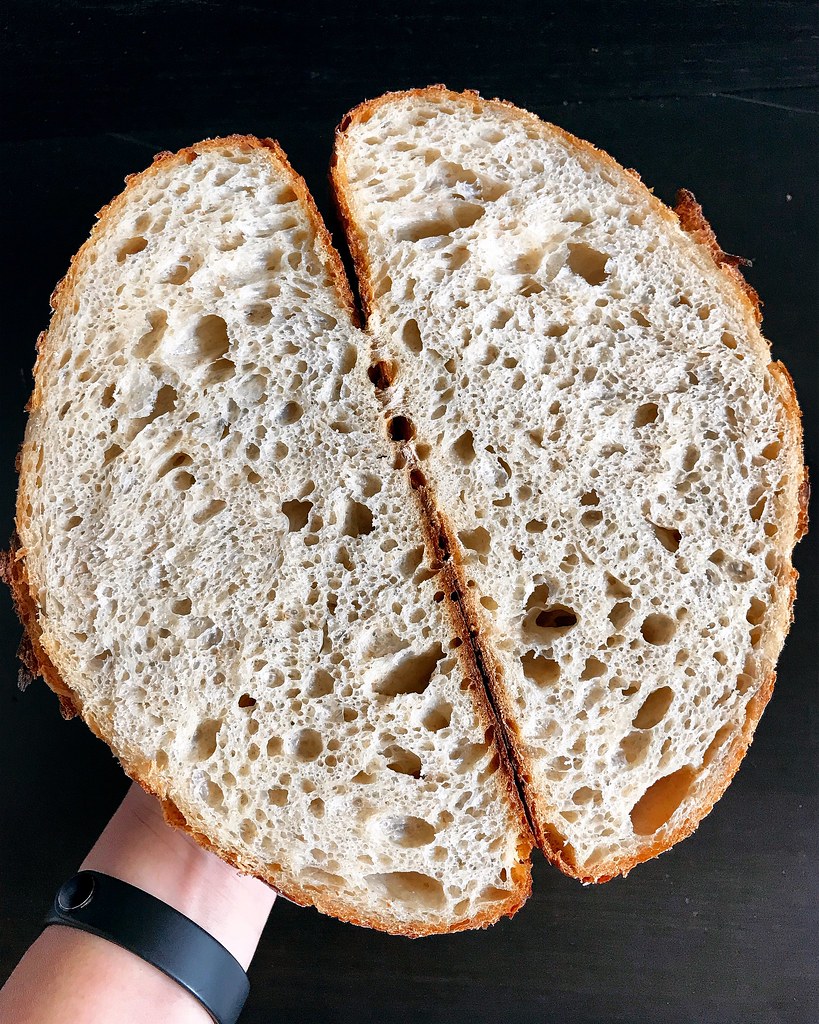
My dough ends up being about 73% hydration, which for me hits the sweet spot of being easy to work with but still wet enough to produce an evenly open crumb. I still mess up my shaping all the time, but thankfully the loaves just get cut up into cubes to be used for communion, so no one can really tell. I hope this guide helps you in your sourdough exploration, and please let me know if you have any questions about my process!
*If you hate discarding starter all the time, you can use it to make other baked goods like pizza dough, English muffins, even pancakes and banana bread!
My Communion Bread
makes 1 loaf
For the starter:
About a tablespoon of sourdough starter (I use a 100% hydration starter with 50/50 all purpose flour and whole wheat flour)
100 grams lukewarm water, about 80°F
50 grams all purpose flour
50 grams whole wheat flour
Use a spoon to mix the starter with the warm water. Add the flours and mix until no dry bits remain. Let sit in a warm spot until it has doubled in volume, usually about 4-6 hours depending on how active and warm it is. You can check to see if the starter is fully active by dropping a spoonful into some cold water. If it floats, the starter has built up enough gas and is ready to be used. Weigh out 100 grams into a large bowl and place the rest of the starter in the fridge until next week.
For the bread:
100 grams active starter
350 grams warm water, about 80°F, plus more for your hands
450 grams all purpose flour
50 grams whole wheat or spelt flour
10 grams kosher salt
Rice flour, for dusting
Use a spoon to mix the active starter with the warm water. Then add the flours and mix until no dry bits remain. Cover and let sit in a warm spot for 25-40 minutes.
Sprinkle the salt evenly over the top of the dough. Wet one hand thoroughly and dribble some water over the salt to start dissolving it. Using the hand that's wet, grab a quarter of the dough, pull it up and fold it over the top of the dough. Rotate the bowl 90° and repeat 3 more times until the salt is completely encased. Pinch the dough a couple of times to separate it into a few pieces, turn it, and smush it back together again before repeating the stretch and fold process. Repeat the pinch, rotate, stretch, and fold process until the salt is fully dissolved and incorporated into the dough, wetting your hand whenever the dough starts getting sticky again. Cover and set the timer for 30 minutes.
When the timer goes off, wet your hand again and do another 4 stretch-and-folds, rotating the bowl 90° each time. After the last fold, turn the dough over so that the seam is underneath. Cover and set the timer for another 30 minutes. Repeat this every 30 minutes for a total of 3 hours. At this point the dough will be a lot more relaxed and have risen a bit. If you press a wet fingertip into the dough, the indent should almost disappear within a few seconds.
Flour a work surface and gently transfer the dough onto the flour. Grab a quarter of the dough, stretch it up and fold it over, then repeat 3 more times on the other corners of the dough to create a taut surface underneath. Dust the top with a little more flour and then flip it over. Use a bench scraper or your hands to gently tuck the sides under and form a half dome. Let sit for 20-30 minutes. In the meantime, dust the banneton with rice flour so that your dough won't stick to it.
After the dough has rested, lightly flour the top and flip it upside down with the bench scraper. Apply another set of stretch-and-folds and flip it over again. Slide the ball around on the work surface until it forms a nice, taut half dome. Use the bench scraper to quickly transfer the dough upside down into the banneton. Cover (I use a shower cap) and place in the refrigerator for about 12-14 hours.
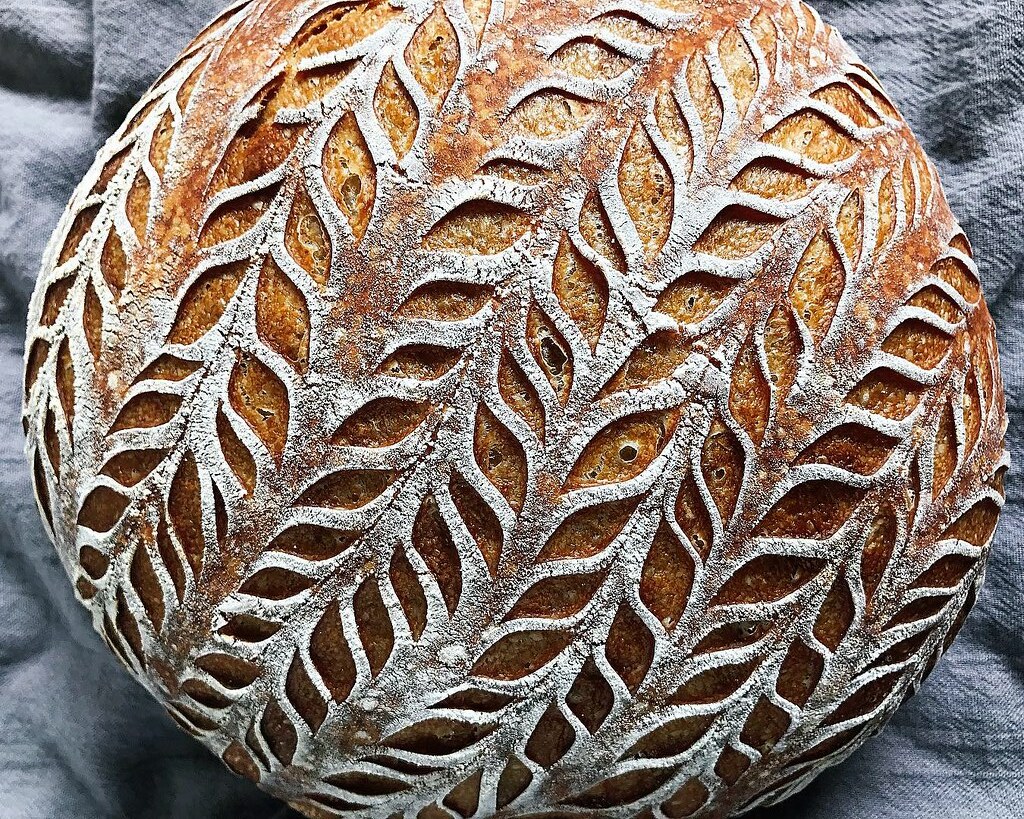
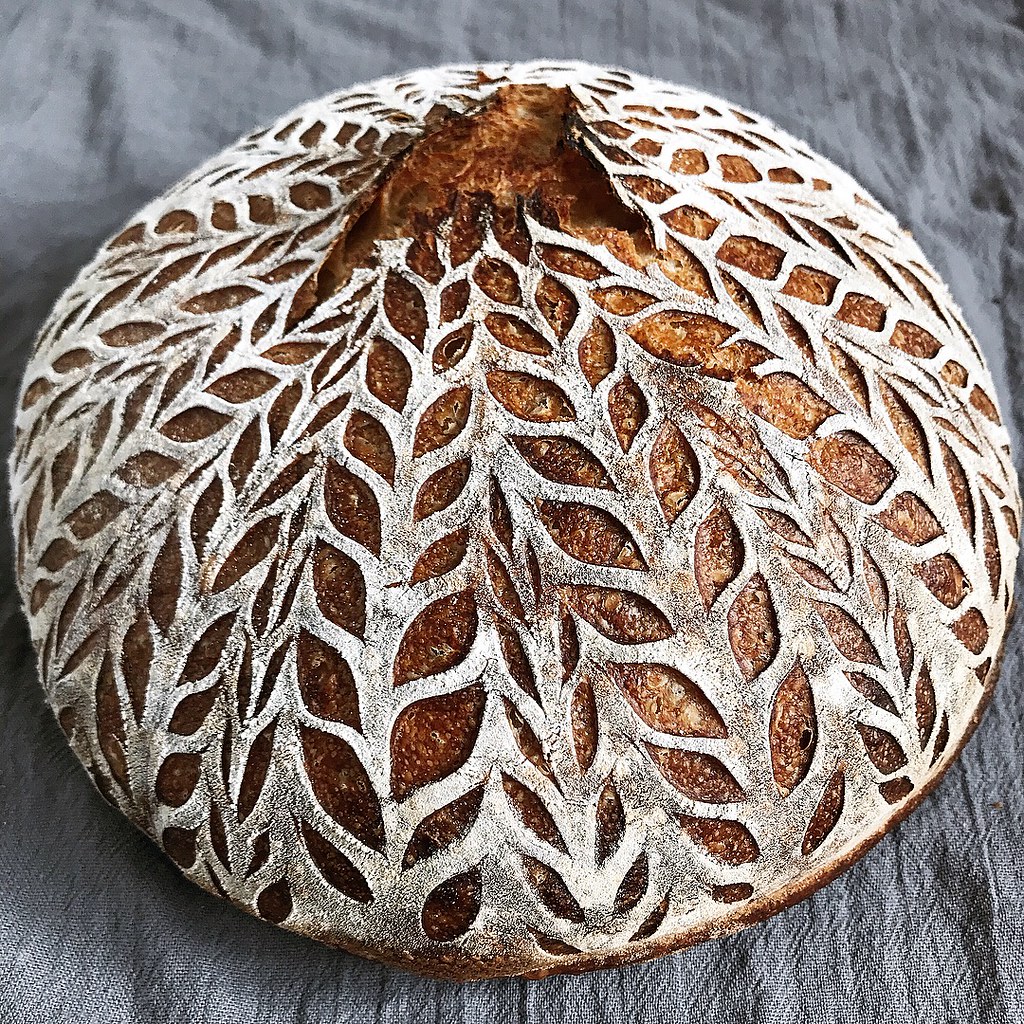
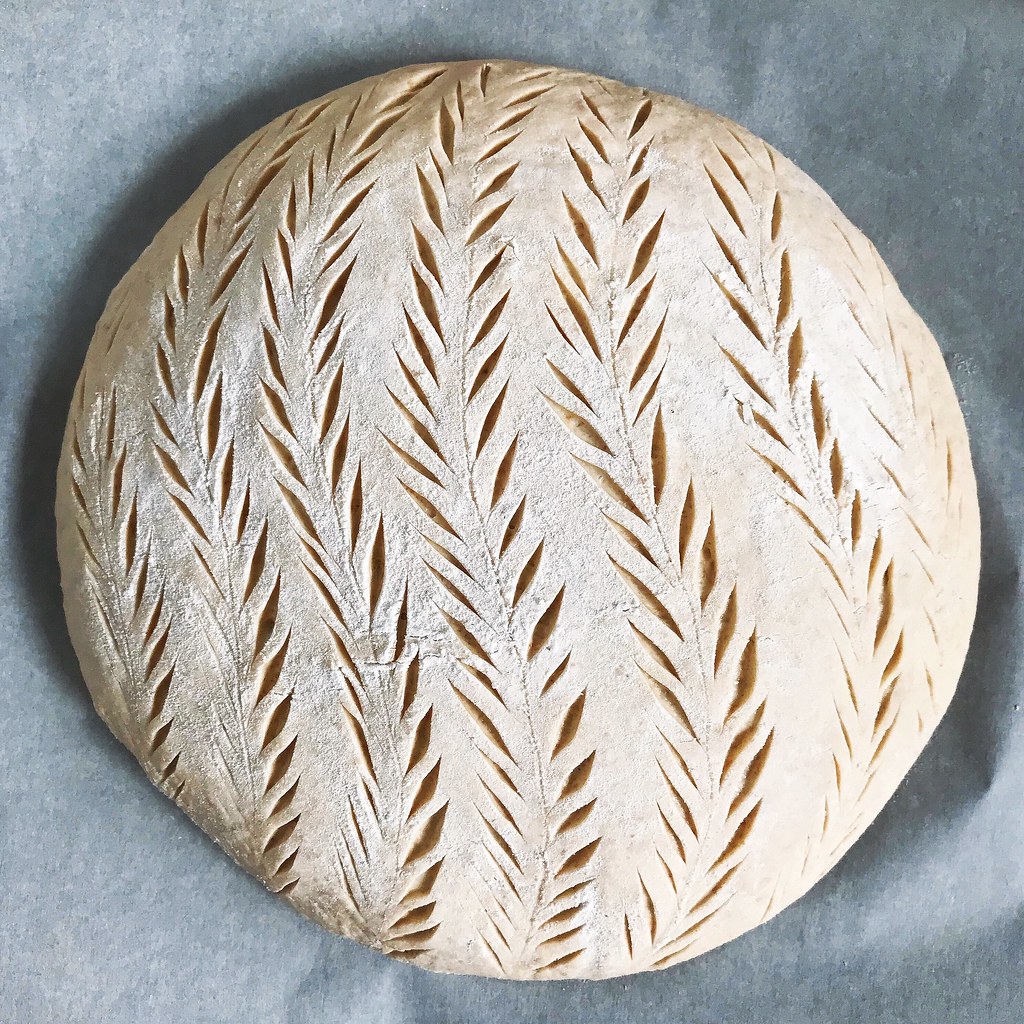
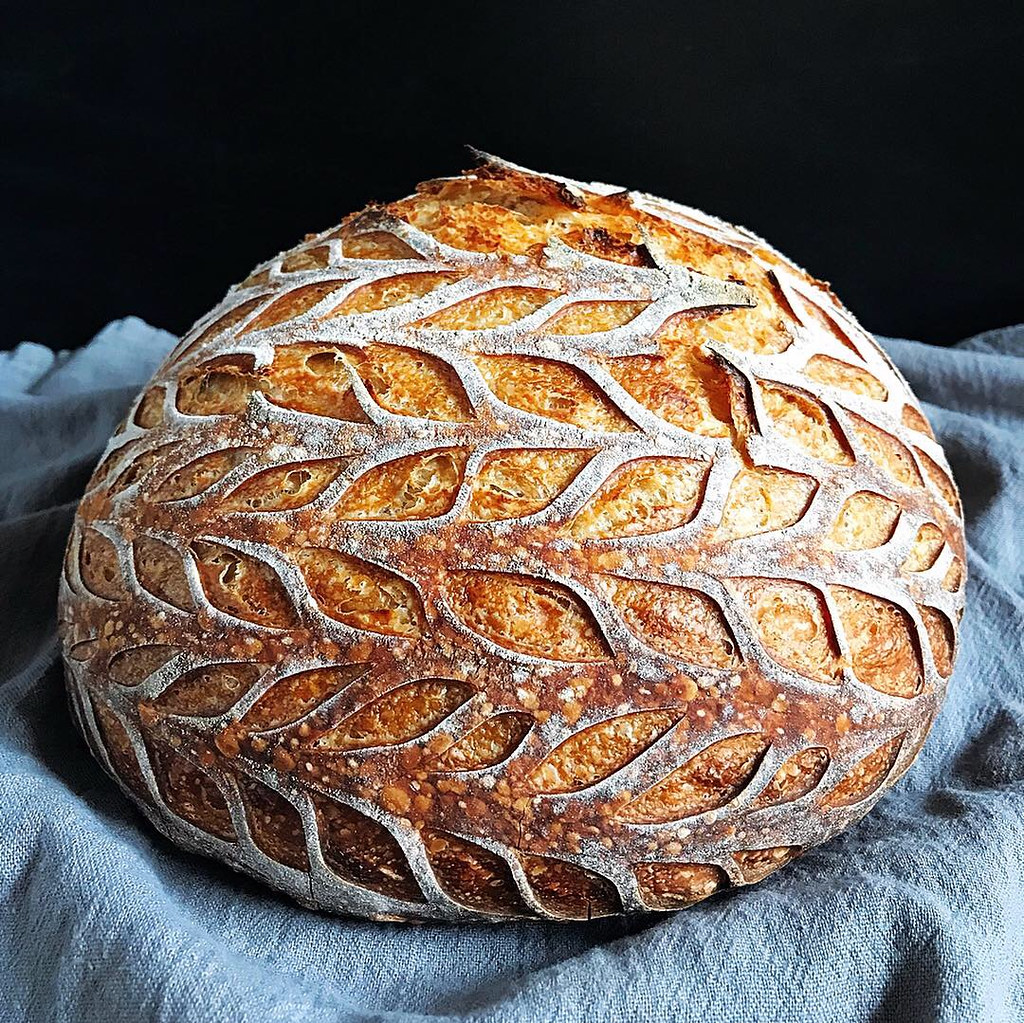
Place a Dutch oven or a baking stone and stock pot in the oven and preheat to 475°F. When the oven is ready, take the banneton out of the fridge and invert the dough onto a large piece of parchment paper. Dust the top with some rice flour if you want some definition to your scoring pattern. Wipe the excess flour off and use a lame or razor blade to score the loaf.
Quickly transfer the dough and parchment paper into the Dutch oven or onto the baking stone. Cover with the lid or stock pot. Reduce the oven temperature to 450°F and bake for 20 minutes. After 20 minutes, carefully remove the lid or stock pot and continue to bake for another 20-25 minutes until nicely browned. Listen to the bread crackle as it cools. Try to wait at least an hour before slicing.
Next: Bacon Fat Scallion Pancakes
Previously: Tomato and Eggs over Rice (Updated)
Last Year: Blueberry Salted Caramel Ice Cream with Chocolate Freckles
Two Years Ago: Soy Garlic Glazed Korean Fried Cauliflower
Four Years Ago: Taiwanese Taro Swirl Mooncakes
Five Years Ago: Ramen Lobster Rolls
Six Years Ago: Caramelized Onion and Swiss Chard Quiche
Monday, August 13, 2018
Tomato and Eggs over Rice (Updated)
When I first found out that the summer collaboration star ingredient was going to be tomatoes, I envisioned a really photogenic heirloom tomato pizza or shakshuka, but the more I thought about it, the more my mind kept going back to this homely, homey dish. It will never win awards for its looks, but it's so incredibly easy to make and delicious that I thought it was worth dusting off from my archives and writing up again.
The thing is, after making this over the many years, it's become one of the few dishes I can make without consulting a recipe. So I figured I'd write it the way I make it. If you really need to follow one (at least the first few times), check out my old post about it. But I bet you'll be making this so many times that eventually you'll be able to make it like I do!
Tomato and Eggs over Rice
serves 1 hungry girl or 2 as a side dish
1 large tomato or 2 smaller tomatoes, total volume about the size of your first
3 eggs (add a 4th egg if your tomatoes are really big; you want about an equal volume of tomato:egg)
Kosher salt, to taste
About a tablespoon chopped scallions (I usually just harvest a few stalks from the ones I have growing on my windowsill)
A splash of rice wine
Sesame oil
Cooking oil
A splash of rice wine vinegar
A pinch of sugar
About 1/2 teaspoon of cornstarch
Cooked rice
Crack the eggs into a bowl and add a few pinches of salt. Whisk with a fork until nicely beaten. Let sit while you prepare the tomatoes and scallions.
Chop the tomatoes into a small dice. Chop the scallions. Add a splash of rice wine and sesame oil to the eggs and whisk again.
Heat a non-stick pan over medium heat and add some oil. When the oil is hot, add the beaten eggs and scramble into large curds. When the eggs are 90% cooked, transfer back to the small bowl.
Add a bit more oil to the pan and heat again. Add the chopped tomatoes, a splash of rice wine vinegar, a pinch of sugar, and a larger pinch of salt. Cook for a minute, then add the chopped scallions.
Add a tablespoon of water to the cornstarch to make a slurry and then add to the tomatoes. Stir until the liquid thickens, then add the eggs back into the pan. Cook until well combined and serve immediately over rice.
Check out the #wesaytomatoes hashtag on Instagram to see the rest of the collaborations!
Next: My Communion Bread
Previously: Cherry Pit Ice Cream with Cherry Ripple and Brown Butter Streusel
Two Years Ago: Zucchini Pizza
Four Years: Grace's Ginger Scallion Fish
Five Years Ago: S'mores Brownie Ice Cream Sandwiches
Wednesday, July 25, 2018
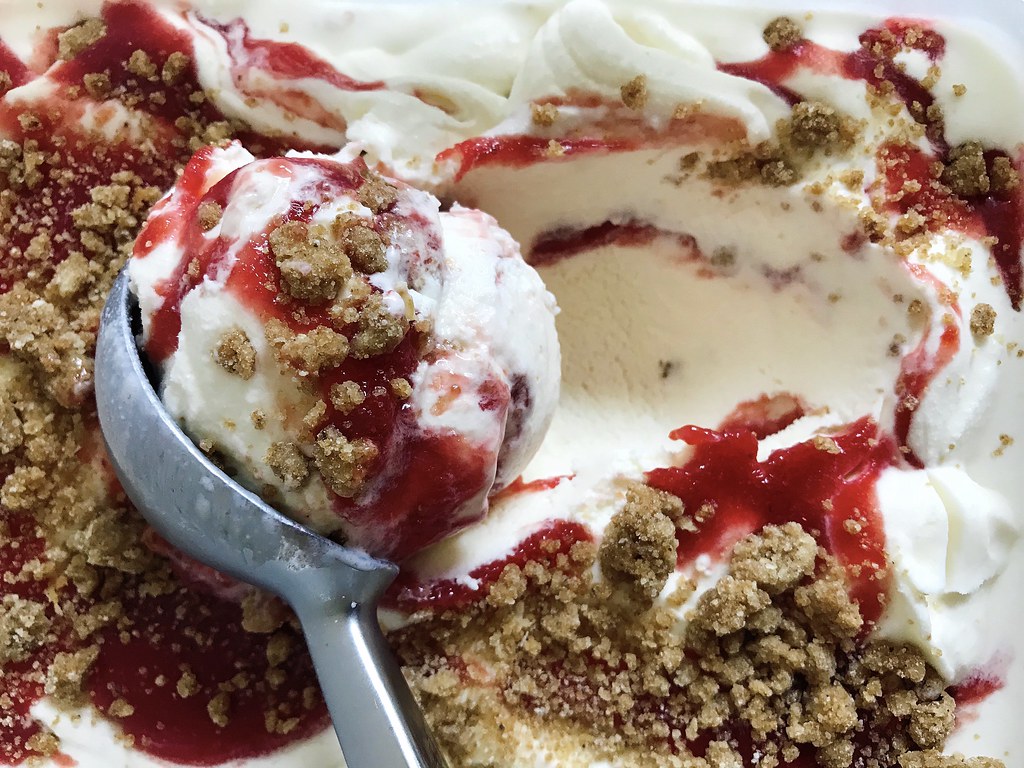
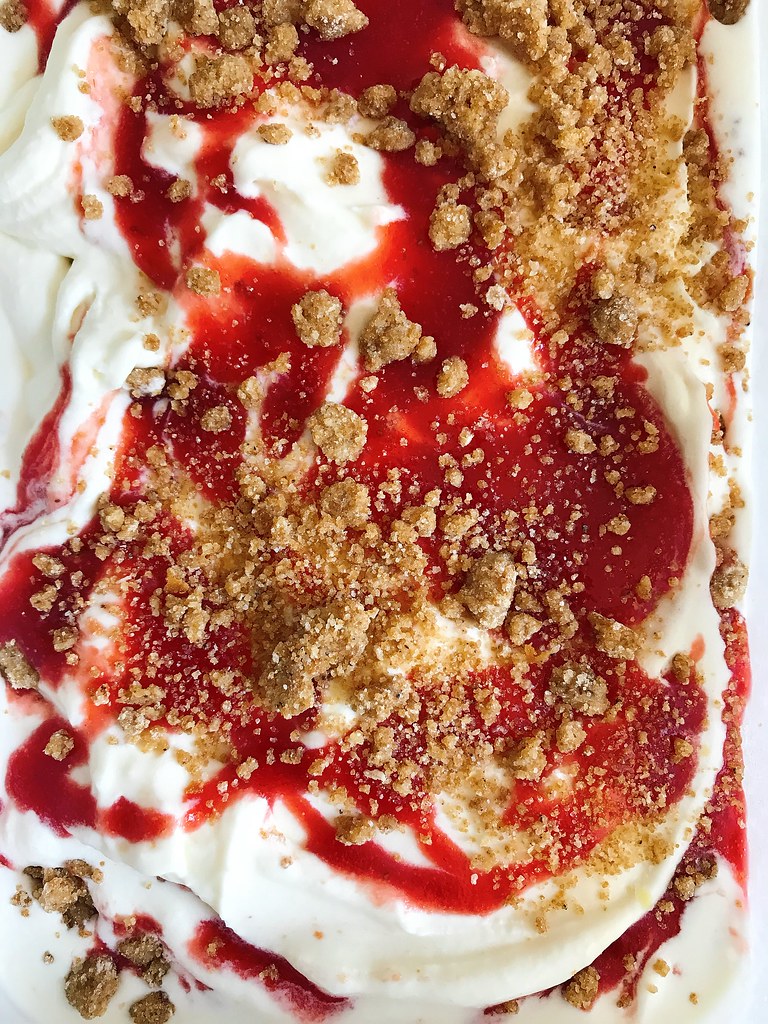
Cherry Pit Ice Cream with Cherry Ripple and Brown Butter Streusel
Have you ever heard of cherry pit ice cream? Apparently within the pits of all stone fruits (cherries, peaches, nectarines, etc.) is a white kernel that smells like an almond. If you steep the kernels in alcohol, you can make a bitter almond extract, and if you steep them in an ice cream base, you can make a delicious ice cream with a subtle almond taste.
Getting to the kernel requires smashing the pits open, which can get kind of messy. Additionally, a toxic chemical, amygdalin, may be released when doing so, but apparently it can be neutralized by cooking. So it's up to you if you want to break the pits open to get to the kernel or not, but I did so because 1. it's fun to smash things, and 2. I wanted to extract as much of the bitter almond flavor as possible.
I used the blank slate Philadelphia-style ice cream recipe from Hello, My Name Is Ice Cream, as the base for the ice cream and added a cherry ripple for fruitiness and brown butter streusel for crunch. Both the ripple and streusel are also adapted from recipes in Hello, My Name is Ice Cream. I really love the combination of all 3 parts, especially the streusel, because I really enjoy the extra texture it provides.
Cherry Pit Ice Cream with Cherry Ripple and Brown Butter Streusel
makes about 1 quart
For the cherry ripple:
1 lb. sour cherries*
50 g sugar
50 g corn syrup
Remove the stems and pit the cherries, reserving the pits. Combine the cherries, sugar, and corn syrup in a saucepan and cook over medium heat until the sugar has dissolved.
Transfer to a blender and blend until smooth. Return the contents to the saucepan and continue to cook until thick and jammy. Remove from the heat and strain through a fine-mesh sieve. Store in the refrigerator until ready to use.
*Note, I made this with sour cherries, but if you want to use sweet cherries, you'll probably want to reduce the amount of sugar and corn syrup.
For the brown butter streusel:
37 g unsalted butter
50 g flour
Scant 1/8 teaspoon baking powder
1/4 teaspoon kosher salt
25 g brown sugar
25 g sugar
Preheat the oven to 350°F and line a sheet pan with parchment paper or a Silpat.
Melt the butter in a small saucepan over medium heat until the milk solids have separated and started to brown. Immediately remove from the heat and set aside to cool down.
Whisk together the flour, baking powder, salt, and sugars. Add the browned butter and mix until there are no dry bits. Transfer the streusel to the sheet pan and break up any large lumps.
Bake for 10 minutes, then stir the streusel to redistribute on the pan. Bake for another 10-15 minutes until the streusel is golden brown and cooked through. Cool the streusel on a wire rack and then store in the freezer until ready to use.
For the cherry pit ice cream:
Pits from the pound of sour cherries
380 g cream
400 g milk (plus 2 tablespoons of milk if using cornstarch)
50 g corn syrup
20 g milk powder
150 g sugar
10 g cornstarch or 3 g commercial stabilizer
Place the cherry pits in a sturdy freezer bag and cover with a dish towel. Use a heavy saucepan or mallet to crack the pits open to expose the white kernels within. I would suggest doing this on the ground with a cutting board underneath because there's a good chance you'll make some holes in the bag.
Place the cracked pits and kernels in a medium heavy-bottomed saucepan and add the cream, milk, and corn syrup. Cook over medium heat until the mixture reaches a boil, stirring occasionally to prevent scorching. In the meantime, prepare a large ice water bath. When the mixture is boiling, transfer to a metal bowl and place in the ice water bath. Stirring occasionally, bring the mixture down to room temperature and then chill in the fridge for 4-6 hours.
Mix the milk powder, sugar, and commercial stabilizer, if using, in a small bowl. If using the cornstarch, mix with 2 tablespoons of cold milk. Prepare another ice water bath.
After the ice cream base has finished steeping, strain through a fine-mesh sieve into the saucepan and whisk in the milk powder mixture. Bring to a boil again, stirring to prevent scorching. Continue to cook for 2 minutes, then add the cornstarch slurry, if using, and continue to cook for another minute until slightly thickened.
Pour the ice cream base into a metal bowl and place in the ice water bath. Stirring occasionally, bring the mixture down to room temperature and then chill in the fridge for 4 hour or overnight. Place a storage container in the freezer.
Churn the ice cream base in your ice cream machine until thick and creamy.
Spoon a layer of the cherry ripple on the bottom of the storage container. Scatter some of the streusel over the ripple, then spread a third of the ice cream into the container. Drizzle a third of the ripple over the ice cream and sprinkle a third of the streusel over that. Repeat the layers two more times (you may have cherry ripple than you need; if so, save in the fridge for up to 2 weeks). Press a piece of plastic wrap directly on the surface of the ice cream, cover with the lid, and freeze for at least 4 hours, until completely firm.
Next: Tomato and Eggs over Rice (Updated)
Previously: Sourdough Discard Pizza Dough
Last Year: Greyscale Cream Puffs
Two Years Ago: My Mom's Beef and Broccoli Stir Fry
Three Years Ago: Pasta con le Sarde
Four Years Ago: Strawberry Pop Tart Slab Pie
Five Years Ago: Zuni Cafe's Fried Eggs in Bread Crumbs
Eight Years Ago: Slow Cooker Bolognese Sauce
Sunday, July 8, 2018
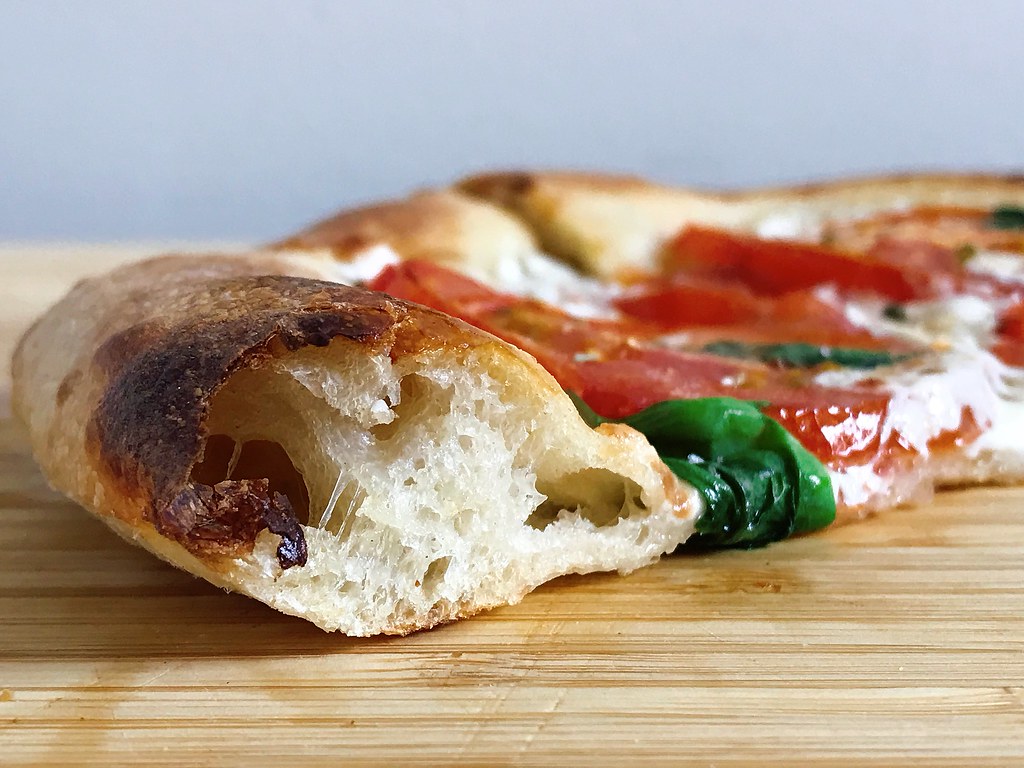
Sourdough Discard Pizza Dough
I've been making sourdough bread once a week now for the last couple of months, and I've been lamenting all the sourdough discard I've had to throw away (plus, it stinks up my trash can!). My friend Alison who originally gave me the sourdough starter also mentioned that I could find some recipes online that used sourdough discard. That gave me the idea to try to use it for pizza dough.
Since I've been using the Tartine Bread country loaf recipe, the starter I use is 100% hydration with a 50/50 mix of all-purpose and whole wheat flour. I basically just applied that math to the pizza dough I've been making the last few years and found that it works pretty well and even adds a little more flavor.
After making the same recipe for so many years, it's naturally migrated towards what works for me in my kitchen. To account for the addition of the sourdough discard, I reduced the amount of yeast I add to just a pinch. If you have enough time and want even more flavor, you could probably omit the additional yeast altogether. I add it for insurance, just in case the discard isn't active enough. Update: My sourdough starter is now active enough I don't add the extra yeast!
Sourdough Discard Pizza Dough
makes two 8 oz. balls of pizza dough (enough for two 10" pizzas)
50 grams sourdough discard (100% hydration)
150 grams warm water (about 90-95°F)
225 grams all-purpose flour
5 grams kosher salt
A pinch of yeast (optional, use if your starter discard isn't very active)
Olive oil
Mix the sourdough discard and warm water together in a medium mixing bowl. Add the flour and mix until there are no dried bits left. Cover and let sit 20-30 minutes.
Sprinkle the salt and yeast over the dough. Wet one of your hands thoroughly with warm water and use it to knead the salt into the dough until you can't feel it anymore. Refer to my original pizza dough post for the fold and pinch method. You should rewet your hands a few times during this process to keep the dough from sticking to you and to help the salt dissolve. Cover and let rest.
After 30-60 minutes, apply a fold to help develop the gluten. During the last fold I dribble some olive oil into the bottom of the bowl and then flip the dough over so the seam is on the bottom and the top (which used to be on the bottom) is coated with oil. Cover and let rest until the dough has doubled in volume, around 6 hours depending on the temperature of your kitchen and how active the sourdough discard is.
Prepare 2 sandwich bags by folding the tops over and adding a little olive oil to each. Flour your work surface and transfer the dough onto it. Flour a knife or scraper and divide the dough in half. Shape each half into a ball. Transfer to the bags, seal, and refrigerate for at least 3 hours and up to 2 days. You can also freeze the dough until ready to use; just thaw it in the fridge overnight the day before you want pizza.
Next: Cherry Pit Ice Cream with Cherry Ripple and Brown Butter Streusel
Previously: Strawberry Matcha Cream Cheese Tart
Last Year: 3-28 Slab Pie
Two Years Ago: My Mom's Beef and Broccoli Stir Fry
Three Years Ago: Pasta con le Sarde
Four Years Ago: Cleveland Cassata Cake
Five Years Ago: Bubble Tea Popsicles
Eight Years Ago: Coconut Lime Sorbet
Saturday, April 21, 2018
Strawberry Matcha Cream Cheese Tart
It's certainly taken its own sweet time, but I think spring is *finally* here, just in time for the #strawberriesarethejam collaboration! I mean, it might've snowed last week, and it's snowed on Mother's Day before, so I'm not ruling winter completely gone either, but I'm just happy to be finally seeing the trees outside starting to bloom!
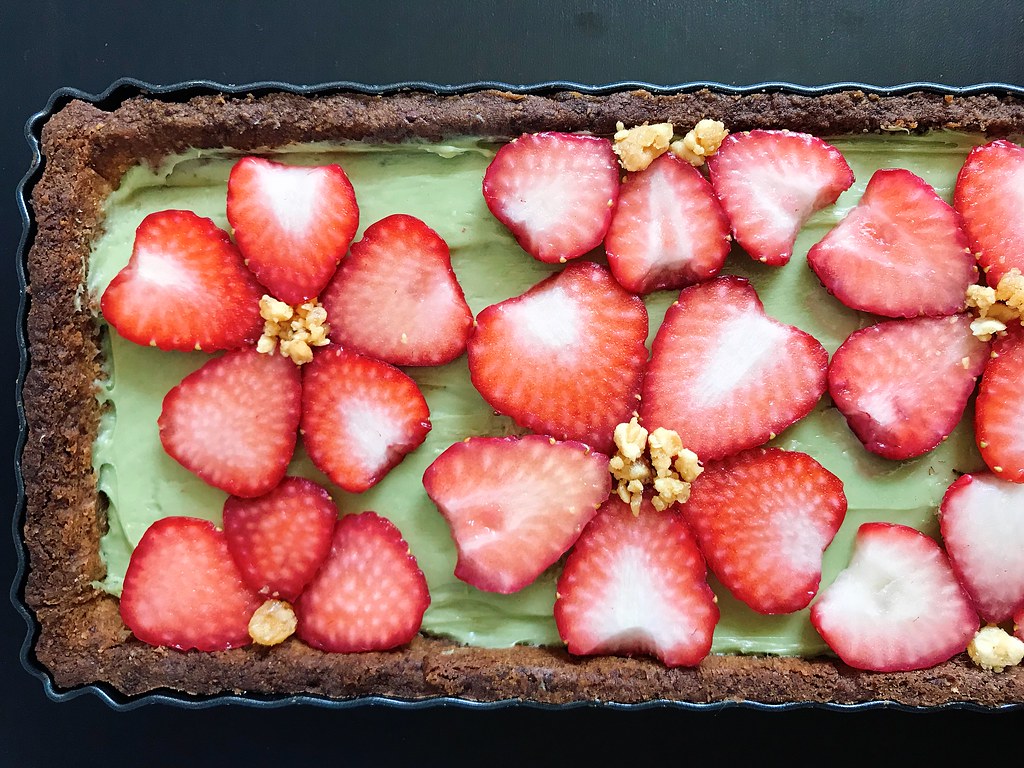
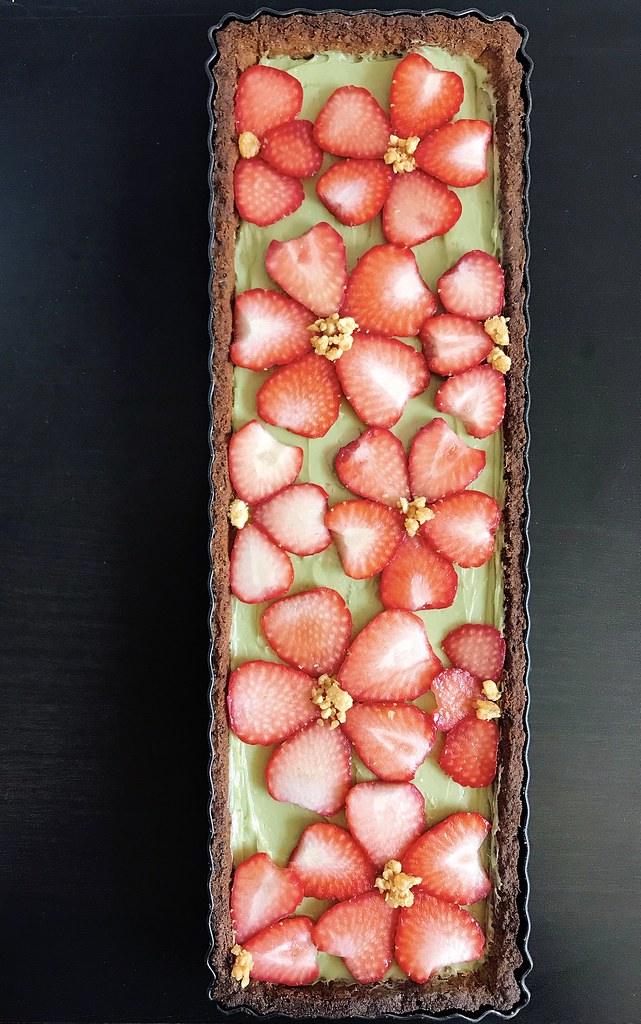
This tart was inspired by the sakura matcha Kit Kats I saw in the Narita airport on my way home from Taiwan this month. While I don't have access to sakura (cherry blossoms) as an ingredient, I thought these sliced strawberries would add a nice, springtime sweetness.
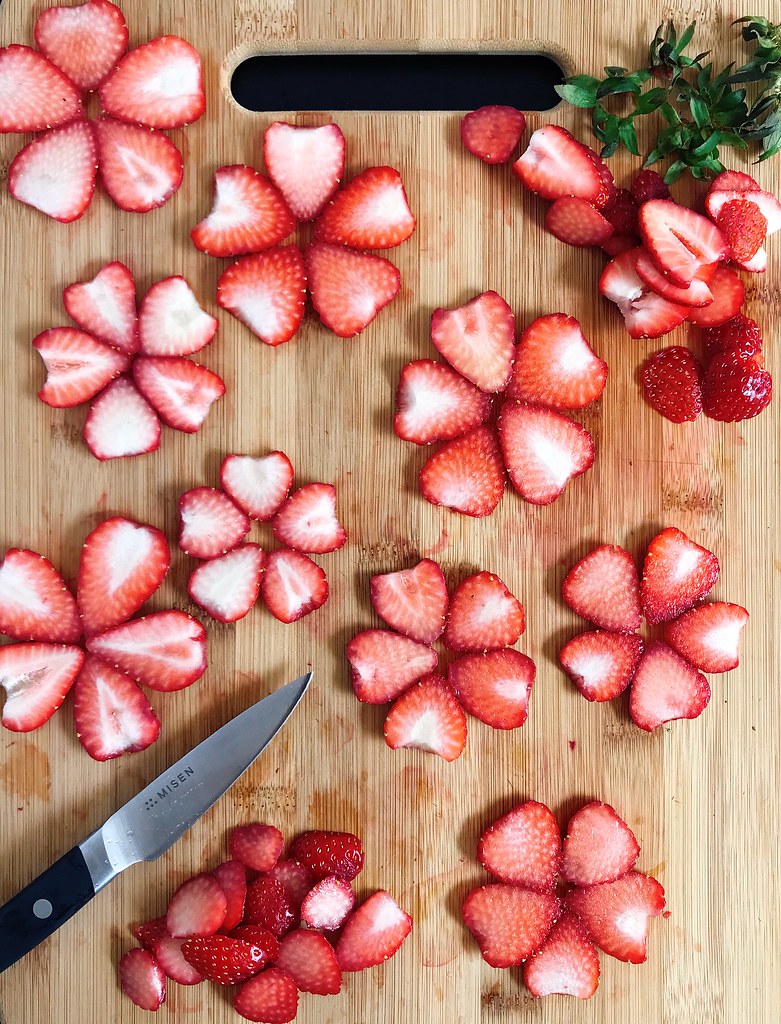
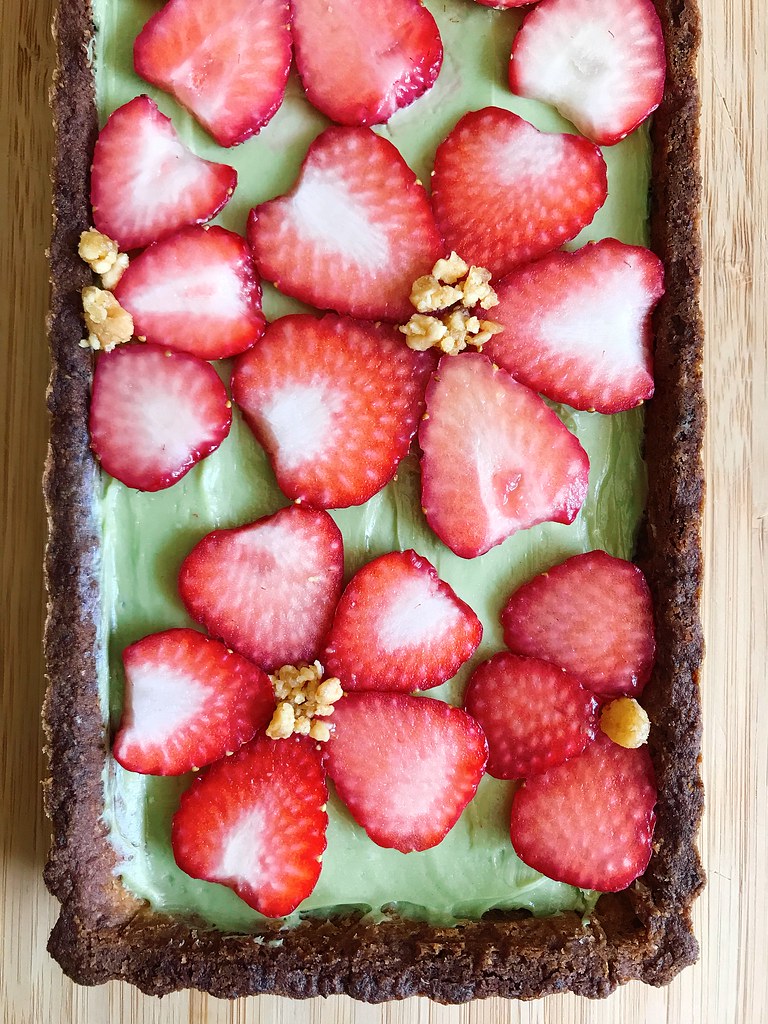
As a bonus, they can also be arranged into pretty flowers that remind me of sakura blossoms. For this tart I used Dorie Greenspan's sweet tart dough with nuts, but her regular sweet tart dough would work as well.
makes 1 tart
Your favorite sweet tart crust, fully baked and cooled
8 oz. cream cheese, softened
1/2 cup sugar
1 1/2 teaspoons ceremonial grade matcha powder
Sliced strawberries
Chopped nuts (optional)
Use the paddle attachment in a stand up mixer or a hand mixer to combine the cream cheese, sugar, and matcha powder until smooth and creamy. Spread into the tart shell and chill while you slice the strawberries.
Arrange the sliced strawberries on top of the cream cheese in the shape of a flower. Add a little sprinkle of chopped nuts in the center if you like.
Previously: My Mom's Taiwanese Zongzi
Last Year: Rhubarb Strawberry Coconut Cream Tart
Two Years Ago: Sesame Soba Noodles with Avocado Rose
Three Years Ago: Gordon Ramsay's Sublime Scrambled Eggs - Two Ways
Four Years Ago: Nutella Mini Crepe Cakes
Eight Years Ago: Lilikoi Malasadas
Nine Years Ago: Moffles
Check out the rest of the bloggers that participated in the #strawberriesarethejam collaboration:
Square Meal Round Table’s Roasted Balsamic Strawberry Pavlova
The Cooking of Joy’s Strawberry Matcha Cream Cheese Tart
This Healthy Table’s Strawberry Tahini Shortcake
Flours in Your Hair’s Strawberry Milk Donuts
The Wood and Spoon’s Strawberry Icebox Pie
Smart in the Kitchen’s Rustic Strawberry Galette
The Herb and Spoon’s Strawberry-Jam Filled Brioche Donuts
Better with Biscuit’s Strawberry Cobbler
My Kitchen Love’s Strawberry Rhubarb Tart
Sift and Simmer’s Rose Strawberry Hibiscus Mille Crepe Cake
What Great Grandma Ate’s No Bake Strawberry Cheesecake Bars (Paleo, Vegan)
A Modest Feast’s Greek Yogurt With Crispy Quinoa and Roasted Strawberries
Hola Jalapeno’s Strawberry Pink Peppercorn Margarita
Worthy Pause’s Strawberry-Basil Shrub Cocktail
Hot Dishing It Out’s Panna Cotta with Strawberry Jelly
Figs & Flour’s Shrimp Tacos with Strawberry Apricot Salsa
Pie Girl Bakes’ Strawberry Ginger Pie
Crumb Top Baking’s Strawberry Chia Jam Oat Bars
The Gourmandise School’s Strawberry Pistachio Salad
Tiny Kitchen Caper’s Strawberries and Cream Pound Cake
Cook Til Delicious’ Mini Chocolate Cake with Strawberry Ganache
Something New For Dinner’s Watermelon, Tomato and Strawberry Salad with Burrata
A Spicy Perspective’s Fresh Strawberry Yogurt Cake
Easy and Delish’s Strawberry Brigadeiros
Plays Well with Butter’s Strawberry Salad with Goat Cheese, Grilled Chicken, & Maple Balsamic Vinaigrette
Katherine in Brooklyn’s Roasted Strawberry Balsamic Ice Cream
Sugar Salt Magic’s Strawberry Mousse Tart
The Healthy Sins’ Coconut Flour Crepes Topped with Fresh Strawberries and Coconut Yogurt
Lemon Thyme and Ginger’s Strawberry Basil No Churn Ice Cream
Jessie Sheehan Bakes’ Strawberry Basil Turnovers
Bavette Meat & Provisions’ Pickled Green Strawberries
Rezel Kealoha’s Apple Cider Rose Poached Strawberries with Thyme Flowers
Made from Scratch’s Roasted Strawberry and Basil Ice Cream
Eat Cho Food’s Strawberry Basil Glazed Donuts
What’s Karen Cooking’s Strawberry Eton Mess
More Icing Than Cake’s Strawberry, Balsamic & Black Pepper Babka
Well Seasoned Studio’s Classic Vanilla Layer Cake with Mascarpone Buttercream and Fresh Strawberries
Farm & Coast Cookery’s Strawberry & Thyme Shortcake
Marianne Cooks’ Strawberry Madeleines
Clean Plate Club’s Mini Strawberry Bundt Cakes with Lemon Glaze
My Berkeley Kitchen’s Strawberry Kale Salad with Balsamic Vinaigrette
The Cinnaman’s Rose Hibiscus Strawberry Icebox Pie
Prickly Fresh’s Strawberry Burrata Kale Salad with Pistachio & Lemon Vinaigrette
Maren Ellingboe’s Angel Food Cake with Whipped Cream & Strawberries
Baking the Goods’ Mini Strawberry Lemon Cupcakes
Fufu’s Kitchen’s Vegan Strawberry Ice Cream Sandwiches
What Annie’s Eating’s Vegan Strawberry + Basil Ice Cream
Katie Bird Bakes’ Strawberry Crumble Bars
Cosette’s Kitchen’s Strawberry Shortcake
Blossom to Stem’s Strawberry Pavlova with Mezcal and Lime
Babby Girl Yum’s Strawberry Spinach Almond Salad
It’s a Veg World After All’s Butter Lettuce Strawberry Salad with Poppyseed Dressing
Le Petite Eats’ Strawberry Orange Blossom Tartlets
Cooking with Cocktail Ring’s Basil Balsamic Strawberry Shortcake
The College Housewife: Mixed Berry Whiskey Crisp
Frosting and Fettuccine’s Strawberry Basil Layer Cake with Strawberry Simple Syrup
Zestful Kitchen’s Strawberry & Pine Nut Brittle SaladSunday, March 18, 2018
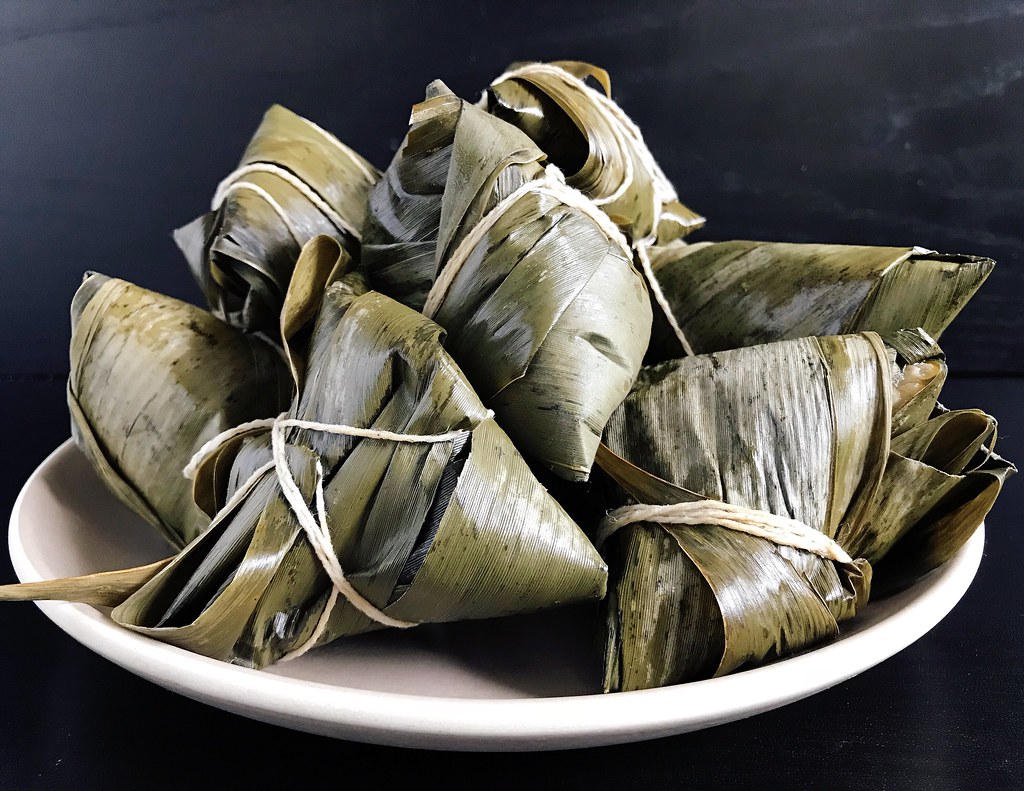
My Mom's Taiwanese Zongzi (粽子)
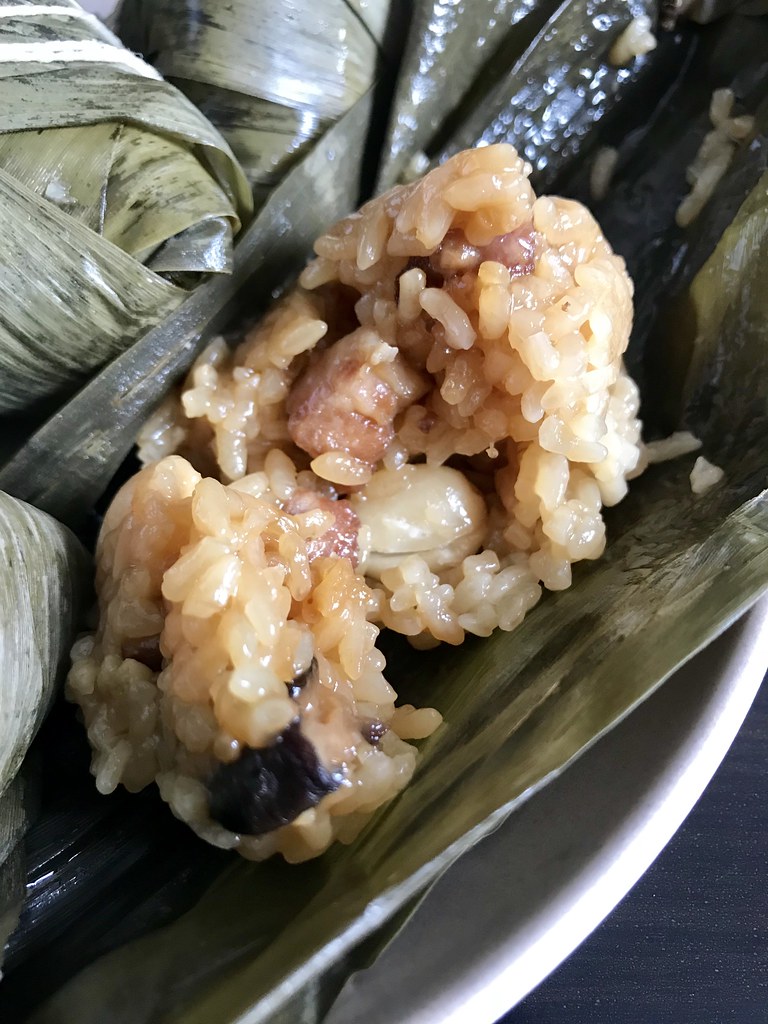
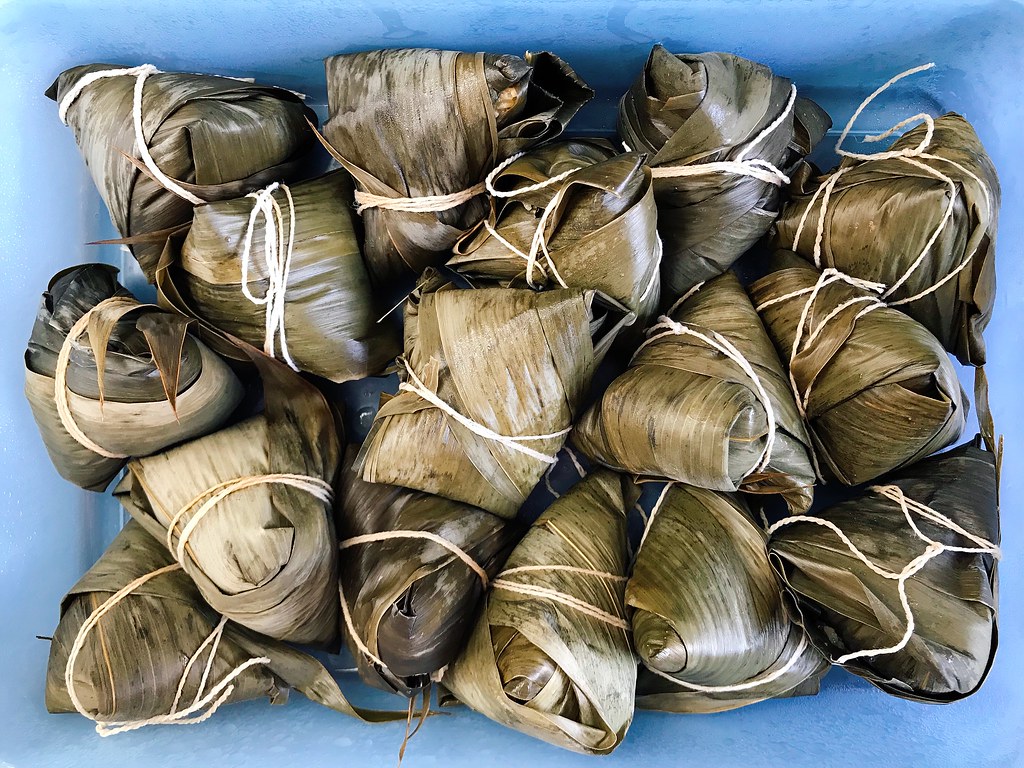
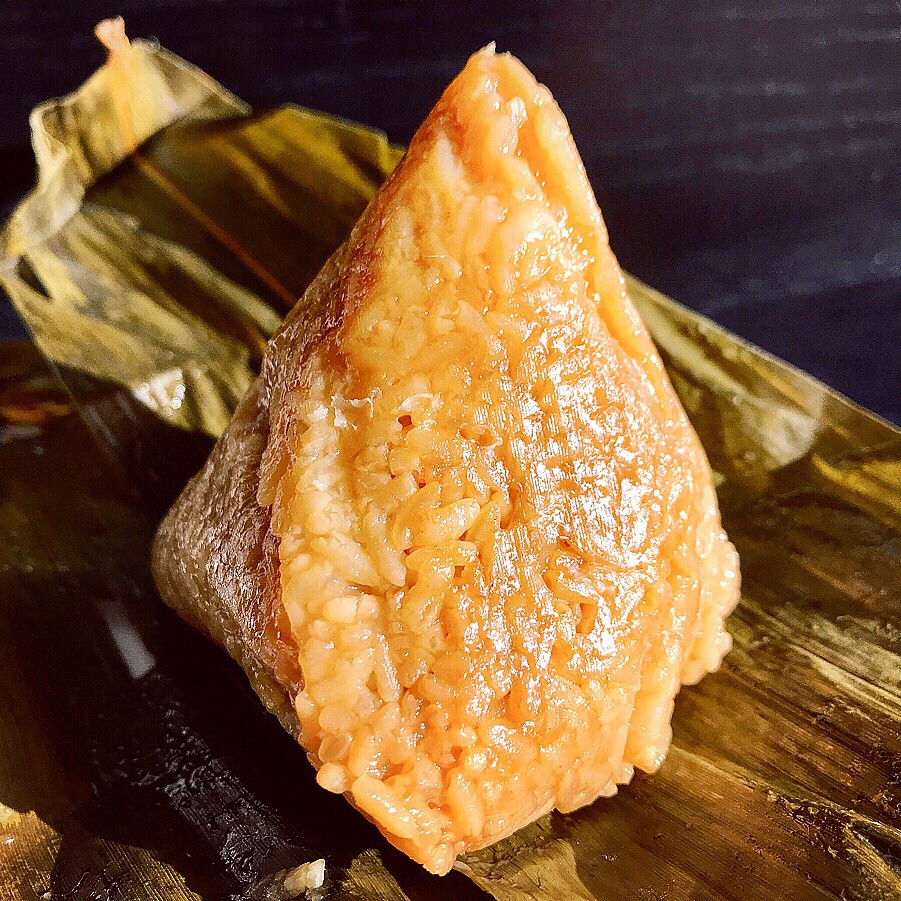
I've been paddling in the annual Boston Dragon Boat Festival for over a decade now, and every year I consider trying to make zongzi, the traditional food eaten for the festival, but by the time the festival rolls around, I always find myself too busy with the races or traveling to attempt them. This year I decided to get a head start (the festival is celebrated on the 5th day of the 5th month of the lunar calendar, so June 18 this year). If you don't know what zongzi are, they're packets of sticky rice wrapped in bamboo leaves (or sometimes lotus or banana leaves). The fillings differ depending on where you are, and sometimes they're even sweet! The ones I grew up with were filled with marinated pork, shiitake mushrooms, fried shallots, peanuts, and sometimes chestnuts and/or dried baby shrimp. I've also had versions with salted duck egg yolks and Chinese sausage in them too.
Even beyond the fillings there are different ways to wrap zongzi. The ones my mom makes are shaped like tetrahedrons, whereas I've also seen them wrapped in a rectangular shape. Some of the recipes I've found online cook the zongzi in boiling water for up to 8 hours, but because the filling is cooked before being stuff in the sticky rice, you only need to cook these for an hour. My mom told me that in southern Taiwan they boil it for even shorter by wrapping cooked sticky rice and boiling just long enough to impart the bamboo leaf flavor.
I posted a picture of these zongzi on Instagram and mentioned that when I had asked my mom for the recipe, she told me it would be too hard to make. I don't think my mom has ever told me something would be too hard for me to do before, so it only made me want to make them even more. I was really surprised to read in the comments though that a lot of other people had the same reaction from their mothers when they had asked them for their recipe! I wonder if that's what their moms told them too, and they're just passing the advice along.
Since these are indeed very difficult to make, I wanted to share some of the tips I figured out while trying to figure it out myself:
- Soak at least 1.5 times as many leaves as you think you'll need. A good portion of mine would tear while I was trying to wrap them at which point you have to start all over. Don't throw those leaves away, though! Fold them in half vertically, and use wrap the outside of any of your more precariously wrapped zongzi to add another layer of protection.
- Be very careful handling the leaves. The edges are razor sharp and will give you a wicked paper cut!
- My mom folds the bottom of the leaves up so that the root ends don't stick out, but a lot of other people just cut that end off.
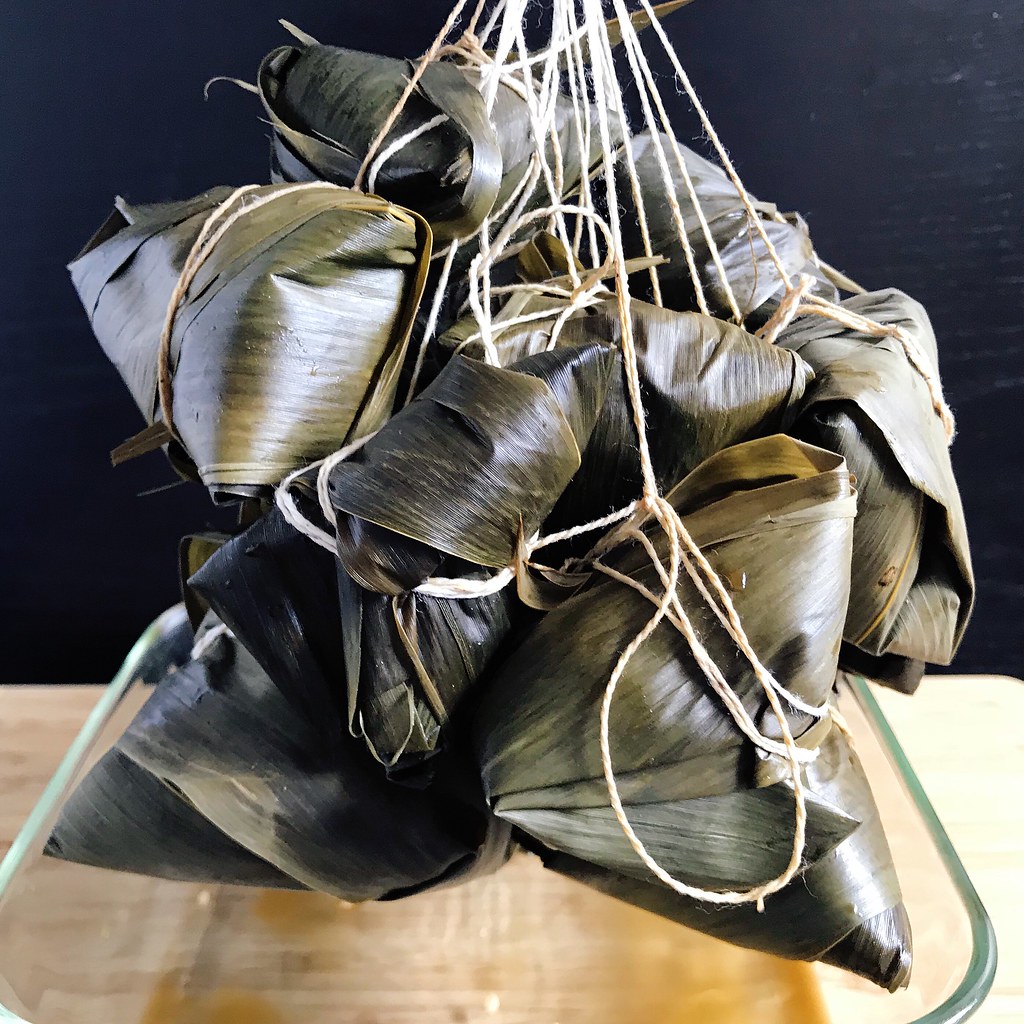
- My mom ties a bunch of strings to a doorknob so there's tension on the string when you try to tie it around the zongzi with one hand (the other hand is used to hold the zongzi tightly closed). Some of my friends mentioned that their moms would use a broomstick set across two chairs for the same purpose. I read somewhere that you can also hold one end of the string between your teeth, and actually that method worked the best for me, although I know my dentist friends would definitely frown on that because there's a chance of chipping your tooth from all the tension.
- I found that the easiest way to tie the string around the zongzi was to place it close to the anchored end and use your free hand to wrap the other end of the string multiple times around the zongzi. You want to try to wrap it around the "equator" of the tetrahedron, so that there are two corners on either end. This will help keep the string in place, otherwise it may fall off when you're cooking it (I know from experience).
I made this video to show you how to wrap the zongzi, but after showing it my mom to confirm it's how she wraps hers, she said she does it differently!
Then she sent me a link to this video which she said is more like how she wraps it. I love listening to it because you hear a mixture of Taiwanese and Mandarin which is kind of like what I heard growing up. That said, if you wrap it my way, you'll get smaller zongzi and will probably be able to make at least 24 with the amount of ingredients below. If you wrap it the way my mom does, you'll make fewer but, larger ones.
Taiwanese-Style Zongzi
makes 12-24 depending on how you wrap themTaiwanese-Style Zongzi
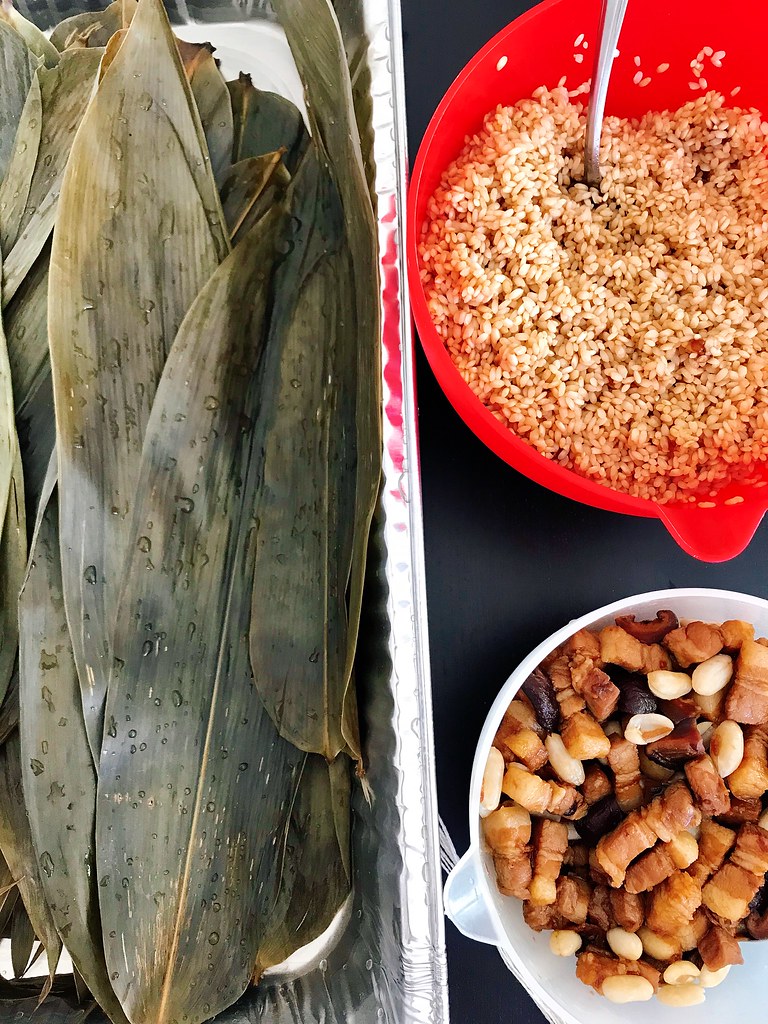
3 1/2 cups glutinous rice
6 oz. bamboo leaves
8 dried shiitake mushrooms
1/2 cup raw peanuts
2/3 cup soy sauce, divided
2 tablespoons rice wine
2 tablespoons sugar, divided
1 lb. pork belly
1 tablespoon oil
2 tablespoons fried shallots
Kitchen twine
Soak glutinous rice in room temperature water for 2 hours or overnight.
Soak bamboo leaves in room temperature water for an hour or overnight, weighing them down so they're completely submerged.
Soak shiitake mushrooms in room temperature water for an hour or overnight, also weighing them down so they're completely submerged. Soak the peanuts for an hour or overnight in a separate bowl.
Combine 1/3 cup soy sauce, the rice wine, and 1 tablespoon of sugar in a medium bowl. Slice the pork into bite-sized pieces and marinate in the soy mixture for an hour.
Cut the kitchen twine into 60" pieces (this is easy for me since that's my wingspan). Gather them all together and fold in half. Make a loop knot at that halfway point so that there are now twice as many pieces of 30" long twine connected at the top by a loop knot.
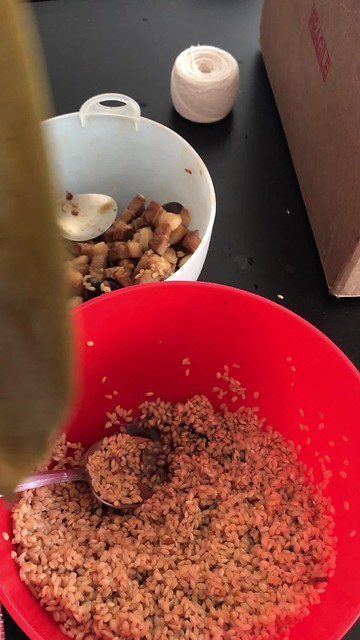
Wash the bamboo leaves thoroughly after they've softened. Drain the rice and then add the remaining soy sauce and sugar and mix. Cut the ends off the mushrooms and slice the caps into quarters. Drain the peanuts.
Heat a large wok or pan over medium heat and add the oil. Add the sliced mushroom, pork, and fried shallots. Stir fry until the pork is almost completely cooked through. Transfer to a bowl. Add any liquids left in the pan to the rice and mix well.
Set up your work station: hook the twine over a sturdy latch-style doorknob or cabinet handle*. Have the bamboo leaves, seasoned sticky rice, peanuts, and meat mixture nearby with a large spoon.
Grab two of the leaves and with the smooth sides facing you, position them so that they overlap slightly on the bottom and angle towards each other at the top. Fold the bottom half inch up and over so that the tough root end doesn't stick out anymore (or cut off the bottom half inch)*. Now fold the sides of the bottom of the leaves together like a book. Fold the bottom inch or two up along one side and then open up the leaves so that it forms a short cone.
Continue to grip the bottom of the cone with one hand and use the other hand to place a large spoonful or two of the rice in the cone. Pack it down well, then add a spoonful of the cooked filling, making sure to get a bit of each of the ingredients. Cover the filling with another spoonful of the rice and pack it down again. Fold the top of the leaves over the rice so that now you have a 4-sided pyramid. Fold the remaining portion of the leaves that are still sticking out together and then continue to wrap around the pyramid. Holding the pyramid tightly with one hand, use the other hand to wrap the twine around the middle a couple of times and then tie it off tightly. Leave it hanging from the twine and wrap the rest of the zongzi.
Bring a large pot of water to a boil and submerge the zong zi. Continue to cook for an hour, until the sticky rice is cooked through. Drain and let the zong zi cool before unwrapping to eat, discarding the leaf. Serve with sweet chili sauce and/or soy paste. These freeze very well, just microwave to reheat!
*See my tips above for variations.
Next: Strawberry Matcha Cream Cheese Tart
Previously: Candied Carrot Rose Tart
Last Year: Japanese Chicken Curry Rice
Two Years Ago: Tropical Pulled Pork on Griddled Banana Bread Sandwiches
Three Years Ago: A Better Homemade Pasta Recipe
Four Years Ago: Mushroom Marsala Pizza
Five Years Ago: Peking Duck Pizza
Eight Years Ago: Bacon Fat Caramels
Nine Years Ago: The Feng Family Secret Peking Duck
Thursday, February 1, 2018
Candied Carrot Rose Tart
When I first found out that the ingredient for this season's collaboration was carrots, my heart sank. Because, you guys, I hate carrots. Always have, always will. I'll eat them if I have to, but I would never go out of my way to make a recipe spotlighting them. But the more I thought about it, the more I decided: challenge accepted!
At first I thought about doing some sort of carrot cake, because that's the only way I like carrots--when I can't taste them. But then I decided I could push the envelope a little farther and came up with this tart, which is basically a deconstructed carrot cake, cream cheese frosting and all!
I used Dorie Greenspan's spiced tart dough from her book Baking: From My Home to Yours, the cookbook the Food52 Baking Club is going through this month. It works well for this tart because it has the nuts, cinnamon, and cloves traditionally found in carrot cake. The filling is just a simple mix of cream cheese, sour cream, and sugar.
But the candied carrot roses is probably what you want to know about. I got that idea from Stella Park's Bravetart cookbook when the Food52 Baking Club went through that book a couple of months ago. She covers the technique on Serious Eats and her own blog, so I didn't bother taking pictures myself (plus, sticky hands + taking pictures = not good).
In order to make sure that I made enough roses to cover the top of the tart, I found a plate that was about the same size as the tart and kept making the roses until the plate was covered. It took me a little less than 6 large carrots to get there, including a bunch of ribbons that were too short. And I had to candy all the carrot strips in 3 batches since they wouldn't all fit into the syrup at once. If you want some extra shine/sweetness, you could brush some of the leftover poaching syrup onto the roses just before serving.
Candied Carrot Rose Tart
makes 1 tart
Your favorite tart shell, fully baked and cooled
8 oz. cream cheese, softened
1/4 cup sour cream
1 1/2 cup sugar, divided
Juice from half a lemon
1 cup water
1/2 a cinnamon stick
6 long, thick carrots
Use the paddle attachment in a stand up mixer or hand mixer to combine the cream cheese, sour cream, and 1/2 cup of sugar. Spread into the tart shell and chill while you make the carrot roses.
Combine the remaining 1 cup of sugar, lemon juice, cinnamon stick, and water in a medium saucepan. Bring to a boil and then lower the heat to a simmer.
Cut off the carrot tops and peel. Then, using the vegetable peeler, peel the carrots into long, thick strips.
Once all the sugar has dissolved in the syrup, add a third of the carrot strips. Cook for about a minute, then turn off the heat and allow the strips to cool in the syrup.
Pick up one of the strips and squeegee the excess syrup off with your fingers. Hold the thinner end with one hand and start twirling the rest of the carrot strip around it to form a rose. Tuck the end underneath and set it down on a plate about the size of your tart pan. Repeat with remaining strips until you have enough to cover the plate, and thus, the top of your tart.
Carefully transfer the carrot roses to the tart and return to the fridge until ready to serve.
Check out the rest of the bloggers who participated in the #24carrotgoals collaboration below:
Square Meal Round Table’s Rainbow Carrot and Ricotta Tart
Better with Biscuits’ Carrot Souffle
This Healthy Table’s Beet and Carrot Galette
Always Eat Dessert’s Carrot Cake Squares with Orange Glaze
Figs & Flour’s Thai Peanut Pizza
Fufu’s Kitchen’s Oven Baked Carrot Fries Drizzled with a Tahini Sauce
Flours in Your Hair’s Carrot Pecan Cookies
Hola Jalapeño’s Roasted Carrots with Chipotle-Honey Butter
Worthy Pause’s Paleo Thai Curry Carrot Soup
Something New for Dinner’s Minted Sous Vide Carrots with Balsamic Vinegar and Goat Cheese
What Great Grandma Ate’s Paleo Carrot Mug Cake
More Icing Than Cake’s Spiced Quinoa & Roasted Carrot Salad
Hot Dishing It Out’s Vegan Carrot Whoopie Pies
Katie Bird Bakes’ Carrot Cake Scones
Confetti Kitchen’s Harissa-Roasted Carrots with Lentils and Yogurt
Easy and Delish’s Carrot Spaghetti
Pie Girl Bakes’ Five Spice Carrot Bundt Cakes with Bourbon Cream Cheese Glaze
Smoothies and Sundaes’ Carrot Cake Sourdough
Zestful Kitchen’s Moroccan-Stuffed Portobello Mushrooms
Food by Mars’ Paleo Carrot Walnut Loaf Cake
Cosette’s Kitchen’s Sumac Carrot and Feta Salad
Measuring Cups Optional's Carrot Curry Soup
Rezel Kealoha’s Turkish Yogurt Carrot Dip
Pies and Prejudice’s Carrot Pie with Maple & Cardamom
Amanda Skrip’s Rainbow Roasted Carrots with Citrus Fennel + Arugula
Baking The Goods’ Roasted Carrot & Herby Feta Galette
Marianne Cooks’ Carrot and Zucchini Mini Muffins with a Cinnamon Frosting
Rumbly in My Tumbly’s Chai Carrot Pie
Cook Til Delicious’ Mini Carrot Cake
What Annie’s Eating’s Roasted Carrots with Herby Carrot Top Salsa Verde
It’s a Veg World After All’s Zesty Sunflower Carrot Spirals
Butter Loves Company’s Iced Carrot Cake Cookies
Le Petit Eats’ Carrot Cake Breakfast Bars w/ Maple Coconut Icing
Smart in the Kitchen’s Curried Carrot Ginger Soup (Whole30)
Cocoa and Salt’s Classic Carrot Cake
Dirty Whisk’s Carrot and Herbed Ricotta Tart
A Modest Feast’s Pomegranate-Molasses-Glazed Carrots With Crispy Chickpeas and FetaNext: My Mom's Taiwanese Zongzi
Previously: Pork, Cabbage, and Tofu Dumplings
Last Year: Salted Egg Yolk Mochi Ice Cream
Three Years Ago: Burmese Coconut Noodles with Tofu
Four Years Ago: Grilled Cheese Egg in a Hole
Five Years Ago: Passion Fruit Marshmallows
Eight Years Ago: Kalua Pork
Nine Years Ago: Tomato and Eggs over Rice
Subscribe to:
Posts (Atom)

