Showing posts with label pork. Show all posts

Sunday, March 18, 2018

My Mom's Taiwanese Zongzi (粽子)


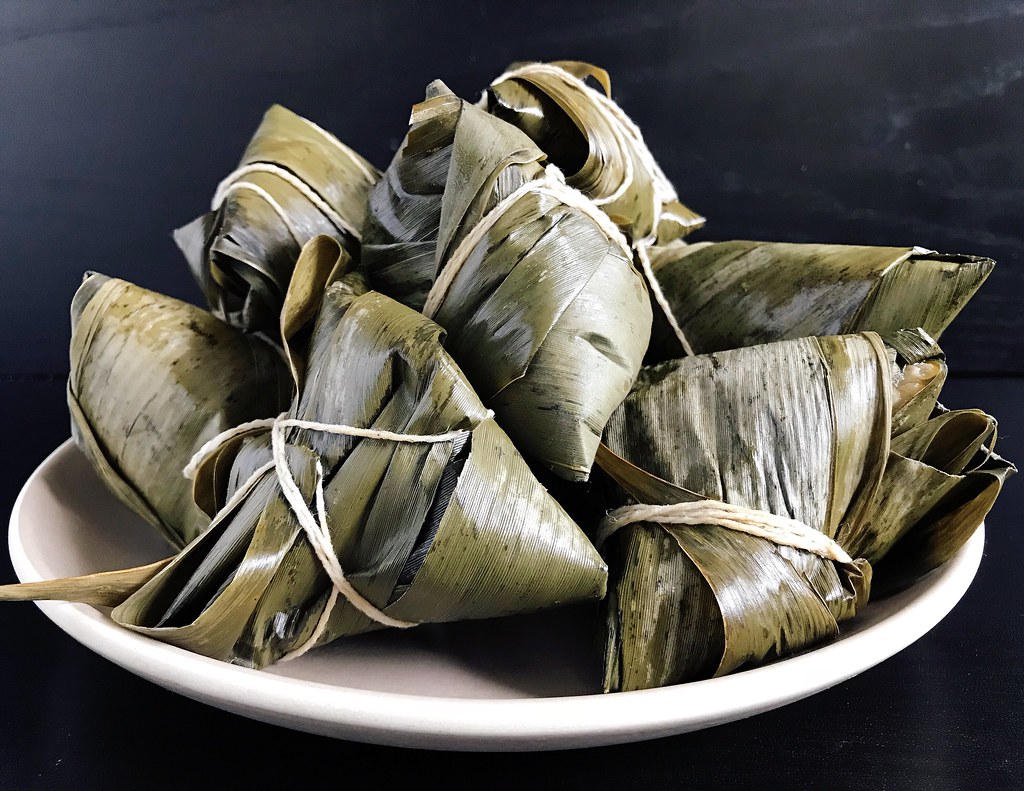
I've been paddling in the annual Boston Dragon Boat Festival for over a decade now, and every year I consider trying to make zongzi, the traditional food eaten for the festival, but by the time the festival rolls around, I always find myself too busy with the races or traveling to attempt them.  This year I decided to get a head start (the festival is celebrated on the 5th day of the 5th month of the lunar calendar, so June 18 this year).  If you don't know what zongzi are, they're packets of sticky rice wrapped in bamboo leaves (or sometimes lotus or banana leaves).  The fillings differ depending on where you are, and sometimes they're even sweet!  The ones I grew up with were filled with marinated pork, shiitake mushrooms, fried shallots, peanuts, and sometimes chestnuts and/or dried baby shrimp.  I've also had versions with salted duck egg yolks and Chinese sausage in them too.
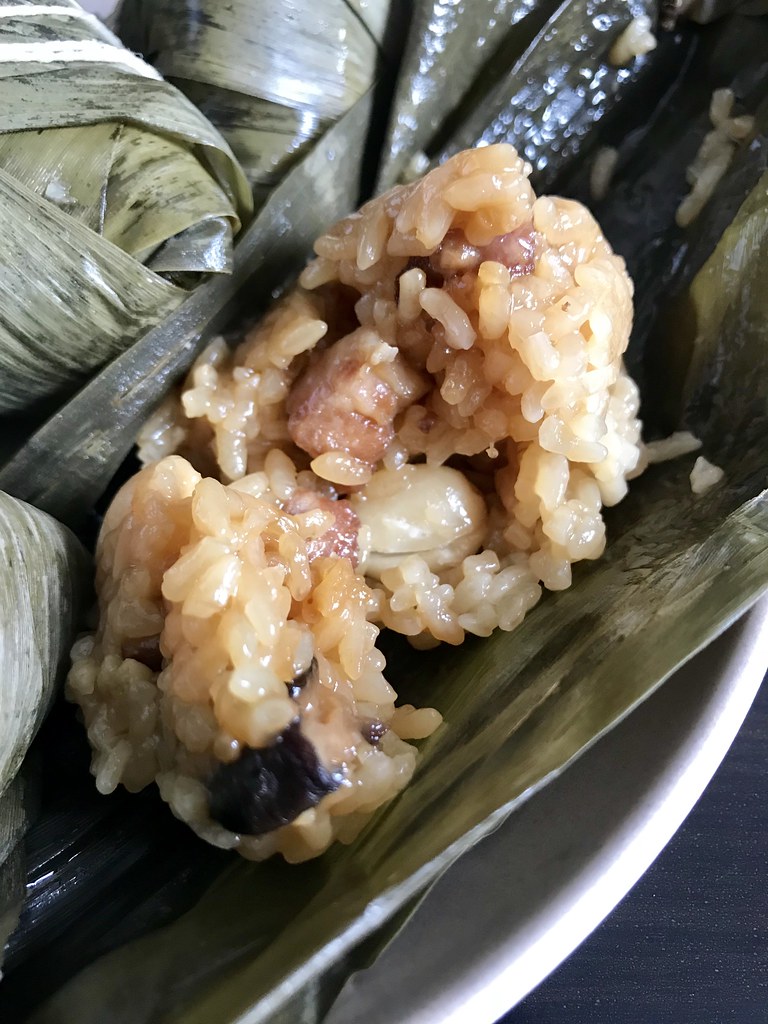

Even beyond the fillings there are different ways to wrap zongzi.  The ones my mom makes are shaped like tetrahedrons, whereas I've also seen them wrapped in a rectangular shape.  Some of the recipes I've found online cook the zongzi in boiling water for up to 8 hours, but because the filling is cooked before being stuff in the sticky rice, you only need to cook these for an hour.  My mom told me that in southern Taiwan they boil it for even shorter by wrapping cooked sticky rice and boiling just long enough to impart the bamboo leaf flavor.
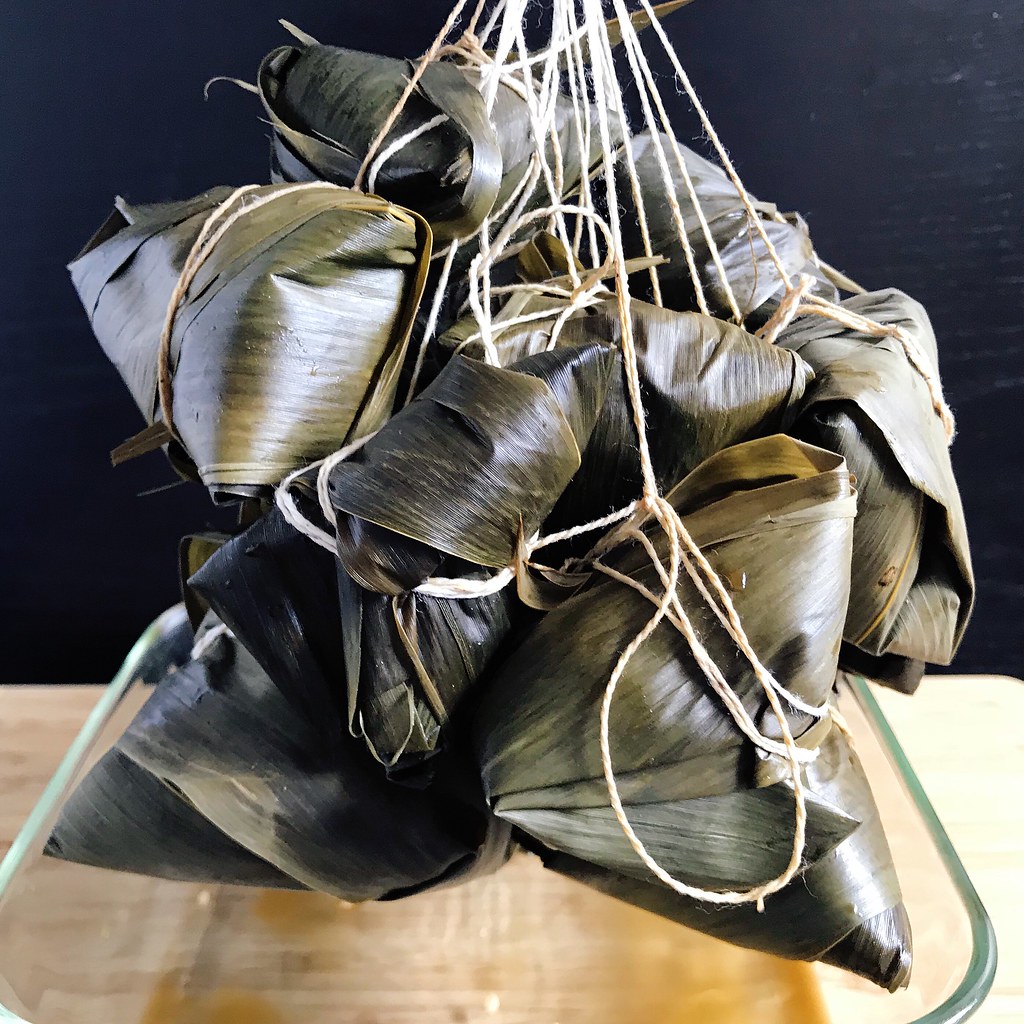

I posted a picture of these zongzi on Instagram and mentioned that when I had asked my mom for the recipe, she told me it would be too hard to make.  I don't think my mom has ever told me something would be too hard for me to do before, so it only made me want to make them even more.  I was really surprised to read in the comments though that a lot of other people had the same reaction from their mothers when they had asked them for their recipe!  I wonder if that's what their moms told them too, and they're just passing the advice along.
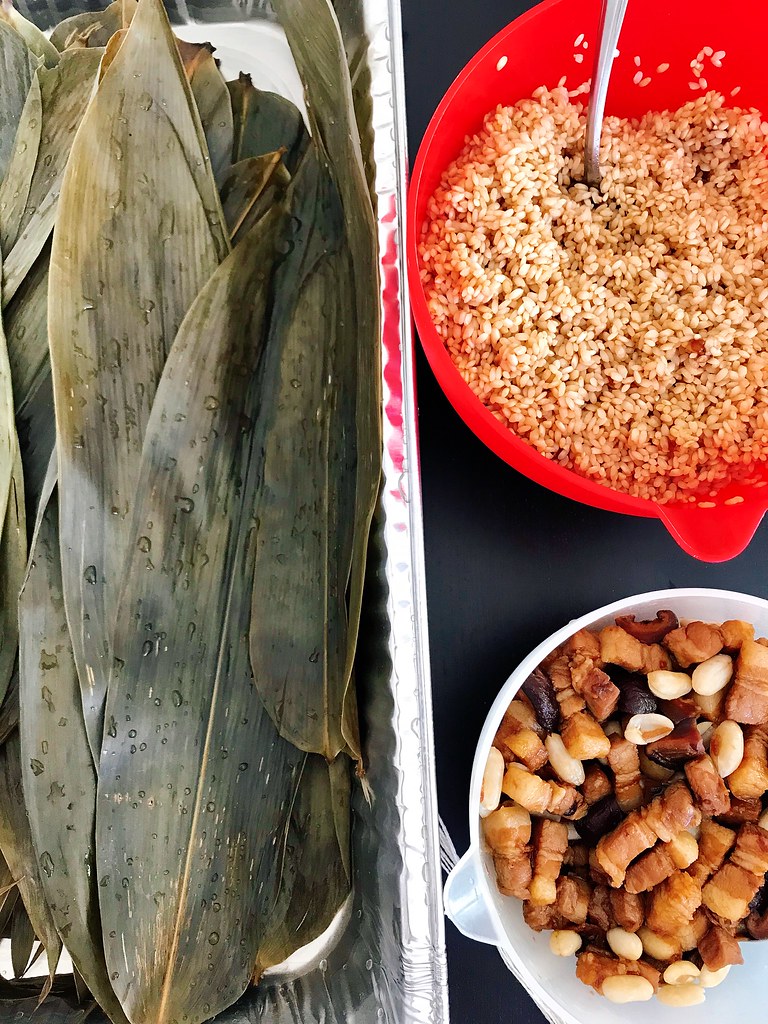

Since these are indeed very difficult to make, I wanted to share some of the tips I figured out while trying to figure it out myself:
  • Soak at least 1.5 times as many leaves as you think you'll need.  A good portion of mine would tear while I was trying to wrap them at which point you have to start all over.  Don't throw those leaves away, though!  Fold them in half vertically, and use wrap the outside of any of your more precariously wrapped zongzi to add another layer of protection.
  • Be very careful handling the leaves.  The edges are razor sharp and will give you a wicked paper cut!
  • My mom folds the bottom of the leaves up so that the root ends don't stick out, but a lot of other people just cut that end off.  
  • My mom ties a bunch of strings to a doorknob so there's tension on the string when you try to tie it around the zongzi with one hand (the other hand is used to hold the zongzi tightly closed).  Some of my friends mentioned that their moms would use a broomstick set across two chairs for the same purpose.  I read somewhere that you can also hold one end of the string between your teeth, and actually that method worked the best for me, although I know my dentist friends would definitely frown on that because there's a chance of chipping your tooth from all the tension.
  • I found that the easiest way to tie the string around the zongzi was to place it close to the anchored end and use your free hand to wrap the other end of the string multiple times around the zongzi.  You want to try to wrap it around the "equator" of the tetrahedron, so that there are two corners on either end.  This will help keep the string in place, otherwise it may fall off when you're cooking it (I know from experience).
I made this video to show you how to wrap the zongzi, but after showing it my mom to confirm it's how she wraps hers, she said she does it differently!
How to make zongzi

Then she sent me a link to this video which she said is more like how she wraps it.  I love listening to it because you hear a mixture of Taiwanese and Mandarin which is kind of like what I heard growing up.  That said, if you wrap it my way, you'll get smaller zongzi and will probably be able to make at least 24 with the amount of ingredients below.  If you wrap it the way my mom does, you'll make fewer but, larger ones.
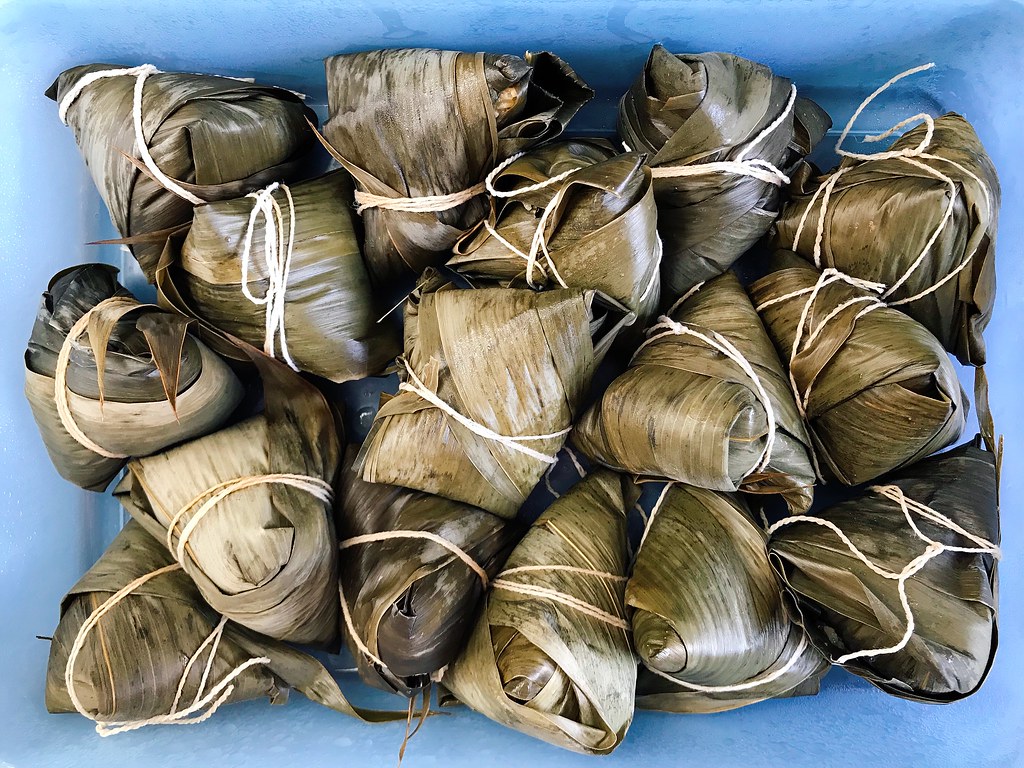


Taiwanese-Style Zongzi
makes 12-24 depending on how you wrap them

3 1/2 cups glutinous rice
6 oz. bamboo leaves
8 dried shiitake mushrooms
1/2 cup raw peanuts
2/3 cup soy sauce, divided
2 tablespoons rice wine
2 tablespoons sugar, divided
1 lb. pork belly
1 tablespoon oil
2 tablespoons fried shallots
Kitchen twine

Soak glutinous rice in room temperature water for 2 hours or overnight.

Soak bamboo leaves in room temperature water for an hour or overnight, weighing them down so they're completely submerged.

Soak shiitake mushrooms in room temperature water for an hour or overnight, also weighing them down so they're completely submerged.  Soak the peanuts for an hour or overnight in a separate bowl.

Combine 1/3 cup soy sauce, the rice wine, and 1 tablespoon of sugar in a medium bowl.  Slice the pork into bite-sized pieces and marinate in the soy mixture for an hour.

Cut the kitchen twine into 60" pieces (this is easy for me since that's my wingspan).  Gather them all together and fold in half.  Make a loop knot at that halfway point so that there are now twice as many pieces of 30" long twine connected at the top by a loop knot. 

Wash the bamboo leaves thoroughly after they've softened.  Drain the rice and then add the remaining soy sauce and sugar and mix.  Cut the ends off the mushrooms and slice the caps into quarters.  Drain the peanuts.

Heat a large wok or pan over medium heat and add the oil.  Add the sliced mushroom, pork, and fried shallots.  Stir fry until the pork is almost completely cooked through.  Transfer to a bowl.  Add any liquids left in the pan to the rice and mix well.

Set up your work station:  hook the twine over a sturdy latch-style doorknob or cabinet handle*.  Have the bamboo leaves, seasoned sticky rice, peanuts, and meat mixture nearby with a large spoon.

Grab two of the leaves and with the smooth sides facing you, position them so that they overlap slightly on the bottom and angle towards each other at the top.  Fold the bottom half inch up and over so that the tough root end doesn't stick out anymore (or cut off the bottom half inch)*.  Now fold the sides of the bottom of the leaves together like a book.  Fold the bottom inch or two up along one side and then open up the leaves so that it forms a short cone.

Continue to grip the bottom of the cone with one hand and use the other hand to place a large spoonful or two of the rice in the cone.  Pack it down well, then add a spoonful of the cooked filling, making sure to get a bit of each of the ingredients.  Cover the filling with another spoonful of the rice and pack it down again.  Fold the top of the leaves over the rice so that now you have a 4-sided pyramid.  Fold the remaining portion of the leaves that are still sticking out together and then continue to wrap around the pyramid.  Holding the pyramid tightly with one hand, use the other hand to wrap the twine around the middle a couple of times and then tie it off tightly.  Leave it hanging from the twine and wrap the rest of the zongzi.

Bring a large pot of water to a boil and submerge the zong zi.  Continue to cook for an hour, until the sticky rice is cooked through.  Drain and let the zong zi cool before unwrapping to eat, discarding the leaf.  Serve with sweet chili sauce and/or soy paste.  These freeze very well, just microwave to reheat!

*See my tips above for variations.
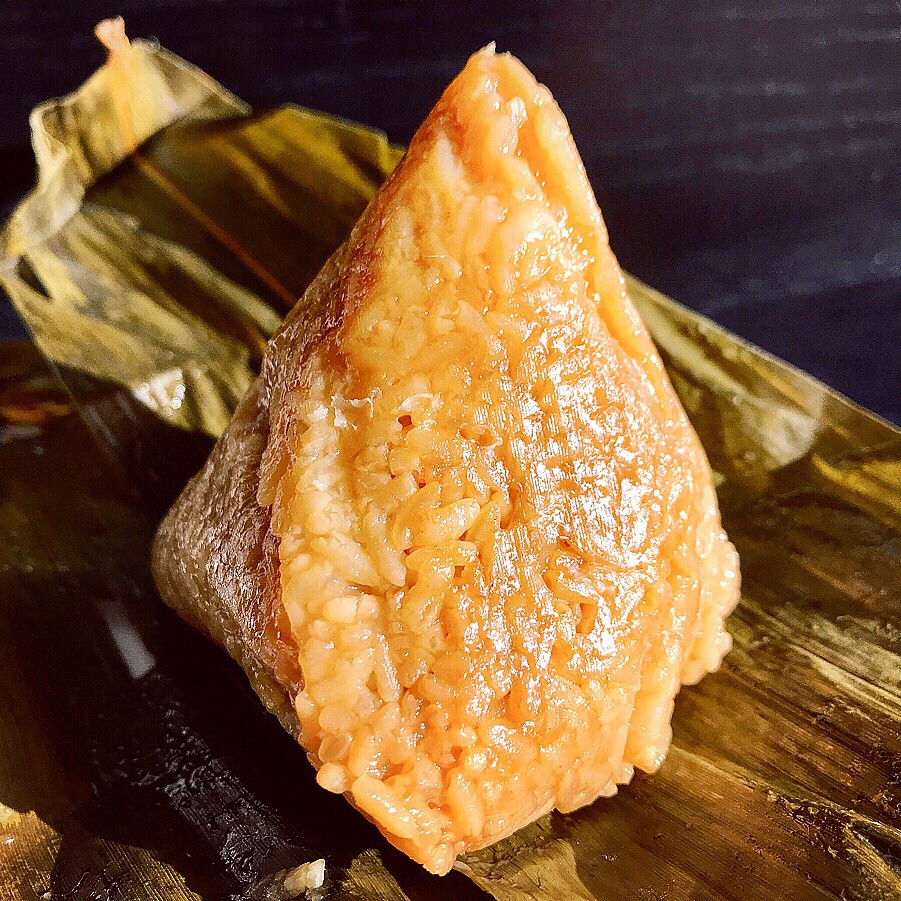

Next: Strawberry Matcha Cream Cheese Tart
Previously:  Candied Carrot Rose Tart
Last Year:  Japanese Chicken Curry Rice
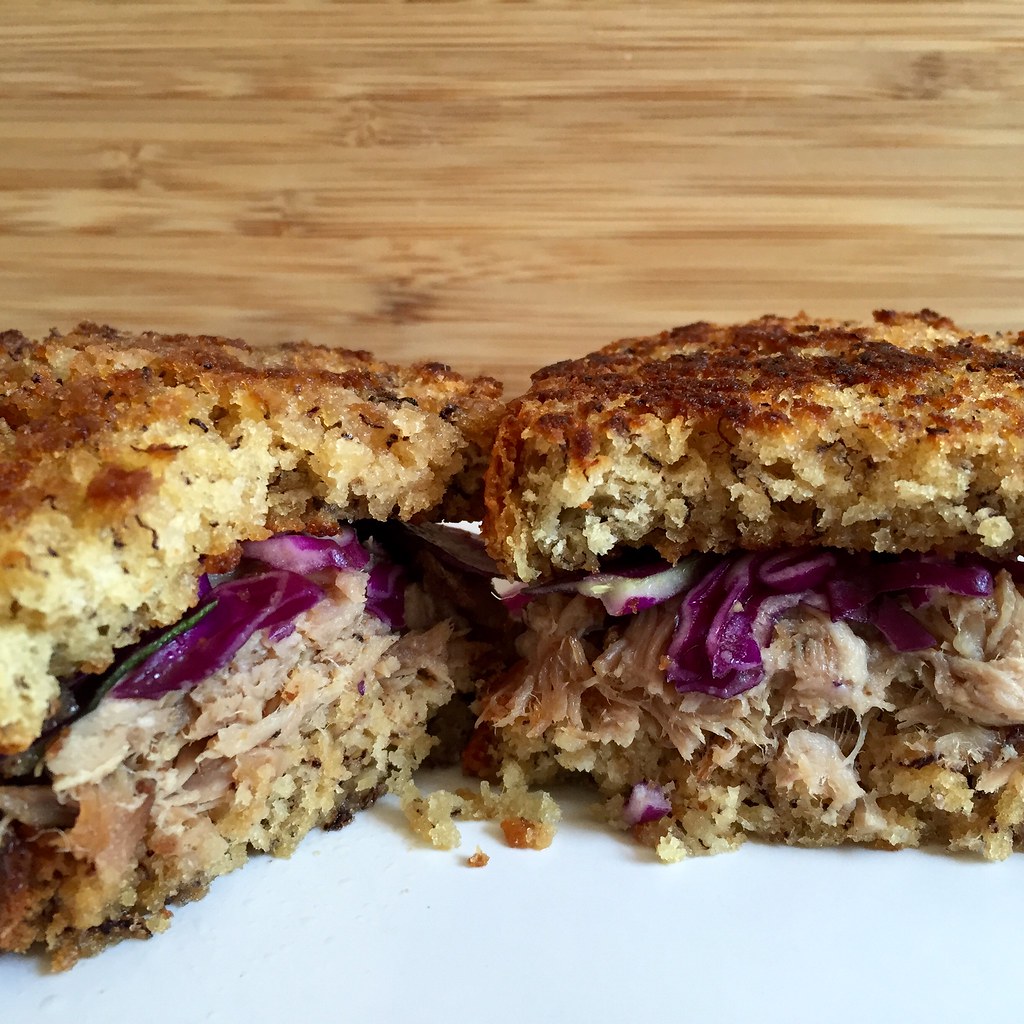
Two Years Ago:  Tropical Pulled Pork on Griddled Banana Bread Sandwiches
Three Years Ago:  A Better Homemade Pasta Recipe
Four Years Ago:  Mushroom Marsala Pizza
Five Years Ago:  Peking Duck Pizza
Eight Years Ago:  Bacon Fat Caramels
Nine Years Ago:  The Feng Family Secret Peking Duck Recipe

Friday, December 15, 2017

Pork, Cabbage, and Tofu Dumplings


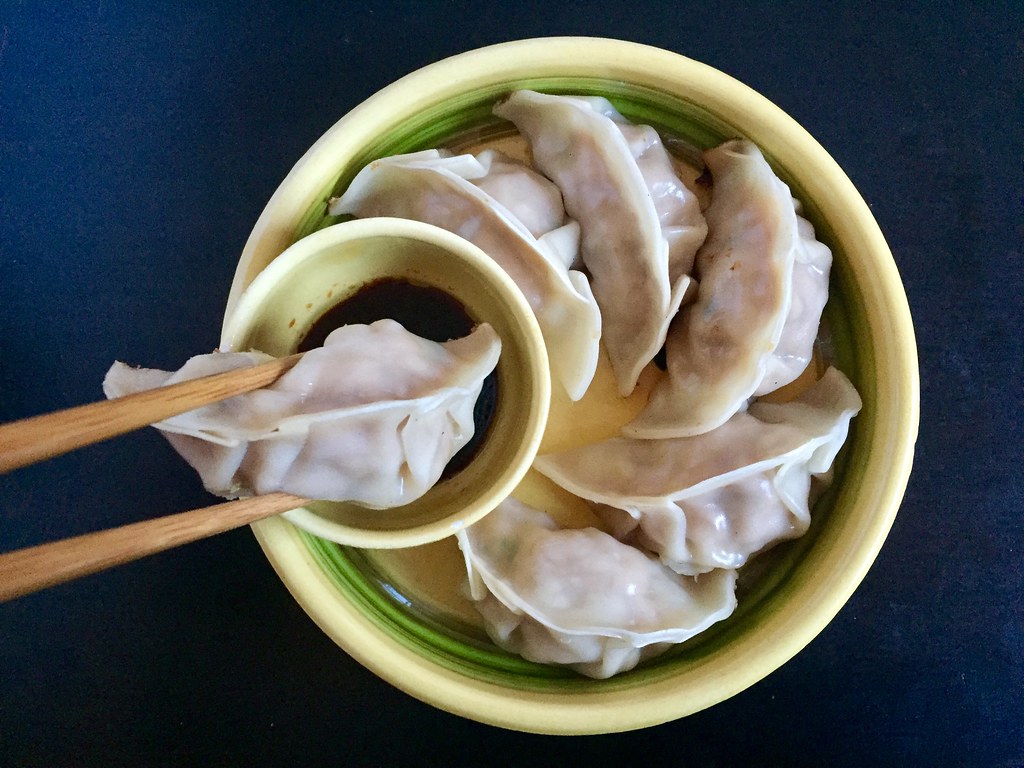
Next up in my updated posts is my mom's pork and cabbage dumplings!  I made these slightly healthier by substituting some of the pork for tofu and reducing the soy sauce, sesame oil, and sugar a bit.  See my original post from 9(!) years ago for a lot of tips and tricks to making and cooking the dumplings (as well as to see how my photography skills have improved over the years, haha).


Pork, Cabbage, and Tofu Dumplings
makes about 80

1-1.5 lbs. ground pork
1 medium head of napa cabbage, roughly chopped
1/2 teaspoon salt
19 oz. firm tofu
2 bundles of bean thread vermicelli
4 scallions, chopped
1/2 cup soy sauce
4 tablespoons sesame oil
1 tablespoon sugar
80 dumpling skins (about 2 packs)

Press the tofu between a couple layers of paper towels for 15 minutes.  Soak the bean thread vermicelli in lukewarm water for 15 minutes.

Use a food processor to finely chop the napa cabbage and transfer to a large bowl.  Mix the salt in and let rest for 15 minutes.  Squeeze handfuls of the cabbage over a sink to discard the water that's been released.  Add the squeezed cabbage back to the large bowl after drying it out.  Chop the softened noodles and add to the cabbage.  Crumble the tofu into the bowl and add the pork.  Add the scallions, soy sauce, sesame oil, and sugar and mix well.

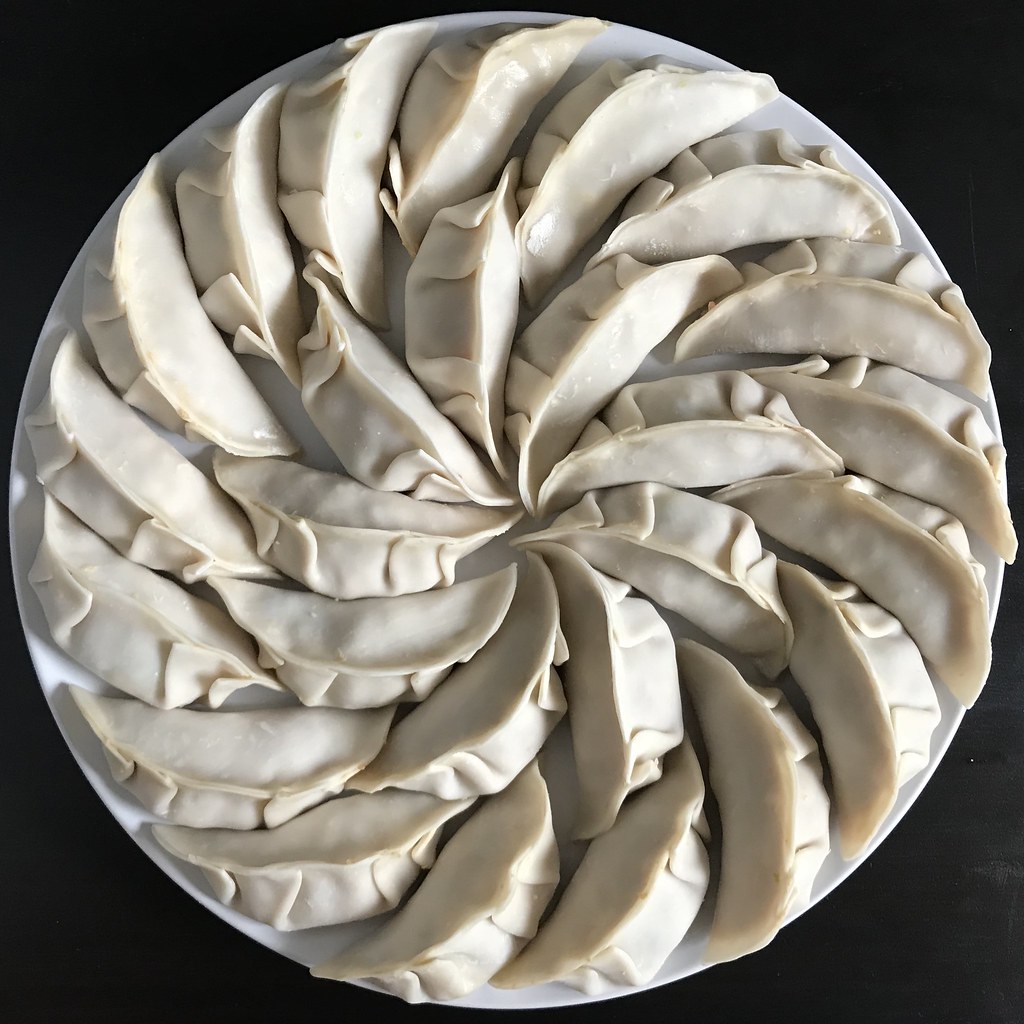
Fill the dumpling skins and seal the wrappers with a little water on the edges.  Boil or steam-fry the dumplings and serve.  If not eating immediately, place the plates of filled dumplings in the freezer until firm, then transfer to freezer bags.


Next:  Candied Carrot Rose Tart
Previously:  My Mom's Steamed Bao Buns
Last Year:  Pull-Apart Scallion Swirly Bread
Three Years Ago:  Puppy Chow Pie
Four Years Ago:  Miso Pumpkin Soup
Five Years Ago:  Homemade Ramen Noodles
Eight Years Ago:  Tim Tam Slam Ice Cream
Nine Years Ago:  Pork and Cabbage Dumplings

Wednesday, March 16, 2016

Tropical Pulled Pork on Griddled Banana Bread Sandwiches

https://www.flickr.com/photos/joyosity/25635814581/in/dateposted-public/

Back in January I found an incredible deal for airfare to St. Thomas so I went ahead and booked it along with four nights at the Marriott Frenchman's Reef using my points.  Even though the weather forecast the weeks up to the trip showed a lot of possible rain, it turned out to be beautiful and sunny every day we were there!

https://www.flickr.com/photos/joyosity/25180348454/in/dateposted-public/
Sunrise at the Frenchman's Reef

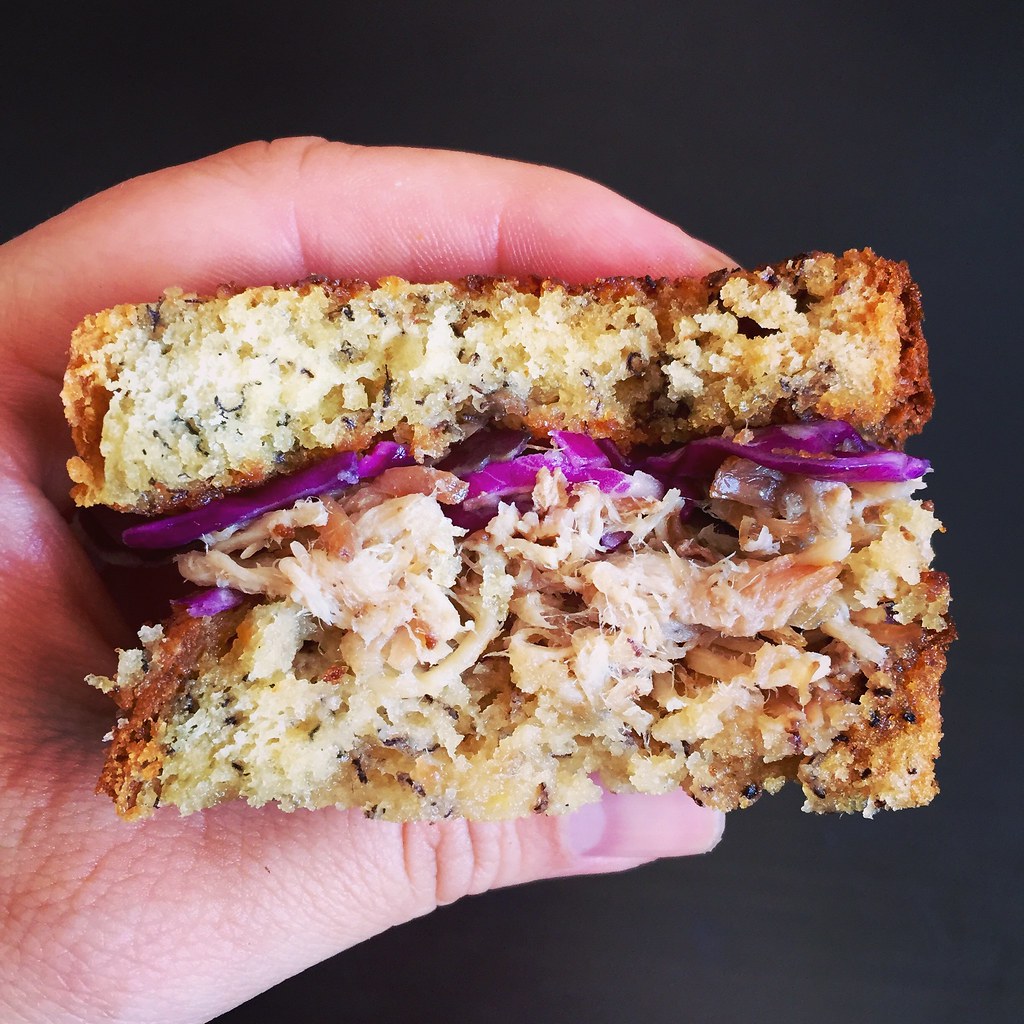
On our third day, my friend Sooyun and I took the passenger ferry from Red Hook to Cruz Bay in St. John and hiked the Lind Point Trail to Honeymoon Beach.  After some relaxing time on the beach, we continued over to the Caneel Bay Resort for lunch.  Little did I know I was about to have one of the best sandwiches I had ever eaten.  We almost didn't order it (I was craving a turkey sandwich, and Sooyun almost ordered something else before I reminded her about the rum pork on crispy banana bread sandwich she had pointed out earlier), but after tasting it, I'm so grateful we did.  I think it was that perfect balance of salty pulled pork and sweet banana bread plus the crunch from a red cabbage slaw.  The memory of this sandwich haunted me for over a month before I finally decided to try and recreate it.

https://www.flickr.com/photos/joyosity/25810827555/in/dateposted-public/
Floating at Honeymoon Beach, St. John

For the pulled pork I pretty much followed my slow cooker kalua pork recipe except I added a quartered orange and garlic plus a splash of passion fruit rum.  For the banana bread I followed this basic recipe but you can just use your favorite recipe as long as the bread can be sliced and griddled without falling apart.  Then I made a quick cabbage slaw using coconut white balsamic vinegar, lemon sugar, and shredded red cabbage.  If you don't have smoked sea salt, passion fruit rum, coconut white balsamic vinegar, and lemon sugar, you should be fine using regular sea salt, another rum (or skipping the rum altogether), a light vinegar (like cider or rice wine), and regular white sugar.  But then where would be the fun in that? 

https://www.flickr.com/photos/joyosity/25104257803/in/dateposted-public/

Tropical Pulled Pork on Griddled Banana Bread Sandwiches
makes about 8 sandwiches

For the pulled pork:
3 lbs. boneless pork butt/shoulder
2 tablespoons smoked sea salt
1 orange, quartered
6 garlic cloves, peeled
1/4 cup rum (tropical flavor like passion fruit or mango preferred)

Using a steak knife, poke the pork all over and rub with smoked salt.  Place in the slow cooker along with the orange quarters and garlic cloves.  Turn on low and cook for 12 hours. 

Halfway through, flip the pork and add the rum.

When done, remove the excess fat and shred the pork with a fork.

For the red cabbage slaw:
3 cups shredded red cabbage
1 teaspoon kosher salt
1 tablespoon coconut white balsamic vinegar (or other light vinegar)
1 teaspoon lemon or white sugar

Place the shredded cabbage in a salad spinner or a colander over a bowl.  Sprinkle the salt over the cabbage and mix.  Let sit for an hour, then rinse and squeeze/spin out the excess water.

Transfer the cabbage to a sealable container.  Add the vinegar and sugar and mix.  Cover and store in the refrigerator for at least 30 minutes, until ready to use.

For the sandwiches:
2 loaves of your favorite banana bread (or just one loaf if you want to make open faced sandwiches)
Butter

Slice the banana bread to the thickness you prefer and butter both sides.  Heat a pan over medium-high heat and cook the banana bread slices, turning once, until both sides are browned.

Top one slice with the pulled pork and slaw and add the other slice.  Serve with plantain or yucca chips and die of happiness.

https://www.flickr.com/photos/joyosity/25180343634/in/dateposted-public/
Sunset at Frenchman's Reef

Next:  The 4-Hour Baguette
Previously:  Pad Thai
Last Year:  Homemade Squid Ink Pasta
Two Years Ago:  Miso-Glazed Eggplant
Three Years Ago:  Peking Duck Pizza
Six Years Ago:  Bacon Fat Caramels
Seven Years Ago:  St. Patrick's Day Maki

Friday, July 2, 2010

Slow Cooker Bolognese Sauce

P6123021

A few weeks ago I had eaten some pasta with bolognese sauce at Basta Pasta in Cambridge, and afterwards, I was totally craving more of the savory meat sauce. I remembered that The Kitchen had posted a recipe for making it using a slow cooker which sounded perfect, since I didn't really want to have to deal with hours in front of a hot stove during the summertime. Even so, you do need to spend some time sweating the vegetables, browning the meat, and reducing the liquids, but the end result is so totally worth it. The only changes I made to the original recipe is that instead of adding 1 cup of the reserved tomato juices, I reduced all the tomato juice from the 2 cans until there was only about 1 cup of liquid left and added that to the slow cooker. Also, I used a pound of ground beef and a pound of ground pork instead just ground beef.
Slow-Cooked Bolognese Sauce (from The Kitchn)
makes 6 cups
1 tablespoon olive oil
1 medium onion, finely chopped
2 celery stalks, finely chopped
1 medium carrot, finely chopped
3 cloves of garlic, minced
1 pound ground beef
1 pound ground pork
1/8 teaspoon nutmeg
1 teaspoon salt
1/2 teaspoon pepper
1 cup milk (whole or 2-percent)
1 cup white wine
2 28-ounce cans of whole peeled tomatoes, drained and finely chopped (juices reserved)
1 cup reserved tomato juices
Mirepoix ingredients plus garlic
Heat the olive oil in a large saucepan over medium heat. Add the onion, celery, and carrot and cook until the onion is translucent and all the vegetables have softened. Add the garlic and cook until fragrant, about 30 seconds. Add the pork and beef, breaking it apart with your spoon and cooking until it is just browned. Season with nutmeg, salt, and pepper.
Add ground pork and beef
Stir in the milk and bring it to a rapid simmer. Continue simmering until the milk has reduced completely and very little liquid remains, about 10 minutes. Stir in the wine and simmer again until reduced completely, about 10 minutes. Transfer the beef mixture to the slow cooker.
In the same, now-empty pot, reduce the reserved tomato juices until you have about 1 cup left.
0 hours in slow cooker
Add the chopped tomatoes and reduced tomato juices to the slow cooker. Stir to combine. Cover and cook on HIGH for 6 hours or LOW for 8 hours.
In the last half hour of cooking, remove the lid to allow any excess liquid to evaporate and reduce the sauce. The finished sauce should be chunky and creamy without being soupy.
P6123040
Serve over spaghetti with a hunk of crusty bread for mopping up the sauce!
P6123017

Tuesday, January 19, 2010

Kalua Pork

Nope, that's not a typo. This isn't pork made with Kahlua. This is kalua pork, the Hawaiian roasted pork served at luaus. Traditionally, a whole salted pig is put into a pit filled with hot rocks and banana leaves and covered so that it can cook all day. I got to go to Hawaii years and years ago for a family reunion (relatives from Taiwan and the US met halfway) and still remember loving this dish. The pork was moist, fall-off-the-bone tender, and had a depth of flavor that I thought could only be delivered via cooking in a pit for hours and hours.

Luckily for those of us who don't have easy access to whole pigs, pits, hot rocks, and banana leaves, you can make kalua pork in a slow cooker with only 2 ingredients: pork butt and smoked salt! The first you can get from almost any grocery store; just make sure it'll fit into your slow cooker. Apparently, pork butt is actually the same thing as pork shoulder, so either would work.

Smoked Hawaiian Sea Salt

I found smoked Hawaiian sea salt at Narrin's Spice and Salt in Cleveland's West Side Market. I had actually bought this a couple of years ago but never figured out what to use it in until now. This particular product has a blend of Hawaiian black and pink salt along with regular white sea salt. If you can't find smoked sea salt, you can also use liquid smoke with regular sea salt.

Kalua Pork
makes about 6 servings

2.5 lbs. pork butt (or shoulder)
2 tablespoons smoked Hawaiian sea salt

Pork Shoulder

Using a steak knife, poke the pork all over and then rub the salt all over.

Kalu Pork

Place the pork in a slow cooker and cook on low for 20 hours, turning once halfway through. Pork is done when it can be easily shredded with a fork.

Kalu Pork

That's it! With only two ingredients and two lines of instructions, you'll be surprised how flavorful the finished product is. During the slow cooking process, all the fat starts to render out of the meat so that at the end, it's cooking in its own juices, a sort of pork confit if you will. While I wouldn't consider the top half of the meat (that isn't sitting in the juices) to be dry, it is drier and less salty than the bottom half. I tried to turn the meat again when it was done to try to even it out, but the pork was so tender, I wasn't sure I could get it flipped without totally mangling it. If I had had more time, I would've shredded all the meat and served it with the reserved juices on the side for people to add if they wanted. Instead, I just brought the whole thing to a potluck and served it with some shredded cabbage sauteed with garlic and rice, letting people shred off as much as they wanted.


Kalu Pork

One year ago:  Mayonnaise Shrimp with Candied Walnuts, Char Siu Bao

Sunday, December 6, 2009

Wah Guay, or Taiwanese Rice Cake with Meat Sauce

Wah guay

It's been a while since I've posted any recipes from my mom, and I just received a random request for this recipe, so I'd like to introduce you to wah guay, of Taiwanese rice cake with meat sauce. The name of the dish is Taiwanese, so I don't even know how to correctly pronounce it, much less romanize the spelling. My mom makes this dish a lot for pot lucks, and it's one of her specialties; I believe she even made up the recipe herself. All the flavoring comes from the meat sauce which is really pretty salty plus a little sweetness, heat, and umami. You need all of the saltiness because the rice cake is just steam-baked rice flour and water. That's it. But if you make it right, it should come out with a thick, custardy texture that jiggles like Jell-o.

Make sure that you use a soy sauce paste for the topping and not regular soy sauce. Soy sauce paste is more viscous and also slightly sweeter than the normal stuff. We used it a lot growing up in dipping sauces for things like boiled dumplings and hot pot because the water that inherently deposits with each dip wouldn't dilute the soy sauce paste as much as it would with normal soy sauce. And if you can find the sweet chili paste, definitely try that. It's barely spicy, but does cut through the saltiness of the meat sauce just enough. In a pinch, I guess a little sriracha sauce could do.

Wah Guay
makes 24 servings

1 (16 oz.) bag of rice flour (not the glutinous kind)
1 lb. ground pork
2 tablespoons vegetable oil
1/4 cup fried shallots
1/4 cup rice wine
2 tablespoons sugar
1/2 teaspoon five spice powder
6 tablespoons soy sauce
Soy sauce paste or chili soy sauce paste
Sweet chili paste (optional)
Cilantro (optional)

Preheat the oven to 350 °F and lightly grease a 9" x 13" casserole dish.

Add 9 cups boiling water

In a large mixing bowl, mix the rice flour with 2 cups of water using a spatula. Continue stirring and add 7* cups boiling water in a continuous stream. Once fully incorporated, transfer to the casserole dish, cover loosely with aluminum foil, and bake for 45-90** minutes until fully set.

In a medium-sized pot, heat oil on high until hot. Add the shallots and fry for 20 seconds. Add the pork, rice wine, sugar, five spice powder, and soy sauce and continue to cook until meat is no longer pink, breaking the pork into smaller pieces. Cover, lower the heat, and let simmer for 2 minutes. Then turn off the heat and let sit covered.

Wah guay

Once the rice cake is done, top with the meat sauce. Drizzle with soy sauce paste and sweet chili paste and top with cilantro, if desired.

I am not a big fan of cilantro, so my mom usually just garnishes three-quarters of the dish with the cilantro, leaving an unblemished quarter for me. Isn't my mommy the best?

One note I should make, I tried making this once in grad school in a toaster oven and the rice cake never really "set". And even my mom has said that it hasn't set correctly for her on a few occasions. Neither of us could figure it out; I'm guessing it has to do with having the perfect ratio of water to rice flour and the ideal conditions for steaming and baking in the oven.

*The original recipe listed 9 cups of boiling water, but after making this recipe recently, I would suggest only using 7 cups of boiling water (in addition to the 2 cups of room temp water).  

**The original recipe listed a 45 minute bake time, but the last time I made this it wasn't set in the middle yet at 45 minutes.  Next time I'm also going to try stirring the mixture maybe every 15 minutes to ensure a more even bake.

One year ago:  Beef Noodle (Soup) and Lu Dan

Tuesday, January 27, 2009

Xiao Long Bao (Steamed Soup Dumplings)

New word of the day: as⋅pic [as-pik]– noun, a savory jelly usually made with meat or fish stock and gelatin.

Of course, when you say it, it sounds like the action of relieving an itch in your butt crack. Anyways, aspic is the secret ingredient for making xiao long bao, or steamed soup dumplings. Because aspic is solid, you can easily wrap it in a dumpling along with the meat filling, and when you steam it, the aspic melts and becomes the hot, gushing soup that squirts out of the bun and burns your tongue.

You can make your own aspic by either making fresh stock and boiling it down and chilling it so that it solidifies or dissolving unflavored gelatin (like Knox) in chicken broth and chilling it. I found out that if I chilled the leftover braising liquid from making my mom's beer duck (sorry, it's a classified recipe now, but you can probably find it on-line somewhere else) it solidifies into an aspic. And since I had made some beer duck the night before and Liv and Ruth were making fresh dumpling skins, I figured we should try to make some xiao long bao as well!

First, to make the homemade dumpling skins, all you need is flour and hot water. Ruth doesn't really use measurements and mostly goes by feel, but I found this recipe on the chowhound forums that works pretty well.

Homemade dumpling skins

Homemade Dumpling Skins
(adapted from here)
makes 56 skins

3 cups all-purpose flour
1 cup boiling water
4 tablespoons cold water
Flour for dusting

Pour boiling water into the flour, quickly stir with a fork or chopstick, mix well, then add the cold water. Mix and knead into a soft dough about 5 minutes.

Cover with damp cloth or paper towel. Set aside and rest for 20 minutes.

Knead the dough for 1 minute and divide into 4 quarters. Roll one quarter into a long snake and pinch into about 1 inch lengths.

Dough waiting to be rolled

Dust flour on work surface. Roll each piece into a circle of about a 3 inch diameter.

Homemade dumpling skin

You'll want to make the edges a little thinner than the center, and for xiao long bao, you definitely want the edges very thin since you'll be doing a lot of pleating. The great thing about making your own skin for wrapping dumplings is that it's much stretchier than the kind you buy so you don't need to worry as much about overfilling. Also, you don't need to add that ring of water around the edge to make the dough stick. In fact, if you get the dough wet (from the filling or whatnot), it doesn't stick as well. If that happens, just set it aside and work on the next one. When it dries out a bit you can try pinching it again to make it stick.

Now back to making xiao long bao. Actually, this is a very un-traditional version since I was just using my mom's pork and cabbage dumpling filling and beer duck aspic. A more traditional xiao long bao filling wouldn't have the napa cabbage or bean thread vermicelli in it and maybe would have shrimp or crab meat in it instead. But I wasn't about to make a separate filling or aspic for this experiment so tough cookies.

Xiao long bao

Joy's Untraditional Xiao Long Bao
makes however many you want

Leftover braising sauce from Mama Huang's Beer Duck, chilled overnight to form an aspic
Pork and cabbage dumpling filling
Homemade dumpling skins (recipe above)
2 large napa cabbage leaves per steamer tray, washed
Ginger, peeled and julienned
Black vinegar

Take a dumpling skin, spoon some dumpling filling into it and spread it out to form a thin layer.

Add a 1/2 teaspoon of aspic. Add a little more dumpling filling on top.

Gather one edge of the dumpling skin and start pleating all the way around, twisting at the end to seal. (Here's a video of Ruth showing us how to do this, with Liv reminding us how to pronounce the gelatinous soup.)

Place two napa cabbage leaves on the bottom of each steamer tray, cutting off the white stem if necessary to fit.

Wrapped xiao long bao

Place the wrapped dumplings on the leaves and steam for 10 minutes.

Steamed xiao long bao

Serve with a dipping sauce of julienned ginger and black vinegar.

Ginger and black vinegar

I didn't really notice the addition of the cabbage and vermicelli in the filling that much because the duck aspic melts into this wonderful broth that almost overwhelms everything else. In fact, I wish the pork filling I used wasn't seasoned because the duck aspic was more than enough seasoning by itself. Just remember to be careful biting into the soup dumplings because the soup may be really, really hot!

Sunday, January 18, 2009

Char Siu Bao

Char siu bao

Liv and Ruth came over yesterday to make some bao zi, or more accurately, Ruth and I made bao zi and Liv washed the veggies, diced the meat, fixed my chairs, set up my HDTV, and cleaned up afterwards. I'm not complaining! =) At first we were going to just make veggie buns (su cai bao) and pork and cabbage buns, but I thought it might be fun to try to make char siu bao. I really like the big, fluffy, white char siu bao you can get a Cantonese dim sum, but after trying to find the recipe on-line, it looks like the only way to get that is with a Vietnamese mix, and I didn't really feel like heading back out to try to find some. And I was all ready to make char siu pork from scratch using a marinade of soy sauce, hoisin sauce, five spice powder, and honey, but then I found a jar of char siu sauce at the Asian grocery store, all mixed up and ready to go. So I copped out and bought that since, after all, this is my first time trying to make char siu, and I was making the dough from scratch.

Char siu

Char Siu Pork

makes enough for 16 buns and one or two servings over rice

1.6 lbs. pork butt or shoulder (you want something fatty, pork loin wouldn't work)
1 (8.5 oz.) jar of char siu sauce

Cut the pork into long strips about 1 cm thick. Using a fork, prick the strips all over to tenderize and also to help the sauce marinate the meat thoroughly. Add 5 tablespoons of the char siu sauce and marinate overnight in the refrigerator.

Pre-heat the oven to 350 °F. Boil 2 cups of water.

Making char siu

Place the pork strips on a grilling rack in a single layer. (I used the racks from my toaster oven with a baking pan underneath.) Add enough boiling water to the bottom of the pan to come to a depth of 1/2 inch. Roast for 10 minutes.

Turn the strips with tongs and baste with more char siu sauce. Repeat every 10-15 minutes until the pork has roasted for at least a total of 30 minutes.

Remove from the oven and allow to cool. Slice the pork on the diagonal against the grain. You can serve the pork with rice and vegetables, on top of ramen, or use as a filling for char siu bao.

Char siu

I liked how the sauce made the pork (artificially) red just like the kind you get from Cantonese restaurants, and the taste seemed similar enough, although the texture wasn't as crispy as what you get at a restaurant. Maybe next time I will try making this without the water bath or on a barbecue grill.

To prepare the char siu pork as filling for char siu bao, you'll need to dice the pork into small pieces and add a little more char siu sauce to bind it together.

Diced char siu

Char Siu Bao
makes 16 buns

1 recipe for hua juan dough, mixed, kneaded, risen once, and re-kneaded
1 lb. char siu pork, either homemade or from a store, diced
2 tablespoons char siu sauce

Toss the diced pork with the char siu sauce, adding a teaspoon or two of warm water if necessary.

Divide the dough into 16 equal parts. Take one piece, roll it into a ball, and flatten with your hands. Stretch the circle out so that it is about the size of your palm. (You could use a rolling pin to do this, but there's no need.)

Add about 1 tablespoon of filling to the middle of the dough. Cup your hand so that the dough comes up around the filling. Using the hand not holding the dough, pinch a bit of the edge, pull it up and away from you. Then grab another piece further away from you and continue around the dough, rotating as you go. Once you have gone all the way around, twist what you have left between your fingers and seal.

Here is a (mostly silent) video of Ruth showing how to do it with her su cai bao:


Place the bun sealed side down on a square of parchment paper. Return the filled buns to the oven (set at the lowest possibly setting) for 20-30 minutes to proof.

Add water to your steamer (I use my stock pot with the pasta insert and steamer insert for two levels) and heat on high. Once the water is boiling, place the buns in your steamer and steam for 13-15 minutes.

Char siu bao

I found that when I made this I had added too much char siu sauce to the diced pork so it was too salty, so I reduced the amount in the recipe above, and I would suggest adding a little water to dilute the sauce even further so that you have enough sauce to bind the meat all together.

If you're not going to eat all the buns right away, you can freeze them in a freezer bag and reheat them individually in the microwave for 1 minute, wrapped with plastic wrap or in a sandwich bag.

Monday, December 15, 2008

Pork and Cabbage Dumplings

Shui jiao

Another favorite thing my mom makes are her dumplings. She also taught me how to wrap them, and I've definitely become something of a dumpling wrapping nazi when I'm at dumpling making parties. I really, really don't like the dumplings without pleats, the ones that just lay there on its side looking so pitiful. Not only do they just not look like real dumplings, they can't sit upright so they take up more space both on the tray and in the frying pan. This is a problem because a) you don't want the fresh dumplings to touch one another or else they will stick together, and b) you want the dumplings to be able to stand upright on the frying pan so that you can fry the bottom and steam the rest (I'll tell you how below).

And while I'm on the topic of personal preferences, I like my dumplings thin-skinned. Not really sure why, other than it's a texture preference. I also do not like the ones with Chinese chives--the flavor is way too strong! I find that pork and cabbage are the perfect fillers because they are innocuous enough to deliver the flavors of the seasonings used. Another weird quirk of mine: I don't like black pepper. But to compensate I use white pepper which is a little less piquant.

A couple of tips for making dumplings:
  • If you don't have a food processor (I didn't have one for years until Carsten gave me his, thanks Carsten!) you can use a blender for the cabbage and scallions, but you'll need to add water so that the cabbage and stuff can move around. Just make sure you squeeze out the water thoroughly afterwards. I haven't tried using a blender to mince ginger, but I have a feeling it wouldn't work properly. Fortunately, there is much less ginger than cabbage to mince, and there's always the chef's knife and a cutting board.
  • To taste test the filling, just microwave a teaspoon or so for about 20 seconds. Yes, this is a tip from my mom. Isn't she the smartest?
  • You want the filling to be moist, but not swimming in liquid because the excess liquid will often seep out of the wrapped dumplings and cause them to stick to each other. If you see a lot of excess liquid in your filling, transfer it into a sieve placed over a bowl (but not touching the bottom of the bowl). The liquid will seep out on its own, and you'll be back in business. Another way my mom combats this issue is to add bean thread vermicelli so that it soaks up some of the liquid. It also adds a wonderful dimension to the texture of the filling.
  • One of the hardest parts of folding a dumpling properly is getting the skin pliant enough. If you have really fresh dumpling skins, this won't be an issue as they'll be elastic enough for you to stretch and fold to your heart's content. If they've been in the fridge or freezer for a while, one way to get the edges softer is to wet them with warm water before you add the filling so they have some time to soften.
  • To keep the freshly-wrapped dumplings from sticking to each other, place a few tablespoons of flour on the tray you'll be using to set the dumplings on after you wrap them. Dip each dumpling in the flour so that the bottom won't stick to the tray. Make sure that when you set them down they don't touch each other. When the tray is filled with fresh dumplings and if you are planning on freezing the dumplings, place the tray in the freezer for about 15 minutes or until they are starting to feel a little stiff. Then pop them in a freezer bag or Tupperware and put back in the freezer.
  • Here is a quick video (thanks Annie for her videography skills) for how to wrap the dumplings. I'm especially proud of the serendipitous Taiwan-shaped imprint I leave in the flour after dipping my dumpling. You can also check out step-by-step photos for how to wrap starting here.

My Mom's Pork and Cabbage Dumplings

makes about 124 dumplings

2.5 lbs. ground pork
1 medium head of napa cabbage, roughly chopped
4 scallions, roughly chopped
1 tablespoon ginger, peeled and roughly sliced
2 bundles of bean thread vermicelli (dong fen)
3/4 cup soy sauce
6 tablespoons sesame oil
2 teaspoons white pepper
3 tablespoons sugar
124 round dumpling wrappers (2 packs)
flour

1) Soak the bean thread vermicelli in a bowl filled with hot water for 15 minutes.

2) While the vermicelli is soaking, use a food processor to mince the cabbage, scallions, and ginger. Transfer to a large mixing bowl by handfuls, squeezing out the extra water.

3) Squeeze out the excess water in the vermicelli and use the food processor to chop into about 1/2" pieces. Add to the mixing bowl.

4) Add the ground pork, soy sauce, sesame oil, white pepper, and sugar to the bowl and mix well. Taste test the filling by microwaving about a teaspoon of the mixture for about 20 seconds and tasting the result. Add more soy sauce, sesame oil, pepper, or sugar as necessary.

5) Prepare plates or trays with flour for dipping and have a small bowl of warm water ready. Hold the wrapper in one hand and use the other to dip a finger in the water and wet the edges of the wrapper. Put a spoonful of the filling in the middle of the wrapper and fold in half. Seal center portion of the joined edges. Make two pleats on both the left and right side of the dumpling. Make sure that the whole thing is totally sealed and then dip the bottom in the flour and place on the tray. Repeat 123 times.

6) Once a tray is filled, if you are planning on freezing the dumplings, place it in your freezer and work on the next tray. By the time the second tray is ready, the dumplings on the first tray should be solid enough to place in a freezer bag. I usually add another tablespoon of flour to the bag just to make sure that nothing sticks together.

Cooking shui jiao

7) To boil the dumplings (i.e. to make shui jiao): bring a pot of water to boiling. Drop the frozen or fresh dumplings in and stir occasionally to make sure they don't stick to one another. After a few minutes, they will start to float, and they are ready once the skin is swollen (a few minutes after they start to float).

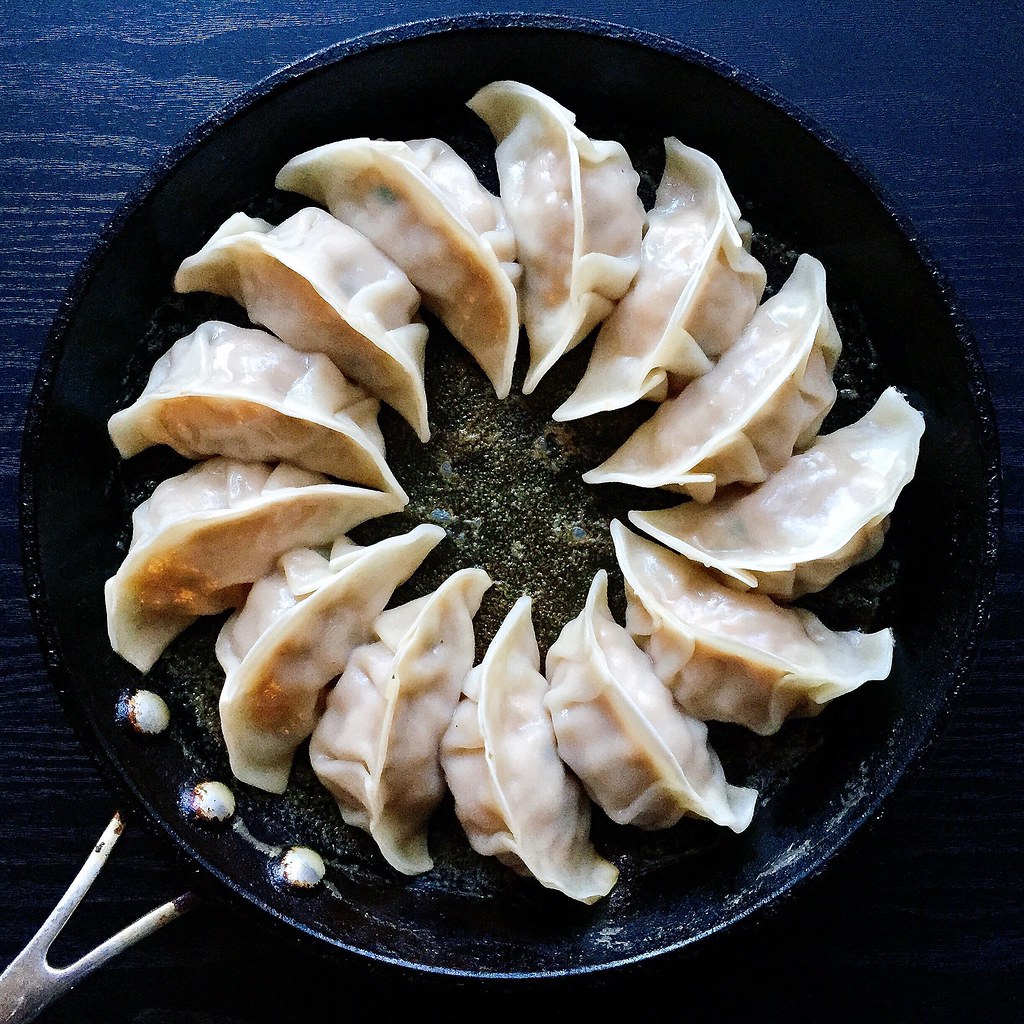
8) To pan-fry the dumplings (i.e. to make guo tie): heat a frying pan on high and add oil once it is hot. Once the oil is hot (I sprinkle a few drops of water onto the pan and wait for them to sizzle and evaporate), add the dumplings one at a time so that they are sitting upright. Once the bottoms are browned, add about a 1/2 cup of water (for 8 dumplings, my usual serving size). If you like your guo tie extra crispy, add 1 T of flour or cornstarch to the water and mix to get rid of the lumps before you add it to the pan. Be very careful as the steam coming off the pan may burn you. Cover and let cook for a few minutes until the water is almost all gone. Remove the lid and let the rest of the water cook off.

9) Serve with a dipping sauce. Straight soy sauce works, but if you have the time, add some vinegar, sesame oil, and sugar.

Making guo tie (pot stickers)