Showing posts with label waffles. Show all posts

Friday, April 22, 2022

Sourdough Discard Okonomiyaki Waffles

I’ve made waffled okonomiyakis before and sourdough discard okonomiyakis before, so I figured it was time to combine the two!  The use of sourdough discard in this recipe not only helps prevent waste, it also adds a little tanginess to the flavor, and adding a pinch of baking soda to the batter will cause it to get light and fluffy!  Using a waffle iron to make the okonomiyaki means that both sides get cooked at the same time (so no awkward flipping) and get a little crispier than just cooking it on a flat top.

You can add whatever fillings and toppings you want (it’s literally the definition of okonomiyaki); my preferences are bacon (easier for me to find than pork belly), and instead of chopping up my own cabbage, I usually grab a bag of pre-chopped coleslaw mix from the grocery store!  For toppings I like the homemade okonomiyakisauce from Just One Cookbook, Kewpie mayonnaise, bonito flakes, furikake, and chopped scallions.

Sourdough Discard Okonomiyaki Waffles
makes two 7’ round waffles

150 g (100% hydration) sourdough discard*
1 large egg
Pinch of salt
Pinch of sugar
Pinch of dashi powder
Pinch of baking soda
200 g chopped cabbage (or coleslaw mix)
4 slices bacon, cut so they’ll fit the waffle iron
Okonomiyaki sauce
Kewpie mayonnaise
Bonito flakes
Furikake
Chopped scallions

Preheat your waffle iron to medium-high.

Mix the sourdough discard, egg, salt, sugar, dashi powder, and baking soda until well combined.  Add the cabbage and mix again.

Place half the bacon on the bottom of the waffle iron and grease the top half.  Add half of the batter on top of the bacon and close the waffle iron.  When it’s golden brown and cooked through, remove from the waffle iron and repeat.  Top immediately with your desired toppings and serve hot.

*I haven't tried this myself yet, but if you don’t have any sourdough discard, you could try mixing together 75 g all-purpose flour with 75 g water and skip the baking soda, but it won’t have quite as much flavor or fluffiness.

Previously:  Hurricane Popcorn Marshmallow Treats
Next:  Taiwanese Braised Pork over Rice (滷肉飯)

Saturday, August 1, 2020

Sourdough Belgian Waffles


Well this is my first post in almost a year, so you know these are worth making!  I've been trying to find a sourdough waffle recipe that I like as much as Smitten Kitchen's essential raised waffles, but none of the ones I tried really had the flavor or texture I was looking for.

Then two things happened:  my friend Arthur sold me his Belgian waffle maker, and I tried making a half batch of  The Kitchen McCabe's sourdough Belgian waffles, only I started the first part of the batter late at night and didn't realize until the following morning that I had only used like a tablespoon of my sourdough starter in the batter instead of a full cup.  But the waffles were AMAZING.  Light and lacy, crispy on the outside and custardy on the inside, with enough flavor that you could eat it without any syrup or butter.


I needed to make sure I could replicate the waffles again, so I asked for testers on my Instagram page, and thankfully quite a few people responded.  Out of ~50 testers, 80% loved the waffles whereas the rest were less impressed.  The chief complaint was that they never got crispy or lost their crispiness too soon.  When I tried the recipe again myself, I noticed the same thing, but I did find that reheating the waffles in my toaster oven made them much crispier.

Another comment was that they were too salty.  I realized that I had listed the kosher salt by volume instead of weight, and since I use Diamond Crystal kosher salt, another other kind of salt was going produce a must saltier waffle.  Lesson learned!

Since such a small amount of starter is used in the recipe, it doesn't seem to matter much what kind of starter you use, but for what it's worth, my starter I keep is 100% hydration and fed with half AP flour and half whole wheat flour.  I tested these waffles once with more sourdough starter and once with milk instead of water.  I couldn't really tell too much of a difference with the former but found the latter to be even softer than the ones with water and with no added flavor.

All in all, I'd say these are the perfect waffles for someone who doesn't particularly like the flavor of sourdough in their waffles, but has sourdough starter and no milk, haha.  Since such a small amount of starter is used in the batter and it's such a runny batter, the rise you get is more from the baking soda in the waffle iron than from the sourdough.  It seems to help if you have one of those Belgian waffle makers that you flip too, but people had success with regular waffle irons, too.  This recipe doubles quite easily too, if you have more mouths to feed.


Sourdough Belgian Waffles
makes about 3-4 Belgian waffles, depending on the size of your waffle iron

10-50 g sourdough starter (does not need to be active starter; discard is fine)
120 g (1/2 cup) room temperature water
90 g flour (I like to use 25 g whole wheat flour + 65 g all-purpose flour)
42 g (3 tablespoons) melted butter, slightly cooled
1 g (1/2 teaspoon) Diamond Crystal kosher salt
15 g (1 tablespoon) honey
1 large egg, lightly beaten
4 g (1 teaspoon) vanilla extract
1/4 teaspoon baking soda

The night before, mix together the sourdough starter, water, and flours.  Cover and let sit at room temperature overnight.

In the morning, add the melted butter, salt, honey, egg, and vanilla extract.  Start heating up your waffle iron.  When it is ready, stir the baking soda into the waffle batter and mix well.  Lightly grease the iron and add ~1/2 cup batter to the iron and cook until golden brown.  Serve immediately or freeze.


P.S  If you'd like a really simple recipe for blueberry syrup, you can find it in the caption of this Instagram post.

Previously:  Snowskin Cake Truffle Mooncakes

Wednesday, July 31, 2019

Mochi Waffles


I can't believe it's the end of July, and this is the first time I've posted on here this year!  I've been posting less and less on here because I've been cooking mostly from recipes on here already or using recipes from cookbooks.  So the fact that I'm posting this recipe means it's a good one.  =)

I've made mochi waffles before using mochi blocks, but these are made from scratch.  I was inspired by Snixy Kitchen's chocolate mochi donuts which were in turn inspired by Third Culture Bakery's mochi muffins.  I figured that by increasing the surface area, you'd get a better crispy crust to chewy innards ratio (and I was right)!  I also like that making the batter from scratch means you can play around with the flavors more.  I tried making a pandan version and a black sesame version, but I think it would be easy to adapt this recipe to make a chocolate or matcha version as well!


Mochi Waffles
makes 8

16 oz. sweet glutinous rice flour
1 cup sugar
2 teaspoons baking powder
1/2 teaspoon kosher salt
2 tablespoons black sesame seeds or 1/4 teaspoon pandan extract
4 tablespoons butter, melted and cooled to room temperature
13. oz can of coconut milk, well shaken
2 beaten eggs, room temperature

Mix the dry ingredients in a large bowl.  If making the black sesame flavor, grind the sesame seeds (I used my coffee grinder) and add to the dry ingredients.

Whisk the wet ingredients together, then add to the dry ingredients and mix until smooth.  Since this is a gluten free recipe, you don't need to worry about it getting tough if you mix too much.  Batter will be fairly thick.

Preheat waffle iron to medium.  Use a 1/2 cup measure to scoop batter onto the waffle iron and cook until lightly golden.  The waffle will be soft and floppy coming out of the iron but will crisp up a bit upon cooling.  Serve immediately with sweetened condensed milk and fruit if you like.  Leftovers can be stored at room temperature in an airtight container for a day.  Reheat in a toaster oven before serving.


I used my Cuisinart classic waffle maker to make these, so the settings and quantities might have different results depending on your waffle maker.

Next:  Snowskin Cake Truffle Mooncakes
Previously:  Bacon Fat Scallion Pancakes

Monday, January 9, 2017

Marion Cunningham's Yeast-Raised Waffles


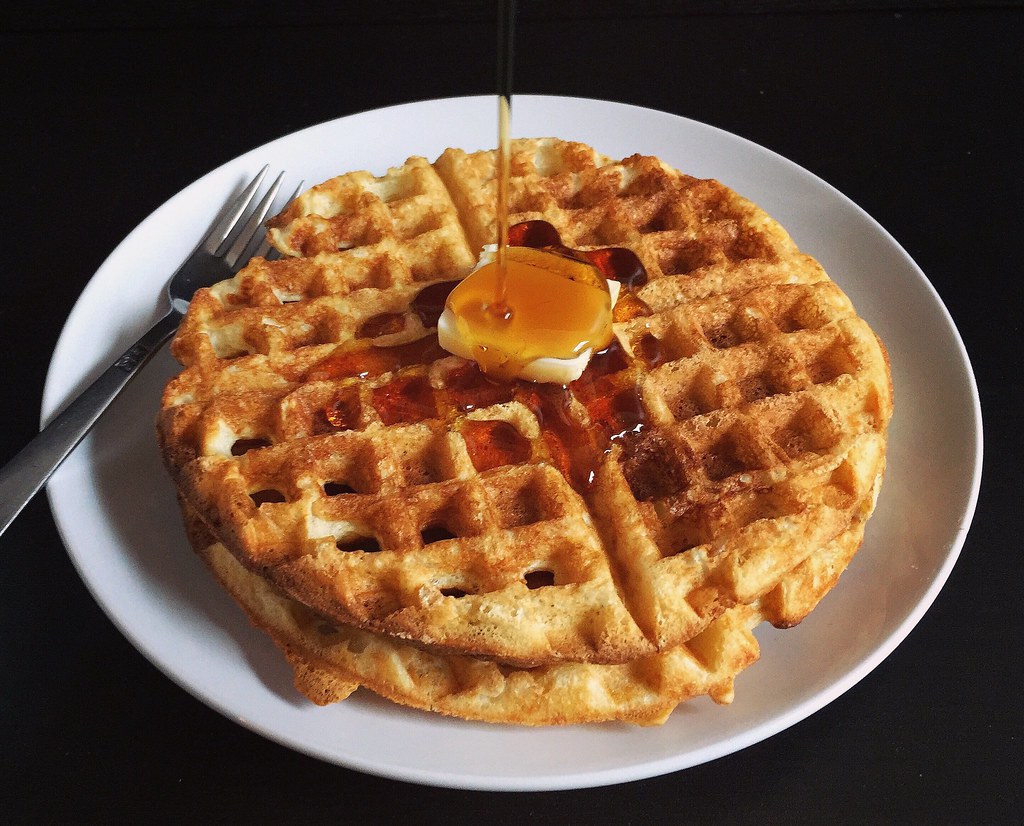
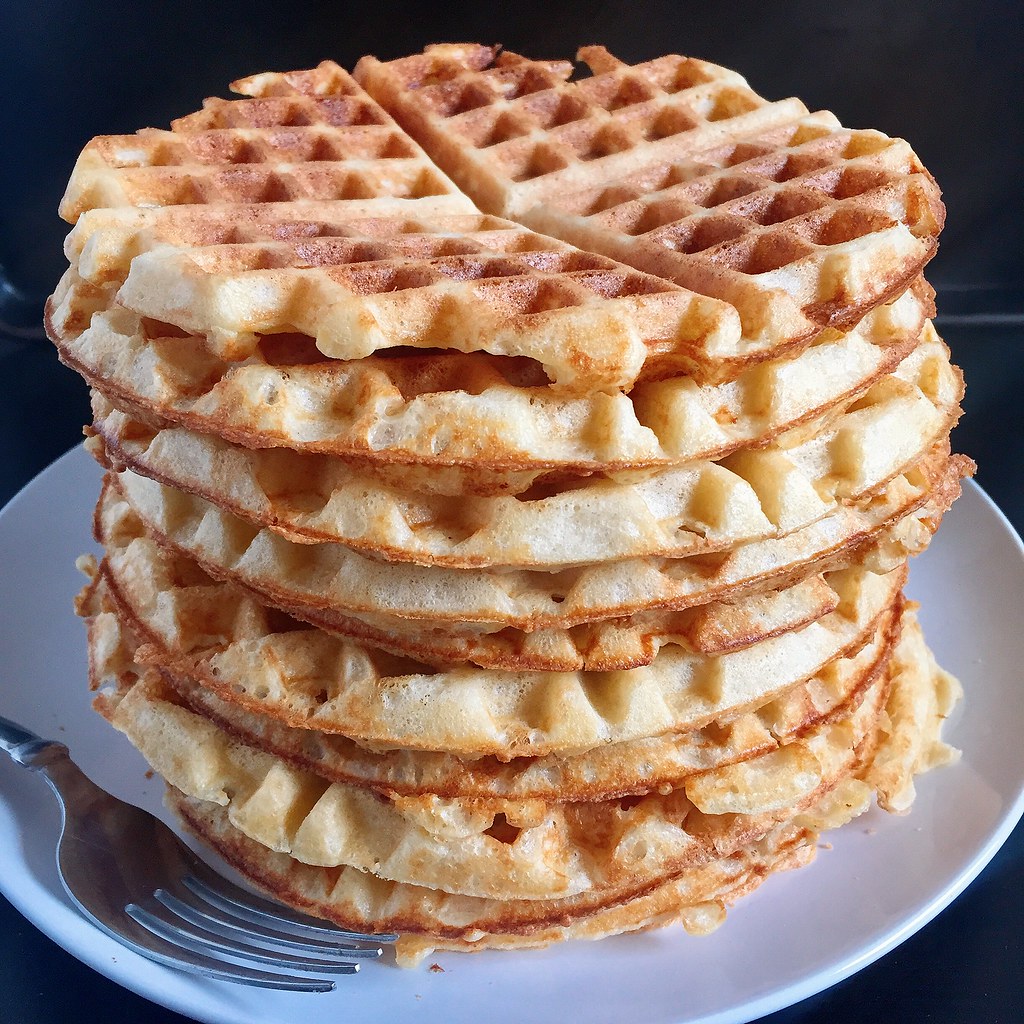
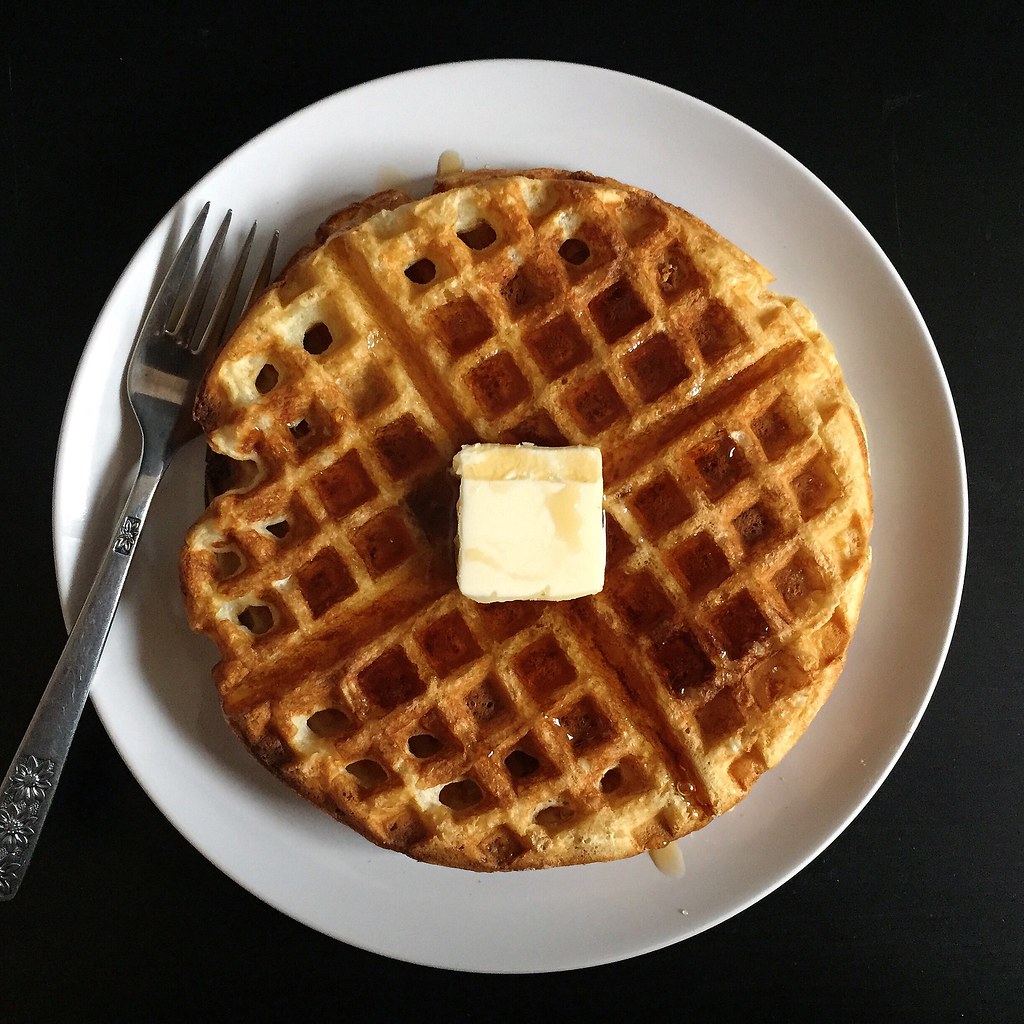
I've posted about overnight waffles before, but I wasn't very impressed with them so I've been making Waffles of Insane Greatness instead whenever I want waffles.  Then I discovered this recipe and everything changed.  I still love the Waffles of Insane Greatness, especially if I want waffles now and not tomorrow, but the flavor you get from letting the yeasted batter sit overnight is so amazing and complex and worth the wait.  Unlike the overnight waffle recipe I tried previously, these waffles stay crispy, especially if you keep them in a warm oven while you make the rest of the batch.  They also freeze very well, which is good because the recipe makes quite a lot of waffles.  I just pop them in my toaster oven in the morning like an Eggo waffle.

The original version of the recipe has you letting the batter sit out overnight on the counter at room temperature.  If that freaks you out, you can always let it sit in the refrigerator overnight, but you will lose a little of the flavor.  The first time I made these, I read the recipe wrong and added the eggs with everything else so I let it rise in the fridge.  The second time I added the eggs after letting it sit out overnight, and both times were pretty great so just do what you feel comfortable with.  The recipe also scales up and down pretty well; I've made a half batch when I've only had 1 egg as well as a 6x batch for a ski trip!


Marion Cunningham's Yeast-Raised Waffles (from The Breakfast Book)
makes about 12 waffles, depending on the size of your waffle iron

1/2 cup warm water, about 100°F
1 packet (about 2 1/4 teaspoons) active dry yeast
2 cups milk
1/2 cup unsalted butter, melted
1 teaspoon kosher salt
1 teaspoon sugar
2 cups all-purpose flour
2 large eggs, lightly beaten
1/4 teaspoon baking soda

Sprinkle the yeast over the warm water in a large bowl and let dissolve while you measure the rest of the ingredients.  Add the milk, melted butter, salt, sugar, and flour and whisk until combined.  Cover and let sit overnight on your counter or in the refrigerator.

In the morning, whisk in the eggs and baking soda.  Cook in a waffle iron and serve warm.  Waffles will freeze well; just reheat in a toaster or toaster oven.


Next:  Salted Egg Yolk Mochi Ice Cream
Previously:  Chocolate Babka
Two Years Ago:  Peanut Butter Noodles
Three Years Ago:  Banoffee Pie
Seven Years Ago:  Banana Bread Yeasted Waffles
Eight Years Ago:  Buckeyes

Monday, April 18, 2016

Will It Puffle?


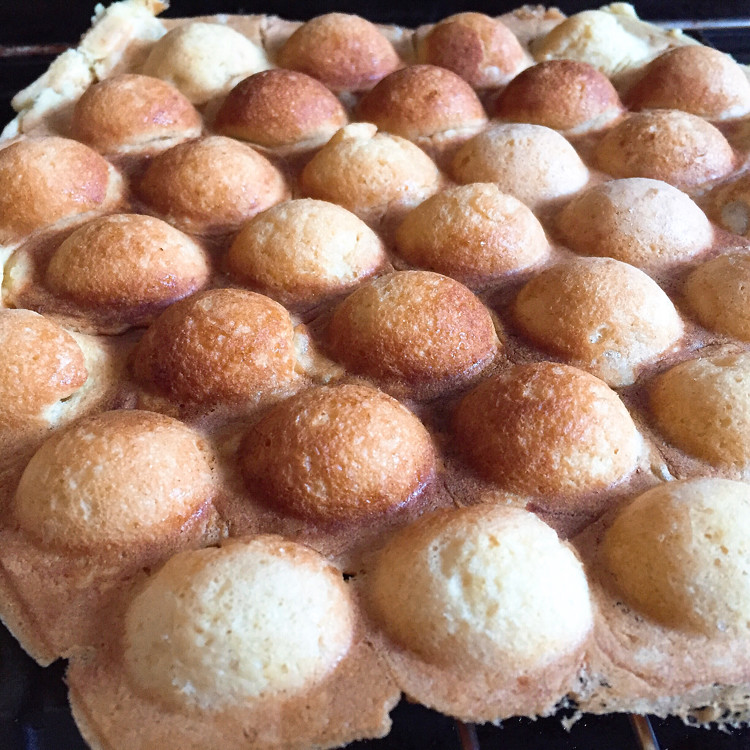
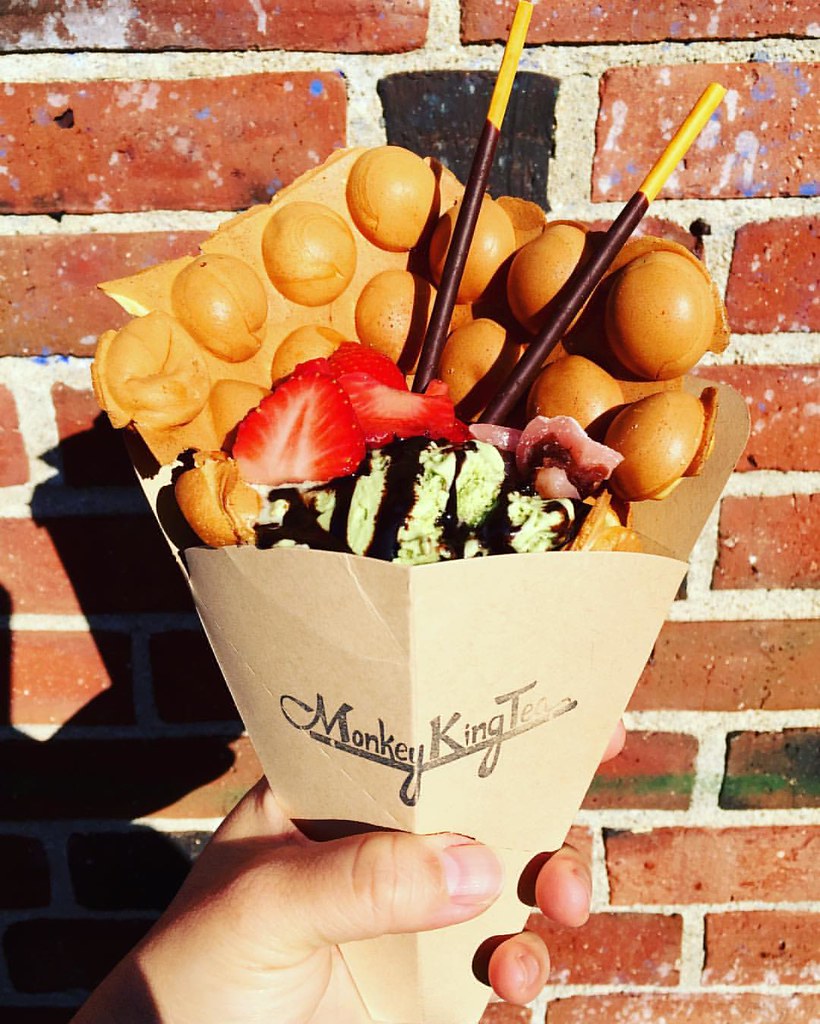
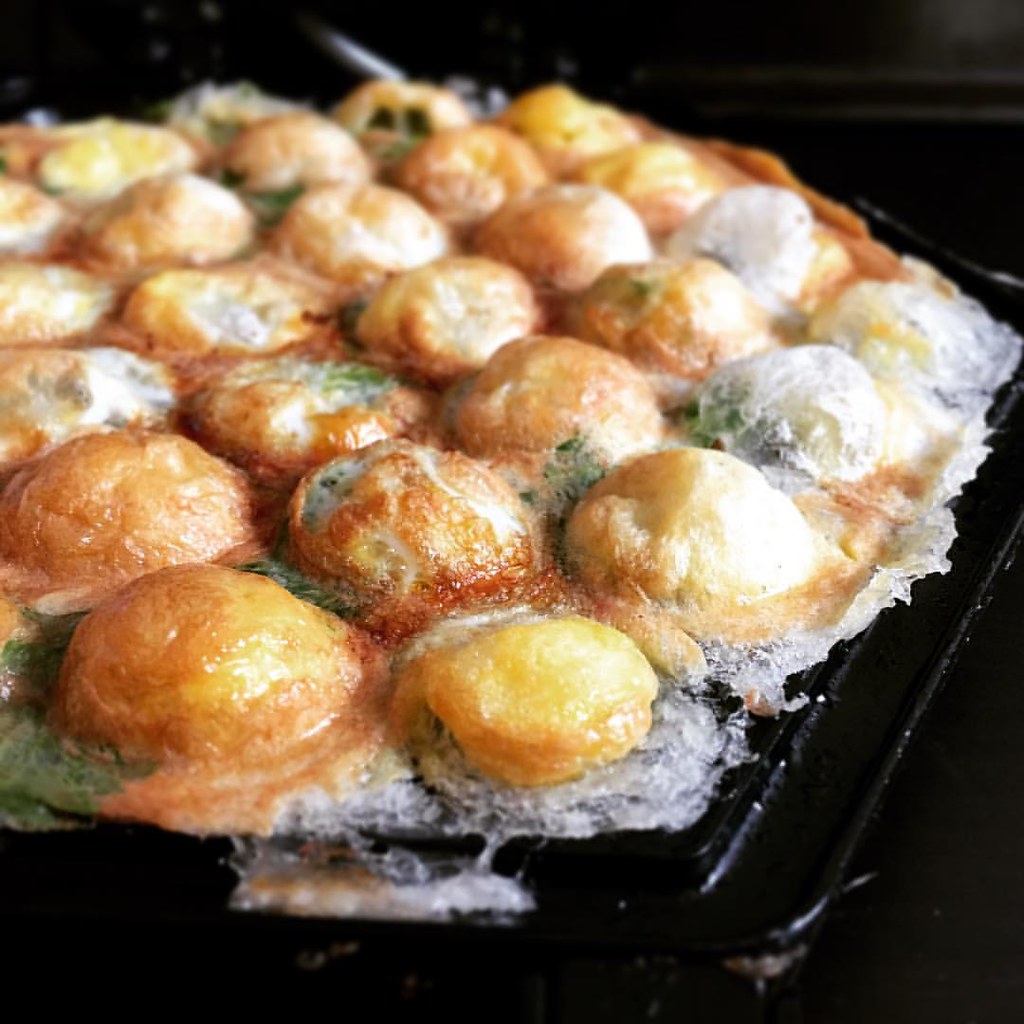
I was so excited when I received an electric bubble waffle maker from my brother and sister-in-law for my birthday last year.  I had visions of making the eggettes I used to get from NYC's Chinatown and SF's Genki and maybe even making a puffle cone a la Cauldron Ice Cream or Monkey King Tea (below).  But after trying the recipes I found on-line for eggettes and puffle cones (basically the same recipe) I'm still not satisfied with the results.  I even played around a little with the ingredients but nothing I made recreated the aroma, texture, or taste I was looking for.


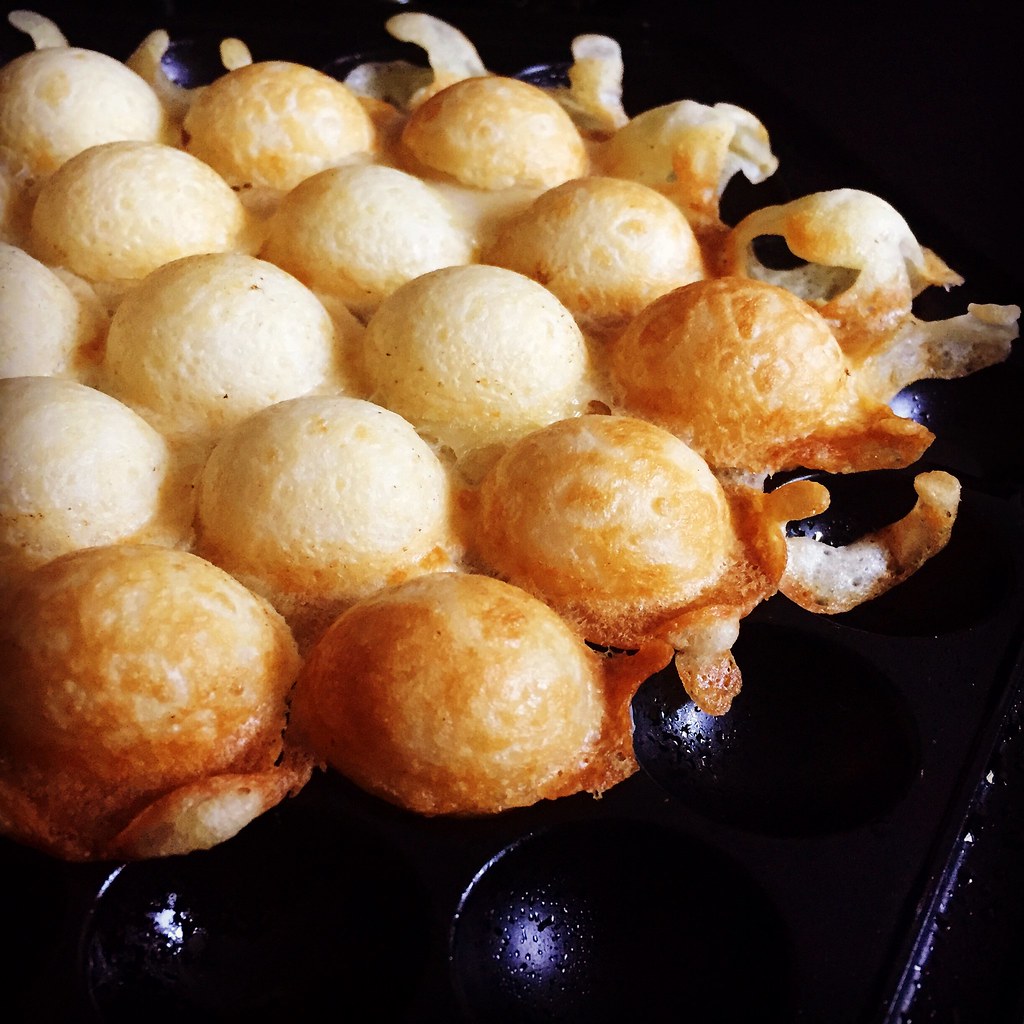
Not to be deterred, I decided to experiment with some other batter-based foods I had made before.  First up was pão de queijo (Brazilian cheese bread).  Since some of the eggette recipes used a little tapioca flour, I figured it would be fun to try an entirely tapioca flour based batter in the bubble waffle maker.  The results were incredible!

https://www.flickr.com/photos/joyosity/24500005166/in/dateposted-public/

The bubble waffle maker was able to encapsulate the chewy, airy bread in a crispy crust in a fraction of the time it takes to bake the pão in the oven.  And it's sooooo cute!

https://www.flickr.com/photos/joyosity/26219396352/in/dateposted-public/

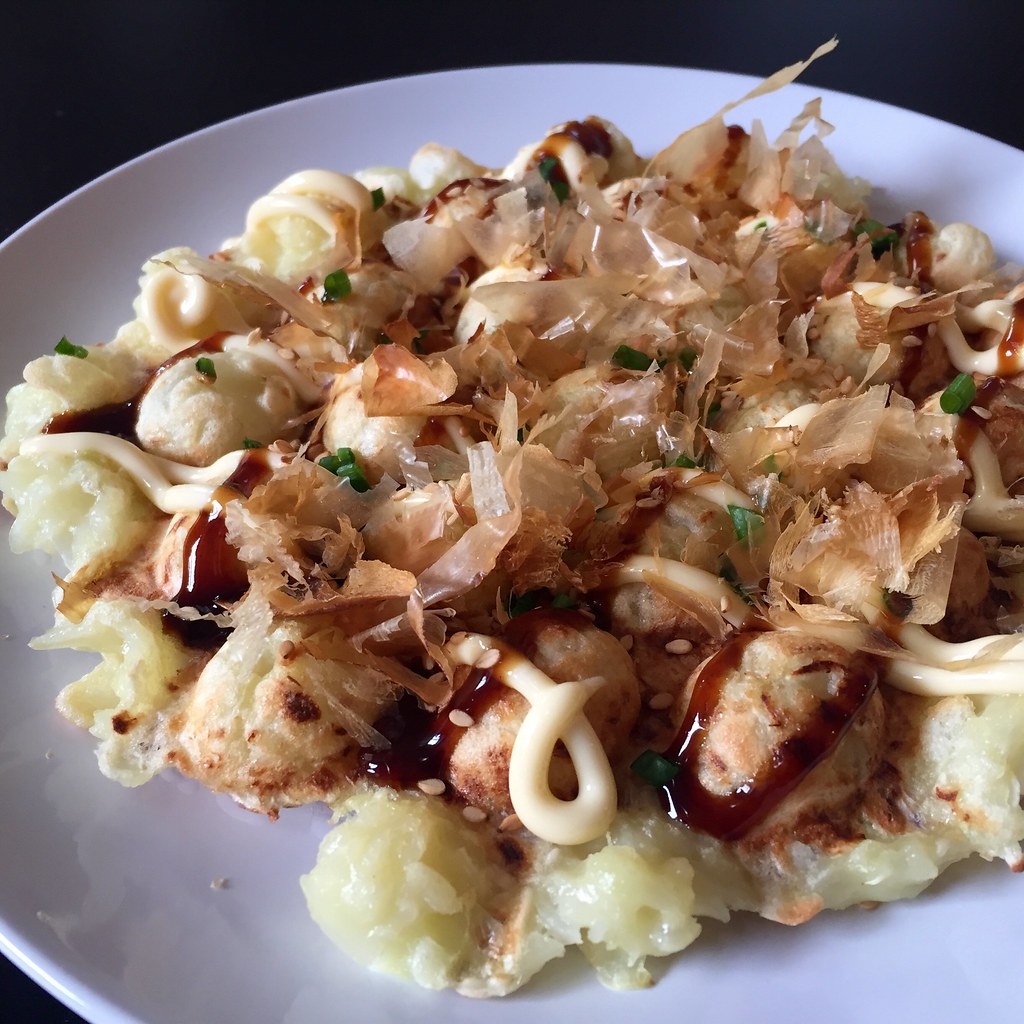
I also tried Korean pajeon (above) and Japanese okonomiyaki (below), and the results were decent, but not really worth writing about.

https://www.flickr.com/photos/joyosity/26307581532/in/dateposted-public/

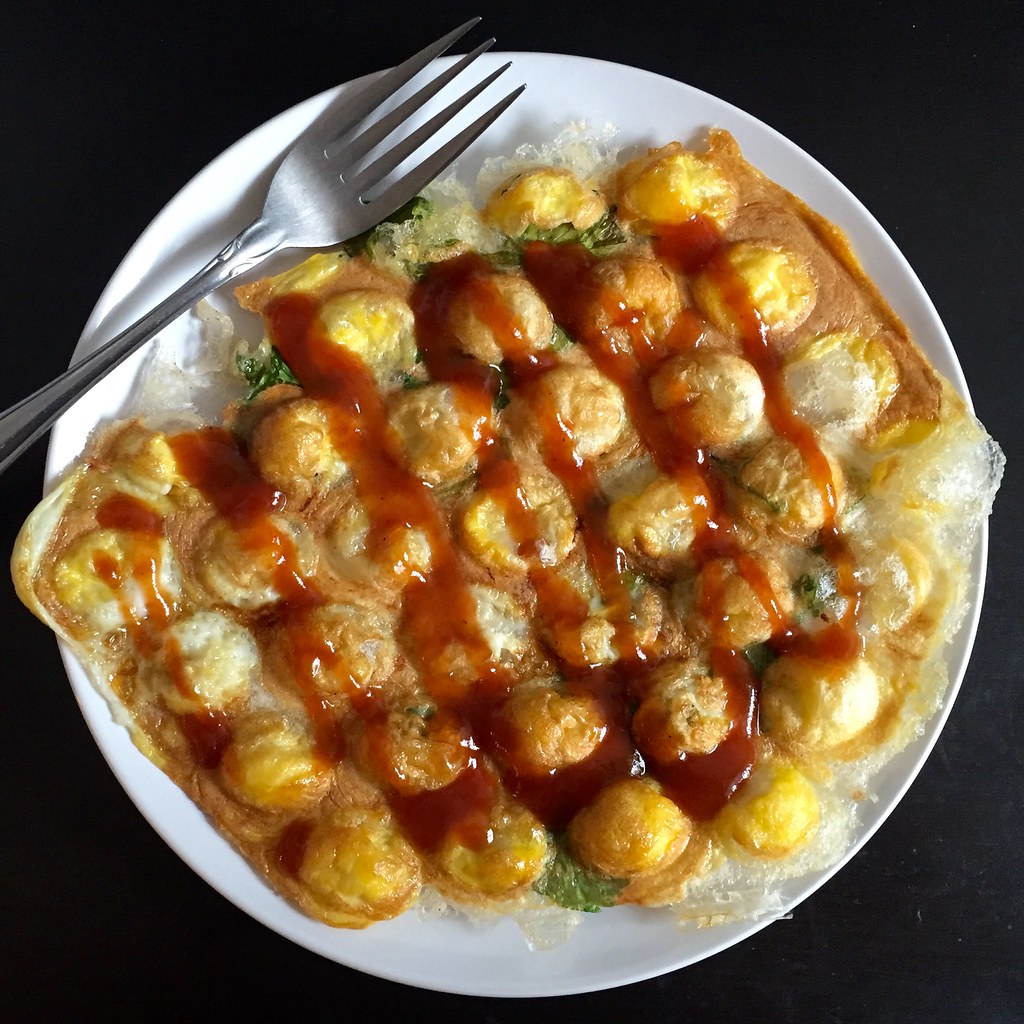
Probably my favorite use of the bubble waffle maker has to be the Taiwanese oyster omelette.  Since I remember the sweet potato starch batter to be super sticky, I added a half tablespoon of oil to the batter itself and made sure to oil the waffle iron well before adding the batter.  And even though I took those precautions, I was still surprised when the omelette came out rather easily from the iron.  

https://www.flickr.com/photos/joyosity/26169045712/in/dateposted-public/

As with the pão de queijo, I loved how the outside of the batter got super crispy but still stayed moist inside.  And the shape of the bubble waffle maker gave it a lot more nooks and crannies for an even higher crispy to chewy ratio!


So does anyone else have a good eggette recipe or recommendation for what to try next in the bubble waffle maker?

Next:  Sesame Soba Noodles with Avocado Rose
Previously:   The 4-Hour Baguette
Last Year:  Gordan Ramsay's Sublime Scrambled Eggs - 2 Ways
Two Years Ago:  Nutella Mini Crepe Cakes
Six Years Ago:  The Best Scones in the World
Seven Years Ago:  Samoa Cupcakes and the Cupcake Exchange

Monday, October 20, 2014

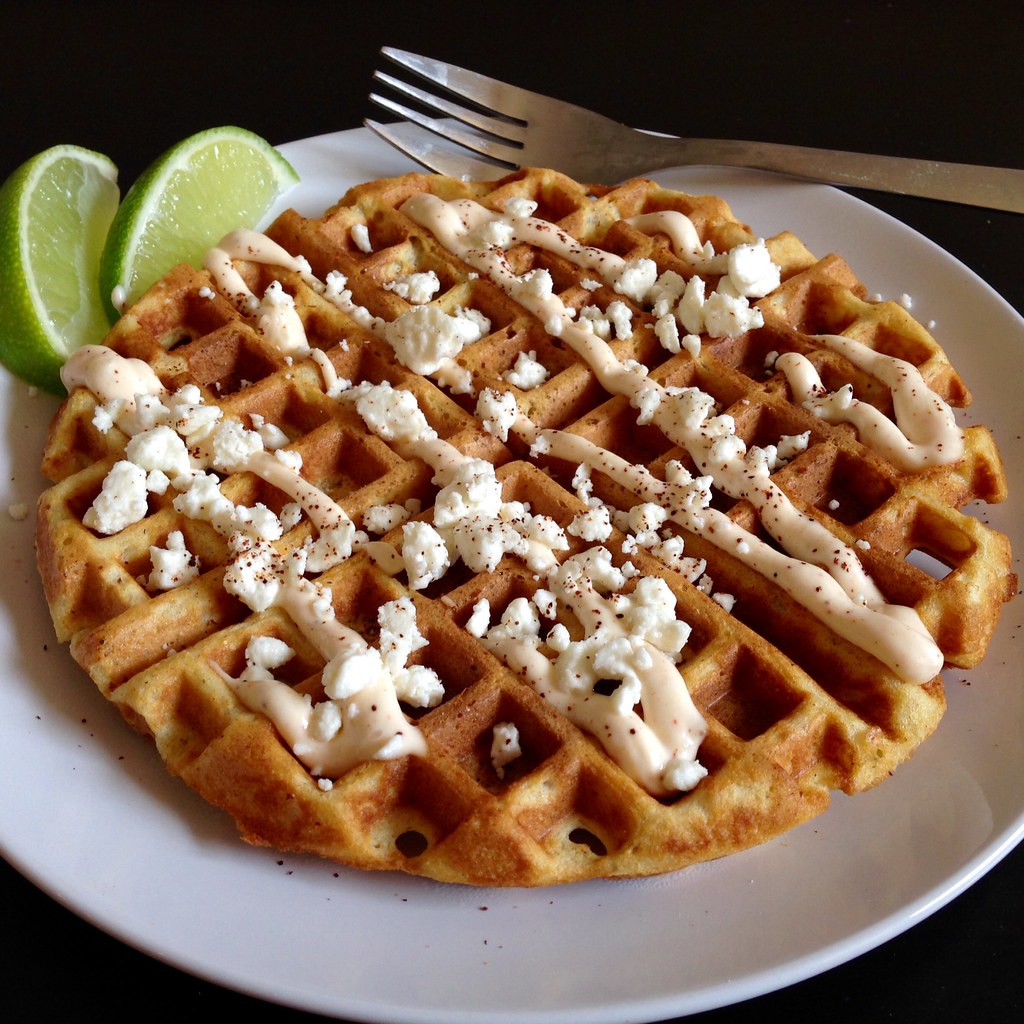
Elote-Style Cornbread Waffles

https://www.flickr.com/photos/joyosity/15381999597/

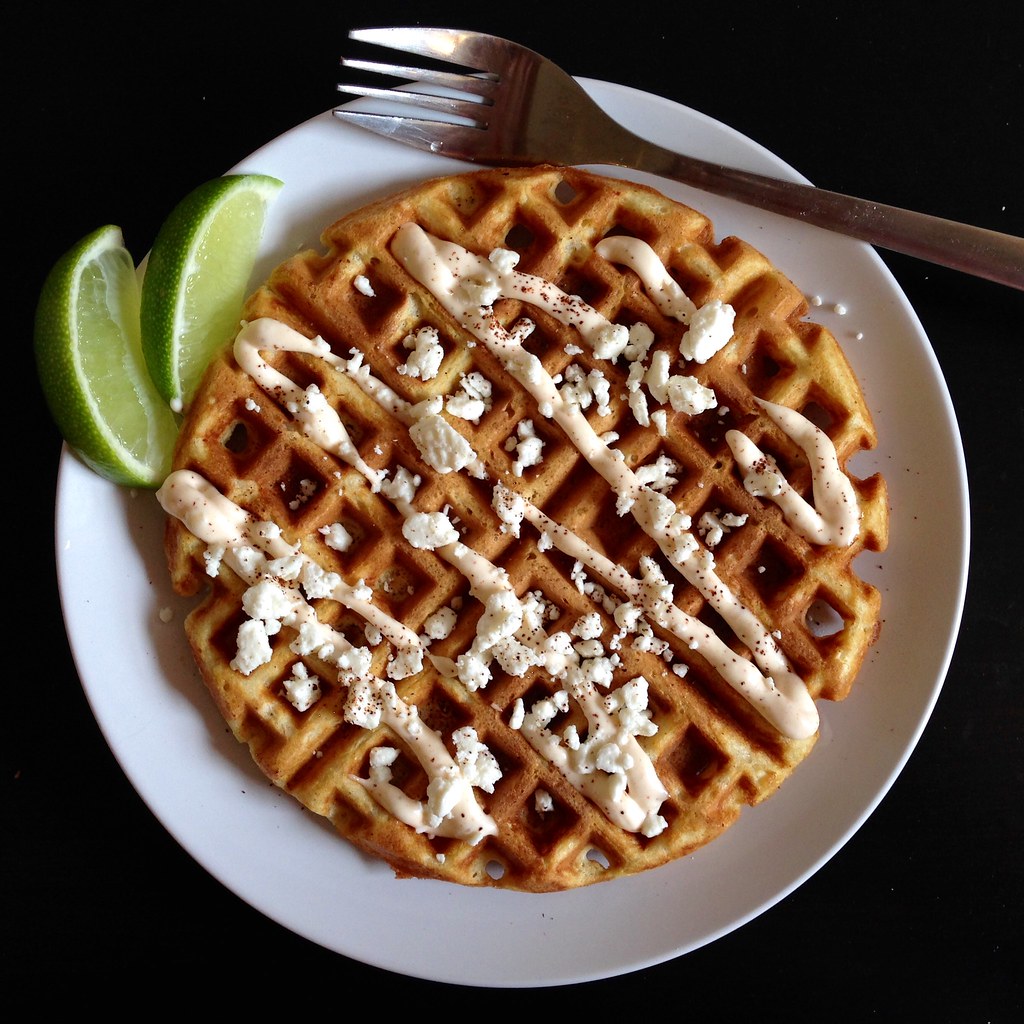
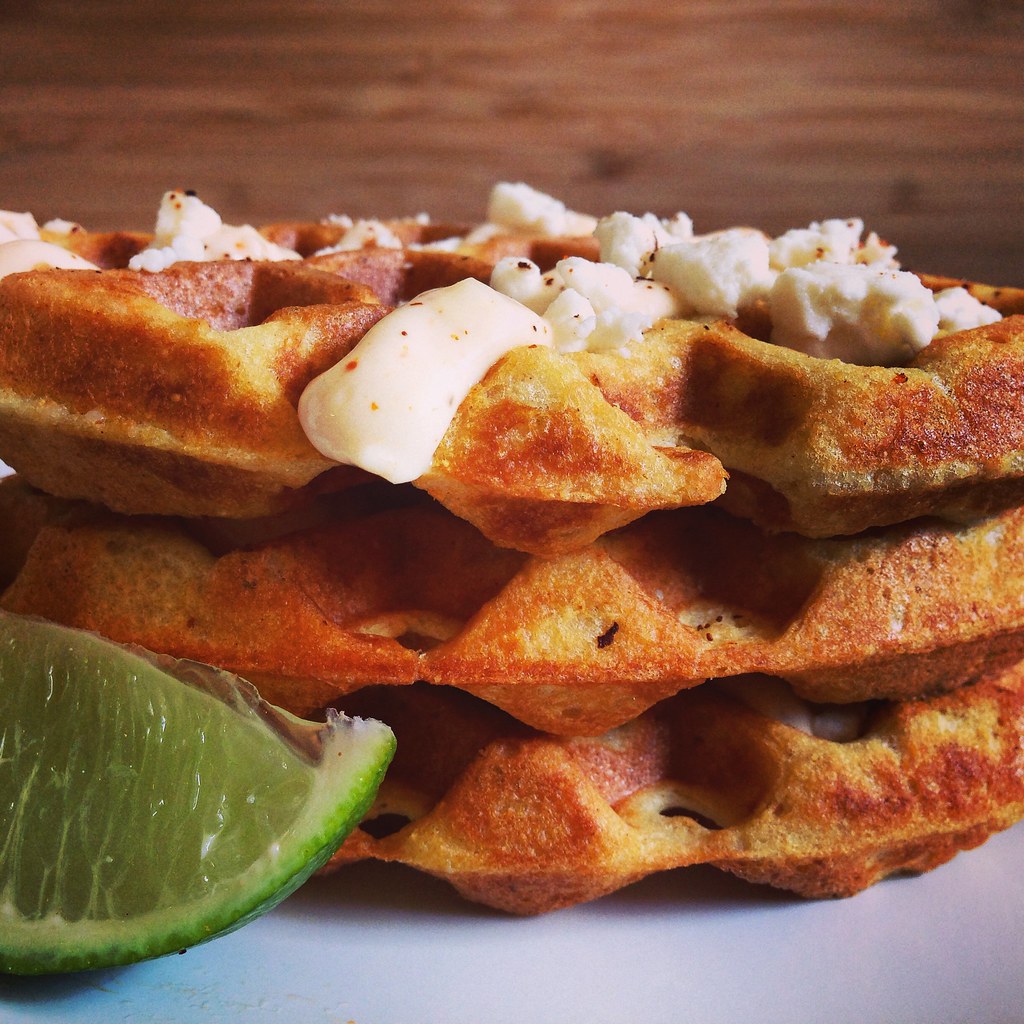
In case I haven't mentioned how much I love my church, Highrock, recently, here's another reason:  we recently had a fundraiser for the Tokyo Life Church called Highrocktoberfest.  How awesome is that?  In addition to a competition for the best home brew, there was also a chance to win a prize for the best cornbread.  At first I thought about making a sweet cornbread with honey butter, but then I came up with the idea to make cornbread waffles topped with the seasoned mayonnaise and crumbled cheese that usually goes on elote (Mexican grilled corn)!

https://www.flickr.com/photos/joyosity/15544306646/

I used the crunchy cornbread waffle recipe from King Arthur Flour and made the same mayo I had used before for elote, except I added a squirt of sriracha this time to add a bit more color and flavor.  I couldn't find any cotija cheese so I just substituted with feta.  I'm happy to say I won the cornbread competition with this recipe!

https://www.flickr.com/photos/joyosity/15568007485/

Elote-Style Cornbread Waffles (adapted from King Arthur Flour)
makes about 10 waffles

For the waffles:
1 3/4 cups buttermilk
2 eggs
5 tablespoons butter, melted and cooled
1 1/2 cups all-purpose flour
1 cup yellow cornmeal
2 tablespoons sugar
2 teaspoons baking powder
1 teaspoon baking soda
1 teaspoon salt

For the toppings:
1 cup mayonnaise
2 garlic cloves, minced
Juice from 1/2 a lime
Cayenne pepper
Chili powder
Paprika
Sriracha (optional)
1 cup crumbled cotija or feta cheese

In a medium-sized mixing bowl, whisk together the buttermilk, eggs, and melted butter or oil. In a separate bowl, blend together the dry ingredients, then quickly and gently combine the wet and dry ingredients. Let the batter sit for 10 minutes, to allow the cornmeal to soften.

In the meantime, mix the mayo, minced garlic, and lime juice together.  Add cayenne pepper, chili powder, paprika, and sriracha (if using) to taste. 

Drop the batter by 1/3-cupfuls onto a hot waffle iron and bake until the waffle iron stops steaming.  Top with the spicy mayonnaise and crumbled cheese.  Sprinkle on more cayenne pepper and/or chile powder as desired, and serve with lime wedges.

https://www.flickr.com/photos/joyosity/14947261064/

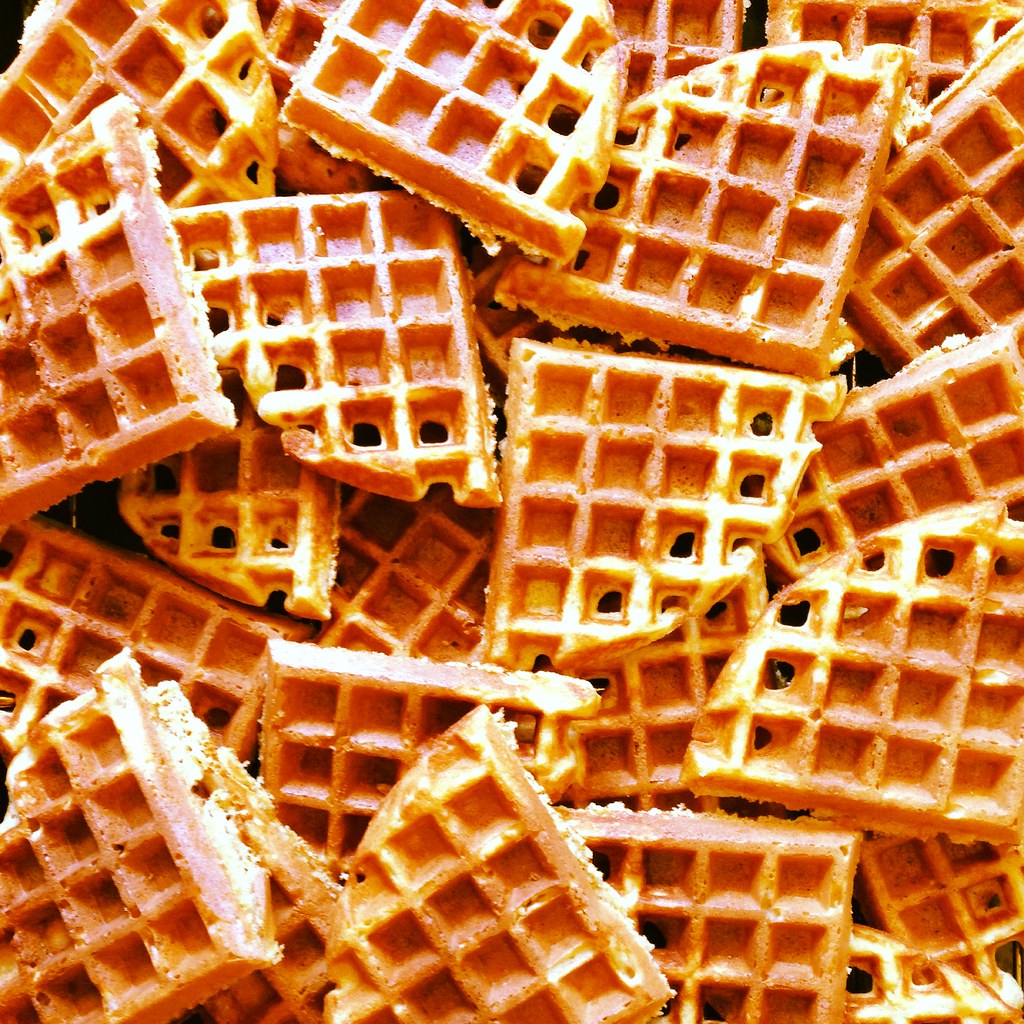
The waffles are best fresh out of the waffle iron because they start to get soft once they get to room temperature.  You can always reheat them in the oven to get them to crisp up again.  Since I was making these for a lot of people, I ended up cutting each waffle into eighths and serving them nacho-style.  If you have the corn-shaped pans for making cornbread sticks, I think it would be really cute to dress those up elote-style as well!

Next:  Nigel Slater's Chocolate Beet Cake
Previously:  Jeni's Salty Vanilla Frozen Custard
Two Years Ago:  Cranberry Royale Sorbet

Friday, January 15, 2010

Banana Bread Yeasted Waffles

When I was originally looking for yeasted waffle recipes, I stumbled across this one for Banana Bread Waffles. I know, right? What an awesomely yummy idea! The more I thought about it, the more I was tempted to skip the waffle face off and just make these. But ordinances must be followed, so I saved this one for last. The only thing I changed was that I added some walnut pieces to the batter right before cooking since I had some lying around, and since I didn't have ground ginger or ground cloves, I added a pinch of allspice. Oh, and I halved the original recipe since I only had 2 bananas.

P1022297

Banana Bread Yeasted Waffles (from seven spoons)
makes 2-3 servings

2 tablespoons unsalted butter, melted
1/2 cup plus 1 tablespoon milk
1/2 teaspoon vanilla extract
1 cup all-purpose flour
1/2 tablespoon dark brown sugar, packed
3/4 teaspoons yeast
1/4 teaspoon salt
1/4 teaspoon ground cinnamon
1/8 teaspoon ground nutmeg
Pinch of allspice
1 egg, beaten lightly
1/2 cup mashed ripe banana, about 1 1/2 bananas
1 tablespoon Greek yogurt
1/4 cup walnut pieces (optional)

In a small bowl, whisk together the butter, milk and vanilla. Set aside, the mixture should be warm but not hot.

In a large mixing bowl, sift or whisk together the flour, brown sugar, yeast, salt and spices. Pour the wet ingredients into the dry, whisking until smooth. Stir in the beaten eggs. Cover the bowl loosely and refrigerate for at least 12 hours, but up to 24.

About 30 minutes before you want to make waffles, take the batter out of the refrigerator to come up to room temperature slightly. It should be doubled in size and the surface will be covered in bubbles.

When ready to begin, stir the sour cream into the mashed bananas and then mix the fruit and walnuts (if using) into the batter. It will deflate, but use a light, quick hand to thoroughly combine.

Heat your waffle iron and bake the waffles as per the manufacturer's instruction.

Serve with maple syrup and additional slices of fresh bananas and walnuts, if desired.

Leftovers can be frozen and then reheated in a toaster or in an oven; keep the heat low and an eye on them though, they brown quickly.

P1022300

I found that I needed more than 30 minutes at room temperature for the batter to double, so I stuck it in a slightly warm oven for 15 minutes. In the end, I found these waffles to be more soft than crispy and the flavor wasn't very memorable. In fact, right now I'm thinking that griddling a slice of real banana bread on a waffle iron might be even better....

One year ago:  Nian Gao (Mochi Cake), Red Bean Ice Cream

Wednesday, January 6, 2010

Gaufres de Liege (Belgian Waffles)

I know I had said I'd try to post something more colorful, but I fear that won't be happening anytime soon. Because I have become obsessed with making waffles. Even after deciding I liked The Waffle of Insane Greatness better than Mark Bittman's Overnight Waffles, which many people said were the best waffles ever, I decided to give yeasted waffles another chance. Especially after I saw this post for "The Best Waffle You'll Ever Eat: Gaufres de Liege" on The Kitchn in one of their end of the year roundups. You can probably tell that I am quite influenced by hyperboles.

P1022286

I really was excited to find a recipe for a real Belgium waffle that used turbinado sugar instead of pearl sugar since it's ever so much easier to find turbinado sugar in Boston. I didn't have any bread flour so I used regular all-purpose flour instead. I can't tell you how much of a difference it made, but I definitely did end up with a dough more than a batter at the end. The post mentions that any waffle iron should work as long as "the pockets are fairly deep". I'm not sure my waffle iron falls into that category, but I didn't notice any uncooked portions so don't let that deter you. Lastly, the recipe calls for the use of a stand mixer. I don't have a stand mixer. I'd love a stand mixer. I will gladly accept a stand mixer. But until then, I have a hand mixer, and that's what I used. Since the recipe did mention that the dough would be quite stiff, I switched out the usual beaters I use for batters and used the special beaters that the manufacturers stated would work better for stiff doughs. It worked, but I can definitely see why a stand mixer (or an extra hand) would have been ideal.
Gaufres de Liege (from Chichi on The Kitchn)
makes 12 small waffles
6 tablespoons warm milk (no hotter than 110°F)
1/2 teaspoons granulated sugar 

2 teaspoons instant yeast
1 1/2 cups (230 grams) bread flour, sifted (all-purpose flour seemed to work fine for me)
1 teaspoons cinnamon
2 teaspoons vanilla extract
1/2 teaspoons salt
1 medium egg
1 egg yolk
1/2 cup (4 oz) unsalted butter, at slightly cooler than room temperature
140 grams turbinado sugar, or pearl sugar if you choose
Cooking spray
Dissolve the sugar in the warm milk; then add the yeast. Make sure that the milk is not too hot, lest it kill the yeast instead of promoting its growth. Place a plate or some kind of cover on top of the bowl with the milk, sugar and yeast. Set aside for about five minutes. When you check on it, the yeast should have bubbled up, looking light brown and spongy.
Meanwhile, mix the sifted bread flour with the cinnamon, vanilla extract, and salt in the bowl of a stand mixer. Pour in the yeast mixture; then add the whole egg and egg yolk. Mix on medium speed until it is fully combined. The dough will be yellow and stiff, yielding only slightly to a poke.
Cover the mixing bowl with plastic wrap and let the dough rest in a warm place for about thirty minutes.
Beat in the butter piece by piece; you do not have to wait for the prior piece to be fully incorporated before adding the next. When the dough has incorporated about half of the butter, the mixture will be like a very thick, somewhat broken-up paste. If you keep engaging the mixer on medium-high speed, the dough will eventually become a cohesive whole, looking smoother and more feeling more elastic. Scrape the sides of the bowl if needed.
Kneading very gently, incorporate the sugar crystals just enough to get them evenly distributed. Work quickly so as not to soften the buttery dough too much.
Divide the dough into a dozen equal pieces, gently forming them into balls.
Place the balls of dough on a cutting board in a warmish place for fifteen minutes or so. During the last two minutes of this resting time, preheat your waffle iron until it is very warm, but not hot.
P1022283
Spray the griddles with cooking oil. Place each ball of dough in a whole square or section of the waffle iron. Like regular waffle batter, the dough will start to puff up. Cook the waffles until the surface is golden to dark brown. Be sure that the waffle iron you are using is appropriately deep, or else the interior of the waffle will not be cooked through.
Set the waffles on a cooling rack as they come out of the iron to promote a crispy exterior. Serve immediately with a sprinkling of powdered sugar.
Any leftover waffles, if they are not dark brown, can be carefully re-cooked in a toaster for approximately thirty to sixty seconds. Leftover waffles may also be kept in an airtight container between sheets of parchment paper, for up to three days.
P1022290

My roommate declared these waffles better than the previous two. Personally, I think they're a whole other species of waffle so it's hard to compare. These seem more like cookies that I can eat with my hands rather than needing a plate, utensils, and maple syrup. I found that they were sweet enough (and a whole heck of a lot cleaner) to eat without the powdered sugar. The waffles didn't really seem to crisp up as much as get uniformly solid, but the turbinado sugar definitely kept its crunch and gave it a nice, fun texture.

One year ago:   Buckeyes

Monday, December 28, 2009

Homemade Waffle Face Off

overnight vs insanity

Ever since I tried my first Belgian waffle (with real pearl sugar!) from Mr. Crepes a few weeks ago, I've been wanting to make some waffles. My friend, Nicole, had left me her waffle maker when she moved away this past summer and I had yet to break it out. I was hoping to buy some pearl sugar from Mr. Crepes, but it turns out they no longer sell it there. So I settled for making regular waffles. But oh my, the many different "regular" waffle recipes that existed! I browsed through the waffles on TasteSpotting, The Kitchn, and looked up Alton Brown's recipe. I remembered an episode from Good Eats when he explained that the batter you want for pancakes and the batter you want for waffles are two completely different things since pancakes should be soft and fluffy and waffles should be crispy on the outside. Unfortunately, his recipe for the Basic Waffle included buttermilk as an ingredient, and I didn't really feel like buying something I don't usually use just to make this. But then I found a recipe titled, "Waffle of Insane Greatness". How could you not want to make those?

And then while talking to my friend, Helena, about my plan to make waffles, she recommended Mark Bittman's recipe for Overnight Waffles from How to Cook Everything (thank you, Ellen!), saying they were the best waffles she had ever had. That's when I decided it was time for another face off: Yeasted vs. non-yeasted waffles.

Obviously, as you can tell from the title, the Overnight Waffles need to be started the night before to give the yeast time to do it's thing. There are several steps to the recipe, and I followed everything to the letter (including separating the egg and whipping up the egg whites; is there anything more satisfying than whipping egg whites up to a soft peak by hand?) except that I halved the recipe. Hopefully it didn't alter the outcome too much.

overnight

Overnight Waffles (based on Mark Bittman's recipe from How to Cook Everything)
makes 2-3 servings

1/4 teaspoon instant yeast
1 cup all purpose flour
1/2 tablespoon sugar
1/4 teaspoon salt
1 cup milk
4 tablespoons butter, melted and cooled
1/4 teaspoon vanilla
Canola oil (for brushing on waffle iron)
1 egg

The night before, combine dry ingredients and stir in the milk, then butter and vanilla. The mixture will be loose and creamy. Cover and set aside overnight at room temperature.

PC272358

The next morning, brush the waffle iron lightly with oil and preheat. Separate the egg and stir the egg yolk into the batter. Beat the egg whites until they hold soft peaks. Fold them gently into the batter.

Pour the batter onto the waffle iron just until the barely covered. Bake 3 to 5 minutes, depending on your iron. Serve immediately with maple syrup and butter.

I thought it was interesting that in the book, Mark mentions that his favorite type of maple syrup is Grade B which is also the cheapest. Maple syrup is pretty darn expensive even up here in New England, but I found that Harvest sells Grade B maple syrup in bulk!

It looks like the "Waffle of Insane Greatness" recipe is from a restaurant called Aretha Frankenstein's in Tennessee. I have a feeling I will never get to go and try the originals, but having the recipe is good enough for me.

insanity

Waffle of Insane Greatness (courtesy of the Food Network and Aretha Frankenstein's)
makes 4 servings

3/4 cup all purpose flour
1/4 cup cornstarch
1/2 teaspoon baking powder
1/4 teaspoon baking soda
1/2 teaspoon salt
1 cup milk
1/3 cup vegetable oil
1 egg
1 1/2 teaspoons sugar
3/4 teaspoon vanilla

In a medium bowl, combine the flour, cornstarch, baking powder, baking soda, and salt; mix well. Add the milk, vegetable oil, egg, sugar, and vanilla and mix well. Let the batter sit for 30 minutes.

Preheat the waffle iron. Do not use non-stick spray on the waffle iron; the oil in the batter will allow the waffle to release easily. Follow the directions on your waffle iron to cook the waffles. Serve immediately with butter and syrup.

It's true about not needing to grease the waffle iron for these. If you let the batter sit long enough, the oil will even start to separate. If that happens, just stir the batter again and the oil will re-incorporate. I chose not to halve this recipe because it would've been a lot harder to do so and also because it seemed like the main ingredients (flour, milk, oil, and egg) were almost identical in quantity.

As you can see from the pictures above, the Waffle of Insane Greatness browned more uniformly and had a more defined shape. This translated into a crisper waffle. It also had an eggier taste than the Overnight Waffles which I thought had a pretty strong yeasty taste. The texture of the Overnight Waffles was definitely fluffier but I didn't really get the crispiness.

PC272365

I decided to try to make them side by side so that they had the same amount of time on the iron. Again you can see (below) that the Waffle of Insane Greatness had a more defined shape and that the Overnight Waffles had more air bubbles, but now you can see that the Overnight Waffles actually brown quicker than the Waffle of Insane Greatness. (Please ignore the fact that there are holes in the Waffle of Insane Greatness; that's more due to user error as you can see in the picture with the waffle iron.)

PC272366

Personally, I had a slight preference for the Waffle of Insane Greatness because it was able to get the crispy texture I wanted. Too many air bubbles in the Overnight Waffles meant it absorbed the maple syrup like a sponge and got way too soggy way too fast. Also, I thought the yeasty taste was a little too strong for me. One of my roommates preferred the Overnight Waffles, though, and my other roommate's sister preferred the Waffle of Insane Greatness.

As a final experiment, I mixed the last of both batters together and made an Overnight Waffle of Insane Greatness. This turned out to be the perfect waffle for me. The yeasty flavor was neutralized and turned into a more malted flavor. The waffle was crispier and had less air bubbles than the Overnight Waffles but was fluffier than the regular Waffle of Insane Greatness. If I ever really, really wanted to make the perfect waffle, I would make these two recipes and combine them again. But being the lazy person I am, I'll probably just make the Waffles of Insane Greatness again and maybe try separating the egg and whipping up the egg whites before folding them in.

PC272372

One year ago:  Hot Pot, Tang Yuan

Wednesday, April 15, 2009

Moffles!

I first heard about moffles through The Kitchn (btw, in case you haven't seen, my bunny buns were featured as a Delicious Link on The Kitchn a few days back!) and decided if there was any way I could get my hands on a waffle iron and mochi blocks, I would definitely try it out. Well, luckily, my friends Jen and Tammy had a waffle iron and mochi blocks, which Tammy got from a Korean grocery store. I invited them over with their respective supplies and said I'd provide the toppings.

The condiments for moffles

At first I was thinking more traditional waffle toppings like maple syrup, whipped cream, bananas, Nutella, etc., but then Jen suggested we stick to more traditional mochi accompaniments, such as sweetened red beans, peanuts ground with sugar, and black sesame powder, which I thought was a brilliant idea. Even better, when I was at Super 88 looking for black sesame seeds, I found instant sesame powder mix, which according to the ingredients, already had sugar in it. As for the peanut powder, I just used a food processor to grind a half cup of raw peanuts with 3 tablespoons of granulated sugar. Just make sure you don't grind too long or else you'll end up with peanut butter. You basically want it to look like this:

Peanut powder

I added sweetened condensed milk to the toppings because I like how it goes with sweetened red beans, and I thought the powders might need something kind of wet and sticky to bind to. Finally, I made some frozen yogurt on the spot using a cup of vanilla yogurt, 1/3 cup of sour cream, and 1 bottle of Chinese yogurt drink. I was aiming for something like Pinkberry frozen yogurt, but I failed to add sugar, and the texture wasn't quite there. Still edible, though. =)

The mochi blocks

So according to the article, you just throw some mochi blocks on to the waffle iron and let it do its thing. I set the waffle iron on high, sprayed it with some cooking oil, put two blocks in the center, and closed the top. The blocks start off dry and dense; basically nothing you'd ever try to eat as is. But as the heat started cooking the mochi, the blocks began to expand and fill out the entire waffle iron. After a couple minutes, we were able to press down on the iron to close it, and we took the moffles off the iron once they were coming out the sides.

Moffle!

Then we cut each moffle into quarters and started experimenting with the toppings. I found that the moffle itself didn't have too much flavor, which is not a bad thing as it was really the texture that stands out. The outside is crispy, almost crackly, while the inside is soft and almost gooey. In a word, awesome.

I really, really liked the sesame powder topping as it reminded me of the sesame filled tang yuan, and the red bean and sweetened condensed milk topped moffles were pretty good too. I wasn't as big of a fan of the peanut powder, but then, I'm not a big fan of peanuts in general.

Moffle with red beans and sweetened condensed milk

I would totally make moffles again, if ever such a confluence of a waffle maker and mochi blocks being in my kitchen happened again. And if you have a waffle maker, I can totally find some mochi blocks to bring by. ;)