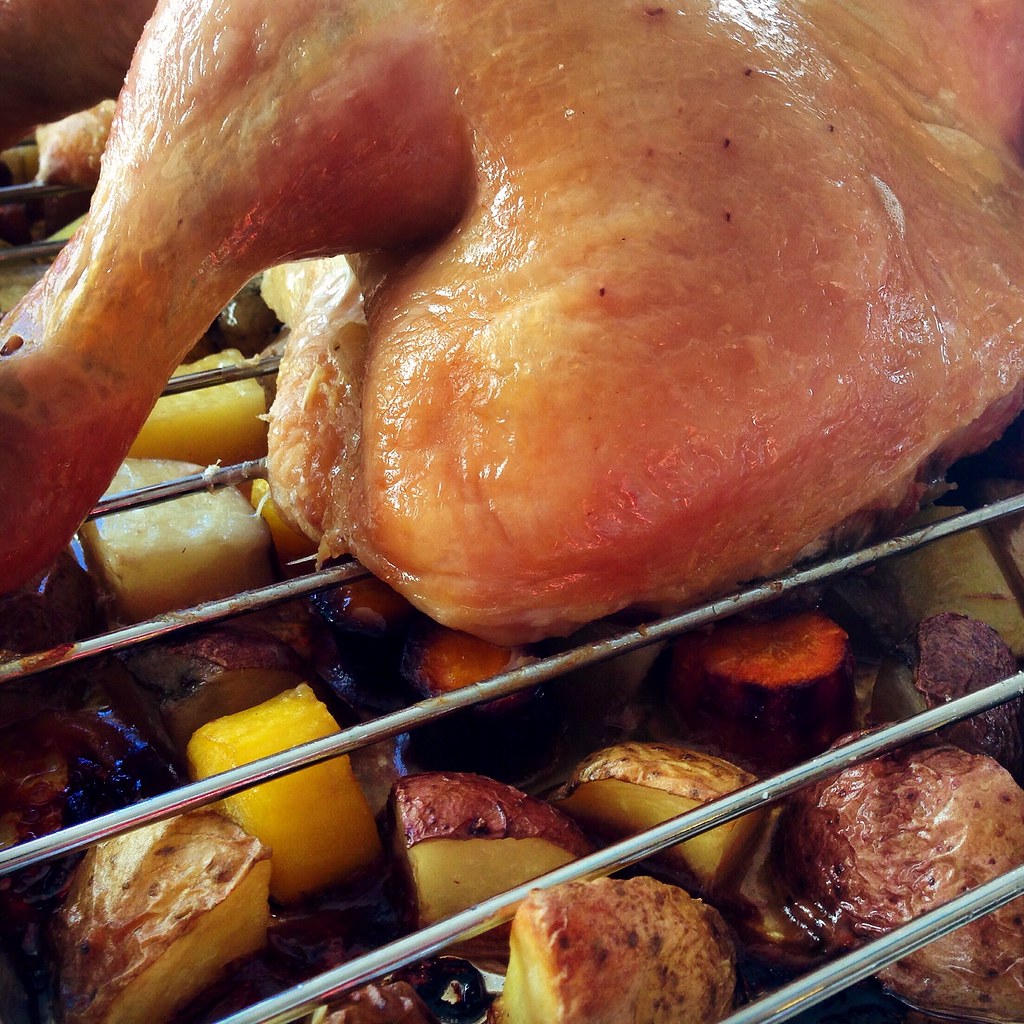
Showing posts with label chicken. Show all posts

Wednesday, March 1, 2017

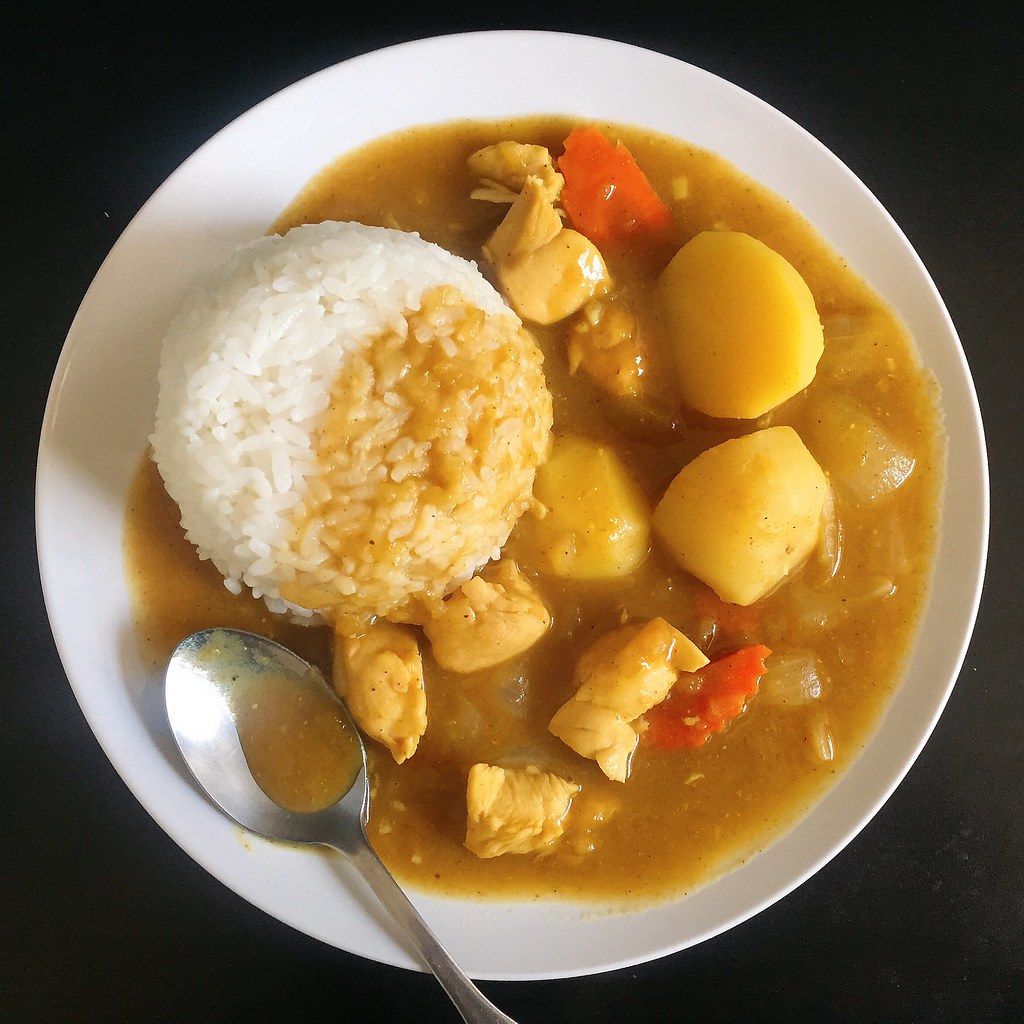
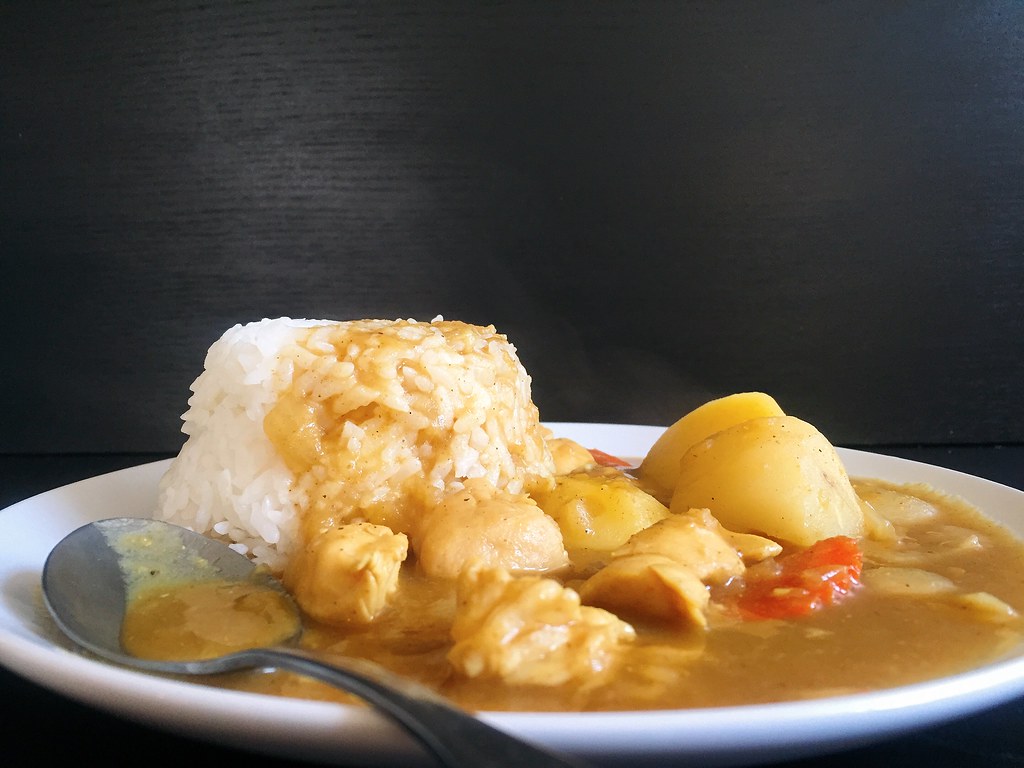
Japanese Chicken Curry Rice


If you’ve ever made Japanese curry rice from one of those store-bought curry blocks, you know how delicious and easy it is, but did you know it’s almost as easy to make it from scratch?  And considering the palm oil, MSG, and preservatives used in the blocks, it’s probably a lot healthier to make your own.
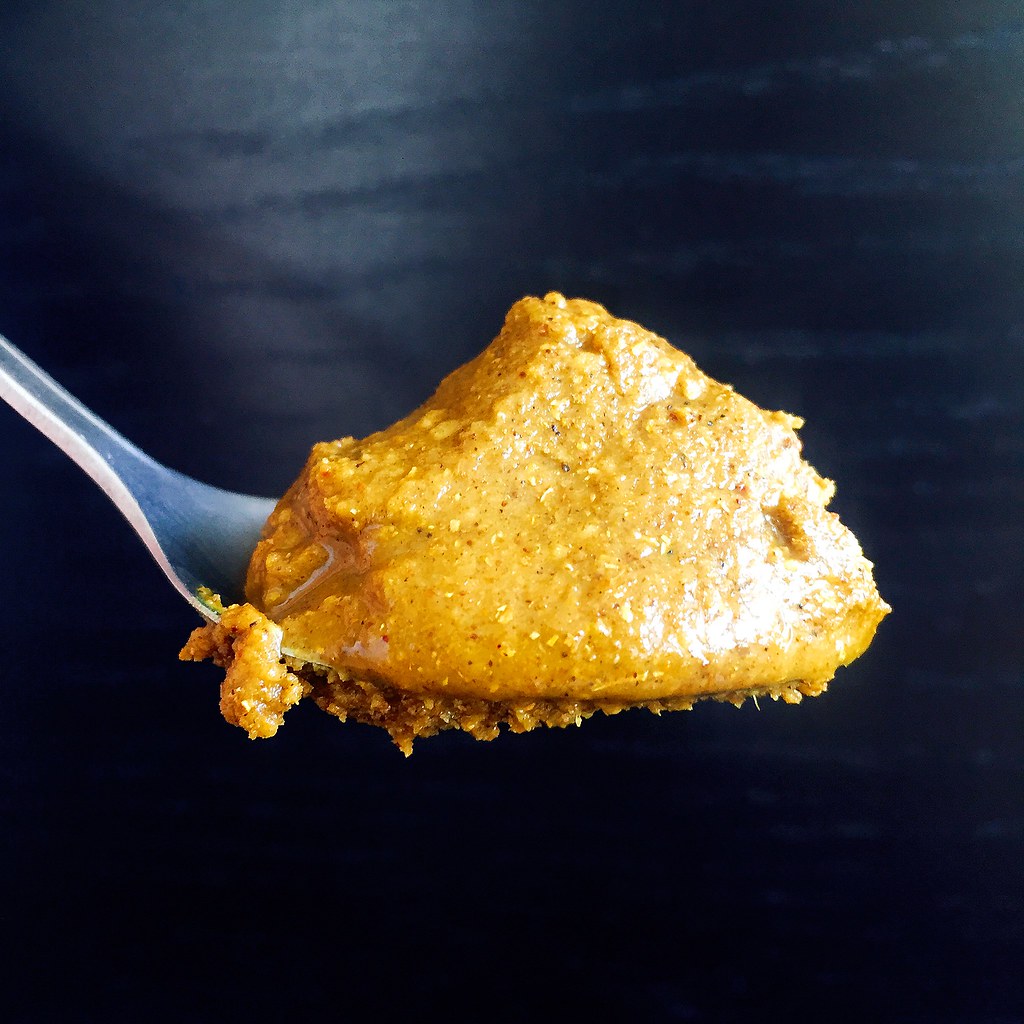

I pretty much followed the chicken curry rice recipe from Just One Cookbook except I caramelized the onions as recommended by Marc from No Recipes and Serious Eats.  I also used chicken breast instead of chicken thighs because I really, really hate dark meat.  Another great thing about making your own curry roux is that it’s easily customizable.  If you prefer it spicier, add cayenne pepper; if you prefer it sweeter add honey, etc.  This recipe makes a slightly sweet, medium-mild spicy curry.
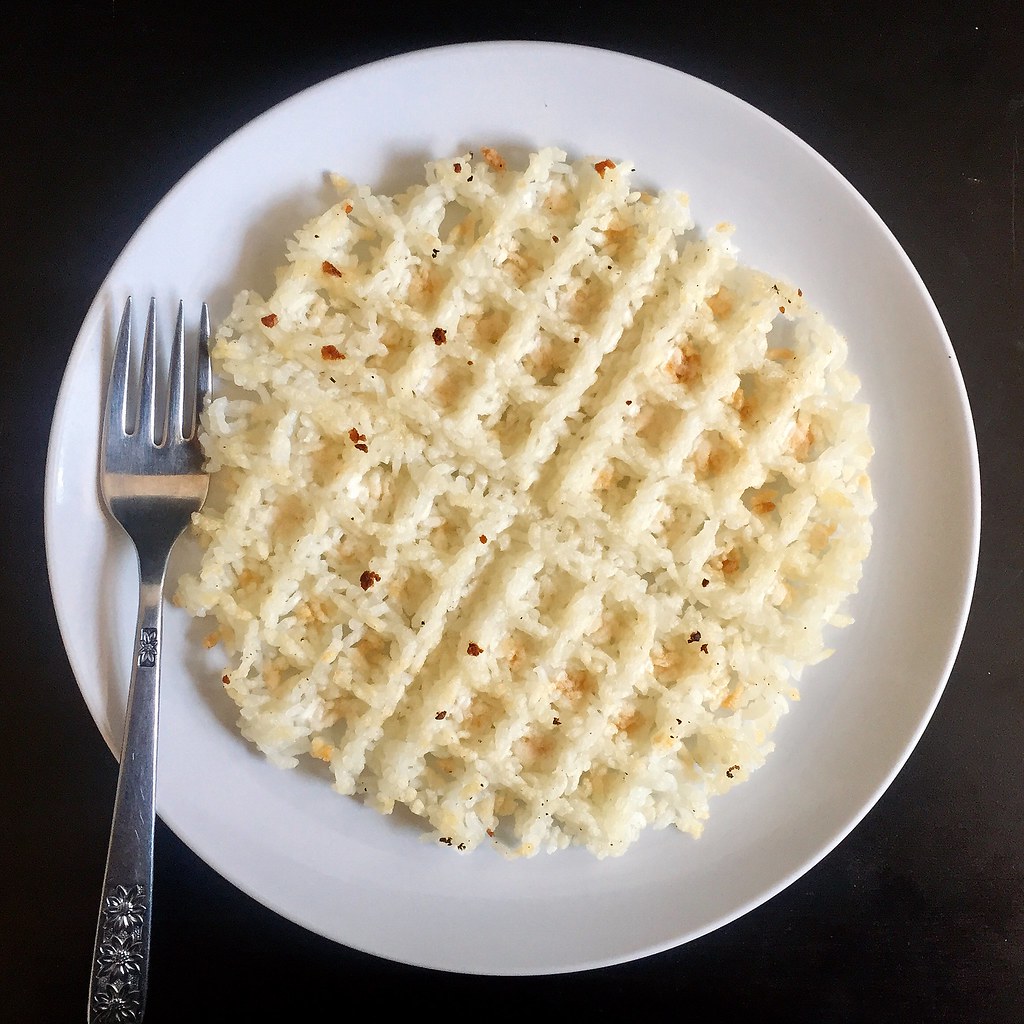

Japanese curry is usually served with steamed rice, but if you want to have a little more fun, I’d highly suggest waffling some day-old cooked rice.  The rice gets crispy-crunchy-toasty-chewy and adds a really interesting texture. 
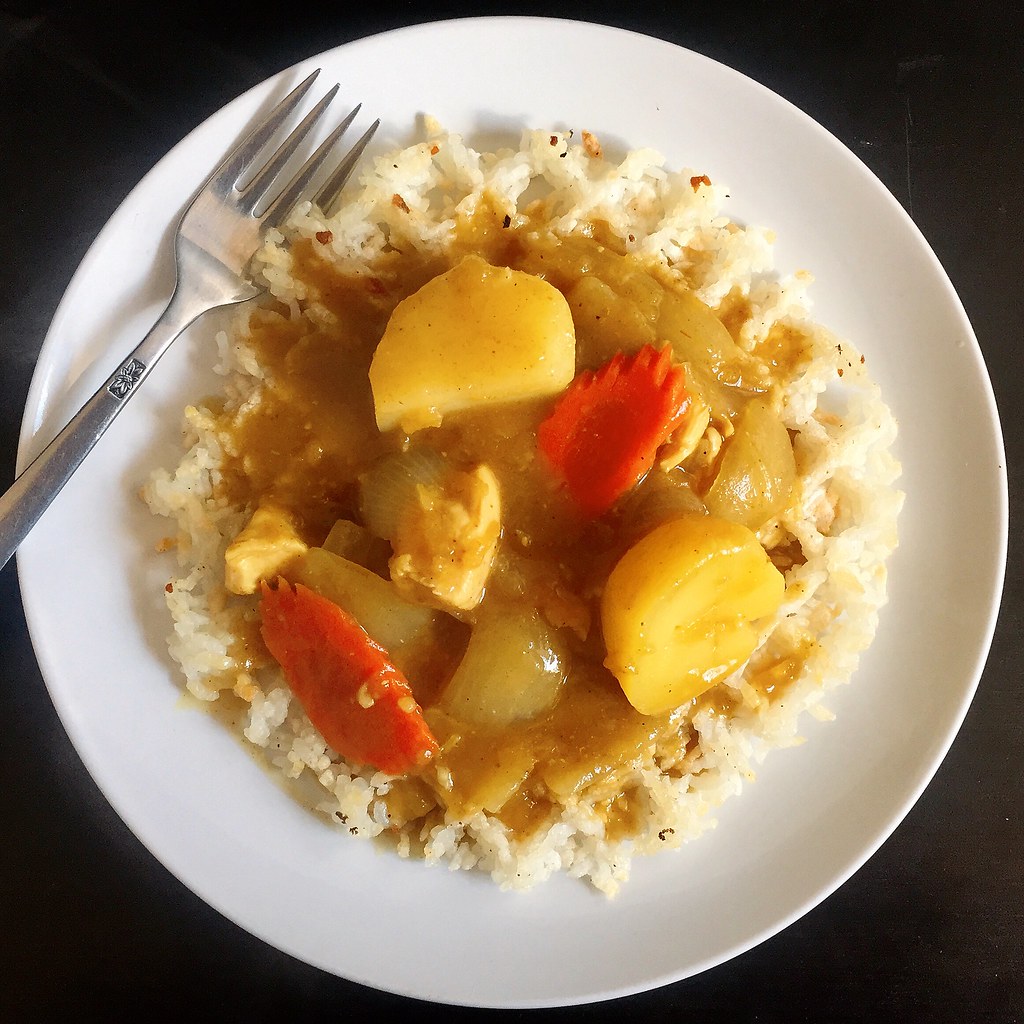

Japanese Chicken Curry Rice (adapted from Just One Cookbook)
serves 4-6

1 lb. boneless chicken, skinless thighs or breast
Kosher salt and black pepper
2 tablespoons oil
2 onions, coarsely chopped
2 garlic cloves, minced
1 teaspoon grated ginger
1 carrot, peeled and coarsely chopped
1 qt. chicken broth
1 apple
2 large Yukon gold potatoes
3 tablespoons unsalted butter
4 tablespoons all-purpose flour
1 tablespoon garam masala
1 tablespoon curry powder
2 tablespoons soy sauce
1 tablespoon ketchup
1 tablespoon honey (optional)
Cooked rice

Cut the chicken into bite-sized pieces and season with salt and pepper.

Add the onions to a large pot or Dutch oven over medium heat.  Cook with a large pinch of salt until dry and just starting to color.  Add a tablespoon of oil, mix, and continue to cook until the onions start sticking to the bottom again.  Add the rest of the oil and continue to cook until caramelized.  Add the minced garlic, grated ginger, and chicken.  Cook until the chicken turns white.  Add the chopped carrot and chicken broth and bring to a boil.

Peel the apple, coarsely grate, and add to the pot.  Peel the potatoes, cut into bite-sized chunks, and add to the pot.  Simmer for 20 minutes until the potatoes are tender.

In the meantime, make the curry roux by melting the butter in a small pan over medium-low heat.  Add the flour and stir until the roux starts to get darker, about 5-10 minutes.  Mix in the garam masala and curry powder and take off the heat once combined.

When the potatoes are done, add some of the hot liquid to the roux and whisk until the roux is loose, adding more liquid as necessary.  Add back to the pot and bring back to a boil.  Stir in the soy sauce and ketchup.  Taste, and add the honey if you'd prefer it sweeter.  Simmer until the curry has thickened.  Serve with cooked rice.

Next:  Rainbow Crepe Cake
Previously:  Quintessential Apple Pie with Bacon Fat Crust
Last Year:  Tropical Pulled Pork on Griddled Banana Bread Sandwiches
Two Years Ago:  A Better Homemade Pasta Recipe
Three Years Ago:  Mushroom Marsala Pizza
Four Years Ago:  Peking Duck Pizza
Seven Years Ago:  Bacon Fat Caramels
Eight Years Ago:  Potato Leek Soup with Bacon

Wednesday, September 7, 2016

Macau-Style Portuguese Chicken Rice

https://www.flickr.com/photos/joyosity/29466501016/in/dateposted-public/

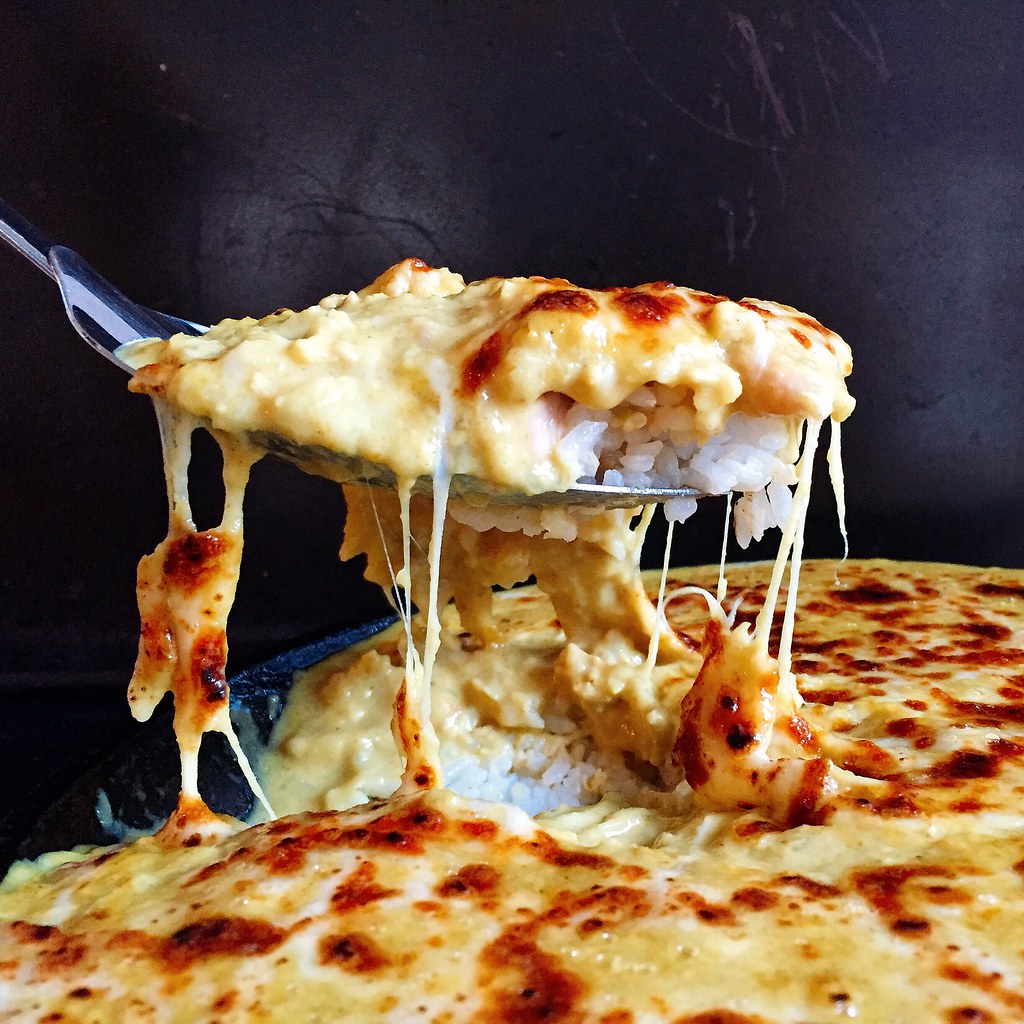
I only needed one bite of the Portuguese Chicken Rice from Double Chin to know that I needed to figure out how to make it at home.  I hadn't even ordered it myself; my friend Alvin was nice enough to let a bunch of us try his, and I'm so grateful he did.  Sadly, it's not a very photogenic dish, but once you try it, you won't care.

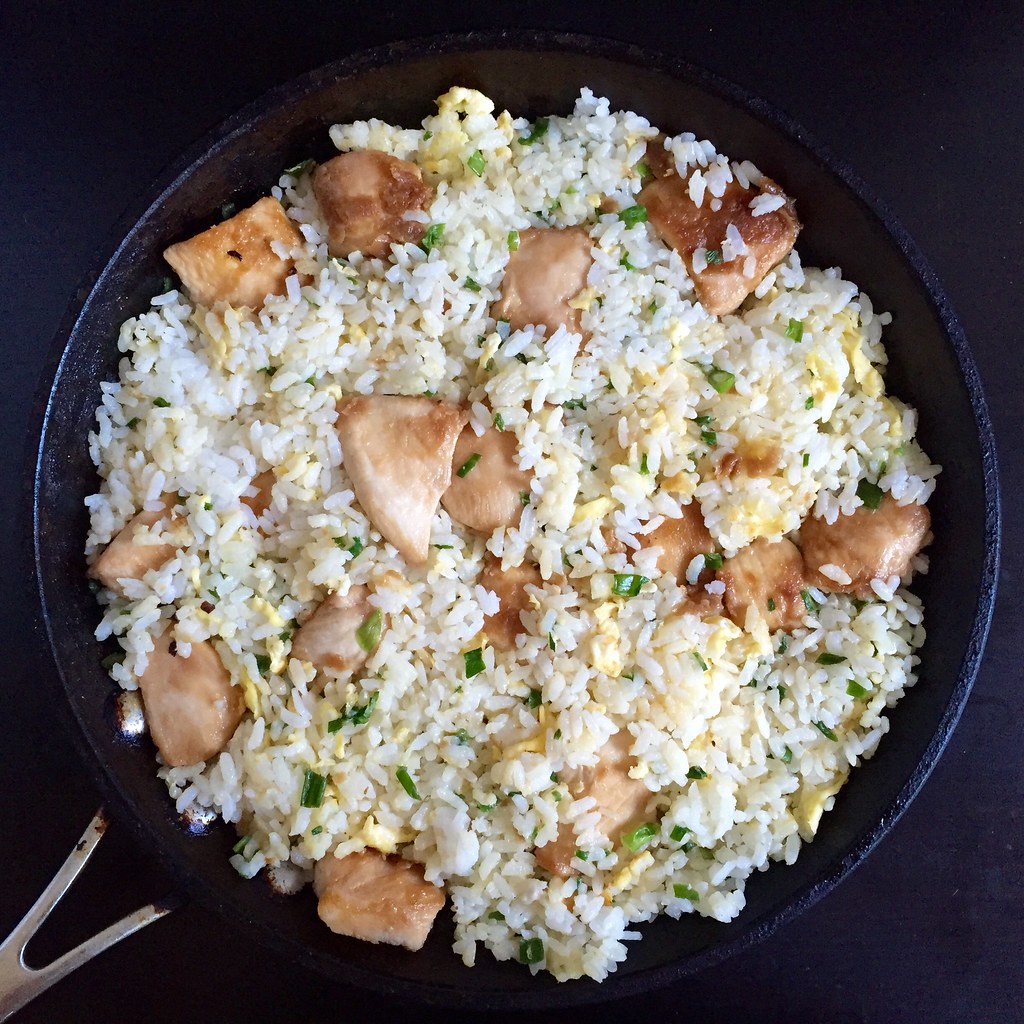
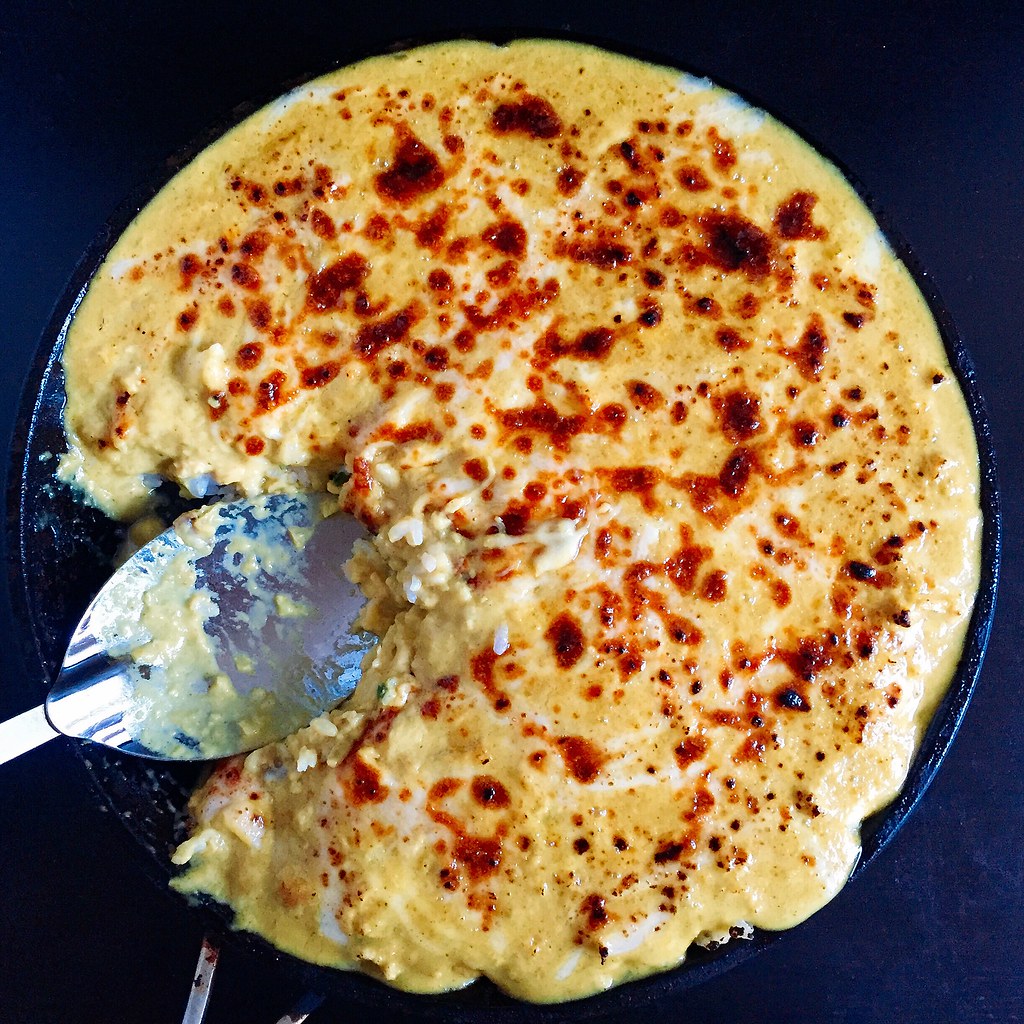
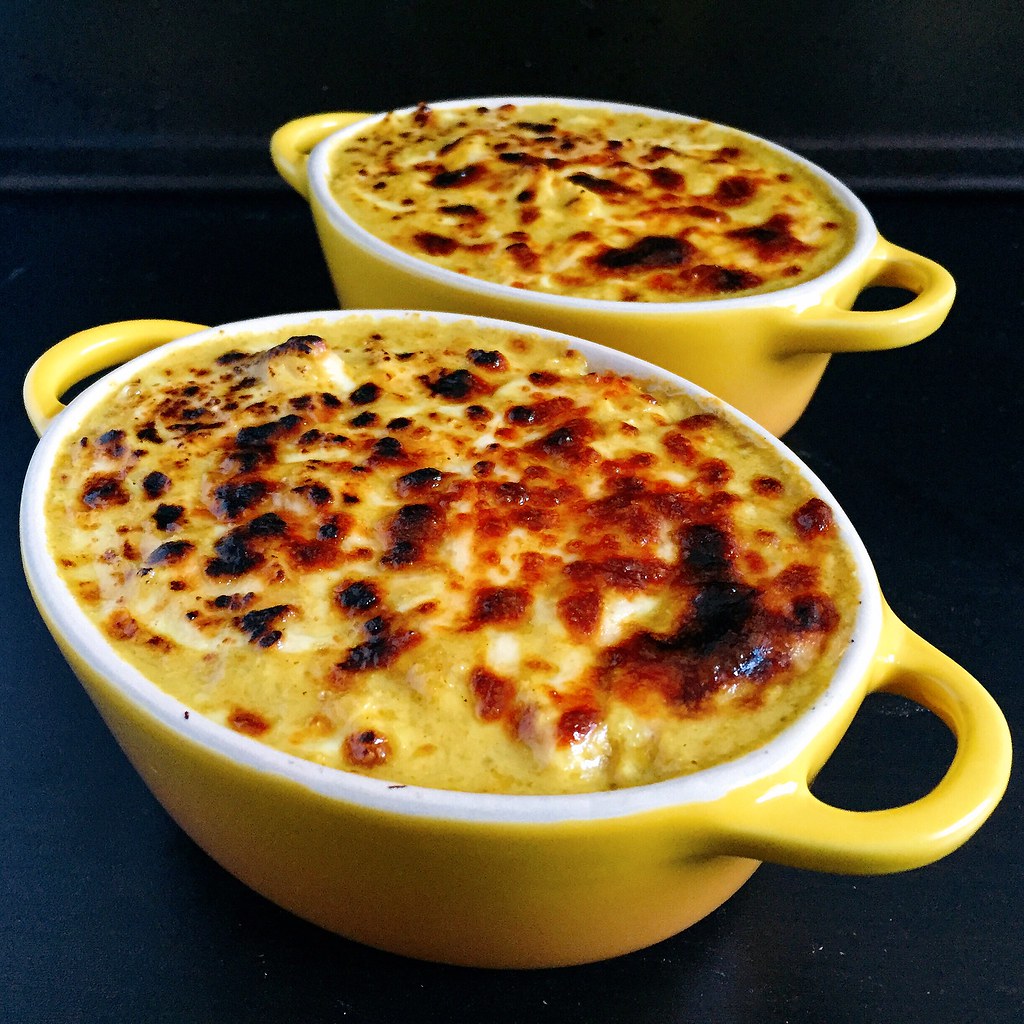
It starts with a layer of chicken fried rice topped with a mild coconut curry sauce and finished with a sprinkling of shredded cheese.  Then everything goes under the broiler until it gets all bubbly and gooey.  I know it's kind of strange to have cheese on an otherwise Asian dish, but it works so well in this case.  I think the key is to use a mild, melty cheese so that it doesn't overpower the rest of the dish.  I ended up using a mix of mozzarella and provolone.  I thought it was interesting that when I was looking for recipes on-line to use, a lot of them just listed "shredded cheese" as the ingredient without any reference to what kind of cheese.  Perhaps in Asia there is just one kind of shredded cheese available!

https://www.flickr.com/photos/joyosity/29420771461/in/dateposted-public/

I ended up referring to Lady and Pups' version because I love everything else she does, and it seemed the most similar to what I had at Double Chin.  The modifications I made were that instead of fish I used chicken and marinated it beforehand.  I used chicken breast because I prefer white meat, but feel free to use chicken thigh meat if you prefer dark meat.  I also made a couple of other modifications to her recipe based on what I had on hand (less scallions and water instead of milk) and taste preferences (half the amount of shallots).

Please note that this makes quite a bit of food.  Mandy's original recipe said that it serves 2, but it would probably be more like 6 Joy-sized servings.  And if you're wondering why it's called Portuguese chicken rice, I think it has to do with the fact that Macau was a Portuguese colony up until the end of the last century.  Apparently this dish is very popular in Hong Kong cafes, and I remember seeing something similar at one of my favorite eateries in Taiwan.

https://www.flickr.com/photos/joyosity/29211783800/in/dateposted-public/

Macau-Style Portuguese Chicken Rice (heavily adapted from Lady and Pups)
serves 4-6

For the chicken:
1 lb. boneless chicken, cut into 1" pieces
1 tablespoon cornstarch
1 tablespoon soy sauce
1 tablespoon rice wine
2 tablespoons vegetable oil

Mix all the ingredients except for the oil and marinate for 20 minutes.

Heat the oil over medium-high heat and cook the chicken until lightly brown.  Save 2/3 of it for the fried rice and finely chop the rest for the sauce.

For the fried rice:
2 tablespoons vegetable oil
2-3 eggs, beaten
3 cups day-old cooked rice, refrigerated
1/2 cup chopped scallions
Kosher salt and white pepper, to taste

Heat the oil over medium-high heat in a large pan and add the eggs.  Immediately add the rice and mix to coat.  Once the rice is heated through, add the scallions, salt, and white pepper to taste.  Add the reserved chicken and mix until even.  Remove from heat and set aside.

For the coconut curry sauce:
2 tablespoons vegetable oil
1 shallot, coarsely chopped
3 garlic cloves, coarsely chopped
1 teaspoon ginger, grated
1 tablespoon unsalted butter
1 tablespoon curry powder
1 tablespoon onion powder
2 tablespoons finely shredded unsweetened coconut
1 tablespoon all-purpose flour
13.5 oz. can coconut milk
1/2 cup water
1 1/2 cups mix of shredded mozzarella and provolone cheese, divided

Use a small blender to puree the oil, shallot, and garlic cloves.  Mix with the grated ginger and butter and cook over medium heat in a saucepan for a few minutes until very fragrant.  Add the curry powder, onion powder, coconut, and flour continue to cook for a few more minutes to toast the spices.  Whisk in the coconut milk and water and bring to a boil.  Simmer for 5-7 minutes until thickened.  Stir in the chopped chicken and 1 cup of the cheese.

Preheat the broiler.  Transfer the fried rice to a buttered casserole dish or oven safe pan.  You can also use multiple smaller dishes.  Pour the curry sauce over the rice and top with the remaining 1/2 cup of shredded cheese.  Broil for a few minutes until browned in spots and bubbly.  Serve immediately.

https://www.flickr.com/photos/joyosity/29420773131/in/dateposted-public/

Next:  Caramelized Honeycomb Ice Cream
Previously:  Extra-Crispy Tortilla Pizza
Two Years Ago:  Taiwanese Taro Swirl Mooncakes
Three Years Ago:  Brown Butter Vinaigrette Lobster Buns
Four Years Ago:  Caramelized Onion and Swiss Chard Quiche

Monday, November 10, 2014

Spatchcock Chicken with Roasted Root Vegetables

https://www.flickr.com/photos/joyosity/15718609966/

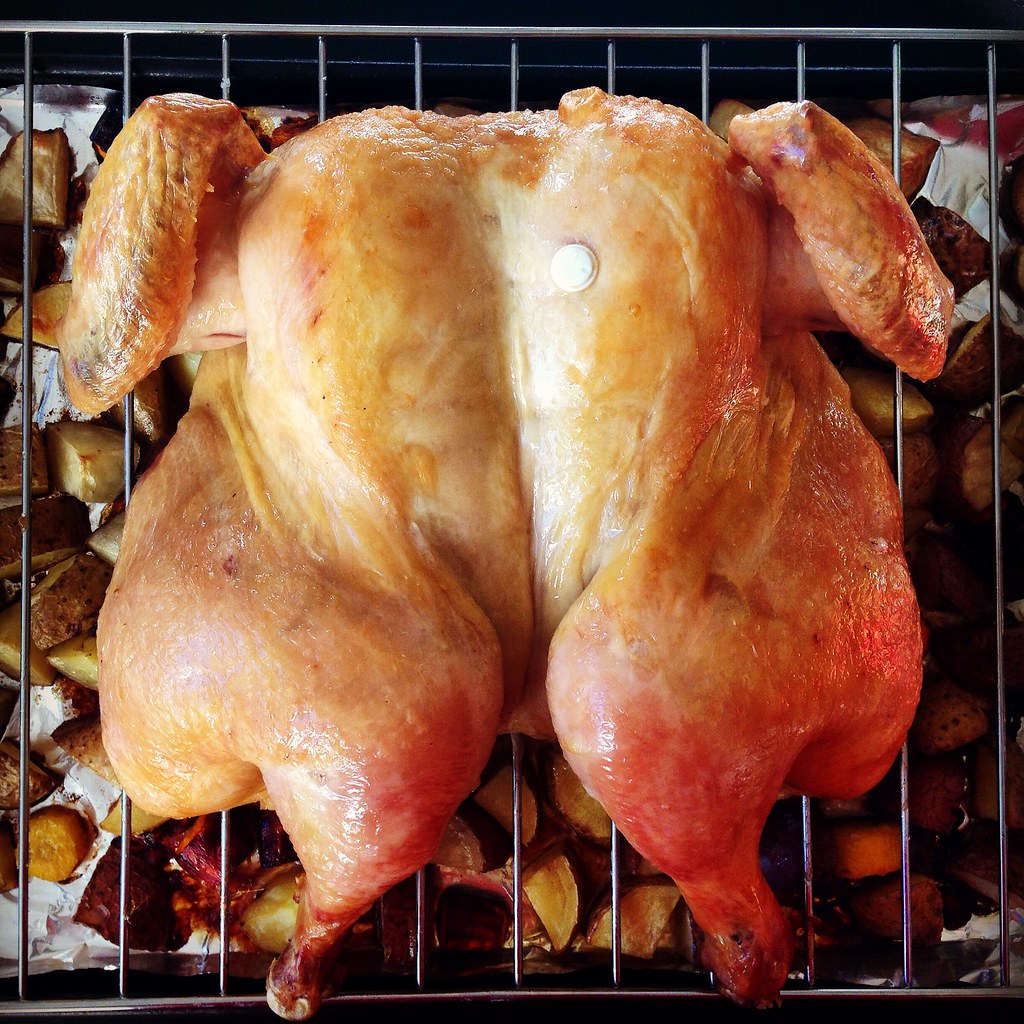
A few months ago my friend Ellen posted a gorgeous picture of the best roast chicken she had ever made and challenged us to name the technique she used to make it.  From the picture, I knew immediately it was a spatchcocked chicken, and I've been wanting to try it ever since.  Well, this weekend we needed some cooked chicken to make curry chicken tea sandwiches for Amy's baby shower, so I volunteered to make the chicken instead of just buying a rotisserie chicken.

https://www.flickr.com/photos/joyosity/15122914673/

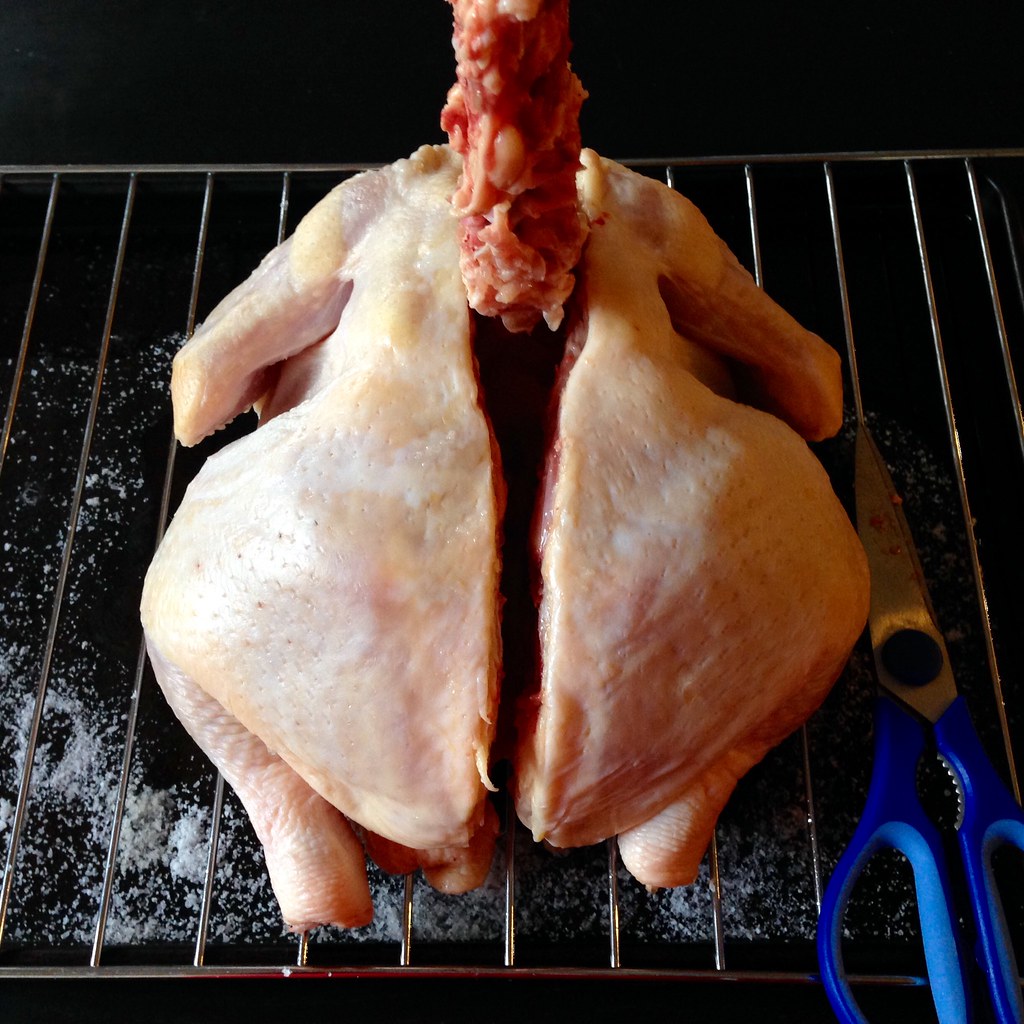
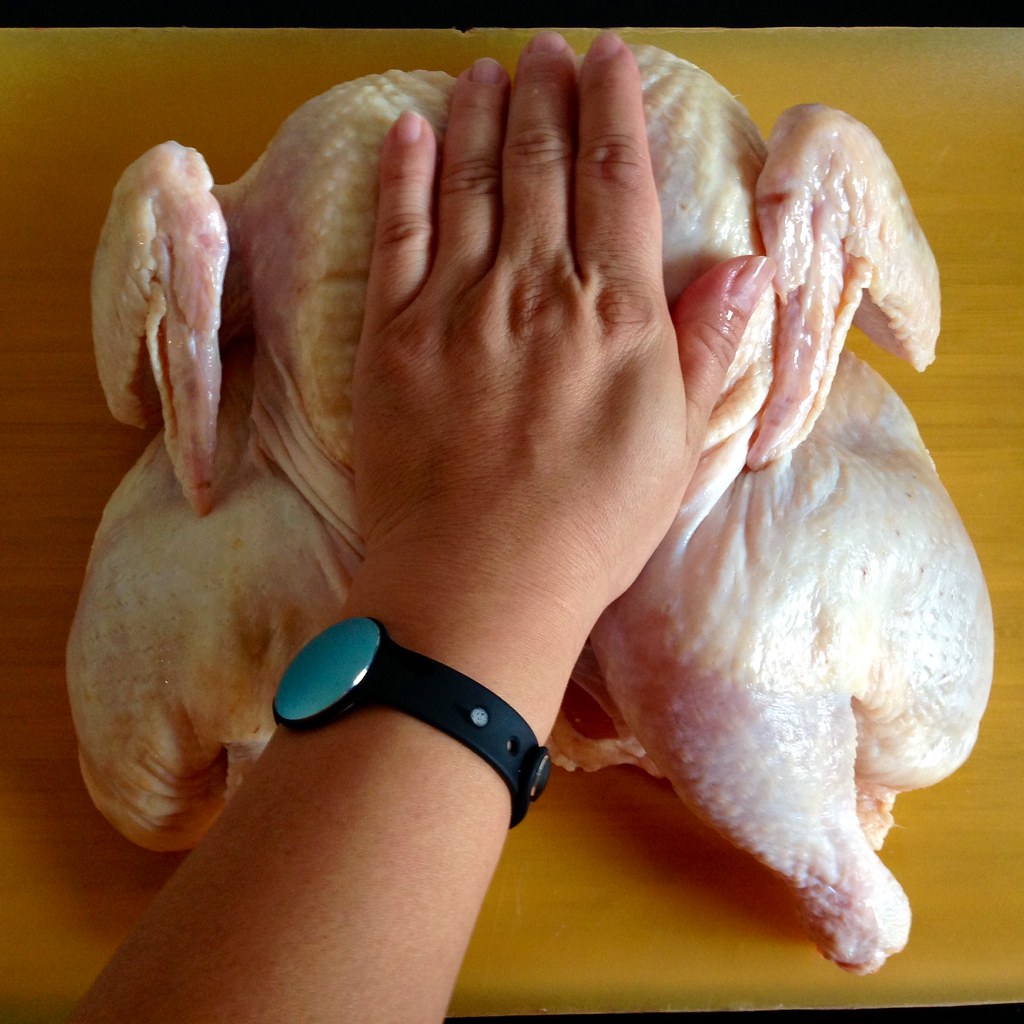
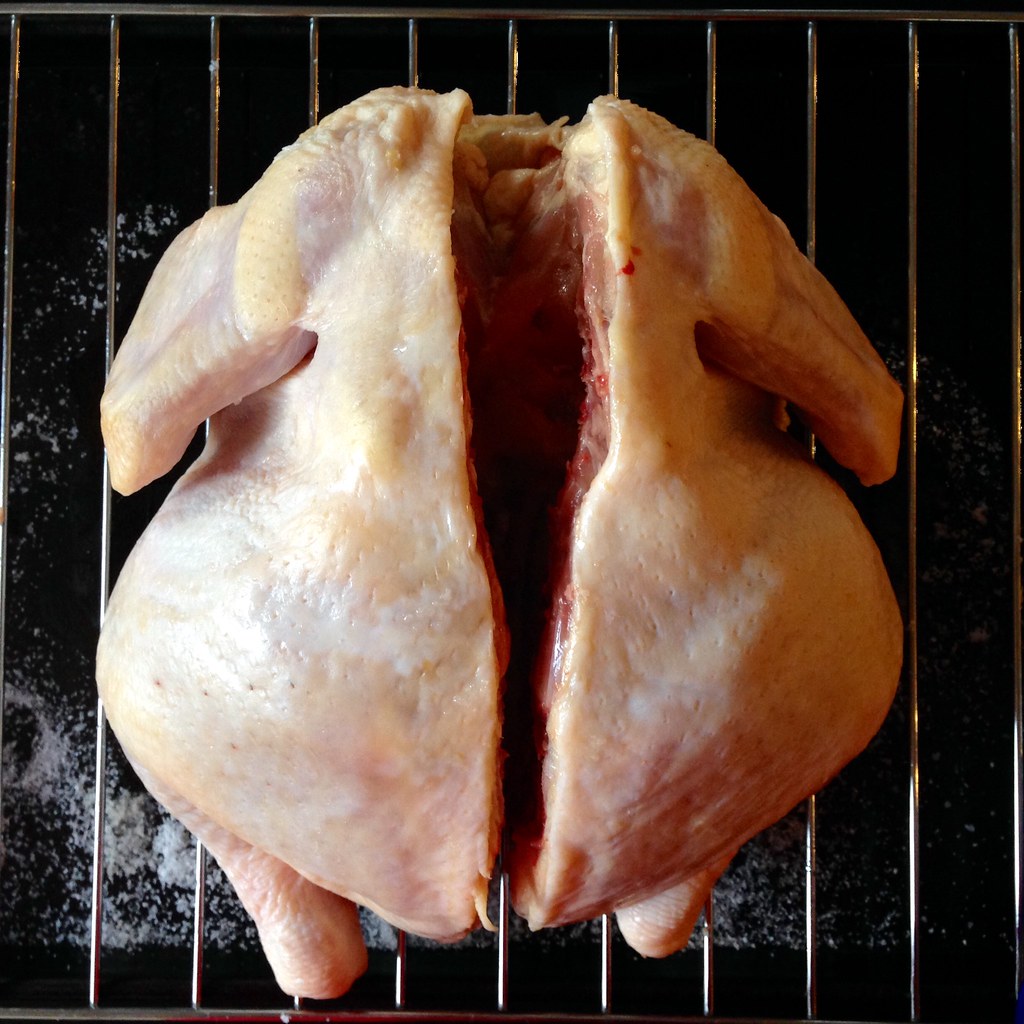
Spatchcocking a chicken just means cutting out the backbone and then butterflying the chicken so that you can roast it flat.  This way the dark meat and white meat cook more evenly, and you can also cook it a lot faster than roasting it whole.  Usually you have to use a lot of pressure to force the bird to "crack" open, but this post from Epicurious mentions making a notch on the sternum bone/cartilage before flipping the bird over which makes it a lot easier. 

https://www.flickr.com/photos/joyosity/15718606686/

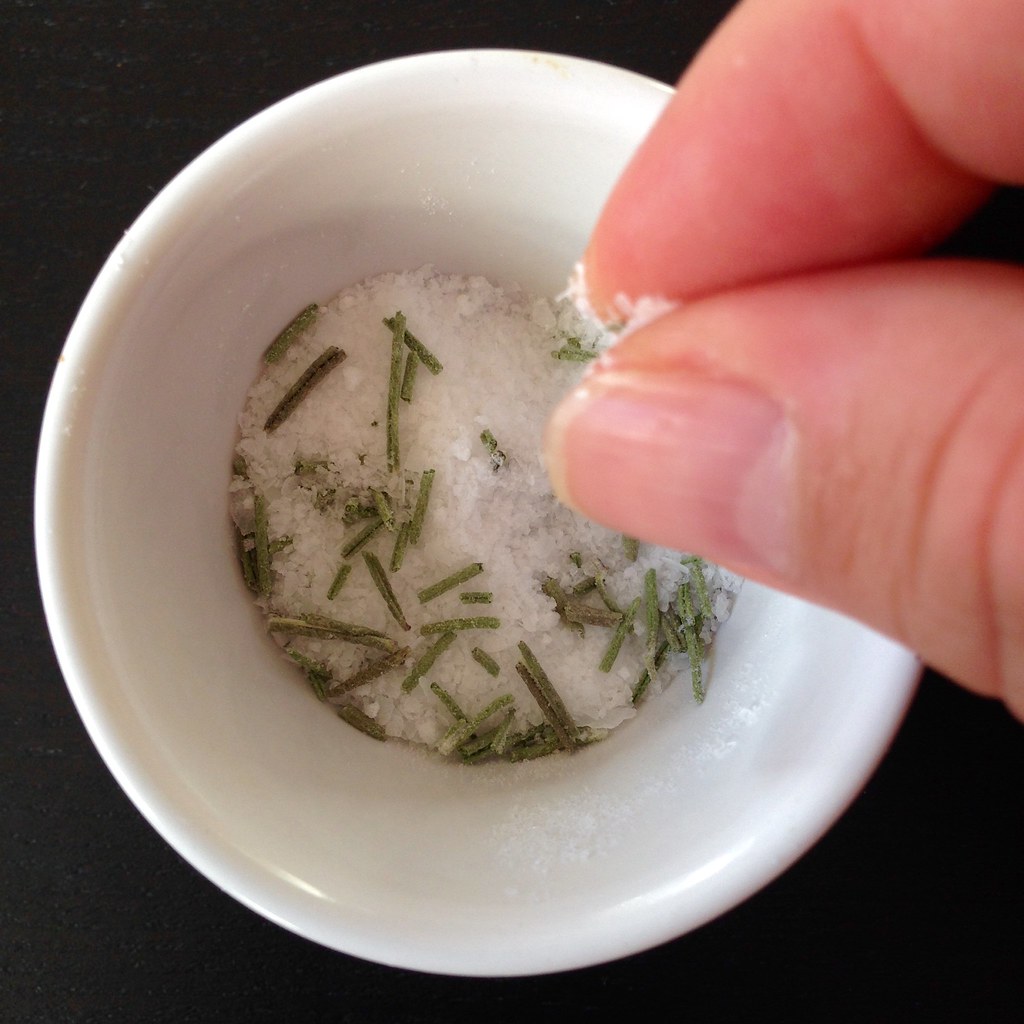
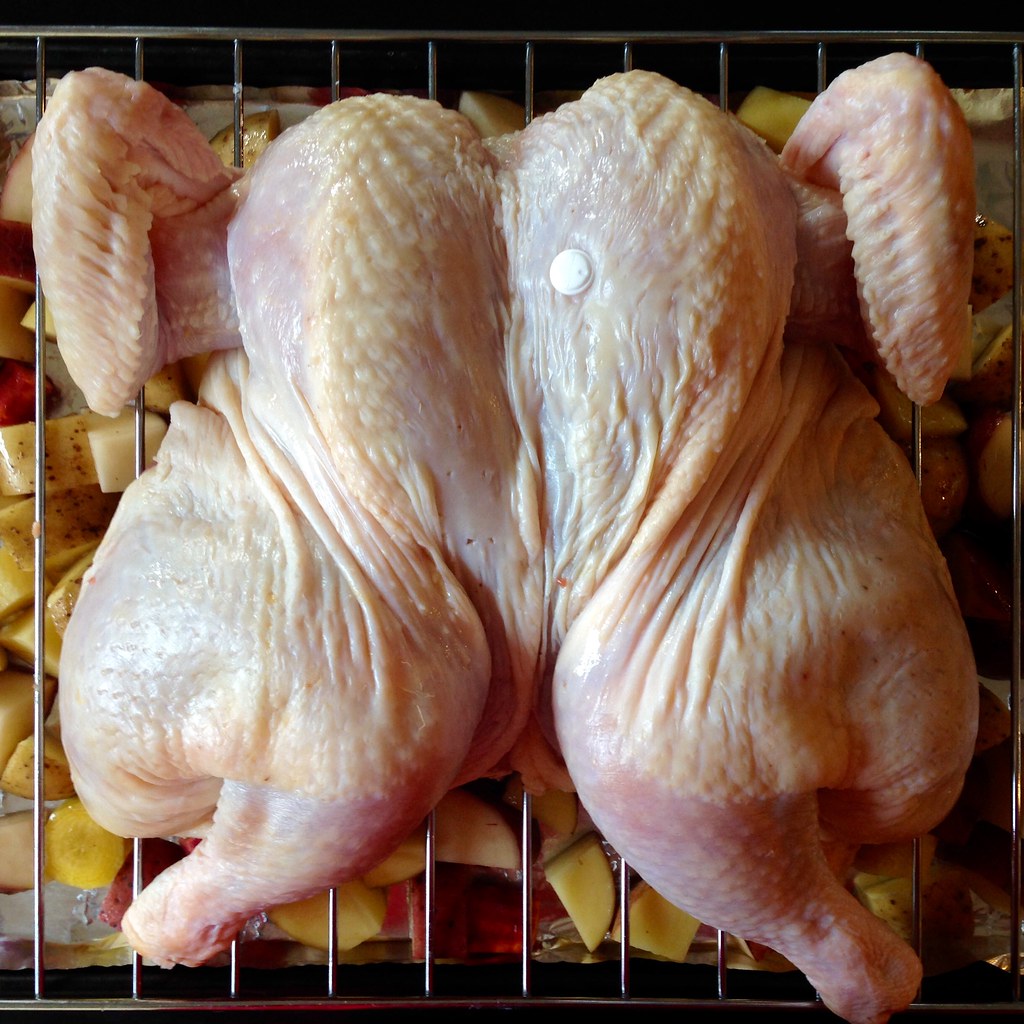
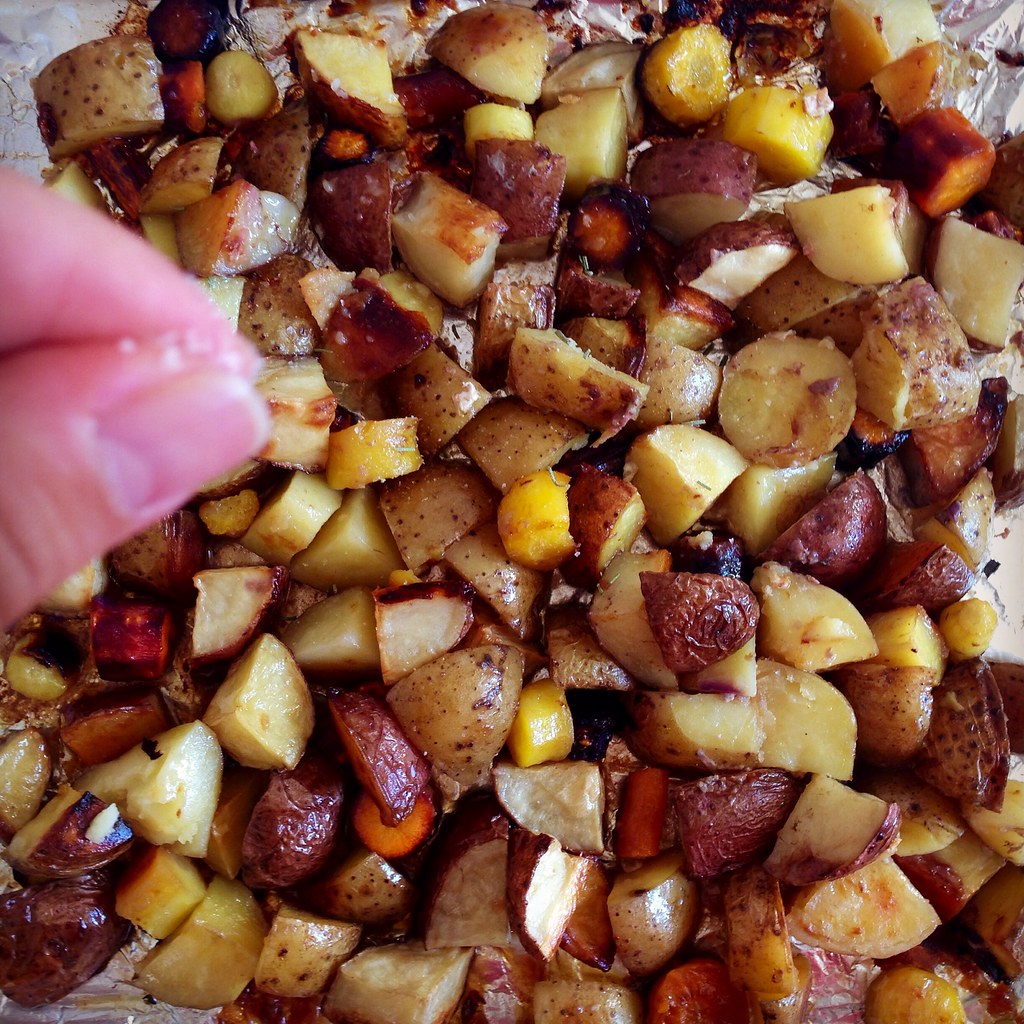
I was also inspired by The Crepes of Wrath's post to dry brine the chicken overnight and roast it on top of vegetables to catch all the delicious drippings.  It reminded me of the roasted potatoes from the Roli Roti food truck at the San Francisco Ferry Building Farmers market. They're piled underneath the spinning rotisserie meat so they absorb all the dripping goodness and then topped with a sprinkle of rosemary salt, which I totally copied here on the potatoes and multi-colored carrots I got in my recent Boston Organics delivery.

https://www.flickr.com/photos/joyosity/15556901088/

The end result is a gloriously moist, crispy skinned chicken with amazingly flavored vegetables using a bare minimum of ingredients.  You can use this same technique to make your Thanksgiving turkey, too!

https://www.flickr.com/photos/joyosity/15122371234/

Spatchcock Chicken with Roasted Root Vegetables
serves 4-6

1 large chicken
Kosher salt
Olive oil
3 lbs. root vegetables, chopped into 3/4" chunks (potatoes, carrots, onions, etc.)
1 teaspoon chopped fresh rosemary

https://www.flickr.com/photos/joyosity/15743862652/

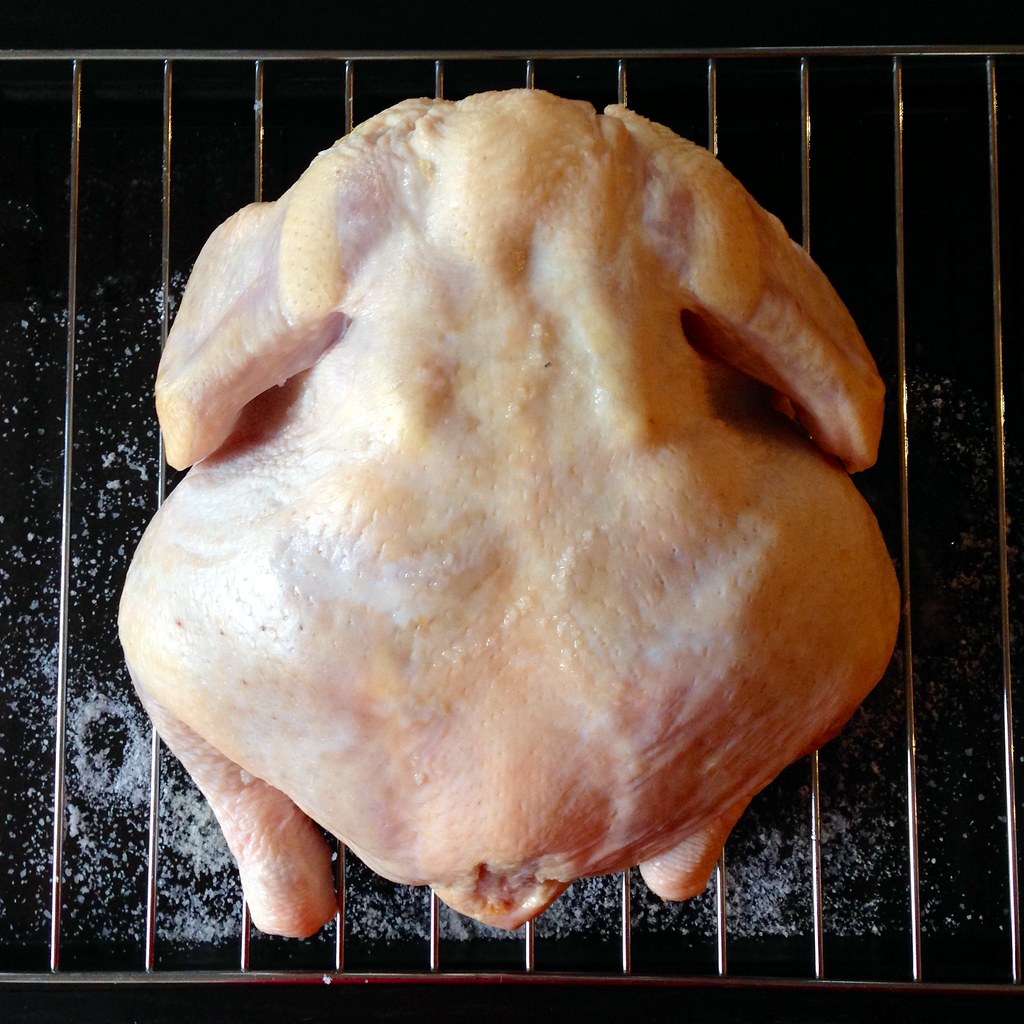
The night before you want to roast the chicken, pat the chicken dry with paper towels.  Rub about 1/2 cup of kosher salt all over and inside the chicken, even under the skin if possible.  Place a cooling rack on top of a rimmed baking sheet and place the chicken on top of the rack.  Transfer to the refrigerator to dry brine overnight.

https://www.flickr.com/photos/joyosity/15740424491/

The next day, preheat the oven to 450°F.  Place the chicken breast side down on a cutting board.  Using kitchen shears or a sharp knife, cut out the backbone starting from the tail end.  You can save the backbone for making chicken stock and/or gravy.  Pull the bird open wider and cut through the bone in the center of the breast.  Flip the bird over and flatten so that the thighs are knock-kneed.  Fold the wings underneath.  Brush all over with olive oil.

https://www.flickr.com/photos/joyosity/15743855292/

Wash the baking sheet and line with aluminum foil.  Toss the root vegetables with a few drizzles of olive oil.  Spread on top of the foil and replace the cooling rack.  Place the chicken breast side up on the cooling rack and place the whole thing in the oven.  Roast for 30 minutes at 450°F, then turn the temperature down to 400°F and continue to roast until a thermometer stuck into the thickest part of the thigh reads 165°F (about 15-30 minutes, depending on the size of the bird).

https://www.flickr.com/photos/joyosity/15556440369/

Allow the chicken to rest at least 10 minutes before carving.  Mix a tablespoon of kosher salt with the chopped rosemary.  Sprinkle on top of the vegetables and serve alongside the chicken. 

https://www.flickr.com/photos/joyosity/15556904918/

Next:  Sriracha Popcorn
Previously:  Caramel Apple Cinnamon Rolls
Two Years Ago:  Duchikey (or Simplified Turducken)

Monday, November 12, 2012

Duchikey (or Simplified Turducken)

The idea of making a turducken is kind of frightening:  deboning three different birds and then stuffing one inside the other inside the other and then roasting it all low and long enough so that it's cooked all the way through but not dry or burnt on the outside.  Crazy.

But when Serious Eats posted a way to make a simplified turducken a couple of years ago by using cuts from all three birds instead of the whole birds, I knew I had to try it.  It's a pounded duck breast covered with a layer of stuffing covered with chicken thighs, another layer of stuffing, and then turkey cutlets.  Thus, a duchikey.  The Serious Eats post included a recipe for stuffing, but I decided to further simplify it by just using Stove Top stuffing, a personal guilty pleasure.

Duchikey ingredients
 
Duchikey (based on the recipe from Serious Eats)
makes 4 servings

1 box Stove Top stuffing, prepared
1 large duck breast (about 8 oz.)
1/2 lb. boneless, skinless chicken thighs (2-3)
1 turkey cutlet (about 1/4 lb.)
1 tablespoon oil

Adjust oven rack to middle position and preheat oven to 350°F.

Lay duck breast skin-side down on cutting board with long edge perpendicular to edge of table. Using sharp chef's knife or boning knife, make one thin horizontal slit from left side of breast to right side, about 1/4 inch from the top, leaving 1/8th-inch connected on right side. Open like book. Repeat, making another cut from right to left and open duck breast like business letter. Place duck breast between two pieces of wax paper or plastic wrap and pound gently until roughly 1/3 of an inch thick. Refrigerate until needed.
 
Pound chicken thighs between two sheets of wax paper with meat pounder or rolling pin until each one is even 1/3-inch thickness. Refrigerate until needed. Repeat with turkey cutlet.

Duck breast layer

Lay opened duck breast skin side down on cutting board. Season with salt and pepper. Spread 3-4 tablespoons stuffing onto duck meat. Use back of spoon or offset spatula to smooth stuffing entirely over top of breast.

Chicken thighs layer
 
Lay flattened chicken thighs on top of duck. Season with salt and pepper. Chicken layer should be the same size or slightly smaller than the duck layer. Trim chicken if necessary. Spread 3-4 tablespoons stuffing over chicken, smoothing with spatula or back of spoon.

Turkey cutlets layer
 
Lay turkey cutlet on chicken layer, trimming if necessary to fit over chicken. Season with salt and pepper. Spread 1 tablespoon stuffing over turkey. Place remaining stuffing in 13 x 9-inch baking pan.

Roll duchikey jelly-roll style from left to right. Cut five 12-inch pieces of butcher's twine and lay parallel to each other in 1-inch intervals. Place duchikey on top and twine working from outside towards center to secure. Trim off excess twine.

Wrapped duchikey
 
Season duchikey with salt and pepper.  Heat oil over medium-high heat in heavy 12-inch oven-proof cast iron or stainless steel skillet until shimmering. Add duchikey, duck skin side down, and brown on all sides, approximately 8 minutes total. Transfer duchikey and stuffing to oven and roast until instant read thermometer inserted into center of duchikey registers 150°F, about 30 minutes. Remove duchikey to cutting board, tent lightly with aluminum foil and let rest at least 10 minutes before slicing.

Duchikey
 
I found that the original recipe called for too much turkey, so I halved the amount.  I liked that it was so much easier to make than a turducken, and it's perfect if you're just feeding a small crowd for Thanksgiving.  Moving the duck to the outside and browning it first gives you a really nice, crispy skin, too, without making the rest of the meat dry.

Next:  Grapefruit Pie
Previously:  Cereal Milk Ice Cream and Pie
Four years ago:  Homemade Crystallized Ginger

Monday, March 30, 2009

Hong Kong Style Pan-Fried Noodles

And now it's time to get back to some more Asian dishes. Pan-fried noodles are one of my favorite dishes at Cantonese restaurants, and I made this a couple of weeks ago when I needed to used up some (more) leftovers from hot pot as well as some broccoli from a Boston Organics delivery. I was really surprised at how easy it was; the hardest part was going to the Asian grocery store and finding the fresh Hong Kong style egg noodles. You could probably try making these with fresh or cooked semolina or non-Hong Kong style egg noodles, but the results won't be the same. The thin Hong Kong style egg noodles allow you pan-fry them while fresh so that they get crispy and cooked through without needing to boil them first, and they serve as the perfect medium for absorbing the gravy as well.

Other than the noodles, you can probably substitute any other meats and veggies you want: shrimp, beef, pork, chicken, squid, or baby corn, straw mushrooms, snow peas, baby bok choy, Chinese broccoli, etc.

Pan-fried Noodles with Chicken and Broccoli

Hong Kong Style Pan Fried Noodles (based on sugarlens' recipe)
serves 4

1 (16 oz.) package Hong Kong style noodles (I found these in the refrigerated aisle at the Asian grocery store)
2 small chicken breasts, sliced thinly
1 small onion, sliced thinly
2 cups broccoli, chopped
2/3 cup sliced mushrooms
3 cloves garlic, minced

Marinade:
2 teaspoons corn starch
2 teaspoons sesame oil
2 teaspoons soy sauce
2 teaspoons oyster sauce

Sauce:
2 tablespoons of oyster sauce
2 tablespoons of soy sauce
1 cup water
2 tablespoons of sugar
2 teaspoons of cooking wine

Thickening:
1 tablespoon of corn starch
1 tablespoon of water

Add oil to a heated pan. Add noodles. The noodles should brown very quickly. Use a pair of chopsticks or a spatula to make sure the noodles are getting browned evenly. If you need to, use the spatula to press the noodles against the pan or add some more cooking oil to make sure you brown most of the noodles. Plate the noodles and set aside.

Pan-fried Noodles

Mix together the ingredients for the marinade and add the sliced chicken. Set aside. In a separate bowl, combine the ingredients for the sauce. In a smaller bowl, combine corn starch and water. Set aside.

Add oil to a heated pan and saute garlic and broccoli for about 3 minutes or until garlic is starting to turn brown. Add a half cup of water and cover to let the broccoli finish cooking by steaming. After 5 minutes, remove cover and check to see if the broccoli is done. Salt to taste and dish out.

Add oil to a heated pan and cook onions, mushrooms, and chicken until done. Add broccoli back to the pan. Stir well. Add the sauce mixture. Bring it to a boil.

Add the corn starch mixture and give a quick stir. Bring it to a boil.

Pour gravy on top of the noodles. Serve immediately!

Yum

I'm definitely one of those "save the best for last" type eaters, so I almost always have a little bit of the crunchy noodles left at the end. Yum!

Saturday, February 28, 2009

Homemade Chicken Stock

The basis for any soup is a good stock, which is really so simple to make that there's no reason to ever use the canned kind. I used two great tips from thekitchn.com to make my latest batch:

1. Save vegetable scraps for stock. I had some leftover celery and carrots from making the clam chowda and extra onion left from making roast chicken which I threw in a freezer bag until I was ready to make the stock.

Freezer bag of scraps for stock

2. Use the pasta strainer insert. A great way to remove the carcass and vegetables after the stock is done without having to awkwardly dump everything into a strainer. You still have to strain the stock, but it's a lot easier without the huge carcass in the way.

Scraps in pasta insert

Homemade Chicken Stock
(based on this recipe)
makes 6 quarts
Chicken carcass or 4 chicken breast carcasses (preferably with a little meat left on it)
A handful or two each of onions, carrots, and celery
Bay leaf
Peppercorns
Garlic cloves

Pull apart whatever is left of the chicken carcass. It's good to split small bones apart; this helps the stock jell. Cut up one or two onions, a few stalks of celery, and a couple carrots and pile into the pasta insert of a large pot with the chicken pieces. Add a bay leaf, a few peppercorns, a couple of garlic cloves, and any other wilting greens you have around - leeks and turnips are good too.

1 Bay leaf
Fill the pot with water, cover, and put over high heat.
Bring to a rolling boil then lower the heat. You don't want this to boil briskly; the water should just gurgle, with a few bubbles occasionally hitting the surface.
If a foamy muck comes to the top, skim it off. This is just fat rising to the surface. Don't worry if you can't get all of it. Let simmer for about four hours - or however long you have. Two hours will produce a reasonably good chicken stock, although it is not ideal.
Removing the solids
Once the stock is done, remove from heat. Remove the pasta insert and drain. Carefully ladle stock through a sieve into storage containers, pouring it out once it is at a manageable volume.
Chilled chicken stock
If it is cold outside, set the containers of stock outside to chill; otherwise, let cool to room temperature and then transfer to refrigerator to chill.
Skimming off the fat
Once it has chilled, skim off the fat from the top of the stock. The stock will keep in the fridge for a few days and in the freezer for a few months.
Homemade chicken stock
If you don't feel like your stock has enough body, you can reduce it in volume by boiling it until you get it to where you want it. Whatever you do, do not add salt to your stock. That should be done when you are making your soup; you can always add salt to a soup but there's no way to save an over-salted soup.
Next up: Potato Leek Soup with Bacon
Wednesday, January 7, 2009

Thin Crust Chicken Masala Pizza with Spinach and Parmesan Cheese

I'm supposed to be in Green Bay right now, only I'm not; I'm sitting in my own kitchen typing this. In my two years of working in a position where I travel 50%, this is the first time that my flights have been completely cancelled. Not just delayed, but cancelled. I consider myself lucky on two accounts: 1) that this is the first time, and 2) that I found out when I was still sitting in this chair at home 2 hours before the flight. I'm just grateful I didn't have to find out at the airport or worse, wasn't stuck waiting at the airport as they delayed the flight repeatedly before they cancelled.

So since I was stuck at home I decided to try making some chicken masala since I'd been thinking about learning how to make Indian food. I started off small, though, and bought the Trader Joe's masala simmer sauce instead of making my own and just added cut-chicken breast and some frozen spinach. Heaped on top of brown jasmine rice, it wasn't bad, but it wasn't...satisfying. My two roommates had already helped themselves to some, so I just had a little bit left, maybe a third of a cup. It wasn't exactly enough to toss, but not enough for another meal either.

And then I thought, why not try to make a pizza out of it? I seriously don't even know where the idea came from, but it didn't seem absolutely far-fetched. The masala was tomato-based, and I'd seen plenty of pizzas with chicken and spinach on them. The only cheese I had in the fridge was some shredded parmesan, but why not give it a shot? I dug out The Kitchn's old thin crust pizza recipe, which thankfully did not need a lot of time to make.

Less than an hour later, I was taking the first bite of this strange, new pizza. The crust was exactly as it had been described: slightly crunchy but with a bit of a chew to it, and innocuous enough for whatever you wanted to pile on top. The pizza as a whole kind of reminded me of California Pizza Kitchen's BBQ Chicken pizza except that instead of bbq sauce, it was masala sauce, so spicier and less sweet. I only added a very light sprinkle of the parmesan so that you can barely taste it, but something about the texture kind of tempers the spiciness of the masala sauce.

Copying Bon Appetit

Thin Crust Chicken Masala Pizza with Spinach and Parmesan Cheese

makes one 8"x11" pizza

1/2 jar Trader Joe's masala simmer sauce
9 oz. chicken breast meat, cut into 1" chunks
3/4 cup frozen spinach
1 thin crust pizza dough (I used half the recipe from here)
1/4 cup shredded parmesan or mozzarella cheese

Add 1/2 cup water and chicken to the simmer sauce. Heat to boiling and then reduce to simmer for 15 minutes, stirring occassionally. After 10 minutes, add the spinach and stir to mix.

Have 3 small girls eat their 3 small servings over rice and save the remaining 1/3 cup. Shred remaining chicken.

Heat oven to 500 °F and place a baking stone in the lower middle rack.

Place the pizza dough on a 12" sheet of parchment paper and use your hands to spread the dough out to 1/4" thickness or less. Top with the chicken masala mixture and spread out with a spoon. Add more masala simmer sauce if necessary to cover.

Transfer the pizza to the baking stone using a baking sheet or thin cutting board. Bake for 5 minutes and then turn 180° and bake another 3 minutes.

Sprinkle cheese on top and bake for another 2-3 minutes.

Remove from oven and let sit on a wire rack to cool for at least 5 minutes (this is when the crust gets crispy so it's worth the wait!).

Thin Crust Chicken Masala Pizza with Spinach and Parmesan Cheese

I still have one ball of pizza dough left so I think when I come back from Green Bay and Chicago I'll try making a breakfast pizza with eggs on top. Or maybe the bbq chicken pizza. We'll see....