Showing posts with label orange. Show all posts

Friday, February 13, 2015

Odile's Fresh Orange Cake

https://www.flickr.com/photos/joyosity/16309101170/

I came across Dorie Greenspan's Baking Chez Moi cookbook at my local library the other day and borrowed it without even opening it.  I've made some of her recipes in the past and totally trust her authority in all things baking, just like I trust Jeni's in all things frozen.  I was a little disappointed that there weren't pictures for every recipe in the book, but maybe that's a good thing because otherwise I'd want to make (and eat) every single last thing in there.
https://www.flickr.com/photos/joyosity/16495536932/

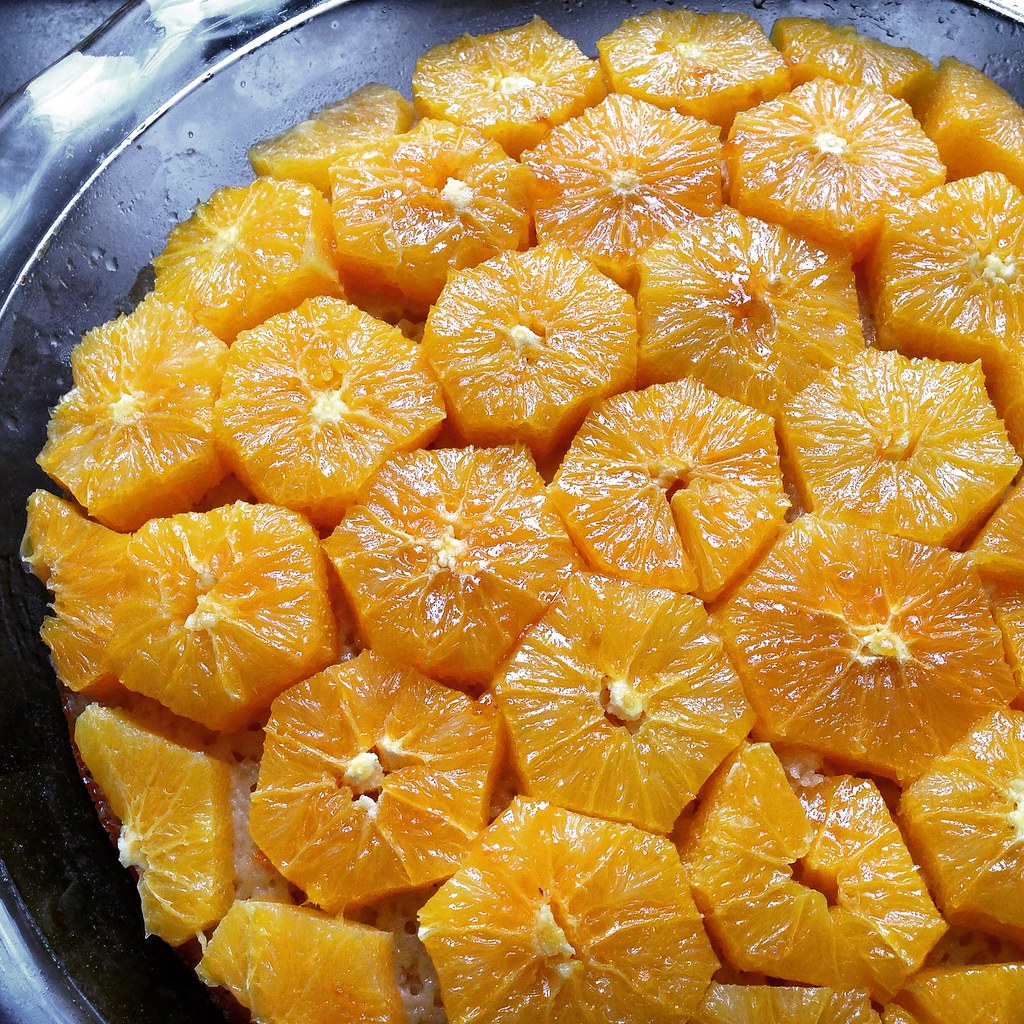
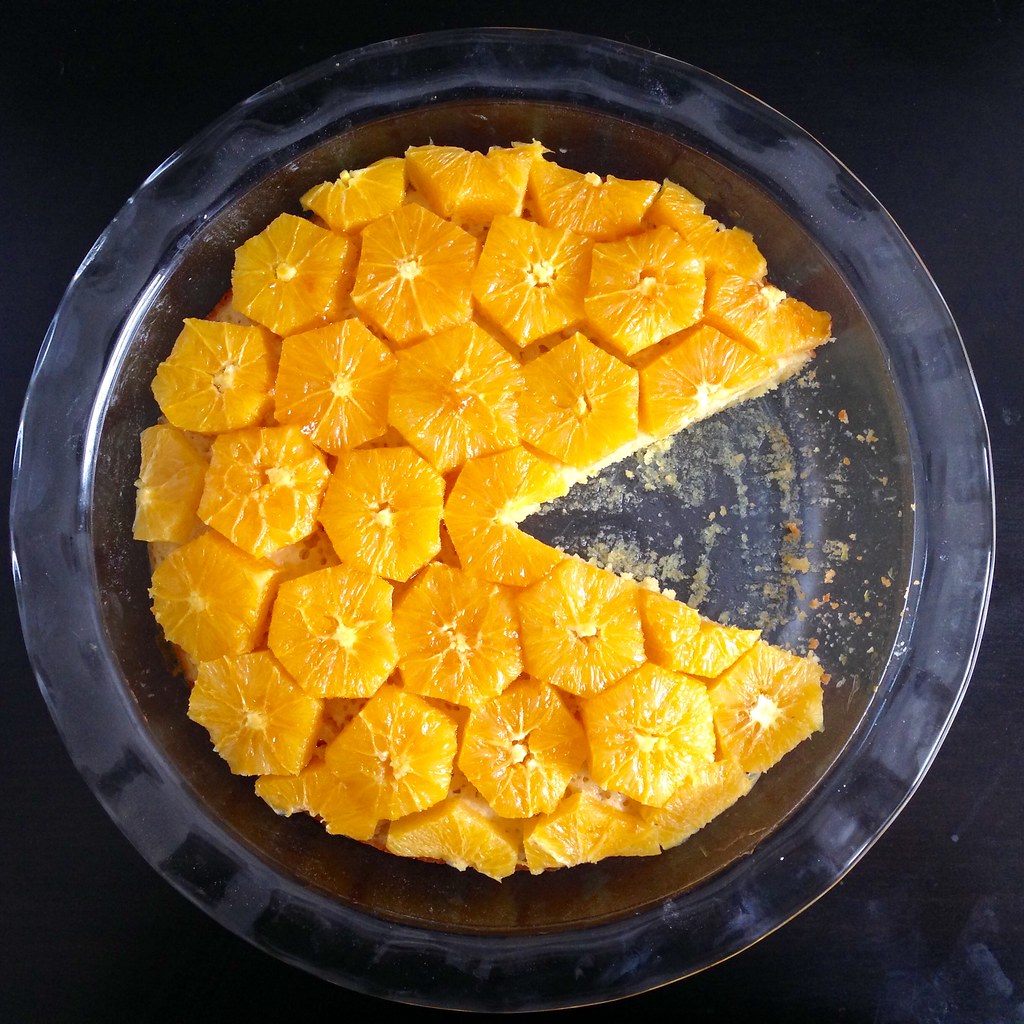
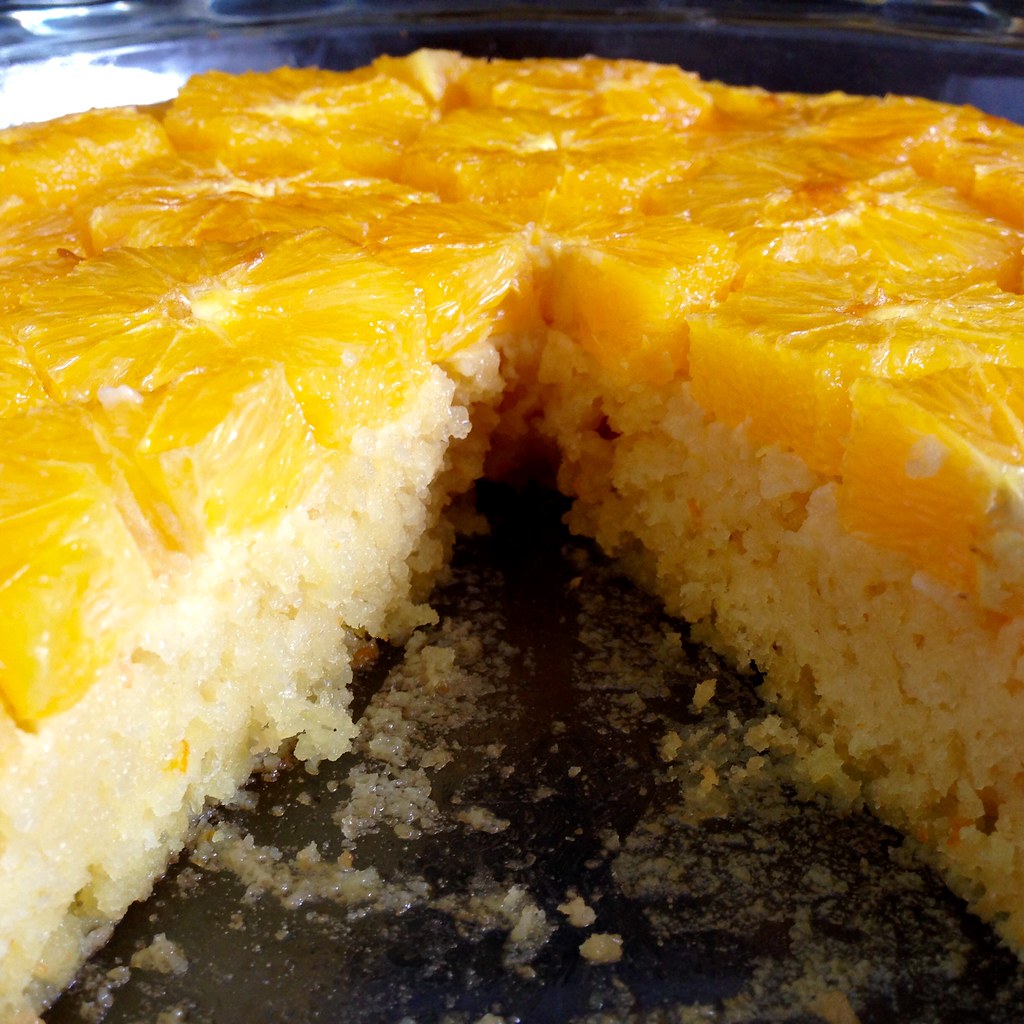
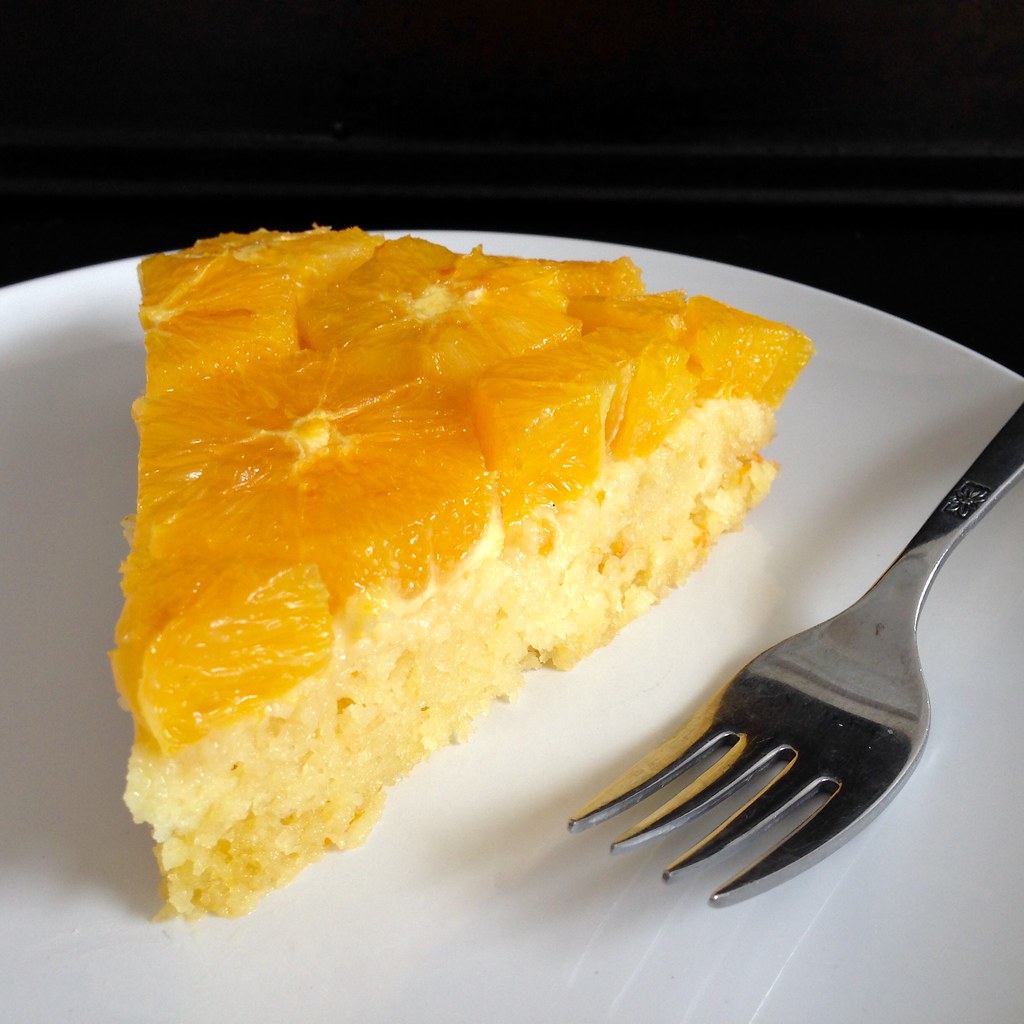
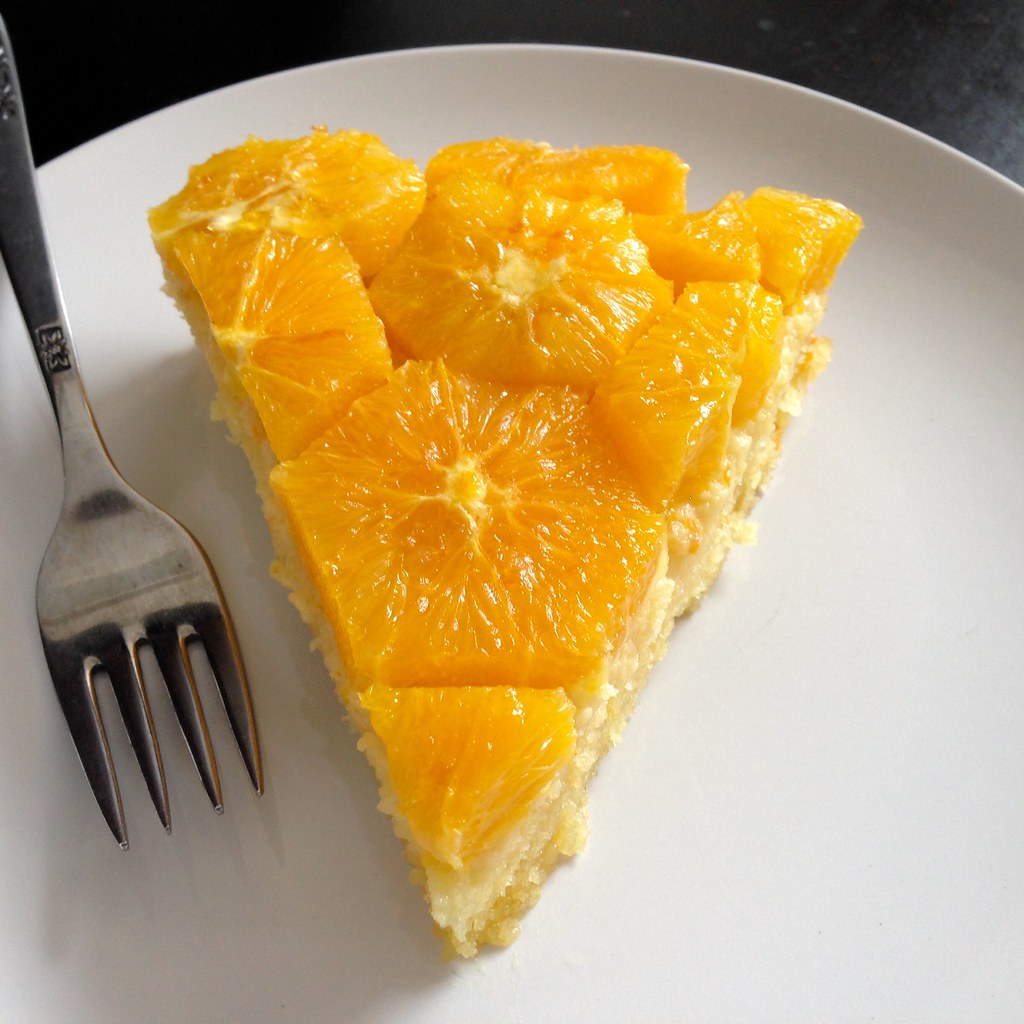
The first thing that caught my eye was this fresh orange cake that had beautiful slices of glistening oranges on top.  As I was currently sitting at home in the midst of the third snowstorm to hit in as many weeks, I desperately needed a reminder of something warm and sunny.
https://www.flickr.com/photos/joyosity/16470530396/

I made just a few adjustments to her recipe; since I didn't have an 8" cake pan, I used a pie pan, which was 8" at the bottom but wider on top.  This just meant more space for the showstopping orange topping.  And after cutting a few of the oranges into her suggested pentagon shape, I realized I was wasting a lot less of the orange if I cut them into hexagons instead.  I think hexagons are easier to arrange together than pentagons anyways (or maybe I've just been playing too much Civilization V).  In her recipe, she says you only need 3 oranges to fill the top of your cake, but I found I needed a lot more, like almost the whole bag.  I guess it depends on the size of your oranges, but one way you can estimate how many slices you need is to poach them in a pot the same diameter as the top of your cake.  If you arrange them in a single layer in the pot, you'll see if you need to keep cutting up more oranges to cover the bottom.
https://www.flickr.com/photos/joyosity/15876386963/

Odile's Fresh Orange Cake (slightly adapted from Dorie Greenspan's Baking Chez Moi)
makes 1 cake

For the cake:
3/4 cup plus 2 tablespoons all purpose flour
1 1/2 teaspoons baking powder
1/2 teaspoon salt
1/2 cup sugar
1 large orange
1 stick unsalted butter, at room temperature
2 large eggs, at room temperature

For the topping:
At least 3 oranges, possibly a lot more
1 cup sugar
1 cup water
1 cinnamon stick (optional)
2 tablespoons orange marmalade

Center a rack in the oven and preheat the oven to 350°F.  Butter an 8-inch round cake pan, dust with flour and tap out the excess. Whisk together the flour, baking powder, and salt in a small bowl. Put the sugar in the bowl of a stand mixer or in a large bowl in which you can use a hand mixer. Grate the zest of the orange over the sugar. Squeeze the juice into a measuring cup–you should have about 1/3 cup, but a little more or a tad less won’t throw things off.

Rub the sugar and zest together with your fingertips until the sugar is moist and fragrant. If you’re using a stand mixer, fit it with the paddle attachment and attach the bowl. Add the butter to the bowl and beat on medium speed for about 2 minutes, until the mixture is smooth and creamy. Add the eggs one at a time, beating for 1 minute after each one goes in, then pour in the juice and beat to blend. Reduce the mixer speed to low and add the dry ingredients, mixing only until they disappear into the batter. The batter may look a little lumpy and grainy, but that’s fine. Turn the batter out into the cake pan and smooth the top.  Bake the cake for 20 to 25 minutes, or until a knife inserted into the center comes out clean.

In the meantime, make the topping.  Cut the tops and bottoms off each orange, stand the orange up and remove the remaining peel by cutting straight down the sides of the orange 6 times, to shape it into a hexagon.  Then turn the oranges on their sides and slice them about 3/8" thick.

Bring the sugar, water, and cinnamon stick to boil in a medium saucepan, then reduce the heat and simmer for 2 minutes.  Gently drop the orange slices into the syrup and cook over low heat for 3 minutes.  Carefully remove the slices with a slotted spoon; strain and reserve the syrup.

Arrange the orange slices on top of the cake and pour about a 1/2 cup of the poaching syrup over the oranges and cake.  Melt the marmalade and brush it over the fruit.  Cool the cake completely before slicing and serving.
https://www.flickr.com/photos/joyosity/16308802508/

Next:  First Night in Florence Spaghetti
Previously:  Heart-Shaped Tamagoyaki (Japanese Omelet)
Last Year:  Squid Ink Spaghetti Aglio e Olio
Two Years Ago:  Jjajungmyeon (Korean Black Bean Noodles)

Thursday, August 14, 2014

Citrus Cured Salmon

https://www.flickr.com/photos/joyosity/14901944553/in/photostream/

Ever since I saw Jen's post for Thomas Keller's citrus marinated salmon, I've wanted to try it out.  I love cold-smoked salmon, and the thought that I could make something similar at home was really intriguing to me.  I was in Seattle again recently, and went to Pike Place Market specifically to get another Copper River sockeye salmon just for this purpose.  Since the salmon is never actually cooked, you'll want to get the freshest sushi-grade salmon available and treat it as you would if preparing sushi by keeping it chilled as much as possible.

https://www.flickr.com/photos/joyosity/14695379010/

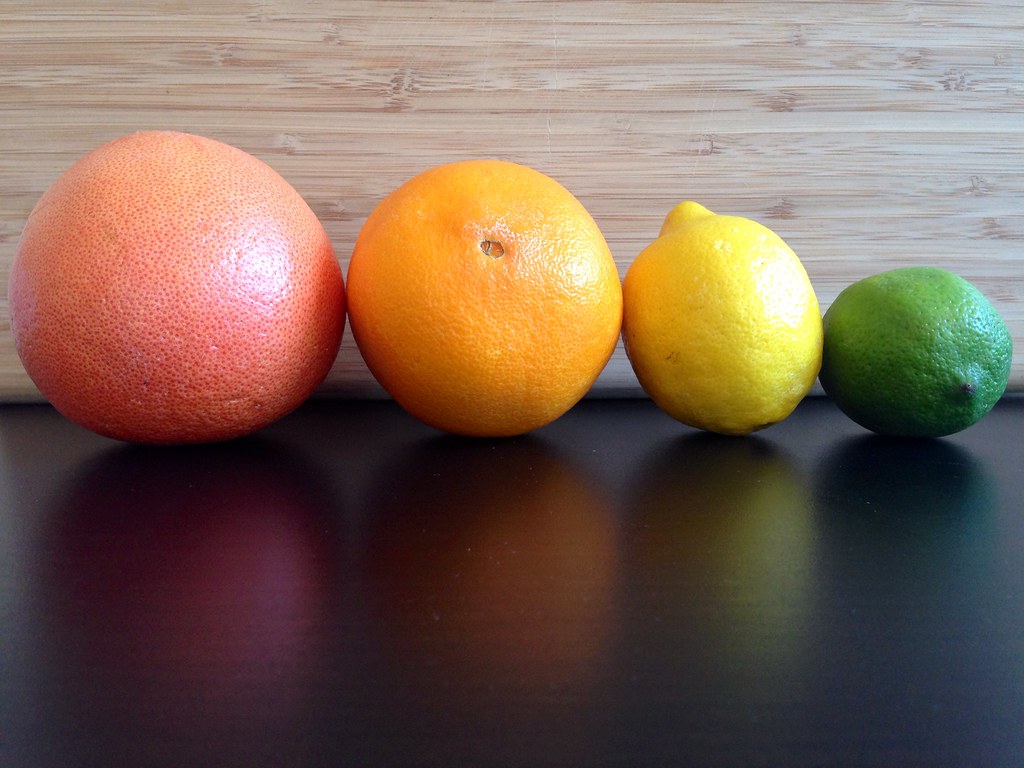
Jen's recipe calls for a teaspoon and a half each of lime zest, lemon zest, orange zest, and grapefruit zest, but it's okay if you don't have all four citrus fruits; you just need about 2 tablespoons total of citrus zest for this recipe.  Since I had the time to cure my salmon for a full 24 hours, I chose not to press the salmon while curing it, trusting that time and salt would perform the necessary osmosis.

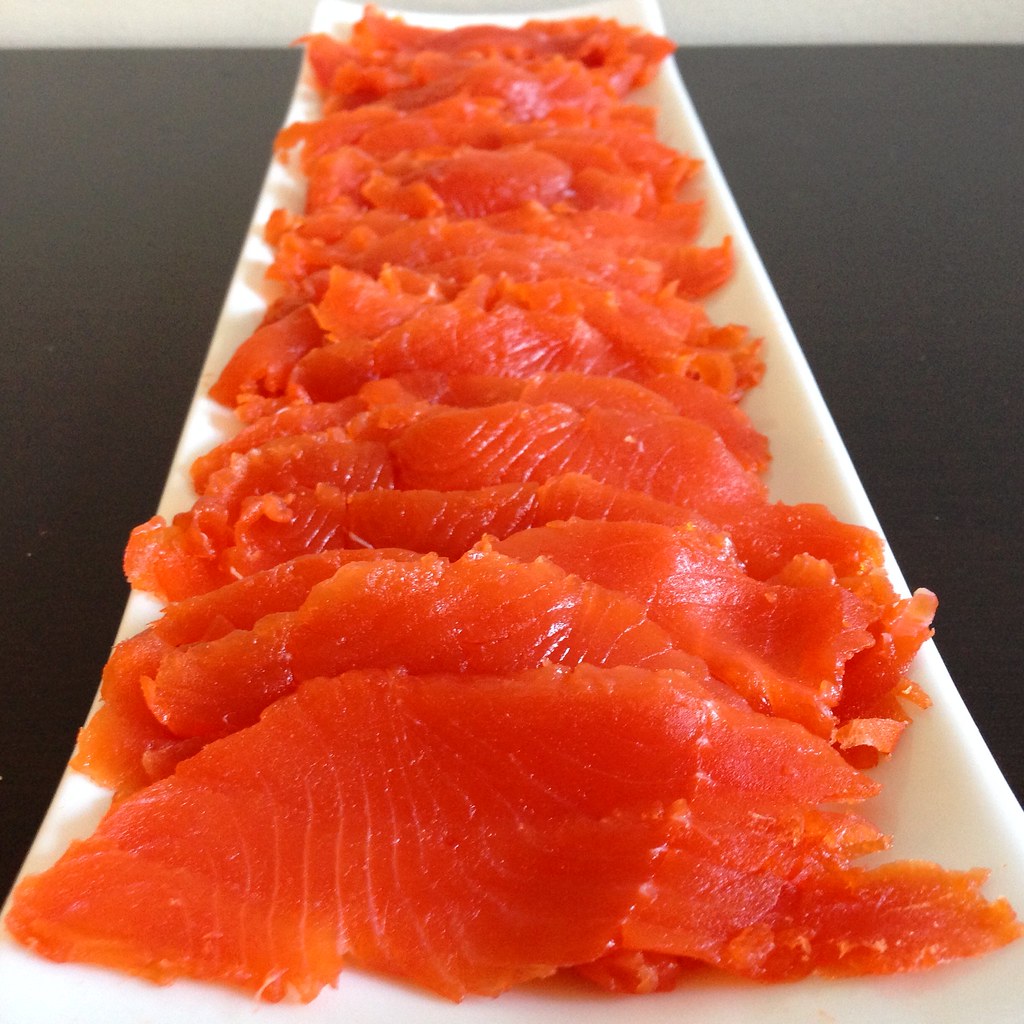
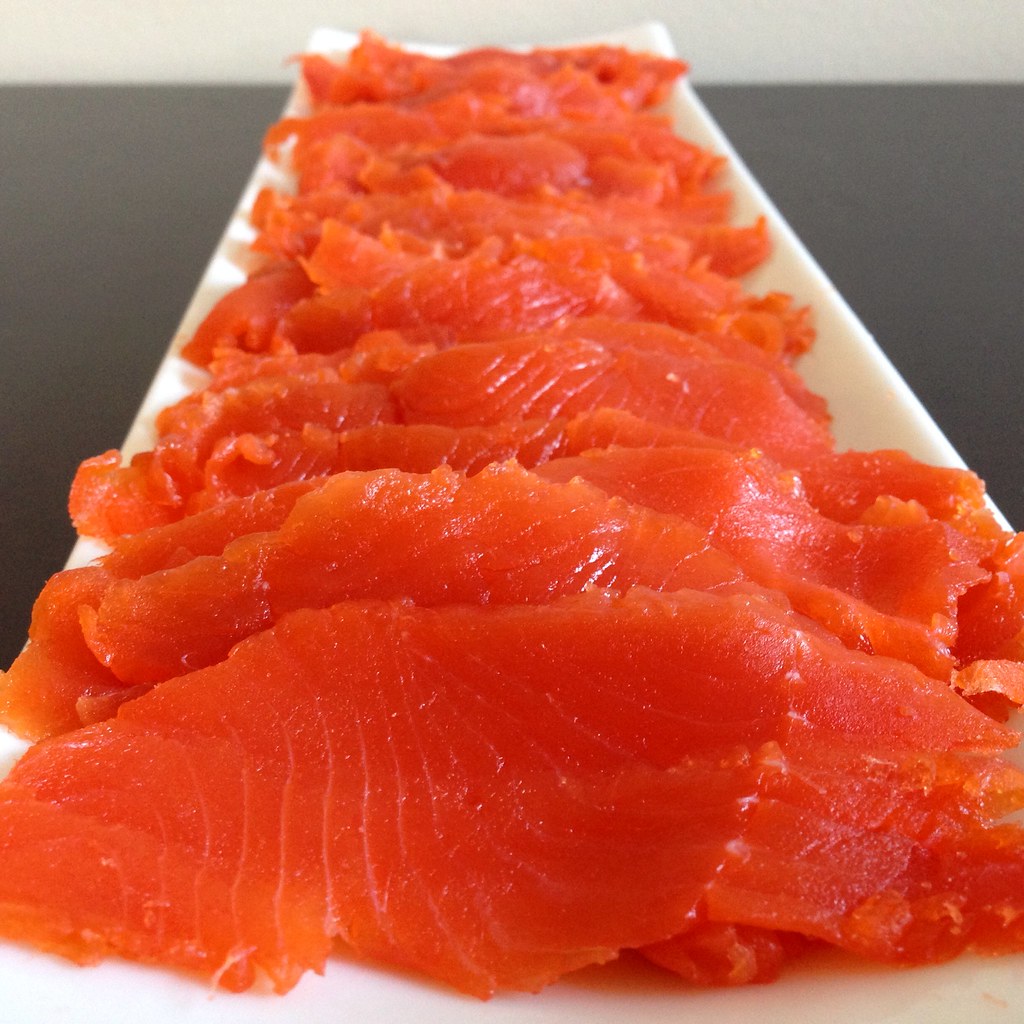
The change in texture of the cured salmon is pretty spectacular.  It's a lot more dense and almost gummy like pâte de fruit.  By itself, the cured salmon can be pretty salty, but served with some crème fraîche or sour cream and crackers, it makes for a wonderfully impressive appetizer!

https://www.flickr.com/photos/joyosity/14901944553/

Citrus Cured Salmon (adapted from Tiny Urban Kitchen)
serves 6-8

Zest from 1 pink grapefruit
Zest from 1 orange
Zest from 1 lemon
Zest from 1 lime
1/2 cup kosher salt
1/2 cup sugar
1 salmon filet, skin removed (about 2 lbs.)

https://www.flickr.com/photos/joyosity/14879604864/

Mix the zests, salt, and sugar together.

Feel along the salmon and if there are any pin bones, remove them with tweezers or pliers.

https://www.flickr.com/photos/joyosity/14695376000/

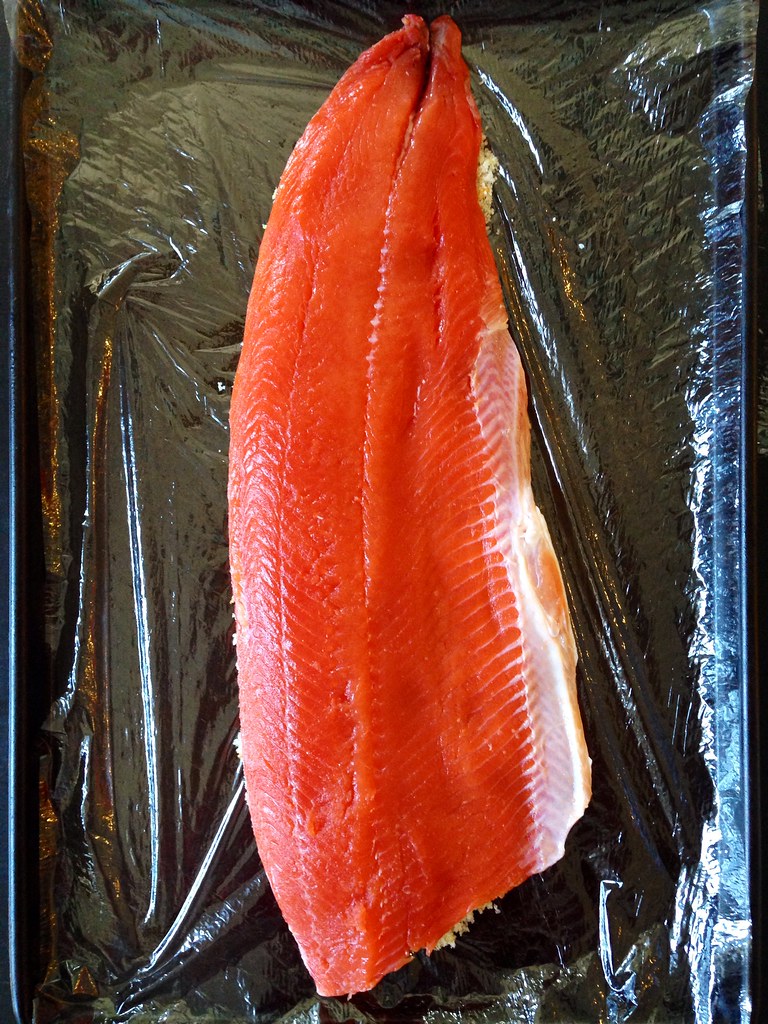
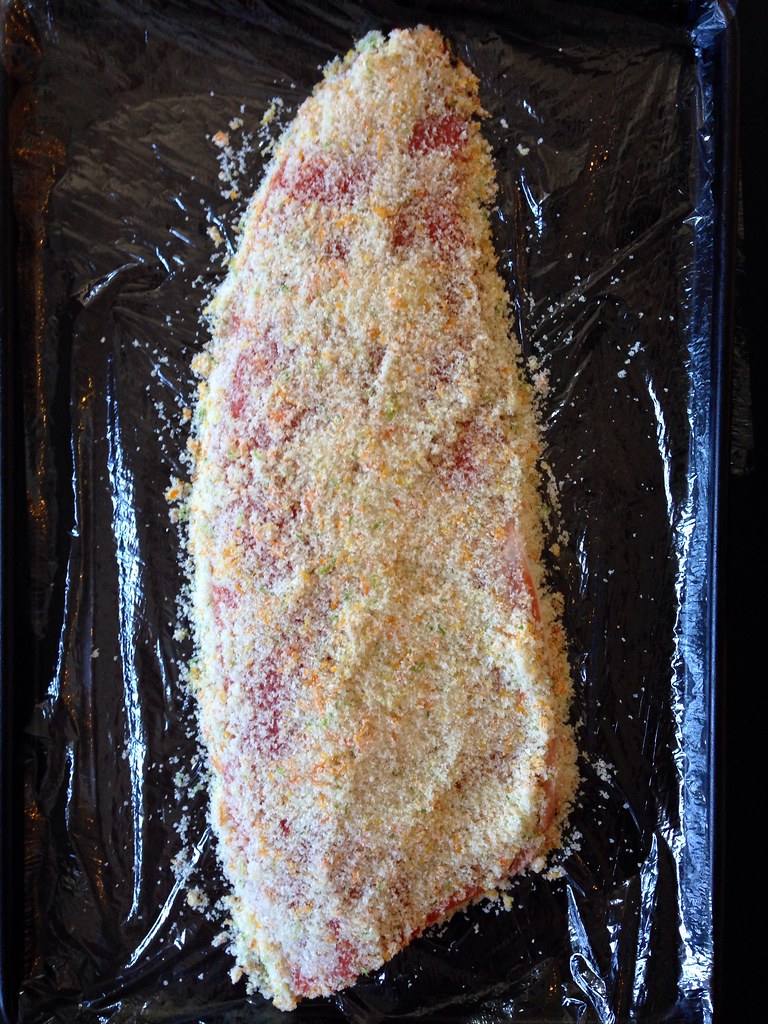
Line a large tray with enough plastic wrap to completely wrap the filet.  Spoon half of the salt mixture onto the tray in the shape of the filet.  Place the filet on top, and spoon the rest of the salt mixture on top of the salmon.  Spread the salt mixture evenly over the fish. 

https://www.flickr.com/photos/joyosity/14695452018/

 Wrap well with the plastic wrap, and transfer the tray to the refrigerator.  Let cure for 24 hours.

https://www.flickr.com/photos/joyosity/14901937893/

Unwrap the salmon and rinse under cold water.  Pat dry and transfer to a cutting board.  With a sharp knife, cut thin slices at an angle against the grain.

https://www.flickr.com/photos/joyosity/14695538077/

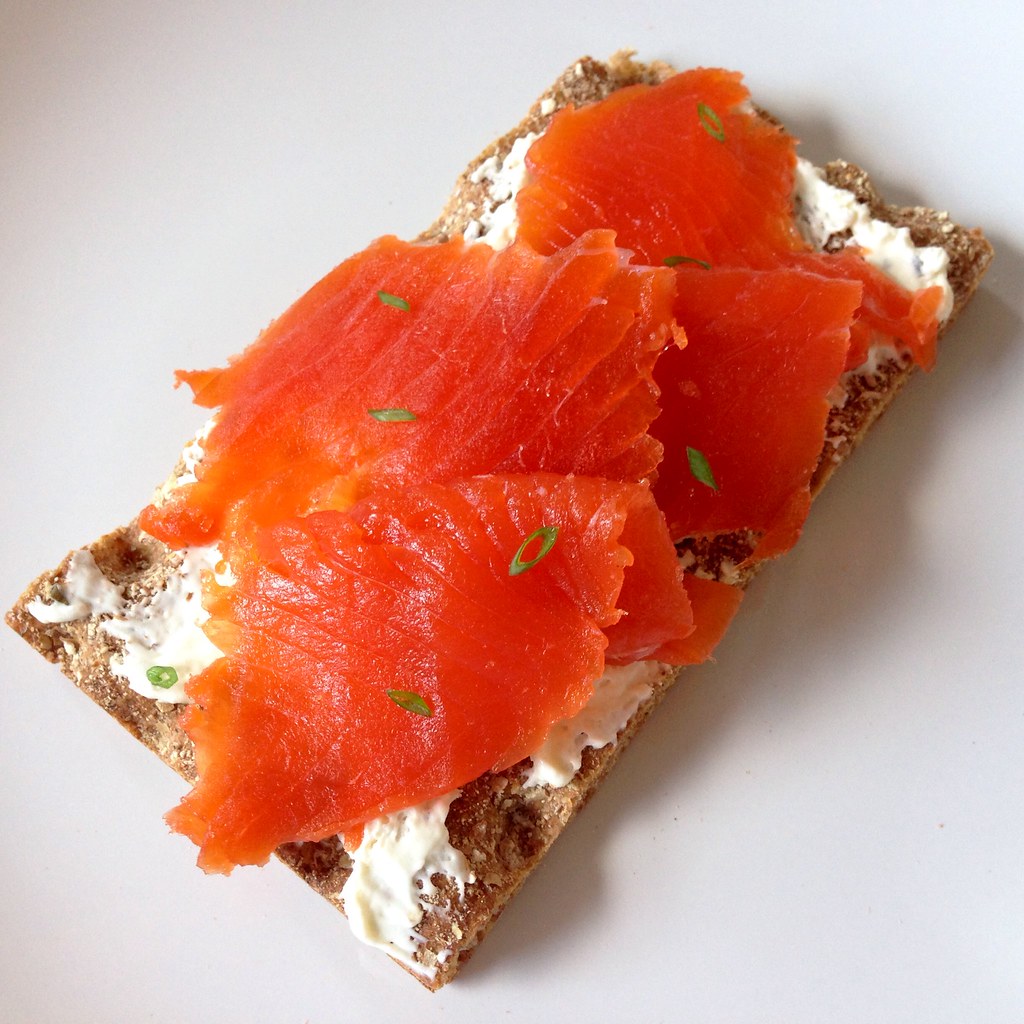
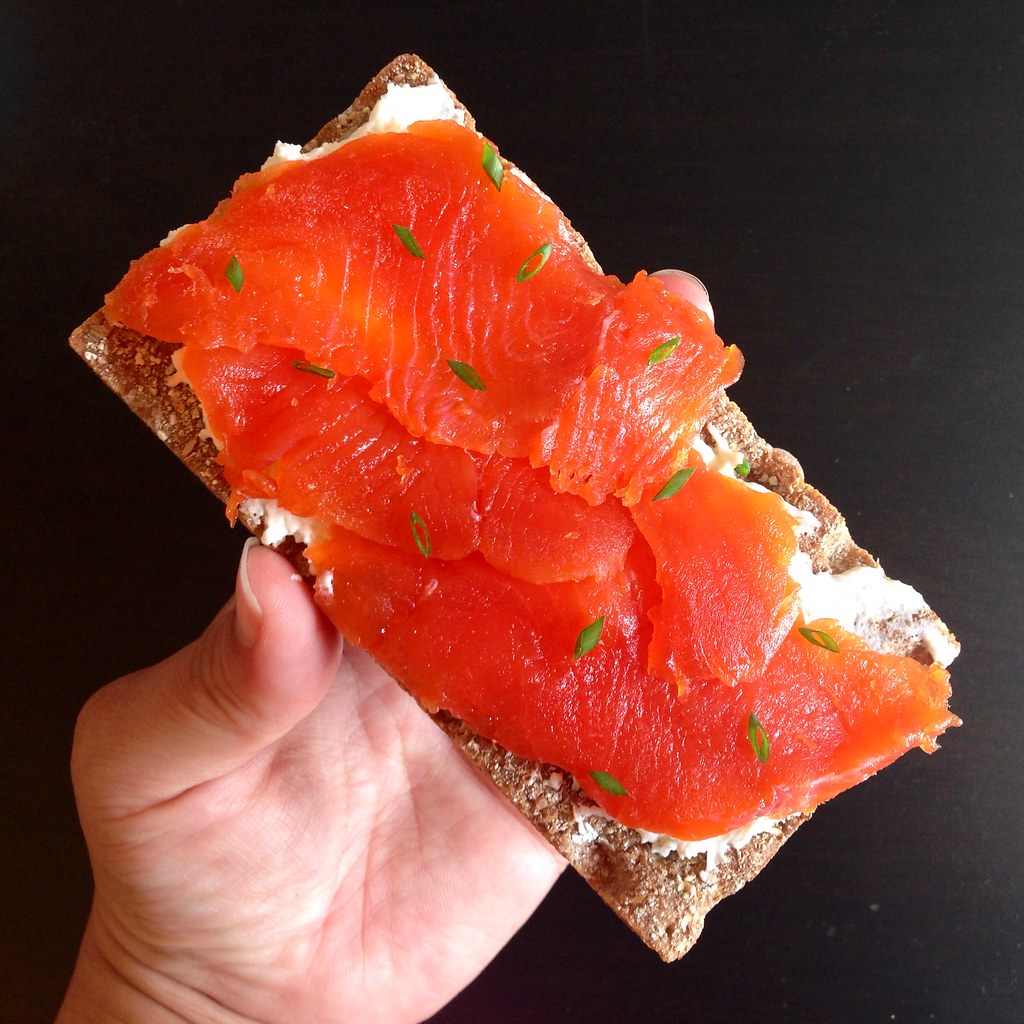
Serve with crème fraîche, sour cream, or cream cheese and crackers or bread.  I served mine with chive cream cheese and hearty crispbread.

https://www.flickr.com/photos/joyosity/14710143737/

After you've zested the fruits, you'll want to use them right away for something else or else they'll dry up really quickly.  I recommend juicing them; I used the juice to make an Atlantic Beach Pie!

Next:  Bill Smith's Atlantic Beach Pie
Previously:  Coconut Ice Cream with Mango Passion Caramel Swirl
Last Year:  Shakshuka Pizza

Monday, June 23, 2014

Orange Mocha Frappuccino!

https://www.flickr.com/photos/joyosity/2567370431

Ten years ago I paddled in my first dragon boat race.  Two years later, I started my own team and named it The Boat for Kids Who Don't Paddle Good.  Every year, before the Boston Dragon Boat Festival, we get together for a potluck and watch Zoolander.  Every year, in the official program, our team bio reads, "We're pretty sure there's a lot more to life than being really, really, ridiculously good looking, and we plan on finding out what that is."  Every year, I look forward to paddling with my team, making new friends, and leaving it all on the water.

Every year, that is, until this year.  =(  So when the team admiral told me I could make up for not being on the team by bringing orange mocha frappuccinos to this year's potluck, I thought, "challenge accepted."  Unfortunately, the same busy travel schedule that kept me from joining the team kept me from making these in time for the potluck, but I hope creating this recipe from scratch and posting it goes toward making amends.  Because you know what can really help you sort through these important issues?

https://www.flickr.com/photos/joyosity/14450993935/

Orange Mocha Frappuccino!
makes 3 large frappes

3/4 cup coffee beans, ground
1 large orange
2/3 cup sugar
1/3 cup plus 1 tablespoon cocoa powder
Pinch of salt
1 1/2 cups milk
3 cups ice
Whipped cream (optional)

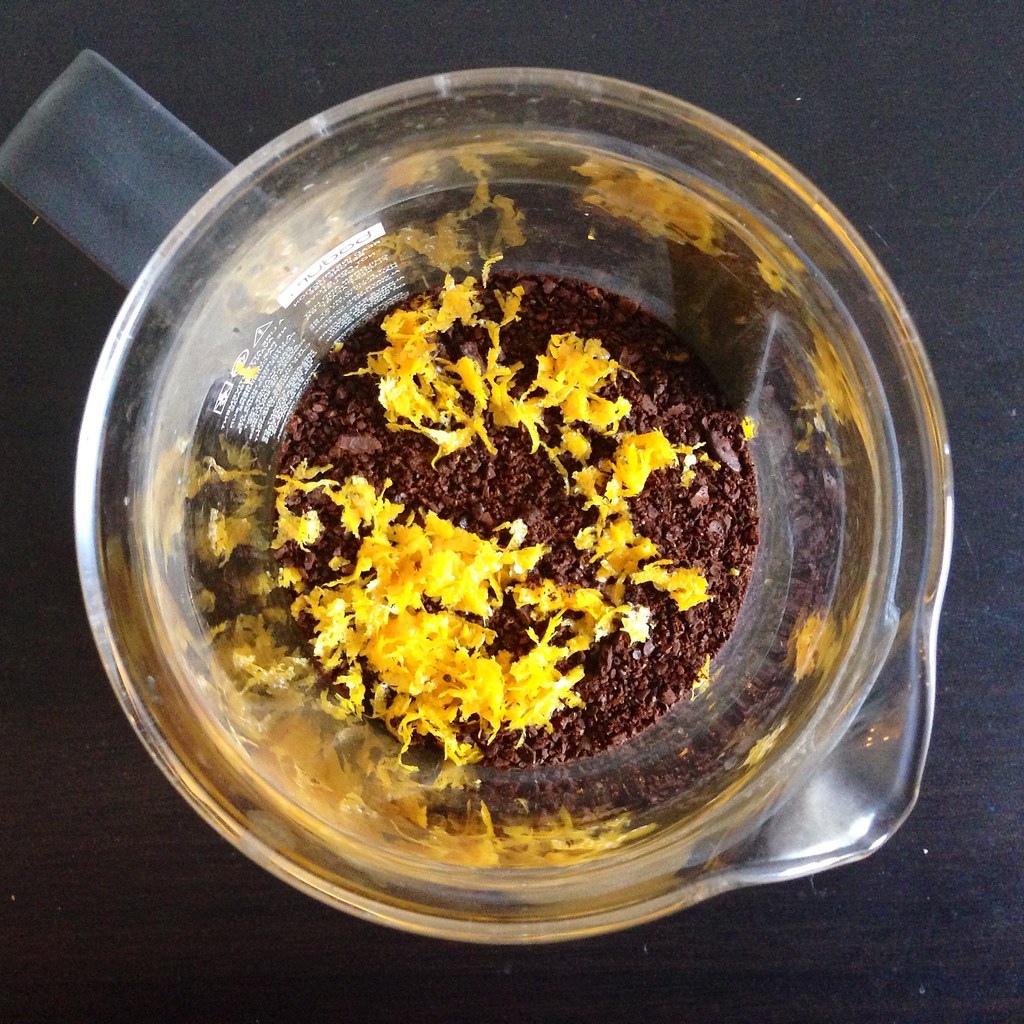
Zest and juice the orange.  Combine the ground coffee and orange zest in a 2-cup French press or measuring cup.  Add enough water to reach the 2 cup line.  Stir to make sure all the coffee grounds get wet.  Let sit a few minutes and then stir one more time to disperse all the coffee grounds that have floated to the top.  Cover and let sit overnight at room temperature.

https://www.flickr.com/photos/joyosity/14264380670/

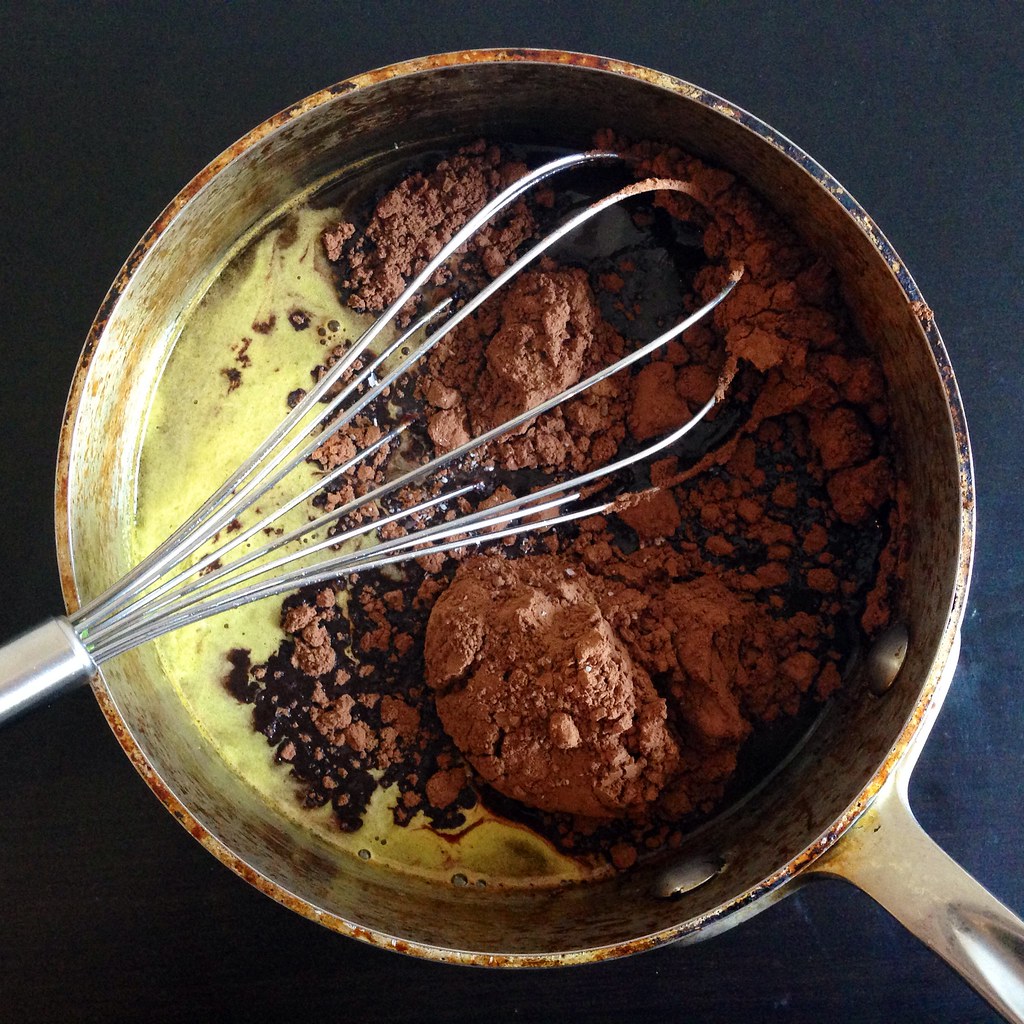
Add the orange juice to a measuring cup and add enough water to reach 2/3 cup.  Pour into a small saucepan and add the sugar, cocoa powder, and pinch of salt.  Whisk and heat over medium-low heat until it starts to simmer and is slightly thickened.  Cool and transfer to another container.  Store in the refrigerator until needed.

https://www.flickr.com/photos/joyosity/14471164813/

The next day, press and/or filter the cold brew coffee. 

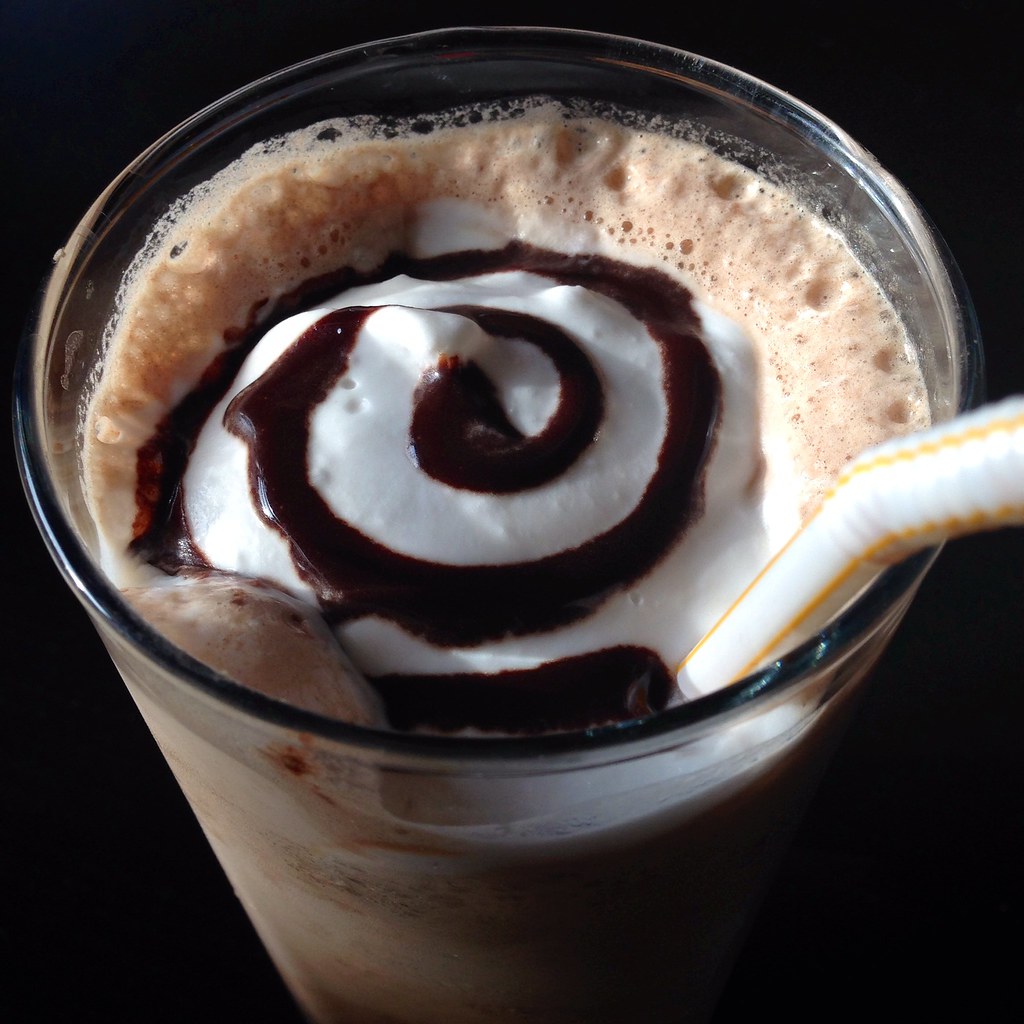
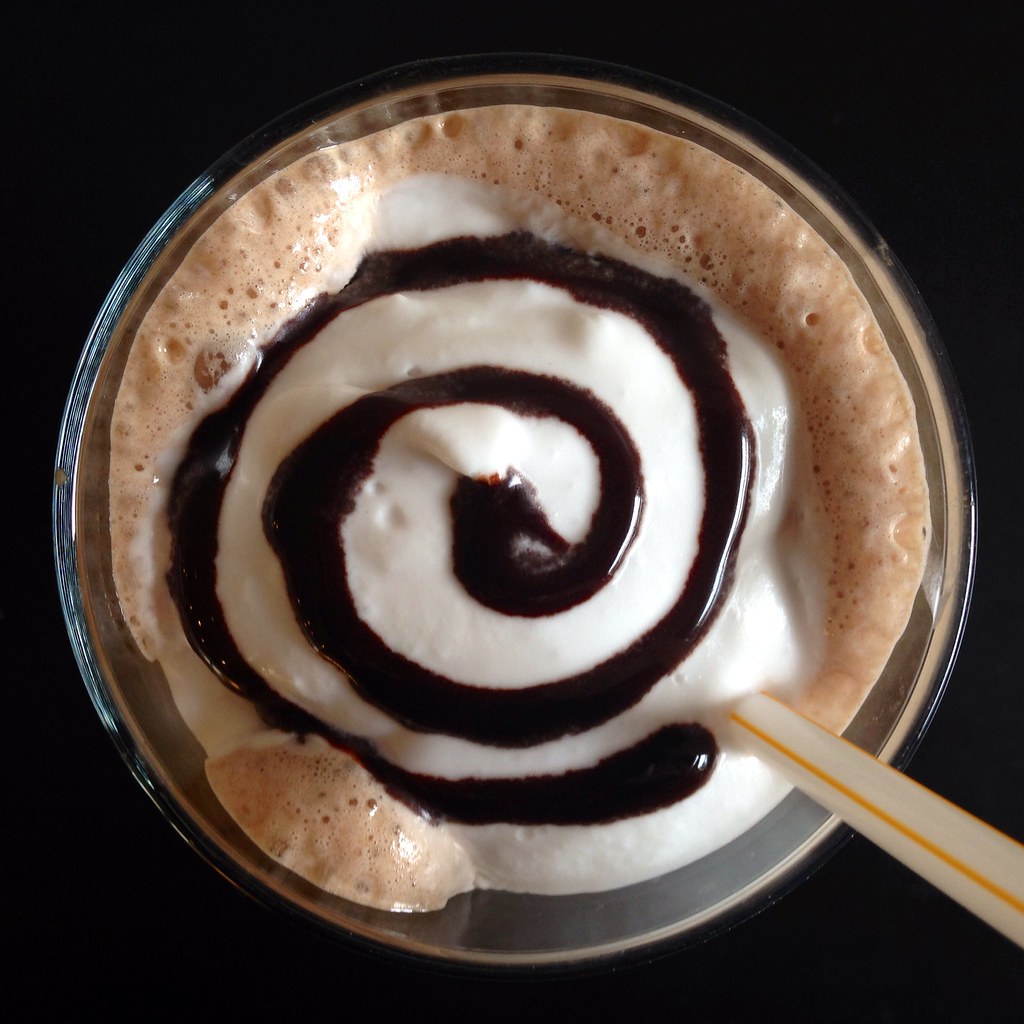
For each frappuccino, combine 1/2 cup of orange cold brew coffee, 1/2 cup of milk, 3 tablespoons of the orange chocolate syrup, and a cup of ice in a blender.  Blend until frothy and pour into a tall glass.  Garnish with whipped cream (I used coconut whipped cream) if desired and more orange chocolate syrup.  Enjoy!

https://www.flickr.com/photos/joyosity/14264559107/

Alternatively, you could also freeze the cold brew coffee into ice cubes and blend those with the milk for a stronger frappe.  And you could also add some finely chopped candied orange peel or orange sugar on top for even more garnish.  You'll have more than enough orange chocolate syrup left over which you can use to make orange chocolate milk (seriously yum), drizzle over ice cream, eat with a spoon straight out of the jar....

Note:  No gasoline fights were started as a result of drinking these frappuccinos.

Next:  Plum, Nectarine, and Peach Galette
Previously: Tofu and Shiitake Potstickers
Last Year:  Passion Fruit Macarons
Four Years Ago:  Amnesty Bread

Monday, June 16, 2014

Orange and Fennel Salt-Baked Salmon

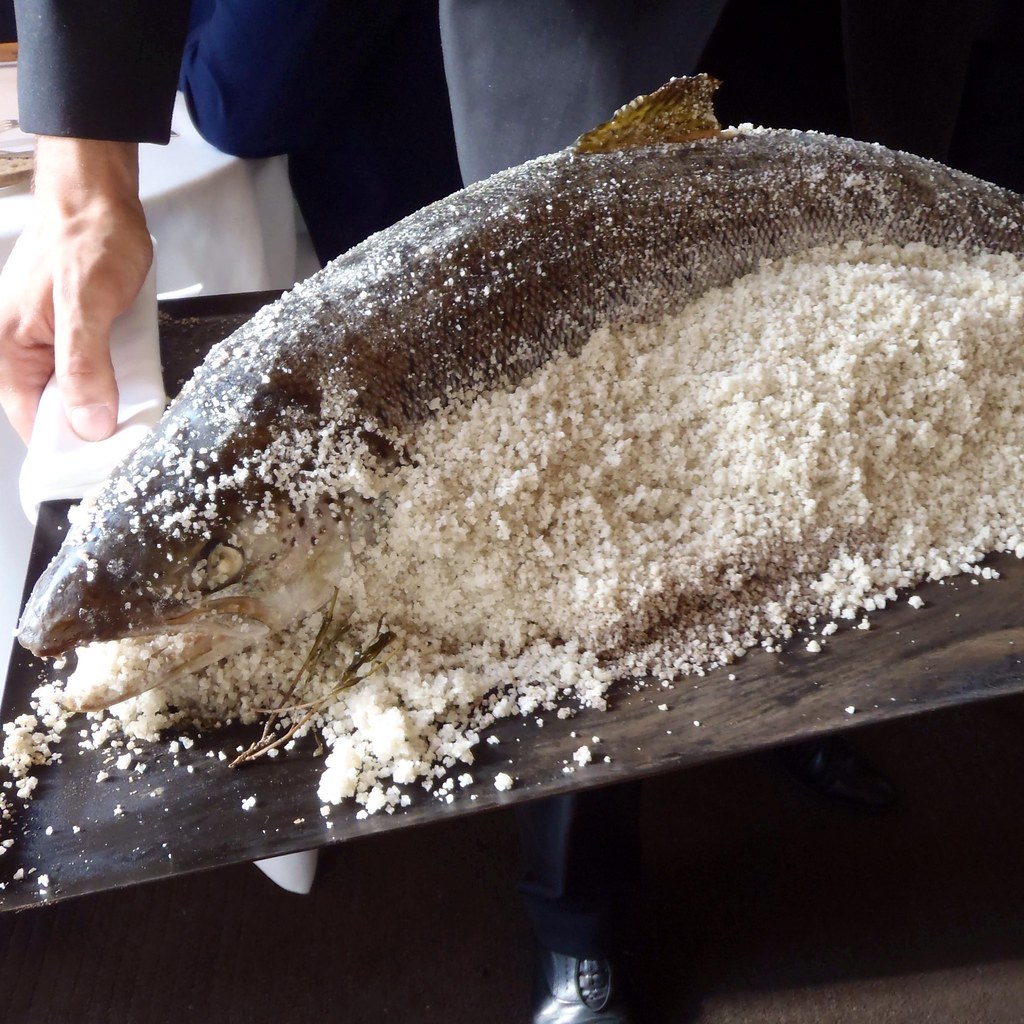
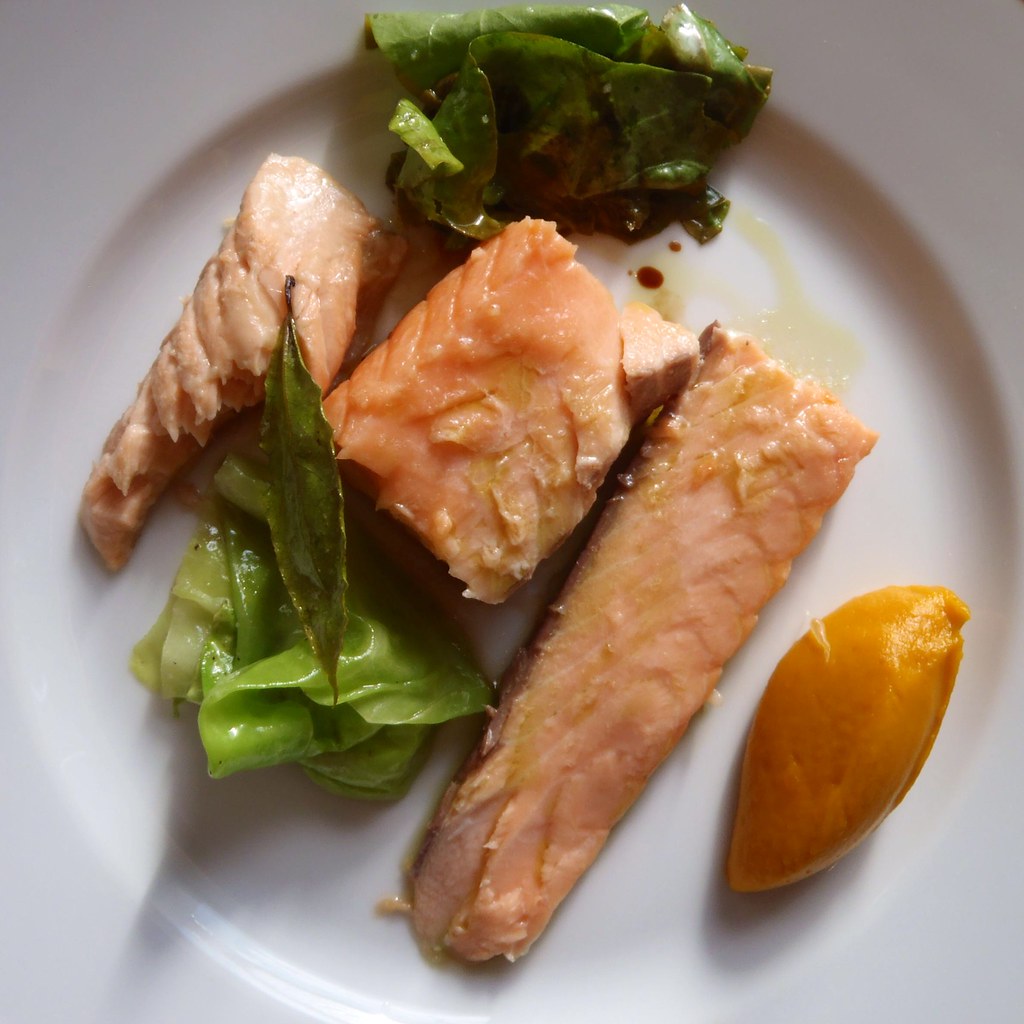
One of the best meals I've ever had was at Alain Passard's L'Arpège in Paris.  My friend Ellen and I were lucky enough to score reservations for lunch there and chose to go with the tasting menu.  After what seemed like a dozen divine courses, the main entree was brought out for us to see:

https://www.flickr.com/photos/joyosity/14439094663/

An entire salmon, roasted in a salt crust!  After they showed it to us, it was brought back to the kitchen and filleted and plated.  

https://www.flickr.com/photos/joyosity/14395796846/

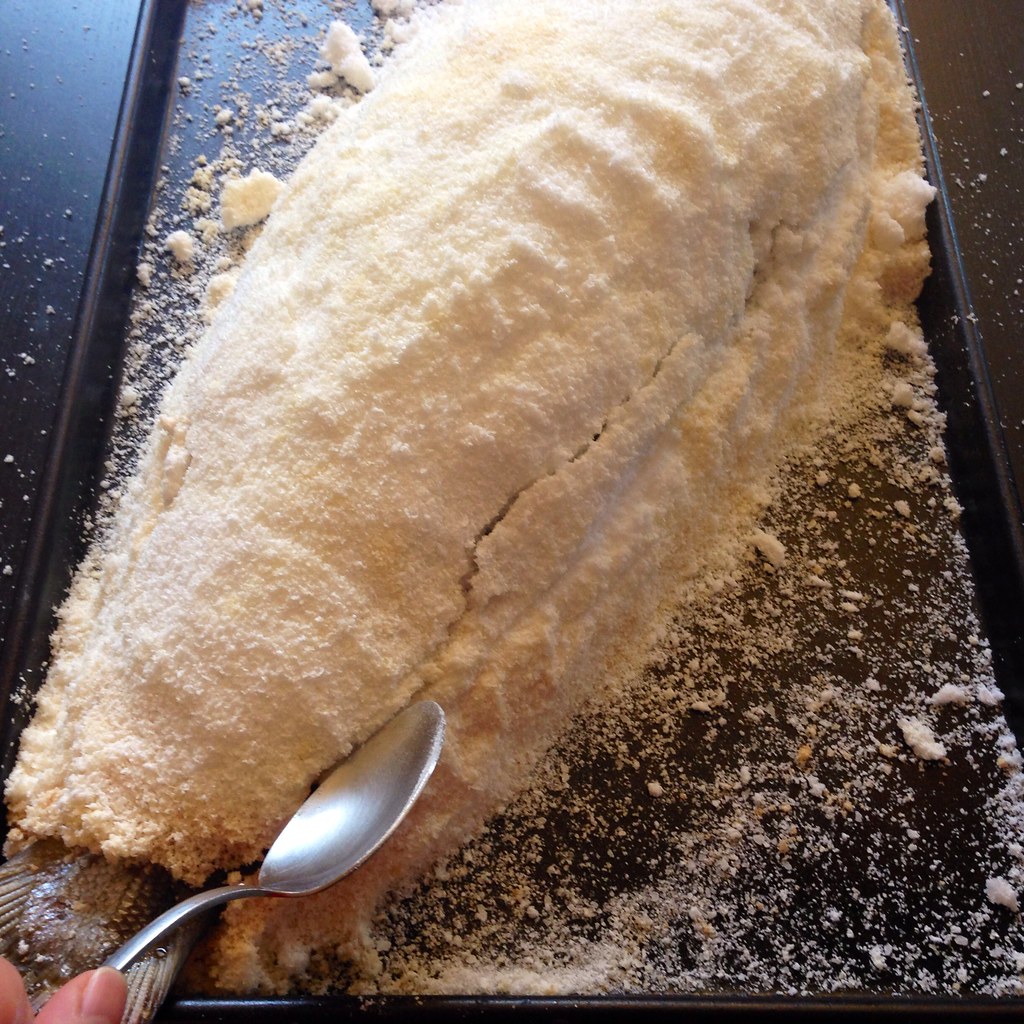
The technique of baking in a salt crust seals in the moisture and essentially allows the fish to steam in its own juices.  Because you remove as much salt as you can before plating the fish, it doesn't get overly salty and is just seasoned perfectly.  Best of all, it makes for a really impressive main course at your next dinner party.

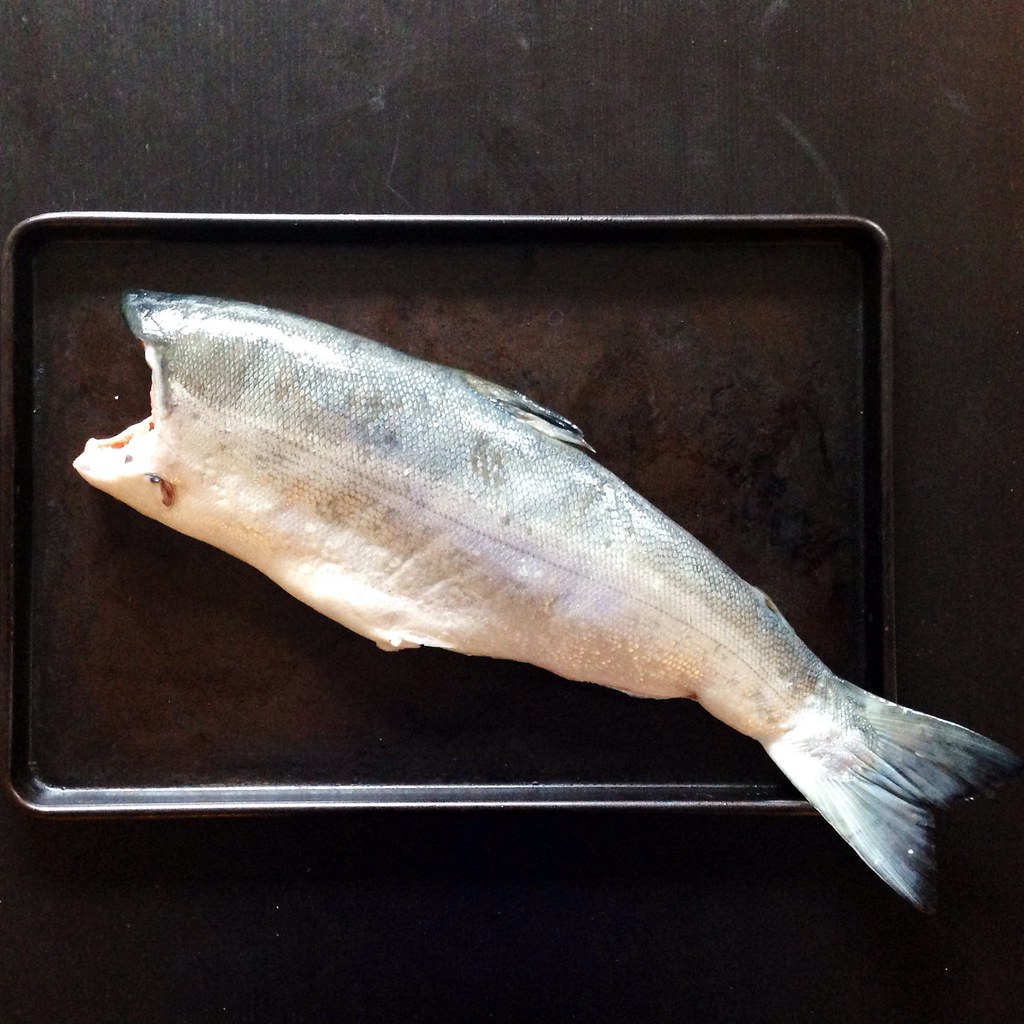
So when I was in Seattle a couple of weeks ago and found out that Copper River salmon was back in season, I knew I had to get one and try salt-baking at home.  I bought a whole fish from Pike Place Fish Co., had it packed in a 48 hour box, and hauled it all the way back home with me.

https://www.flickr.com/photos/joyosity/14232281179/

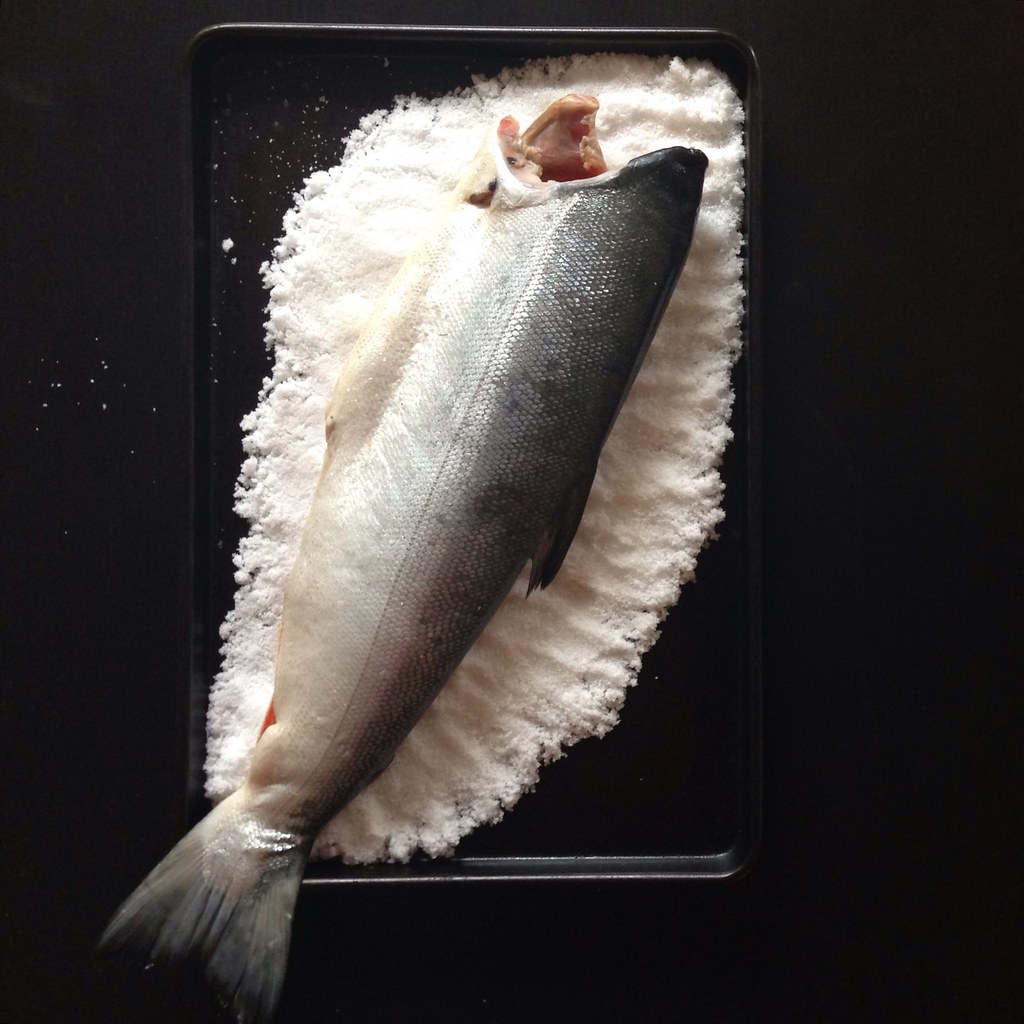
I was a little disappointed that the fish came headless, but in the long run, it was probably better for me since I was squeamish enough having to deal with the fins and all.  Thankfully it was already gutted and cleaned for me.

https://www.flickr.com/photos/joyosity/14418595605/

Regardless of whether you get a whole or headless fish, you definitely want to make sure the skin is left on so that there's a barrier between the meat and the salt crust. 

https://www.flickr.com/photos/joyosity/14417334272/

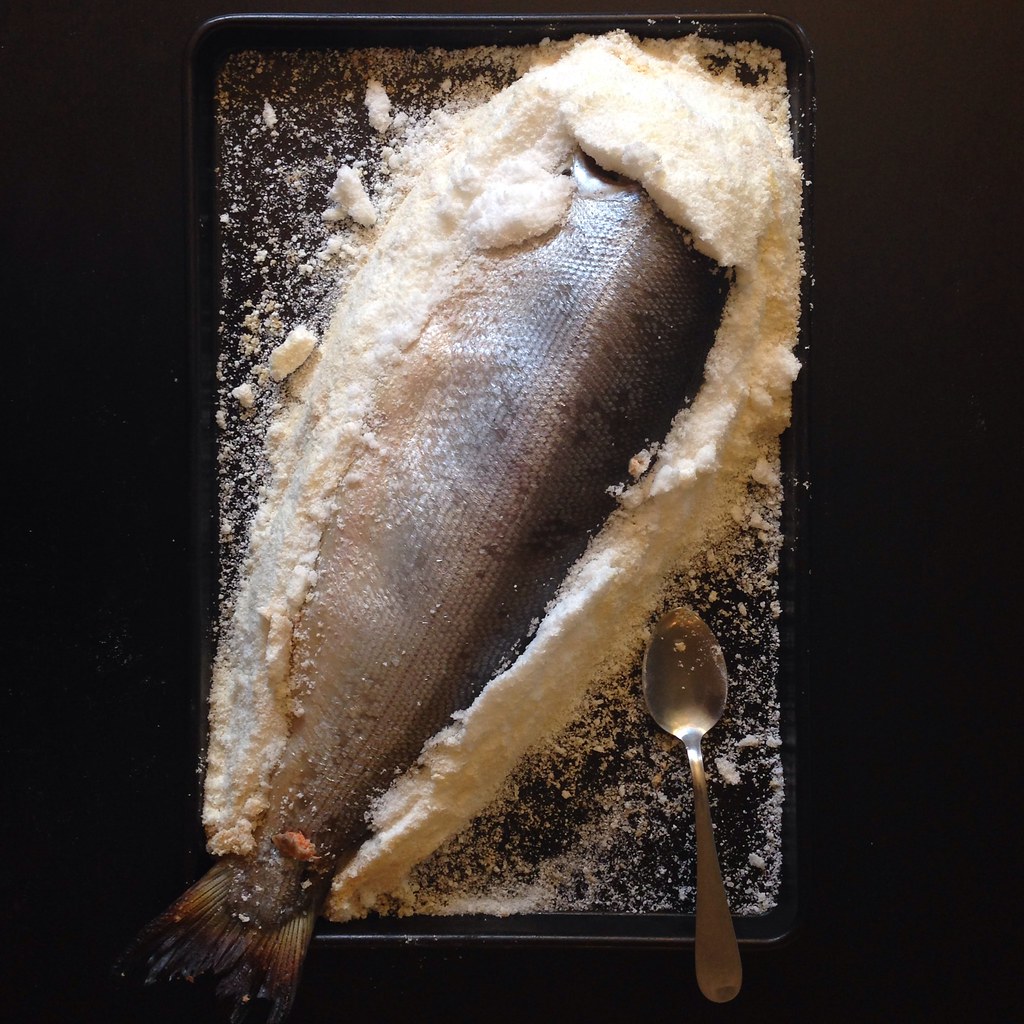
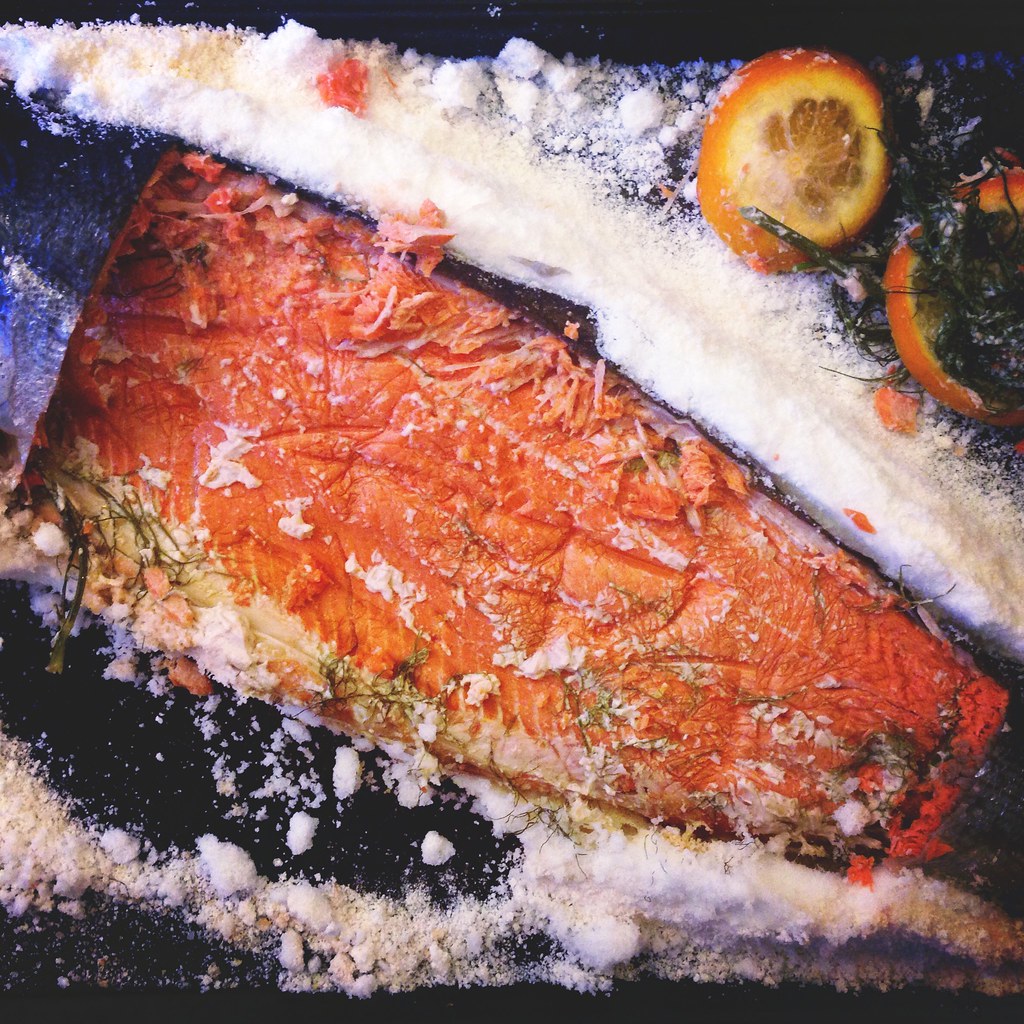
When the fish is done, the crust should be really hard; don't be afraid to give it a couple of good whacks to break it open.  If you're lucky like I was, the top of the crust will come off in one big piece.  I recommend doing this in front of your dinner guests, receiving yours oohs and ahs, and then bringing the fish back to the kitchen to plate.

https://www.flickr.com/photos/joyosity/14417476794/

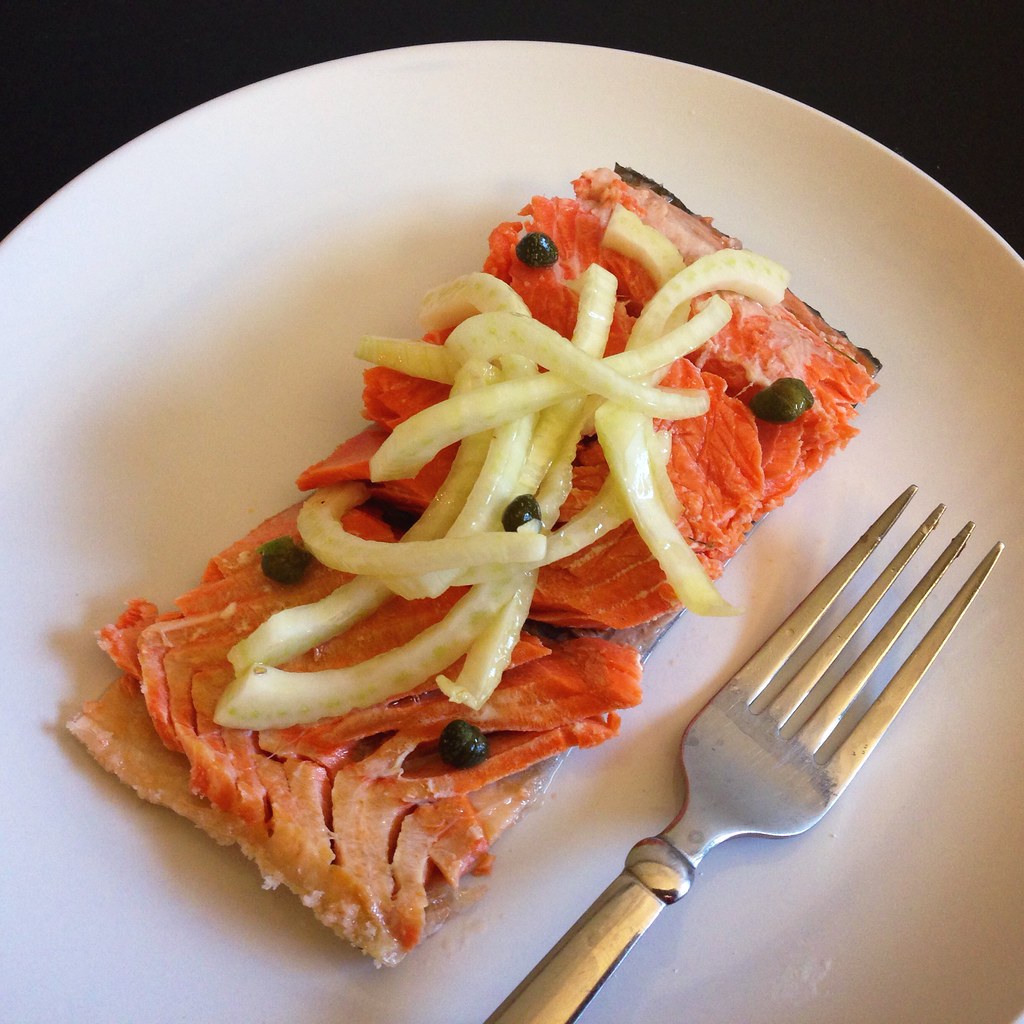
I chose to pair the fish with an orange fennel salad so that the crunch and acidity would complement the rich, tender salmon. 

Orange and Fennel Salt-Baked Salmon (adapted from Food and Wine)
serves 5-6

One 3-lb. salmon, gutted and cleaned, with skin on
2 large oranges
1 large fennel bulb
48 oz. (3 lbs.) kosher salt, plus more for seasoning
2 egg whites
1/2 cup water
1 tablespoon fresh lemon juice
2 tablespoons olive oil
1 tablespoon capers, rinsed

Preheat the oven to 450°F.

https://www.flickr.com/photos/joyosity/14395479296/

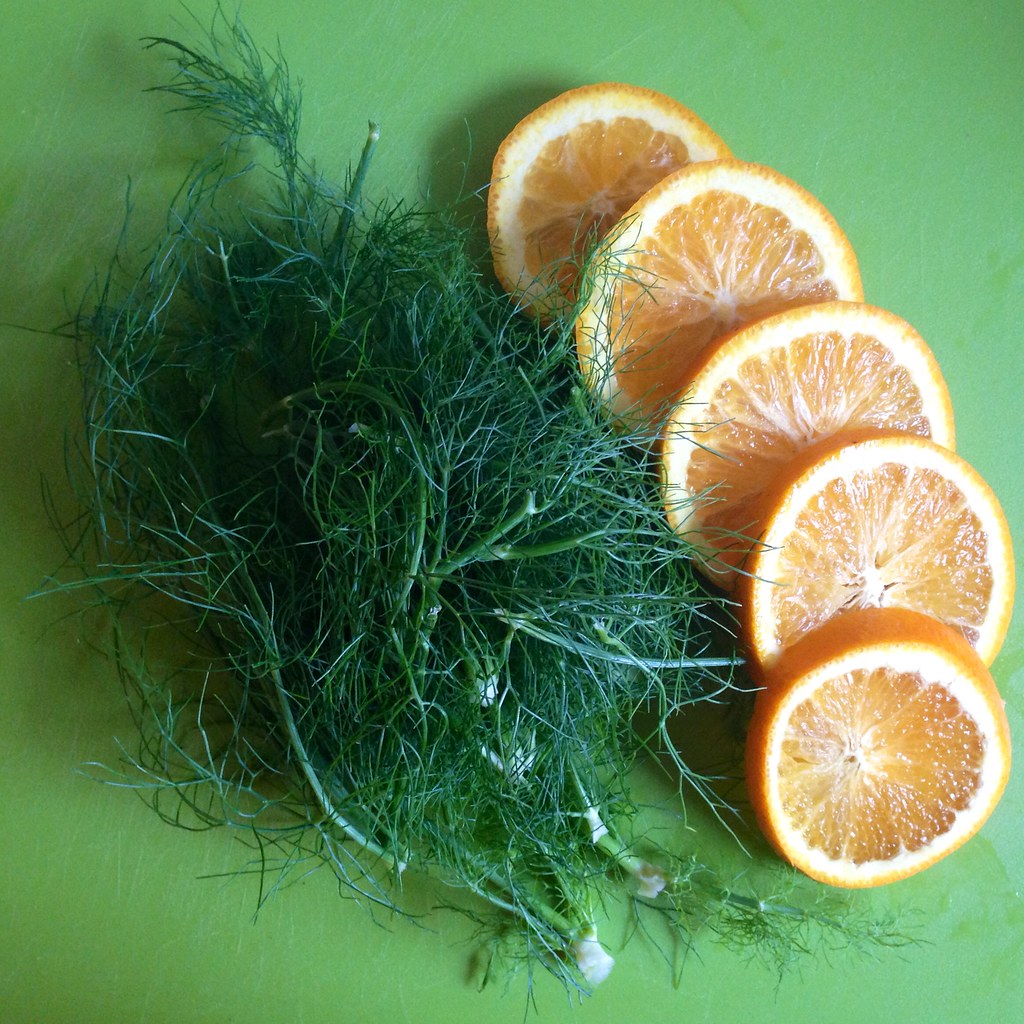
Slice one of the oranges and juice the other one.  Cut the feathery tops off of the fennel bulb and save.

https://www.flickr.com/photos/joyosity/14246245907

In a large bowl, mix the salt, egg whites, and a 1/4 cup of water.  It should feel like wet sand.  Add more water if needed, to get a consistency where you can pack the salt together.  Spread about half of the salt on a large sheet pan in the approximate shape of the fish.


https://www.flickr.com/photos/joyosity/14418594405/

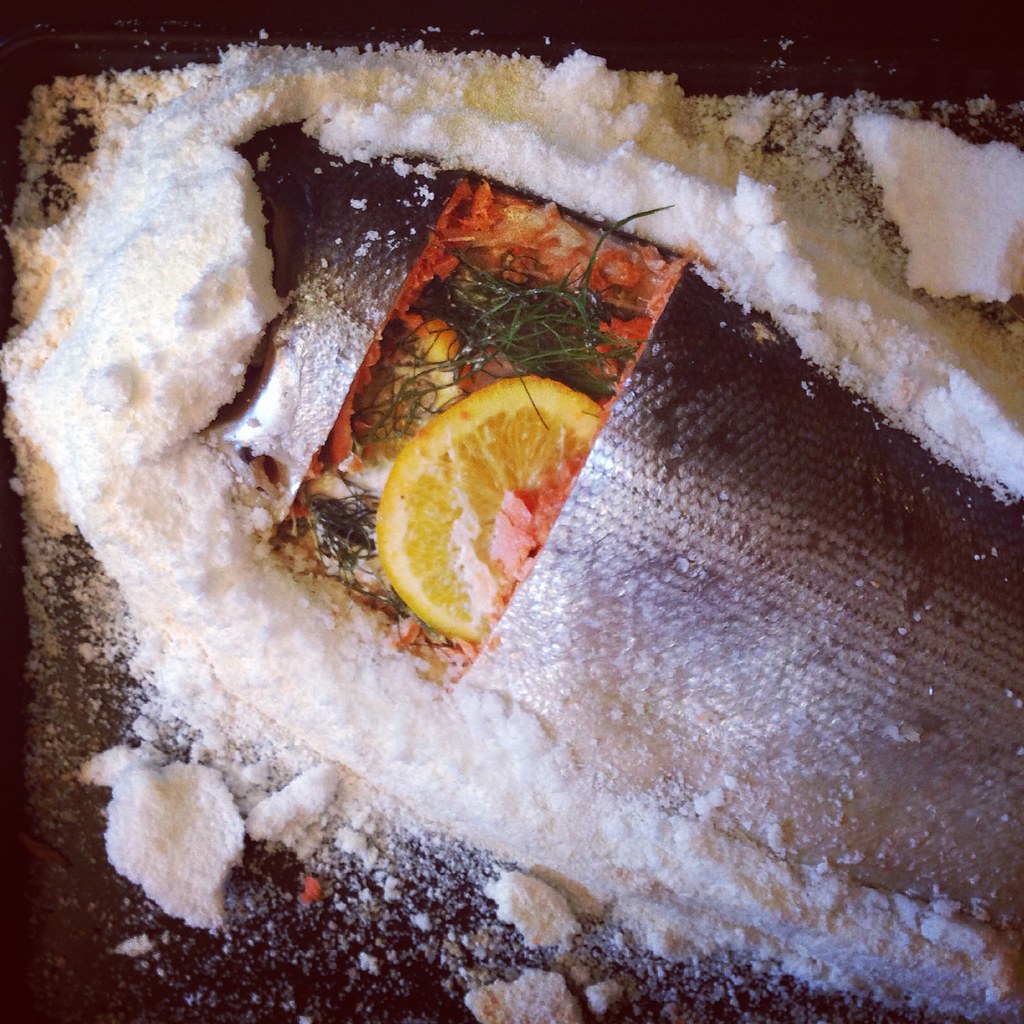
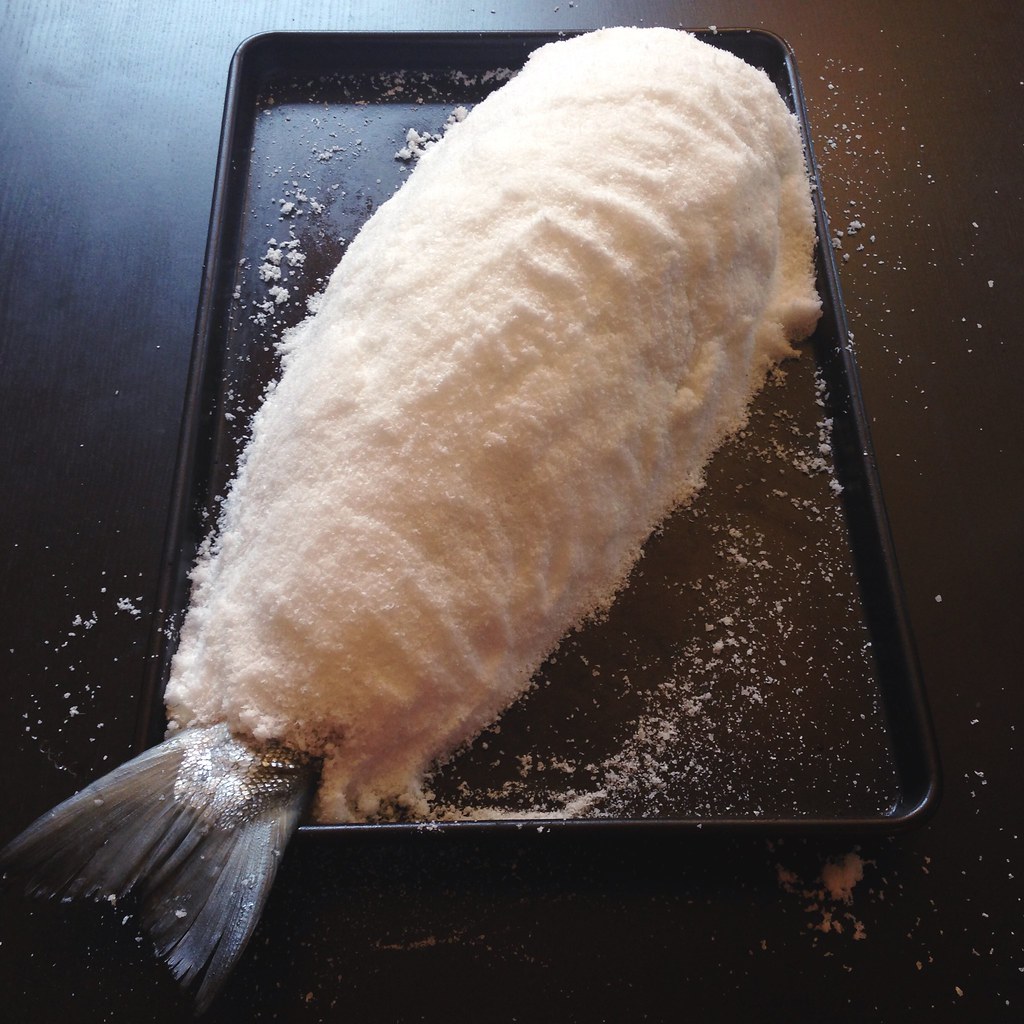
Remove the fins from the salmon and pat dry.  Stuff the fish with the orange slices and fennel tops.  Place on top of the salt.  Use the rest of the salt to cover the body of the fish entirely; you may leave the head and tail uncovered.  Pack the salt tightly to seal.  Bake in the oven for 25 minutes.

https://www.flickr.com/photos/joyosity/14438779643/

In the meantime, slice the fennel bulb in half, remove the core, and slice the rest thinly.  Toss with the orange juice, lemon juice, olive oil, and capers.  Salt and pepper to taste.

https://www.flickr.com/photos/joyosity/14231973729/

When the fish is done, allow to rest in the salt for 10 minutes.  Using a knife or spoon, tap the salt crust sharply to crack.  

https://www.flickr.com/photos/joyosity/14417318962/

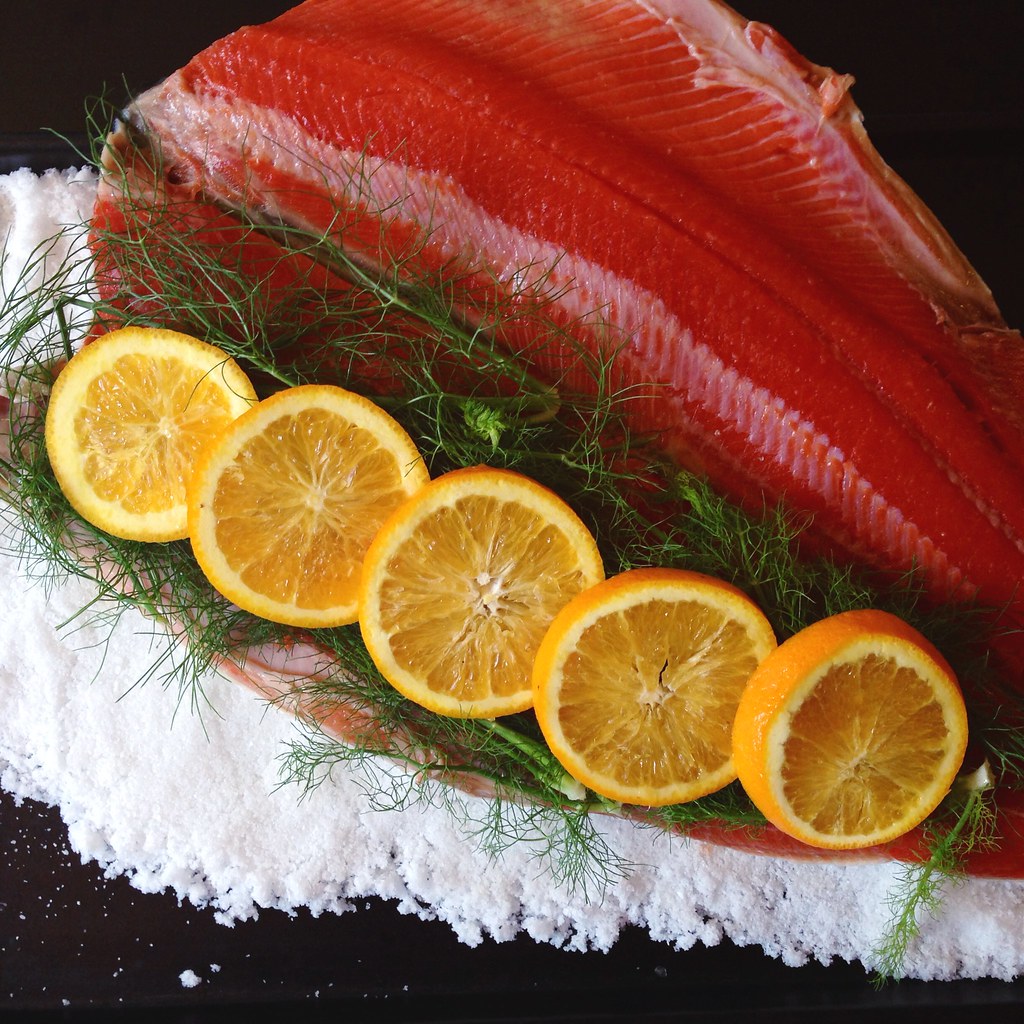
Remove the crust and brush off any remaining salt.  Portion out the top half of the fish.  Remove the bones, orange slices, and fennel tops, and portion out the bottom half.

https://www.flickr.com/photos/joyosity/14417462704/

Serve the fillets with orange fennel salad on top.

Honestly, this is such a fool-proof way of cooking fish that I could've probably used regular farm-raised salmon and gotten similar results.  But just look at how red that Copper River salmon is!  I think the next time I get my hands on one, I want to try citrus curing it.

Next:  Speculoos (Cookie Butter) Ice Cream and Mini Stroopwafel Ice Cream Sandwiches
Previously:  Sesame-Crusted Tofu
Last Year:  Homemade Cronuts
Four Years Ago:  Elote (Mexican Grilled Corn)

Friday, May 29, 2009

Fresh Orange Sorbet

I had 4 oranges (2 from a previous delivery) and 1 lemon from Boston Organics that I wanted to use up, so I googled "orange lemon sorbet" and found this recipe for fresh orange sorbet from Cooking Light. The recipe said that I'd need about 10 medium-size oranges and 2 medium-size lemons, but I found that the 4 oranges made enough juice for half the recipe. I also added a splash of citrus vodka to the mixture right before adding it to the ice cream maker to keep it from being too icy.

Fresh orange sorbet

Fresh Orange Sorbet (from Cooking Light)
makes about 6 cups

2 1/2 cups water
1 cup sugar
Orange rind strips from 2 oranges
2 2/3 cups fresh orange juice
1/3 cup fresh lemon juice
Splash of citrus vodka (optional)

Combine water and sugar in a small saucepan, and bring mixture to a boil. Add orange rind strips; reduce heat, and simmer 5 minutes. Remove and discard orange rind strips. Remove liquid from heat, and let cool to room temperature. Stir in orange juice and lemon juice. Chill in refrigerator until completely cool.

Right before churning, add the splash of citrus vodka. Freeze in ice cream maker according to manufacturer's directions. Serve immediately.

Making fresh orange sorbet*

When I was churning the sorbet, I noticed these icy globules forming which made me concerned that there might be globs of ice in the sorbet surrounded by sticky orange syrup (similar to what happens when you freeze orange juice), but the texture of the sorbet ended up being pretty uniform.

I did neglect to read the instructions to the end and ended up freezing the sorbet overnight instead of serving it immediately. Despite the addition of the alcohol to lower the freezing temperature, the sorbet did get quite hard and icy so that the texture was more like a granita. It was still quite refreshing, however, and I found the combination of the flavor and texture strangely addictive. I love how it tastes like fresh-squeezed orange juice even days after it was made. And the fact that it was ice cold made it all the more perfect as a summer dessert or palate cleanser.

Friday, March 20, 2009

Carrot Cake Cupcakes with Orange Cream Cheese Frosting

I don't like carrots but ended up with a whole pound of them from Boston Organics in my latest delivery. This wouldn't have been a problem back when I was a kid because my brother liked them, so anytime I had carrots I would just give them to him. But now that my brother lives on the opposite side of the country, I am forced to do things like make carrot cake cupcakes. Alas, the tragedy of it all. By the way, my brother's birthday is this Sunday so happy birthday, Timmy, and pretend I made and mailed these to you!

Carrot cupcakes with orange cream cheese frosting


Carrot Cake Cupcakes with Orange Cream Cheese Frosting (based on the recipe from Tartelette's site)
makes 30 cupcakes

For the cake:
2 cups all purpose flour
1 ½ tablespoons ground cinnamon
¼ teaspoon ground nutmeg
¾ teaspoons baking soda
¼ teaspoon baking powder
4 large eggs
¾ cup vegetable oil
1 teaspoon pure vanilla extract
2 cups granulated sugar
1 teaspoon kosher salt
1 pound carrots, grated medium fine

For the frosting:
12 oz. cream cheese softened
2 1/ 2 cups confectioners’ sugar
Zest of 1 orange
2 sticks butter, softened
1 teaspoon pure vanilla extract

Preheat oven to 350 °F. Line muffin tins with cupcake liners.

In a medium bowl, whisk together the flour, cinnamon, nutmeg, baking soda, and baking powder. Set aside.

In a large bowl, beat the eggs at high speed until light and frothy, about one minute. Decrease the speed to medium and add the oil, vanilla, sugar, and salt and mix just until combines. Decrease the speed to low and add the flour mixture until just combined. Using a spatula, fold in the carrots.

Fill each cupcake liner halfway with batter. Bake for 18 minutes. Cool completely before frosting.

Combine the cream cheese, sugar, and zest with an electric mixer. Start on low speed and then increase to medium high speed and beat until smooth. Add the butter and mix on medium speed until just fluffy and smotth, about 45 seconds. Add the vanilla and mix until just combined. Do not overbeat.

Carrot cupcakes

The original recipe was for a layer cake, but I thought it translated well to cupcake form. The only issue I had was for the first batch I filled the liners about 2/3 - 3/4 full and the batter ended up overflowing onto the tin when it baked. Adding orange rind to the cream cheese frosting is ingenious and adds a vibrant aromatic and a very subtle whiff of tartness to the otherwise very sweet topping. If I had wanted to go the extra mile, I would've added a sprinkle of additional orange zest on top or maybe finely chopped crystallized ginger. I thought about a carrot curl, but then I'd be defeating the purpose of making these cupcakes because I don't like the taste of carrots.

Off to Mount Tremblant and Montreal!

Friday, March 13, 2009

Panna Cotta, Take 3

Orange panna cotta

Okay, I think I have finally achieved the perfect consistency after two tries. I basically followed the same recipe as before, but this time I tried orange flavored panna cotta instead of almond, and I only had half-and-half and no cream so I adjusted the ratio a bit.

Orange Panna Cotta (based on this recipe)
makes 6 small servings

2 cups half-and-half
1 cup heavy cream
1 1/4 cups granulated sugar, divided
Zest from 1 medium orange
1 teaspoon orange extract
1 tablespoon powdered unflavored gelatin bloomed in 3 tablespoons water
1 red navel orange (or any other kind of orange that doesn't segment well; I would not recommend mandarins for example)
1 cup freshly squeezed orange juice

In a small saucepan over medium-high, combine half-and-half, milk, zest, and 3/4 cups sugar; bring to a boil. Stir in the orange extract. Remove from heat, and let stand for 20 minutes.

Cut the orange horizontally (along the latitudinal planes) so that you have 6 circular slices that will fit into the ramekins you are using.

Microwave the gelatin and water for 8 seconds. Add a ladleful or two of the warm half-and-half mixture to the gelatin and gently stir until all lumps are gone. Add to the rest of the half-and-half mixture. Pass the mixture through a sieve and divide evenly among 6 small ramekins or other servings dishes. Carefully add the orange slices so that they are floating on top. Cover with plastic wrap and place in the refrigerator for at least 3 hours.

In a small saucepan, boil the orange juice and remaining 1/2 cup sugar until the sugar is dissolved. Let cool.

Once the panna cotta has set, pour the orange syrup on top and serve.

Orange panna cotta

I think because I added the warm mixture to the gelatin to dissove it before adding it to the rest of the mixture, it really helped to distribute the gelatin. I definitely noticed a lot less gelatinous lumps in the sieve this time, and as a result, the texture of the panna cotta was perfect--neither too soft or too firm. On the other hand, I realize I like the almond flavored ones better, so if I ever make this again, I know what I'll stick with.

I had originally wanted the orange slices to sit on the bottom of the ramekin so that after the panna cotta had set, I could flip it upside-down and serve it with the orange slice on top. But the slices ended up floating when I added the panna cotta mixture so I had to scrap that idea. That's also the reason why you can see some milkiness on top of the orange slice and why the circumference of the slice I chose was a lot smaller than the mouth of the ramekin. And by the way, how are people able to unmold the panna cotta anyways? I tried running a knife along the edge, but it didn't work very well; you could see the knife marks along the edge and the top (or bottom, depending on how you look at it) was all sunk in afterwards. Maybe I need to run some hot water on the outside first to "melt" the edges a bit....

I didn't take any pictures of how it looked with the orange syrup because by the time it had cooled the light sucked, and anyways, I like the look without the syrup because you can clearly see the pure white of the panna cotta and the little orange slice floating on top like a lily pad. Too bad you can't really eat the orange slice as is because of the rind. I suppose if I had had the time, I could have candied the slices so that they could be eaten as is. Perhaps next time....

Thursday, January 29, 2009

Clementine Cupcakes

Clementine cupcake

Twas the same snowy morning, and two forlorn clementines were staring at me, beseeching me to do something with them other than throw them away. They were already several days past their prime, shriveled and sunken, although not yet spoiling. There must be something I can do with them, I thought. And then I remembered the clementine cake recipe I had noticed on Smitten Kitchen. A flourless cake made with whole clementines, almond flour, sugar, and eggs. Perfect, because I had some leftover almond flour from the macaron experiments that I needed to use up. Alas, two clementines do not a whole cake make. So then I thought, why don't I try cupcakes?

1 hour and 15 minutes later

Since it was snowing, and I didn't have any ice in the freezer, I figured I'd try cooling the clementines outside in a snow bath instead of an ice bath. I put a metal bowl out, and an hour and 15 minutes later, it was halfway full of snow.

Cooling the boiled clementines in the snow

I plopped the two clementines in there and covered it with more snow and waited half an hour. When I looked back on it, this is what I found.

30 minutes later

One of the clementines melted its own little chimney!

The hot clementine melted a hole in the snow!

If you don't happen to make this on a snowy day, go ahead and just use an ice bath or even a cold water bath. The clementines don't need to be chilled, just cool enough to cut in half and not worry about getting boiling clementine juice on your fingers.

Clementine Cupcakes (adapted from here)
makes 8 cupcakes

2 clementines
2 eggs
1/3 cup sugar
3/4 cup ground almonds
1/3 teaspoon baking powder
Powdered sugar for dusting

Put the clementines in a pot with cold water to cover, bring to the boil, and cook for 2 hours.
Boiling the clementines
Drain and, when cool, cut each clementine in half and remove the seeds. Then finely chop the skins, pith, and fruit.
Boiled clementines
Preheat the oven to 375 °F.
Line a cupcake pan with 8 cupcake liners.
Beat the eggs. Add the sugar, almonds, and baking powder. Mix well, adding the chopped clementines.
Clementine cupcake batter
Pour the cake mixture into the cupcake liners, about 3/4 full, and bake for 30 minutes, when a skewer will come out clean. Remove from the oven and cool.
Remove the cupcake from the liner, turn upside down, and dust with powdered sugar. Serve at room temperature.
Inside of a clementine cupcake

I was a little afraid that the clementines were too old to use, but boiling them in water for two hours really rehydrated them into their young, plump selves. I filled the liners to about 3/4 full but these cupcakes barely rose so you can probably fill them higher if you want. The cupcakes break easily when you remove them from the liner, so you can just dust them while they're still in their liners and serve them that way, but I like the look of the individual mini-cakes.

I like this recipe because you can definitely taste the clementines, but it's not an overly sweet or tart citrus dessert, like say, a lemon bar or key lime pie. If you do want something sweeter and more tart, you can always make a simple glaze with lemon juice and powdered sugar and glaze the cupcake with it. Also, the cupcakes were super moist even without the addition of any oil or butter, which is great if you're worried about that sort of thing. =)

Thursday, December 18, 2008

Macarons: A Lesson in Humility

A few months ago Ellen was telling me about her obsession with macarons and how she was going to try to make them. I wasn't that familiar with these confections although I had seen plenty of beautiful pictures of them on other food blogs. Turns out that 1) they are another species entirely from the coconut macaroons (two o's) that I'm used to, and 2) supposed to be incredibly difficult to make. Naturally, that meant I was going to try at some point.

So first of all, macarons are made with almond flour, sugar, and egg whites, whipped to a meringue. They are then sandwiched with the an appropriate filling (ganache, buttercream, jam, curd, etc.) and the resulting sandwich is also (confusingly) called a macaron. An unique feature of the macaron cookie is called the "feet"--the uneven, ruffled skirt around the edge. Amazingly enough, you want feet on your macarons. The hard part about making a macaron mostly involves the meringue and folding in the tant-pour-tant (the one-to-one mixture of almond flour and sugar). One fold too many or too little will result in cracked and/or hollow cookies and no feet.

Another difficult part about making macarons is amassing the ingredients and tools needed to make them. Egg whites aren't hard to come by, but one tip that has been circulating around is that they should be "aged" at room temperature at least overnight and up to 72 hours. Sure it sounds disgusting, but any germs and bacteria that might grow would be killed in the oven and the aged egg whites hold a meringue that much better because more water has evaporated, leaving more of the structural proteins. Next, almond flour. If you can't find any you can always make it yourself with almonds and a food processor (although I'm not sure how you would get almond flour vs. almond butter) but luckily enough, Harvest carries almond meal in their bulk bins. Unfortunately, the almonds aren't skinned beforehand, so there's flecks of almond skin in the meal, but what can you do? (Actually, now that I think about it, maybe I can sieve the meal beforehand to try to get rid of the skin....) Anyways, you'll want to use the food processor to grind the meal even finer. One great tip I read is to use the food processor to mix the almond flour and powdered sugar so that you don't have to individually sift the two (which is great because I don't have a sifter, although I guess a sieve would work).

To make the macarons you need a mixer (a stand mixer is ideal but I'm too cheap so I just used a hand mixer), pastry bag (again, too cheap to buy so I just filled a large Ziploc bag and cut a hole in the corner), high quality baking sheets (I used my Pampered Chef stoneware cookie sheet), parchment paper, Silpat, or non-stick aluminum foil (I used parchment paper), a food processor (thanks, Carsten!), a candy thermometer, and ideally, a food scale.

Folding the meringue
You can tell it's an Italian meringue because it is so glossy.

There are two ways of making meringue for the macarons, the French way or the Italian way. The Italian way is a little more difficult and involves streaming boiling sugar syrup into the egg whites are they are being whipped but results in almost foolproof macarons as the Italian meringue is much more stable than French meringue. So I chose to try the Italian method. Since I didn't have a food scale (yes, I am cheap!) I used Lesley's recipe here which is "translated" from Tartelette's and decided to try my hand at making a hazelnut macaron with Nutella filling.

Nutella cream macarons
Yes, you can see the specks of almond skin, but look, you can see feet as well!

Hazelnut Macarons (based on Lesley's recipe)
Ingredients:
1/2 cup aged egg whites (comes out to about 4 egg whites)
3 T sugar
1 1/4 cups powdered sugar
1 cup almond meal
2 tsp. hazelnut extract

For syrup:
3/4 cups sugar
1/4 cups water

Begin by placing the water and sugar for the syrup in a small saucepan and bring to a boil. Once the sugar syrup registers 170° F on a candy thermometer, start whipping two of your egg whites. When the egg whites have started to froth, slowly add the 3 T sugar.

When the sugar syrup gets to 230° F on a candy thermometer, add it in driblets to your egg whites (which should hold soft peaks at this point).

Whip the mixture for 10 - 15 minutes, until cool.

Mix the remaining egg whites with the almond meal and powdered sugar in a food processor. Fold this mixture and the hazelnut extract into the meringue mixture.

Fill a pastry bag with a 1/4 inch tip (or a large Ziploc bag with a corner snipped off) with your mixture. Pipe 1" circles on cookie sheets lined with parchment paper, non-stick aluminum foild, or Silpat.

Bake at 320° F for 12 - 15 minutes. After they are done baking, allow them to cool and carefully transfer them to an airtight container. Macarons can be stored in the fridge or freezer.

I made the filling used in the picture above with this recipe, but in the end, I decided I liked just plain Nutella as a filling. I forgot to mention that I had never actually had a macaron before, so I was quite surprised at how sweet it was with my first bite. But after a while I knew what to expect, and it might have helped that I was eating them chilled from the freezer (the colder something is, the less sweet it will taste; one reason why there is so much sugar in an ice cream recipe).

So ta-da! I made my first batch and didn't have too many issues: my macarons had feet, weren't hollow, and didn't have any cracks. The hardest part was actually piping the cookies as I had never piped anything before in my life, and I wasn't exactly using the best tool. The macaron batter is actually quite drippy so you really have to be careful if you aren't using a pastry tip. I would definitely recommend having your parchment paper already cut and spread out so that you can pipe all the macarons at one time. One site I read recommending drawing 1" circles onto the paper beforehand so you know when to stop piping and also where to place them. Another tip that I read on many, many sites is to let the macarons sit for an hour before putting them in the oven so that the top can dry out. I didn't really adhere to this with my first batch as I figured that by the time I had piped the last macaron, the first one would have already had a chance to sit a bit.

Piped macarons
Piped orange macarons (although not very orange in color)

So now that I had one good batch under my belt, I figured it was time to try a different flavor, and I settled on orange macarons with clementine curd using the recipe here. I added orange extract to the macaron batter and used food coloring to try to get them orange. I'm not used to using food coloring, and even though I read that baked macarons come out much lighter than the batter, I was just too scared to get much color into the cookies. And this time I decided to let them sit after being piped. Well I think that was a mistake. Of the four trays I made, only the first one came out without cracks, and I'm pretty sure that was because that one didn't sit as long as the others. Even so, the macarons from the first tray were almost all hollow. =( I was able to salvage a few to take pictures of, but the rest I'm just eating individually and dipping into the curd like chips and dip. I also need to find a filling that's not as runny. As you can see in the picture below, the curd is starting to drip out the sides and one of the principles of macaron making is that the filling should never go past the circumference of the cookie.

Orange macarons with clementine curd

Now I understand the angst of making macarons; even the "almost fool-proof" recipes can go horribly wrong. But I'm not entirely defeated; I think I'll try to make more macarons in the next few days. I even have the egg whites sitting out already. It's really too bad Highrock is a nut-free church or else I'd bring some for people to try. Anyone have any ideas for other flavor combinations? I might try a peppermint macaron and chocolate ganache combo or maybe a coconut macaron with orange marshmallow creme filling....


P.S. I tried the peppermint macarons with peppermint chocolate ganache!

Peppermint macarons with peppermint chocolate ganache