Thursday, November 27, 2025

Boiled Apple Cider Maple Pie

I've been making a certain boiled cider pie recipe for a while but usually for other people so I rarely got to try it myself.  Then a couple of years ago I made it for Thanksgiving and apparently was disappointed enough with the result that I told my friend who was hosting to remind me to retire the recipe.

Well, it's a good thing she keeps notes because she she reminded me the following year, I had totally forgotten and was thinking about making it again!

This year, I remembered that she had told me to retire the pie, but I was still intrigued with the idea of a pie that used boiled apple cider as a base so I decided to do some research and see if I could find another recipe to try.  I found one called Apple Cider Chess Pie that sounded pretty much like what I wanted to make and lo and behold, when I clicked on the link, it turns out it was my recipe!  Apparently I had had the same idea last year, developed a pie based on Sister Pie's salted maple pie, posted it on Food52, and then completely forgot about it!

Unfortunately when I went to make the pie this year, I realized I had forgotten the butter in the ingredient list but I couldn't figure out how to edit the recipe on the Food52 website, so I figured I should document it here, which I probably should have done in the first place.

Boiled Apple Cider Maple Pie
makes one 9" pie

Your favorite pie crust, blind baked and cooled (I like Erin McDowell's All Buttah Pie Dough)
4 cup apple cider
1/2 cup plus 2 tablespoons unsalted butter 
3 large eggs, divided
Kosher salt
1/2 cup maple syrup
1/4 cup light or dark brown sugar
Dash of freshly grated nutmeg
1 large egg yolk
1/4 cup heavy cream, at room temperature
1 teaspoon vanilla extract

Boil the apple cider in a large saucepan until reduced to ~1/2 cup. When it gets close to that point, it will get thick and very bubbly so make sure to watch it closely so that it doesn't boil over. It should be about as thick as maple syrup and will get even thicker upon cooling. This may take around 20-30 minutes, depending on how large your pot is. Transfer the boiled cider to a pint-sized measuring cup and allow to cool.

Preheat the oven to 350 F.

In the same saucepan (no need to clean it), melt the butter. I like to brown my butter for extra flavor, but you can just melt it too.

In the measuring cup that the boiled cider is in, add enough maple syrup to reach 1 cup total (i.e. ~1/2 cup of syrup). Add to the melted butter and whisk in the brown sugar, a pinch of salt, and nutmeg.

In a medium bowl, whisk 1 egg with a splash of water and small pinch of salt. Brush the crimped edges of the blind-baked pie crust with the egg wash. Then add the remaining 2 eggs, egg yolk, heavy cream, and vanilla extract to the bowl and whisk to combine.

Slowly add the egg mixture to the boiled cider mixture and whisk to combine. Place the pie crust on a parchment-lined baking sheet and pour the filling in until it reaches the bottom of the crimps (you may have some extra filling, in which case you can pour it into a small ramekin and bake it alongside the pie for a baker's treat).

Bake for 45 - 60 minutes until the edges are puffy and the center only jiggles slightly. When done, wait until it has completely cooled to slice and serve. It will slice best if chilled in the refrigerator.

Previously:  Passion Fruit Nian Gao with Red Dragon Passion Fruit Spread

Wednesday, February 7, 2024

Passion Fruit Nian Gao with Red Dragon Passion Fruit Spread

When Rooted Fare asked me to develop a recipe that used their limited edition Lunar New Year Flavor Red Dragon Passion Fruit Spread, the first idea that popped into my head was to make nian gao (mochi cake) with it.  Nian gao is commonly eaten during the Lunar New Year because it is a homonym for "year" and "high" in Chinese which is an auspicious phrase.  There are many kinds of nian gao such as Shanghainese stir-fried nian gao (a savory dish) or steamed Chinese nian gao (a sweet dish), but my favorite kind is baked like butter mochi.

The last few years I've been baking my nian gao in a Baker's Edge brownie pan to maximize the crust to interior ratio, but someone once commented that they would make it in muffin tins for the same effect.  Since I figured more people have muffin tins than a special pan, I decided to try making mine this way too.

For this recipe I adapted my trusty nian gao recipe by substituting 1/2 a cup of passion fruit pulp for an equal amount of milk.  I love the added passion fruit flavor, but if you don't have passion fruit pulp, you can definitely make this with the full 3 cups of milk.  And if you want an even more pronounced passion fruit flavor, you can use a whole cup of passion fruit pulp and just 2 cups of milk.

Passion Fruit Nian Gao with Red Dragon Passion Fruit Spread
makes ~24 servings

1/2 cup passion fruit pulp
2 1/2 cups whole milk
1/2 cup unsalted butter, melted
1 1/4 cups white sugar
3 large eggs, lightly beaten
1 teaspoon vanilla extract
1 lb. sweet glutinous rice flour (aka mochiko)
1 teaspoon baking powder
1/2 cup Rooted Fare's Red Dragon Passion Fruit Spread
Black sesame seeds (optional)

Preheat the oven to 350°F.  Grease 2 muffin pans or a 9"x13" baking pan.

Combine the passion fruit pulp and the whole milk in a medium mixing bowl and microwave until warm but not hot, about 90 seconds (this is so the melted butter won't solidify when added and the eggs won't cook when added).  Whisk in the melted butter and sugar.  Add the beaten eggs and vanilla extract and whisk until combined.

In a large mixing bowl, whisk the sweet glutinous rice flour with the baking powder to combine.  Add the liquids a cup at a time and stir; this will help prevent lumps in the final batter.  At first the mixture will be *very* thick, but keep adding the liquids one cup at a time and stirring, and once the batter is smooth, you can add the rest of the liquids all at once.  Whisk until completely smooth.

If using the muffin pans, add 1/4 cup of batter to each well.  If using the baking pan just pour all the batter in at once.  Dollop about a teaspoon of the Red Dragon Passion Fruit Spread into the center of each well or all over the baking pan.  

Bake for 30 minutes if using the muffin pans, and about an hour if using the baking pan.  The nian gao is done when the edges are golden brown and the center is set.  If using, sprinkle on the black sesame seeds when the nian gao comes out of the oven.  Let cool before serving.  Store any leftovers in an airtight container at room temperature for up to 3 days.  If it is too firm after a couple of days you can gently warm it up in the microwave for about 15 seconds to get the chewy texture back.

If you run out of the Red Dragon Passion Fruit Spread (it is limited edition, after all), the original nian gao recipe is excellent with Rooted Fare's Crunchy Black Sesame Butter dolloped on it instead of red bean paste!

Next:  Boiled Apple Cider Maple Pie
Previously:  Soy-Marinated Jammy Eggs

Saturday, January 28, 2023

Soy-Marinated Jammy Eggs (滷蛋)

The kind of lu dan I grew up eating was made from eggs that had been hard boiled, peeled, then dropped into a vat of red-braising meat, like Taiwanese beef noodle soup or braised pork.  I still love those kind of eggs, but nowadays I prefer my egg yolks to be jammy instead of hard and chalky.

When I discovered the recipe for Momofuku soy sauce eggs several years ago, I was delighted to be able to make the kind of eggs I was dreaming about (and without needing to make a pot of braised meat to do it!).  This version is heavily influenced by that recipe but adapted for 4 eggs, which fits perfectly in one of those pint-sized plastic deli containers.  You can save the marinade in the refrigerator and reuse it for another batch of eggs.

Serve these eggs with the aforementioned Taiwanese beef noodle soup or braised pork over rice or just about anything with noodles (ramen!) or rice (Taiwanese pork chops!).  I also like to snack on them by adding a squirt of Kewpie mayonnaise (and maybe a smattering of chopped chives if I'm feeling fancy) to imitate deconstructed deviled eggs.


Soy-Marinated Jammy Eggs (滷蛋)
makes 4 eggs

4 large eggs, straight from the refrigerator
4 tablespoons hot water
1/2 tablespoon sugar
1 teaspoon rice vinegar
6 tablespoons soy sauce
1/8 teaspoon Joy's Five Spice

Bring a pot of water to a boil and add the eggs.  Cook for exactly 7 minutes.  In the meantime, prepare an ice water bath and make the marinade.

In a pint-sized plastic deli container, dissolve the sugar in the hot water, then add the rice vinegar, soy sauce, and five spice powder.  

When the 7 minutes are up, immediately transfer the eggs to the ice bath.  Once the eggs are cool enough to handle, crack all over with the back of a spoon and return to the ice bath (the water from the ice bath helps with peeling the egg).  Carefully peel the eggs, then transfer them to the marinade.  Place a piece of paper towel on top of the eggs so that the marinade covers the top of any eggs that peek out.

Marinate for at least 3 hours and up to overnight.  Remove from the marinade and keep the marinade in the fridge for the next batch.  Serve the eggs immediately or keep in the fridge for up to a week.

Since the deli container is such a snug fit for the 4 eggs, you'll probably get patches on the eggs where they don't get as much exposure to the marinade.  You can fix that by rotating the eggs in the marinade periodically, but since its doesn't really influence the taste, I don't really bother.  Sometimes they come out looking like little mouse ears though, so the only solution to that is to add some sesame seeds to complete the mouse face.

Next:  Passion Fruit Nian Gao with Red Dragon Passion Fruit Spread
Previously:  Taiwanese Braised Pork over Rice

Wednesday, January 25, 2023

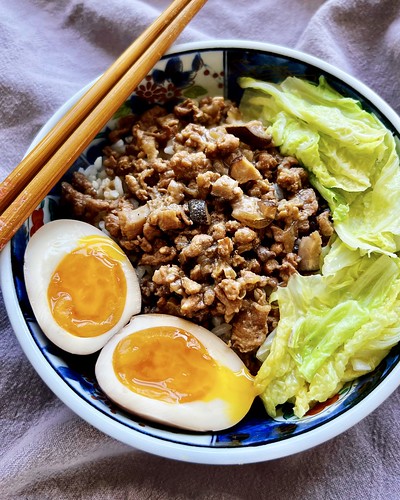
Taiwanese Braised Pork over Rice (滷肉飯)

I always thought the Mandarin phrase "cha bu duo" meant "as much as you need" because that's how my mom would respond whenever I asked her how much of an ingredient to add to a dish.  For instance, when I asked her how to make lu rou fan (Taiwanese braised pork over rice), she told me to add fried shallots, cooking wine, and soy sauce to the browned pork.  I asked her how much of each, and she just said "cha bu duo" in an exasperated voice. 

But when I asked her what that phrase meant, she explained it means "more or less". Google translates it to "almost, nearly, similar". None of that is helpful though without any actual measurements, haha.

After several rounds of experimenting and the added guidance of TACL-LYF's Taiwanese Homestyle Cooking cookbook, I've come up with my preferred way to make this homey dish.  Some recipes call for using exclusively pork belly, but the version I grew up eating was made with only ground pork.  Using half ground pork and half pork belly is a nice compromise, but you can also just use only fatty ground pork.

One ingredient I've started using that's kind of like a cheat code is Lee Kum Kee's pork bone soup base.  It comes super concentrated so I like to freeze it in small portions and just dissolve the amount I need for a particular recipe.  Not only does it add a lot of flavor, it's full of collagen that will add a nice sticky mouthfeel to the braised pork.  If you don't have any pork bone soup, you can just use water, and I've read that some people add unflavored gelatin to give it that same mouthfeel.

If you want, you can add some peeled, boiled eggs to the pot while it's cooking to make lu dan (soy braised eggs), but I prefer my egg yolks jammy so I usually just marinate them separately.  I also like to serve this with some stir-fried greens like napa cabbage or bok choy, although sometimes if I'm really lazy, I'll just add the greens directly to the pot while it's cooking.


Taiwanese Braised Pork over Rice (滷肉飯)
makes 4 servings

1/2 lb. ground pork
1/2 lb. pork belly, chopped
2 dried shiitake mushrooms
1 tablespoon oil
5 tablespoons fried shallots
1 tablespoon rice wine
1/2 cup reduced sodium soy sauce
1 cup pork bone soup or water (see note above)
1/2 tablespoon rock sugar
1/2 teaspoon Joy's Five Spice
1 star anise
1/2 teaspoon white pepper
4 cups steamed rice

Soak the shiitake mushrooms in hot water for at least 15 minutes, then finely chop.

In a medium saucepan, heat the oil over medium heat and add the mushrooms and fried shallots.  Cook for a minute or two until fragrant, then add the ground pork and chopped pork belly.  Continue to cook until the pork is cooked through and a little browned.  

Add the rice wine to deglaze and then add the soy sauce, pork broth (or water), rock sugar, five spice powder, star anise, and white pepper.  Bring to a boil then turn the heat down to a simmer.  Let simmer for an hour, then serve over rice along with greens, pickled daikon, and a soy marinated egg if you like.

Next:  Soy-Marinated Jammy Eggs
Previously:  Sourdough Discard Okinomiyaki Waffles

Friday, April 22, 2022

Sourdough Discard Okonomiyaki Waffles

I’ve made waffled okonomiyakis before and sourdough discard okonomiyakis before, so I figured it was time to combine the two!  The use of sourdough discard in this recipe not only helps prevent waste, it also adds a little tanginess to the flavor, and adding a pinch of baking soda to the batter will cause it to get light and fluffy!  Using a waffle iron to make the okonomiyaki means that both sides get cooked at the same time (so no awkward flipping) and get a little crispier than just cooking it on a flat top.

You can add whatever fillings and toppings you want (it’s literally the definition of okonomiyaki); my preferences are bacon (easier for me to find than pork belly), and instead of chopping up my own cabbage, I usually grab a bag of pre-chopped coleslaw mix from the grocery store!  For toppings I like the homemade okonomiyakisauce from Just One Cookbook, Kewpie mayonnaise, bonito flakes, furikake, and chopped scallions.

Sourdough Discard Okonomiyaki Waffles
makes two 7’ round waffles

150 g (100% hydration) sourdough discard*
1 large egg
Pinch of salt
Pinch of sugar
Pinch of dashi powder
Pinch of baking soda
200 g chopped cabbage (or coleslaw mix)
4 slices bacon, cut so they’ll fit the waffle iron
Okonomiyaki sauce
Kewpie mayonnaise
Bonito flakes
Furikake
Chopped scallions

Preheat your waffle iron to medium-high.

Mix the sourdough discard, egg, salt, sugar, dashi powder, and baking soda until well combined.  Add the cabbage and mix again.

Place half the bacon on the bottom of the waffle iron and grease the top half.  Add half of the batter on top of the bacon and close the waffle iron.  When it’s golden brown and cooked through, remove from the waffle iron and repeat.  Top immediately with your desired toppings and serve hot.

*I haven't tried this myself yet, but if you don’t have any sourdough discard, you could try mixing together 75 g all-purpose flour with 75 g water and skip the baking soda, but it won’t have quite as much flavor or fluffiness.

Previously:  Hurricane Popcorn Marshmallow Treats
Next:  Taiwanese Braised Pork over Rice (滷肉飯)

Friday, March 25, 2022

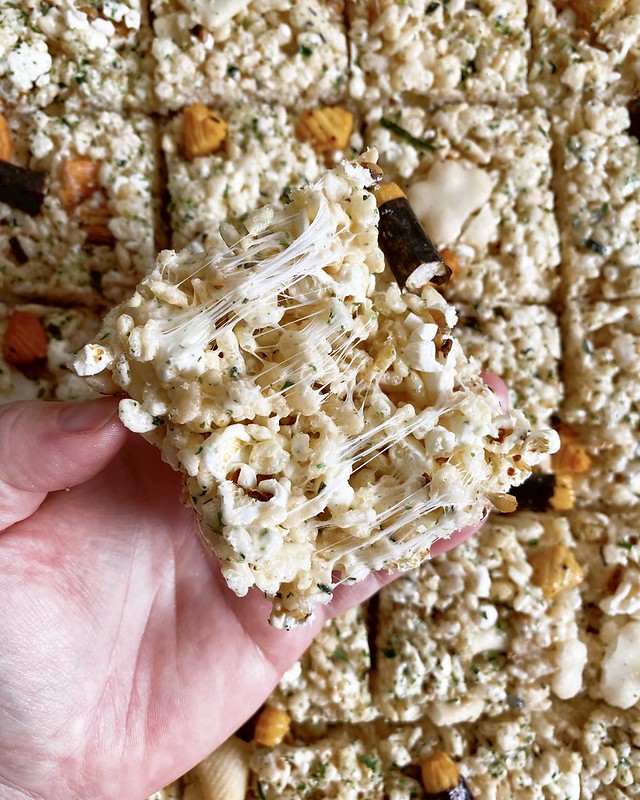
Hurricane Popcorn Marshmallow Treats

Sometimes an idea pops in my head and it sounds so good that I'm sure someone else must have thought of it already, but then a quick search of the internets results in nothing!  I was inspired to make these because the kind folks at Sanzo had sent me some microwave popcorn and furikake in their limited edition Turning Red lychee sparkling water treat box.  My first thought was to make some hurricane popcorn with it, but I was already thinking of making some Rice Krispies treats, and then I just thought, why not combine them?

If you're not familiar with hurricane popcorn, it's a Hawaiian snack that combines kettle corn, furikake, and mochi crunch (aka Japanese rice crackers or arare).  It's one of those sweet and salty snacks that quickly becomes addictive because you just need that next bite to balance out the sweetness or saltiness from the last bite (kind of like Chicago mix popcorn).

These treats amp up the sweetness and crunch factor by adding marshmallows and Rice Krispies but still remain irresistible.  I add a little soy sauce (another common ingredient in hurricane popcorn) for saltiness but if that is a little too weird for you, you can just substitute with salt to taste.  Also, I only used 3 tablespoons of furikake so it's not too overpowering, but you can add more if really like that flavor.

Hurricane Popcorn Marshmallow Treats
makes 24 pieces

1/2 cup (1 stick) unsalted butter
1 teaspoon soy sauce (or substitute with salt, to taste)
3 tablespoons furikake, divided
10 oz. mini marshmallows
6 cups Rice Krispies cereal
2 cups popped popcorn (optional)*
1 cup Japanese rice crackers

Line a 9"x13" baking pan with parchment paper.

Melt the butter in a large pot or Dutch oven over medium heat.  Once fully melted, turn the heat to low and add the soy sauce (or salt) and 2 tablespoons of the furikake and stir until combined.  Add the marshmallows and stir occasionally until fully melted.

Add the cereal, popcorn, and rice crackers and mix until combined.  Pour the mixture into the lined baking pan and press down with oiled hands (I like to save the butter wrapper to do this with) into an even layer.  Top with the remaining tablespoon of furikake.

Let cool, then remove from the pan using the parchment paper and slice into 24 pieces.  Enjoy!

*I made this again without popcorn and liked the texture even more!

Previously:  Taiwanese Beef Noodle Soup (Updated)
Next:  Sourdough Discard Okonomiyaki Waffles

Monday, March 14, 2022

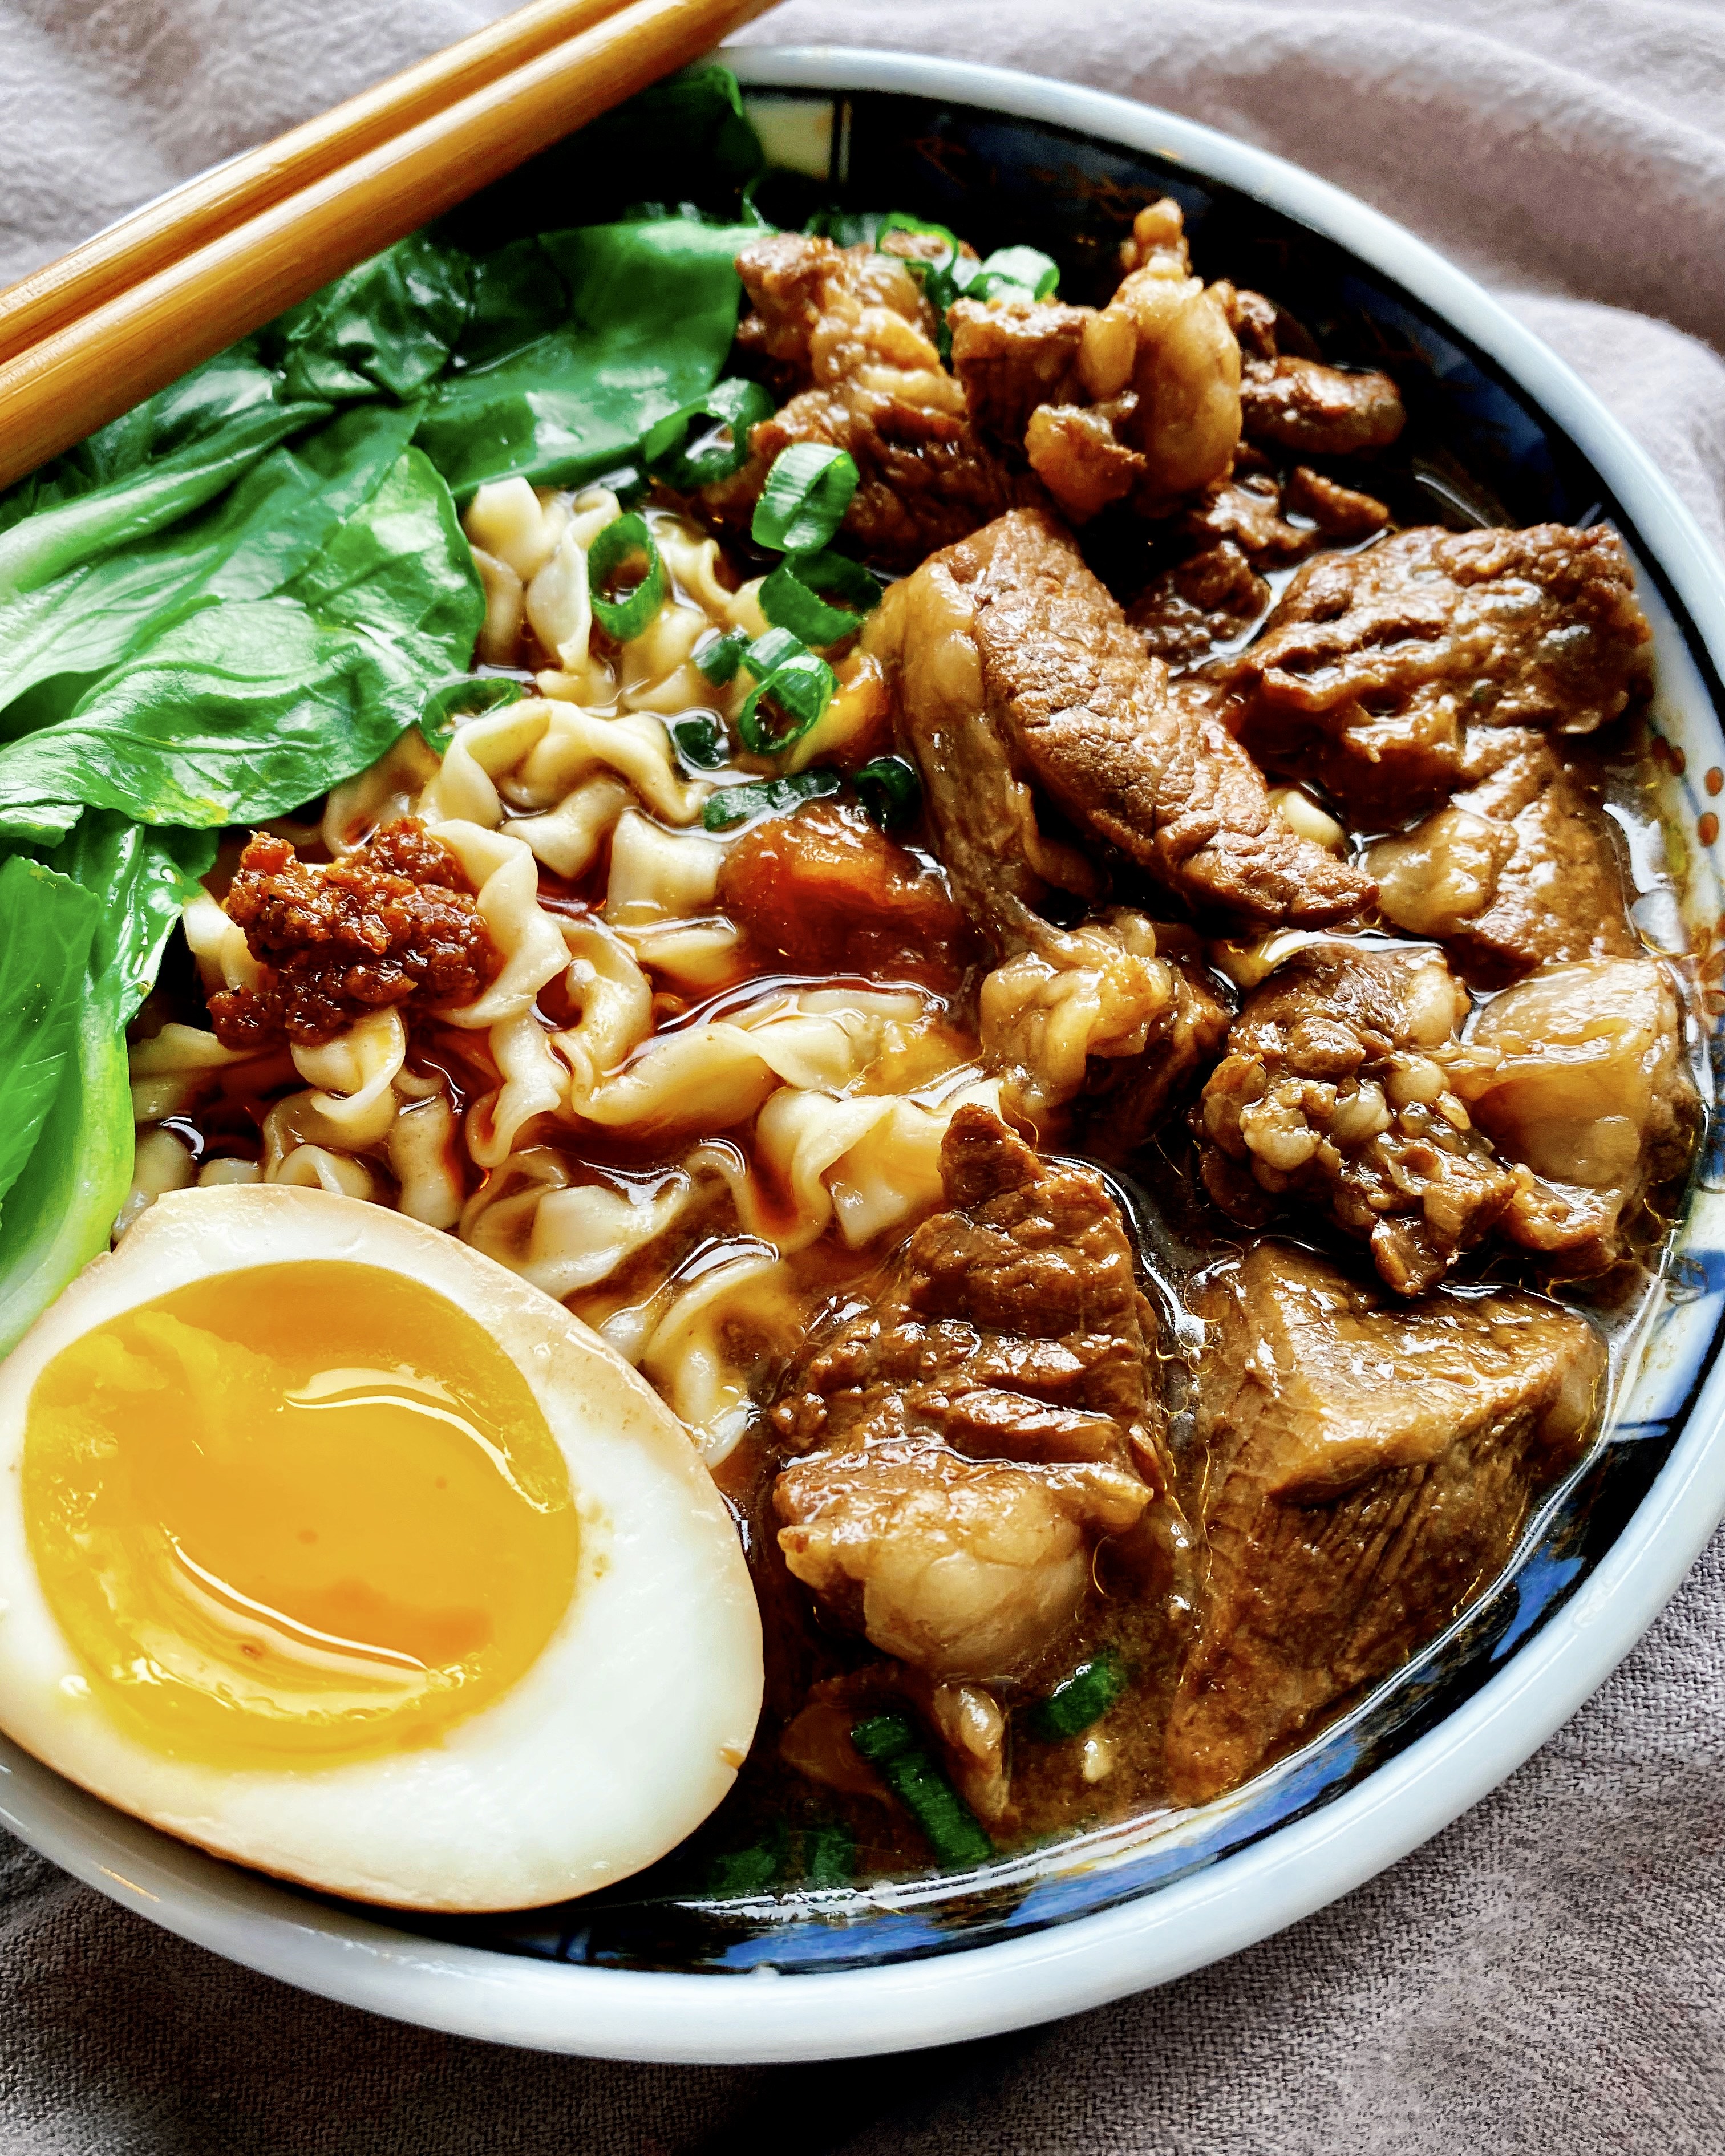
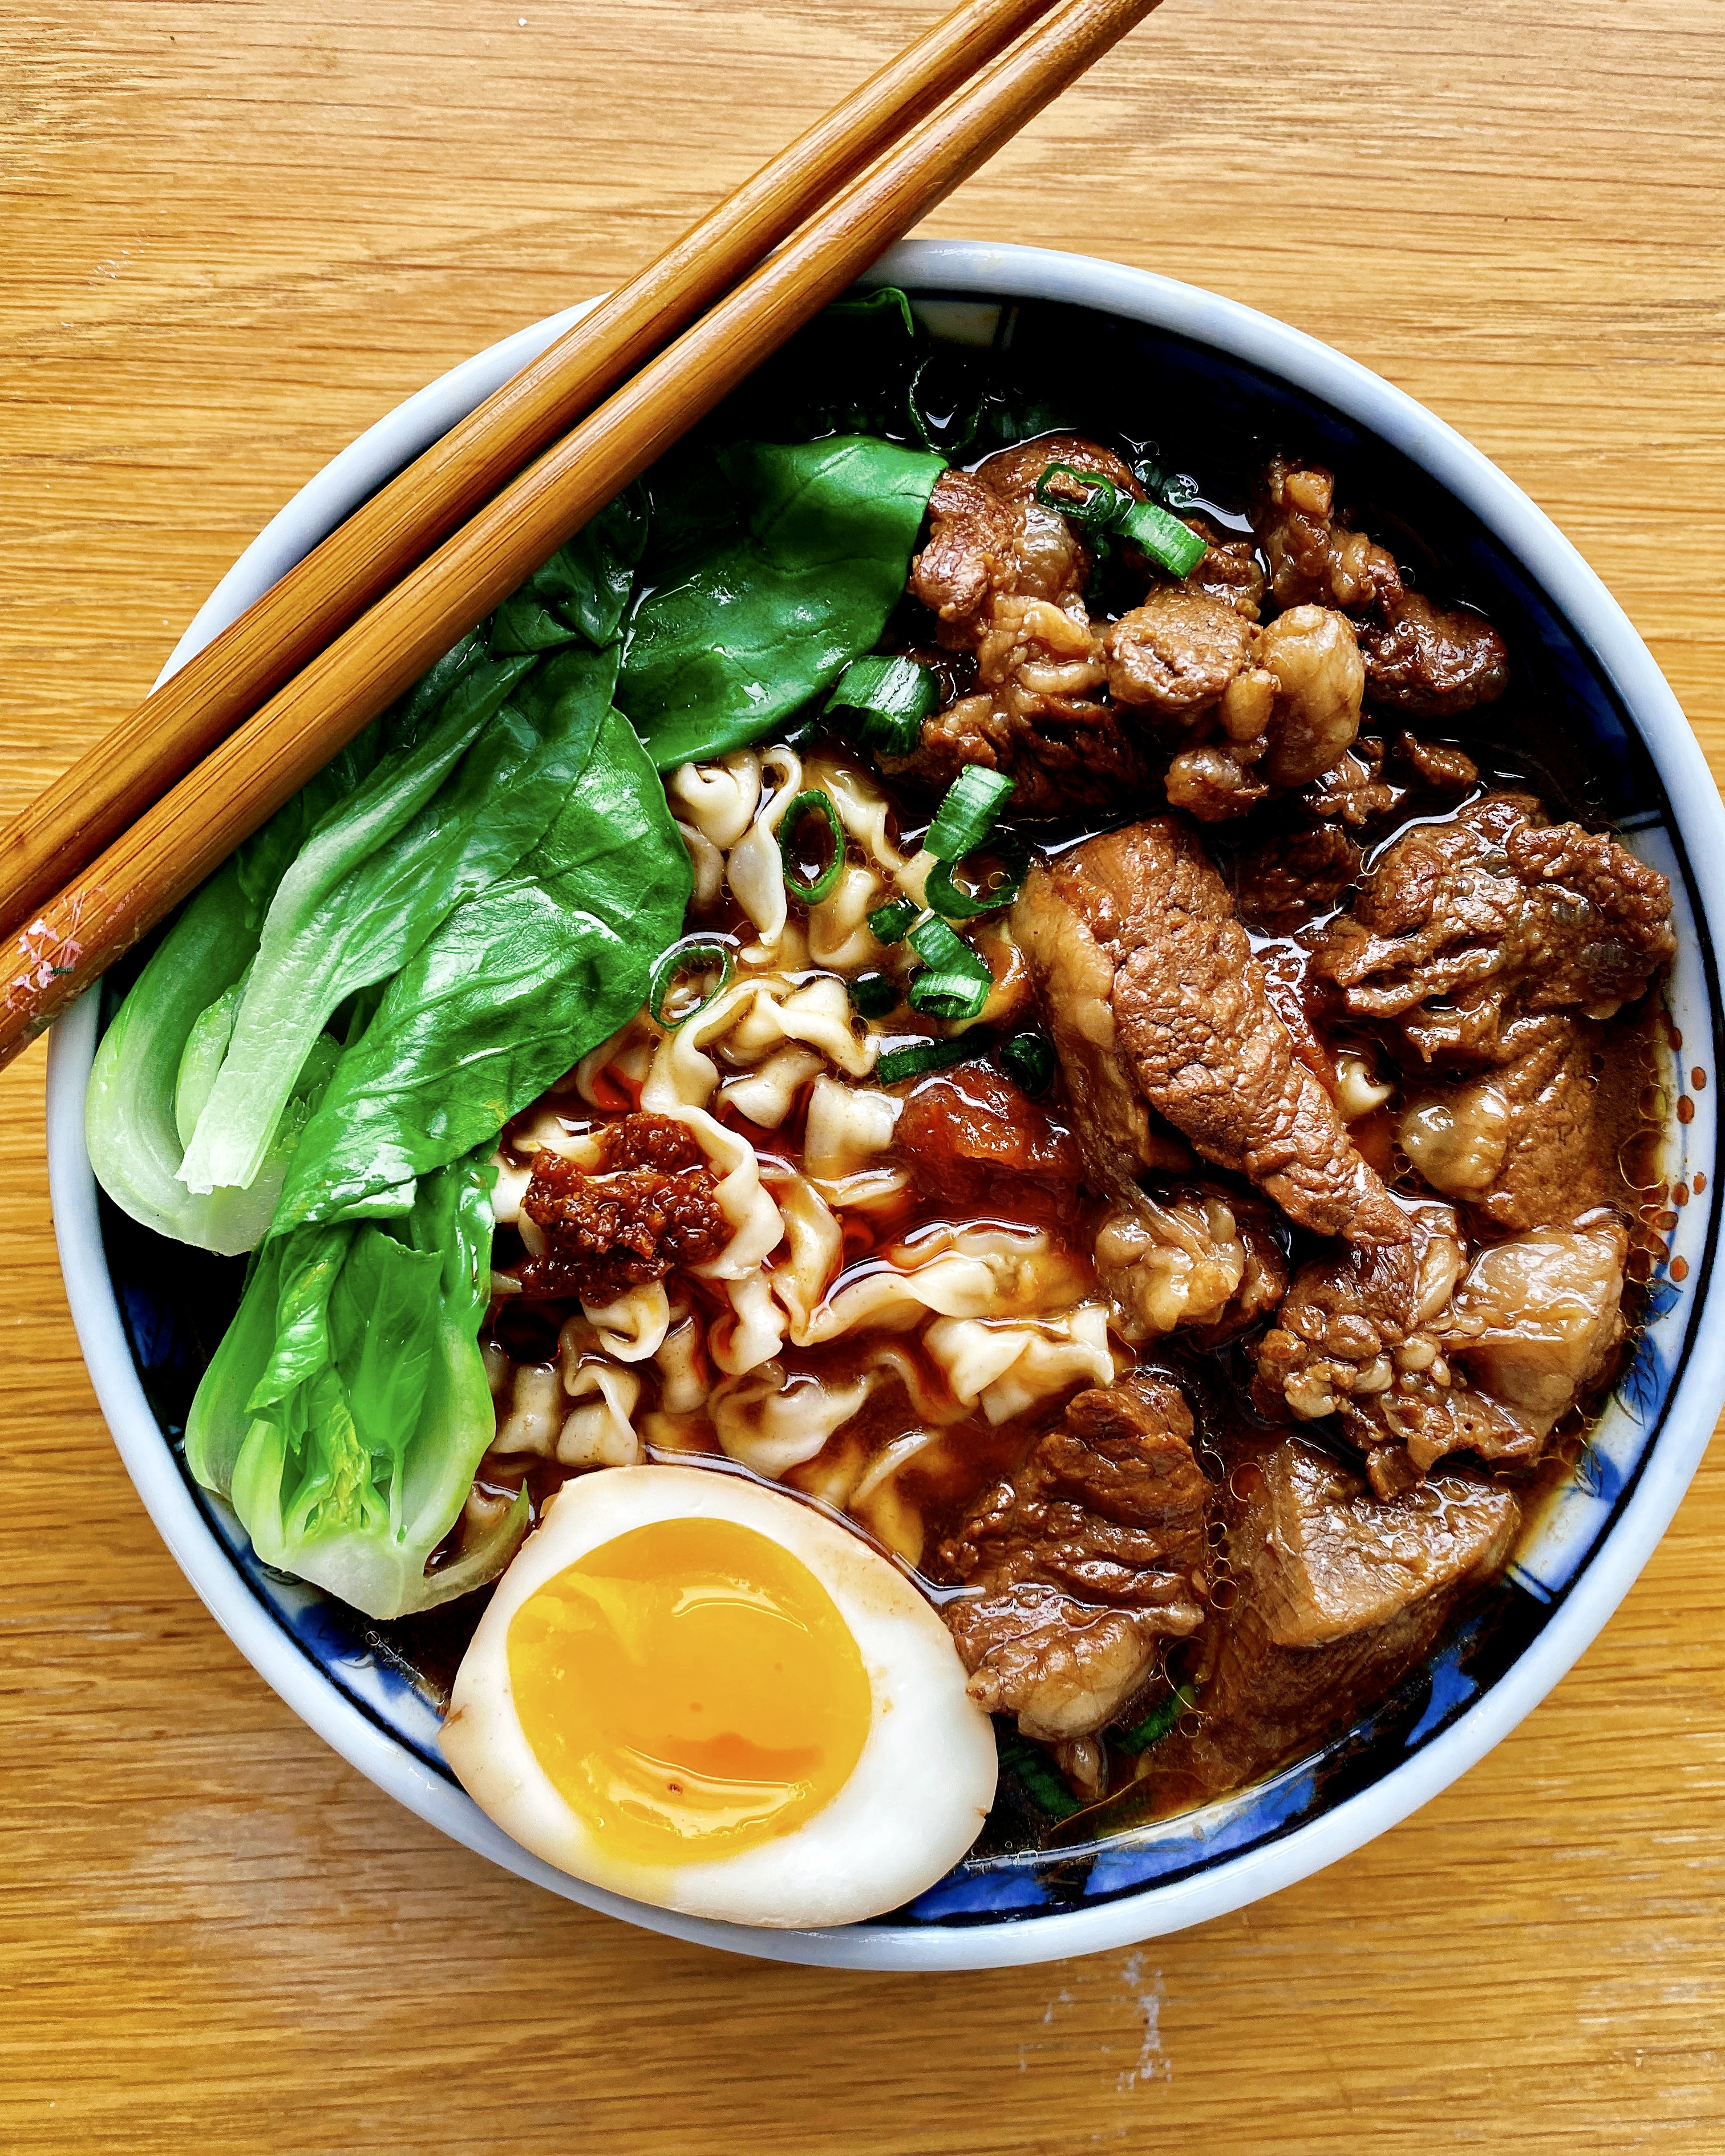
Taiwanese Beef Noodle Soup (Updated)

Quite a few things have changed since I posted my first rendition of beef noodle soup on this blog 14 years ago (it was my 3rd blog post ever!):  I've gotten better at cooking; I went through a vegan, then vegetarian, then pescatarian stint; and I started posting on Instagram

I'd say I'm more of a social carnivore now in that I do eat meat when I'm out with friends but very rarely cook it at home.  In fact, I think I've only made beef noodle soup maybe once or twice since I posted the original recipe.  But after seeing all the delicious BNS posts on the Taiwanese Home Cooking FB group and receiving a chuck eye steak from Vermont Wagyu, I knew it was time to fix that.

Looking back at the original BNS post, I was shocked to see that it called for 1.5 cups of soy sauce!  I chalk it up to one of those mistakes that happens when someone with little cooking experience tries to transcribe a recipe from someone who never measures anything when cooking.  I've since adjusted the quantity to a more reasonable 1/2 cup of low-sodium soy sauce.

The original version calls for napa cabbage and angel hair pasta, and while both are perfectly fine to use, I now opt for the more photogenic baby bok choy and use more authentic Taiwanese dried noodles like A-Sha brand.  And for the lu dan, instead of cooking already hard-boiled eggs in the sauce, I prefer tucking chilled 7-minute boiled eggs in the soup after it's been strained and cooling.  This way the yolks remain nice and jammy while the whites absorb the delicious flavor.

A few other changes:  I've listed white peppercorns, a cinnamon stick, and bay leaf as optional spices in addition to the star anise.  If you don't have them it's fine, but if you have them it will add a nice complexity to the soup.  The star anise is an absolute must, though, to make this a Taiwanese beef noodle soup.  Lastly, I stole this idea from Kenji's recipe--since almost all soups taste better the next day, I remove the beef from the soup, then strain everything else out before letting it chill overnight in the fridge.

Taiwanese Beef Noodle Soup
makes about 2-3 servings

1 lb. chuck steak, cut into 1" chunks
1 tablespoon oil, if needed
2 scallions, cut into 2" pieces
1 inch ginger, sliced
3 garlic cloves, peeled and smashed
1 tomato, skinned and roughly chopped
1 star anise
1 teaspoon white peppercorns (optional)
1 cinnamon stick (optional)
3 tablespoons rock sugar
1/2 cup low-sodium soy sauce
1/2 cup Shaoxing rice wine
2 cups beef broth
1 bay leaf (optional)
3 large eggs
Baby bok choy or napa cabbage, blanched
Noodles, cooked
Chili oil/sauce (like Sze Daddy), optional

If there is a lot of extraneous fat on the steak, you can cut it off and render it in a large Dutch oven or pot (add it to the pot cold then turn the heat to medium).  Otherwise, heat the oil in the pot and add the beef.  Flip the beef around to brown all the sides, then remove from the pot. 

Add the scallions, ginger, garlic, star anise, tomato, and white peppercorns and cinnamon stick, if using, to the pot and cook for a couple of minutes until very fragrant.  Add the rock sugar and stir around until it has mostly dissolved.  Return the beef to the pot and deglaze the bottom with the soy sauce and wine.  Add the beef broth and bay leaf, if using, and bring to a simmer.  Cover and continue to simmer on low for an hour.

In the meantime, bring another pot of water to boil.  Add the eggs (straight from the fridge) to the pot and set the timer for 7 minutes.  Prepare an ice bath.  After 7 minutes, remove the eggs from the pot and plunge them into the ice bath.  Once they are cool enough to handle, peel the eggs and set aside in the fridge to chill.

After an hour, check the beef for tenderness and the soup for flavor.  Cook longer or adjust seasonings if needed.  When the beef is ready, transfer from the soup into another pot or container large enough to hold the soup.  Strain the rest of the soup into the pot/container with the beef in it.  Add the peeled eggs, cover, let come to room temperature, then place in the fridge overnight.

When ready to serve, reheat the soup (remove the eggs first if you want to keep them jammy).  Blanch the veggies in boiling water until bright green and tender.  Remove and then cook the noodles in the same boiling water.  Drain and portion the noodles into 3 bowls, ladle the soup and beef over the noodles and add the veggies.  Slice the eggs in half and add to the bowl.  Serve with chili sauce (I like Sze Daddy for additional Taiwanese flavors) if you like.

Previously:  No Knead Sourdough Focaccia
Next:  Hurricane Popcorn Marshmallow Treats

Tuesday, March 30, 2021

No Knead Sourdough Focaccia

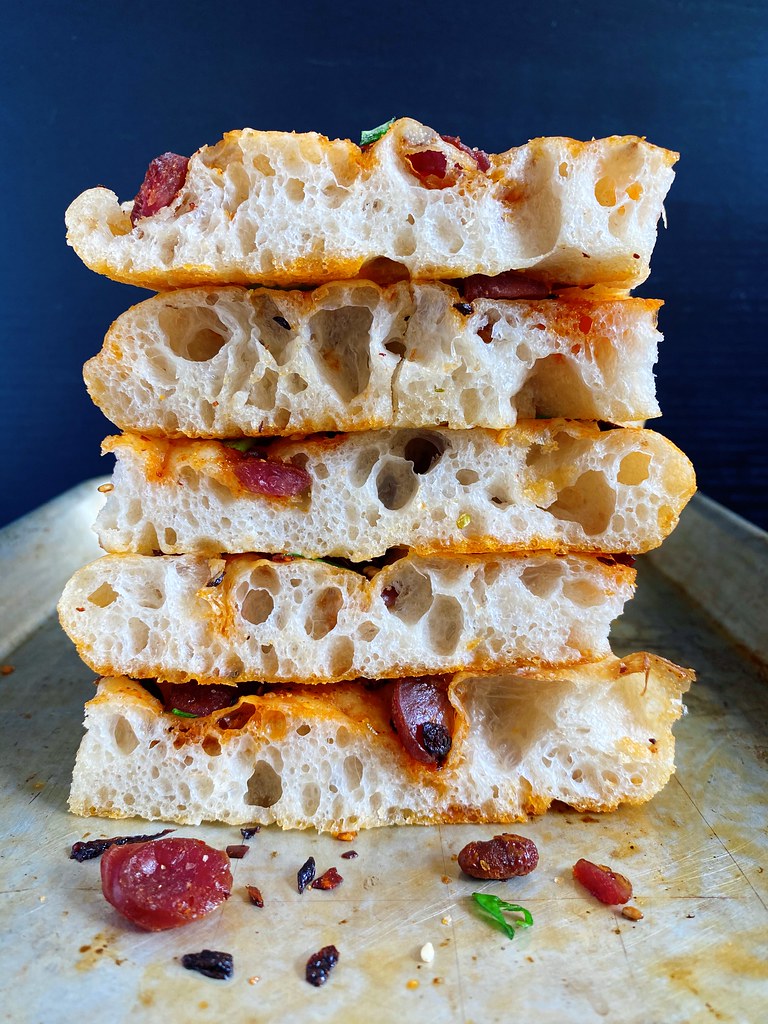
I've been tinkering around with my sourdough discard pizza dough recipe for a while now to produce a focaccia to my liking, and I think I've finally figured out a recipe that produces the kind of focaccia I prefer:  fluffy with lots of big holes, a crispy bottom, and a soft interior that won't go stale after a day or two.

What I love about this dough is that it's quite forgiving as well.  You basically want to slightly overproof the dough, so you don't have to worry about timing very much since you let it ferment overnight in the fridge.  And just like my sourdough discard pizza dough recipe, there's no kneading required!

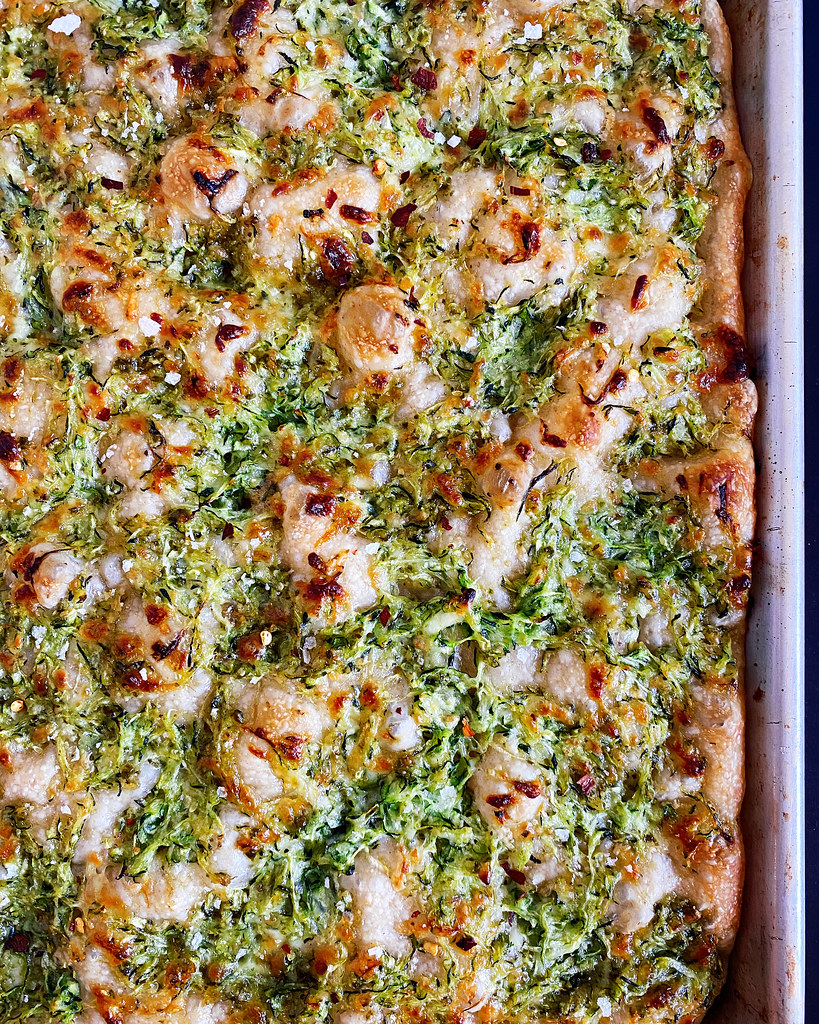
Regarding toppings, I've made more traditional versions with just olive oil, salt, and rosemary, but I've also treated it like a pizza dough and topped it with shredded Gruyere and zucchini before.  My absolute favorite combination is to drizzle the top of the dough with Laoganma spicy chili crisp and top with slices of Taiwanese sausage, mala salt, scallions, and sesame seeds.

No Knead Sourdough Focaccia

makes one 9" x 12" focaccia

75 grams active 100% hydration sourdough starter
175 grams warm water
250 grams all-purpose flour
6 grams salt
Oil for greasing the dough and pan
Toppings (flaky sea salt, herbs, cheese, etc.)

Mix the starter with the water in a medium mixing bowl until the starter is well dissipated. Add the flour and mix until a dough forms and all the flour has been incorporated.  Cover and let rest for 30 minutes.

Add the salt and use wet hands to pinch and fold the dough for several minutes until the salt has dissolved and the dough has built up some strength.  Cover and let rest for 30-60 minutes. 

Stretch the 4 corners of the dough one at a time and fold it over itself (this is called applying a fold).  Dribble some oil on top and use your hands to spread the oil and cover the surface of the dough, including where it touches the bowl.  Cover and let rest for 4-6 hours until doubled in volume.  Transfer the dough to the fridge to rest overnight.

The next morning, generously grease a quarter-sheet pan and start to stretch the dough out in it.  Give the top of the dough a light coating of oil, cover, and let the dough come to room temperature over the next 2 hours.  Continue to stretch the dough out every 30 minutes or so until it almost fills the pan.  If you have one, place a pizza stone or baking steel on the middle rack and preheat the oven to 450°F.

Once your dough is at room temperature and starting to get puffy, add your toppings starting with the oil.  Carefully spread the oil across the surface of the dough and then dimple with your fingertips.  Add any additional toppings and continue to proof until your oven is preheated.  Bake the focaccia for 15-20 minutes until browned to your liking.  Let cool slightly before slicing or cutting with scissors to serve.

Store in an airtight container at room temperature or in the fridge depending on your toppings.  You can rewarm the focaccia by microwaving briefly or in a toaster oven at 200°F until warmed through.

Next:  Taiwanese Beef Noodle Soup (updated)
Previously:  General Tso's Tofu

Saturday, September 19, 2020

General Tso's Tofu

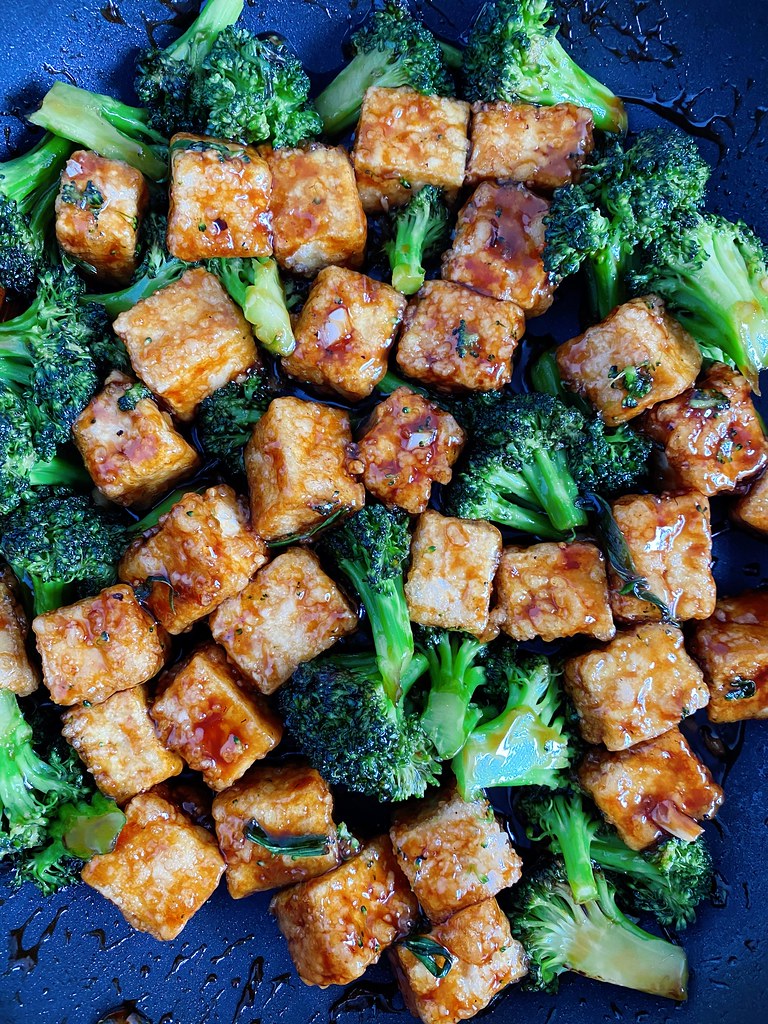
I previously posted this recipe in an Instagram post, but since I make it so much, I figured it would be easier to find here for future reference.  The sauce recipe is adapted from Lev Grossman's Best General Tso Tofu recipe on Food52, and the idea to use sweet potato starch as the coating for the tofu came from my friend Rebecca.  If you don't have sweet potato starch, you can use regular potato starch or cornstarch or even just fry the tofu without any coating.

General Tso's Tofu
makes 2-3 servings

14-16 oz. firm or extra-firm tofu
1 large head of broccoli
3 garlic cloves, minced and divided
Oil for frying
Kosher salt, to taste
Sweet potato flour for coating
3 tablespoons sugar
1 tablespoon cornstarch
3 tablespoons soy sauce
2 tablespoons Shaoxing wine
2 tablespoons rice vinegar
3 tablespoons chicken stock
Gochujang or sriracha, to taste
1 inch fresh ginger, thinly sliced
Handful of scallions, chopped into 1" sections

Steamed rice

Drain and cut tofu into cubes (no need to press!). 

Heat oil in a large skillet and add 1 minced clove of garlic. Add broccoli florets, season with salt, and stir fry until bright green. Add ~1/3 cup water, cover, and steam until broccoli is tender. Remove from pan and wipe down the pan.

Cover bottom of skillet with 1/4" oil and heat over medium. Toss tofu cubes in sweet potato flour and fry in batches until all sides are golden brown. Remove to a paper towel-lined plate. While tofu is frying, stir together the sugar, cornstarch, soy sauce, Shaoxing wine, rice vinegar, chicken stock, and gochujang to taste.

Stir fry the remaining 2 minced cloves of garlic, ginger slices, and scallions in remaining oil. Add the sauce and cook until thickened. Add the fried tofu and broccoli back in and stir to coat. Serve with steamed rice.


Next:  No Knead Sourdough Focaccia
Previously:  My Sourdough Challah 

Sunday, September 13, 2020

My Sourdough Challah

I learned recently that there are at least 2 different kinds of challah:  the sweet, eggy Ashkenazi version which is probably what most people think of when they think of challah, and the Sephardic version, which is found in the Breaking Breads and Pastry Love cookbooks.  I've made both versions, but I like making the Sephardic version more because the dough is a lot easier for me to work with.


My go-to challah recipe is based off of the one from Pastry Love, except I substitute 50 g of my 100% hydration sourdough starter for 25 of flour, 25 g of water, and half the yeast.  The resulting bread doesn't have the full sourdough tang, but I find it easier to digest than the kind made with just commercial yeast.  If you have a very active starter, you might be able to get away with using less yeast or even forgoing it altogether, but I'm usually using starter that's been left to ferment on my counter overnight so it's not at its most active which is why I add some commercial yeast for insurance.


My Sourdough Challah
makes 1 loaf

50 g sourdough starter, 100% hydration
95 g warm water
4 g active or instant yeast
40 g sugar
2 large eggs (1 for the dough, 1 for the egg wash)
45 g vegetable oil
325 g all-purpose flour
7 g kosher salt

Mix the starter and water together in the bowl of a stand mixer.  Sprinkle on the yeast and allow to dissolve before adding the sugar, 1 egg, oil, and flour.  Knead using the dough hook on low for about 5 minutes until the dough comes together.  Cover and let rest for 10 minutes.  Sprinkle on the salt and knead on low for 8 more minutes.  Cover again and let rest for 90 minutes at warm room temperature.

Uncover the dough and punch down.  Fold over the 4 corners of the dough, recover and let rest another 90 minutes.  

While the dough is fermenting, make an egg wash by whisking together the 2nd egg, 1 scant tablespoon of water, and a pinch of salt.  Mix well but try not to make too many air bubbles.

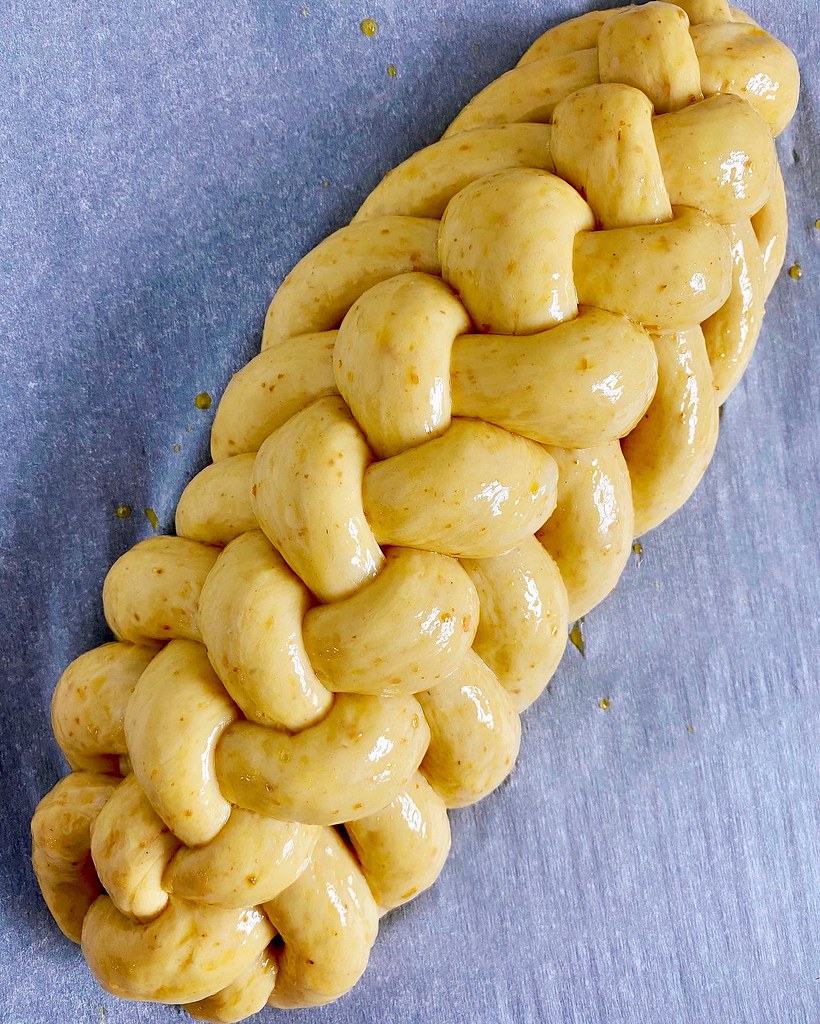
Punch down the dough again and divide into even portions (the number will depend on how many strands you want; for reference, the first two pictures in this post are a 7-strand braid and the last two are an 8-strand braid).  Working one at a time, press each portion into a rough rectangle.  You want to try to remove any large air bubbles at this point because they will form weak points in your strand.  To form the strand, you will be rolling over the long side of the rectangle like a jelly roll.  To help maintain tension in the dough, use your fingertips to gently push the portion you just rolled over back into the dough all along the length of the dough.  (I highly suggest you watching my IGTV video which shows you how to form the strands since it's much easier to show you than explain how to do it.)  When you get to the bottom of the dough, pinch the seam together and roll the log out a couple of times on the work surface to create a taut surface and start shaping it into a long strand.  At this point you can also taper the ends if you want.  Set aside and work on the next strand.

Once you've shaped all the strands into logs, start with the first log you formed and roll it out into a longer snake.  Set aside and work on the next one.  Once you've roll them all out into longer snakes, give them one last roll to their final length.  Allowing the dough to rest in between the 3 shaping rounds lets the dough relax a little and not shrink back so much.  Braid and form the strands into your desired shape.  Transfer to a parchment paper lined baking sheet.  

Brush on a thin, even layer of the egg wash, trying not to let too much settle in between the strands.  Let rest for 90-120 minutes in a warm, draft-free area (I use my microwave).  Preheat the oven to 350℉.

When the dough is nice and puffy, turn it 180° from the position it was when you applied the egg wash and brush on another thin, even layer.  Turning the loaf helps ensure that you don't miss any of the surface.  Bake the loaf for 30-35 minutes, turning once halfway, until it is evenly browned.  Let completely cool before slicing.  Store in a paper bag for up to 3 days.

Previously:  Sourdough Belgian Waffles
Next: General Tso's Tofu

Saturday, August 1, 2020

Sourdough Belgian Waffles


Well this is my first post in almost a year, so you know these are worth making!  I've been trying to find a sourdough waffle recipe that I like as much as Smitten Kitchen's essential raised waffles, but none of the ones I tried really had the flavor or texture I was looking for.

Then two things happened:  my friend Arthur sold me his Belgian waffle maker, and I tried making a half batch of  The Kitchen McCabe's sourdough Belgian waffles, only I started the first part of the batter late at night and didn't realize until the following morning that I had only used like a tablespoon of my sourdough starter in the batter instead of a full cup.  But the waffles were AMAZING.  Light and lacy, crispy on the outside and custardy on the inside, with enough flavor that you could eat it without any syrup or butter.


I needed to make sure I could replicate the waffles again, so I asked for testers on my Instagram page, and thankfully quite a few people responded.  Out of ~50 testers, 80% loved the waffles whereas the rest were less impressed.  The chief complaint was that they never got crispy or lost their crispiness too soon.  When I tried the recipe again myself, I noticed the same thing, but I did find that reheating the waffles in my toaster oven made them much crispier.

Another comment was that they were too salty.  I realized that I had listed the kosher salt by volume instead of weight, and since I use Diamond Crystal kosher salt, another other kind of salt was going produce a must saltier waffle.  Lesson learned!

Since such a small amount of starter is used in the recipe, it doesn't seem to matter much what kind of starter you use, but for what it's worth, my starter I keep is 100% hydration and fed with half AP flour and half whole wheat flour.  I tested these waffles once with more sourdough starter and once with milk instead of water.  I couldn't really tell too much of a difference with the former but found the latter to be even softer than the ones with water and with no added flavor.

All in all, I'd say these are the perfect waffles for someone who doesn't particularly like the flavor of sourdough in their waffles, but has sourdough starter and no milk, haha.  Since such a small amount of starter is used in the batter and it's such a runny batter, the rise you get is more from the baking soda in the waffle iron than from the sourdough.  It seems to help if you have one of those Belgian waffle makers that you flip too, but people had success with regular waffle irons, too.  This recipe doubles quite easily too, if you have more mouths to feed.


Sourdough Belgian Waffles
makes about 3-4 Belgian waffles, depending on the size of your waffle iron

10-50 g sourdough starter (does not need to be active starter; discard is fine)
120 g (1/2 cup) room temperature water
90 g flour (I like to use 25 g whole wheat flour + 65 g all-purpose flour)
42 g (3 tablespoons) melted butter, slightly cooled
1 g (1/2 teaspoon) Diamond Crystal kosher salt
15 g (1 tablespoon) honey
1 large egg, lightly beaten
4 g (1 teaspoon) vanilla extract
1/4 teaspoon baking soda

The night before, mix together the sourdough starter, water, and flours.  Cover and let sit at room temperature overnight.

In the morning, add the melted butter, salt, honey, egg, and vanilla extract.  Start heating up your waffle iron.  When it is ready, stir the baking soda into the waffle batter and mix well.  Lightly grease the iron and add ~1/2 cup batter to the iron and cook until golden brown.  Serve immediately or freeze.


P.S  If you'd like a really simple recipe for blueberry syrup, you can find it in the caption of this Instagram post.

Previously:  Snowskin Cake Truffle Mooncakes

Wednesday, August 28, 2019

Snowskin Cake Truffle Mooncakes


The mooncakes I grew up eating were the golden, baked kind--usually filled with red bean or lotus seed paste and sometimes even a salted egg yolk inside.  It's so ubiquitous that iOS has an emoji for them (while there still isn't an emoji for waffles??).  They were good, but oh so heavy and dense; it was hard to eat more than a few tiny slices.  Luckily, a few different kinds have popped up since I was a child like the swirly, flaky Taiwanese version I made a few years ago.  Even more recently, I've been seeing snowskin mooncakes where the skin is made with glutinous rice flour resulting in a soft, translucent skin.


I did some research on how to make them, and it looks like there's a hard way with a lot of ingredients and steps and an easy way with just a few ingredients and no steaming involved.  I already know how difficult it can be to work with mochi, so I went with the easy way by following the directions from Kirbie's Cravings and Tiny Urban Kitchen.

The first step is either sourcing roasted glutinous rice flour or making your own.  Since I already had some flour at home, I tried dry roasting it in my wok.  It's not hard to do, but it does take a little patience and a lot of stirring before you get that first wisp of smoke.  Then you sift it together with powdered sugar before rubbing in a fat like shortening.  I've tried using coconut oil and butter and both tasted great, but since butter has a slightly higher melting point, it's easier to work with.

The hardest part for me was figuring out how much liquid to add to make the dough.  If you don't add enough it'll be too crumbly to work with, and if you add too much, it'll be too sticky.  I found the hard way that if you overdo it with the liquid, you can add in some more powdered sugar to bring it back to the right consistency.


Then there's the matter of the filling.  I knew I didn't want to go with the traditional heavy fillings and wanted to come up with something that might be more accessible for the American pantry and palate.  It had to be something pliable enough to mold, firm enough to keep its shape, wouldn't need additional cooking, and hopefully stable at room temperature.  I considered a cheesecake type filling or cookie dough before I thought of an even better idea:  cake truffles!  You may know them as cake balls or cake pops, but it's what you get when you mix cake crumbs with frosting or another binder, roll them up and cover with chocolate or candy melt.


It's incredibly easy to make and there's a million different variations.  I made some to bring to a friend's birthday party, and since she loves watermelon, I baked a strawberry box mix cake, mixed it with some frosting and mini-chocolate chips, and wrapped it with pandan flavored snowskin so it looked like a watermelon.  I also make some with non-dyed snowskin and Funfetti cake inside for a birthday cake mooncake.  My favorite version so far has been using the chocolate chip-passion fruit cake truffle from All About Cake and wrapping it with a snowskin made with passion fruit pulp instead of water.


Snowskin Cake Truffle Mooncakes
makes about 35 mooncakes using a 50 g mooncake mold

For the cake truffle filling:

9"x13" cake, baked and cooled
Mix-ins like mini-chocolate chips or sprinkles (optional)
Binder, like frosting or fruit juice

Use your hands to crumble the cake into crumbs.  Add your mix-in, if using, and toss to combine.  Add your binder, a little at a time, until you can squeeze the mixture and it holds its shape.  Use a cookie dough scoop to form about 35 balls.

For the snowskin:

250 grams sweet glutinous rice flour
225 grams powdered sugar, plus more for rolling
75 grams butter or coconut oil
125 grams water or other liquid like fruit juice
Food coloring and/or flavor extract, optional

In a large skillet or wok, dry roast the rice flour over medium heat, stirring constantly, until it starts to smoke and change color.  Allow to cool to room temperature, then sift together with the powdered sugar into a medium bowl.  Add the butter or coconut oil and then rub it into the dry mixture until well combined.  If using the food coloring and/or flavor extract, add to the water.  Add half of the liquid to the bowl and mix together.  Gradually add more of the liquid until the mixture is soft and pliable but not tacky.  It's a fine line between a crumbly and sticky texture so go slowly.

Pinch off about a walnut size lump of the mixture and roll out into a thin disc on a surface dusted with powdered sugar.  Wrap the snowskin around one of the cake balls.  If there is extra snowskin after wrapping the cake ball, pinch it off and return it to the rest of the mixture.  If you need more, pinch off a bit from the mixture and patch up the hole.  Place the wrapped cake ball on the counter, seal side down, and make sure it will fit into the mooncake mold.  If it is too wide, use your hands to gently shape it narrower and taller.  Use a 50 g mooncake mold to press it into shape and release.  Repeat with the rest of the snowskin dough and cake balls.  You can store the mooncakes in an airtight container in the fridge for 1-2 days or 1-2 weeks in the freezer.  Let thaw before serving.


Previously:  Mochi Waffles

Wednesday, July 31, 2019

Mochi Waffles


I can't believe it's the end of July, and this is the first time I've posted on here this year!  I've been posting less and less on here because I've been cooking mostly from recipes on here already or using recipes from cookbooks.  So the fact that I'm posting this recipe means it's a good one.  =)

I've made mochi waffles before using mochi blocks, but these are made from scratch.  I was inspired by Snixy Kitchen's chocolate mochi donuts which were in turn inspired by Third Culture Bakery's mochi muffins.  I figured that by increasing the surface area, you'd get a better crispy crust to chewy innards ratio (and I was right)!  I also like that making the batter from scratch means you can play around with the flavors more.  I tried making a pandan version and a black sesame version, but I think it would be easy to adapt this recipe to make a chocolate or matcha version as well!


Mochi Waffles
makes 8

16 oz. sweet glutinous rice flour
1 cup sugar
2 teaspoons baking powder
1/2 teaspoon kosher salt
2 tablespoons black sesame seeds or 1/4 teaspoon pandan extract
4 tablespoons butter, melted and cooled to room temperature
13. oz can of coconut milk, well shaken
2 beaten eggs, room temperature

Mix the dry ingredients in a large bowl.  If making the black sesame flavor, grind the sesame seeds (I used my coffee grinder) and add to the dry ingredients.

Whisk the wet ingredients together, then add to the dry ingredients and mix until smooth.  Since this is a gluten free recipe, you don't need to worry about it getting tough if you mix too much.  Batter will be fairly thick.

Preheat waffle iron to medium.  Use a 1/2 cup measure to scoop batter onto the waffle iron and cook until lightly golden.  The waffle will be soft and floppy coming out of the iron but will crisp up a bit upon cooling.  Serve immediately with sweetened condensed milk and fruit if you like.  Leftovers can be stored at room temperature in an airtight container for a day.  Reheat in a toaster oven before serving.


I used my Cuisinart classic waffle maker to make these, so the settings and quantities might have different results depending on your waffle maker.

Next:  Snowskin Cake Truffle Mooncakes
Previously:  Bacon Fat Scallion Pancakes

Sunday, December 30, 2018

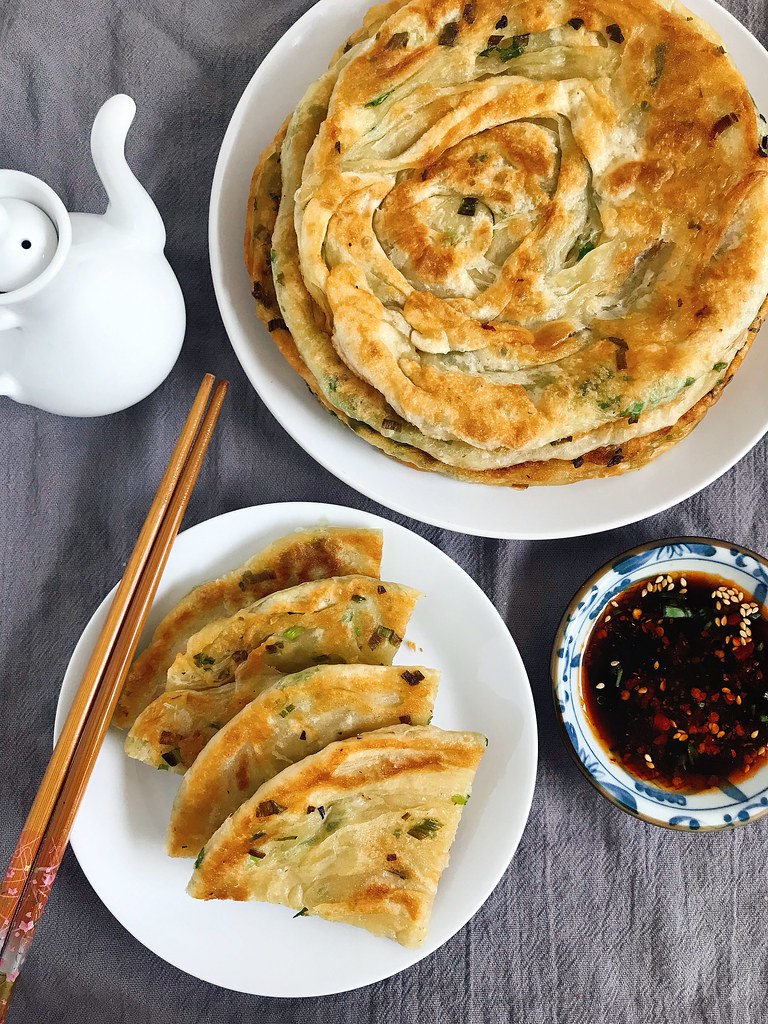
Bacon Fat Scallion Pancakes


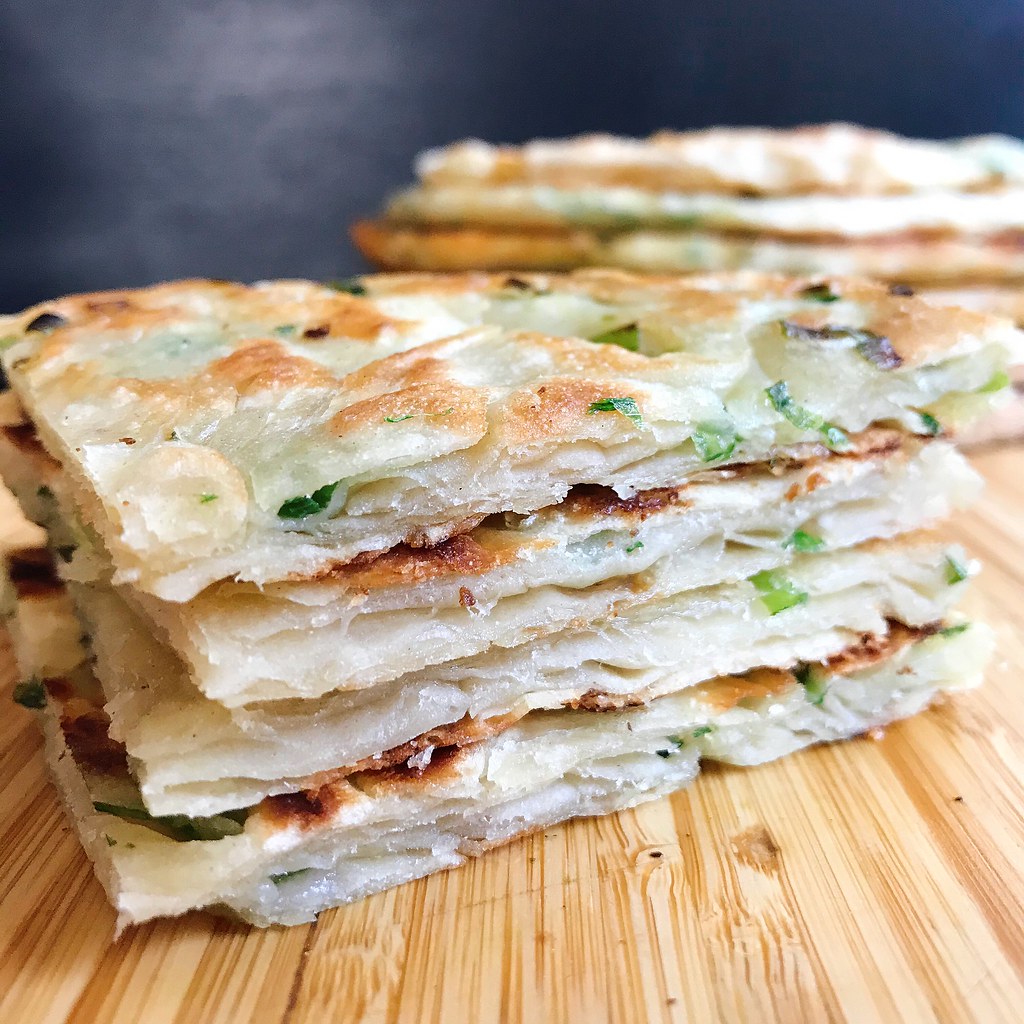
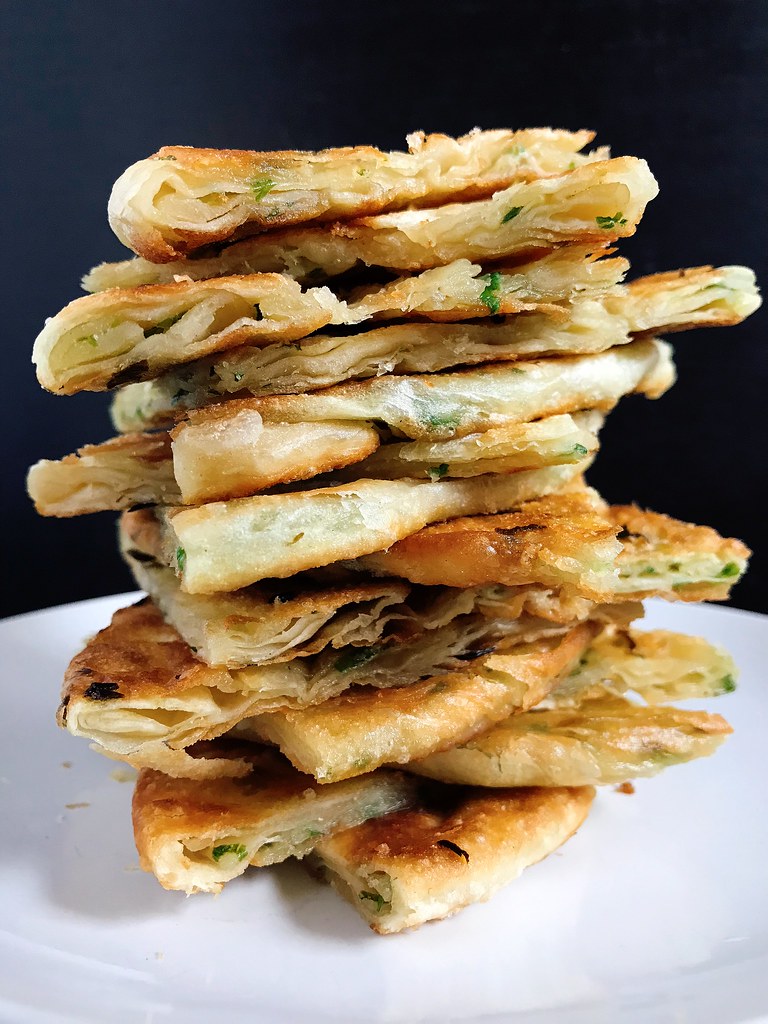
I've been making scallion pancakes the same way for years using a recipe I got from one of my chef friends, but recently I tried a different recipe based on a recommendation from the same friend and discovered this one makes just as good, if not better scallion pancakes in a lot less time!


One of the main ingredients for the recipe she sent me was lard, but since I don't usually have that in stock, I tried substituting with bacon fat.  I'm surprised no one else came up with this combo before because it's basically combining two of the greatest tasting things in the world into one.  I fiddled around with the other ingredients a bit to balance out the extra flavor from the bacon fat and ended up with this recipe.  I think it's flavorful enough to not need a dipping sauce, but if you really want one, you can mix up some soy sauce, rice wine vinegar, sesame oil, and hot sauce to your liking.


Bacon Fat Scallion Pancakes
makes 5 pancakes

300 gram all-purpose flour
6 grams kosher salt, divided
10 grams sugar
175 grams warm water
30 grams chopped scallions (about the amount from 1 bunch of scallions)
50 grams bacon fat, melted
Vegetable oil for frying

Mix the flour, 2 grams of salt, sugar, and warm water together and knead for 5 minutes until it forms a cohesive ball of dough.  Cover and let rest for 30 minutes at room temperature.

In the meantime, chop the scallions, melt the bacon fat, and measure out the remaining 4 grams of salt.

Divide the dough into 5 equal portions (I like to use the scale for this).  Roll out one of the portions into a rectangle.  Flip the dough occasionally to prevent it from sticking to the work surface.  When it won't get any thinner with a rolling pin, gently stretch the dough out with your hands to get it even thinner, but stop if the dough starts to rip.

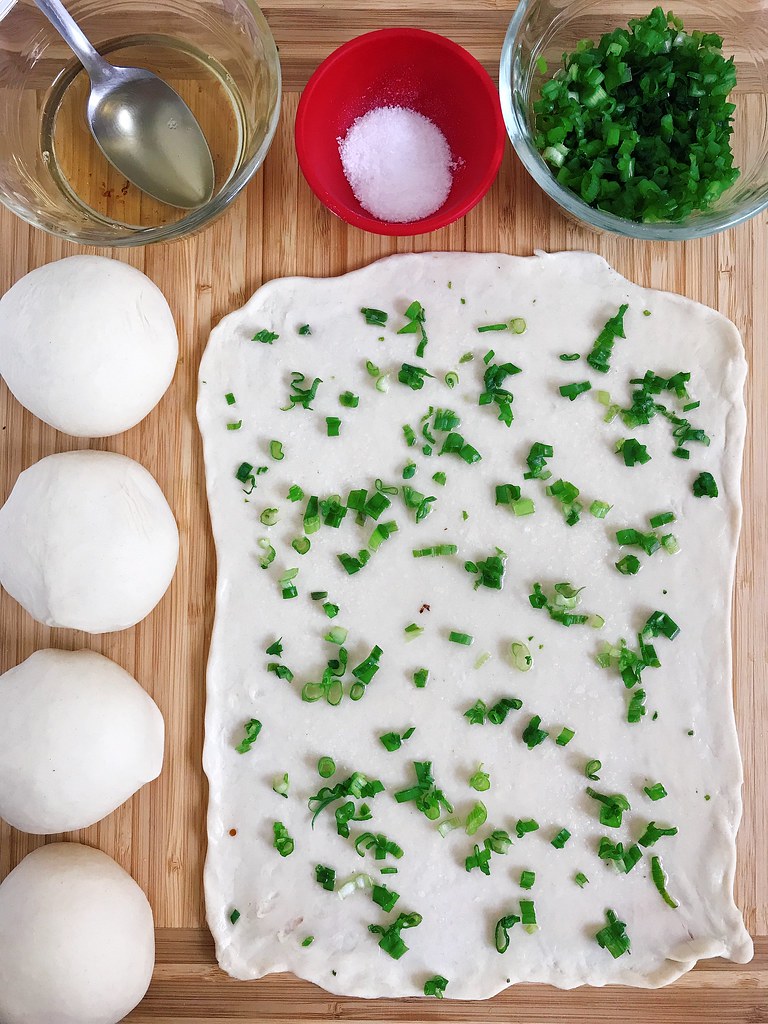
Spoon a fifth of the melted bacon fat on top of the dough and spread it all around with the back of the spoon.  Sprinkle a large pinch and a half of salt all over and then do the same with a fifth of the chopped scallions.

Starting from the long edge, roll up the dough to form a long rope.  Don't worry about making a tight coil; focus on making the dough as thin as possible by continuing to gently stretch it out as you roll it up.  Once you've formed a long rope, coil it up into a spiral with the seam side down and tuck the end underneath.  Use your palm to squash the coil into a flatter disc.  Set aside and repeat with the other 4 pieces of dough.

Heat up a frying pan over medium high heat with enough oil to generously coat the bottom.  If you have any leftover bacon fat you can add it to the oil.  While the oil is heating, use your hands or a rolling pin to flatten one of the discs even more.  Aim for the pancake to be a little less than 1/4" thick, but don't flatten it completely or else you'll lose all the layers.

Fry the pancake until golden brown on one side and flip.  It's okay if you need to flip it a few times to get it evenly browned on both sides.  While you're waiting for it to cook, go ahead and flatten the next pancake.  When the pancake is done, transfer it to a wire rack.  Make sure you have enough oil left in the pan and fry the next one.

If you have any leftovers, I like to quarter and freeze them so that I can use my compact air fryer to reheat them.


Next:  Mochi Waffles
Previously:  My Communion Bread
Last Year:  Pork, Cabbage, and Tofu Dumplings
Two Years Ago:  Cranberry Curd Tart
Four Years Ago:  Puppy Chow Pie
Five Years Ago:  Miso Pumpkin Soup
Six Years Ago:  Thomas Keller's Lemon Tart
Nine Years Ago:  Tim Tam Slam Ice Cream
Ten Years Ago:  Curry Turnovers

Tuesday, September 25, 2018

My Communion Bread


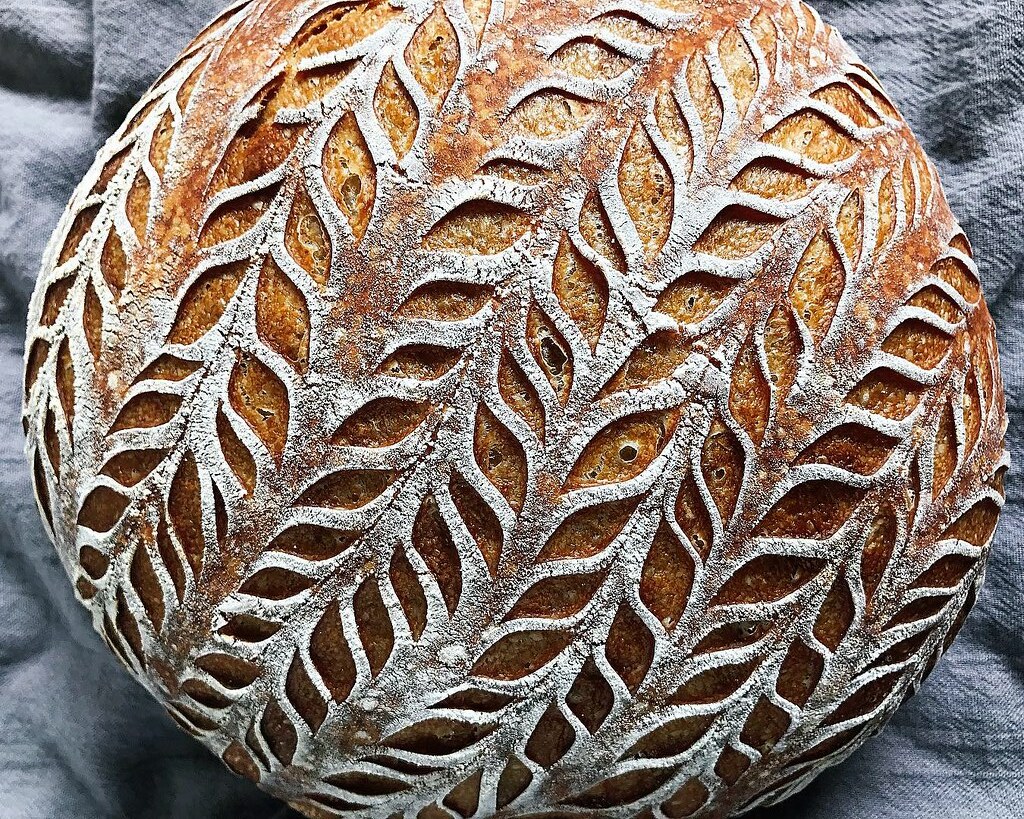
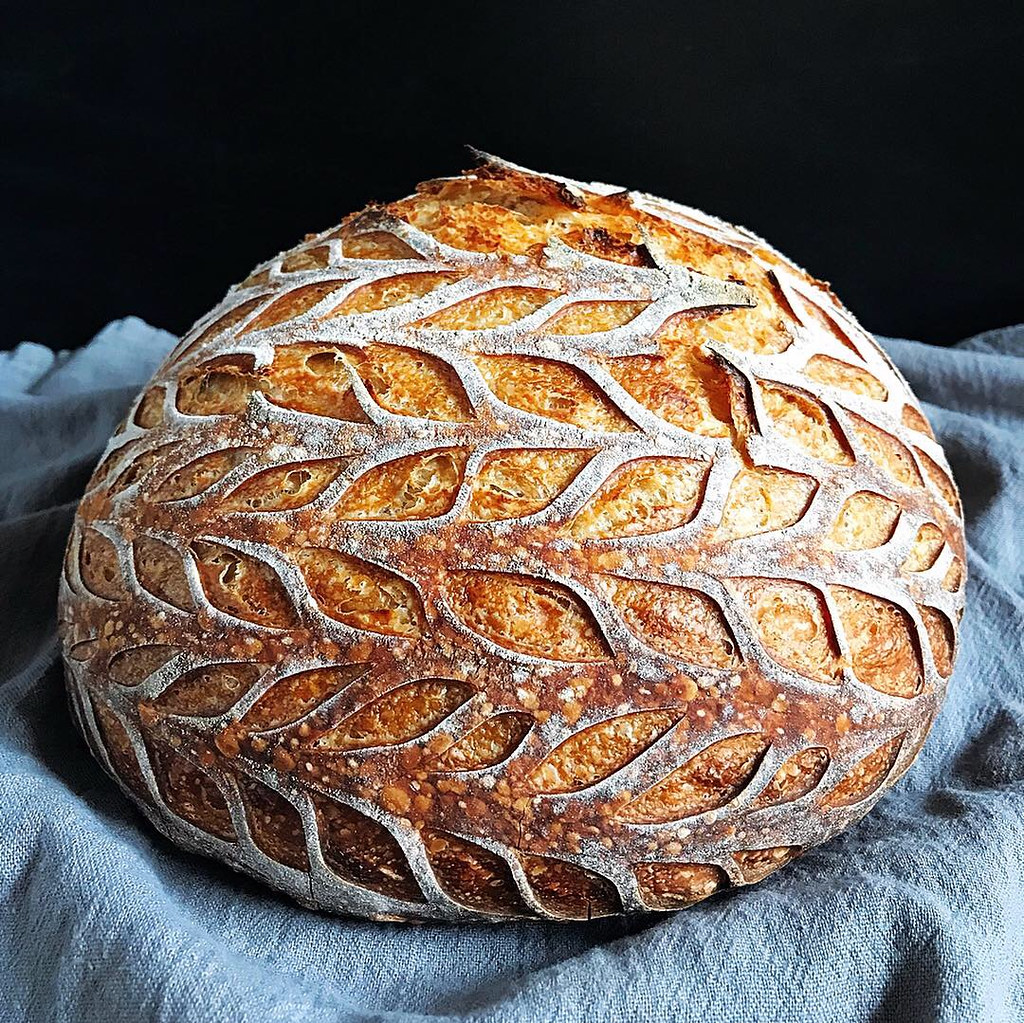
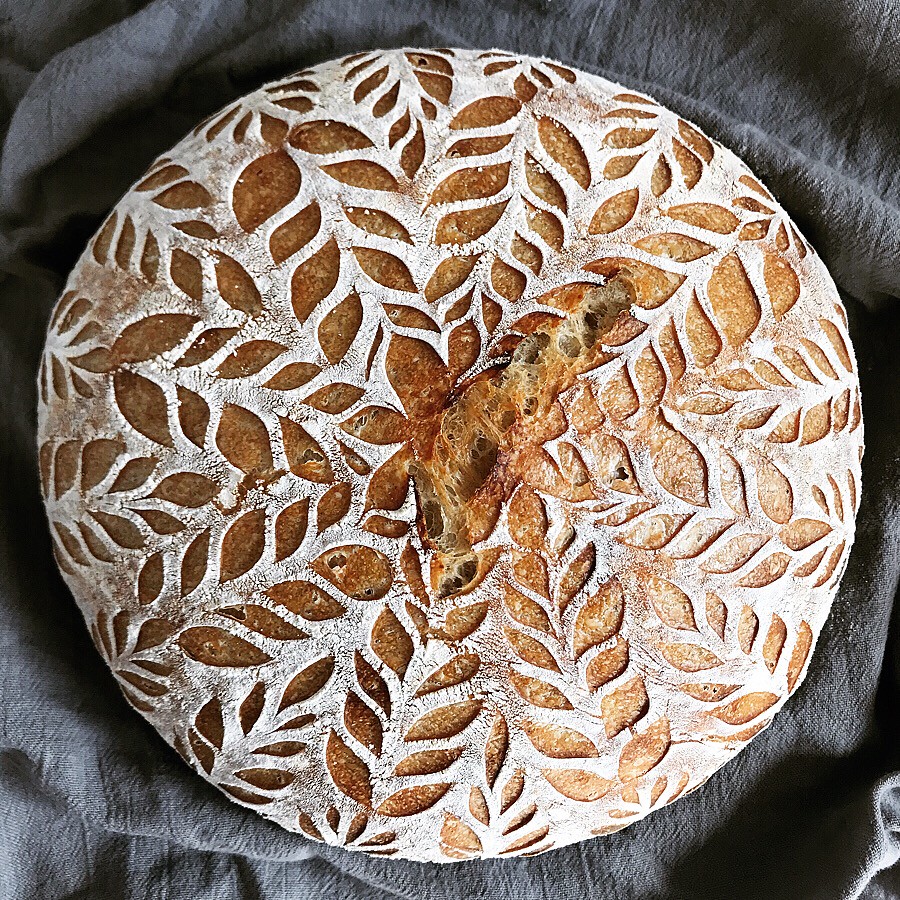
I've been making sourdough bread for one of my church's services every week for communion for a while now and figured it was finally time to write up how I make it.  This is loosely based on the country loaf from Tartine Bread, a wonderful book that goes a lot deeper into the methods involved.  I highly recommend picking up a copy and reading it through at least once to not only understand how sourdoughs work but also to be inspired by the process.
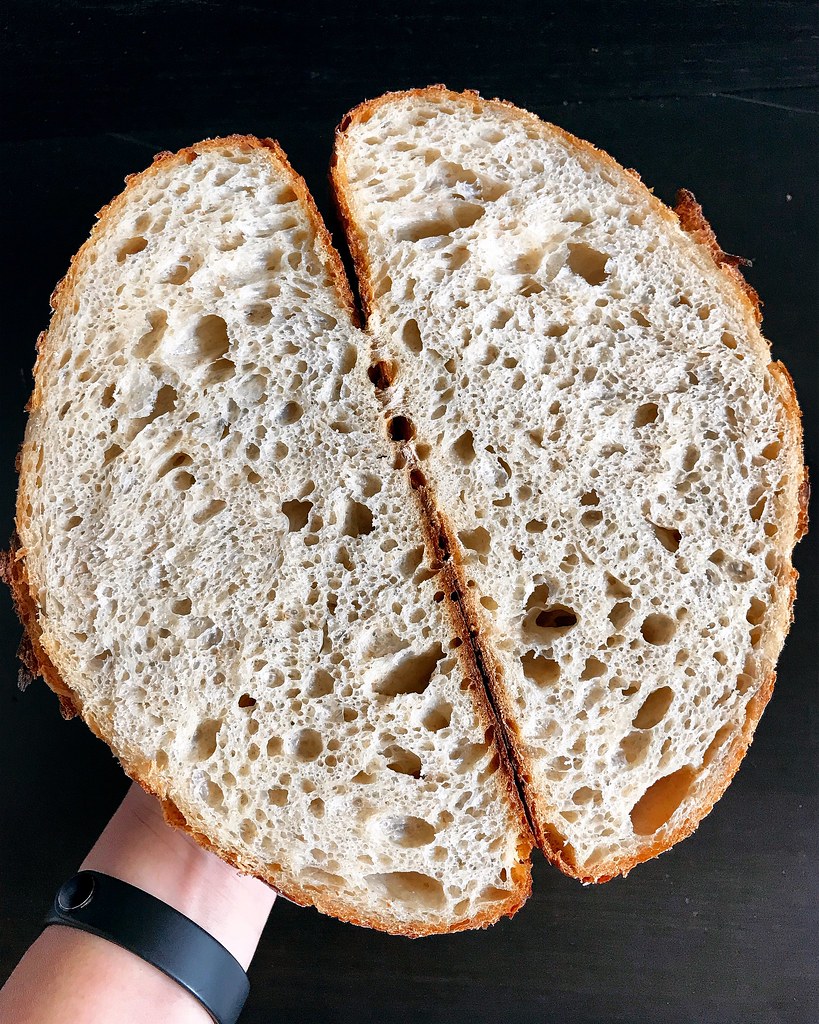

I was lucky enough to get a sourdough starter from a friend instead of having to start one from scratch.  The first thing you should probably know about a starter is that you'll need to feed it periodically.  This means discarding the majority of it* and adding some more water and flour to the remaining bit and letting it get all bubbly and doubled in volume.  I feed my starter with a 50/50 mixture of all purpose flour and whole wheat flour and an equal amount of water by weight (e.g. 25 g of all purpose flour, 25 g of whole wheat flour, and 50 g water).  Some people do this daily, or even more than once a day, but since I really only make bread once a week, I keep my starter in the fridge and just feed it the day before I want to bake it.  If I happen to be traveling and can't feed it for more than a week, I'll do a few rounds of feeding until it starts smelling and acting like I'm used to before I use it.
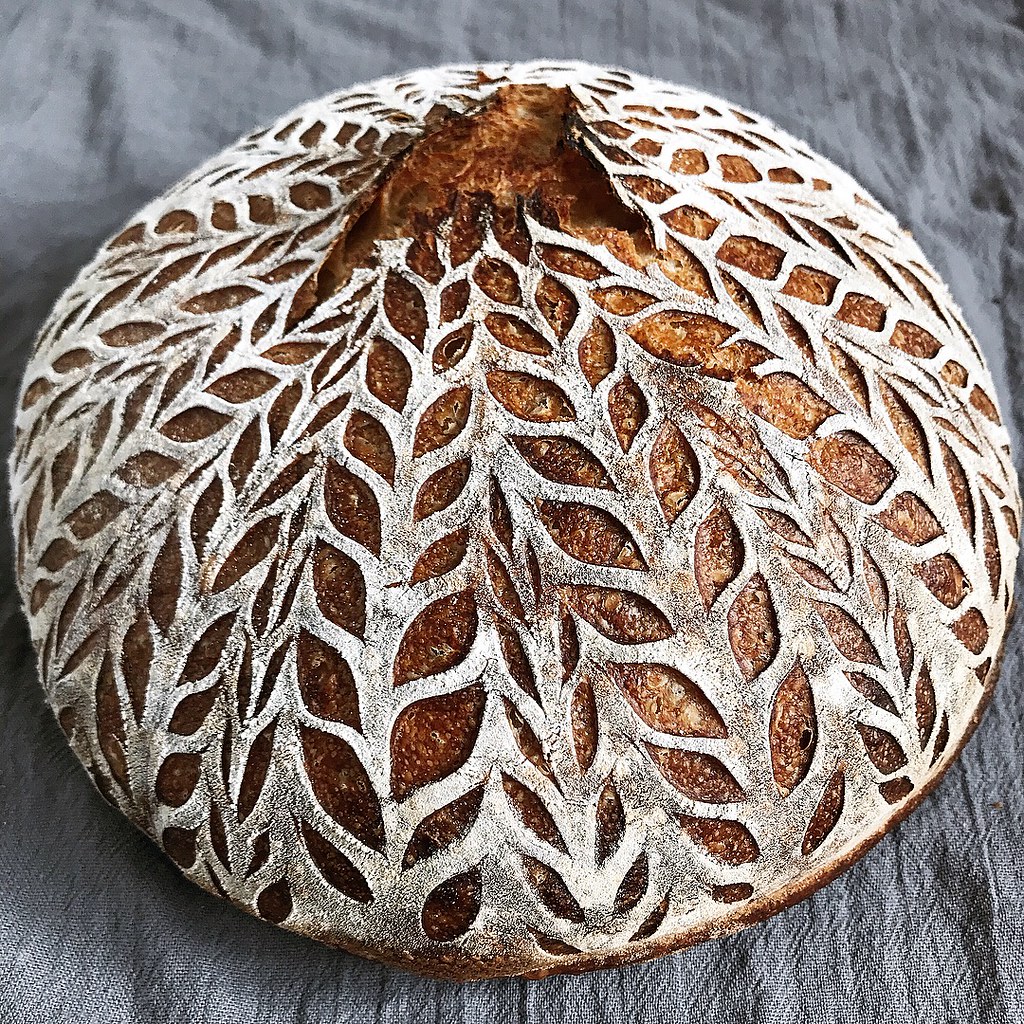

Some of the equipment you'll want to invest in are a food scale (to weigh the ingredients with), digital thermometer, bench scraper, banneton (to hold the shaped dough for its second rise), parchment paper, a lame or razor blade to score the loaf with, and a Dutch oven or cast iron combo cooker to bake the loaf in.  The only Dutch oven I own is actually an oval one and not wide enough for the round loaves I make, so I came up with another solution for trapping the steam in:  I bake my bread on a pre-heated baking stone and invert a stock pot over it.
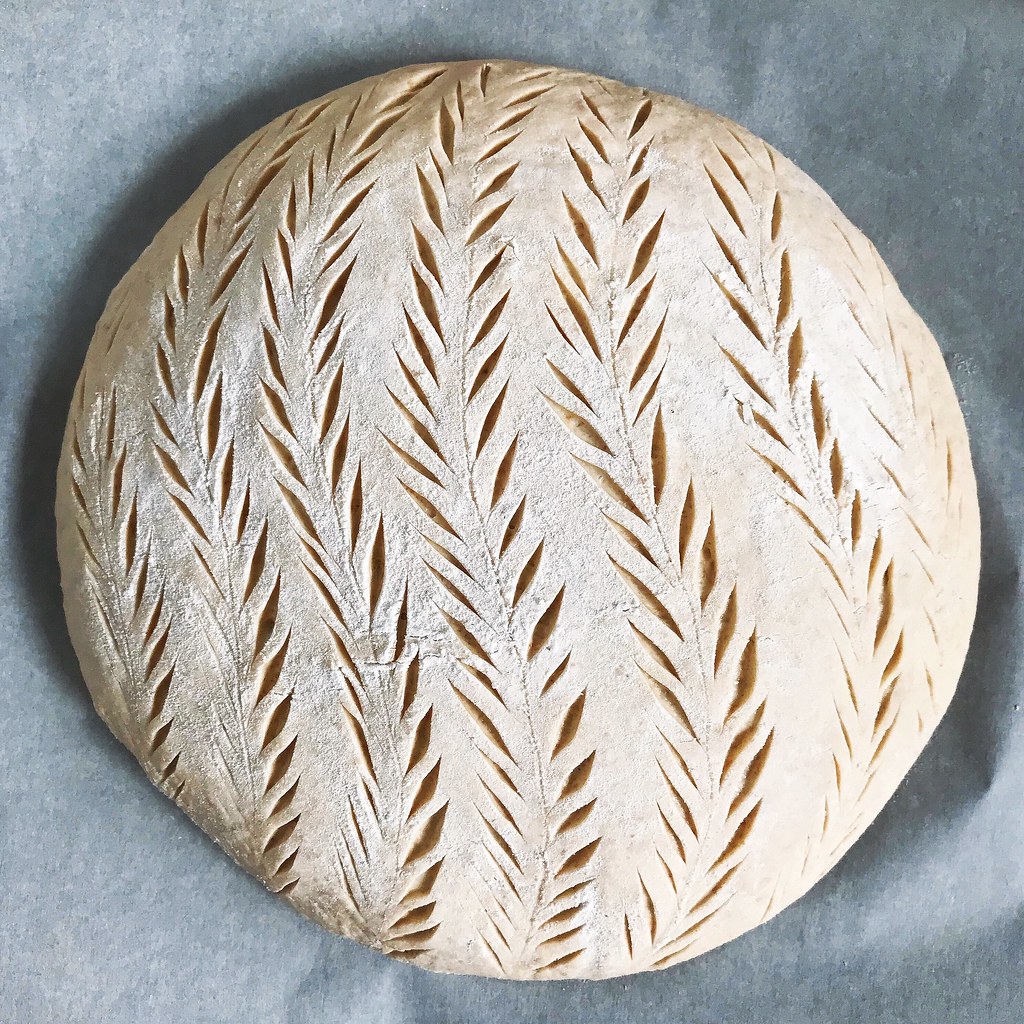

Timing wise, I feed my starter the morning of the day before I want to bake.  It takes about half a day for it to get fully active.  Then I add the rest of the ingredients and do a few rounds of folding over the next 3-4 hours.  I'll shape it, place it in a banneton, and let it do its final rise overnight in the fridge.  The next morning I'll preheat the oven and take the dough out when the oven is ready, score it while it's still cold, and bake it.  So it takes about 24 hours from start to finish but could be shorter if you do the second proof at room temperature or longer if you leave the dough in the fridge.

My dough ends up being about 73% hydration, which for me hits the sweet spot of being easy to work with but still wet enough to produce an evenly open crumb.  I still mess up my shaping all the time, but thankfully the loaves just get cut up into cubes to be used for communion, so no one can really tell.  I hope this guide helps you in your sourdough exploration, and please let me know if you have any questions about my process!

*If you hate discarding starter all the time, you can use it to make other baked goods like pizza dough, English muffins, even pancakes and banana bread!


My Communion Bread
makes 1 loaf

For the starter:
About a tablespoon of sourdough starter (I use a 100% hydration starter with 50/50 all purpose flour and whole wheat flour)
100 grams lukewarm water, about 80°F
50 grams all purpose flour
50 grams whole wheat flour

Use a spoon to mix the starter with the warm water.  Add the flours and mix until no dry bits remain.  Let sit in a warm spot until it has doubled in volume, usually about 4-6 hours depending on how active and warm it is.  You can check to see if the starter is fully active by dropping a spoonful into some cold water.  If it floats, the starter has built up enough gas and is ready to be used.  Weigh out 100 grams into a large bowl and place the rest of the starter in the fridge until next week.

For the bread:
100 grams active starter
350 grams warm water, about 80°F, plus more for your hands
450 grams all purpose flour
50 grams whole wheat or spelt flour
10 grams kosher salt
Rice flour, for dusting

Use a spoon to mix the active starter with the warm water.  Then add the flours and mix until no dry bits remain.  Cover and let sit in a warm spot for 25-40 minutes.

Sprinkle the salt evenly over the top of the dough.  Wet one hand thoroughly and dribble some water over the salt to start dissolving it.  Using the hand that's wet, grab a quarter of the dough, pull it up and fold it over the top of the dough.  Rotate the bowl 90° and repeat 3 more times until the salt is completely encased.  Pinch the dough a couple of times to separate it into a few pieces, turn it, and smush it back together again before repeating the stretch and fold process.  Repeat the pinch, rotate, stretch, and fold process until the salt is fully dissolved and incorporated into the dough, wetting your hand whenever the dough starts getting sticky again.  Cover and set the timer for 30 minutes.

When the timer goes off, wet your hand again and do another 4 stretch-and-folds, rotating the bowl 90° each time.  After the last fold, turn the dough over so that the seam is underneath.  Cover and set the timer for another 30 minutes.  Repeat this every 30 minutes for a total of 3 hours.  At this point the dough will be a lot more relaxed and have risen a bit.  If you press a wet fingertip into the dough, the indent should almost disappear within a few seconds.

Flour a work surface and gently transfer the dough onto the flour.  Grab a quarter of the dough, stretch it up and fold it over, then repeat 3 more times on the other corners of the dough to create a taut surface underneath.  Dust the top with a little more flour and then flip it over.  Use a bench scraper or your hands to gently tuck the sides under and form a half dome.  Let sit for 20-30 minutes.  In the meantime, dust the banneton with rice flour so that your dough won't stick to it. 

After the dough has rested, lightly flour the top and flip it upside down with the bench scraper.  Apply another set of stretch-and-folds and flip it over again.  Slide the ball around on the work surface until it forms a nice, taut half dome.  Use the bench scraper to quickly transfer the dough upside down into the banneton.  Cover (I use a shower cap) and place in the refrigerator for about 12-14 hours.

Place a Dutch oven or a baking stone and stock pot in the oven and preheat to 475°F.  When the oven is ready, take the banneton out of the fridge and invert the dough onto a large piece of parchment paper.  Dust the top with some rice flour if you want some definition to your scoring pattern.  Wipe the excess flour off and use a lame or razor blade to score the loaf.

Quickly transfer the dough and parchment paper into the Dutch oven or onto the baking stone.  Cover with the lid or stock pot.  Reduce the oven temperature to 450°F and bake for 20 minutes.  After 20 minutes, carefully remove the lid or stock pot and continue to bake for another 20-25 minutes until nicely browned.  Listen to the bread crackle as it cools.  Try to wait at least an hour before slicing.


Next:  Bacon Fat Scallion Pancakes
Previously:  Tomato and Eggs over Rice (Updated)
Last Year:  Blueberry Salted Caramel Ice Cream with Chocolate Freckles
Two Years Ago:  Soy Garlic Glazed Korean Fried Cauliflower
Four Years Ago:  Taiwanese Taro Swirl Mooncakes
Five Years Ago:  Ramen Lobster Rolls
Six Years Ago:  Caramelized Onion and Swiss Chard Quiche