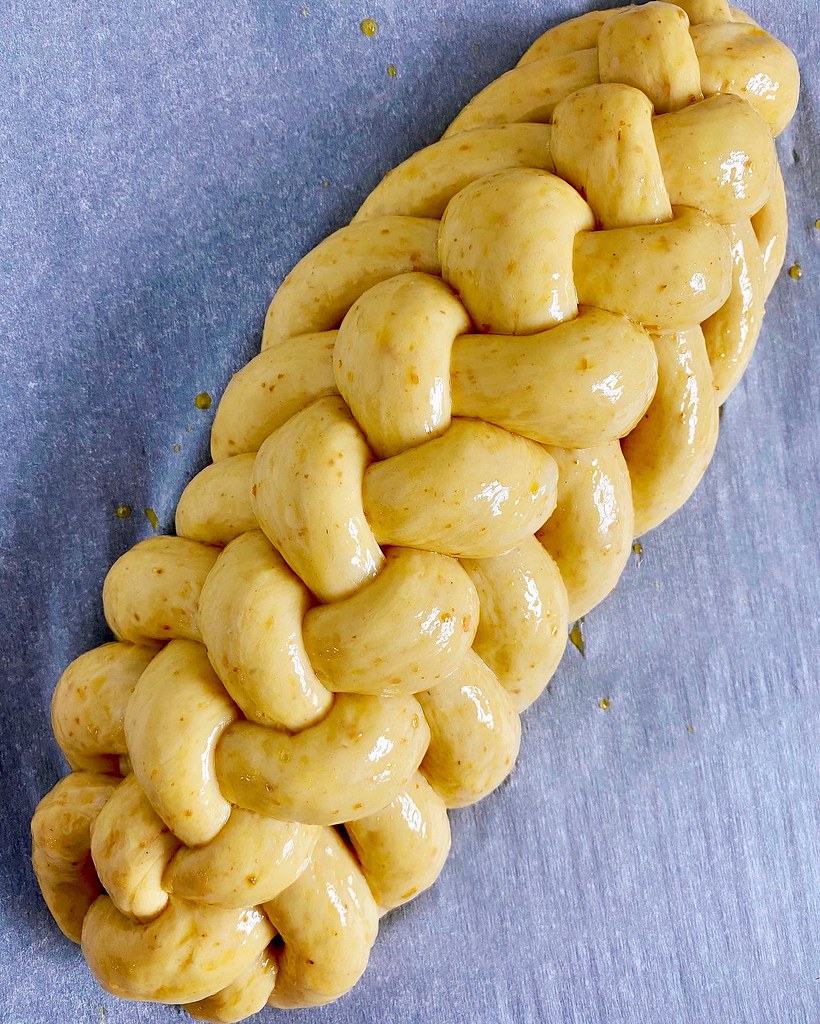
I learned recently that there are at least 2 different kinds of challah: the sweet, eggy Ashkenazi version which is probably what most people think of when they think of challah, and the Sephardic version, which is found in the Breaking Breads and Pastry Love cookbooks. I've made both versions, but I like making the Sephardic version more because the dough is a lot easier for me to work with.
My Sourdough Challah
makes 1 loaf
50 g sourdough starter, 100% hydration
95 g warm water
4 g active or instant yeast
40 g sugar
2 large eggs (1 for the dough, 1 for the egg wash)
45 g vegetable oil
325 g all-purpose flour
7 g kosher salt
Mix the starter and water together in the bowl of a stand mixer. Sprinkle on the yeast and allow to dissolve before adding the sugar, 1 egg, oil, and flour. Knead using the dough hook on low for about 5 minutes until the dough comes together. Cover and let rest for 10 minutes. Sprinkle on the salt and knead on low for 8 more minutes. Cover again and let rest for 90 minutes at warm room temperature.
Uncover the dough and punch down. Fold over the 4 corners of the dough, recover and let rest another 90 minutes.
While the dough is fermenting, make an egg wash by whisking together the 2nd egg, 1 scant tablespoon of water, and a pinch of salt. Mix well but try not to make too many air bubbles.
Punch down the dough again and divide into even portions (the number will depend on how many strands you want; for reference, the first two pictures in this post are a 7-strand braid and the last two are an 8-strand braid). Working one at a time, press each portion into a rough rectangle. You want to try to remove any large air bubbles at this point because they will form weak points in your strand. To form the strand, you will be rolling over the long side of the rectangle like a jelly roll. To help maintain tension in the dough, use your fingertips to gently push the portion you just rolled over back into the dough all along the length of the dough. (I highly suggest you watching my IGTV video which shows you how to form the strands since it's much easier to show you than explain how to do it.) When you get to the bottom of the dough, pinch the seam together and roll the log out a couple of times on the work surface to create a taut surface and start shaping it into a long strand. At this point you can also taper the ends if you want. Set aside and work on the next strand.
Once you've shaped all the strands into logs, start with the first log you formed and roll it out into a longer snake. Set aside and work on the next one. Once you've roll them all out into longer snakes, give them one last roll to their final length. Allowing the dough to rest in between the 3 shaping rounds lets the dough relax a little and not shrink back so much. Braid and form the strands into your desired shape. Transfer to a parchment paper lined baking sheet.
Brush on a thin, even layer of the egg wash, trying not to let too much settle in between the strands. Let rest for 90-120 minutes in a warm, draft-free area (I use my microwave). Preheat the oven to 350℉.
When the dough is nice and puffy, turn it 180° from the position it was when you applied the egg wash and brush on another thin, even layer. Turning the loaf helps ensure that you don't miss any of the surface. Bake the loaf for 30-35 minutes, turning once halfway, until it is evenly browned. Let completely cool before slicing. Store in a paper bag for up to 3 days.
Previously: Sourdough Belgian Waffles
Next: General Tso's Tofu


Great! I love sourdough breads & pastries. Thank you for sharing.
ReplyDeletewww.breadvesalt.blogspot.com