And while I'm on the topic of personal preferences, I like my dumplings thin-skinned. Not really sure why, other than it's a texture preference. I also do not like the ones with Chinese chives--the flavor is way too strong! I find that pork and cabbage are the perfect fillers because they are innocuous enough to deliver the flavors of the seasonings used. Another weird quirk of mine: I don't like black pepper. But to compensate I use white pepper which is a little less piquant.
A couple of tips for making dumplings:
- If you don't have a food processor (I didn't have one for years until Carsten gave me his, thanks Carsten!) you can use a blender for the cabbage and scallions, but you'll need to add water so that the cabbage and stuff can move around. Just make sure you squeeze out the water thoroughly afterwards. I haven't tried using a blender to mince ginger, but I have a feeling it wouldn't work properly. Fortunately, there is much less ginger than cabbage to mince, and there's always the chef's knife and a cutting board.
- To taste test the filling, just microwave a teaspoon or so for about 20 seconds. Yes, this is a tip from my mom. Isn't she the smartest?
- You want the filling to be moist, but not swimming in liquid because the excess liquid will often seep out of the wrapped dumplings and cause them to stick to each other. If you see a lot of excess liquid in your filling, transfer it into a sieve placed over a bowl (but not touching the bottom of the bowl). The liquid will seep out on its own, and you'll be back in business. Another way my mom combats this issue is to add bean thread vermicelli so that it soaks up some of the liquid. It also adds a wonderful dimension to the texture of the filling.
- One of the hardest parts of folding a dumpling properly is getting the skin pliant enough. If you have really fresh dumpling skins, this won't be an issue as they'll be elastic enough for you to stretch and fold to your heart's content. If they've been in the fridge or freezer for a while, one way to get the edges softer is to wet them with warm water before you add the filling so they have some time to soften.
- To keep the freshly-wrapped dumplings from sticking to each other, place a few tablespoons of flour on the tray you'll be using to set the dumplings on after you wrap them. Dip each dumpling in the flour so that the bottom won't stick to the tray. Make sure that when you set them down they don't touch each other. When the tray is filled with fresh dumplings and if you are planning on freezing the dumplings, place the tray in the freezer for about 15 minutes or until they are starting to feel a little stiff. Then pop them in a freezer bag or Tupperware and put back in the freezer.
- Here is a quick video (thanks Annie for her videography skills) for how to wrap the dumplings. I'm especially proud of the serendipitous Taiwan-shaped imprint I leave in the flour after dipping my dumpling. You can also check out step-by-step photos for how to wrap starting here.
My Mom's Pork and Cabbage Dumplings
makes about 124 dumplings
2.5 lbs. ground pork
1 medium head of napa cabbage, roughly chopped
4 scallions, roughly chopped
1 tablespoon ginger, peeled and roughly sliced
2 bundles of bean thread vermicelli (dong fen)
3/4 cup soy sauce
6 tablespoons sesame oil
2 teaspoons white pepper
3 tablespoons sugar
124 round dumpling wrappers (2 packs)
flour
1) Soak the bean thread vermicelli in a bowl filled with hot water for 15 minutes.
2) While the vermicelli is soaking, use a food processor to mince the cabbage, scallions, and ginger. Transfer to a large mixing bowl by handfuls, squeezing out the extra water.
3) Squeeze out the excess water in the vermicelli and use the food processor to chop into about 1/2" pieces. Add to the mixing bowl.
4) Add the ground pork, soy sauce, sesame oil, white pepper, and sugar to the bowl and mix well. Taste test the filling by microwaving about a teaspoon of the mixture for about 20 seconds and tasting the result. Add more soy sauce, sesame oil, pepper, or sugar as necessary.
5) Prepare plates or trays with flour for dipping and have a small bowl of warm water ready. Hold the wrapper in one hand and use the other to dip a finger in the water and wet the edges of the wrapper. Put a spoonful of the filling in the middle of the wrapper and fold in half. Seal center portion of the joined edges. Make two pleats on both the left and right side of the dumpling. Make sure that the whole thing is totally sealed and then dip the bottom in the flour and place on the tray. Repeat 123 times.
6) Once a tray is filled, if you are planning on freezing the dumplings, place it in your freezer and work on the next tray. By the time the second tray is ready, the dumplings on the first tray should be solid enough to place in a freezer bag. I usually add another tablespoon of flour to the bag just to make sure that nothing sticks together.

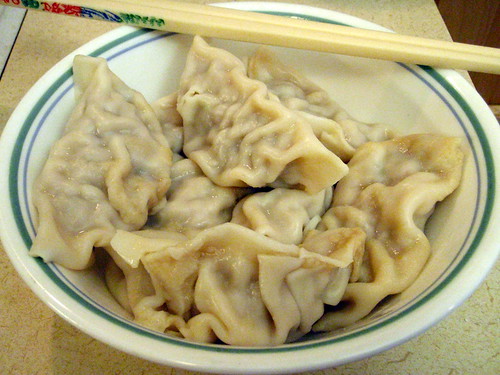
7) To boil the dumplings (i.e. to make shui jiao): bring a pot of water to boiling. Drop the frozen or fresh dumplings in and stir occasionally to make sure they don't stick to one another. After a few minutes, they will start to float, and they are ready once the skin is swollen (a few minutes after they start to float).
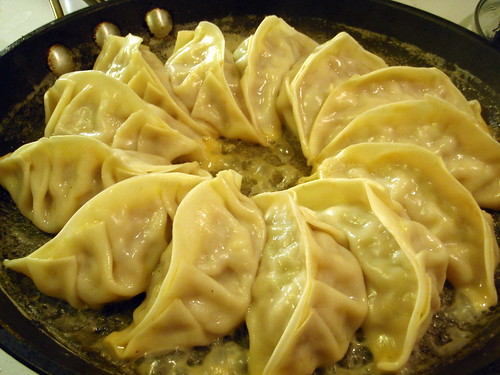
8) To pan-fry the dumplings (i.e. to make guo tie): heat a frying pan on high and add oil once it is hot. Once the oil is hot (I sprinkle a few drops of water onto the pan and wait for them to sizzle and evaporate), add the dumplings one at a time so that they are sitting upright. Once the bottoms are browned, add about a 1/2 cup of water (for 8 dumplings, my usual serving size). If you like your guo tie extra crispy, add 1 T of flour or cornstarch to the water and mix to get rid of the lumps before you add it to the pan. Be very careful as the steam coming off the pan may burn you. Cover and let cook for a few minutes until the water is almost all gone. Remove the lid and let the rest of the water cook off.
9) Serve with a dipping sauce. Straight soy sauce works, but if you have the time, add some vinegar, sesame oil, and sugar.


These look wonderful! I spent a year in south central mainland China and am delighted to find these recipes! Thank you!!!
ReplyDeleteRegarding liquid in the filling... My mother used to slightly freeze the filling until all the liquid is semi-frozen and wrap the dumplings. (I'd imagine a little gelatin would work great too) When they get cooked, the liquid in the filling melts and turns the dumpling almost into a shao long bao (sp?). Delicious!
ReplyDeleteMade these tonight, with my kids. Not as neat as yours but so yummy. Think I like the fried ones best. Thank your Mum!
ReplyDeleteThank you so much for your detailed recipe and directions. I am making these dumplings again for the second time, because they were so good and my family LOVES them. I did cut the recipe in half because I am making them by myself and i used half ground pork and half ground turkey. I also do not have a processor. Last time I used the blender and it was rough squeezing out all that water. This time, I used a regular green head of lettuce and I used my cheese grater. I still squeezed out excess water, but it was much easier....still quite messy though. I also used the grater for the ginger! Overall, I love them and thanks!
ReplyDeleteThis is great -- best and most straightforward description of how to fold them that I've seen! I'm inspired to try soon -- you make it look so easy! :-)
ReplyDeleteThanks, and good luck! It does take a little practice, but once you get the hang of it, it's pretty straight forward. =)
Delete