Saturday, February 28, 2009

Homemade Chicken Stock

The basis for any soup is a good stock, which is really so simple to make that there's no reason to ever use the canned kind. I used two great tips from thekitchn.com to make my latest batch:

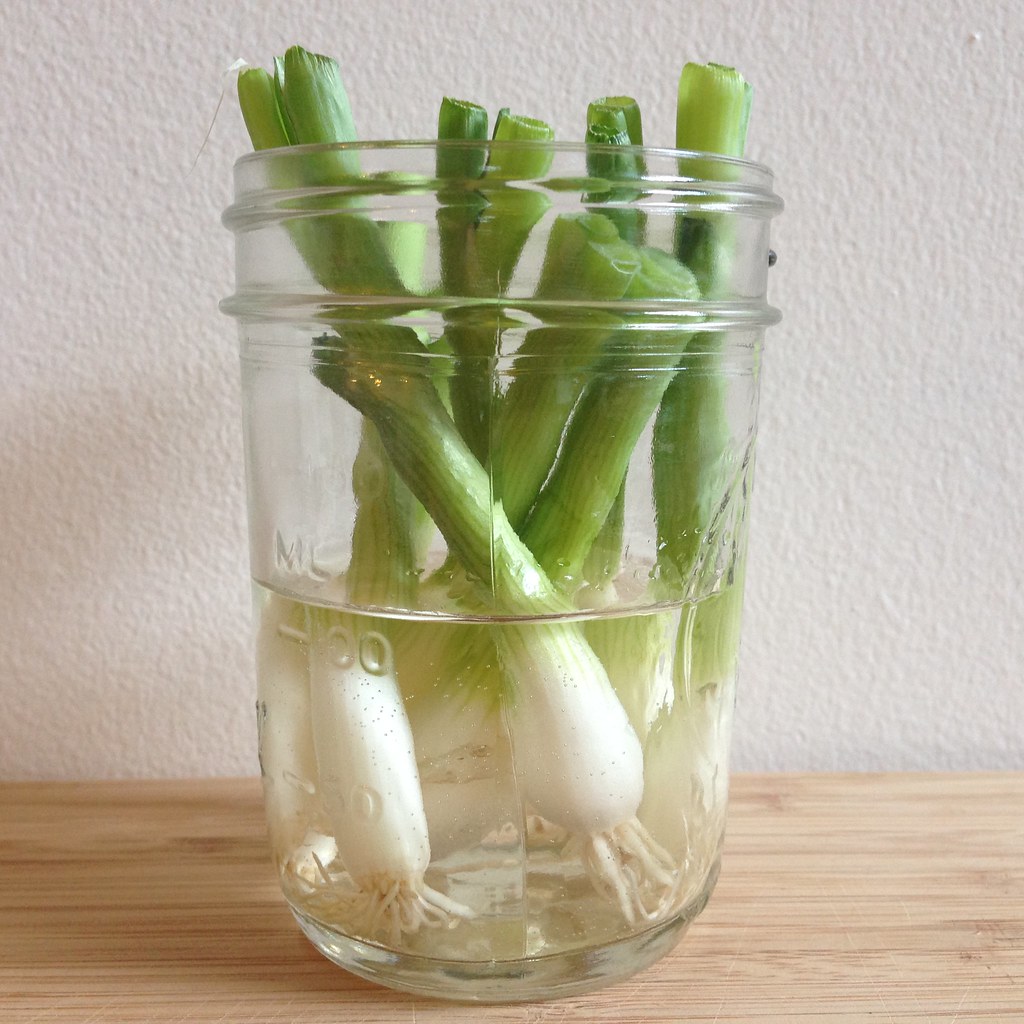
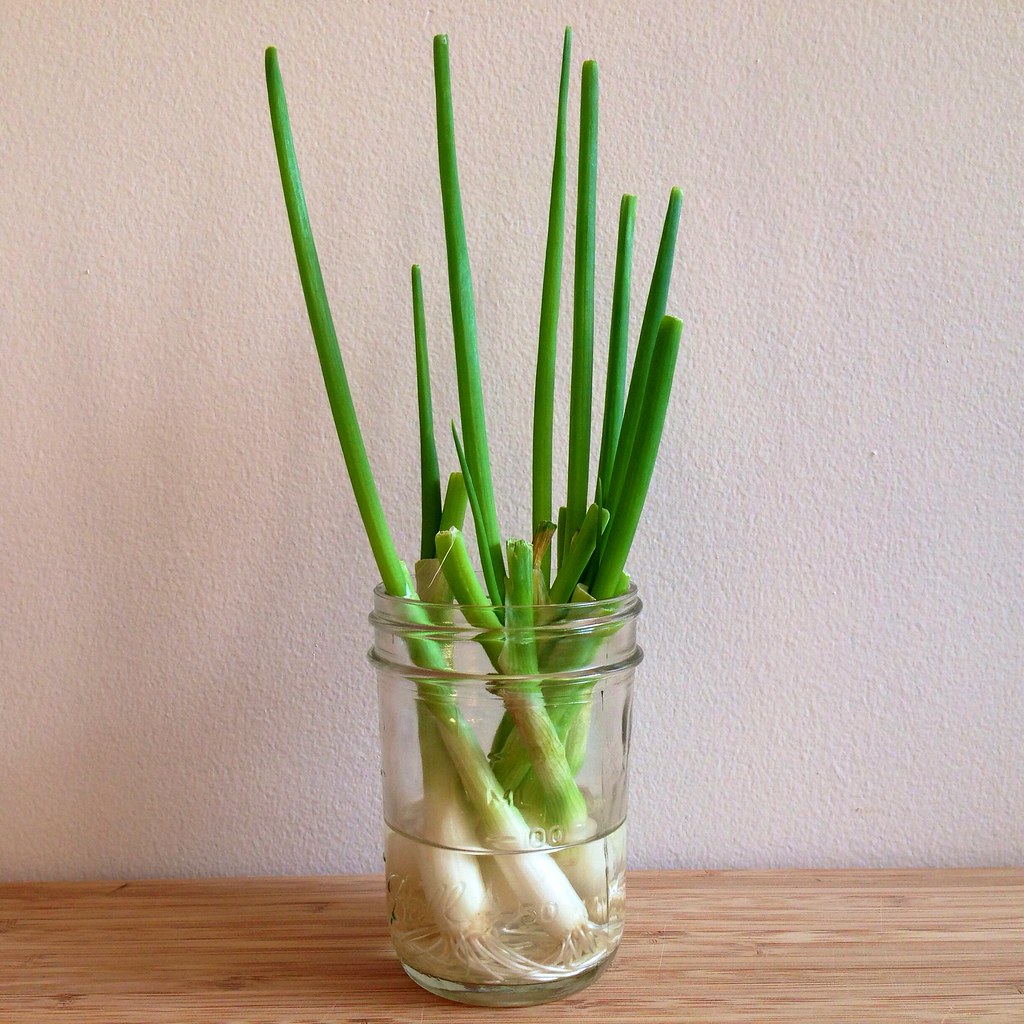
1. Save vegetable scraps for stock. I had some leftover celery and carrots from making the clam chowda and extra onion left from making roast chicken which I threw in a freezer bag until I was ready to make the stock.

Freezer bag of scraps for stock

2. Use the pasta strainer insert. A great way to remove the carcass and vegetables after the stock is done without having to awkwardly dump everything into a strainer. You still have to strain the stock, but it's a lot easier without the huge carcass in the way.

Scraps in pasta insert

Homemade Chicken Stock
(based on this recipe)
makes 6 quarts
Chicken carcass or 4 chicken breast carcasses (preferably with a little meat left on it)
A handful or two each of onions, carrots, and celery
Bay leaf
Peppercorns
Garlic cloves

Pull apart whatever is left of the chicken carcass. It's good to split small bones apart; this helps the stock jell. Cut up one or two onions, a few stalks of celery, and a couple carrots and pile into the pasta insert of a large pot with the chicken pieces. Add a bay leaf, a few peppercorns, a couple of garlic cloves, and any other wilting greens you have around - leeks and turnips are good too.

1 Bay leaf
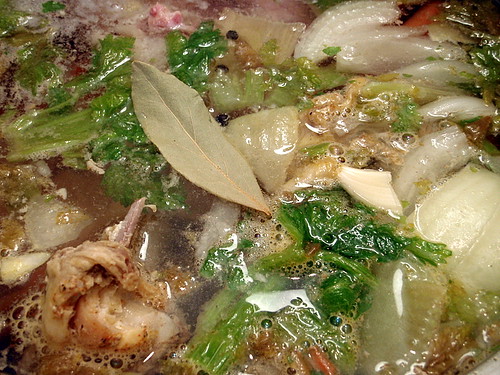
Fill the pot with water, cover, and put over high heat.
Bring to a rolling boil then lower the heat. You don't want this to boil briskly; the water should just gurgle, with a few bubbles occasionally hitting the surface.
If a foamy muck comes to the top, skim it off. This is just fat rising to the surface. Don't worry if you can't get all of it. Let simmer for about four hours - or however long you have. Two hours will produce a reasonably good chicken stock, although it is not ideal.
Removing the solids
Once the stock is done, remove from heat. Remove the pasta insert and drain. Carefully ladle stock through a sieve into storage containers, pouring it out once it is at a manageable volume.
Chilled chicken stock
If it is cold outside, set the containers of stock outside to chill; otherwise, let cool to room temperature and then transfer to refrigerator to chill.
Skimming off the fat
Once it has chilled, skim off the fat from the top of the stock. The stock will keep in the fridge for a few days and in the freezer for a few months.
Homemade chicken stock
If you don't feel like your stock has enough body, you can reduce it in volume by boiling it until you get it to where you want it. Whatever you do, do not add salt to your stock. That should be done when you are making your soup; you can always add salt to a soup but there's no way to save an over-salted soup.
Next up: Potato Leek Soup with Bacon

Friday, February 27, 2009

Gourmet Magazine, March 2009

I usually feel lucky if I can tear out more than one recipe to try from an issue of Gourmet or Bon Appetit, but I found so many recipes from the most recent Gourmet magazine that I just had to share.

First of all, the cover has a picture of the Monte Cubano sandwich, a "two-in-one induglgence [that] has the irresistible makings of a Cuban sandwich, including Swiss cheese, pickles, and sliced meets--but it's also dipped in egg batter and fried like a Monte Cristo." Strangely enough, my cover (a mailed subscription) is different from the one on the website in that mine just has the picture and the words "Gourmet, The Magazine of Good Living", the date, and the price. I guess you want to have a hint of what's inside for the issues on the newstands.


On page 4 is a recipe for Key Lime Coconut Cake and page 17 has a recipe for Key Lime Pie, one of my most favoritest desserts ever. Page 47 has Panfried Smashed Potatoes, "crisp-skinned yet pillowy [potatoes], sprinkled with a generous amount of salty parmesan" and on page 49 you have Chocolate Raspberry Calfoutis, "somewhere between custard and cake...a simple French country dessert."

Then starting on page 68 you've got a whole article on Korean food with Soy-Pickled Jalapenos, Warm Tofu with Spicy Garlic Sauce, Shrimp and Scallion Pancakes, and Mandarin Orange Ice Cream with Sesame Brittle.

Finally, two recipes for roast chicken, Glazed Chicken with Porcini and Crisp Potatoes on page 86 and Roast Chicken with Pan Gravy on page 98, and a recipe for how to use the carcasses to make Leftover-Roast-Chicken Stock.

Surfing around on their web page I found a video for how to carve a whole roast chicken (a skill I should really learn) and a recipe for Coconut Panna Cotta that would use up the leftover coconut flakes from the Key Lime Coconut Cake.

Yay, I can't wait to start trying these recipes!

Thursday, February 26, 2009

Panna Cotta, Take 1

Almond panna cotta with vanilla poached pears

I think I had panna cotta for the first time 2 years ago when Karen made it for the Soul Food volunteers training dinner. She had made an orange version, and I couldn't stop consuming it. It was perfectly creamy, sweet, and tangy, and the texture was similar to tofu pudding--the silkiest, softest phase something could be while still remaining a solid. I've been meaning to make it ever since but never got around to it until this week.

I'd been playing around with the idea of makind an almond-flavored panna cotta, kind of like an upscale version of almond tofu. And instead of fruit cocktail, I'd add poached pears. This was my first time making both, so I did a little research. I did ask Karen for her panna cotta recipe, but it didn't say how many it served (I should have just asked her) so I tried this one instead. Since I wanted to serve 6, I multiplied the ingredients by 1.5, although I did end up adding a full teaspoon of almond extract because when I tasted the mixture with only 3/4 teaspoons it didn't have as much almond flavor as I wanted it to have.

Almond panna cotta with vanilla poached pears

Almond Panna Cotta (based on this recipe)
makes 6 small servings

1 1/2 cups whole milk
1 1/2 cups heavy cream
3/4 cups granulated sugar
1 teaspoon almond extract
1 tablespoon powdered unflavored gelatin bloomed in 3 tablespoons water

In a small saucepan over medium-high, combine milk, cream, and sugar; bring to a boil. Stir in the almond extract. Remove from heat, and let stand for 20 minutes.

Microwave the gelatin and water for 8 seconds and stir it in the cream mixture. Pass the mixture through a sieve and divide evenly among 6 small ramekins or other servings dishes. Cover with plastic wrap and place in the refrigerator for at least 3 hours.

Even after chilling the it overnight, the panna cotta still looked suspiciously jiggly, and it was definitely softer than I wanted it. I'm not sure if the answer is to add more gelatin because I don't really want the stiffness that's associated with Jell-O Jigglers. I think next time I make this I will try boiling the milk and cream mixture longer to reduce it a bit as instructed in Karen's recipe.

For the pears I found these two recipes for vanilla poached pears which were pretty different from each other, so I decided to try a amalgam of the two. I also wanted to add cherries, but the only ones I could find were dried, tart cherries, so I tried to reconstitute them in the poaching liquid, which didn't work too well.

Vanilla poached pears

Vanilla Poached Pears with Dried Cherries
makes 2 pears

1/2 vanilla bean
2 cups white wine
1/2 cup water
1 cup sugar
2 Bosc pears
12 dried tart cherries

Split the vanilla bean lengthwise in half with a knife and scrape out the seeds.

Add the vanilla seeds and pod to the white wine, water, and sugar in a medium saucepan. Bring to a boil and stir until the sugar is completely dissolved. Reduce to a simmer.

Peel the pears, leaving the stem intact. Slice off the bottom 1/8" of each pear to create a flat, stable base.

Add the pears to the simmering poaching liquid, laying them on their sides so they are almost completely submerged. Cook, turning pears occasionally so they become saturated on all sides, until they are just tender when pierced with a fork, about 7 minutes.

Allow pears to cool completely in their poaching liquid. Add dried cherries to the poaching liquid.

Once cool, transfer 1 cup of poaching liquid plus cherries to a small saucepan and bring to a boil. Cook for about 10 minutes to reduce the liquid. Remove from heat and allow to cool. Use an immersion blender to (try to) puree the cherries. Strain and set aside.

Cut each pear into thirds lengthwise, removing the core. Make vertical cuts into each section so you get very thin slices. Fan the slices out and carefully transfer to the top of panna cotta. Drizzle with cherry liquid mixture.

As you can probably tell from the pictures above, my attempts at incorporating the cherries into the poaching liquid did not turn out too well. And because the panna cotta was so soft, the pears kind of sank into it instead of nicely resting on top. But I really liked the taste of the whole dish. The almond was definitely noticeable in the panna cotta, and the texture of the pears was akin to the canned pears in fruit cocktail but the flavor was a whole lot more sophisticated. Definitely a recipe I want to try again and perfect.

Wednesday, February 25, 2009

Boston Organics, Week 2

So it's been 2 weeks since I got my first delivery from Boston Organics, and I think I've done pretty well. I used the Swiss chard and mushrooms in hot pot last week, added the broccoli stems to fried rice and florets to roast chicken, used the potatoes in clam chowder, lemons in lemon bars, and avocado in avocado ice cream, braised the collard greens with bacon, poached the pears, and ate the rest of the fruits. One banana was pretty brown by the time I got to it so I peeled it and froze it so I can use it for banana bread in the future. And I have 2 red onions left which I'm thinking about using to make French onion soup. Luckily, onions keep for a bit.

This week's Boston Organics delivery
click on the picture to see what everything is

This week I received 1 rio star grapefruit, 2 royal mandarin oranges, 2 pink lady apples, 2 minneola tangelos, 2 red navel oranges, 2 anjou pears, 4 bananas, 1 bunch broccoli, 1 salad tomato, 1.5 lbs. yukon potatoes, 1 box white mushrooms, 1 bunch kale, 1 bunch scallions (yeah, I forgot to add them to the picture because I had already put them in water), and 1 box Munchin' Mix sprouts.

So I can make eggs and tomato over rice with the tomato and scallions, add the mushrooms and kale to hot pot next week, stir-fry or roast the broccoli again, eat the fruit, and maybe make some gnocchi with the potatoes (or more duck fat potatoes, yay!). But what da heck do I do with the sprouts? They're not real bean sprouts (which I love) but just sprouted adzuki beans, lentils, and peas. Any ideas?

Monday, February 23, 2009

Wok-Fried Edamame with Garlic

Wall of recipes

I've been getting Gourmet and Bon Appetit for a couple of months now and try to always rip out at least one recipe from each issue that I would like to try. And since I'm usually reading these magazines in bed, I'll just add them to my growing collection of recipes that I have on my wall, stuck there with a single thumbtack. Not exactly the most aesthetically pleasing of decorations, but it means I see them at least twice a day; reminders that I should be trying them out. I've had this one stuck up there for weeks and finally tried it this past week. And it's probably a good thing I've waited so long because it is absolutely addicting. I'm sure if I had made them sooner I'd be waist deep in edamame shells by now because I. Just. Can't. Stop. Eating. Them. I love eating edamame just boiled in salt water, but these...these are a higher species of edamame. The soy sauce and oyster sauce add a depth of umami, the hot sesame oil brings just enough kick to transcend the saltiness, and the garlic makes this dish deeply satisfying yet keeps you wanting more (yes, I realize that doesn't really make sense, but it's true).

I get my edamame frozen from Trader Joe's. And if you don't have hot sesame oil, you can use regular sesame oil and add one minced, seeded jalepeno pepper. The original recipe also called for 2 teaspoons of minced fresh ginger, but I don't like ginger that much so I omitted it from mine.

Wok-fried edamame

Wok-Fried Edamame with Garlic (based on Alan Wong's recipe from December 2008 issue in the R.S.V.P. section)
6 to 8 appetizer servings

1 lb. unshelled fresh or frozen edamame (soybeans)
2 tablespoons soy sauce
2 teaspoons oyster sauce
1 teaspoon hot sesame oil (spicy hot, not temperature hot)
2 teaspoons peanut oil
2 garlic cloves, minced

Bring 4 cups of water to a boil and add edamame. Once the water is boiling again, cook for 5 minutes or until tender. Drain and transfer edamame to a bowl of ice water to cool. Drain and pat dry or use a salad spinner to dry. Set aside.

Mix together soy sauce, oyster sauce, and hot sesame oil in a small bowl. Set aside.

Heat peanut oil in a heavy large work or skillet over medium-high heat. Add garlic; saute until beginning to brown, about 1 minute. Add edamame and stir to heat through, about 2 minutes. Add soy sauce mixture; stir 1 minute to coat evenly and heat through. Transfer to platter and serve.

Edamame shells

To eat the edamame I pick it up from the stem end, put the other end in my mouth, and squeeze the beans out, sucking off the sauce and garlic as I pull the shell out. It can be a little messy, so make sure you have something to put the discarded shells in and a napkin to wipe your fingers with afterwards.

Friday, February 20, 2009

One Avocado Ice Cream

Remember that lone avocado from my Boston Organics delivery last week?

So for the longest time I thought I was allergic to avocados. I think I tried some for the first time in my early teens (my mom was making California rolls) and my stomach didn't take too kindly to it so I avoided it for years to come. Then I think I tried guacamole once and got addicted and realized my tummy was fine so I realized I wasn't allergic! Come to think of it, the only (other) allergic reactions I've ever gotten were hives after eating a spider roll (twice), although when I eat other sushi rolls and soft shell crab on its own I don't break out. And I've definitely eaten spider rolls at other times without breaking out too.

But back to this avocado. I saw avocado ice cream once at this gelato place between Chinatown and North Beach in SF and thought the idea was intriguing but went for the lychee ice cream instead. But now that I had my own avocado with which I could do anything I wanted to, I figured it was time to make some avocado ice cream.

A quick google gave me Alton Brown's recipe, and I *always* trust Alton Brown. That guy knows what he's talking about.

Churning avocado ice cream

One Avocado Ice Cream (based on this recipe)
makes a little over 1 pint

1 ripe avocado
1 teaspoon lemon juice
1/2 cup milk
2 heaping tablespoons sugar
1/3 cup heavy cream

Cut the avocado in half lengthwise, cutting around the pit. Split in half, discard the pit, and scoop out the avocado meat.

Add the avocado meat, lemon juice, milk, and sugar to a blender and puree.

Transfer the mixture to a medium mixing bowl, add the heavy cream, and whisk to combine. Place the mixture into the refrigerator and chill until it reaches 40 °F or below, approximately 4 to 6 hours.

Process the mixture in an ice cream maker according to manufacturer's directions. However, this mixture sets up very fast, so count on it taking only 5 to 10 minutes to process. For soft ice cream, serve immediately. If desired, place in freezer for 3 to 4 hours for firmer texture.

Avocado ice cream

When I tasted the unfrozen mixture, I understood for the first time that the avocado is a fruit. The sugar and squeeze of lemon juice gave the avocado a tanginess similar to that of the kiwi but without the sharp acidity of that other green fruit. And the texture, oh my, the creaminess.... It was creamier than any ice cream I'd ever tried; it was basically like eating a very, very cold avocado without any iciness involved. Words fail to describe it. You'll simply have to try it for yourself because this recipe only made enough for me. ^_^

Wednesday, February 18, 2009

Boston Cream Cupcakes

Boston cream cupcake

Going with the theme of "Boston" food for Leslie's goodbye party, I made cupcake versions of a Boston cream pie. Most people are probably more familiar with Dunkin' Donuts' Boston Kreme donut and they're pretty similar: a sponge cake (or donut) filled with vanilla custard and topped with a chocolate glaze. Martha Stewart featured a really nice looking Boston cream cupcake in her March issue of Living, but it was a little too authentic to be party-friendly. She actually bakes the cupcakes without a liner, cuts them in half, and sandwiches the vanilla custard in between the layers. I figured it'd be a lot easier to eat a cupcake that had the custard piped into it then to try to deal with a cupcake/custard "sandwich" so I used this recipe to make the cupcakes.

The inside of a Boston cream cupcake

Boston Cream Cupcakes (based on this recipe)
makes 48 cupcakes

2 boxes of butter yellow cake mix
1 (3 oz.) box French vanilla instant pudding
1 cup half & half
1 3/4 cups heavy cream, divided
2 teaspoons vanilla extract
1/4 cup powdered sugar
1 (11.5 oz.) bag semi-sweet chocolate chips
24 maraschino cherries

Prepare yellow cupcakes as directed and allow to cool completely.

In the meantime, prepare the vanilla custard filling by combining the instant pudding with the half & half in a medium bowl.

Whip 1 cup of heavy cream, vanilla, and powdered sugar on medium speed until you get soft peaks. Gently fold in pudding mixture into the whipped cream until fully incorporated.

Place filling into a piping bag or makeshift Ziploc bag, fitted with a coupler and a #21 tip.

When cupcakes have cooled, place tip inside the center of each cupcake and pipe in filling, being careful not to overfill.

Melt the chocolate chips in the remaining 3/4 cups heavy cream over a double boiler (or a bowl fitted on top of a pot of boiling water). Stir until completely melted and homogeneous.

Dip only the tops of the cupcakes in the chocolate ganache. If the top of the cupcake doesn't clear the top of the cupcake liner, you'll want to spread the ganache on using a small butter knife or spatula.

Drain maraschino cherries and cut in half. While cupcakes are still slightly "wet" from the glaze, place half a cherry on top to garnish.

Boston cream cupcakes

I made only half the amount of the vanilla custard filling for this many cupcakes but still had a ton left over afterwards as well as some extra chocolate ganache. Instead of tossing it, I tried folding them together and ended up making a chocolate mousse!

Boston cream mousse

After I took this picture I actually chopped up all my extra maraschino cherries (I think I had about 8 left over) and folded them in as well. The mousse is so freaking rich that it needs the fruit (even one as artificial as a maraschino cherry) to cut the fat a little.

Tuesday, February 17, 2009

New England Clam Chowda and Homemade Oyster Crackers

Homemade clam chowder
That should really be a sad face because Leslie is gone =(

My dear cousin and roommate, Leslie, moved out yesterday after 3.5 years of living together, so we threw a goodbye and birthday party for her on Sunday night. Annie and I came up with a theme of "Boston" for food so I made some New England clam chowder ("chowda" around these here parts) and oyster crackers. This was my first time making it, but I used a highly rated recipe on allrecipes.com for the chowder, and I think it turned out pretty good (at least, better than Campbells). The oyster crackers were more of an afterthought; I realized that it would be good to serve the chowder with oyster crackers but was too lazy to go to the store to get them so I figured I'd just make them myself. And now that I think about it, that's a pretty warped sense of laziness. Oh well.

I almost always go to allrecipes.com if there's something I want to make that I don't have a recipe for. I like the website because you can be assured that the recipes are good by looking for the ones that have tons of reviews and read the comments to catch any useful tips. For example, when I searched for clam chowder on the site, there were 43 returns, but only a few had more than a handful of comments, a couple had at least a hundred, and only one had 440. So of course I chose to use that recipe. And skimming through the comments gave me the idea to add bacon to the chowder to make it even more flavorful.

Bye Bye Leslie Clam Chowda (based on this recipe)
makes 16 servings (or feeds a party of 70+ people)

6 strips bacon
6 (6.5 oz.) cans minced clams
2 cups minced yellow onion
2 cups diced celery
4 cups cubed potatoes
2 cup diced carrots
1 1/2 cups butter
1 1/2 cups all-purpose flour
2 quarts half-and-half
4 tablespoons red wine vinegar
1 tablespoon salt (if you don't have salt you can just cry into the chowda because Leslie is leaving)
Ground black pepper to taste

Brown bacon in a large stock pot until crisp. Remove bacon and set aside. Add onions, celery, potatoes, and carrots to bacon fat and toss. Drain juice from clams and add to vegetables. Add enough water to cover and cook over medium-high heat until tender.

Meanwhile, in a large, heavy saucepan, melt the butter over medium heat. Whisk in flour until smooth. Whisk in cream and stir constantly until thick and smooth. Add to the vegetables and clam juice. Heat through but do not boil.

Crumble the bacon and stir in with clams just before serving. (If the clams cook too much they get tough.) When clams are heated through, stir in vinegar and season with salt and pepper. Serve hot with oyster crackers.

I found the oyster cracker recipe using google. There were a couple of other recipes that used yeast and shortening, but I decided to keep it simple and use this one that uses butter. I considered briefly using bacon fat or duck fat, but then I decided I wanted my guests to go home alive. =P

Homemade oyster crackers
Homemade Oyster Crackers (based on this recipe)
makes about 2 cups
2 cups all-purpose flour
1 tablespoon baking powder
1 teaspoon sea salt
4 oz. unsalted butter, diced
4 oz. whole milk
Sea salt for garnish
Preheat your oven to 375 °F.
Combine all dry ingredients in food processor. Add butter and pulse quickly, until it looks like "coarse meal". Add the milk and process 3 seconds. Remove to floured surface, knead 10 seconds and chill the dough.
Divide the dough into quarters, and working with one quarter at a time (leaving the rest chilling in the refrigerator), roll the dough out to 1/8" thickness and sprinkle with salt. Using a fork, prick the dough all over. Cut with the crackers into any desired shape using a sharp knife or small cookie cutter.
Place the crackers on a cookie sheet and bake for 5-7 minutes or until light brown. Store in an airtight container once cool.
At first I wanted to try to make hexagons and figured I could cut the dough into diamonds and then lop off two opposing corners. But after I cut the dough into diamonds, the dough was too warm to work with so I just stopped there. I loved how these crackers had some real flavor thanks to the butter and didn't just taste like salty cardboard as oyster crackers too often do.
Next up: Boston cream cupcakes and mousse.

Friday, February 13, 2009

Cassava Heavy Cake

Cassava heavy cake

I have to admit, that is not the most photogenic slice of cake. But that cake is kind of a big deal, just like Ron Burgundy. Two years ago I went with Susan and Kristine to Grand Cayman, where we got to try local Caymanian food at Vivine's Kitchen. The kitchen is literally her home's kitchen; we parked in her driveway, walked up the front steps to her front door where she met us and guided us out back to her porch. We tried the conch stew, turtle stew, and whelk, all of which came with plenty of sides including plaintains, rice and beans, potato salad, corn bread and some unidentified tuberous roots. The best part of the meal, however, was the cassava cake. As I recall, it was dark, dense, and moist with a glutinous chew to it. Basically, it was unlike anything we had ever had before, and it was delicious.

Fast forward to 2 days ago when Susan sends me this link for a recipe for cassava heavy cake. At first I was really excited and planned on making this as soon as I could find cassava in Boston. But then I read through the recipe and realized that even if I found cassava, I probably wouldn't be able to make it. I mean, you are basically making your own coconut milk from scratch which takes at least 3 hours to boil, not including the time it takes to peel, cut, and blend the coconut meat, and then the cake takes 3 more hours to bake. I think I'd rather just fly back to Grand Cayman and have some there; it might be quicker.

But then I figured I'd look and see if there were any other recipes on-line and found these two which looked a lot simpler. I still didn't know where I'd find cassava, but then Tammy tells me that it's the same thing as yucca. I almost smacked my forehead. Duh! So I head over to Harvest after work, and what do I see but a whole basket of yucca! I bought about 3 lbs of it, hoping that I would be able to get at least 2 lbs. of grated cassava after peeling and everything. I decided to use both dark and light brown sugar because the original recipe called for dark, but the other ones called for either light or didn't specify. So anyways, here is an amalgam of all 3 recipes.

Ingredients for cassava heavy cake

Cassava Heavy Cake
makes 24 slices

3 lbs. cassava (yucca root)
1 lb. dark brown sugar
1/2 lb. light brown sugar
2 (14 oz.) cans coconut milk
2 tablespoons vanilla extract
1 teaspoon salt
1/2 teaspoon nutmeg
1/2 teaspoon cinnamon
1 stick butter
4 heaping teaspoons cornstarch

Preheat the oven to 350 °F.

Cut off the ends of the cassava and cut crosswise into manageable lengths (about 3"-5"). Set a piece down on one of the cut ends and peel by cutting down along the edge and rotating the root. Once you have peeled all the pieces, wash with cold water and grate.

In a large mixing bowl, add grated cassava, coconut milk, vanilla extract, sugar, salt, cinnamon, and nutmeg. Stir well.

Dissolve the cornstarch in a little water and add to the cassava mixture.

Melt one stick of butter in a glass 9"x13" baking dish on high for 2 minutes in the microwave. Tilt the dish to coat the bottom and pour the rest of the melted butter into the cassava mixture and mix well.

Bake for one and a half hours or until a firm top is achieved. Cool completely and serve at room temperature.

Cassava cake with toasted coconut ice cream

See, even with some of my toasted coconut ice cream on top this cake isn't very pretty. But it sure is yummy! Definitely not as good as I remember Vivine's to be, but then, not many things can stand up to the taste of sweet memories. If I ever make this again, I would probably grate the cassava more finely or food process it before mixing it with everything else, although some of my taste testers said they like the texture of the grated cassava. And while you might be tempted to try the cake while it is still warm, it tastes a lot better once it has cooled and set a little more.

Wednesday, February 11, 2009

Boston Organics

I had thought about joining a CSA last Spring, but because I was traveling so much, it just didn't really make sense. Well, now that I'm not traveling until April, I figured it would be a good time to start. I picked Boston Organics, which isn't really a CSA, on the recommendation of a lot of my small group members. Basically, you get to choose the size of box you want, how often you want it delivered, and what you want in the box. I chose the $29 box, bi-weekly, with 1/2 fruit and 1/2 vegetable. I got my first delivery today, and here's what I got:

My Boston Organics delivery today

If you click on the picture you can go to the flickr page where I've noted what everything is and how much I got of it. Now comes the fun part: deciding how to use it all up. The onions and potatoes are going to go in a clam chowder I'm making for Sunday, and this looks like a really yummy recipe for the collard greens. Broccoli is a no brainer, but I have a feeling the Swiss chard will be a challenge. Unfortunately, the avocado is already ripe but I have no idea what to do with it. The fruit I'm not as concerned about because I've seen a lot of beautiful looking recipes for pear, apple, blood orange, and lemon tarts recently, and if the bananas start getting over-ripe, I love making Erica's mom's banana bread.

So does anyone have a good recipe for guacamole or know what else I can do with the avocado and/or Swiss chard?

Monday, February 9, 2009

Tomato and Eggs over Rice

Tomato and eggs over rice is a dish you'll find on many Chinese restaurant menus, but it's so incredibly easy to make that I never order it. The only preparation is chopping the scallions and tomatoes, and you'll most likely have everything else already in your pantry or refrigerator.

This recipe is based on one that I found on the internet a couple of years ago, but I can't seem to find it anymore. I've made it so many times, though, I make it by memory now, and this is my best recollection. Most of the tomato and eggs recipes that I see now don't include the addition of rice wine to the beaten eggs (it makes the eggs a little fluffier) or vinegar and sugar to the tomatoes (they bring out the full flavor of the tomatoes), and some don't even include the scallions or sesame oil, which I think are vital flavor components to this dish.

Chopped scallions and tomatoes

Fan Qie Chao Dan (Tomato and Scrambled Eggs)
makes 1 serving

3 large eggs
1 large tomato or 2 plum or Roma tomatoes
1 teaspoon rice wine
1 teaspoon sesame oil
1/2 teaspoon kosher salt, divided plus more to taste
2-3 scallions
2 teaspoons vegetable oil, divided
1/2 teaspoon rice vinegar
A pinch of sugar
3/4 teaspoon cornstarch
1 tablespoon water

Beat the eggs and add rice wine, sesame oil, and 1/4 teaspoon salt.  Let sit at least 15 minutes.

Chop the scallions finely and separate the white and green pieces. Chop the tomatoes into 3/4" pieces.

In a large frying pan, heat 1 tablespoon oil until hot. Add egg mixture and cook, folding the cooked parts up and letting the raw parts run down. Once the eggs are 90% done (there will still be some shiny liquidy parts on top) transfer to another dish (I usually use the same bowl I beat the eggs in).

Clean the pan and heat another tablespoon of oil. Once it is hot, add the white scallion pieces and the rest of the salt. Stir fry for 1 minute and then add the tomatoes, the rest of the scallions, vinegar, and sugar. Cook for another 3 minutes.

In a small bowl, mix the cornstarch with 1 tablespoon water. Add to the tomato mixture, stirring until the sauce is thickened. Add the eggs back in and cook for 1 more minute, stirring to mix. Taste and adjust with more salt, sugar, or vinegar to taste.  Serve over rice.

Tomato and eggs over rice

Now let's talk a little about how to keep scallions and leftover rice from going bad. Since I usually cook for just myself, I find that having to buy a whole package of scallions becomes a waste for me because inevitably the last couple of bunches will have withered and dried out by the time I get around to using them. And when I make rice, it seems silly to make less than a cup, but if I refrigerate the leftovers, they end up just getting dried out and nasty.

Then I learned from a previous Japanese roommate that the best way to keep leftover rice is to portion it out into individual servings, wrap it in plastic wrap (yes, just in plastic wrap, no container needed), and freeze it. Then when you want a serving of rice, you just pop it into the microwave (still in the plastic wrap) and reheat it. This way, the rice stays nice and hydrated and fluffy! Plus, it will last a lot longer in the freezer than in the refrigerator. If you're afraid of freezer burn, you can always put the wrapped packages of rice in a freezer bag.

https://www.flickr.com/photos/joyosity/14603396277/

As for the scallions, I tried to replant the roots last year in a seedling tray, and it worked okay except that I had to water them pretty often, and since I traveled so much they finally died on me. I was going to replant another set but then I had an epiphany: why don't I just try letting them grow in water like my little bamboo plant? So I went to the store and picked the freshest looking package of scallions I could find and set them in a long necked vase filled with water up to the white part as soon as I got home. Within a day I could see the roots regrowing! And whenever I needed just the green part of the scallion, I would put the white part with the roots back in the vase, and the green part would start growing within a couple of days as well!  You'll eventually have to replace the scallions because they get too thin, but you should be able to get a couple of uses out of the same roots. 

https://www.flickr.com/photos/joyosity/14770672126/

Next:  Cassava Heavy Cake
Previously:  Toasted Coconut Ice Cream with Sesame Brittle and Crystallized Ginger

Monday, February 2, 2009

Toasted Coconut Ice Cream with Sesame Brittle and Crystallized Ginger

Toasted Coconut Ice Cream with Sesame Brittle and Crystallized Ginger

I'm a big fan of Häagen-Dazs' Toasted Coconut Sesame Brittle ice cream so when I saw this recipe on Tastespotting, I jumped at the chance to try to make it for myself. After reading the recipe, however, I realized it was missing a vital ingredient that the original had: ginger. Since I wasn't sure how to infuse ginger into the sesame brittle, I chopped some of my homemade crystallized ginger and added it to the ice cream.


Chopped crystallized ginger

First, a short lesson on candy making, as you will be making your own sesame brittle. This recipe calls for the use of a candy thermometer to know when to stop cooking the sugar mixture. If you have a food thermometer, but aren't sure if it's a candy thermometer, check and see what the highest temperature it will read is. If it goes up to about 200 °F (and says do not insert in water), it is a meat thermometer. Do not use this thermometer for this recipe! If it goes up to about 450
°F, it is a candy thermometer, and you are all set.

If you don't happen to have a candy thermometer, you can still make this recipe, but you'll have to be extra-vigilant not to let the sugar syrup get too dark in color. What will happen during the cooking process is first all the water will boil off. The temperature will stay at about 230
°F for quite a while until this happens and the color will remain clear. Once most of the water has evaporated, the bubbles will get thicker and the temperature will gradually climb. At 320 °F the syrup will just start to turn golden. A few minutes later, it should turn a deep, golden brown, and at this point the syrup will have reached 340 °F. This is where you want to turn off the heat and add the butter.

Similar to when adding the cream to molten sugar for the salted butter caramel ice cream, the butter will melt rather violently in the super hot sugar. But that's just the beginning. When you add the baking soda to the syrup, it will start bubbling and foaming up, kind of like when you add baking soda and vinegar together to making your paper-mâché volcano "erupt". Except this is a true eruption of some very hot molten sugar, so make sure you are ready to pour it onto the oiled pan once you've added the baking soda.

Finally, after pouring the syrup out, you may want to lick the spoon or use your finger to scoop up any leftover syrup from the pot. Please don't. Or at least if you really feel the need to play with molten sugar, use a toothpick or something to spin your own sesame brittle lollipop or something. But just don't be stupid, okay?

Sesame brittle

Sesame Brittle
(adapted from here)

makes 15 - 20 servings

Vegetable oil
3/4 cup sesame seeds
1/2 cup water
2 cups sugar
1/4 teaspoon cream of tartar
1 cup light corn syrup
2 tablespoons unsalted butter
1 teaspoon baking soda

In a large, un-oiled frying pan, toast sesame seeds until golden brown. Set aside.

Toasting the sesame

Generously oil a baking sheet with raised edges with vegetable oil.


In a medium-sized heavy saucepan, combine the water, sugar, cream of tartar, and corn syrup and bring to a boil over medium heat. Using a candy thermometer, boil the mixture until it reaches 340-350 °F, and the color is a deep golden brown.

Remove from heat and whisk in the butter, then mix in the toasted sesame seeds and baking soda. Be careful during these two steps as the butter will react violently with the very hot molten sugar and the baking soda will cause the volume of the sugar to expand rapidly.

Pour the mixture onto the oiled pan and spread it out with the back of a wooden spoon. Let the brittle harden, uncovered, in a cool place for at least 30 minutes.

Using a metal spoon, crack the brittle to remove from the pan and store in an airtight container.

Breaking the brittle

You'll only need 1 cup of this sesame brittle, which is about 1/5 of the recipe, but you can eat the brittle on its own, and after you take a bite (after it's cooled, people!) I'm sure you'll be glad you made extra. And now onto the ice cream itself. I didn't have any coconut rum, so I substituted it with half vanilla rum and half coconut extract.


Toasted Coconut Ice Cream with Sesame Brittle and Crystallized Ginger (adapted from here)
makes 1 quart

1/2 cup shredded unsweetened coconut
1 1/2 cups heavy cream
2 cups coconut milk
1/2 cup sugar
1 1/2 tablespoons vanilla rum
1 1/2 tablespoons coconut extract
1 cup sesame brittle, broken into small shards or pieces and place in the freezer
3 tablespoons crystallized ginger, finely chopped

Toast the coconut in a skillet over medium-high heat, shaking and stirring until a golden brown. This will probably take less than a minute so be very careful not to burn the coconut. Store in the freezer.

Toasted coconut

In a medium-sized saucepan, bring the cream, coconut milk, and sugar to a boil. Reduce the heat and simmer for about 10 minutes, stirring occasionally. Remove from heat, add the rum and coconut extract and chill the mixture in the refrigerator overnight.

Freeze the mixture in your ice cream maker according to the manufacturer's directions. Once churned, stir in the sesame brittle, toasted coconut, and crystallized ginger and freeze until firm.

Churning the ice cream

I was a little suspicious at the small amount of sugar that was used in this recipe. Only 1/2 cup for a whole quart of ice cream? But the end product tasted fine. The addition of the brittle and crystallized ginger add enough sugar, and if the ice cream itself were more sweet, the effect would be entirely too cloying. As it is, the brittle gives the ice cream a nice crunch while the ginger adds the slightest amount of heat at the end that balances out the creaminess of the coconut ice cream. Now if only I could find a recipe for Häagen-Dazs' Sticky Toffee Pudding ice cream....

Update:  I found one!  Sticky Toffee Pudding Ice Cream