Showing posts with label Japanese. Show all posts

Friday, April 22, 2022

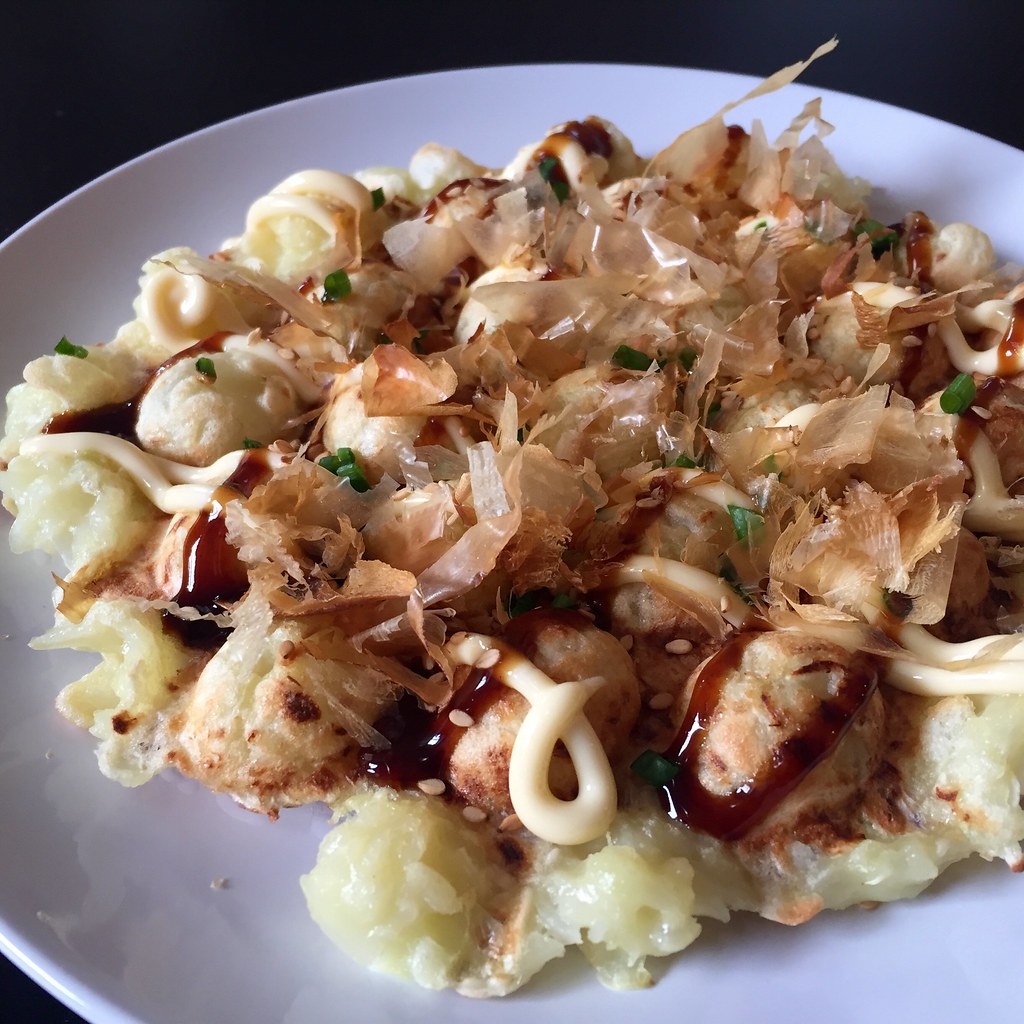
Sourdough Discard Okonomiyaki Waffles

I’ve made waffled okonomiyakis before and sourdough discard okonomiyakis before, so I figured it was time to combine the two!  The use of sourdough discard in this recipe not only helps prevent waste, it also adds a little tanginess to the flavor, and adding a pinch of baking soda to the batter will cause it to get light and fluffy!  Using a waffle iron to make the okonomiyaki means that both sides get cooked at the same time (so no awkward flipping) and get a little crispier than just cooking it on a flat top.

You can add whatever fillings and toppings you want (it’s literally the definition of okonomiyaki); my preferences are bacon (easier for me to find than pork belly), and instead of chopping up my own cabbage, I usually grab a bag of pre-chopped coleslaw mix from the grocery store!  For toppings I like the homemade okonomiyakisauce from Just One Cookbook, Kewpie mayonnaise, bonito flakes, furikake, and chopped scallions.

Sourdough Discard Okonomiyaki Waffles
makes two 7’ round waffles

150 g (100% hydration) sourdough discard*
1 large egg
Pinch of salt
Pinch of sugar
Pinch of dashi powder
Pinch of baking soda
200 g chopped cabbage (or coleslaw mix)
4 slices bacon, cut so they’ll fit the waffle iron
Okonomiyaki sauce
Kewpie mayonnaise
Bonito flakes
Furikake
Chopped scallions

Preheat your waffle iron to medium-high.

Mix the sourdough discard, egg, salt, sugar, dashi powder, and baking soda until well combined.  Add the cabbage and mix again.

Place half the bacon on the bottom of the waffle iron and grease the top half.  Add half of the batter on top of the bacon and close the waffle iron.  When it’s golden brown and cooked through, remove from the waffle iron and repeat.  Top immediately with your desired toppings and serve hot.

*I haven't tried this myself yet, but if you don’t have any sourdough discard, you could try mixing together 75 g all-purpose flour with 75 g water and skip the baking soda, but it won’t have quite as much flavor or fluffiness.

Previously:  Hurricane Popcorn Marshmallow Treats
Next:  Taiwanese Braised Pork over Rice (滷肉飯)

Wednesday, March 1, 2017

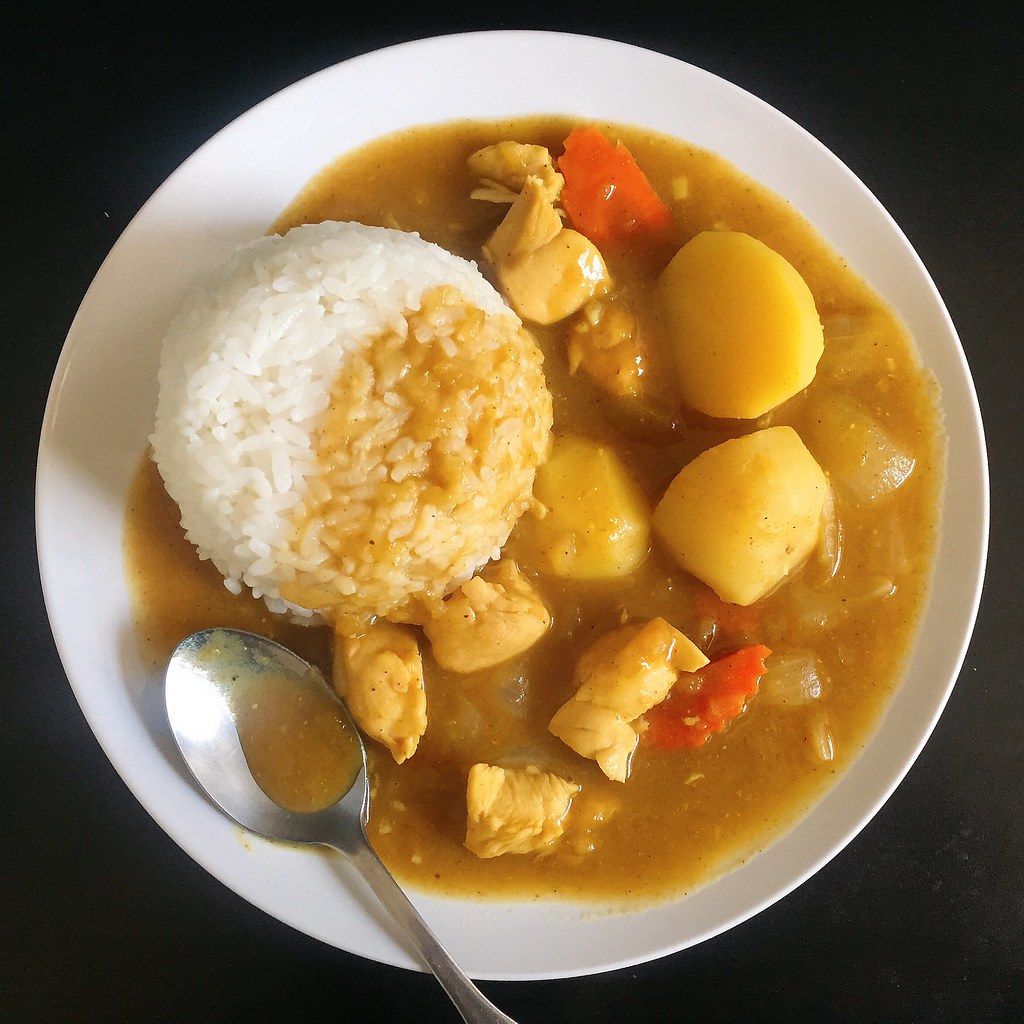
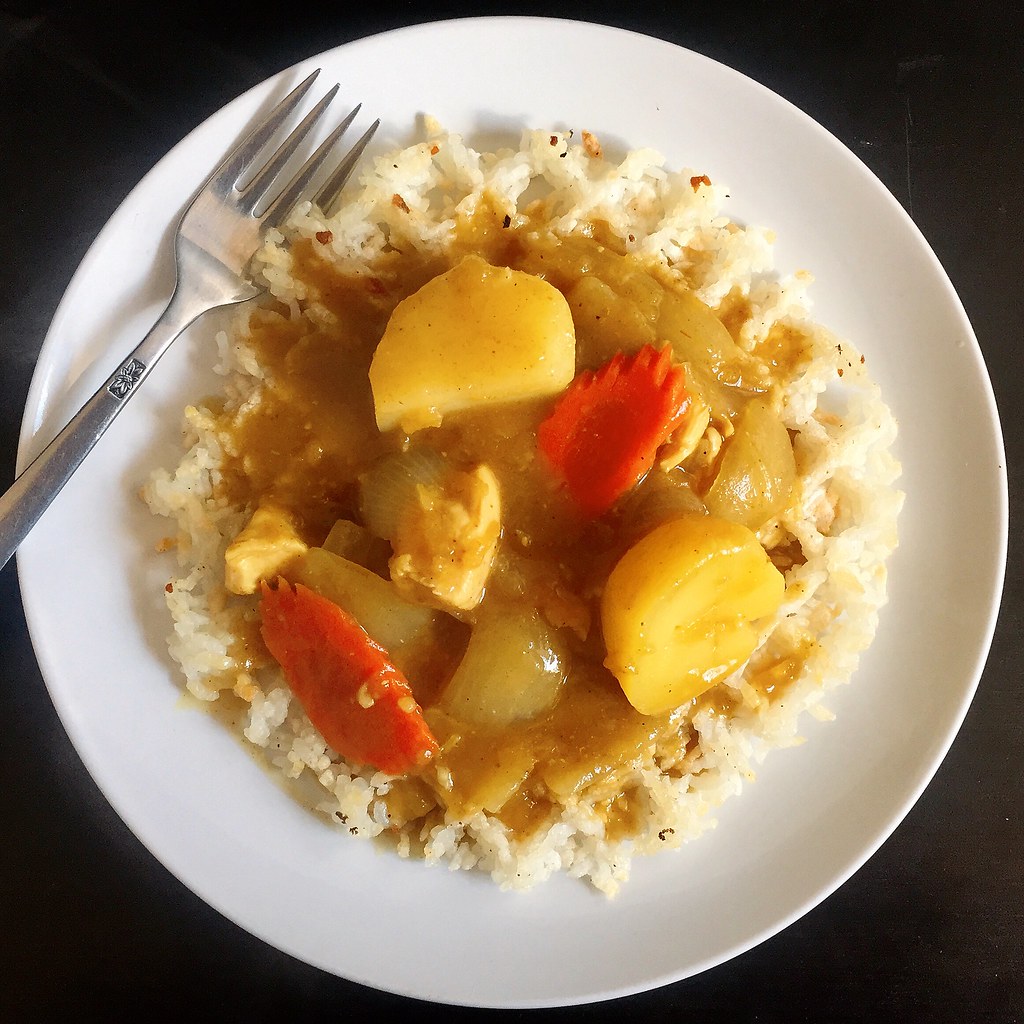
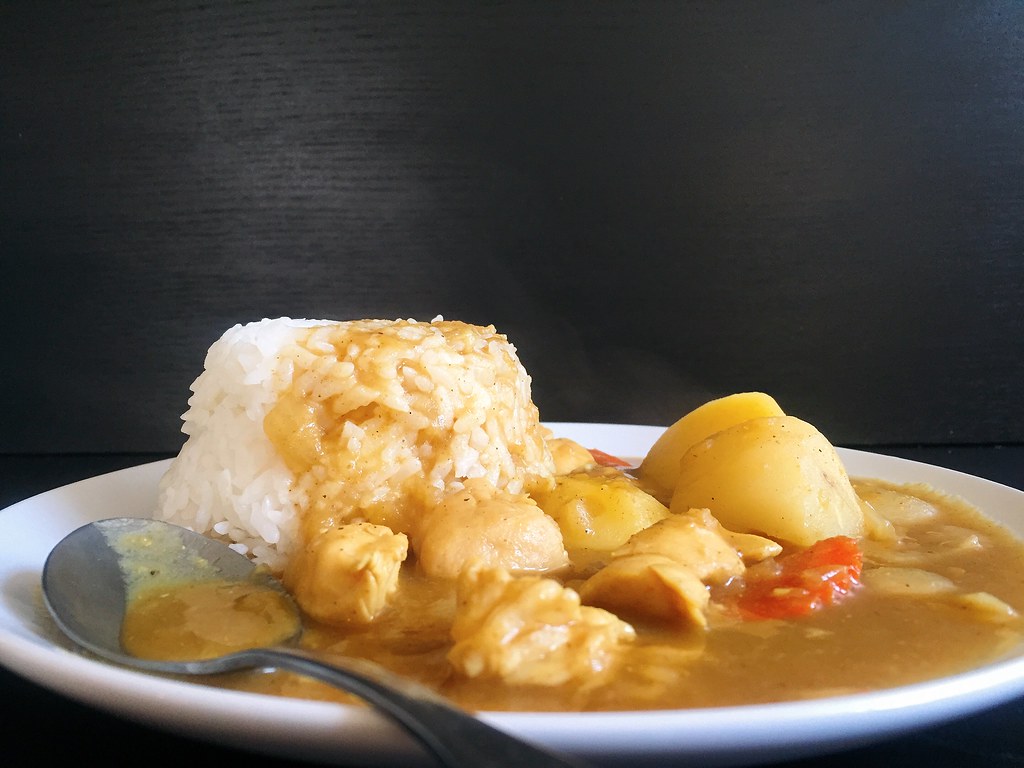
Japanese Chicken Curry Rice


If you’ve ever made Japanese curry rice from one of those store-bought curry blocks, you know how delicious and easy it is, but did you know it’s almost as easy to make it from scratch?  And considering the palm oil, MSG, and preservatives used in the blocks, it’s probably a lot healthier to make your own.


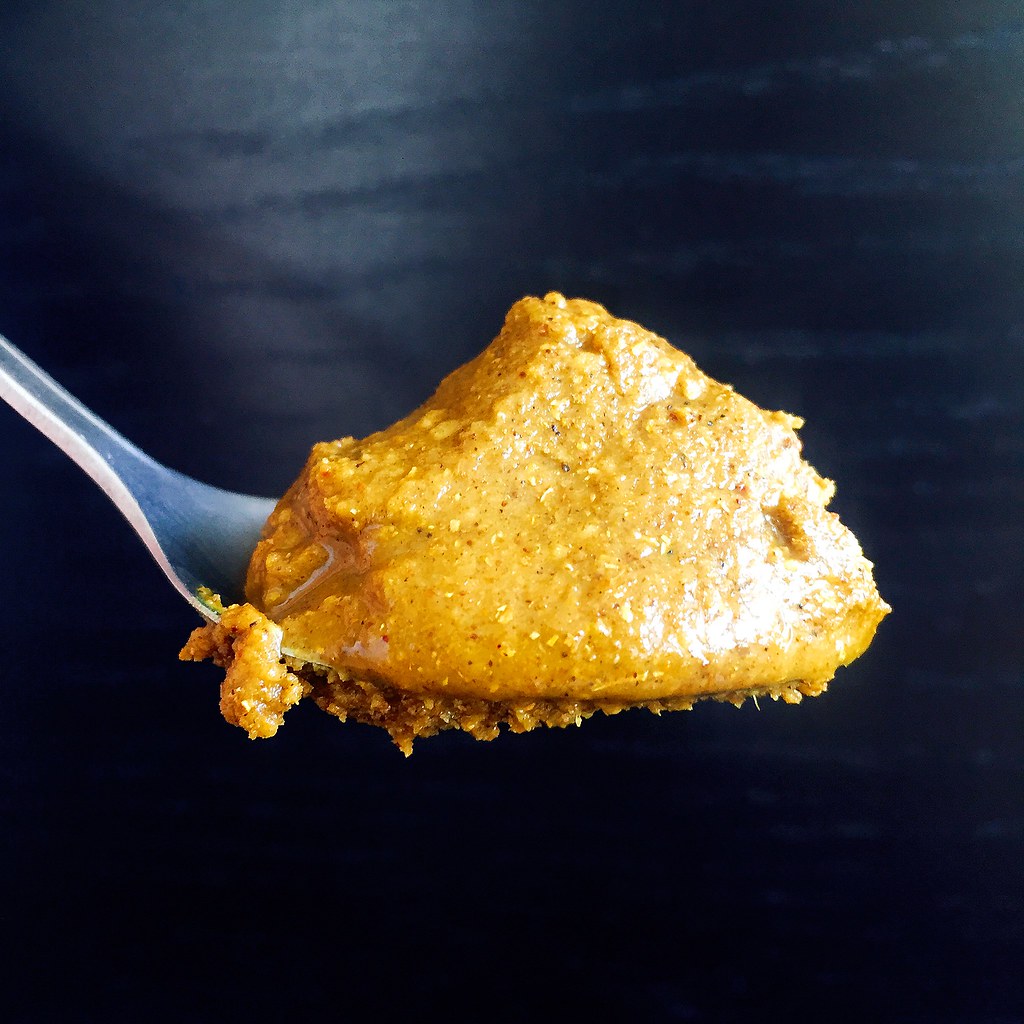
I pretty much followed the chicken curry rice recipe from Just One Cookbook except I caramelized the onions as recommended by Marc from No Recipes and Serious Eats.  I also used chicken breast instead of chicken thighs because I really, really hate dark meat.  Another great thing about making your own curry roux is that it’s easily customizable.  If you prefer it spicier, add cayenne pepper; if you prefer it sweeter add honey, etc.  This recipe makes a slightly sweet, medium-mild spicy curry.


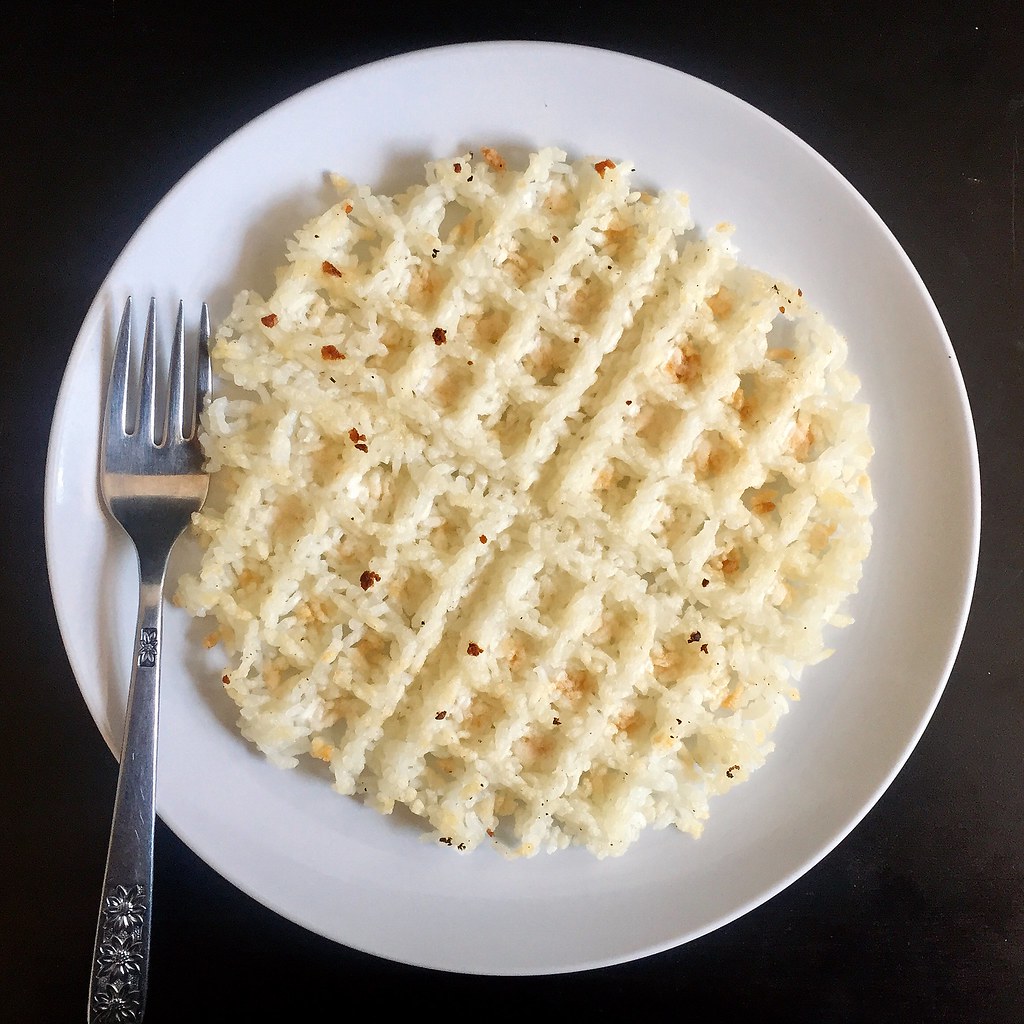
Japanese curry is usually served with steamed rice, but if you want to have a little more fun, I’d highly suggest waffling some day-old cooked rice.  The rice gets crispy-crunchy-toasty-chewy and adds a really interesting texture. 


Japanese Chicken Curry Rice (adapted from Just One Cookbook)
serves 4-6

1 lb. boneless chicken, skinless thighs or breast
Kosher salt and black pepper
2 tablespoons oil
2 onions, coarsely chopped
2 garlic cloves, minced
1 teaspoon grated ginger
1 carrot, peeled and coarsely chopped
1 qt. chicken broth
1 apple
2 large Yukon gold potatoes
3 tablespoons unsalted butter
4 tablespoons all-purpose flour
1 tablespoon garam masala
1 tablespoon curry powder
2 tablespoons soy sauce
1 tablespoon ketchup
1 tablespoon honey (optional)
Cooked rice

Cut the chicken into bite-sized pieces and season with salt and pepper.

Add the onions to a large pot or Dutch oven over medium heat.  Cook with a large pinch of salt until dry and just starting to color.  Add a tablespoon of oil, mix, and continue to cook until the onions start sticking to the bottom again.  Add the rest of the oil and continue to cook until caramelized.  Add the minced garlic, grated ginger, and chicken.  Cook until the chicken turns white.  Add the chopped carrot and chicken broth and bring to a boil.

Peel the apple, coarsely grate, and add to the pot.  Peel the potatoes, cut into bite-sized chunks, and add to the pot.  Simmer for 20 minutes until the potatoes are tender.

In the meantime, make the curry roux by melting the butter in a small pan over medium-low heat.  Add the flour and stir until the roux starts to get darker, about 5-10 minutes.  Mix in the garam masala and curry powder and take off the heat once combined.

When the potatoes are done, add some of the hot liquid to the roux and whisk until the roux is loose, adding more liquid as necessary.  Add back to the pot and bring back to a boil.  Stir in the soy sauce and ketchup.  Taste, and add the honey if you'd prefer it sweeter.  Simmer until the curry has thickened.  Serve with cooked rice.


Next:  Rainbow Crepe Cake
Previously:  Quintessential Apple Pie with Bacon Fat Crust
Last Year:  Tropical Pulled Pork on Griddled Banana Bread Sandwiches
Two Years Ago:  A Better Homemade Pasta Recipe
Three Years Ago:  Mushroom Marsala Pizza
Four Years Ago:  Peking Duck Pizza
Seven Years Ago:  Bacon Fat Caramels
Eight Years Ago:  Potato Leek Soup with Bacon

Monday, April 18, 2016

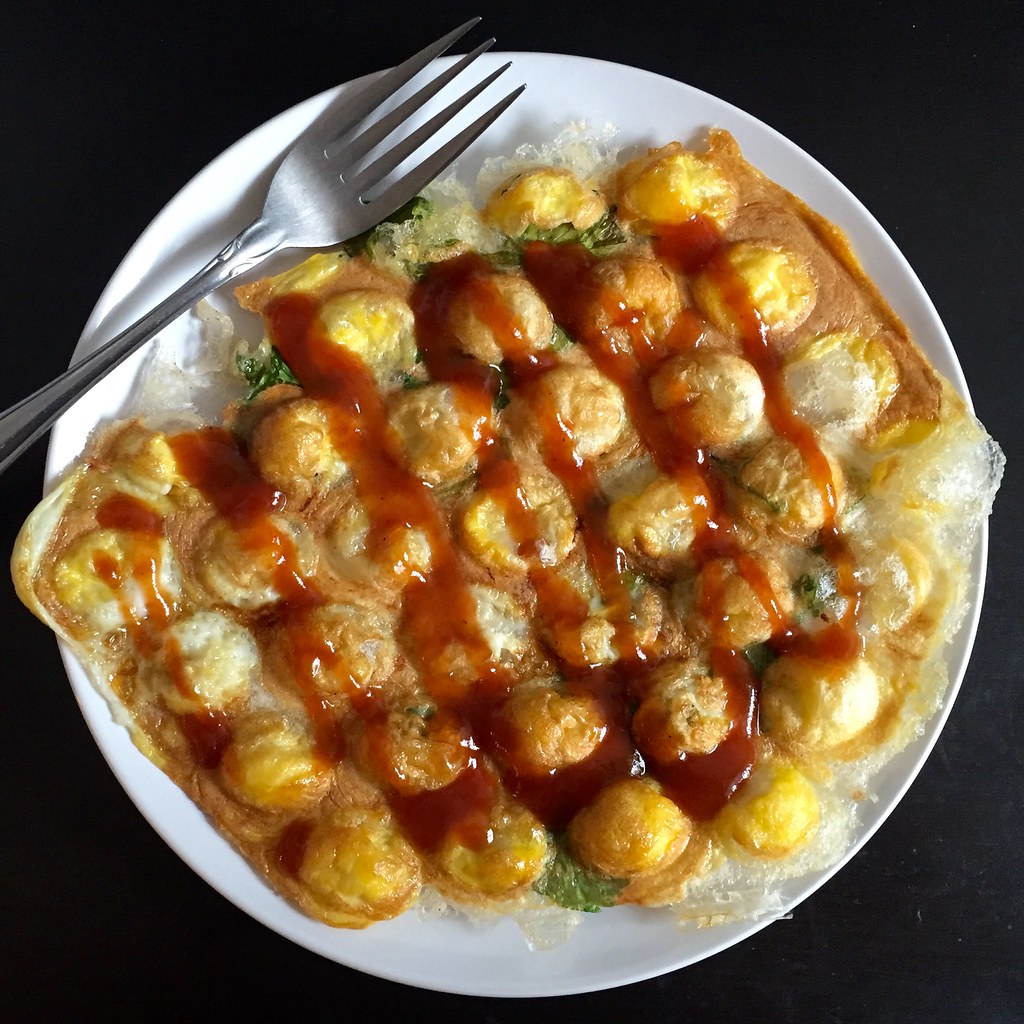
Will It Puffle?


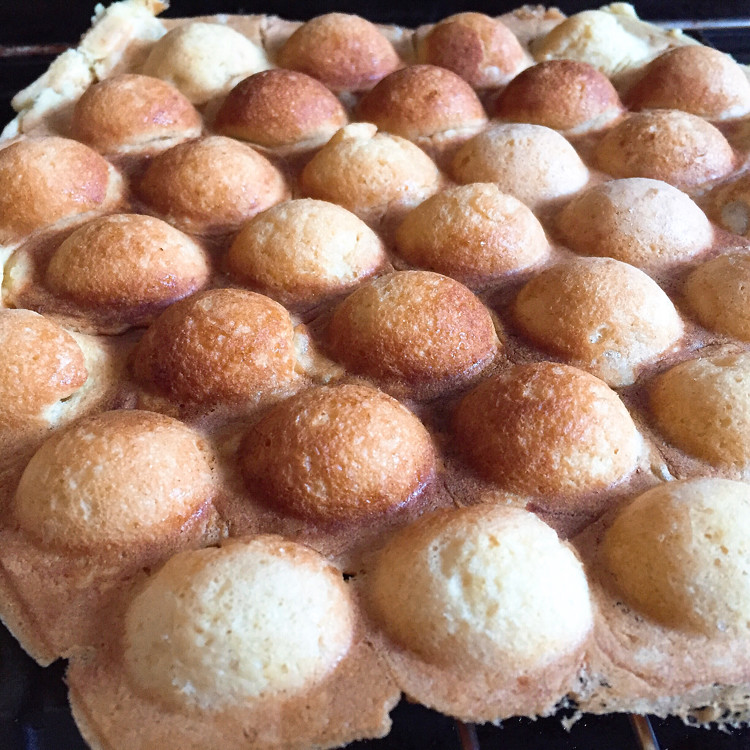
I was so excited when I received an electric bubble waffle maker from my brother and sister-in-law for my birthday last year.  I had visions of making the eggettes I used to get from NYC's Chinatown and SF's Genki and maybe even making a puffle cone a la Cauldron Ice Cream or Monkey King Tea (below).  But after trying the recipes I found on-line for eggettes and puffle cones (basically the same recipe) I'm still not satisfied with the results.  I even played around a little with the ingredients but nothing I made recreated the aroma, texture, or taste I was looking for.


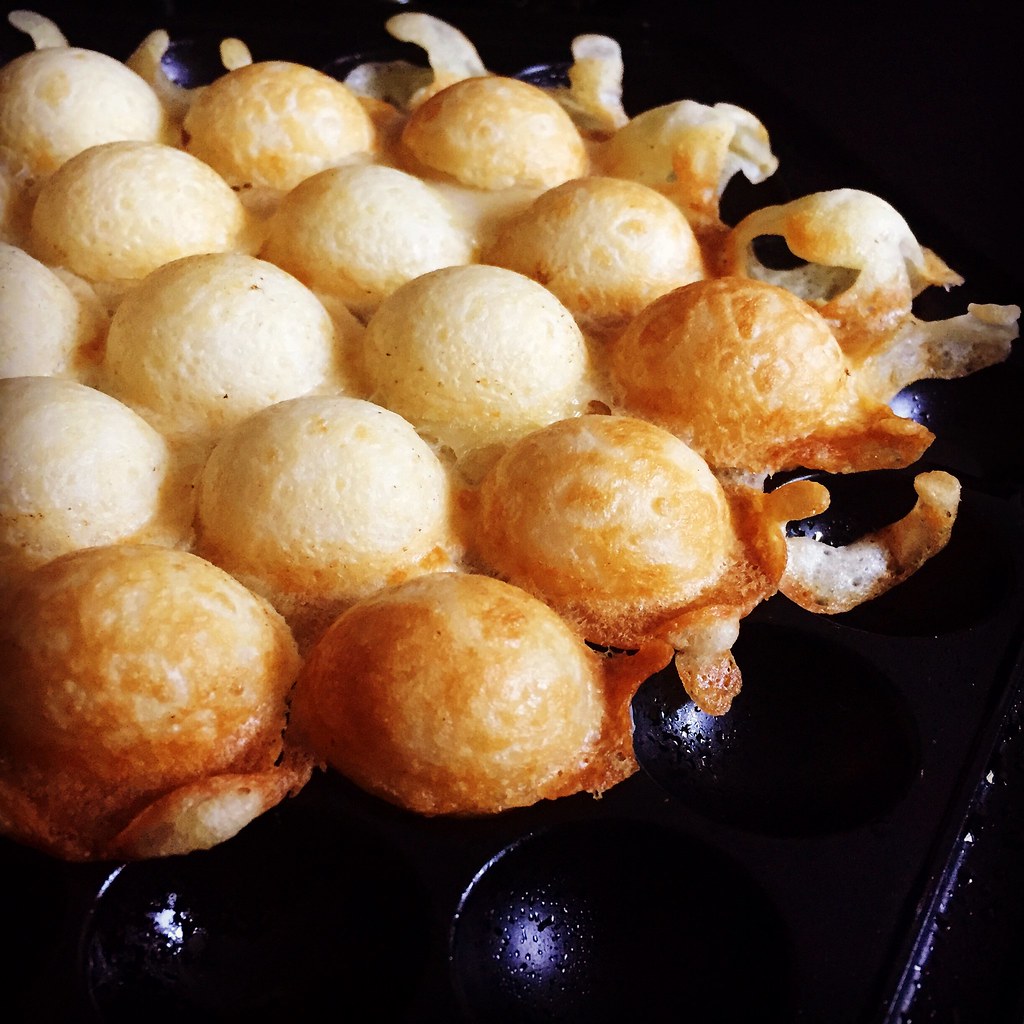
Not to be deterred, I decided to experiment with some other batter-based foods I had made before.  First up was pão de queijo (Brazilian cheese bread).  Since some of the eggette recipes used a little tapioca flour, I figured it would be fun to try an entirely tapioca flour based batter in the bubble waffle maker.  The results were incredible!

https://www.flickr.com/photos/joyosity/24500005166/in/dateposted-public/

The bubble waffle maker was able to encapsulate the chewy, airy bread in a crispy crust in a fraction of the time it takes to bake the pão in the oven.  And it's sooooo cute!

https://www.flickr.com/photos/joyosity/26219396352/in/dateposted-public/

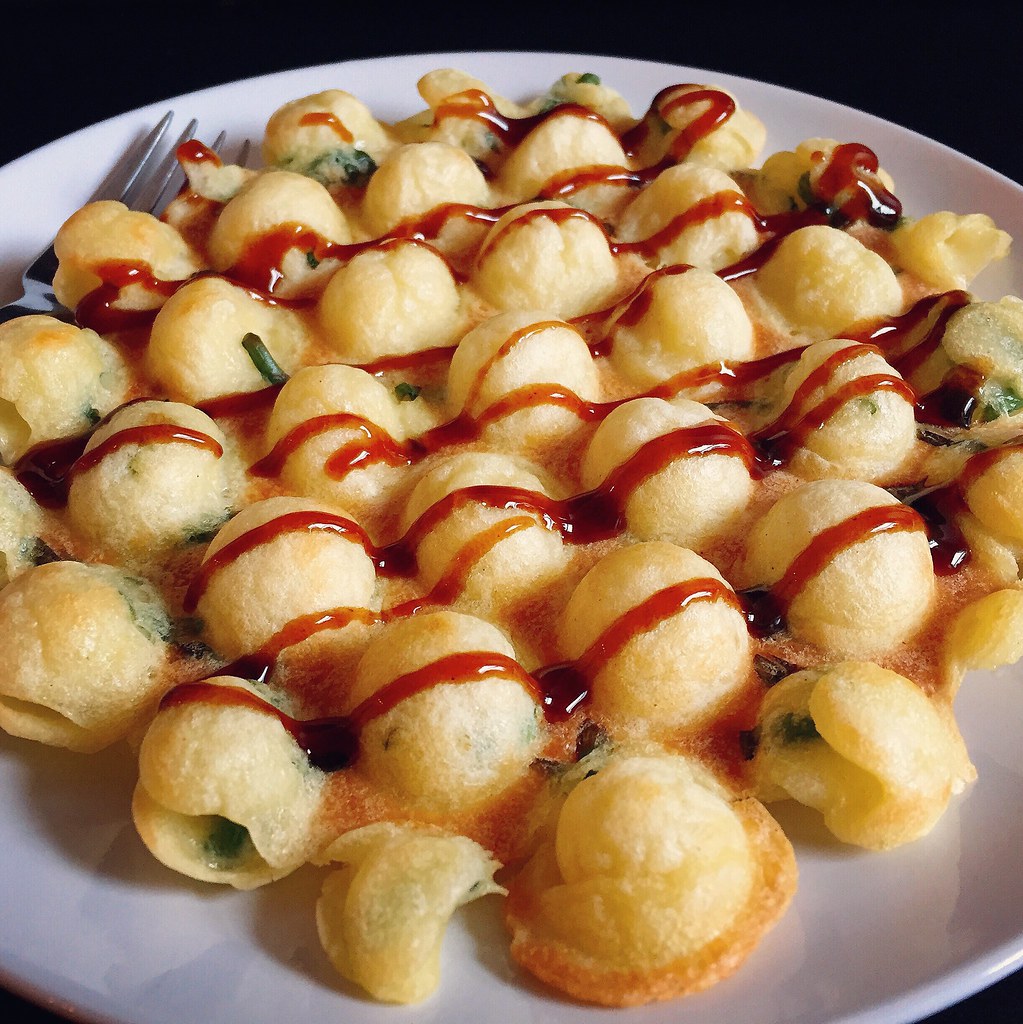
I also tried Korean pajeon (above) and Japanese okonomiyaki (below), and the results were decent, but not really worth writing about.

https://www.flickr.com/photos/joyosity/26307581532/in/dateposted-public/

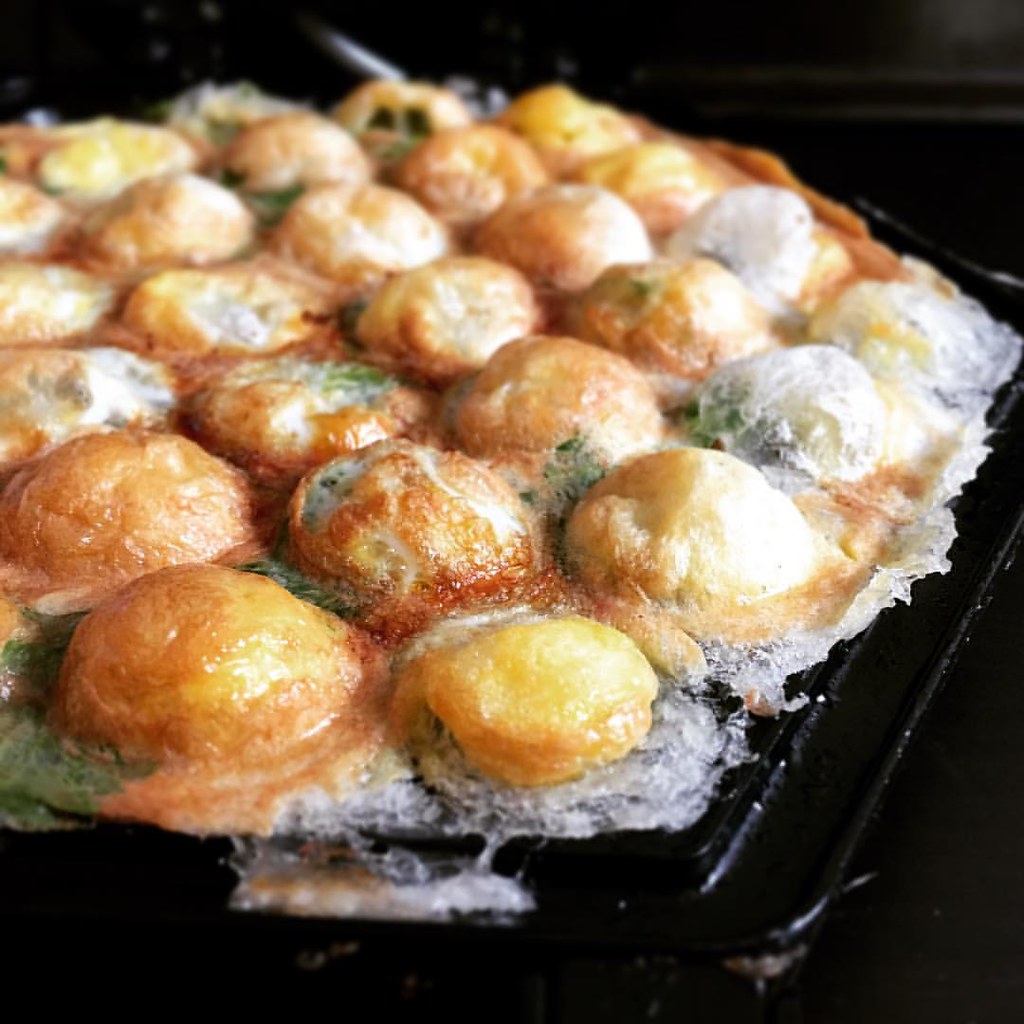
Probably my favorite use of the bubble waffle maker has to be the Taiwanese oyster omelette.  Since I remember the sweet potato starch batter to be super sticky, I added a half tablespoon of oil to the batter itself and made sure to oil the waffle iron well before adding the batter.  And even though I took those precautions, I was still surprised when the omelette came out rather easily from the iron.  

https://www.flickr.com/photos/joyosity/26169045712/in/dateposted-public/

As with the pão de queijo, I loved how the outside of the batter got super crispy but still stayed moist inside.  And the shape of the bubble waffle maker gave it a lot more nooks and crannies for an even higher crispy to chewy ratio!


So does anyone else have a good eggette recipe or recommendation for what to try next in the bubble waffle maker?

Next:  Sesame Soba Noodles with Avocado Rose
Previously:   The 4-Hour Baguette
Last Year:  Gordan Ramsay's Sublime Scrambled Eggs - 2 Ways
Two Years Ago:  Nutella Mini Crepe Cakes
Six Years Ago:  The Best Scones in the World
Seven Years Ago:  Samoa Cupcakes and the Cupcake Exchange

Tuesday, February 10, 2015

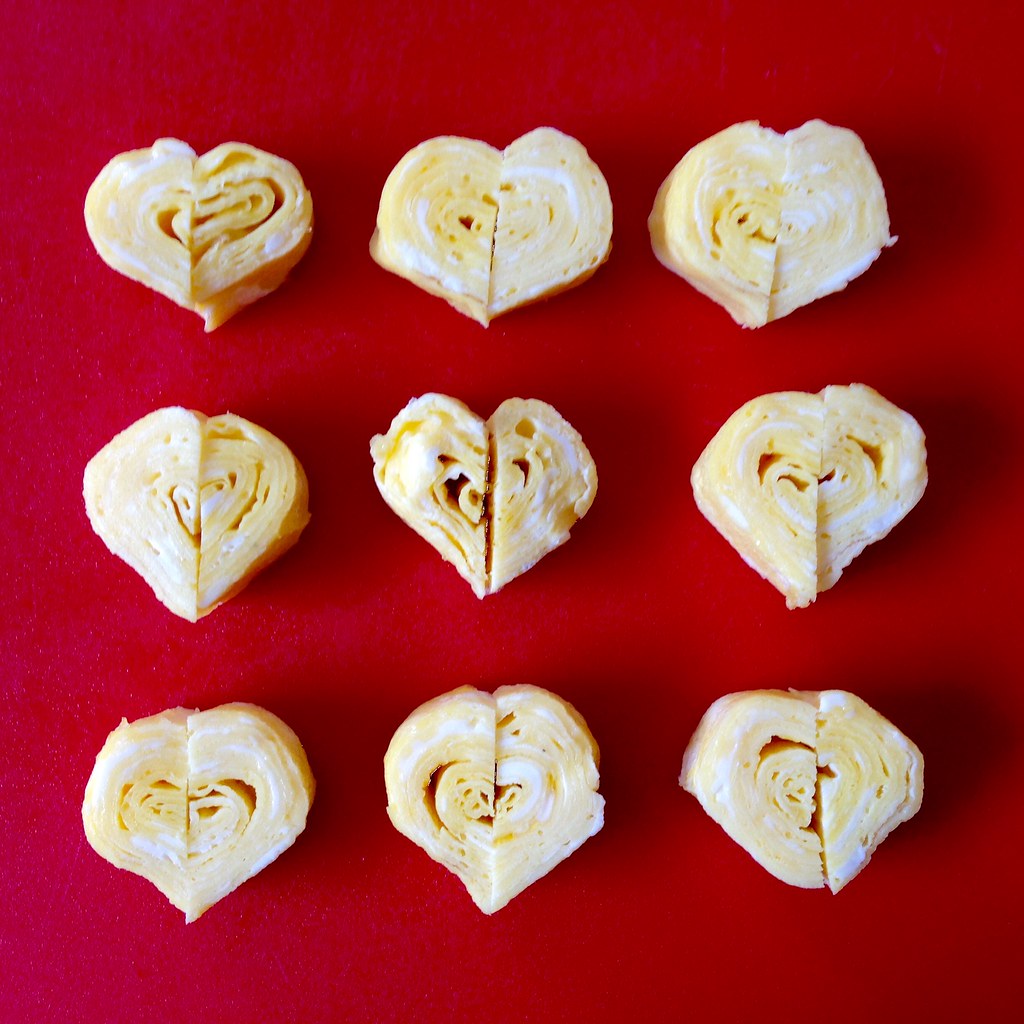
Heart-Shaped Tamagoyaki (Japanese Omelet)

https://www.flickr.com/photos/joyosity/16482774581/

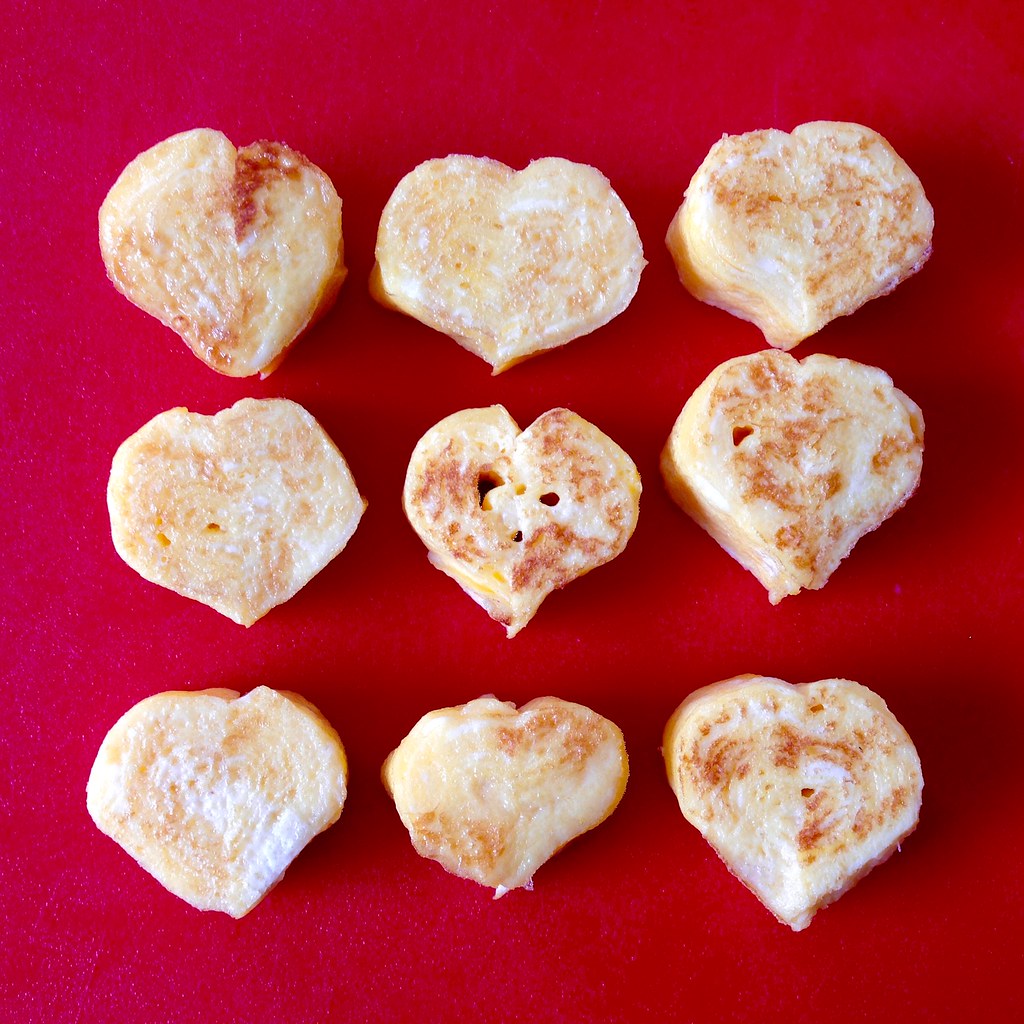
If you're looking for something special to make this Valentine's Day, here's a tutorial on how to make heart-shaped tamago without using any heart-shaped tools!  Even though it might look complicated, if you can make scrambled eggs, you can make these.  They would also be great for a Mother's Day breakfast in bed or just whenever you feel like surprising a loved one.

https://www.flickr.com/photos/joyosity/16482774671/in/photostream/

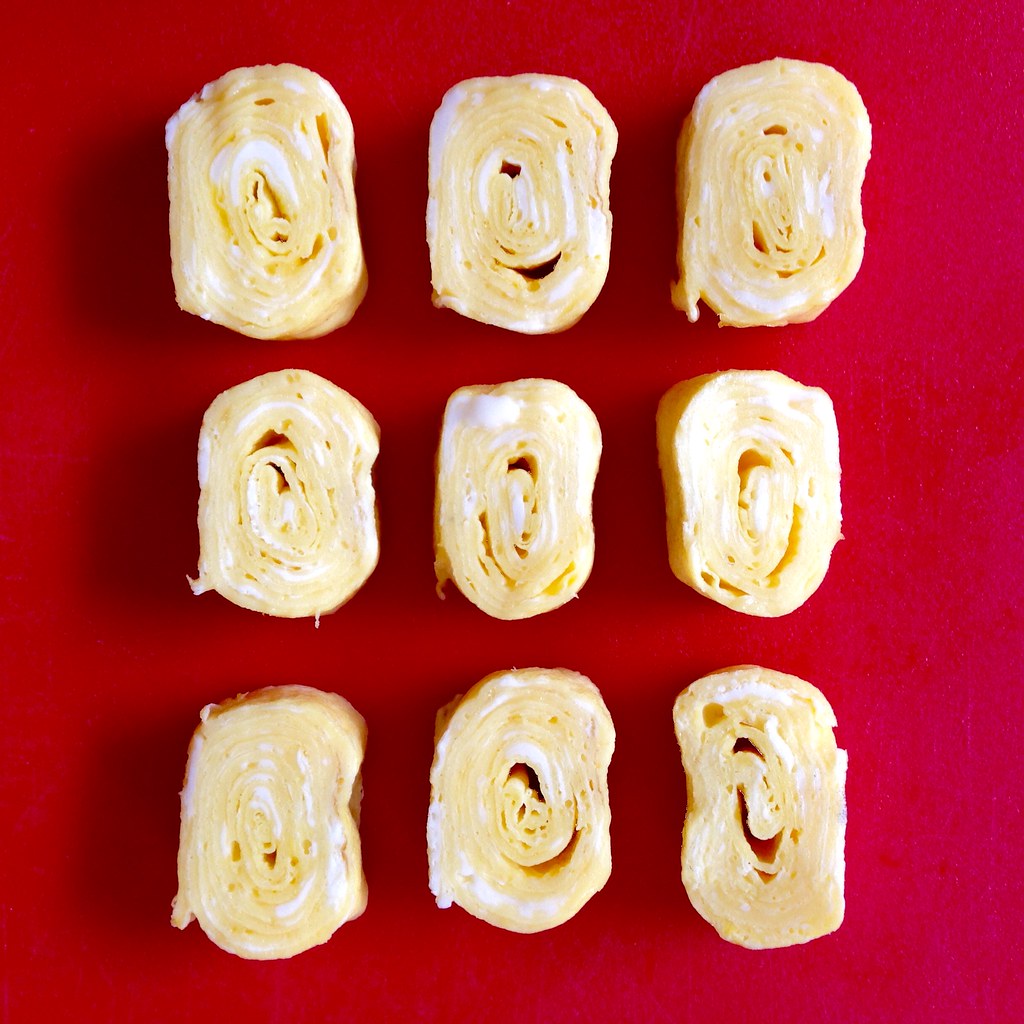
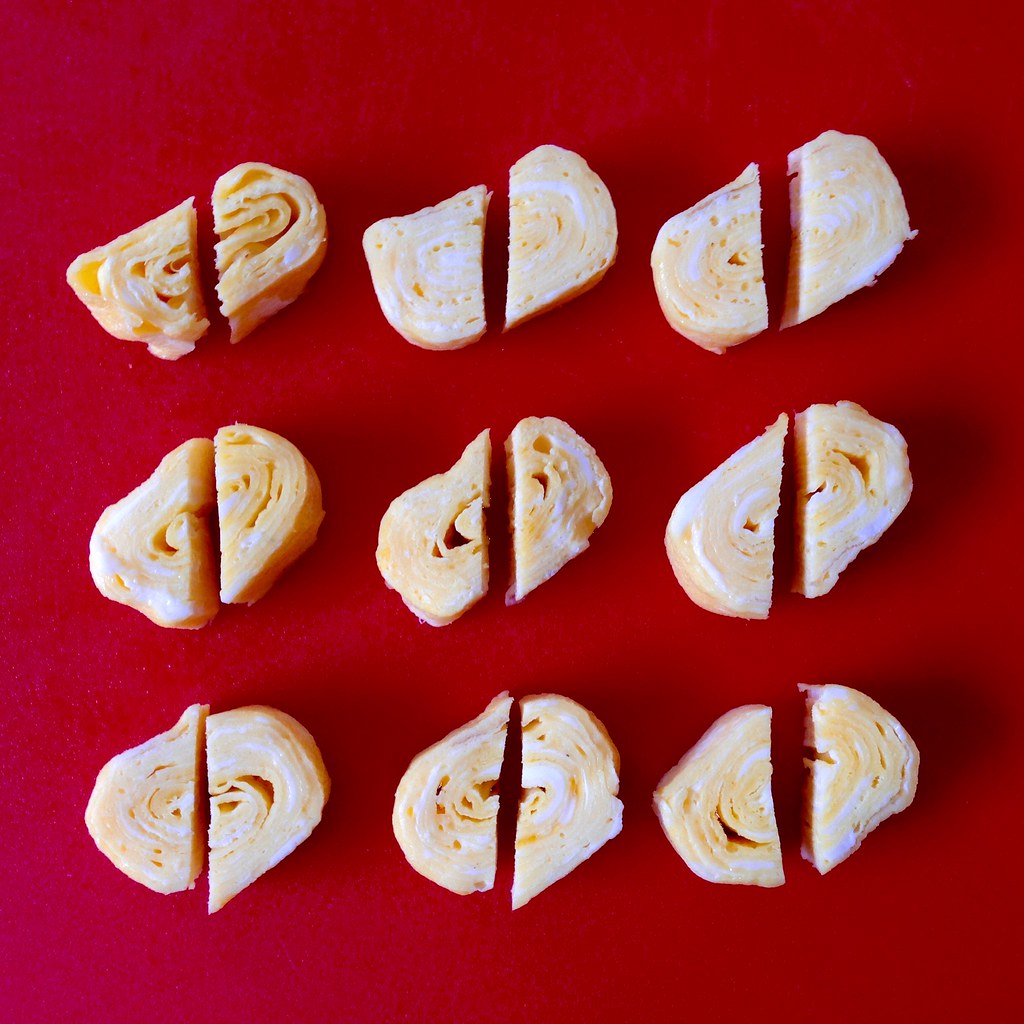
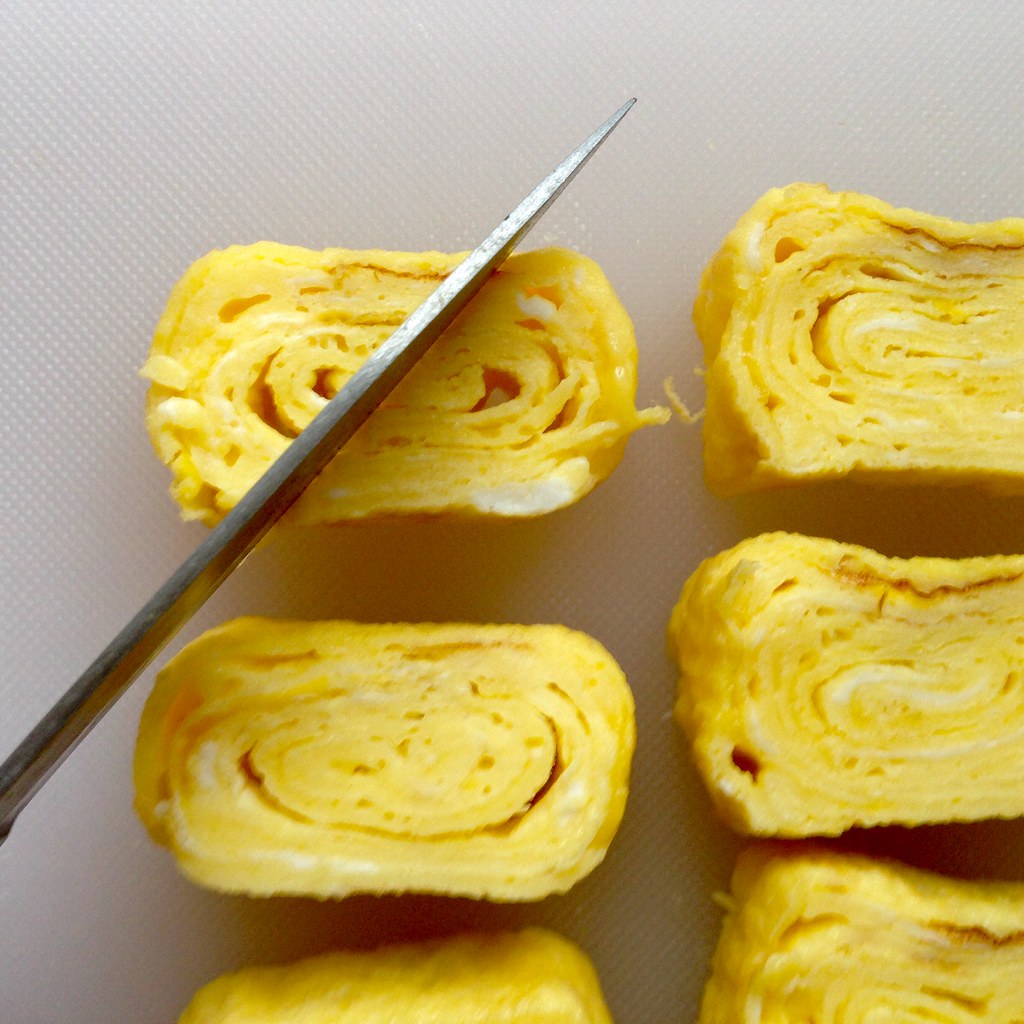
Traditional Japanese tamagoyaki is made from rolling up thinly cooked scrambled eggs.  You'll usually see it in a rectangular or long oval shape.  To make the heart-shaped version, you'll want to make a flattened log, cut out cross sections, and then bisect the cross sections diagonally.

https://www.flickr.com/photos/joyosity/16298246579/

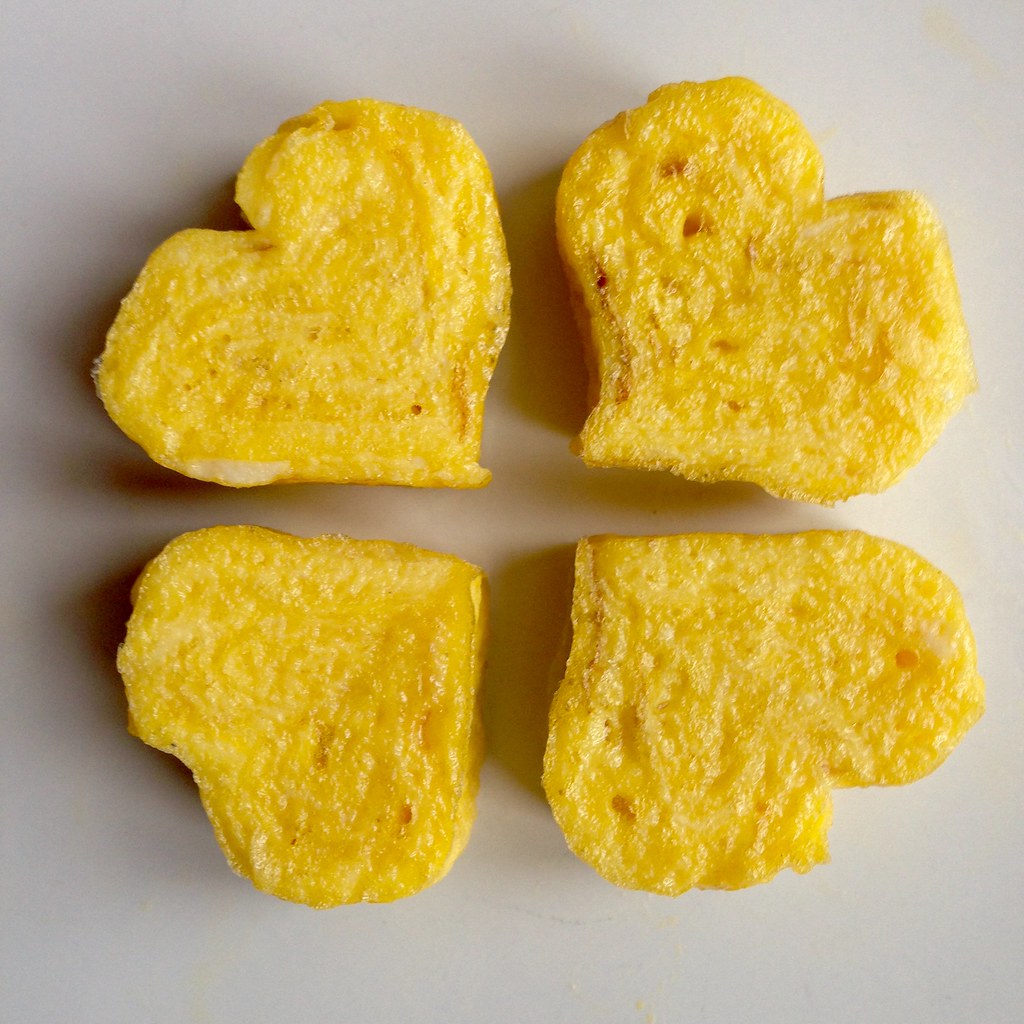
When you flip one of the halves and put it together again, you get the hearts!  You could stop here, but with just a little more effort, you can re-dip the hearts in some uncooked scrambled eggs and cook it again for a few seconds to seal the halves together.

I originally got the idea for making this from my friends Xing-Yin and Esther, who pointed me to a video of someone making it.  Unfortunately I can't find that video anymore, so you'll have to settle for these instructions and pictures. this video.  I like to make mine with just some salt, sesame oil, and mirin to add some flavor, but this would probably work with just straight scrambled eggs, too!

https://www.flickr.com/photos/joyosity/16296802118/

Heart Shaped Tamagoyaki
serves 1-2

1 tablespoon vegetable oil
3 large eggs
1/4 teaspoon salt
1/2 teaspoon sesame oil
1 teaspoon mirin

Pour the oil into a small bowl.  Dip a folded up piece of paper towel in the oil and use it to apply a film of oil to a nonstick skillet about 8" in diameter.  Heat the pan on medium heat.

Scramble the rest of the ingredients together, but try not to introduce too many air bubbles into the mixture.

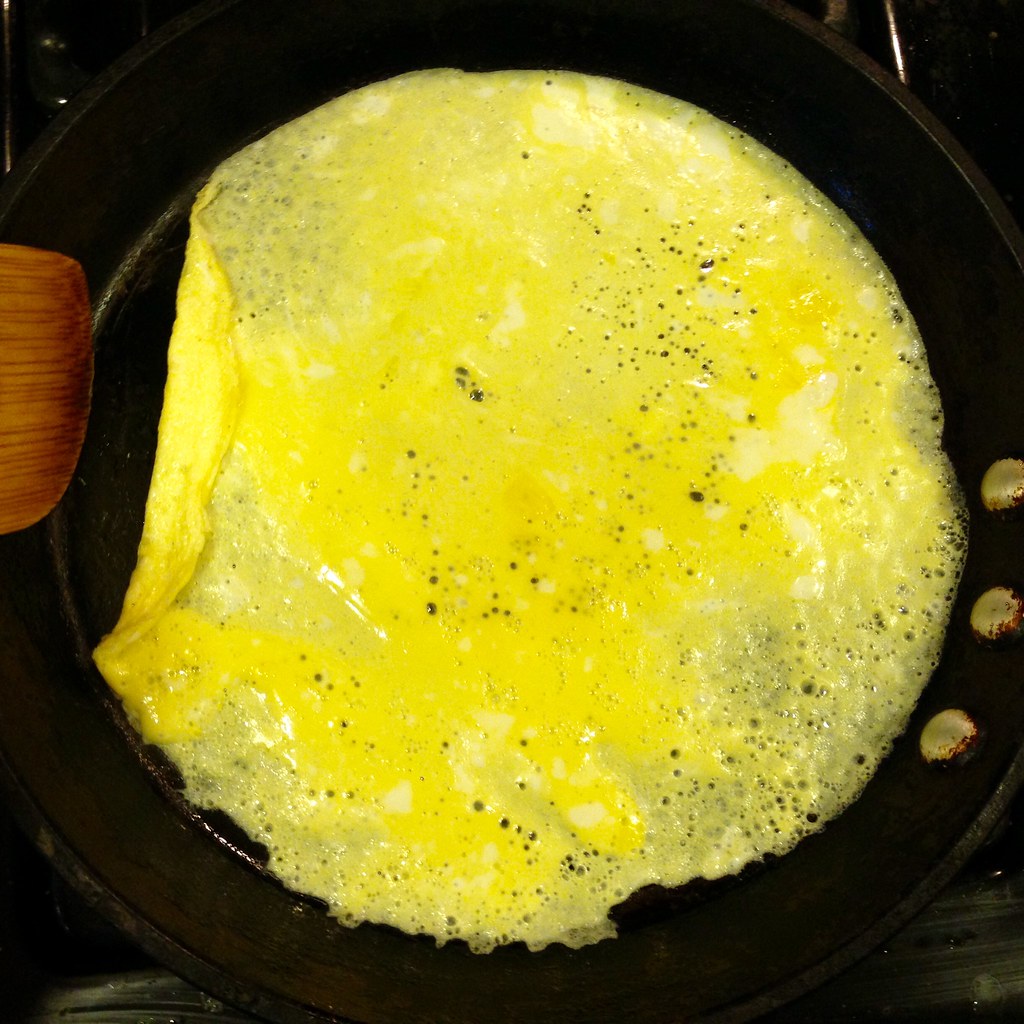
Pour a third of the egg mixture onto the hot pan and swirl it around so that the bottom is evenly covered.  You may want to turn down the heat a bit here since you don't want the egg to cook completely through while you are folding it.

https://www.flickr.com/photos/joyosity/15830991134/

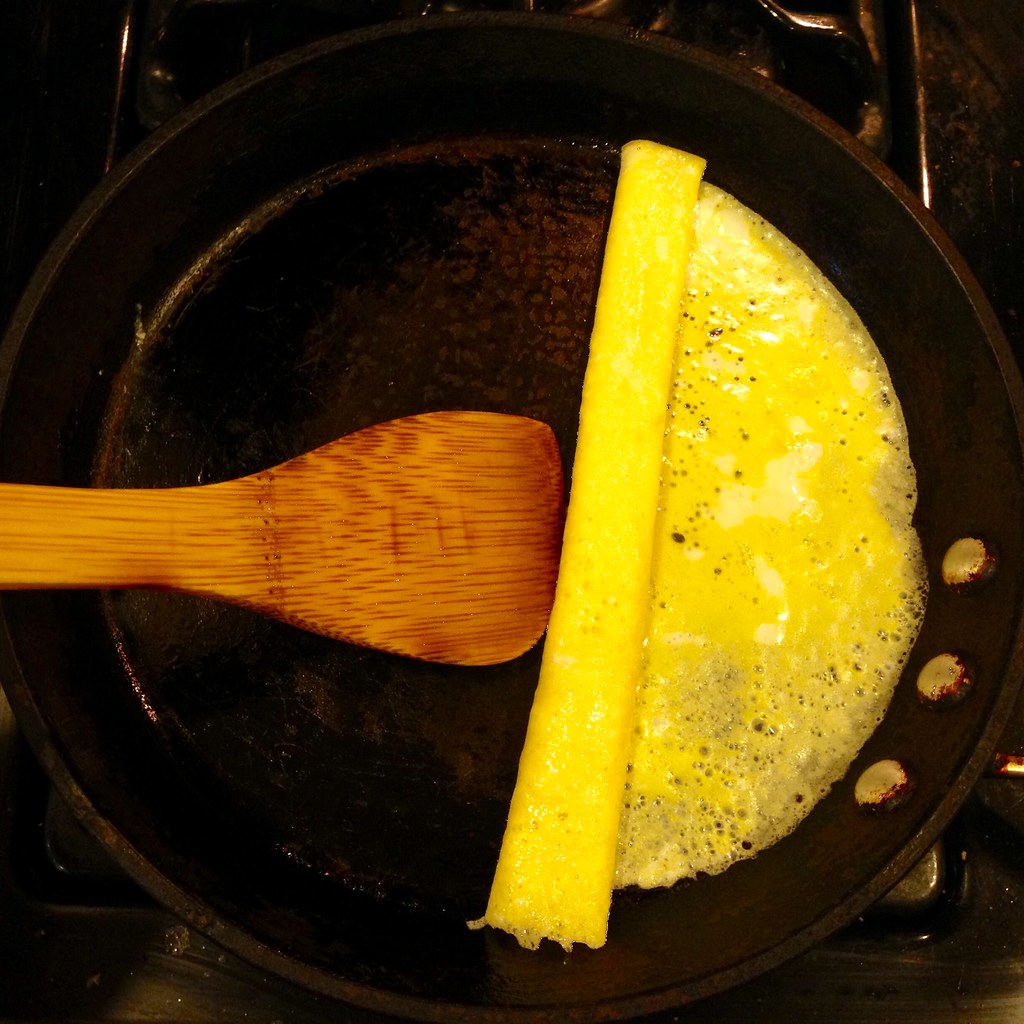
Starting from one end, fold over about 1/4" of the egg and continue to fold it over and over until all the egg has been rolled up.  You want to do this carefully so that you get a tight bundle and end up with a flattened log.

https://www.flickr.com/photos/joyosity/16266081350/

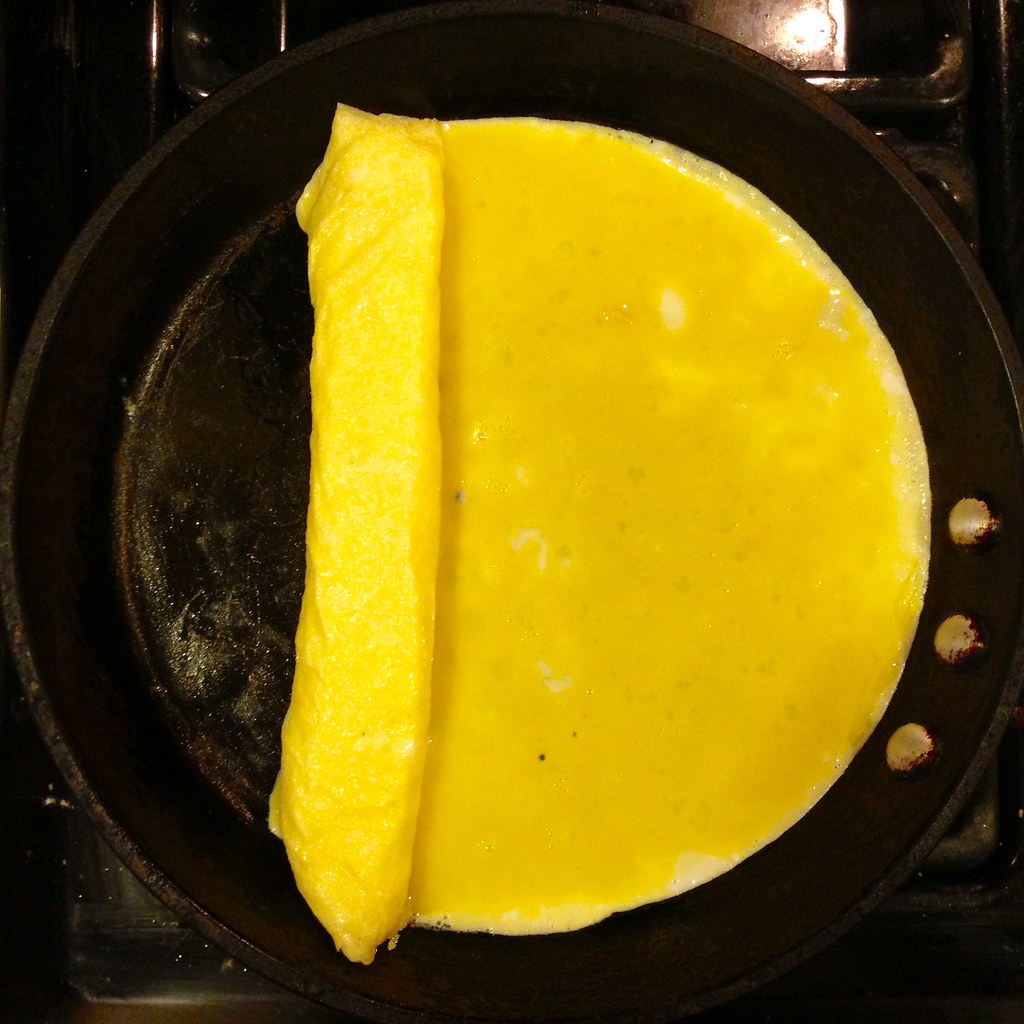
Slide this log over towards the end where you started folding and re-oil the bottom of the pan.  Pour in half of the remaining egg mixture and swirl the pan again to make another layer.

https://www.flickr.com/photos/joyosity/15830991134/in/photostream/

Start folding the egg again in the same direction until it is all folded up.  Slide the log back, re-oil, and pour almost all of egg mixture in, reserving about a teaspoon.  Repeat the swirling and folding.  Once all the egg has been folded up into a flattened log, remove the egg from the pan and place it on a cutting board.

https://www.flickr.com/photos/joyosity/16267265659/

Slice off the uneven ends, then cut the rest of the log into 1/2"-3/4" cross sections.  Lay each cross section down and make a diagonal slice.  Flip one of the halves over and rejoin to make a heart shape.

Choose the nicest shaped sides of each heart, and dip that side into the leftover egg mixture.  Place dipped side down onto the pan and cook for another 15 seconds.  Serve dipped side up.

https://www.flickr.com/photos/joyosity/16427515796/

Next:  Odile's Fresh Orange Cake
Previously:  Matcha White Hot Chocolate
Last Year:  Homemade Tagliatelle with Shaved Truffles
Two Years Ago:  Potato Dominoes
Six Years Ago:  Cassava Heavy Cake

Monday, November 3, 2014

Raindrop Cake

https://www.flickr.com/photos/joyosity/15467918579/

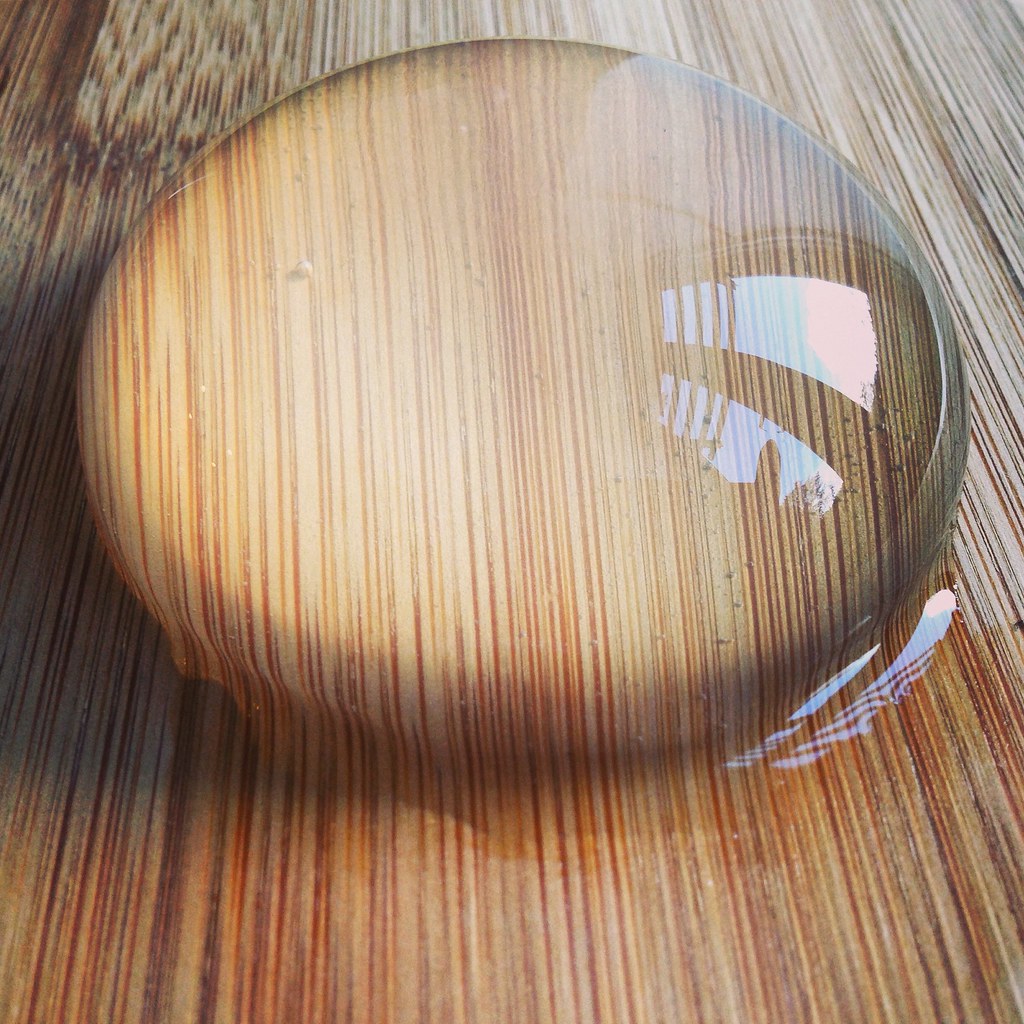
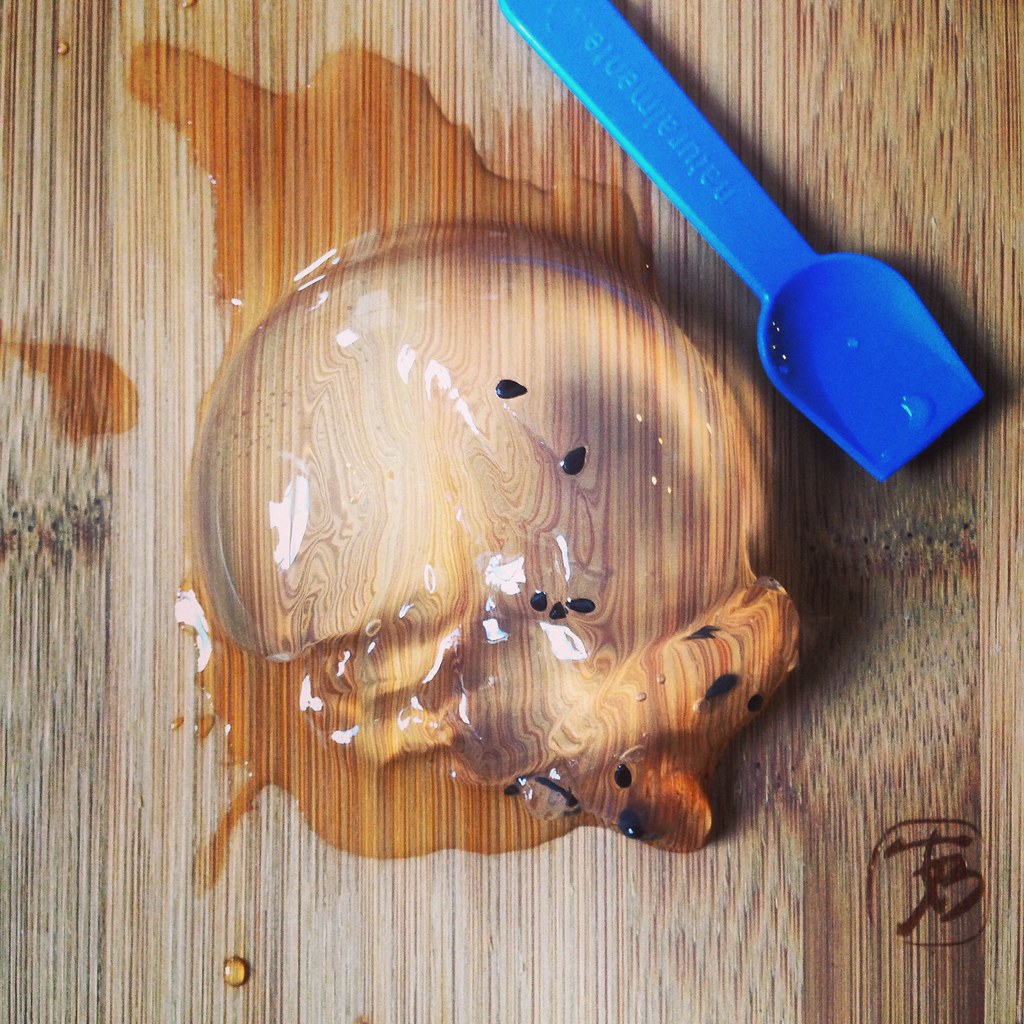
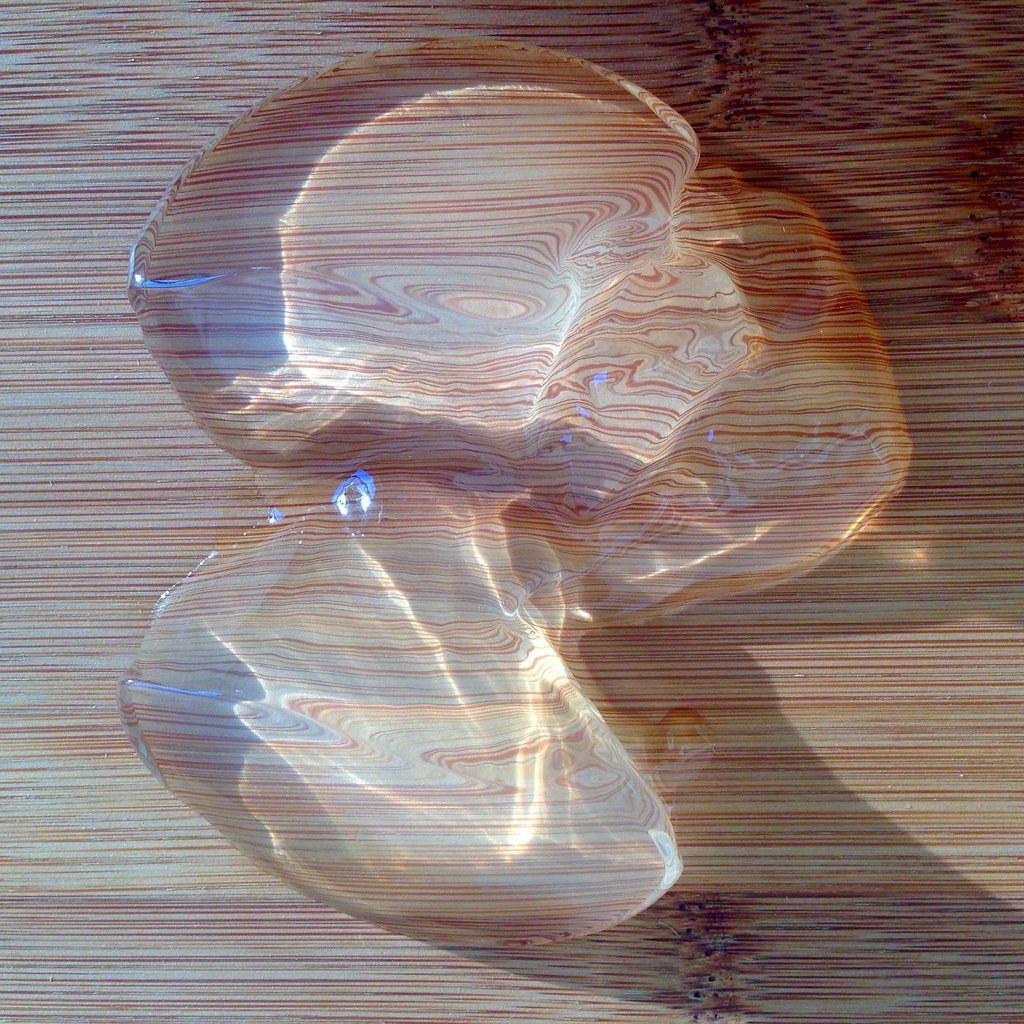
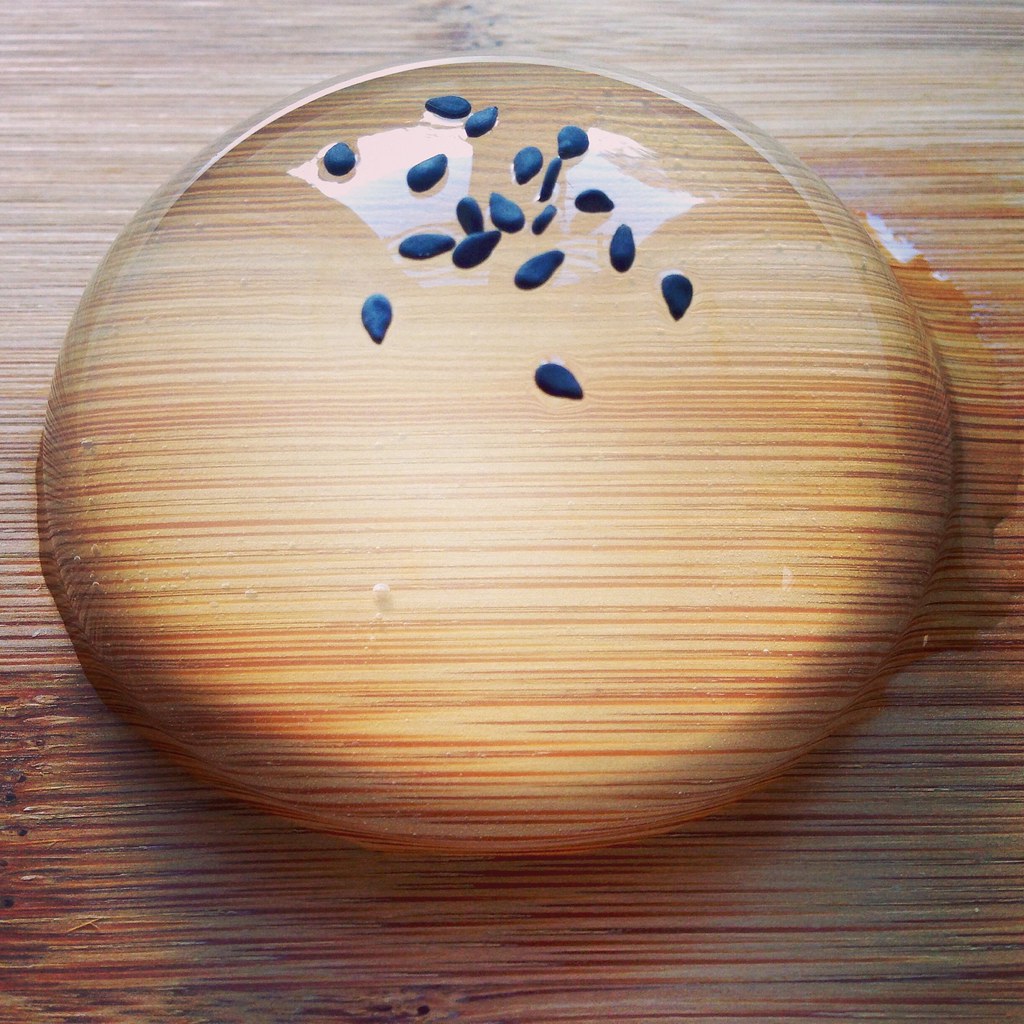
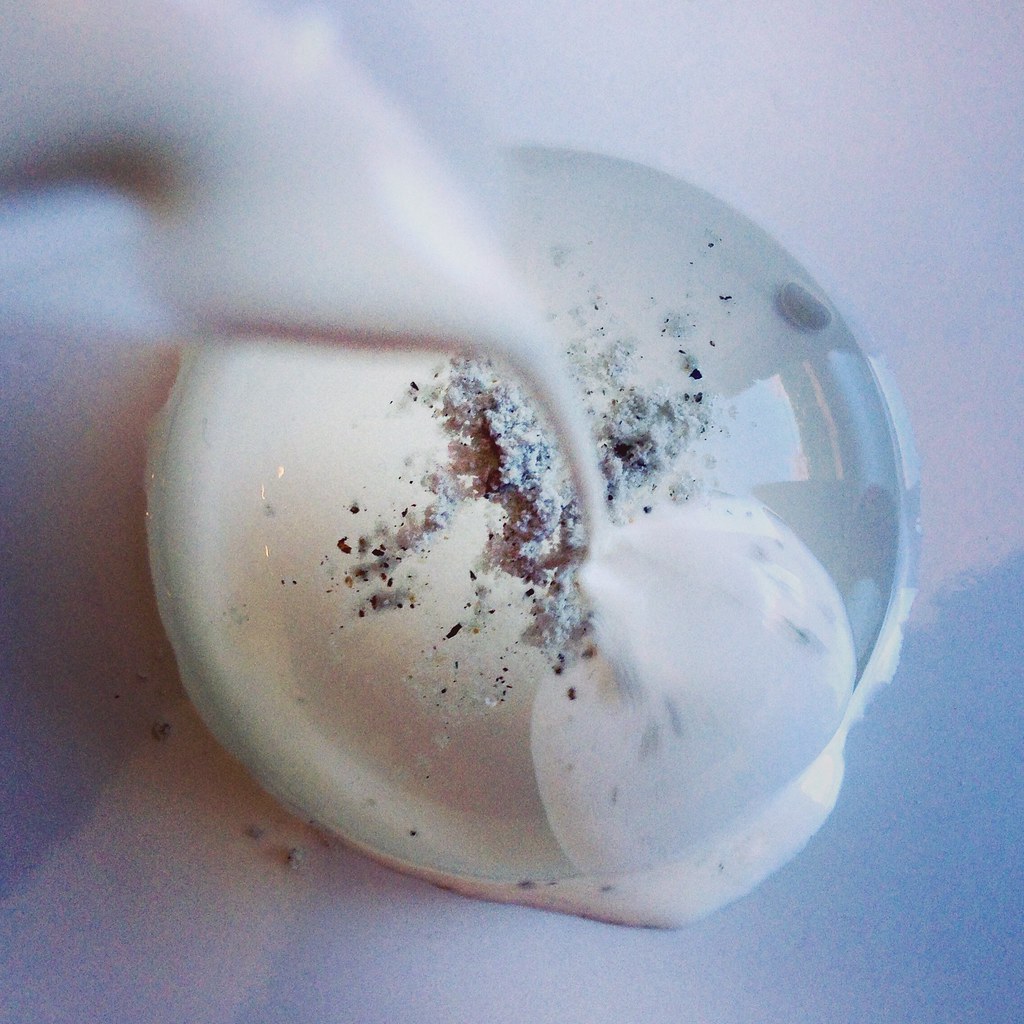
Back in June, the mizu shingen mochi from Kinseiken Seika made a huge splash across the internet (pun intended).  Shaped like a giant drop of water, it is made from spring water from the Japanese Alps and supposedly disintegrates after 30 minutes at room temperature.  My friend Erick kept asking me to try to replicate it, but I totally thought it was just a hoax until I found this post via Reddit back in August.  Even then, it took me a few months before I assembled all the ingredients and tools I needed to make this (spurred on, in part, but Erick's impending birthday).

https://www.flickr.com/photos/joyosity/15468416738/

I ordered the agar powder and spherical mold from Amazon, but you can probably find agar in an Asian grocery store or maybe even Whole Foods.  I wanted the mold so I could make a semi-spherical cake, but you might be able to get away with just using a small bowl.

At first, since my molds only held about 70 ml each, I just used 150 ml of water with 1 g of agar.  This ended up being way too much agar, and the result was a thick, bouncy cake that was yellowish in color.  Fail.

https://www.flickr.com/photos/joyosity/15654554825/

For attempt #2, I added less agar, but since I could still see it floating around in the measuring cup, I kept adding more and more water.  After chilling over night, the cake barely set and collapsed immediately after unmolding.  Fail again.

For my third try, I used about the same amount of agar as before but didn't add any more water.  It set within a few hours in the refrigerator, and I was able to unmold it intact!  It did start "weeping" immediately, but I'm pretty sure that's what it's supposed to do.  Success!

https://www.flickr.com/photos/joyosity/15651878891/

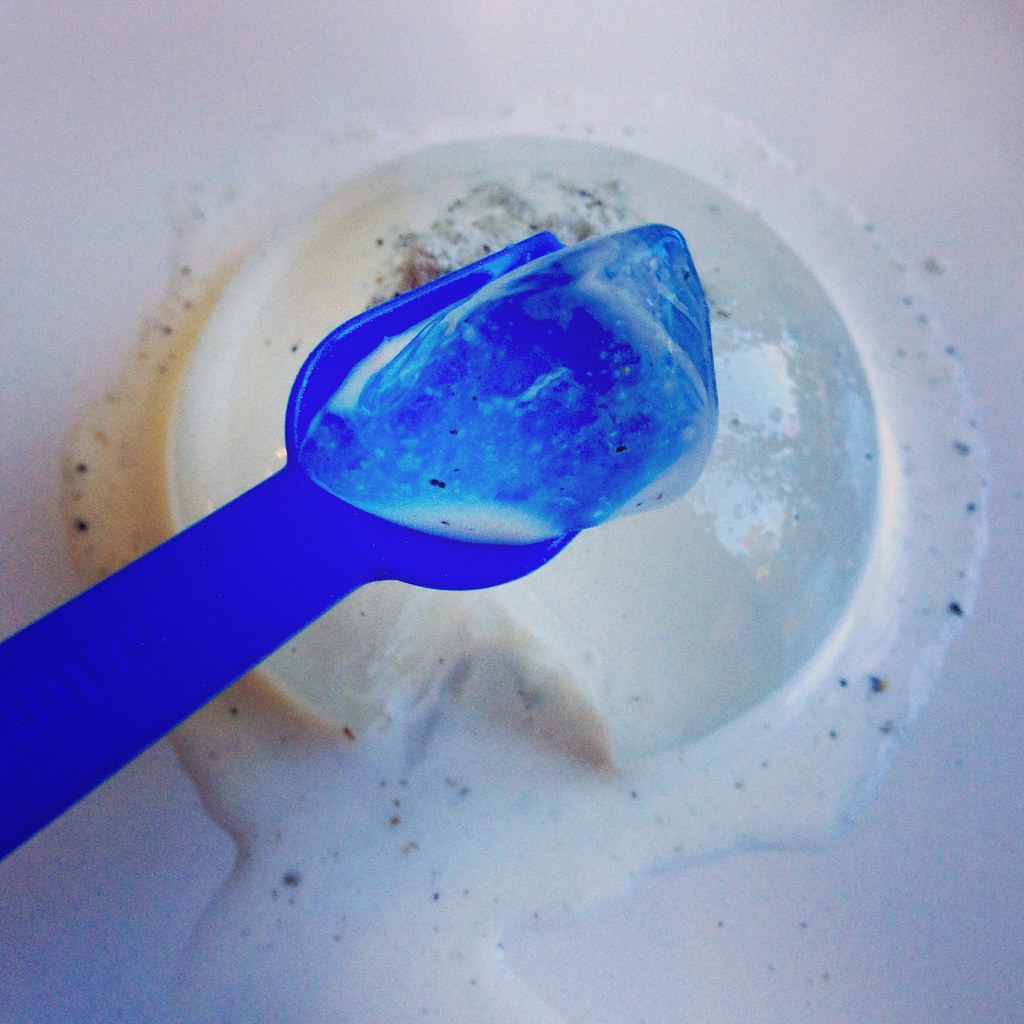
I'm not going to lie, this tasted pretty much like water-flavored Jell-o.  I did add a pinch of vanilla sugar to the mixture, but it was barely noticeable.  The texture sensation was great, though.  It holds just for a second in your mouth before dissolving into a cool, crisp liquid.

I added a few black sesame seeds on top of the first cake I tried, more for show than for taste (it tasted pretty bad).  Since I made two half-spheres each time, for the second cake I decided to try some more flavorful toppings.  The original is served with a black sugar syrup and roasted soybean powder, neither of which I had, but I thought I'd try sprinkling on some sweet black sesame instant drink powder and a splash of half and half.  I really liked the addition of the sweet black sesame powder, but next time I might try sweetened condensed milk instead of half and half. 

https://www.flickr.com/photos/joyosity/15468602367/

Raindrop Cake (adapted from here)
makes 2 cakes

2/3 cup spring water
Pinch of vanilla sugar
~1/8 teaspoon agar powder (you may need to experiment a bit to attain desired texture)

Measure out the water in a microwaveable measuring cup and add the sugar.  Microwave for 30 seconds and stir until sugar is dissolved.

While stirring, sprinkle on the agar powder.  Microwave again for 30 seconds and stir for a minute.  Continue microwave and stirring as needed until the agar is all dissolved, although you'll probably still see clear bits floating around in the water.

Carefully pour into your desired molds; pop any bubbles that may appear.  Transfer the molds to the refrigerator and allow to set for several hours or overnight.

Carefully unmold the cakes and serve immediately with your desired toppings.

https://www.flickr.com/photos/joyosity/15468992910/

Next:  Caramel Apple Cinnamon Rolls
Previously:  Mochi Donuts and Pon de Rings
Two Years Ago:  Margherita Pizza

Monday, September 22, 2014

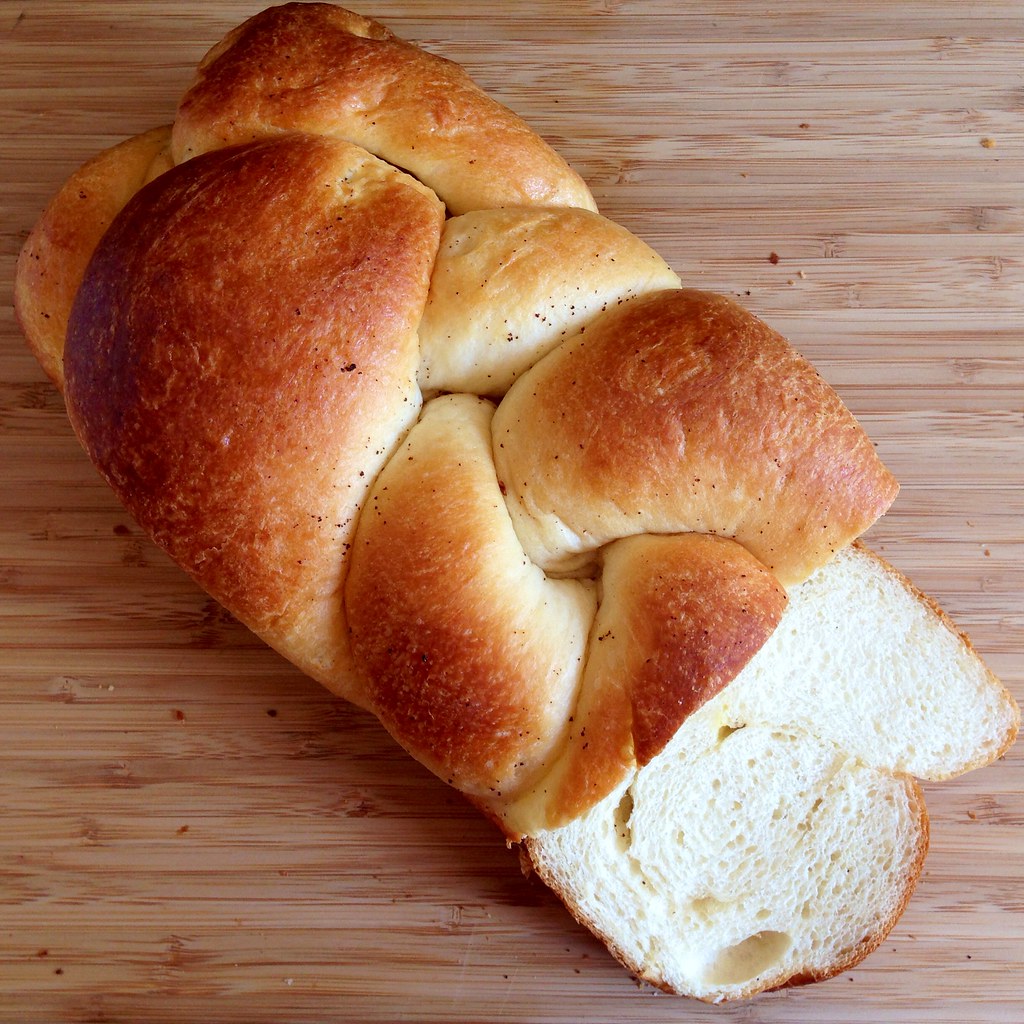
Hokkaido Milk Bread Three Ways (Traditional, Braided, and Taro Swirl)

https://www.flickr.com/photos/joyosity/15292302481/

If you're not familiar with Hokkaido milk bread, it's that super soft, sweet bread you can get at Asian bakeries.  You know how when you walk into an Asian bakery there's this awesome smell?  It's buttery, milky, and sweet, but more than just the sum of those things.  Well, I just discovered that making this bread will basically recreate that smell in your kitchen.  It's incredible.

https://www.flickr.com/photos/joyosity/15108861047/

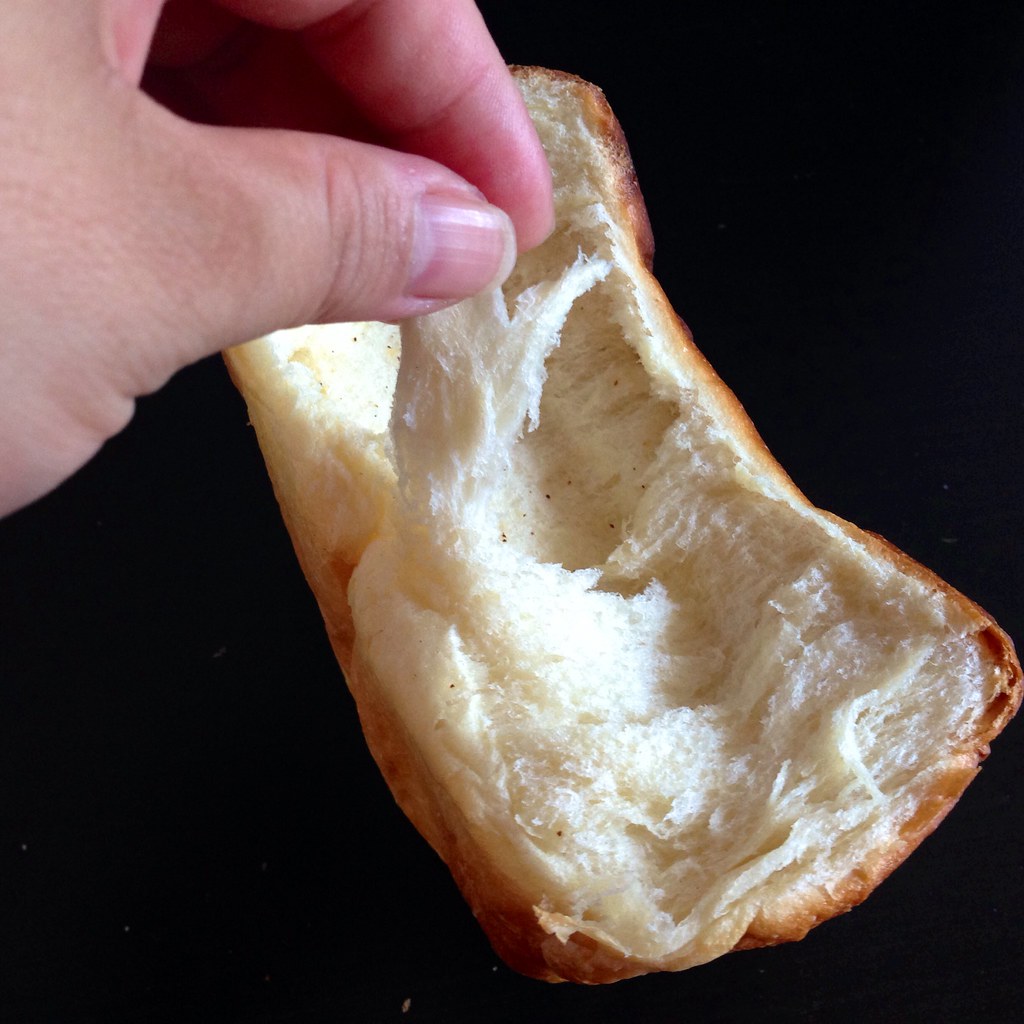
This bread is pretty much on the opposite end of the spectrum from no-knead bread.  It involves a multitude of steps and lots of kneading, but the end result is like eating a fluffy cloud of bread.  I think it's best when fresh, but after a few days, you can toast it for the best toast of your life, or even better, make French toast with it!

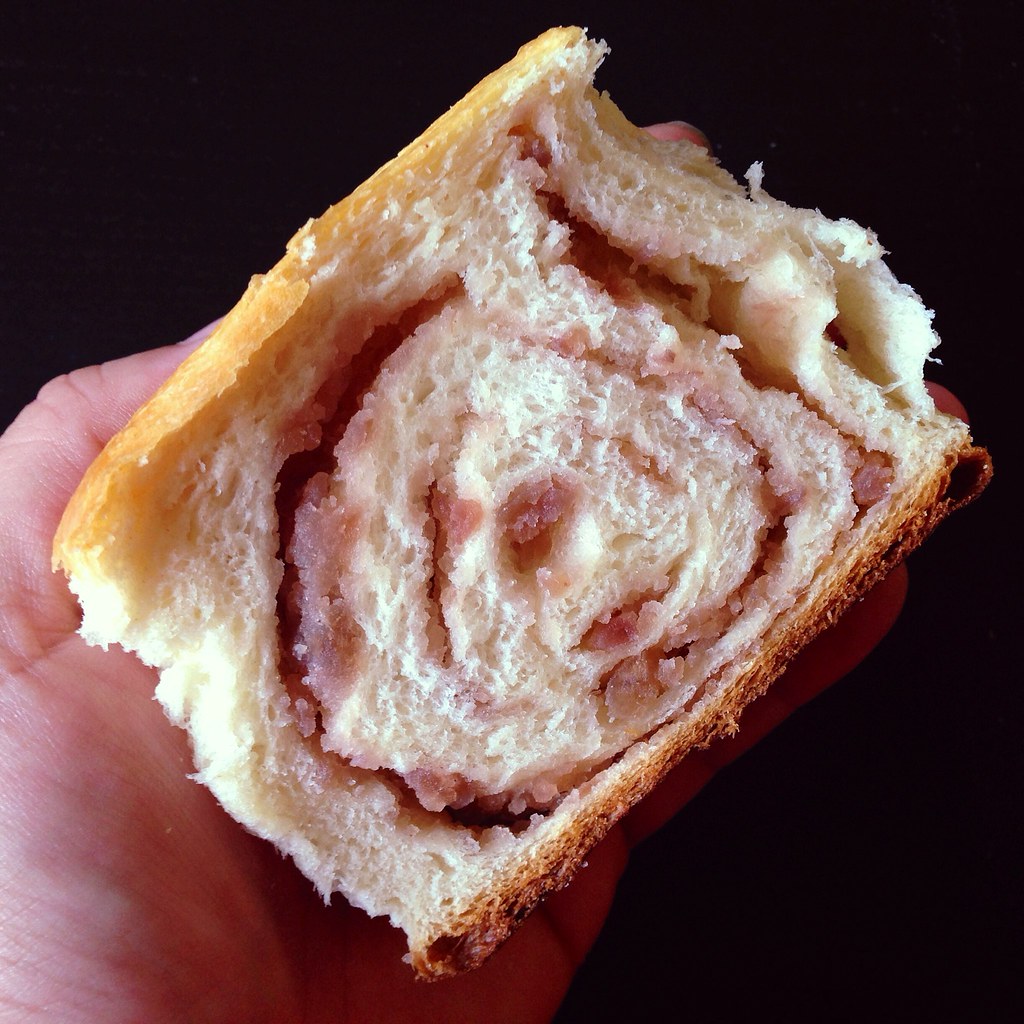
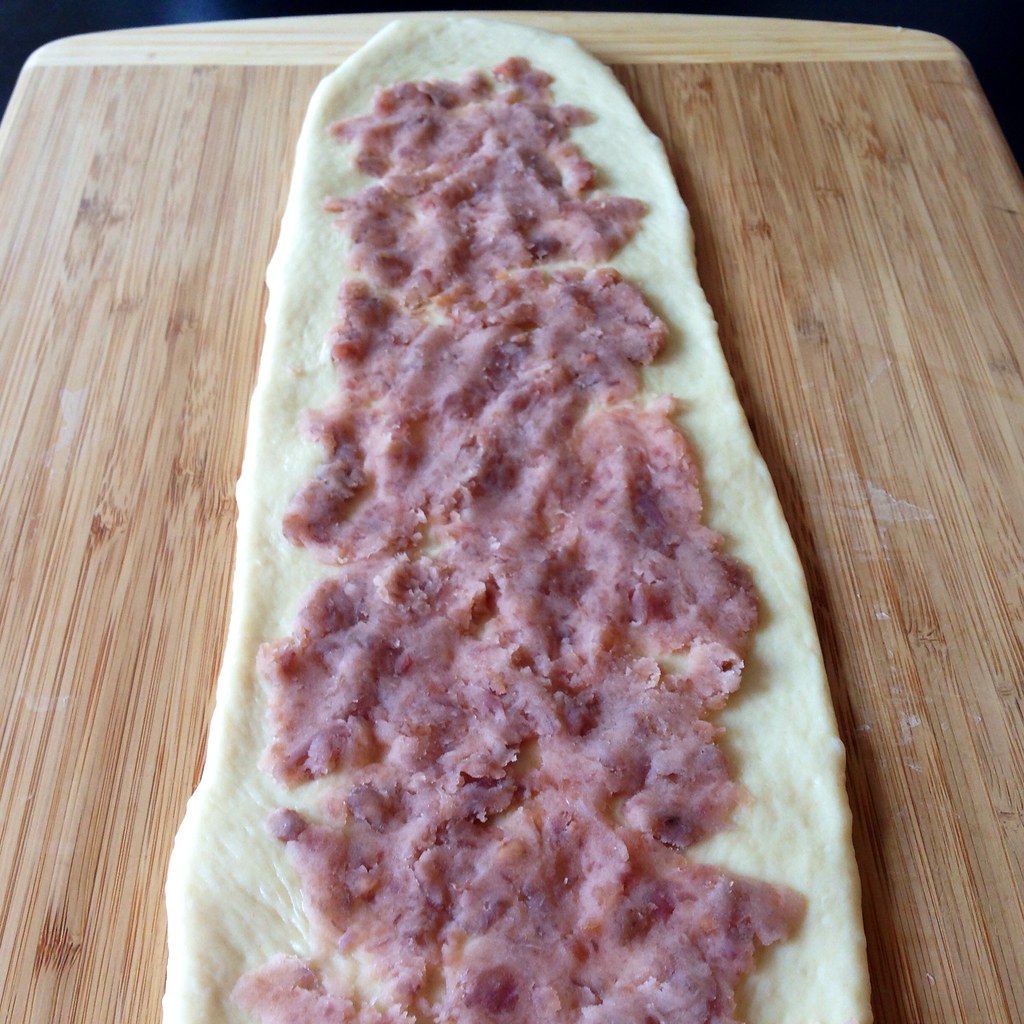
Since I had some leftover taro paste from making the Taiwanese taro swirl mooncakes, I decided to wrap some in the dough and make Taro Swirl Milk Bread.  The bread didn't end up rising quite as much as I would like; I think next time I'll keep the dough a bit thicker before I add the taro and roll it up so that there's a higher bread to taro paste ratio.

https://www.flickr.com/photos/joyosity/15295081462/

Hokkaido Milk Bread Three Ways (Traditional, Braided, and Taro Swirl) (adapted from Lady and Pups)
makes 2 loaves

For first proofing:
600 grams bread flour
42 grams egg white
7 grams yeast
168 grams heavy cream
190 grams whole milk
12 grams unsalted butter, at room temperature
18 grams of sugar

For second proofing:
7 grams salt
5 grams yeast
90 grams sugar
50 grams egg whites
3 grams milk powder
12 grams unsalted butter, at room temperature

To finish:
40 grams butter
Kosher salt
1 egg

Combine the heavy cream, whole milk, butter, and sugar and warm it in the microwave to 110°F.  In a stand mixer with the dough hook attachment, combine the bread flour, yeast, egg whites, and warm milk mixture.  Knead until smooth on medium speed.  Cover and proof in the refrigerator for 18-24 hours until doubled.

Once the dough has doubled, punch out the air.  Cut the dough into small "bite-size" pieces and return it to the stand mixer.  Add the salt, yeast, sugar, and egg whites and turn the mixture on medium.  Work the dough until smooth and elastic (about 5 minutes), then add the butter.  Keep the mixer on medium and work for another 3 minutes.  Then turn the mixer on medium high and work the dough for another 6-10 minutes.  The dough should pull away from the bowl and make "slapping sounds" against the bowl.

https://www.flickr.com/photos/joyosity/15108701120/

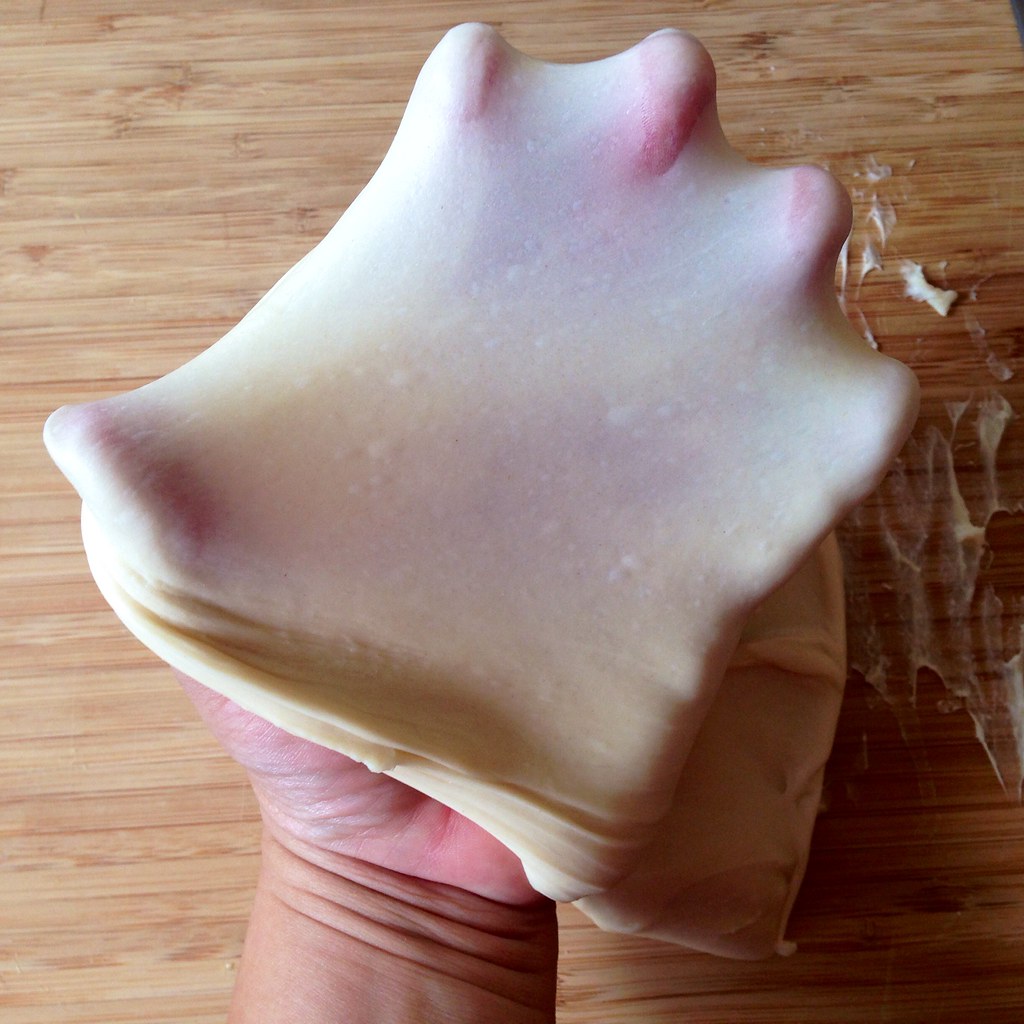
At this point, the dough shouldn't be too sticky but still moist and have developed enough gluten that you could slowly stretch it into a thin, translucent film without breaking it.  Divide the dough into 2 equal portions and let rest for 30 minutes.

In the meantime, brown the 40 grams of butter in a small saucepan over medium-low heat.  The butter will start to foam, then turn brown and smell nutty.  Turn off the heat and set the browned butter aside.

Once the dough is rested, divide each half into 3 equal parts.  Roll each part into an long oval shape, then fold the sides toward the center (like folding a letter) and roll it out again into a long rectangle.  Roll the long rectangle up into a spiral.  Repeat for the other portions and let rest for another 15 minutes.

https://www.flickr.com/photos/joyosity/15295418635/

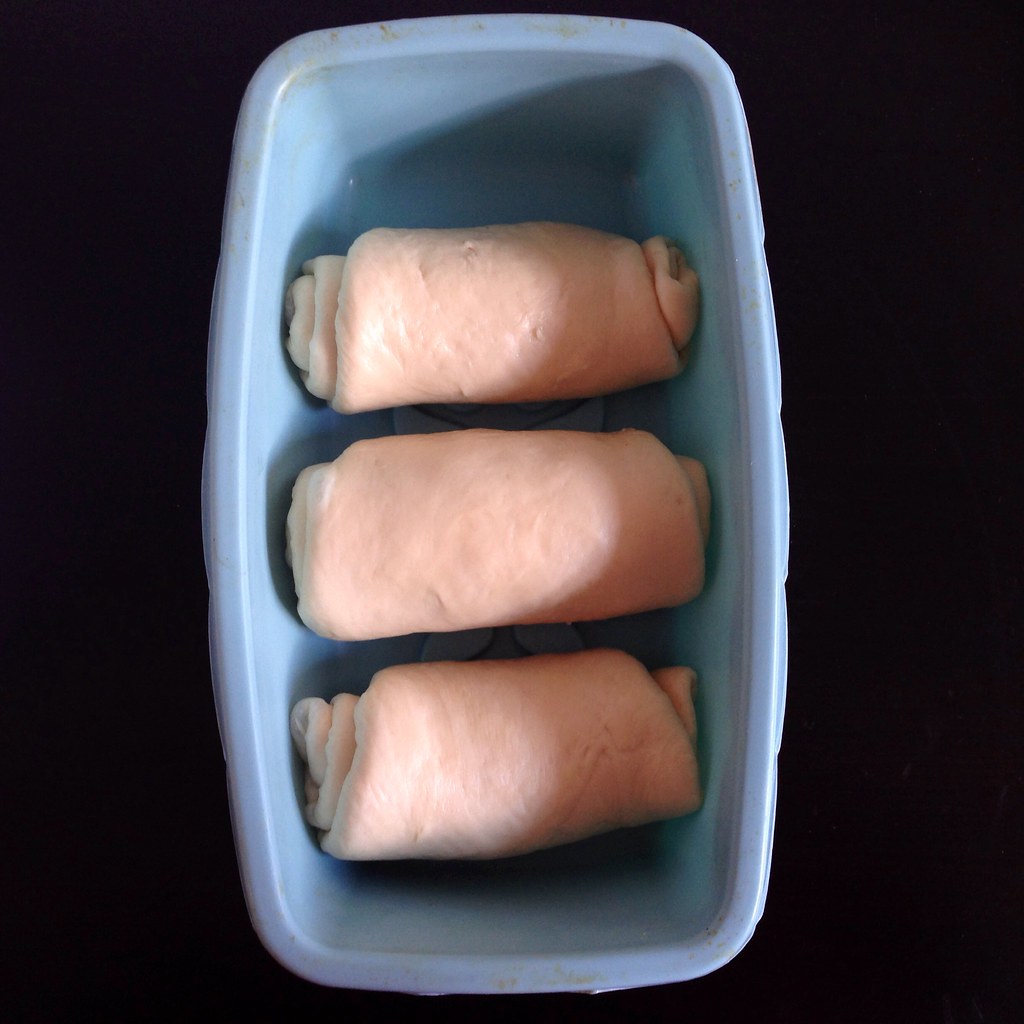
Variation #1:  The traditional way is to take the 3 portions and roll each into a long oval.  Brush with the browned butter and sprinkle with a little salt, then roll up into a spiral.  Place the 3 spirals seam side down in a loaf pan.

https://www.flickr.com/photos/joyosity/15295453685/

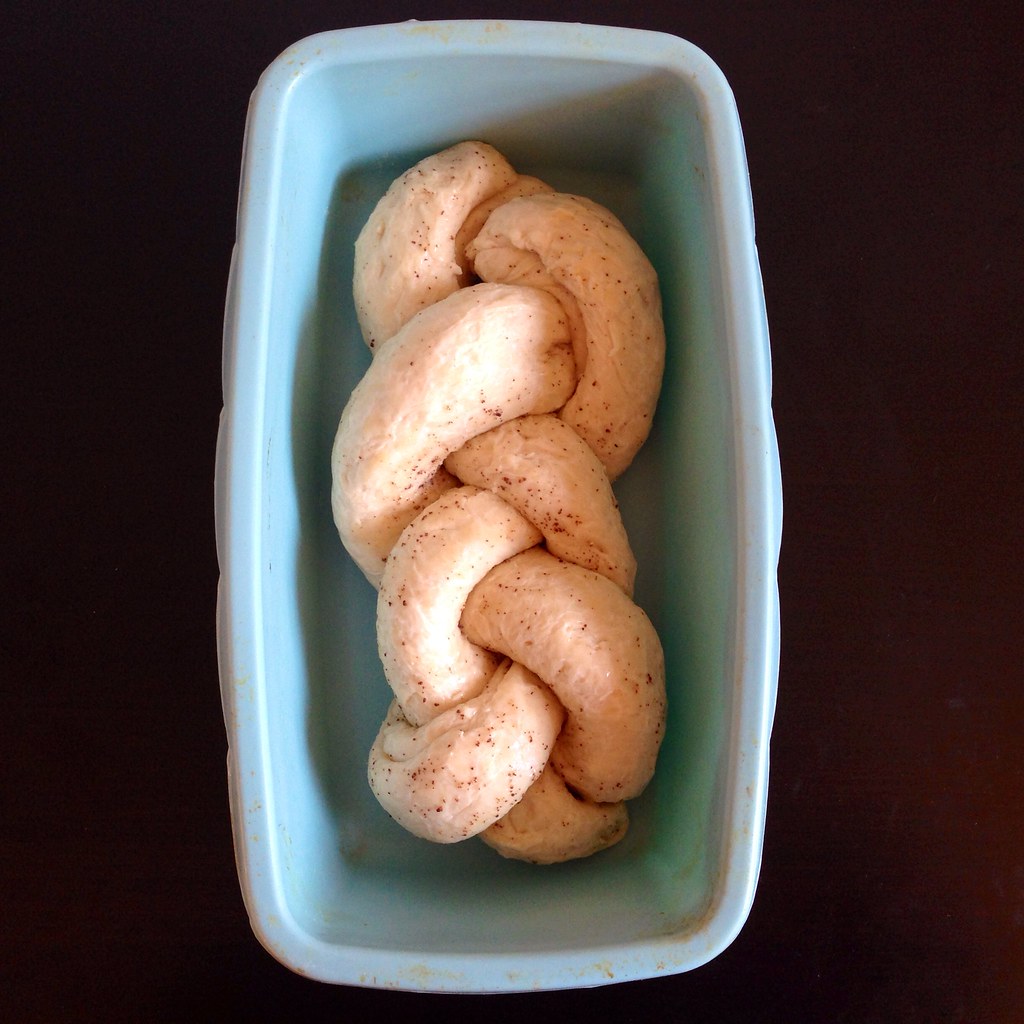
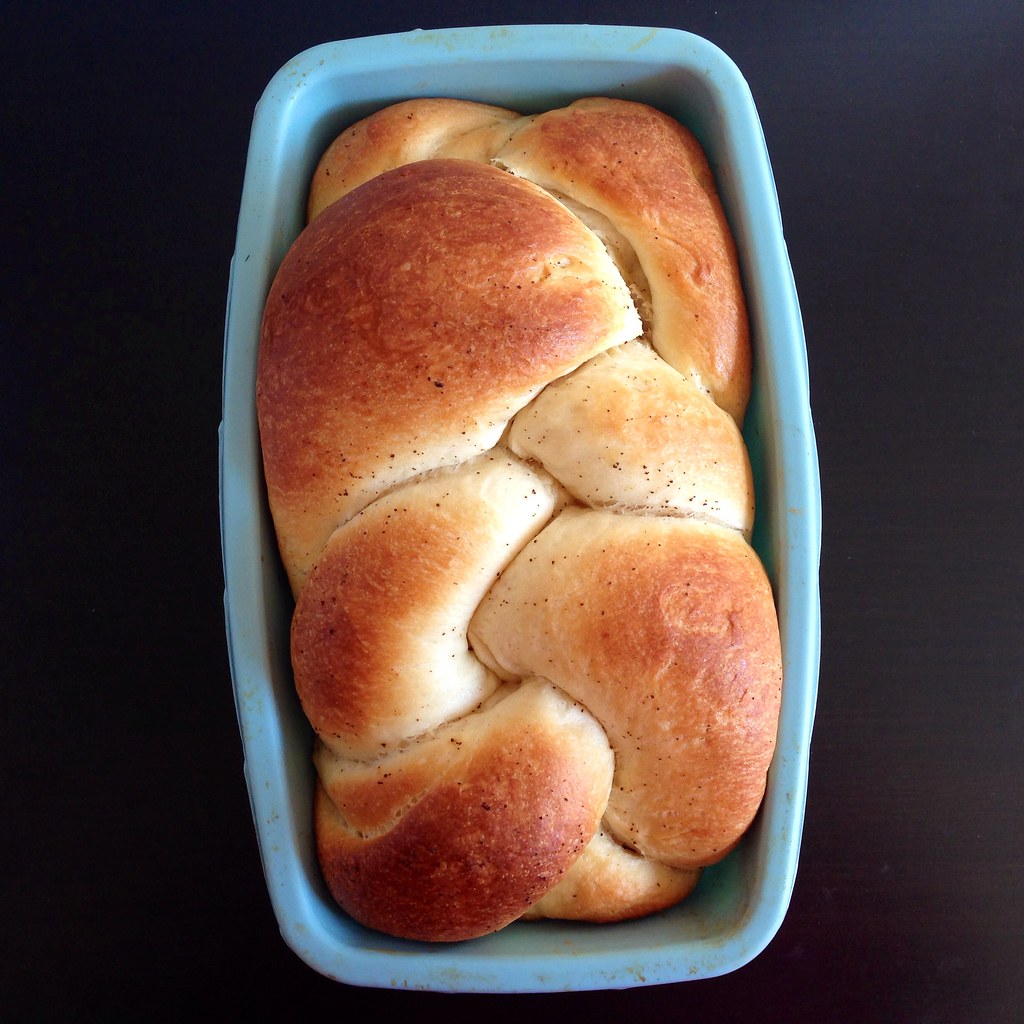
Variation #2:  If you want to make a braided loaf, after brushing on the butter and salt, roll each of the portions lengthwise into a long snake.  Braid the three snakes, tuck the ends underneath, and set into a loaf pan.

https://www.flickr.com/photos/joyosity/15108865578/

Variation #3:  For the taro swirl bread, shape the dough the traditional way, but instead of brushing with butter and salt, spread a thin layer of sweetened taro paste on top of the long oval before rolling up into a spiral.

https://www.flickr.com/photos/joyosity/15108653109/

At this point, you can freeze the shaped dough if you want and just let it come to room temperature before moving on when you're ready to bake the bread.

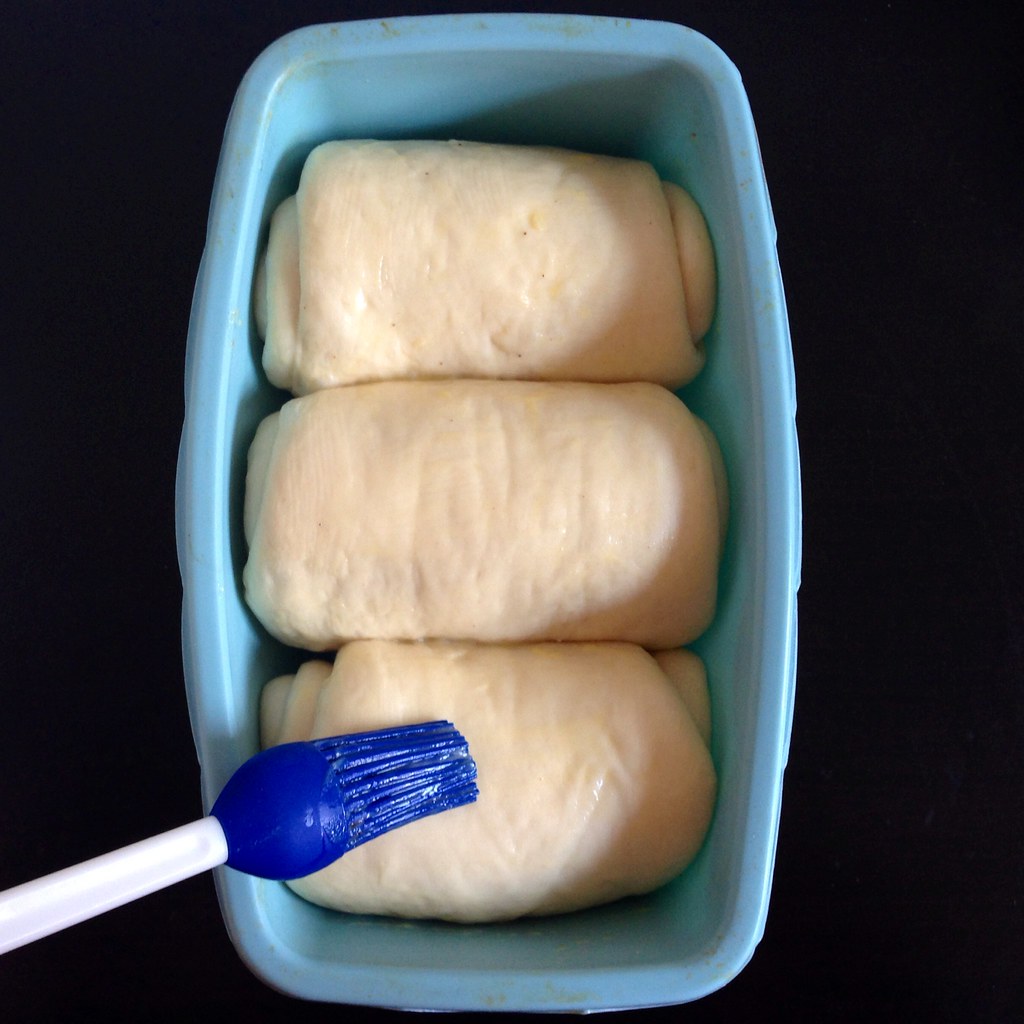
Preheat the oven to 360°F.  Let the dough proof to 80% full (not doubled, which would be 100%); this will probably take 60-90 minutes.  Make an egg wash by beating the egg with a tablespoon of water.  Once the dough is proofed, brush the top with the egg wash and cover with aluminum foil.  Bake for 20 minutes, then remove the foil and back another 10-20 minutes until golden brown on top.

https://www.flickr.com/photos/joyosity/15108738410/

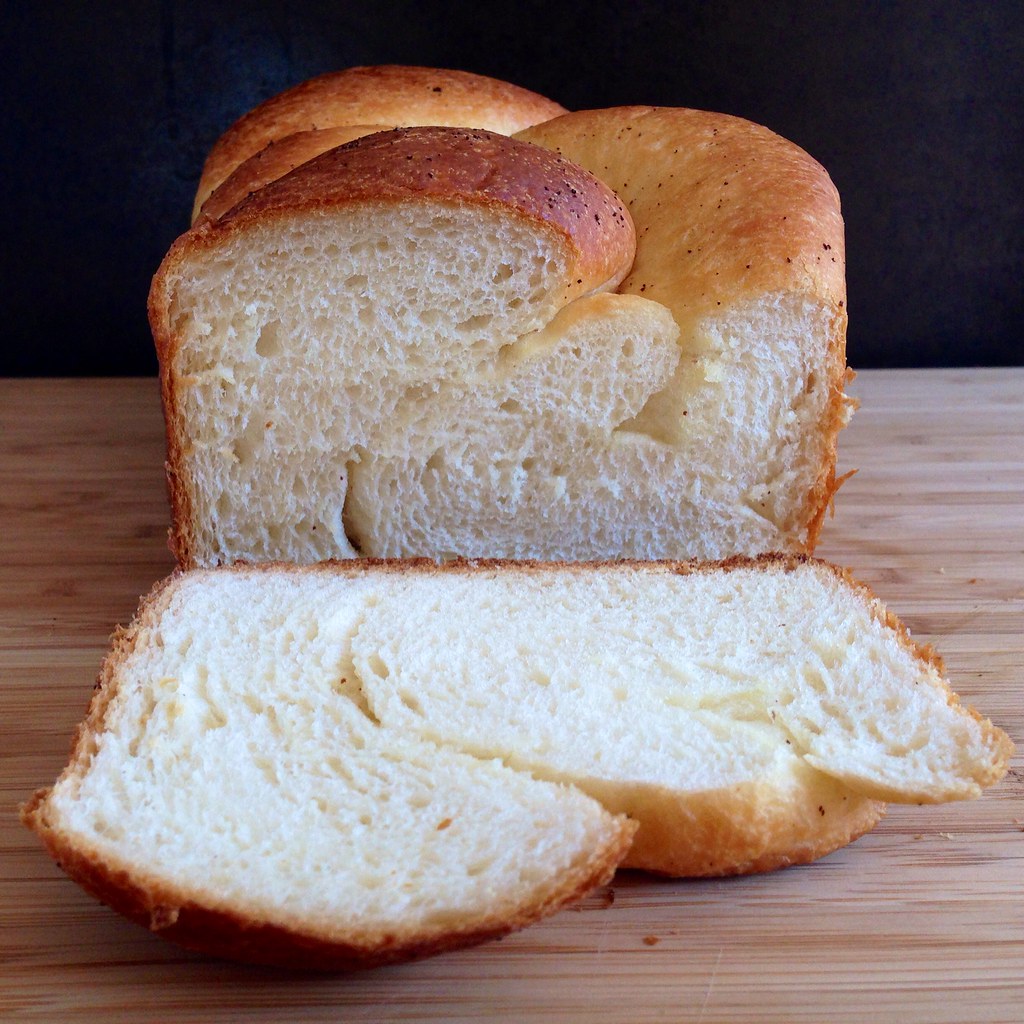
While the braided loaf turned out pretty well, I was a little disappointed with the final look of the traditional loaf (see the second picture from the top).  I think since I used a flexible silicon loaf pan, the bread expanded outwards instead of just up so it ended up not rising as high as I would've liked it to.  However, I liked the texture of the traditional loaf more because if you look at the cross sections of the two loaves, the traditional one has a much fluffier, almost stringy (in a good way) consistency.  This is due to the way it is shaped, hence, the reason it is more traditional.

I also noticed that the bottom of my first loaf (third picture down) was pretty brown by the time I took it out of the oven, so for my next loaf I baked it on top of one of those AirBake cookie sheets, and it turned out much better.

https://www.flickr.com/photos/joyosity/15108741120/

Next:  Ribollita (Tuscan Bread Soup)
Previously:  Ginger Scallion Lobster Buns
Last Year:  Sweet Corn Ice Cream with Black Raspberry Swirl

Tuesday, August 26, 2014

Crispy Skinned Salmon Teriyaki

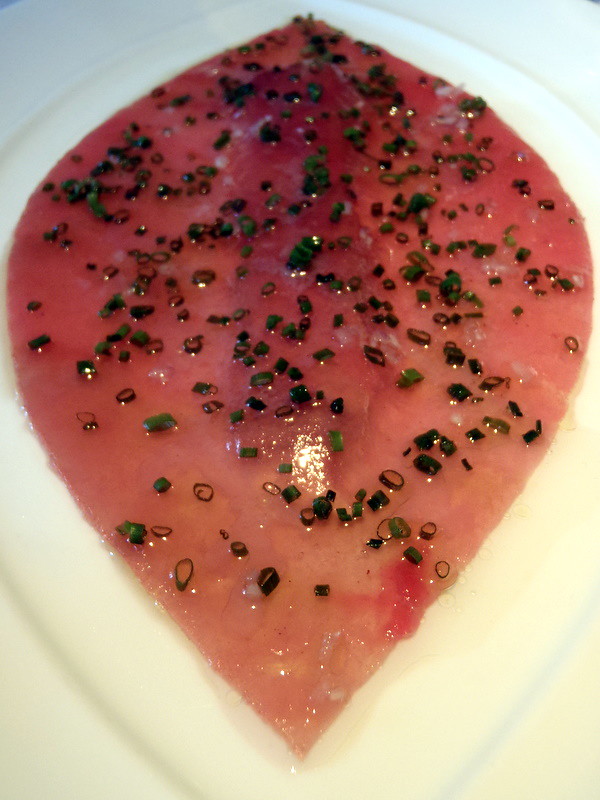
The other best meal I've had in my life (besides lunch at L'Arpège) was at Eric Ripert's Blue at the Ritz Carlton on Grand Cayman.  I ordered the tasting menu, and course after course of the best seafood I'd ever had were brought out to me starting with his signature Tuna Foie Gras.
https://www.flickr.com/photos/joyosity/4870169683/in/set-72157624669411682

I'm usually not a fan of foie gras not only because of the animal cruelty behind it, but also because I just don't really think it lives up to the hype.  But I'll admit, that dish was the first time I liked foie gras.  


Sadly, I've never been to Ripert's outpost in New York, La Bernardin, but I will gladly try his genius recipe for making crispy-skinned fish.  The technique is surprisingly simple and uses a secret ingredient:  Wondra flour.  If you can't find this in your supermarket, you can substitute with all-purpose flour or fine cornmeal.  

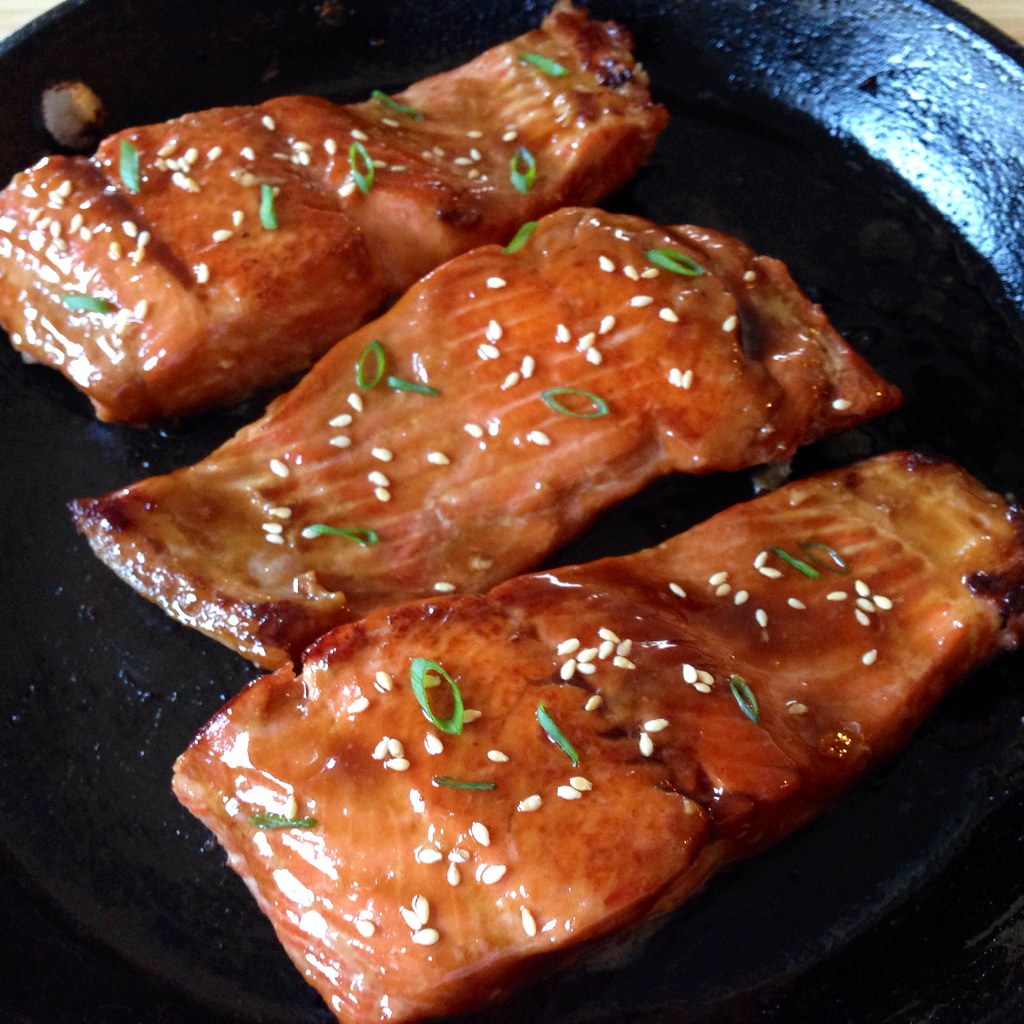
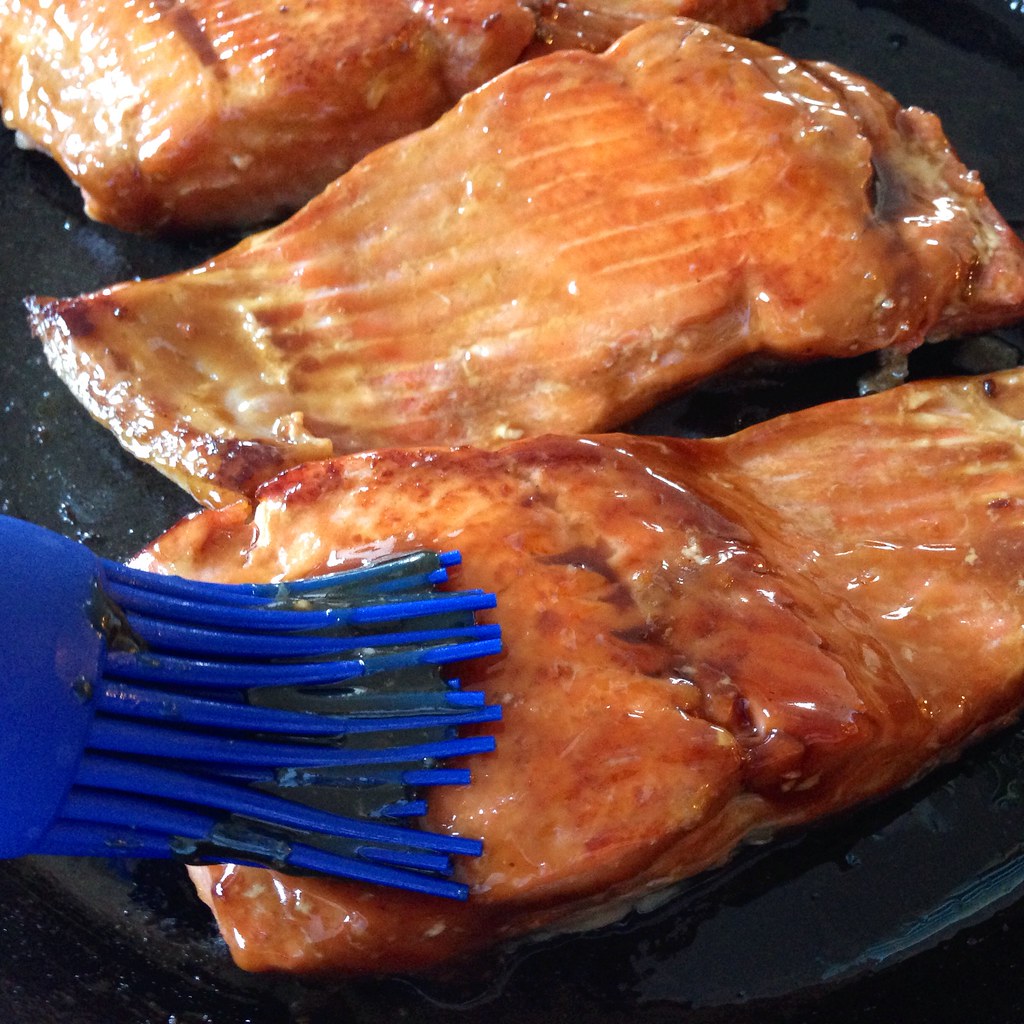
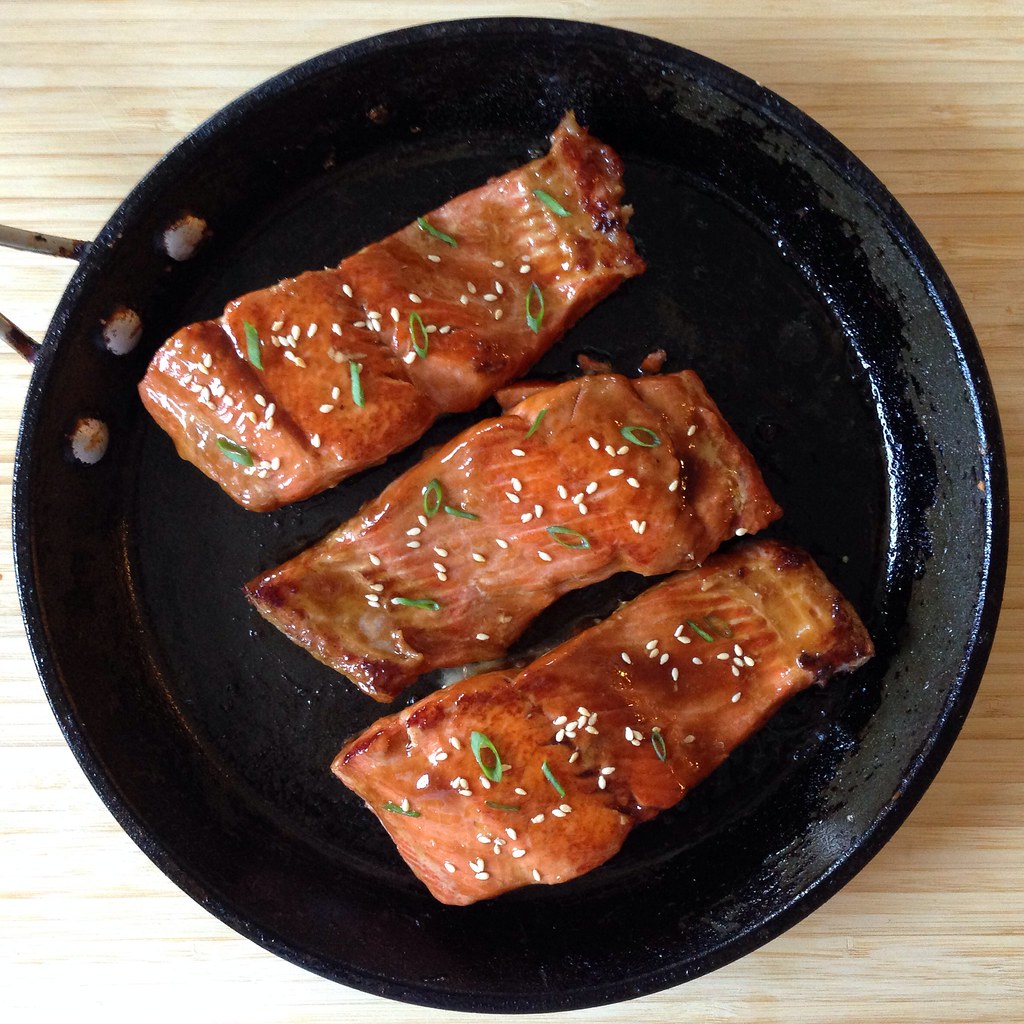
I decided to take the recipe a step further and marinate the salmon first and then slather it with some homemade teriyaki sauce at the end.  I liked this technique because instead of a dry slab of salmon meat topped with a corn syrup sweetened soy sauce, you get a moist, flavorful fillet of salmon with a crispy skin. 

https://www.flickr.com/photos/joyosity/14767060278/

Crispy Skinned Salmon Teriyaki (adapted from Food52)
serves 4

4 six oz. skin-on salmon fillets
1/4 cup soy sauce
1/4 cup mirin
1/4 cup sake or rice wine
1 tablespoon sugar
1 teaspoon cornstarch mixed in 1 tablespoon water
1 tablespoon canola oil
Wondra flour for dusting
Chopped scallions and sesame seed for garnishing

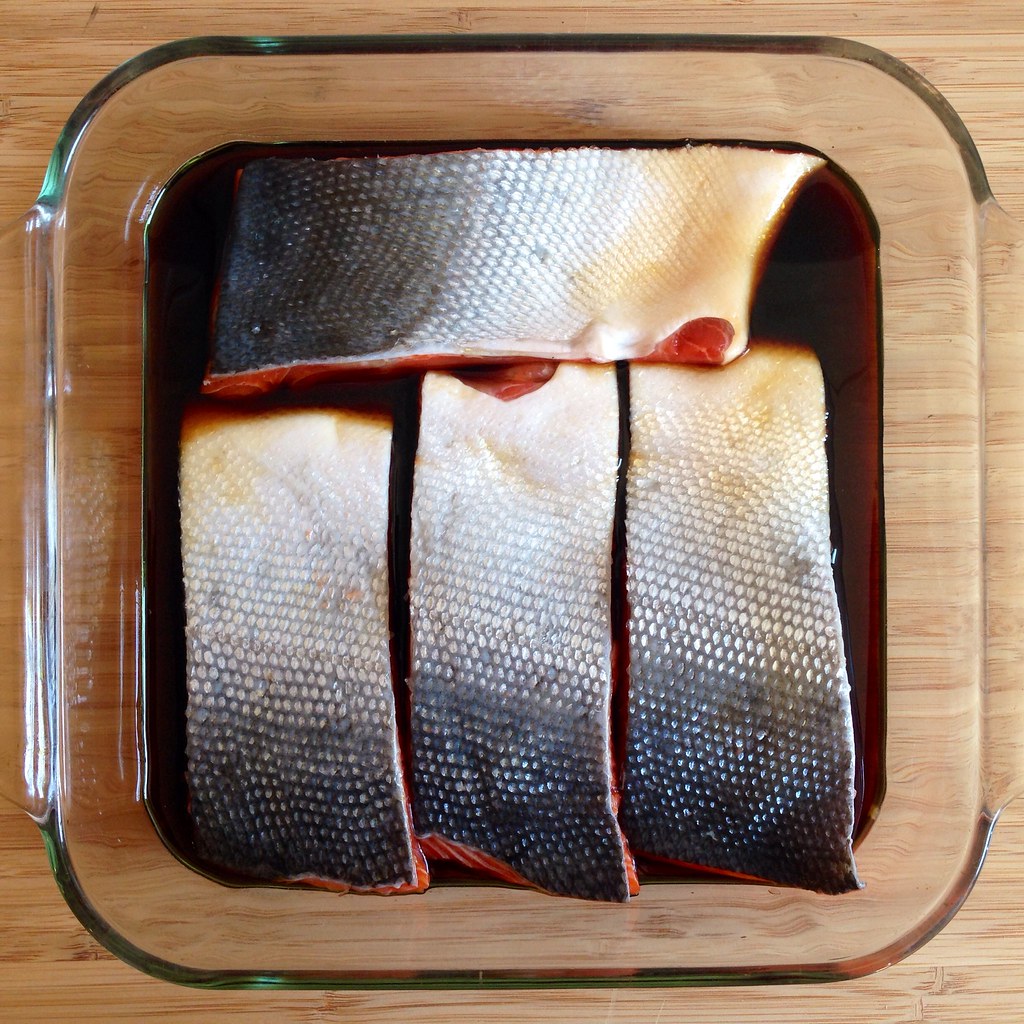
Mix together the soy sauce, mirin, sake, and sugar and heat in the microwave on high for a minute.  Stir until the sugar has completely dissolved.  Transfer to a small baking dish and add the salmon fillets, skin side up.  Cover and marinate in the refrigerator for 30 minutes to overnight.

https://www.flickr.com/photos/joyosity/14950565201/

Preheat the oven to 400°F. 

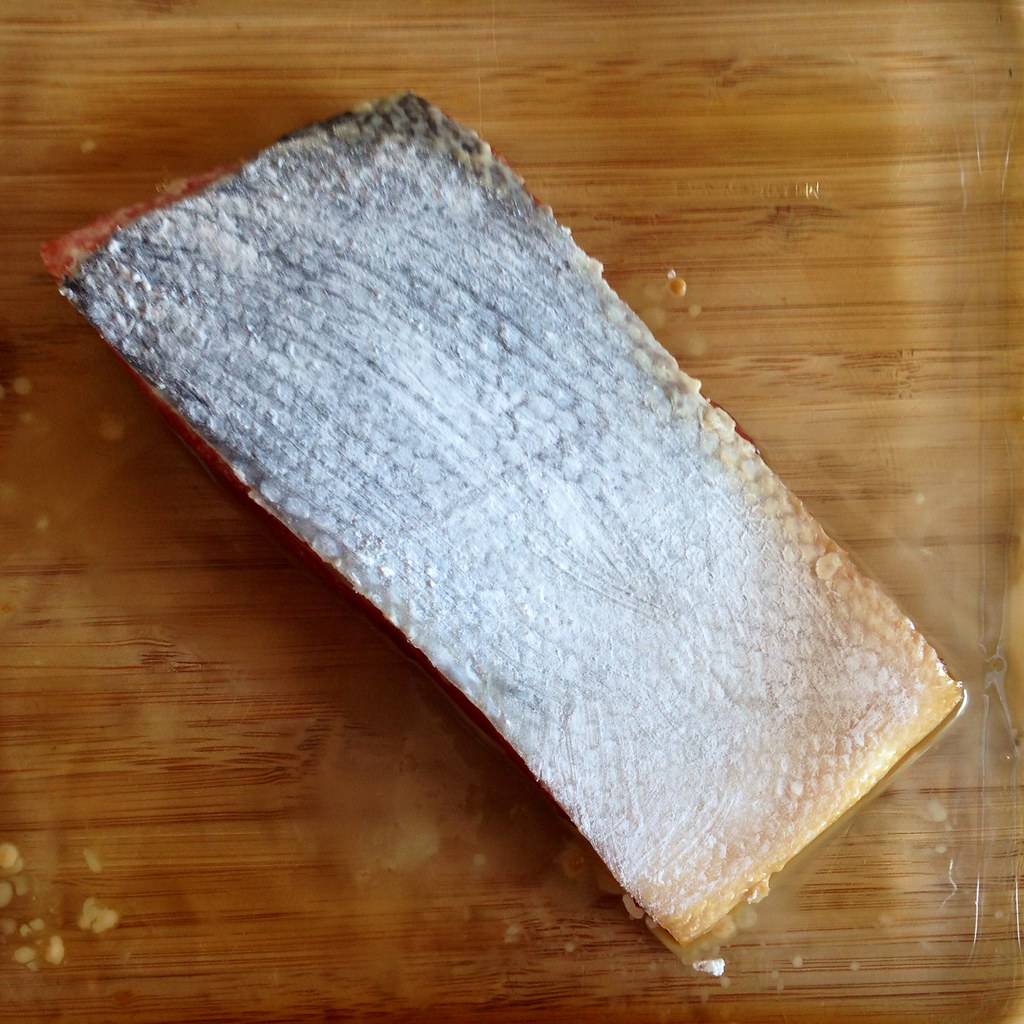
Remove the salmon from the baking dish and reserve the marinade.  Dry the skin with a paper towel and dust with Wondra flour, blowing off the excess.

https://www.flickr.com/photos/joyosity/14953327742/

Pour the marinade into a small saucepan and heat on medium until it starts to simmer.  Add the cornstarch slurry and stir until the teriyaki sauce thickens.  Remove from heat and set aside.

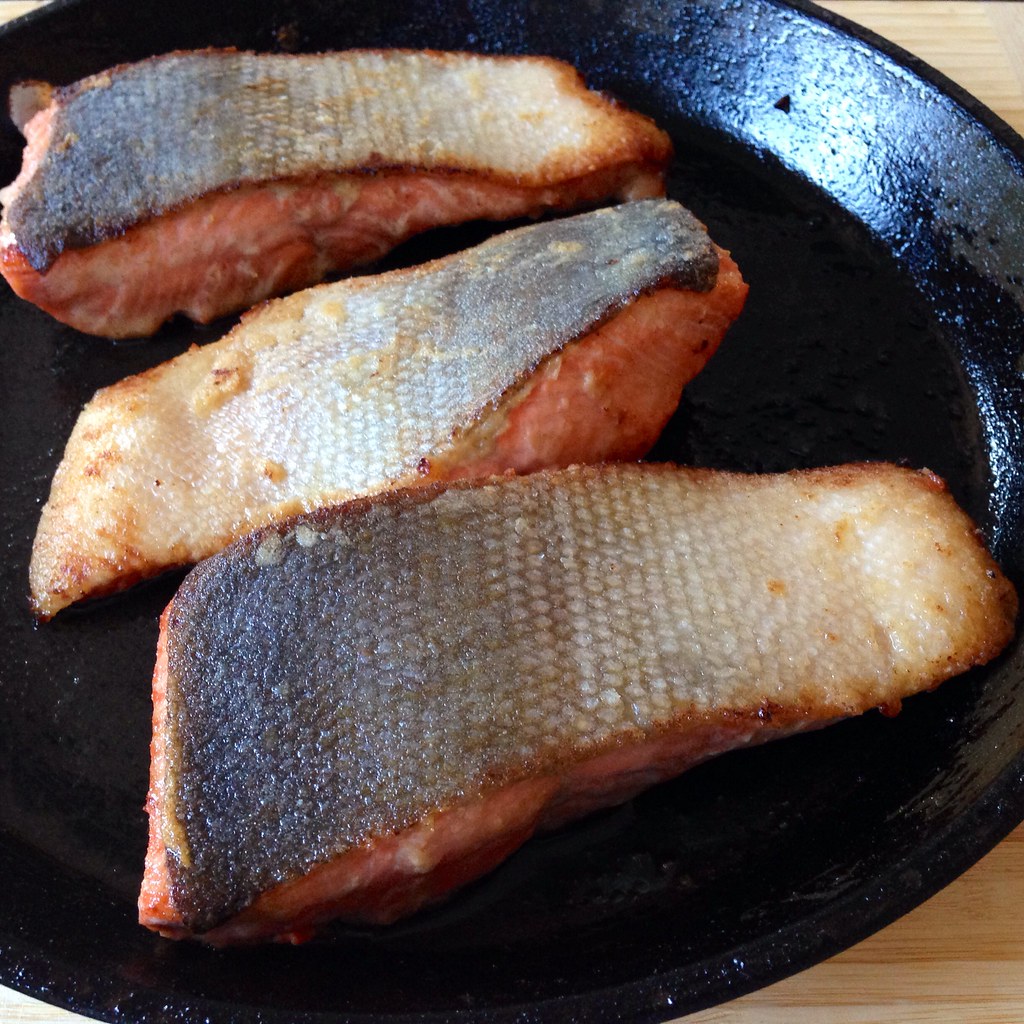
Heat the oil in a large, oven- and flame-proof sauté pan on the stovetop until the oil is very hot, but not smoking.  Put the fish in the pan, skin side down, and press down on the fish with a spatula. Sear on the stovetop over medium heat until golden brown on the bottom, about 3 minutes. 

https://www.flickr.com/photos/joyosity/14953679585/

Turn the fish over, put the pan in the oven, and cook another 2 to 3 minutes, until a metal skewer can be easily inserted into the center of the fillet and, if left for 5 seconds, feels just warm when touched to your lip. 

https://www.flickr.com/photos/joyosity/14930679306/

Remove from the oven, turn the fillets over again, and brush with the teriyaki sauce.  Garnish with chopped scallions and sesame seeds and serve immediately.

https://www.flickr.com/photos/joyosity/14953334332/

Next:  Salt and Pepper Tofu
Previously:  Bill Smith's Atlantic Beach Pie
Last Year:  Mozzarella Stuffed Arancini (Risotto Balls)

Friday, March 7, 2014

Miso-Glazed Eggplant

It seems like a running theme in the last couple of posts has been how I've used up vegetables from my Boston Organics deliveries, so here's another one.

http://www.flickr.com/photos/joyosity/12865358143/

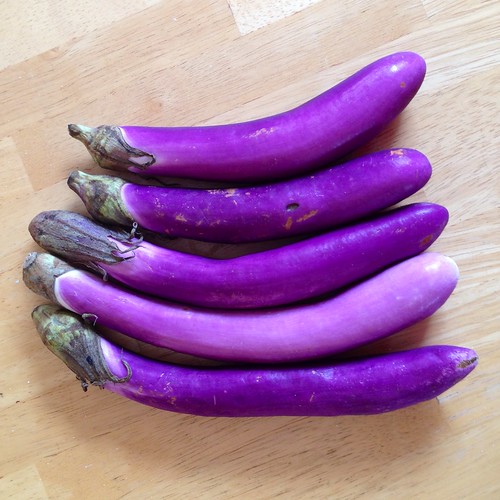
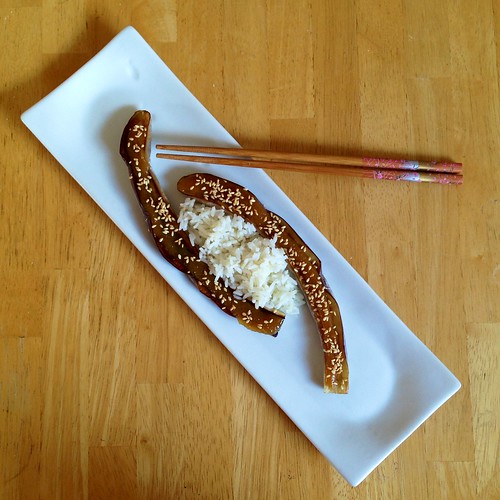
I made this back in August, when eggplants were still in season, and I got these lovelies in my delivery.  I was inspired by Nobu's eggplant with miso, but instead of frying the eggplants first, I roasted them in the oven.  The ingredients for the glaze are the same as for the marinade used for Nobu's miso-marinated black cod, just different proportions since you want more of a paste for this recipe.

http://www.flickr.com/photos/joyosity/12865717234/

Miso-Glazed Eggplant
serves 2

5 small Japanese eggplants
Canola oil
1/4 cup white miso
2 tablespoons sugar
2 tablespoons mirin
2 tablespoon rice wine
Toasted sesame seeds

Preheat the oven to 350°F.

http://www.flickr.com/photos/joyosity/12865284385/

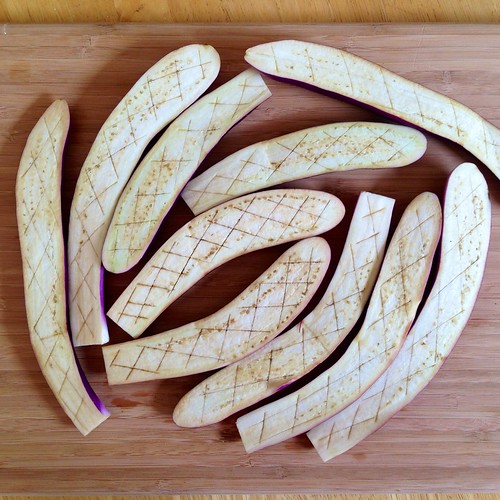
Cut off the top of each eggplant and slice in half, lengthwise.  Carefully cut crosshatches into the flesh of the eggplants, but do not cut all the way through.  Place the eggplants skin side down on a baking sheet and brush the tops with some oil.  Bake for about 8 minutes, until the flesh starts to become tender.  Remove the eggplant from the oven and set your oven to broil.

In a small saucepan, over low heat, combine the miso, sugar, mirin, and rice wine.  Whisk until the sugar dissolves and the sauce begins to thicken.  Remove from heat and allow to cool slightly.

http://www.flickr.com/photos/joyosity/12865288795/

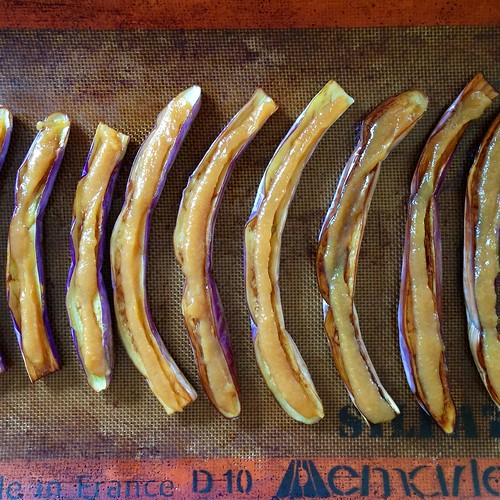
Top each eggplant liberally with the miso glaze.  Place under the broiler until browned and bubbly, just a few minutes. 

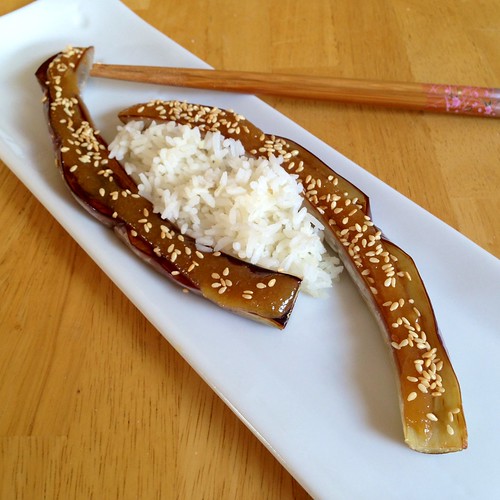
Sprinkle with toasted sesame seeds and serve with rice.

http://www.flickr.com/photos/joyosity/12865374653/

Next:  Dan Bing (Taiwanese Egg Crepe)
Previously:  Mushroom Marsala Pizza
Last Year:  Happiness Cake
Four Years Ago:  Momofuku Milk Bar's Crack Pie
Five Years Ago:  French Red Onion Soup