Wednesday, July 31, 2013

Cold Soba Noodle Salad with Baked Tofu and Edamame


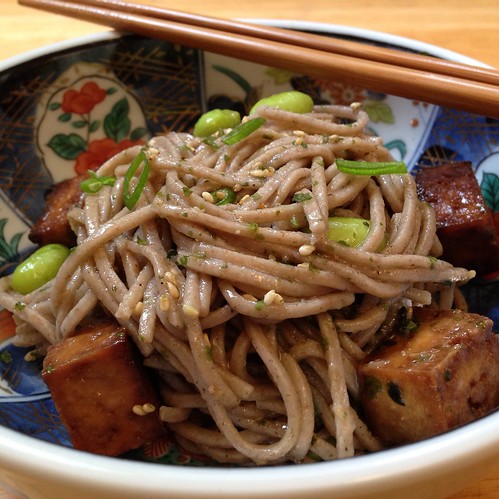
Since the Japan Night dinner was in the middle of a heat wave, we decided to make a cold soba noodle salad with baked tofu and edamame for the main entree.  For the actual event, we bought pressed tofu and marinated and baked that, but when I tested the recipe at home, I first pressed my own tofu.

To do this I first drained a package of firm tofu (you can also use extra-firm).  Then I lined the bottom of a bowl wide enough to fit the tofu in with paper towel, placed the tofu on top of the paper towel, and topped the tofu with another layer of paper towel.  On top of that I placed another bowl and put some heavy cans in it.  After 15 minutes you should see a significant amount of water at the bottom of the bowl.  I usually drain this off and replace the (completely wet at this point) paper towels and keep pressing for another 15 minutes of so.

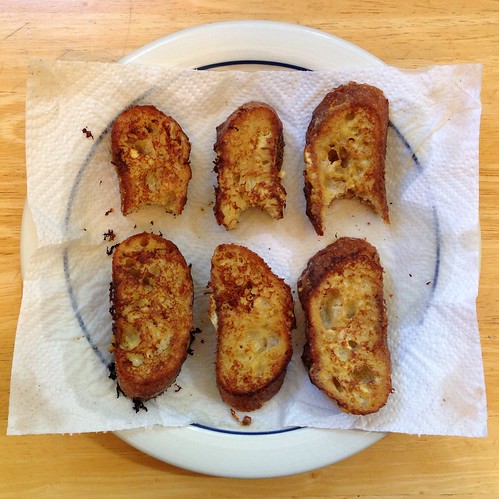
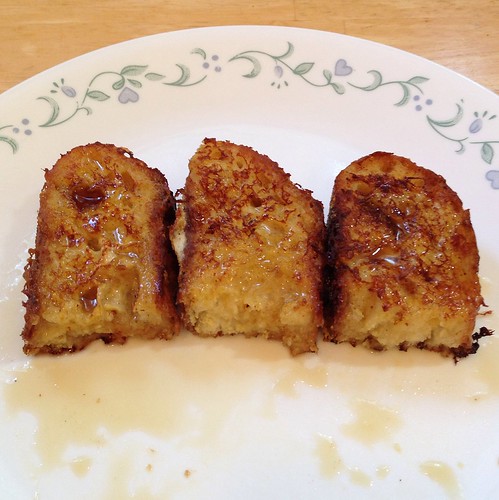
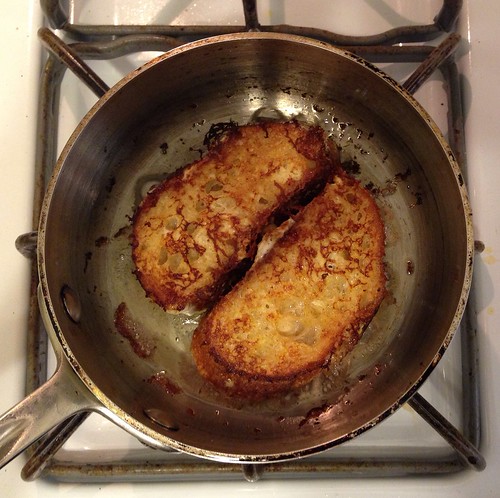
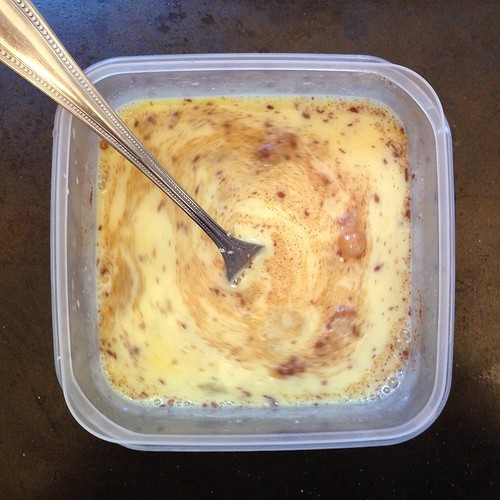
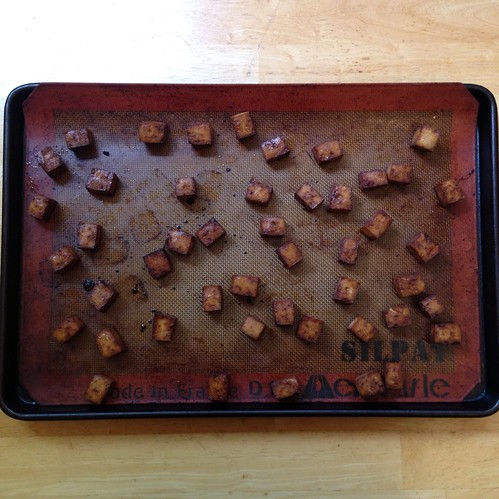
The process of pressing the tofu removes a lot of the water in it so when you marinate it, it will soak up a lot more flavor.  I marinated the tofu in a mixture of soy sauce, sesame oil, mirin, honey, and crushed garlic.  After a 30 minute soak in the marinade, the tofu gets baked for about 40 minutes and develops a nice crispy crust while maintaining a soft, almost custard-y center.  For this recipe I cut the tofu into half-inch cubes before marinating them so they were almost like croutons, but when I make baked tofu to snack on, I'll usually keep them in bigger slabs.


Cold Soba Noodle Salad with Baked Tofu and Edamame
makes 4 servings

For the baked tofu:
16 oz. firm or extra-firm tofu
1/4 cup soy sauce
2 tablespoons mirin
1 tablespoon honey
1 tablespoon sesame oil
1 clove garlic, crushed

Press the tofu for 30 minutes (directions above).  Cut into half-inch cubes and place in a large Ziploc bag.

Mix together the soy sauce, mirin, honey, and sesame oil.  Add the crushed garlic clove and pour into the Ziploc bag, making sure that the marinade covers all sides of the tofu.  Marinate for 30 minutes, turning the bag over at least once.

Preheat the oven to 350ºF.  Cover a baking sheet with aluminum foil and spray with cooking spray or use a Silpat.


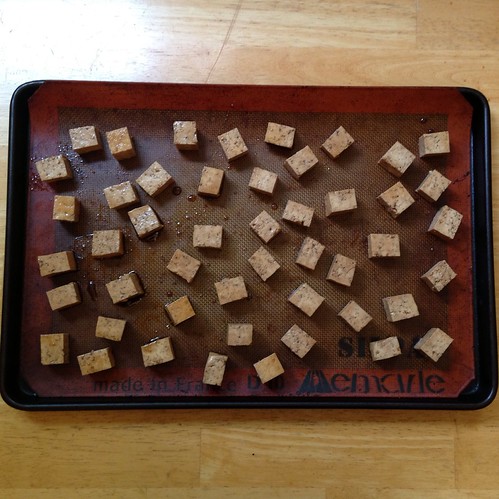
Remove the tofu from the bag, discard the garlic, and reserve the marinade for the dressing.  Spread the tofu evenly on the prepared baking sheet.  Bake for 10 minutes, then flip them over.  Continue baking and flipping every 10 minutes until the total baking time reaches 40 minutes.  Remove from oven and let cool.


For the soba noodle salad:
8 oz. soba noodles
2 tablespoons of the reserved marinade from above
1 tablespoon rice wine vinegar
1 tablespoon sesame oil
1/4 cup canola oil
Baked tofu (recipe above)
2/3 cup shelled edamame
4 Scallions, finely sliced
1 tablespoon toasted sesame seeds

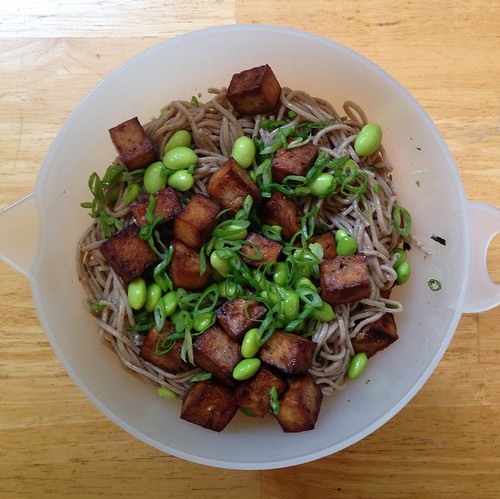
Cook the soba noodles according to the directions on the package.  When done, drain and rinse with plenty of cold water so that it cools down and doesn't stick.  Transfer noodles to a large bowl.


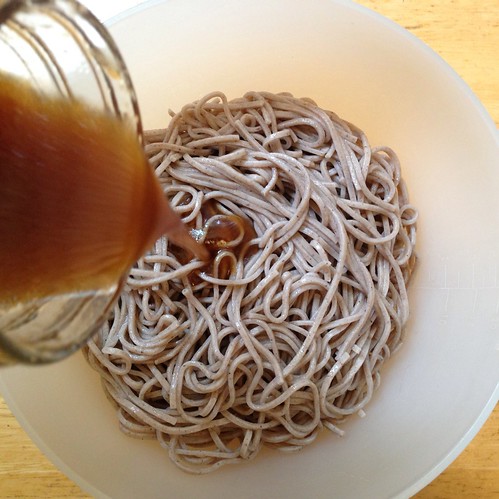
Mix together the reserved marinade, rice wine vinegar, sesame oil, and canola oil.  Pour over the noodles and toss with the baked tofu, edamame, sliced scallions, and sesame seeds.


For the actual event, we also added julienned carrots, red bell peppers, and cucumbers to the salad.


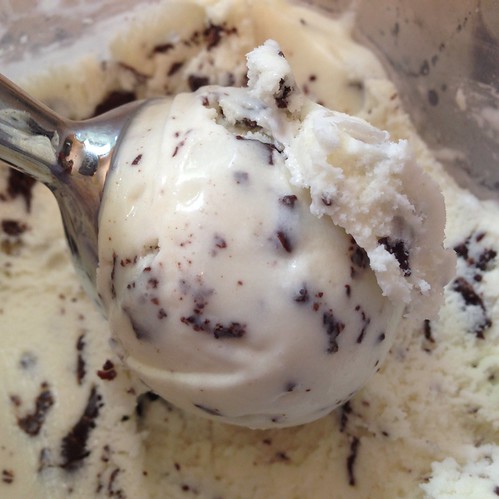
Next:  S'mores Brownie Ice Cream Sandwiches
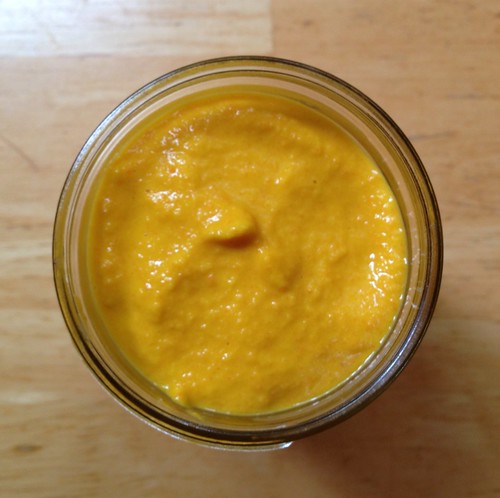
Previously:  Carrot Ginger Salad Dressing

Monday, July 29, 2013

Carrot Ginger Salad Dressing

A few weeks ago I was asked to help out with creating a menu for Japan Night, an event at my church where a missionary family was sharing about their vision for Japan.  We definitely wanted something that was Japanese, or at lease Asian-inspired, and would be easy enough for a small team to cook for upwards of 100 guests in a couple of hours.  After testing a few recipes at home, we ended up with the following menu:

Green Salad with Carrot Ginger Dressing
Vegetable Spring Rolls

The spring rolls we bought frozen and just baked them in the oven, but everything else was pretty much made from scratch!


The carrot ginger dressing is the same bright orange dressing you often get at sushi restaurants before the start of a meal.  I never really knew what was in it and had guessed some type of citrus and probably soy, but in fact the main components are carrots, ginger, and miso!  This totally boggles my mind because I normally don't really like carrots or ginger (in a non-sweet dish) but I can't get enough of this dressing.  It must be the miso.  =)


Carrot Ginger Dressing (adapted from goop)
makes a little over a pint

1 large carrot, peeled and roughly chopped
1 large shallot, peeled and roughly chopped
2 tablespoons roughly chopped fresh peeled ginger
1 tablespoon sweet white miso
2 tablespoons rice wine vinegar
1 tablespoon roasted sesame seed oil
1/4 cup canola oil
2 tablespoons water


Pulse the carrot, shallot and ginger in a blender until finely chopped.


Scrape down the sides, add the miso, vinegar and sesame seed oil and whiz together. While the blender is going, slowly drizzle in the canola oil and the water.


The dressing will keep refrigerated in an air-tight container for about a week.


I like to eat this over butter lettuce, but we used a mesclun salad at Japan Night.


Next:  Cold Soba Noodle Salad with Baked Tofu and Edamame
Previously:  Backyard Mint Ice Cream with Dark Chocolate Freckles

Friday, July 26, 2013

Backyard Mint Ice Cream with Dark Chocolate Freckles


My first time making an ice cream based on Jeni's eggless ice cream recipes was this Peppermint Ice Cream with Peppermint Candy and Dark Chocolate.  The idea was a good one, but I wasn't very impressed with the outcome.  It didn't stop me from trying out her other recipes, though, or adapting them, and I can definitely say that I'm a happy convert to her eggless homemade ice cream recipes.

So when Paula gave me that bag of fresh picked mint from her backyard, I knew I wanted to try making Jeni's Backyard Mint Ice Cream.  I've had the fresh mint ice cream from Toscanini's before, so I was pretty sure I knew what to expect:  a slightly more herbal, even grassy, pure mint ice cream.  And I decided I'd try to add some "dark chocolate freckles", which are basically made by streaming melted chocolate into the churning ice cream.  I've kind of shied away from trying this because even though my ice cream maker has it's own condenser (so I don't have to worry about the ice cream base melting while churning), the opening for add-ins is not that easy to access.  This is probably the only complaint I have about my Lello gelato maker.


Backyard Mint Ice Cream with Dark Chocolate Freckles (from Jeni's Splendid Ice Creams at Home)
makes about 1 quart

2 cups whole milk
1 tablespoon plus 1 teaspoon cornstarch
1 ½ ounces (3 tablespoons) cream cheese, softened
1/8 teaspoon fine sea salt
1 ¼ cups heavy cream
2/3 cup sugar
2 tablespoons light corn syrup
A large handful of fresh mint from your backyard or a farmers' market, leaves roughly torn into small pieces
4 oz. dark chocolate, chopped

Mix about 2 tablespoons of the milk with the cornstarch in a small bowl to make a smooth slurry. Whisk the cream cheese and salt in a medium bowl until smooth. Fill a large bowl with ice and water.

Combine the remaining milk, the cream, sugar, and corn syrup in a 4-quart saucepan, bring to a rolling boil over medium-high heat, and boil for 4 minutes. Remove from the heat, and gradually whisk in the cornstarch slurry.

Bring the mixture back to a boil over medium-high heat and cook, stirring with a heatproof spatula, until slightly thickened, about 1 minute. Remove from heat.


Gradually whisk the hot milk mixture into the cream cheese until smooth. Add the mint. Pour the mixture into a 1-gallon Ziploc freezer bag and submerge the sealed bag in the ice bath. Let stand, adding more ice as necessary, until cold, about 30 minutes.

Refrigerate to steep for 4-12 hours.


Strain out the mint. Pour ice cream base into the frozen canister of your ice cream maker and begin to spin the ice cream.

Meanwhile, melt the chocolate in a double boiler.  Remove from the heat and let cool until tepid but still fluid.


When the ice cream is thick and creamy and almost finished, drizzle the melted chocolate slowly through the opening in the top of the ice cream machine and allow it to solidify and break up in the ice cream for about 2 minutes.


Pack the ice cream into a storage container, press a sheet of parchment directly against the surface, and seal with an airtight lid. Freeze in the coldest part of your freezer until firm, at least 4 hours.


As you can see in the picture above, the chocolate hardens into small, amorphous flecks, but what you can't see is how thin and crispy the chocolate is.  It's exactly like eating an After Eight mint and just as addicting.  It's so good I willfully ignore the pain each bite causes my sensitive teeth.  I may or may not have stood at my kitchen counter, scooping this ice cream straight from the tub into my mouth.  I think it's the first ice cream I've made in a long time that I will finish all by myself!  ^_^

Next:  Carrot Ginger Salad Dressing
Previously:  Oven-Fried Mac 'n' Cheese Pizza

Wednesday, July 24, 2013

Oven-Fried Mac 'n' Cheese Pizza

I ended up with some leftover macaroni and cheese, so I thought I'd try to make a version of Za's Mac 'n' Cheese pizza at home.  Their version adds some caramelized onions to the macaroni and cheese and is baked in crust more similar to a pan pizza than the thin-crust pizzas I've been making lately.

To try to recreate that crust, I rolled out the dough instead of stretching it thin and decided to try making the pizza using the oven-fried method from the Modernist Cuisine at Home cookbook.  Warning:  this involves maneuvering a soft, sticky mass of dough topped with macaroni and cheese into a smoking hot pan of oil.  Proceed at your own risk.


Oven-Fried Mac 'n' Cheese Pizza
makes 1 personal pan pizza

8 oz. ball of pizza dough
3/4 cup leftover macaroni and cheese
2 tablespoons caramelized onions
1 tablespoon bread crumbs
Oil for frying
Tabasco or Frank's hot sauce (optional)

Preheat the oven to 550°F.


On a floured surface, roll the pizza dough out to a 10" circle.


Top with the macaroni and cheese, caramelized onions, and bread crumbs.

Add enough oil to completely coat the bottom of a 10" all-metal frying pan, the kind you can put in the oven without any plastic parts melting.  Heat on high until the oil just starts to smoke.


Carefully slide the pizza into the pan using a pizza peel or a flexible cutting board.  Immediately transfer the pan to the oven.  Bake for 5 minutes.  After 5 minutes, turn the oven to broil and broil for two minutes.  Remove from the oven and allow to cool slightly before cutting and serving.


By keeping the pizza dough a little thicker and frying it in the pan, the crust becomes stable enough to stand up to heavier toppings like macaroni and cheese.  And even though you'll get a nice crispy crust on the bottom, you'll be surprised at how much oil is left in the pan, i.e. how little oil is absorbed by the pizza dough.


I like to add a little Tabasco or Frank's hot sauce on top just for an extra kick.


Next:  Backyard Mind Ice Cream with Dark Chocolate Freckles
Previously:  Martha Stewart's Perfect Macaroni and Cheese

Monday, July 22, 2013

Martha Stewart's Perfect Macaroni and Cheese

...And back to our regularly scheduled program!  What was left of my four foot baguette was now so stale that the only thing it was good for was bread crumbs, and what better way to use bread crumbs (other than with fried eggs) than to top macaroni and cheese!

I haven't always gotten the best results with recipes from Martha Stewart (e.g. the sugar cookie recipe I used for the rainbow cookies), but her recipe for macaroni and cheese is so tried and true that I had to use it.  This is pretty much a no-frills recipe:  straight up macaroni baked in a cheese sauce with only some buttered bread crumbs for garnish.  I was tempted to add caramelized onions, herbs, and at the very least, use some bacon fat in there, but I resisted (mostly because I was bringing this to a potluck and there were going to be some vegetarians there).  The only change I made was that I used the last foot or so of my baguette instead of white bread for the bread crumbs.


Martha Stewart's Perfect Macaroni and Cheese (adapted from Martha Stewart)
makes 12 servings

2 cups bread crumbs, diced into 1/4- to 1/2-inch cubes
8 tablespoons (1 stick) unsalted butter, plus more for dish
5 1/2 cups milk
1/2 cup all-purpose flour
2 teaspoons kosher salt
1/4 teaspoon freshly grated nutmeg
1/4 teaspoon freshly ground black pepper
1/4 teaspoon cayenne pepper
4 1/2 cups (about 18 ounces) grated sharp white cheddar
2 cups (about 8 ounces) grated Gruyere or 1 1/4 cups (about 5 ounces) grated pecorino Romano
1 pound elbow macaroni

Heat the oven to 375ºF. Butter a 9"x12" baking dish; set aside.


Place bread pieces in a medium bowl.  Melt 2 tablespoons butter, pour over the bread, and toss. Set the breadcrumbs aside.

In a medium saucepan set over medium heat, heat milk. Melt remaining 6 tablespoons butter in a high-sided skillet over medium heat. When butter bubbles, add flour. Cook, stirring, 1 minute.

Slowly pour hot milk into flour-butter mixture while whisking. Continue cooking, whisking constantly, until the mixture bubbles and becomes thick.


Remove the pan from the heat. Stir in salt, nutmeg, black pepper, cayenne pepper, 3 cups cheddar, and 1 1/2 cups Gruyere or 1 cup pecorino Romano. Set cheese sauce aside.


Fill a large saucepan with water. Bring to a boil. Add macaroni; cook 2 to 3 fewer minutes than manufacturer's directions, until outside of pasta is cooked and inside is underdone. (Different brands of macaroni cook at different rates; be sure to read the instructions.)


Transfer the macaroni to a colander, rinse under cold running water, and drain well. Stir macaroni into the reserved cheese sauce.


Pour the mixture into the prepared casserole dish. Sprinkle remaining 1 1/2 cups cheddar and 1/2 cup Gruyere or 1/4 cup pecorino Romano; scatter breadcrumbs over the top.


Bake until browned on top, about 30 minutes. Transfer dish to a wire rack to cool for 5 minutes; serve.


Even without any additions, I loved the result.  The cheddar and pecorino were sharp and strong, and the cayenne pepper added just the right amount of kick.  By undercooking the pasta by 2-3 minutes and finishing it up in the oven with the cheese sauce, the macaroni stays nice and firm and not mushy at all.  And the bread crumbs add a good amount of crunch for a change in texture.  Still, I think a little bacon fat in there would have been lovely.  ^_^


If you happen to end up with any leftovers, you can use them to make an oven-fried mac 'n' cheese pizza!

Next:  Oven-Fried Mac 'n' Cheese Pizza
Previously:  Vanilla Sugar Lemonade and Mint Lemonade Slushies

Friday, July 19, 2013

Vanilla Sugar Lemonade and Mint Lemonade Slushies

I had my mac and cheese post all ready to go, but it's just way too hot today to think about turning on the oven or the stove.  So here's another post I've been working on that seems a better match for today's weather.


A couple of weeks ago, Food52 posted a video to show how to make The Best Lemonade You've Ever Had.  Strangely, there was no recipe attached, just a method involving rubbing the lemons in the sugar to scent them before making a simple syrup out of the sugar.  You had to dig into the comments to find that they recommend using equal volumes of lemon juice and simple syrup and that the simple syrup was made with equal volumes of the lemon scented sugar and water.


I tried the method, and on a whim, decided to use vanilla sugar* instead of plain sugar.  Wow.  This was definitely the best lemonade I had ever had.  It's been over a week since I made it, and I've made it several times since then, but I still can't put into words what makes it so great.  The vanilla just elevates the lemonade to another level but in a subtle, understated way.


Vanilla Sugar Lemonade (adapted from Food52)
makes 4 servings

2 large organic lemons, washed and dried
1/2 cup vanilla sugar*
Water


Place the sugar in a wide bowl.  One at a time, rub the outside of the lemons with the vanilla sugar.  Wipe off any sugar that remains on the lemons back into the bowl.


Roll the lemons on a hard surface to make juicing easier.  Slice the lemons in half and juice into a measuring cup.  I was able to get a little more than half a cup of juice.


Add more sugar if you want to match the volume of lemon juice.  Add an equal volume of hot water to the sugar and stir until dissolved to make a simple syrup.


Add the lemon juice and simple syrup to a pitcher or bottle.  Dilute with enough cold water to taste.  I add about 4 parts cold water to 1 part lemon juice/simple syrup solution.  It's still just the tiniest bit too strong for me to drink straight up but perfect once you add a few cubes of ice.  =)


*To make the vanilla sugar, I've been adding the spent vanilla bean pods to an air-tight container of sugar every time I make something that uses fresh vanilla beans.  After letting it sit there for a few days, the sugar absorbs the scent of the vanilla and becomes vanilla sugar!  You can use it in just about anything sweet:  cookies, cakes, ice cream, etc.


Then a couple of days ago I get a text from my friend Paula asking me if I wanted any of the mint she and her family had just picked from their backyard!  I immediately accepted even though I wasn't sure what I would do with it yet.  Then when I was making my third batch of lemonade in probably as many days, I started wondering if maybe I could rub the mint with the sugar and add some mint flavor to the lemonade that way.


So after rubbing the lemons in the sugar, I dropped in a handful of mint leaves and rubbed those all around.  I left the leaves in the sugar while pouring the hot water in and let it steep for a bit before straining out the leaves.  I found that I was able to extract a lot of the mint flavor this way without having to leave the mint leaves in the actual lemonade.  And if you really like the taste of mint, I'd recommend tearing the mint leaves up before adding them to the sugar to release even more oils.


To take it one step further, I decided to blend the mint lemonade with some ice to make a mint lemonade slushie, inspired by Ilene's post.


Yisss....

Next:  Martha Stewart's Perfect Macaroni and Cheese
Previously:  French Toast Face Off

Wednesday, July 17, 2013

French Toast Face Off

I was now down to a little over a foot-and-a-half left of my once four foot baguette, and the bread was now sufficiently stale to make French toast. But which French toast?

Molly from Orangette swears by frying her French toast in oil whereas the popular consensus is to use butter.  I decided to compare the two for myself, taking the extra step of browning the butter first for some added flavor.  And since I had some leftover bacon fat from making the BLTs, I figured I'd try frying some French toast in that as well.  What we have now, my friends, is a French Toast Face Off.


As you can see, isn't a lot of difference in the three visually.  But once I started eating them, there was a world of a difference.  The browned butter-fried French toast was the most unremarkable of the three.  It didn't taste bad, it just didn't shine, and I couldn't even really taste the browned butter (although that might just be me because I can almost never taste browned butter).


The winner of the three in terms of flavor was definitely the bacon fat-fried French toast.  This may come as no surprise since I love bacon, and you could definitely taste the smoky, salty flavor come through in full force here.


But the overall winner for me was the oil-fried French toast.  This was the only French toast that developed a really nice crispy crust while retaining a soft, custardy interior.  For me, texture trumped flavor.  And if I really wanted bacon flavor with my French toast, I could just, you know, eat it with bacon.  =)


French Toast (adapted from Orangette)
Serves 1-2

1 egg plus 1 egg yolk
1/2 cup milk
1/2 tablespoon sugar
1/2 teaspoon vanilla extract
1/8 teaspoon salt
Pinch of freshly ground nutmeg
6 to 8 day-old baguette slices, cut on the diagonal, about 3/4 inch thick
Canola or other flavorless oil
Pure maple syrup, for serving


Whisk together the first five ingredients in a wide, shallow bowl.

Place a large skillet, preferably cast-iron, over low to medium heat, and add enough oil to completely cover the bottom of the skillet.


Two or three at a time, add the bread slices to the egg mixture in the bowl, allowing them to rest for a minute or two on each side. They should feel heavy and thoroughly saturated, but they should not be falling apart.


When the oil is hot, place the slices in the skillet. They should sizzle a bit, and the oil should bubble lightly around the edges of the bread; take care, however, that the oil is not too hot, lest the egg mixture burn.


Cook until the underside of each slice is golden brown, about 2 minutes. Turn the bread, and cook until the second side is golden, another 2 minutes or so.


Remove the bread from the skillet to a plate lined with a paper towel, allow to rest for 30 seconds or so, and serve immediately—with maple syrup, of course.

Next:  Vanilla Sugar Lemonade and Mint Lemonade Slushies
Previously:  Panzanella