Showing posts with label rice. Show all posts

Monday, August 13, 2018

Tomato and Eggs over Rice (Updated)


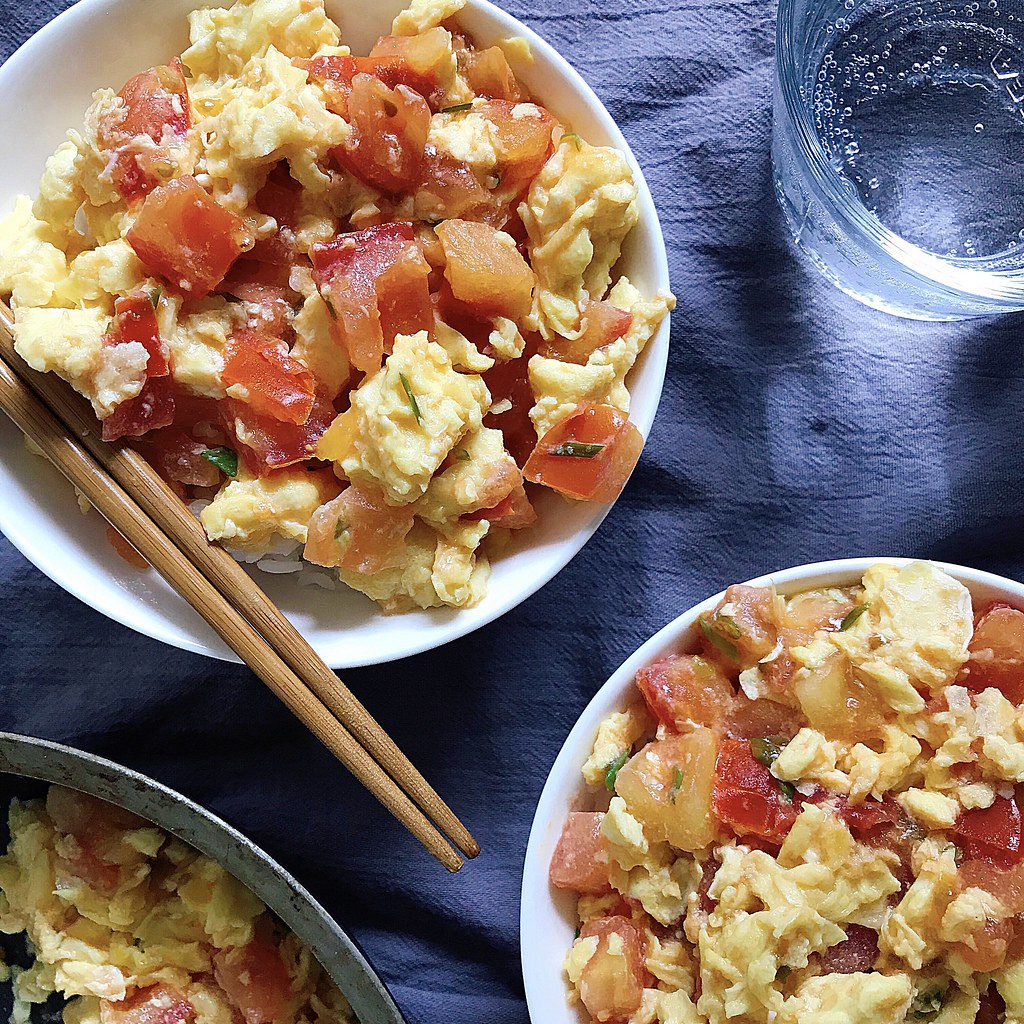
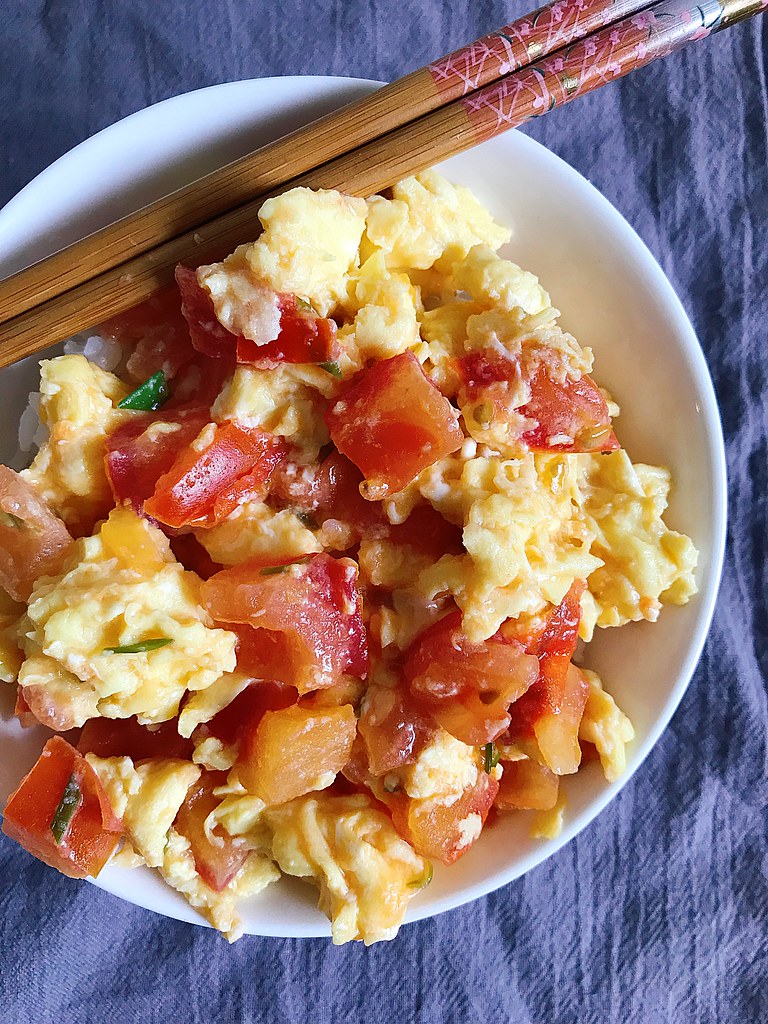
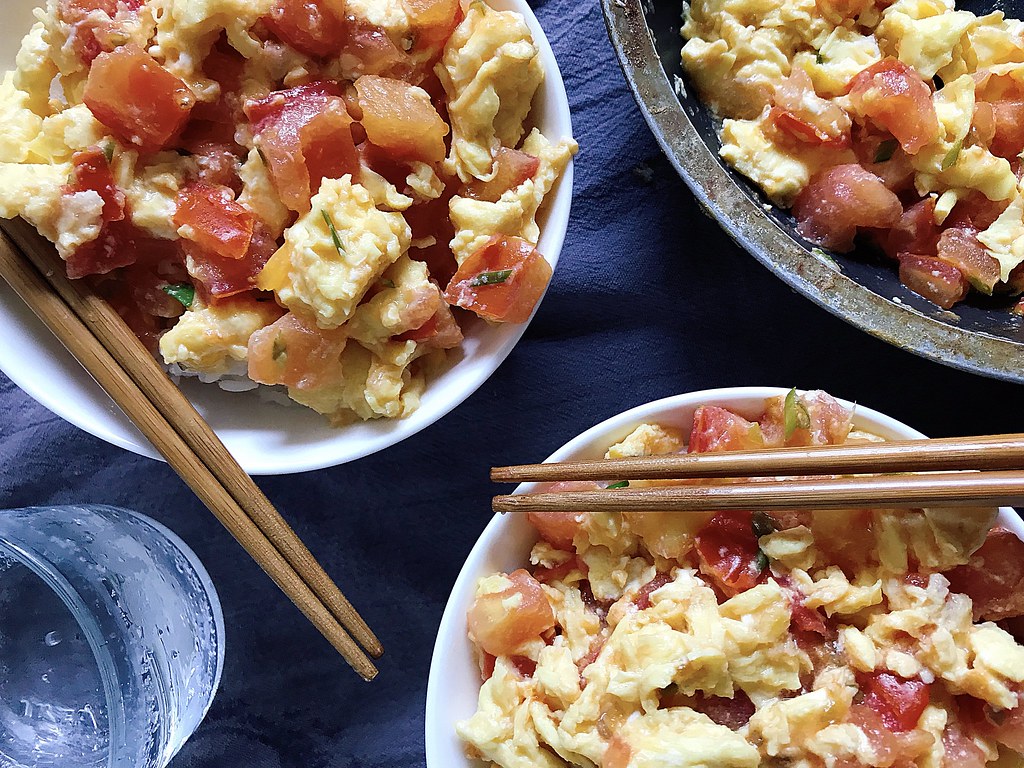
When I first found out that the summer collaboration star ingredient was going to be tomatoes, I envisioned a really photogenic heirloom tomato pizza or shakshuka, but the more I thought about it, the more my mind kept going back to this homely, homey dish.  It will never win awards for its looks, but it's so incredibly easy to make and delicious that I thought it was worth dusting off from my archives and writing up again.

The thing is, after making this over the many years, it's become one of the few dishes I can make without consulting a recipe.  So I figured I'd write it the way I make it.  If you really need to follow one (at least the first few times), check out my old post about it.  But I bet you'll be making this so many times that eventually you'll be able to make it like I do!


Tomato and Eggs over Rice
serves 1 hungry girl or 2 as a side dish

1 large tomato or 2 smaller tomatoes, total volume about the size of your first
3 eggs (add a 4th egg if your tomatoes are really big; you want about an equal volume of tomato:egg)
Kosher salt, to taste
About a tablespoon chopped scallions (I usually just harvest a few stalks from the ones I have growing on my windowsill)
A splash of rice wine
Sesame oil
Cooking oil
A splash of rice wine vinegar
A pinch of sugar
About 1/2 teaspoon of cornstarch
Cooked rice

Crack the eggs into a bowl and add a few pinches of salt.  Whisk with a fork until nicely beaten.  Let sit while you prepare the tomatoes and scallions.

Chop the tomatoes into a small dice.  Chop the scallions.  Add a splash of rice wine and sesame oil to the eggs and whisk again.

Heat a non-stick pan over medium heat and add some oil.  When the oil is hot, add the beaten eggs and scramble into large curds.  When the eggs are 90% cooked, transfer back to the small bowl.

Add a bit more oil to the pan and heat again.  Add the chopped tomatoes, a splash of rice wine vinegar, a pinch of sugar, and a larger pinch of salt.  Cook for a minute, then add the chopped scallions.

Add a tablespoon of water to the cornstarch to make a slurry and then add to the tomatoes.  Stir until the liquid thickens, then add the eggs back into the pan.  Cook until well combined and serve immediately over rice.


Check out the #wesaytomatoes hashtag on Instagram to see the rest of the collaborations!

Next:  My Communion Bread
Previously:  Cherry Pit Ice Cream with Cherry Ripple and Brown Butter Streusel
Two Years Ago:  Zucchini Pizza
Four Years:  Grace's Ginger Scallion Fish
Five Years Ago:  S'mores Brownie Ice Cream Sandwiches

Sunday, March 18, 2018

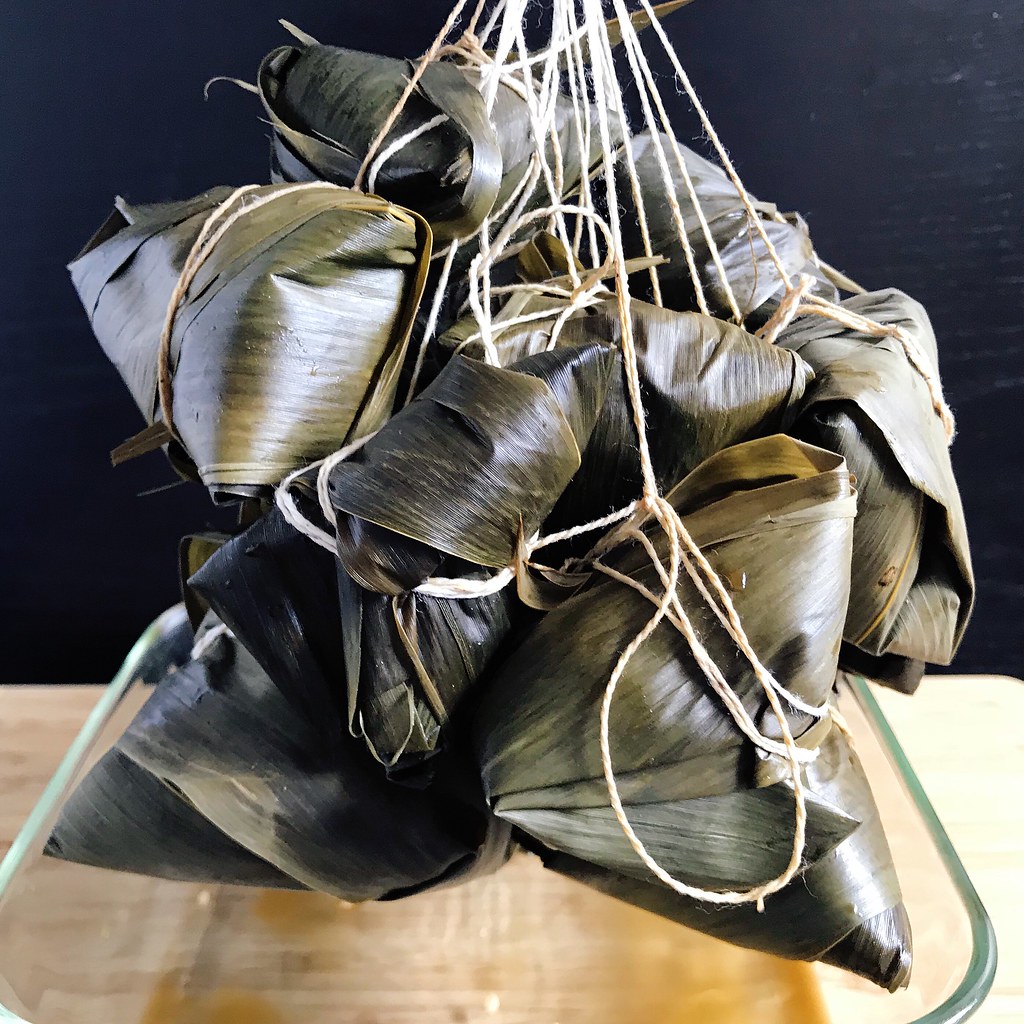
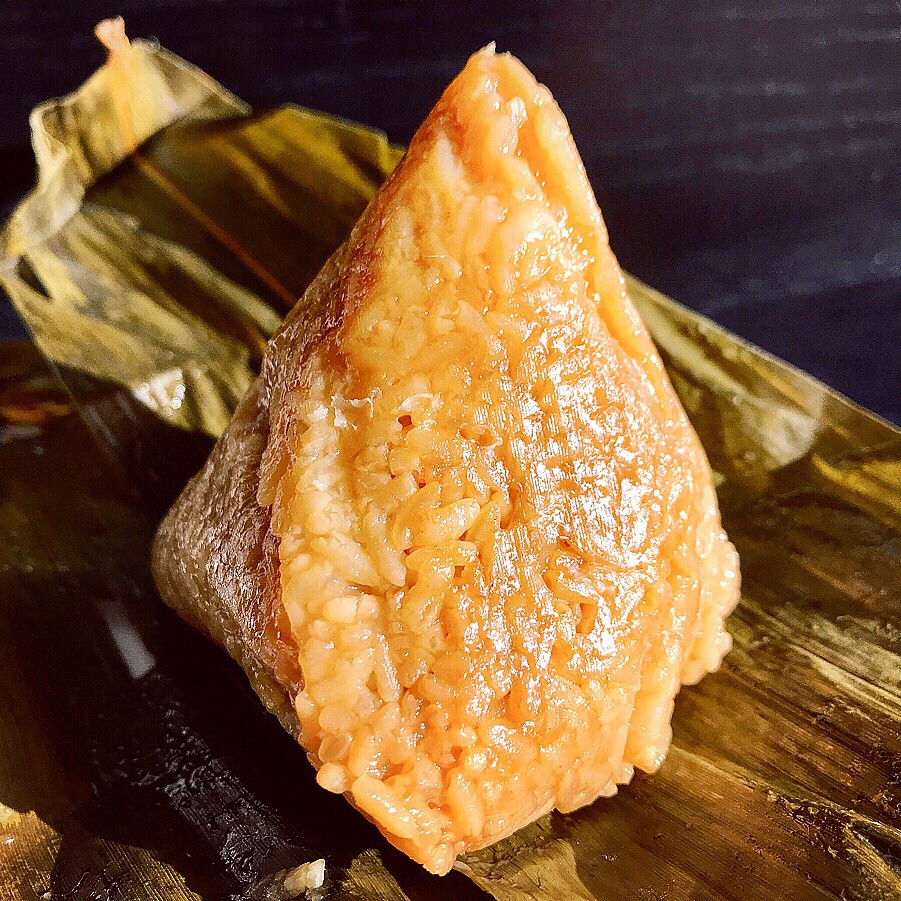
My Mom's Taiwanese Zongzi (粽子)


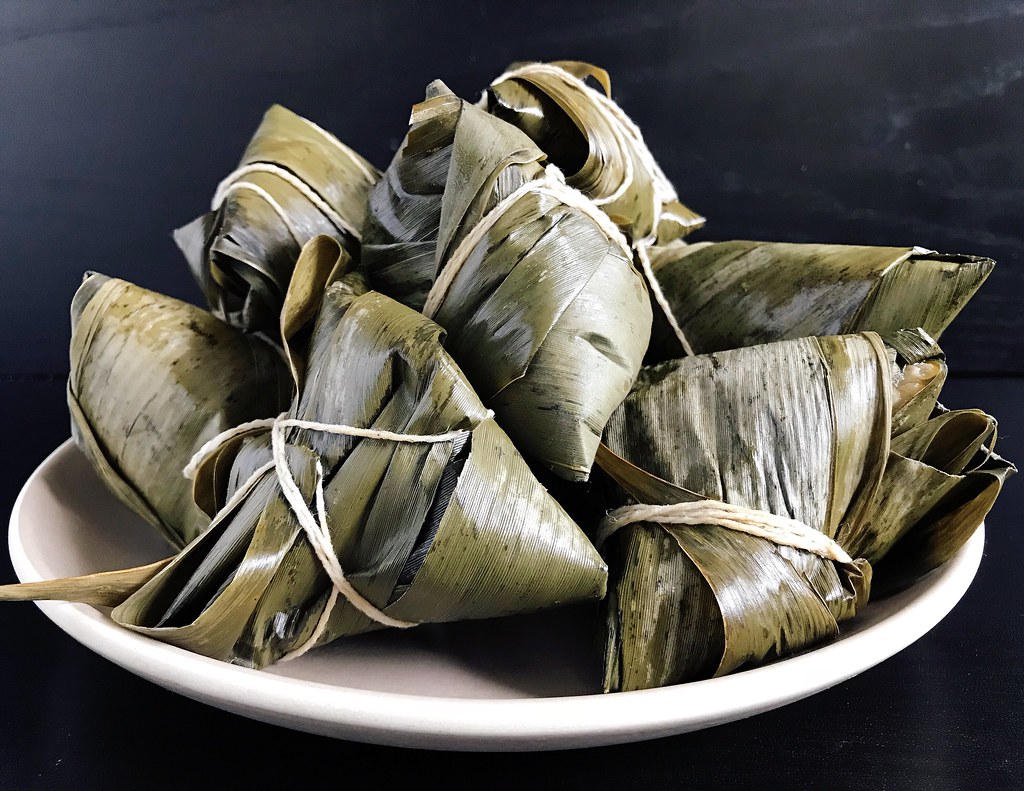
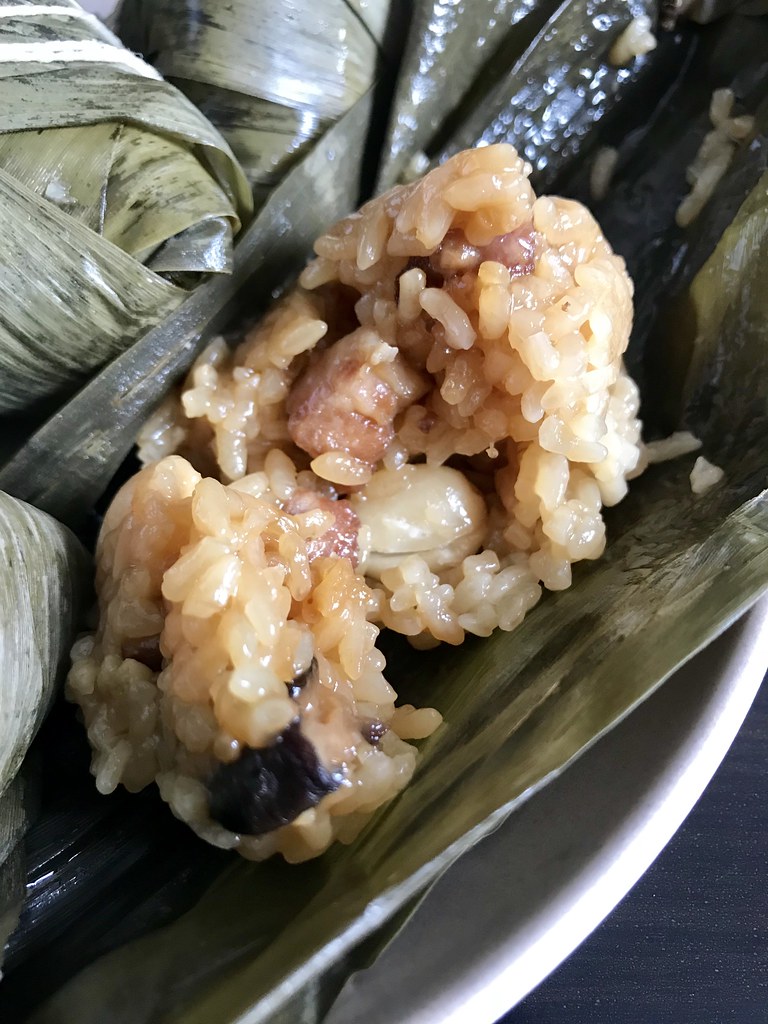
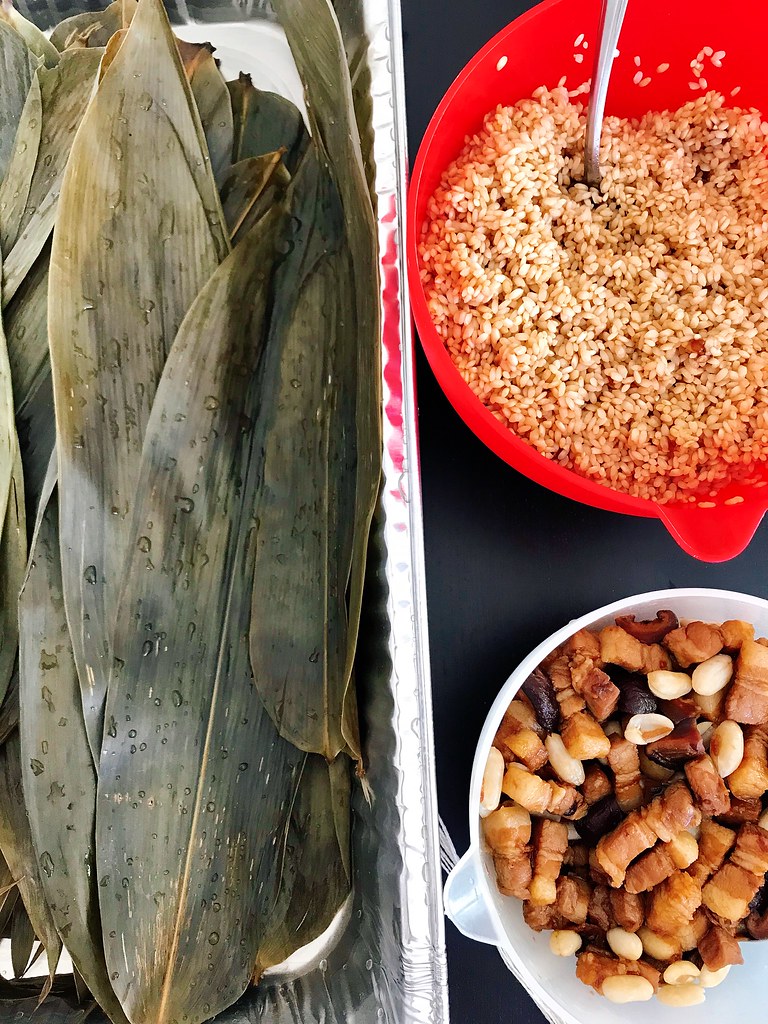
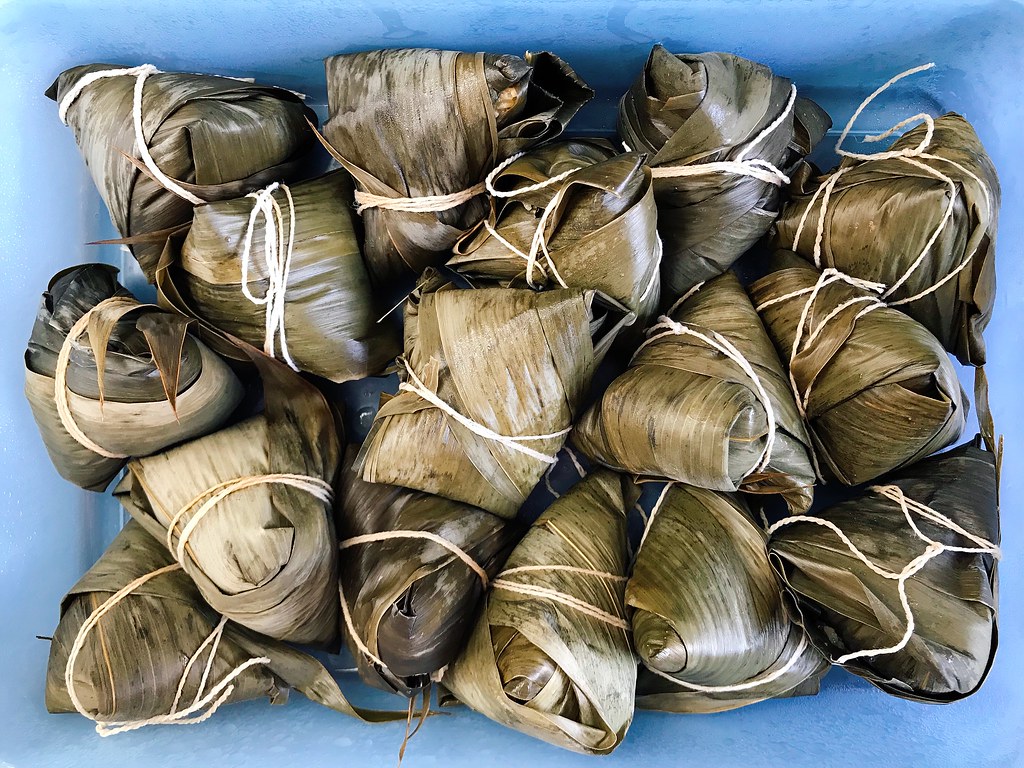
I've been paddling in the annual Boston Dragon Boat Festival for over a decade now, and every year I consider trying to make zongzi, the traditional food eaten for the festival, but by the time the festival rolls around, I always find myself too busy with the races or traveling to attempt them.  This year I decided to get a head start (the festival is celebrated on the 5th day of the 5th month of the lunar calendar, so June 18 this year).  If you don't know what zongzi are, they're packets of sticky rice wrapped in bamboo leaves (or sometimes lotus or banana leaves).  The fillings differ depending on where you are, and sometimes they're even sweet!  The ones I grew up with were filled with marinated pork, shiitake mushrooms, fried shallots, peanuts, and sometimes chestnuts and/or dried baby shrimp.  I've also had versions with salted duck egg yolks and Chinese sausage in them too.


Even beyond the fillings there are different ways to wrap zongzi.  The ones my mom makes are shaped like tetrahedrons, whereas I've also seen them wrapped in a rectangular shape.  Some of the recipes I've found online cook the zongzi in boiling water for up to 8 hours, but because the filling is cooked before being stuff in the sticky rice, you only need to cook these for an hour.  My mom told me that in southern Taiwan they boil it for even shorter by wrapping cooked sticky rice and boiling just long enough to impart the bamboo leaf flavor.


I posted a picture of these zongzi on Instagram and mentioned that when I had asked my mom for the recipe, she told me it would be too hard to make.  I don't think my mom has ever told me something would be too hard for me to do before, so it only made me want to make them even more.  I was really surprised to read in the comments though that a lot of other people had the same reaction from their mothers when they had asked them for their recipe!  I wonder if that's what their moms told them too, and they're just passing the advice along.


Since these are indeed very difficult to make, I wanted to share some of the tips I figured out while trying to figure it out myself:
  • Soak at least 1.5 times as many leaves as you think you'll need.  A good portion of mine would tear while I was trying to wrap them at which point you have to start all over.  Don't throw those leaves away, though!  Fold them in half vertically, and use wrap the outside of any of your more precariously wrapped zongzi to add another layer of protection.
  • Be very careful handling the leaves.  The edges are razor sharp and will give you a wicked paper cut!
  • My mom folds the bottom of the leaves up so that the root ends don't stick out, but a lot of other people just cut that end off.  
  • My mom ties a bunch of strings to a doorknob so there's tension on the string when you try to tie it around the zongzi with one hand (the other hand is used to hold the zongzi tightly closed).  Some of my friends mentioned that their moms would use a broomstick set across two chairs for the same purpose.  I read somewhere that you can also hold one end of the string between your teeth, and actually that method worked the best for me, although I know my dentist friends would definitely frown on that because there's a chance of chipping your tooth from all the tension.
  • I found that the easiest way to tie the string around the zongzi was to place it close to the anchored end and use your free hand to wrap the other end of the string multiple times around the zongzi.  You want to try to wrap it around the "equator" of the tetrahedron, so that there are two corners on either end.  This will help keep the string in place, otherwise it may fall off when you're cooking it (I know from experience).
I made this video to show you how to wrap the zongzi, but after showing it my mom to confirm it's how she wraps hers, she said she does it differently!

How to make zongzi

Then she sent me a link to this video which she said is more like how she wraps it.  I love listening to it because you hear a mixture of Taiwanese and Mandarin which is kind of like what I heard growing up.  That said, if you wrap it my way, you'll get smaller zongzi and will probably be able to make at least 24 with the amount of ingredients below.  If you wrap it the way my mom does, you'll make fewer but, larger ones.


Taiwanese-Style Zongzi
makes 12-24 depending on how you wrap them

3 1/2 cups glutinous rice
6 oz. bamboo leaves
8 dried shiitake mushrooms
1/2 cup raw peanuts
2/3 cup soy sauce, divided
2 tablespoons rice wine
2 tablespoons sugar, divided
1 lb. pork belly
1 tablespoon oil
2 tablespoons fried shallots
Kitchen twine

Soak glutinous rice in room temperature water for 2 hours or overnight.

Soak bamboo leaves in room temperature water for an hour or overnight, weighing them down so they're completely submerged.

Soak shiitake mushrooms in room temperature water for an hour or overnight, also weighing them down so they're completely submerged.  Soak the peanuts for an hour or overnight in a separate bowl.

Combine 1/3 cup soy sauce, the rice wine, and 1 tablespoon of sugar in a medium bowl.  Slice the pork into bite-sized pieces and marinate in the soy mixture for an hour.

Cut the kitchen twine into 60" pieces (this is easy for me since that's my wingspan).  Gather them all together and fold in half.  Make a loop knot at that halfway point so that there are now twice as many pieces of 30" long twine connected at the top by a loop knot. 

Wash the bamboo leaves thoroughly after they've softened.  Drain the rice and then add the remaining soy sauce and sugar and mix.  Cut the ends off the mushrooms and slice the caps into quarters.  Drain the peanuts.

Heat a large wok or pan over medium heat and add the oil.  Add the sliced mushroom, pork, and fried shallots.  Stir fry until the pork is almost completely cooked through.  Transfer to a bowl.  Add any liquids left in the pan to the rice and mix well.

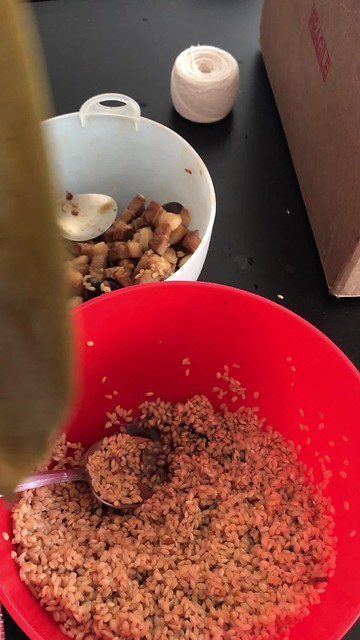
Set up your work station:  hook the twine over a sturdy latch-style doorknob or cabinet handle*.  Have the bamboo leaves, seasoned sticky rice, peanuts, and meat mixture nearby with a large spoon.

Grab two of the leaves and with the smooth sides facing you, position them so that they overlap slightly on the bottom and angle towards each other at the top.  Fold the bottom half inch up and over so that the tough root end doesn't stick out anymore (or cut off the bottom half inch)*.  Now fold the sides of the bottom of the leaves together like a book.  Fold the bottom inch or two up along one side and then open up the leaves so that it forms a short cone.

Continue to grip the bottom of the cone with one hand and use the other hand to place a large spoonful or two of the rice in the cone.  Pack it down well, then add a spoonful of the cooked filling, making sure to get a bit of each of the ingredients.  Cover the filling with another spoonful of the rice and pack it down again.  Fold the top of the leaves over the rice so that now you have a 4-sided pyramid.  Fold the remaining portion of the leaves that are still sticking out together and then continue to wrap around the pyramid.  Holding the pyramid tightly with one hand, use the other hand to wrap the twine around the middle a couple of times and then tie it off tightly.  Leave it hanging from the twine and wrap the rest of the zongzi.

Bring a large pot of water to a boil and submerge the zong zi.  Continue to cook for an hour, until the sticky rice is cooked through.  Drain and let the zong zi cool before unwrapping to eat, discarding the leaf.  Serve with sweet chili sauce and/or soy paste.  These freeze very well, just microwave to reheat!

*See my tips above for variations.


Next: Strawberry Matcha Cream Cheese Tart
Previously:  Candied Carrot Rose Tart
Last Year:  Japanese Chicken Curry Rice
Two Years Ago:  Tropical Pulled Pork on Griddled Banana Bread Sandwiches
Three Years Ago:  A Better Homemade Pasta Recipe
Four Years Ago:  Mushroom Marsala Pizza
Five Years Ago:  Peking Duck Pizza
Eight Years Ago:  Bacon Fat Caramels
Nine Years Ago:  The Feng Family Secret Peking Duck Recipe

Wednesday, March 1, 2017

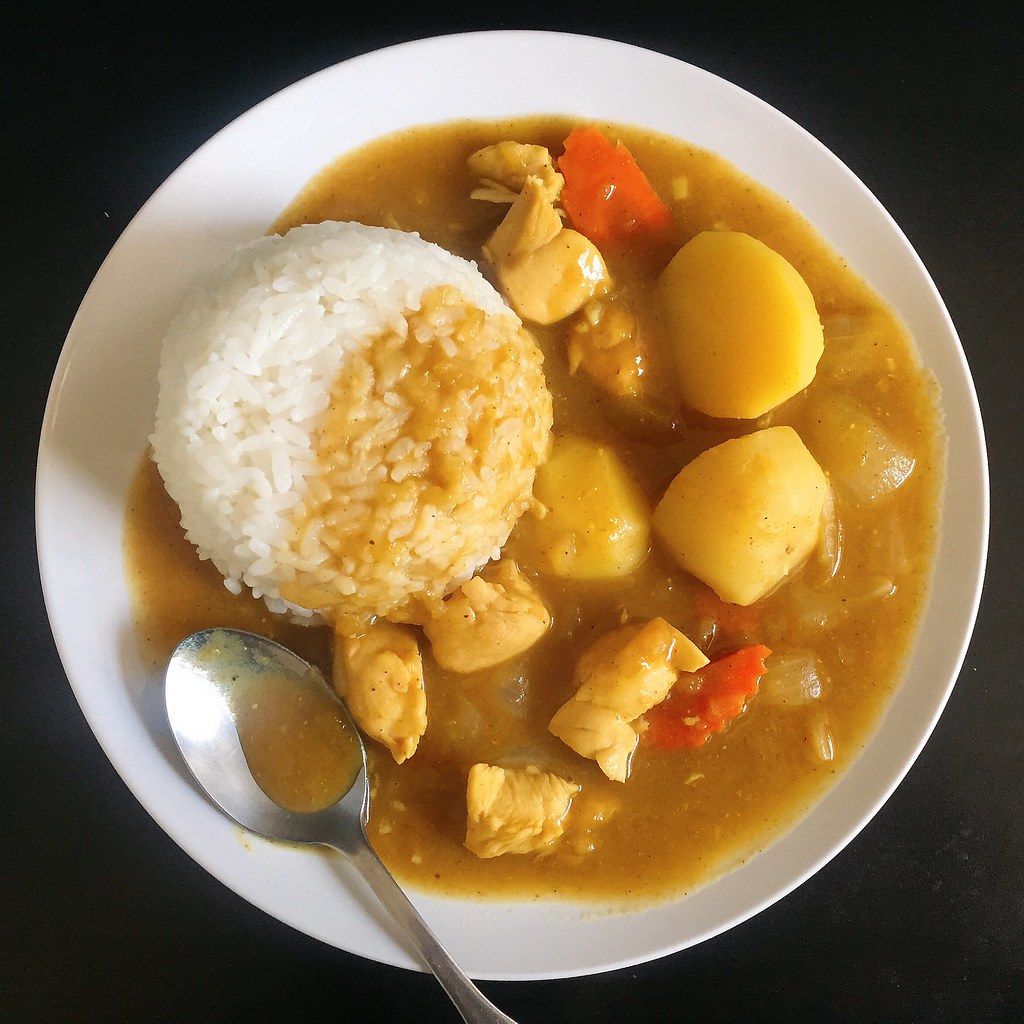
Japanese Chicken Curry Rice


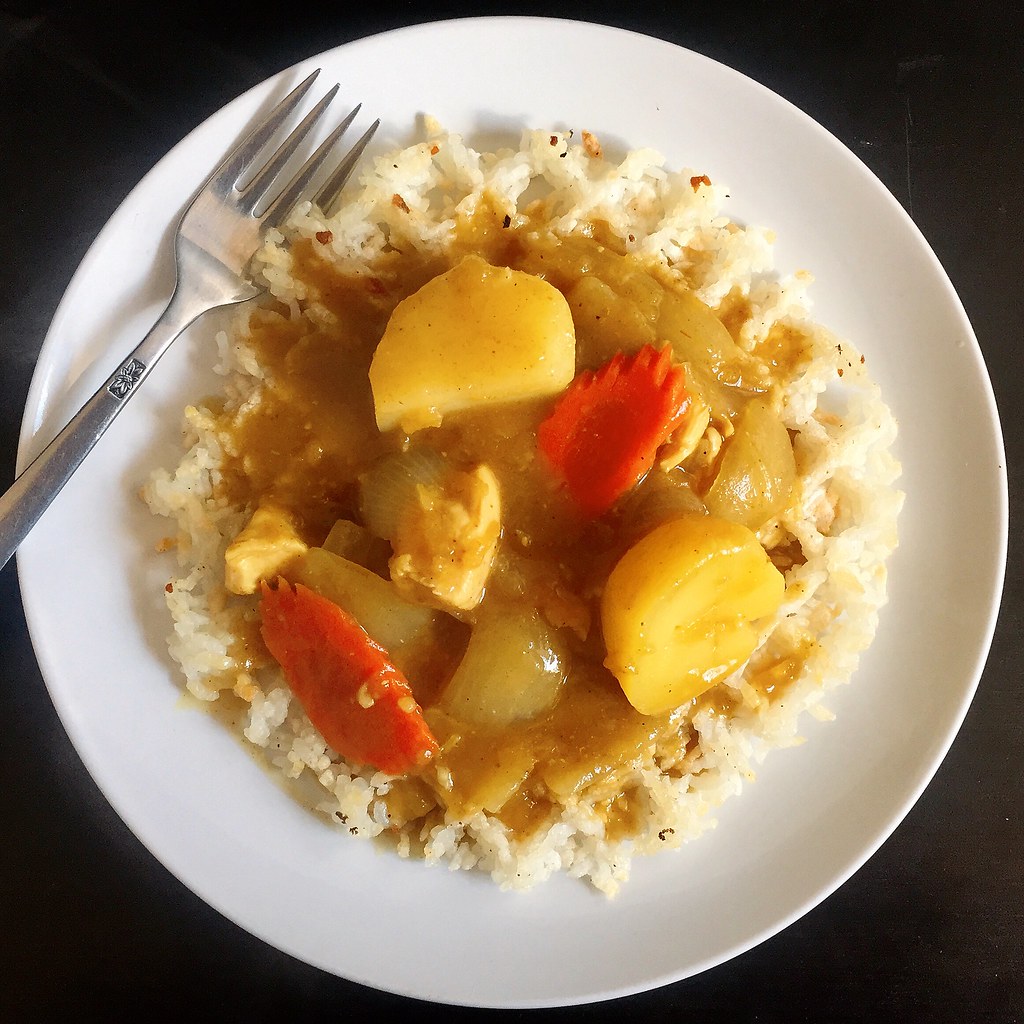
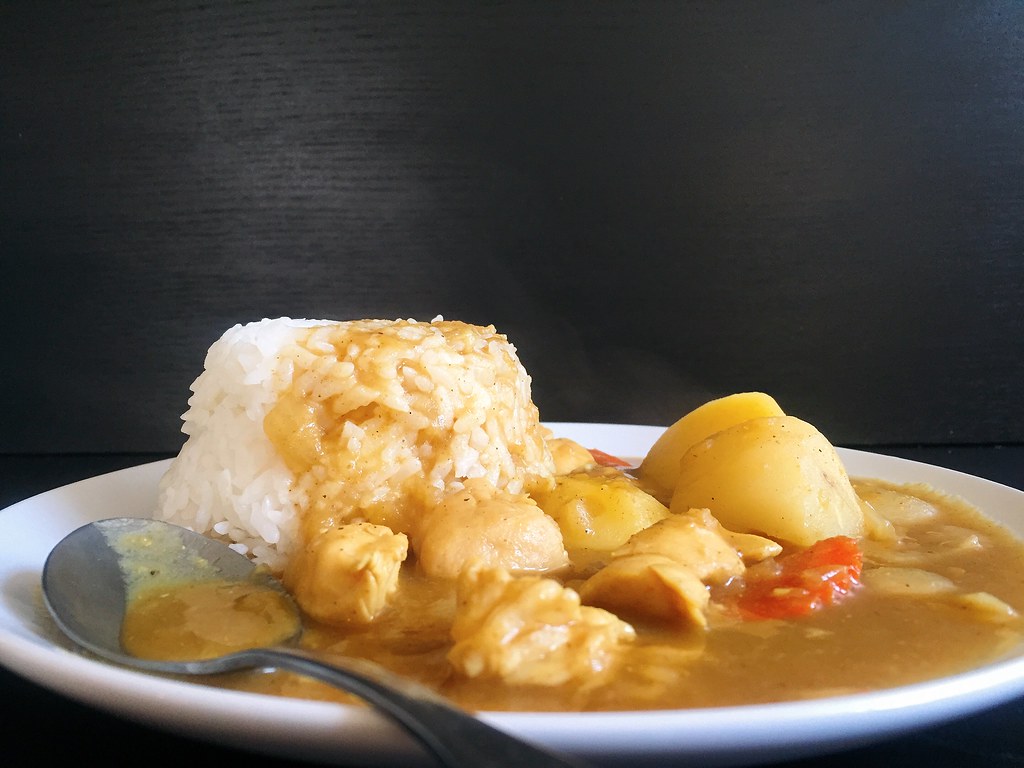
If you’ve ever made Japanese curry rice from one of those store-bought curry blocks, you know how delicious and easy it is, but did you know it’s almost as easy to make it from scratch?  And considering the palm oil, MSG, and preservatives used in the blocks, it’s probably a lot healthier to make your own.


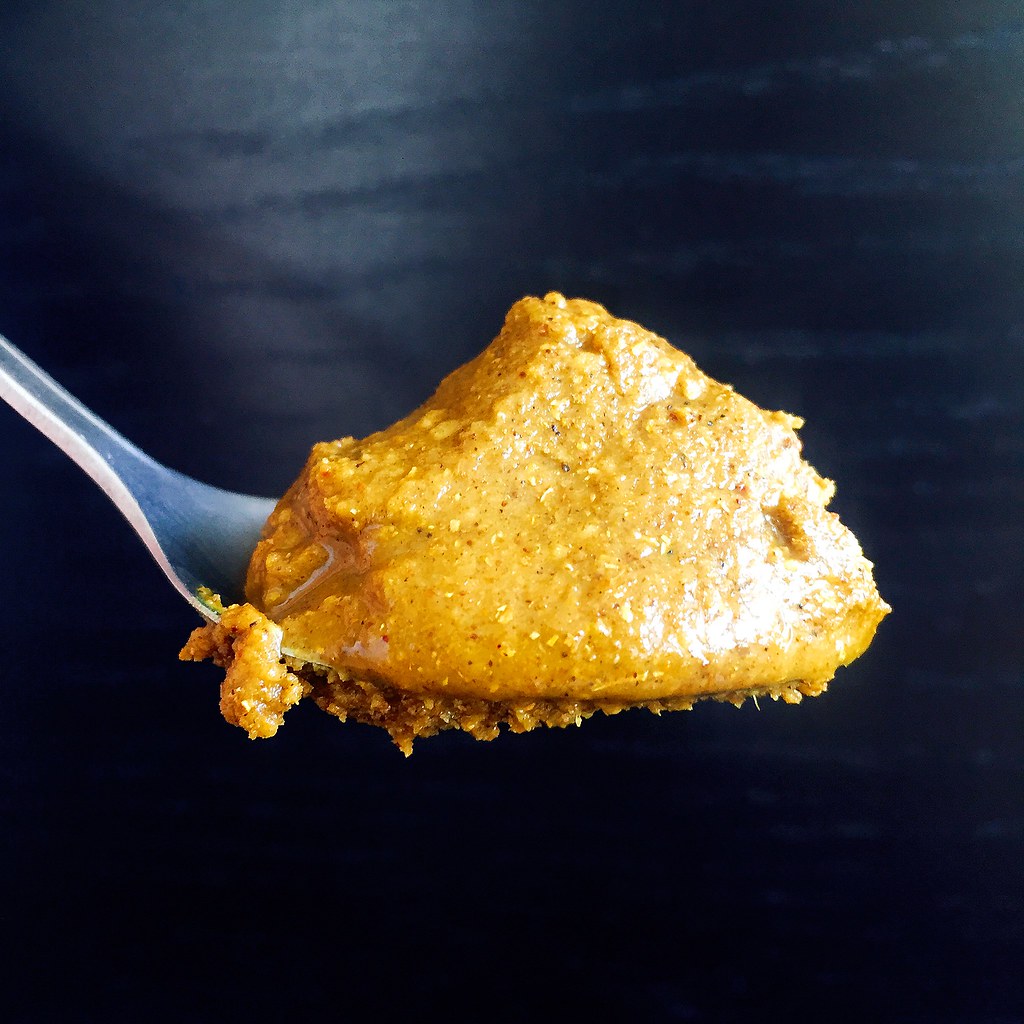
I pretty much followed the chicken curry rice recipe from Just One Cookbook except I caramelized the onions as recommended by Marc from No Recipes and Serious Eats.  I also used chicken breast instead of chicken thighs because I really, really hate dark meat.  Another great thing about making your own curry roux is that it’s easily customizable.  If you prefer it spicier, add cayenne pepper; if you prefer it sweeter add honey, etc.  This recipe makes a slightly sweet, medium-mild spicy curry.


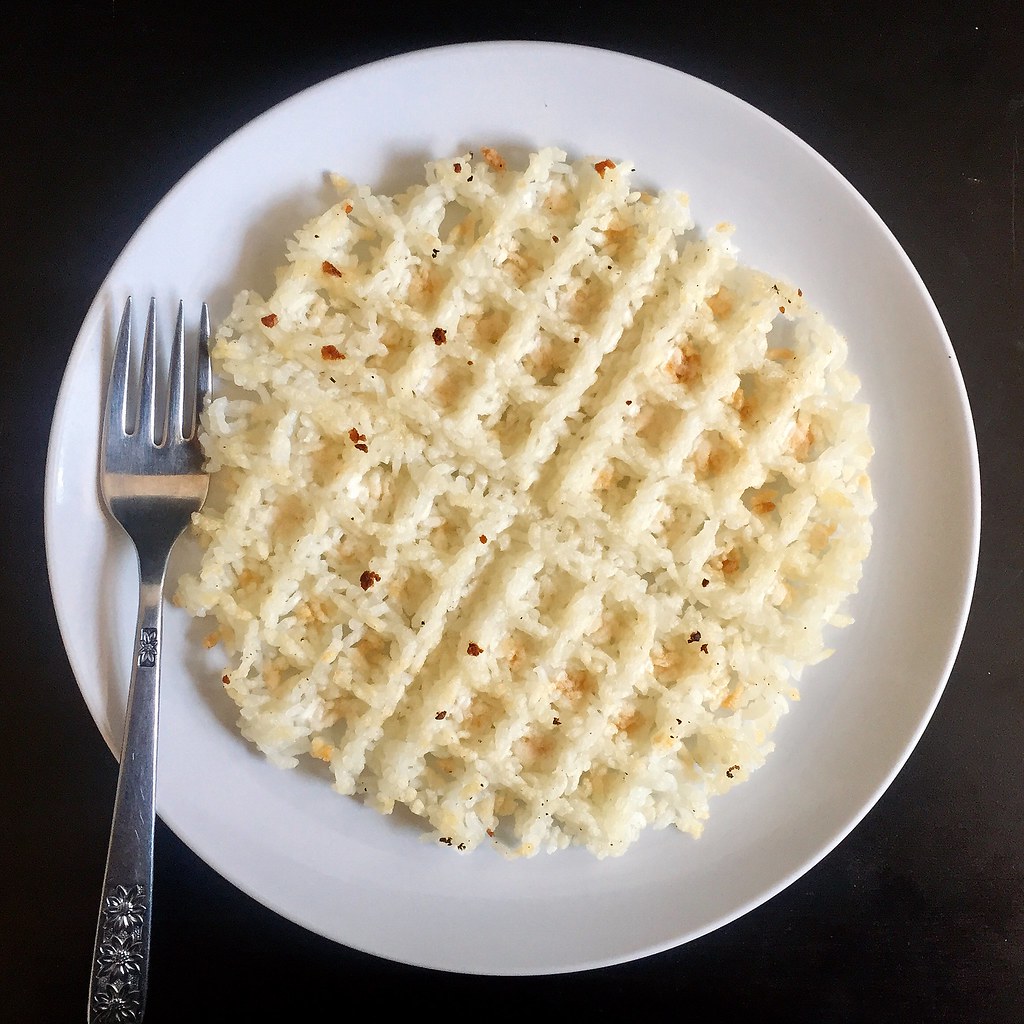
Japanese curry is usually served with steamed rice, but if you want to have a little more fun, I’d highly suggest waffling some day-old cooked rice.  The rice gets crispy-crunchy-toasty-chewy and adds a really interesting texture. 


Japanese Chicken Curry Rice (adapted from Just One Cookbook)
serves 4-6

1 lb. boneless chicken, skinless thighs or breast
Kosher salt and black pepper
2 tablespoons oil
2 onions, coarsely chopped
2 garlic cloves, minced
1 teaspoon grated ginger
1 carrot, peeled and coarsely chopped
1 qt. chicken broth
1 apple
2 large Yukon gold potatoes
3 tablespoons unsalted butter
4 tablespoons all-purpose flour
1 tablespoon garam masala
1 tablespoon curry powder
2 tablespoons soy sauce
1 tablespoon ketchup
1 tablespoon honey (optional)
Cooked rice

Cut the chicken into bite-sized pieces and season with salt and pepper.

Add the onions to a large pot or Dutch oven over medium heat.  Cook with a large pinch of salt until dry and just starting to color.  Add a tablespoon of oil, mix, and continue to cook until the onions start sticking to the bottom again.  Add the rest of the oil and continue to cook until caramelized.  Add the minced garlic, grated ginger, and chicken.  Cook until the chicken turns white.  Add the chopped carrot and chicken broth and bring to a boil.

Peel the apple, coarsely grate, and add to the pot.  Peel the potatoes, cut into bite-sized chunks, and add to the pot.  Simmer for 20 minutes until the potatoes are tender.

In the meantime, make the curry roux by melting the butter in a small pan over medium-low heat.  Add the flour and stir until the roux starts to get darker, about 5-10 minutes.  Mix in the garam masala and curry powder and take off the heat once combined.

When the potatoes are done, add some of the hot liquid to the roux and whisk until the roux is loose, adding more liquid as necessary.  Add back to the pot and bring back to a boil.  Stir in the soy sauce and ketchup.  Taste, and add the honey if you'd prefer it sweeter.  Simmer until the curry has thickened.  Serve with cooked rice.


Next:  Rainbow Crepe Cake
Previously:  Quintessential Apple Pie with Bacon Fat Crust
Last Year:  Tropical Pulled Pork on Griddled Banana Bread Sandwiches
Two Years Ago:  A Better Homemade Pasta Recipe
Three Years Ago:  Mushroom Marsala Pizza
Four Years Ago:  Peking Duck Pizza
Seven Years Ago:  Bacon Fat Caramels
Eight Years Ago:  Potato Leek Soup with Bacon

Wednesday, September 7, 2016

Macau-Style Portuguese Chicken Rice

https://www.flickr.com/photos/joyosity/29466501016/in/dateposted-public/

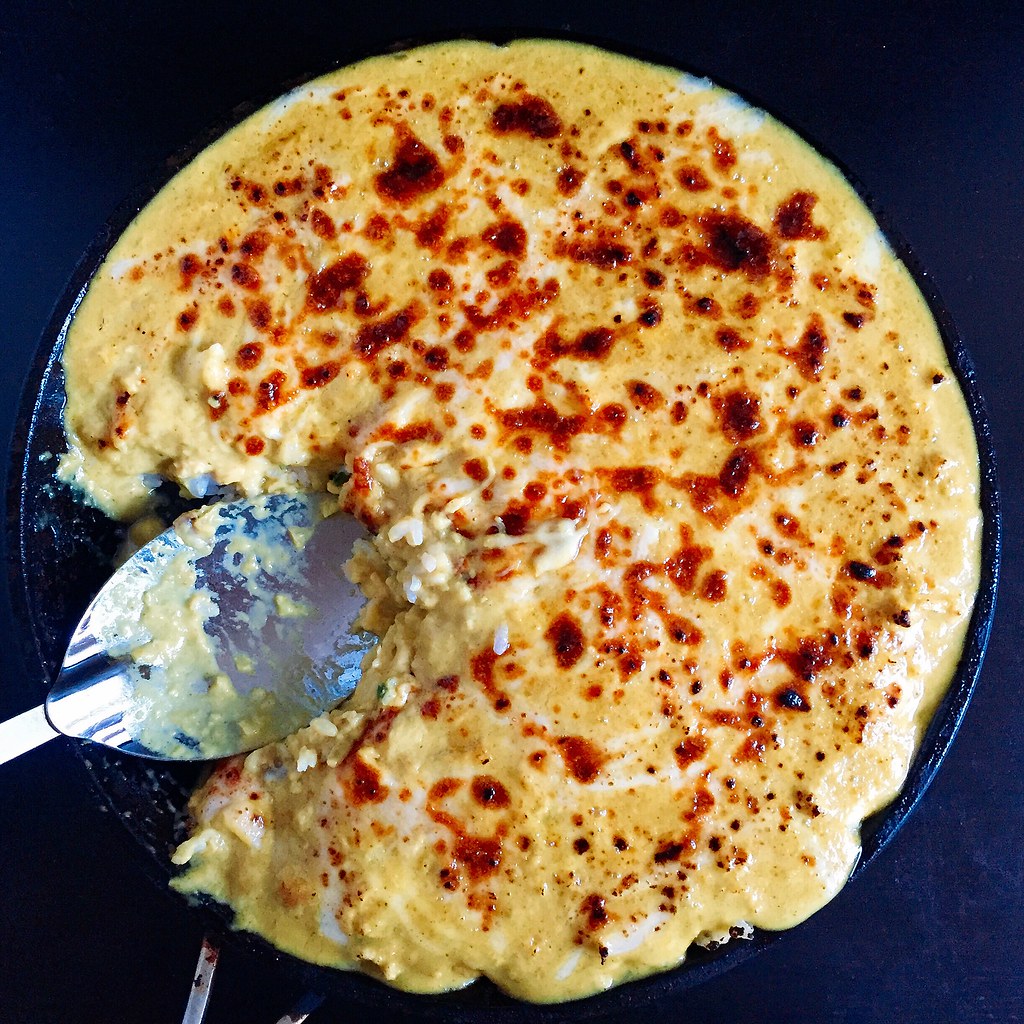
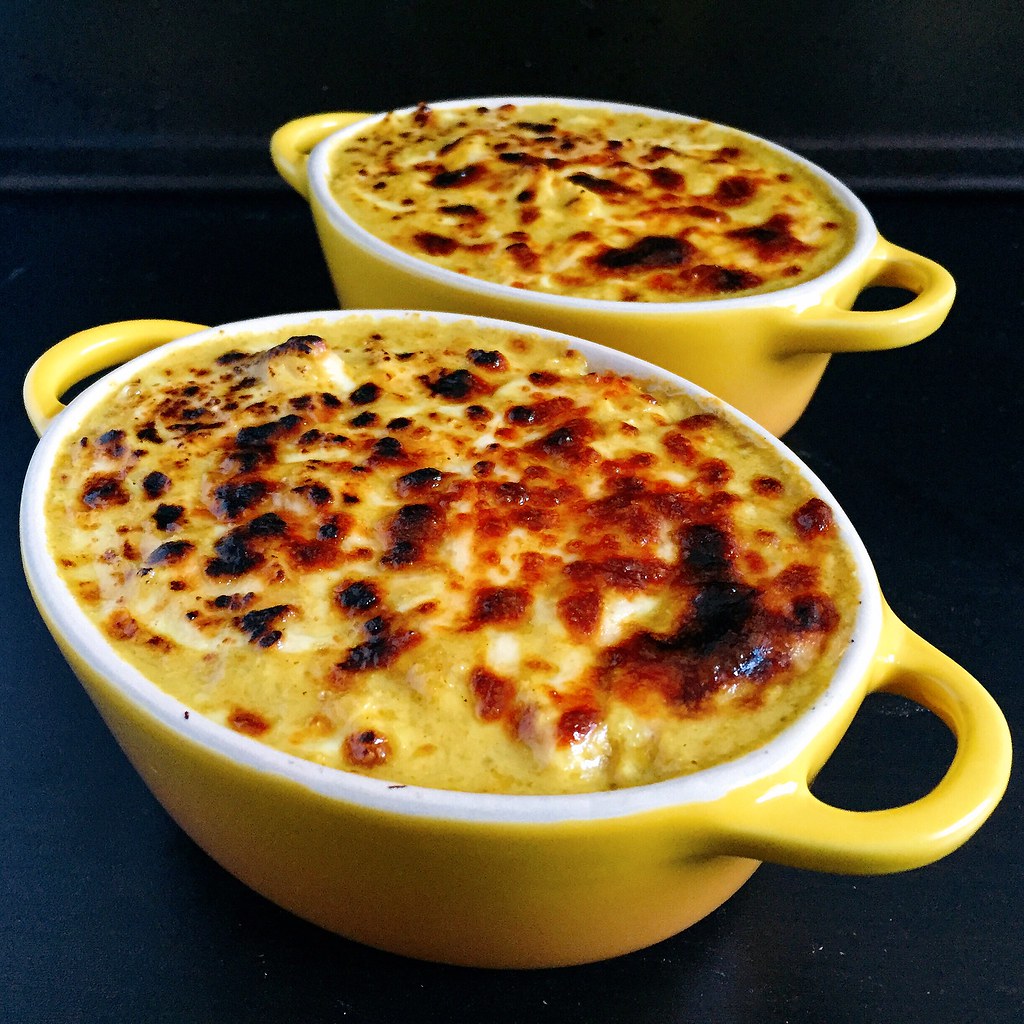
I only needed one bite of the Portuguese Chicken Rice from Double Chin to know that I needed to figure out how to make it at home.  I hadn't even ordered it myself; my friend Alvin was nice enough to let a bunch of us try his, and I'm so grateful he did.  Sadly, it's not a very photogenic dish, but once you try it, you won't care.

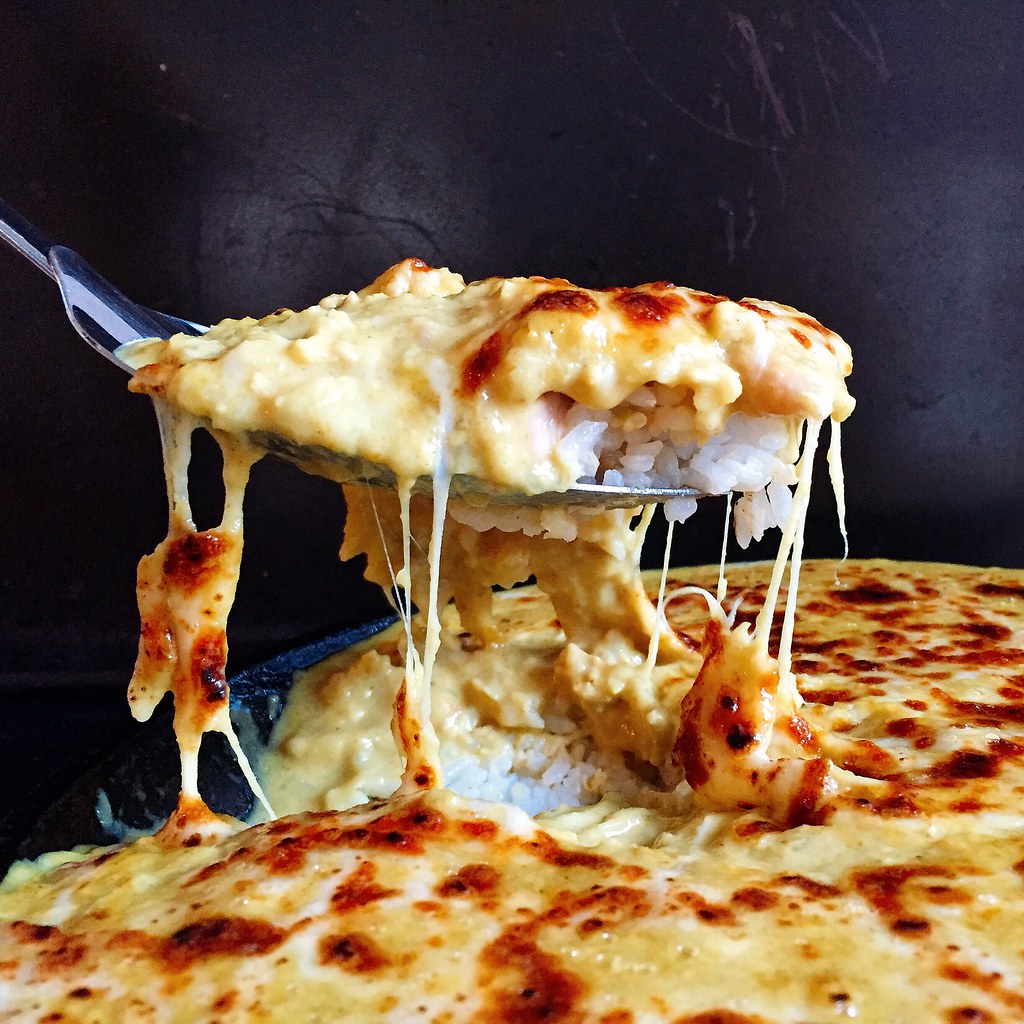
It starts with a layer of chicken fried rice topped with a mild coconut curry sauce and finished with a sprinkling of shredded cheese.  Then everything goes under the broiler until it gets all bubbly and gooey.  I know it's kind of strange to have cheese on an otherwise Asian dish, but it works so well in this case.  I think the key is to use a mild, melty cheese so that it doesn't overpower the rest of the dish.  I ended up using a mix of mozzarella and provolone.  I thought it was interesting that when I was looking for recipes on-line to use, a lot of them just listed "shredded cheese" as the ingredient without any reference to what kind of cheese.  Perhaps in Asia there is just one kind of shredded cheese available!

https://www.flickr.com/photos/joyosity/29420771461/in/dateposted-public/

I ended up referring to Lady and Pups' version because I love everything else she does, and it seemed the most similar to what I had at Double Chin.  The modifications I made were that instead of fish I used chicken and marinated it beforehand.  I used chicken breast because I prefer white meat, but feel free to use chicken thigh meat if you prefer dark meat.  I also made a couple of other modifications to her recipe based on what I had on hand (less scallions and water instead of milk) and taste preferences (half the amount of shallots).

Please note that this makes quite a bit of food.  Mandy's original recipe said that it serves 2, but it would probably be more like 6 Joy-sized servings.  And if you're wondering why it's called Portuguese chicken rice, I think it has to do with the fact that Macau was a Portuguese colony up until the end of the last century.  Apparently this dish is very popular in Hong Kong cafes, and I remember seeing something similar at one of my favorite eateries in Taiwan.

https://www.flickr.com/photos/joyosity/29211783800/in/dateposted-public/

Macau-Style Portuguese Chicken Rice (heavily adapted from Lady and Pups)
serves 4-6

For the chicken:
1 lb. boneless chicken, cut into 1" pieces
1 tablespoon cornstarch
1 tablespoon soy sauce
1 tablespoon rice wine
2 tablespoons vegetable oil

Mix all the ingredients except for the oil and marinate for 20 minutes.

Heat the oil over medium-high heat and cook the chicken until lightly brown.  Save 2/3 of it for the fried rice and finely chop the rest for the sauce.

For the fried rice:
2 tablespoons vegetable oil
2-3 eggs, beaten
3 cups day-old cooked rice, refrigerated
1/2 cup chopped scallions
Kosher salt and white pepper, to taste

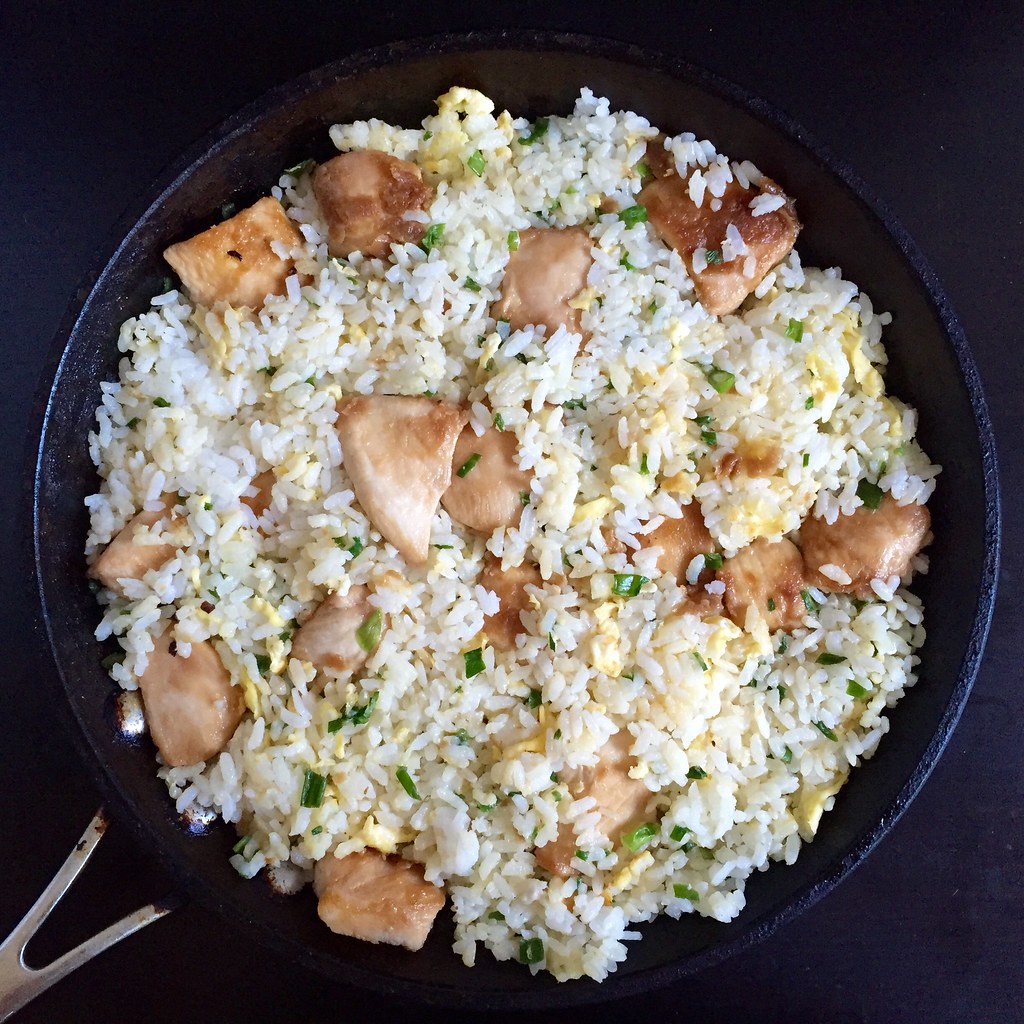
Heat the oil over medium-high heat in a large pan and add the eggs.  Immediately add the rice and mix to coat.  Once the rice is heated through, add the scallions, salt, and white pepper to taste.  Add the reserved chicken and mix until even.  Remove from heat and set aside.

For the coconut curry sauce:
2 tablespoons vegetable oil
1 shallot, coarsely chopped
3 garlic cloves, coarsely chopped
1 teaspoon ginger, grated
1 tablespoon unsalted butter
1 tablespoon curry powder
1 tablespoon onion powder
2 tablespoons finely shredded unsweetened coconut
1 tablespoon all-purpose flour
13.5 oz. can coconut milk
1/2 cup water
1 1/2 cups mix of shredded mozzarella and provolone cheese, divided

Use a small blender to puree the oil, shallot, and garlic cloves.  Mix with the grated ginger and butter and cook over medium heat in a saucepan for a few minutes until very fragrant.  Add the curry powder, onion powder, coconut, and flour continue to cook for a few more minutes to toast the spices.  Whisk in the coconut milk and water and bring to a boil.  Simmer for 5-7 minutes until thickened.  Stir in the chopped chicken and 1 cup of the cheese.

Preheat the broiler.  Transfer the fried rice to a buttered casserole dish or oven safe pan.  You can also use multiple smaller dishes.  Pour the curry sauce over the rice and top with the remaining 1/2 cup of shredded cheese.  Broil for a few minutes until browned in spots and bubbly.  Serve immediately.

https://www.flickr.com/photos/joyosity/29420773131/in/dateposted-public/

Next:  Caramelized Honeycomb Ice Cream
Previously:  Extra-Crispy Tortilla Pizza
Two Years Ago:  Taiwanese Taro Swirl Mooncakes
Three Years Ago:  Brown Butter Vinaigrette Lobster Buns
Four Years Ago:  Caramelized Onion and Swiss Chard Quiche

Monday, November 18, 2013

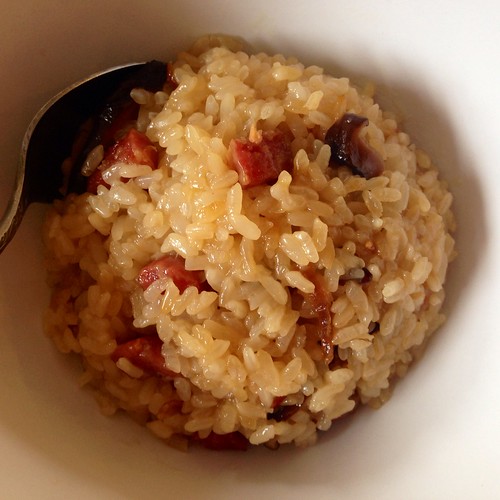
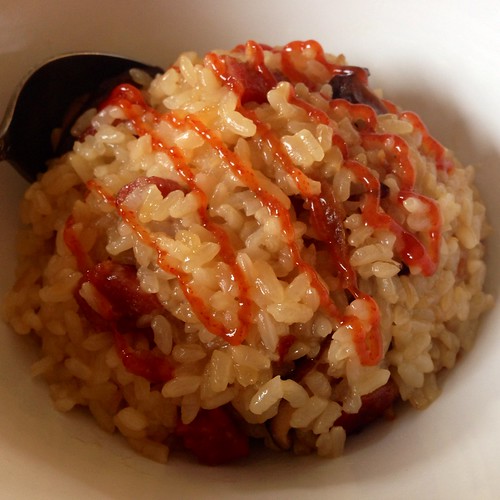
My Mom's Taiwanese Sticky Rice

 http://www.flickr.com/photos/joyosity/10875412813/in/photostream/

One of the reasons I started this blog 5 years ago was to document and share my mom's amazing Taiwanese cooking.  Since then, I've gone on to post a lot of different recipes, but hers are still my favorite ones because they remind me of home.

The other day I was craving some of her sticky rice and called her up to ask for the recipe.  This is how awesome my mom is:  she was able to tell me how to make it right then and there without looking anything up!  She was excited to share this new technique she developed where she first par-cooks the sweet rice and then bakes it off in a casserole dish instead of using a rice cooker.  Apparently when using a rice cooker sometimes the sticky rice can get too mushy but when using this technique it's always "QQ", or chewy.

Instead of cooking the aromatics in a different pan and then transferring everything into a casserole dish, I just used my Dutch oven (don't know how I lived without this baby!)  If you don't have one, just transfer the rice to a casserole dish with a lid, or do what my mom does and just cover it with aluminum foil.

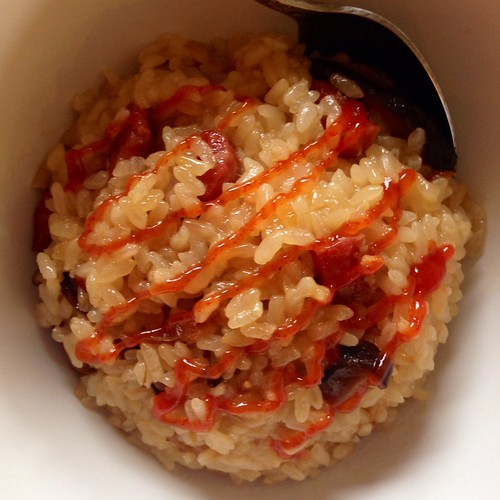
My mom usually makes this with pork or chicken, but I decided to make it with Chinese sausage (which I guess makes it more Cantonese than Taiwanese).  You can find the Chinese sausage and fried shallots (sometimes labelled fried red onions) in a Chinese grocery store.  If you like cilantro, it makes a great topping, but if you don't, it still tastes great without it.  For a little kick, I highly recommend serving it with some sweet chili sauce.


My Mom's Taiwanese Sticky Rice
serves 6-8

3 1/2 cups sweet glutinous rice
6-7 dried shiitake mushrooms
1 tablespoon oil
3 links Chinese sausage, chopped
2 tablespoons fried shallots
2 tablespoons rice wine
1 tablespoon sugar
1/3 cup soy sauce
1 tablespoon sesame oil

Soak the sweet rice and mushrooms in room temperature water for an hour.  The mushrooms will float so place a lid or dish on top to weigh them down.

Preheat the oven to 350°F.  Start boiling 4 cups of water in a large pot. 

Squeeze the water out of the mushrooms and cut off the stems.  Slice the mushroom caps and set aside.

Drain the rice and add to the boiling water.  Make sure that the water covers the rice, adding more water if needed.  Cook for about 5 minutes, stirring frequently, until almost all the water is absorbed.  The rice will have plumped but won't be soft yet.

In the meantime, heat up the oil in a Dutch oven over medium heat.  Add the sausage and cook for a few minutes until the fat is rendered out but before it browns.  Add the mushroom and fried shallots and stir fry for about a minute or two.  Add the rice wine, sugar, soy sauce, and sesame oil and mix well.

Add the rice to the Dutch oven.  Mix very well so that the rice is the same color throughout.  Cover and bake for 20 minutes.

Fluff and serve with cilantro and sweet chili sauce, if desired.


Next:  My Mom's Pi Jiu Ya (Beer-Braised Duck)
Previously:  Kaddo (Afghan Pumpkin with Yogurt and Tomato Sauces)
Last Year:  Duchikey (or Simplified Turducken)
Five Years Ago:  Homemade Crystallized Ginger

Monday, October 14, 2013

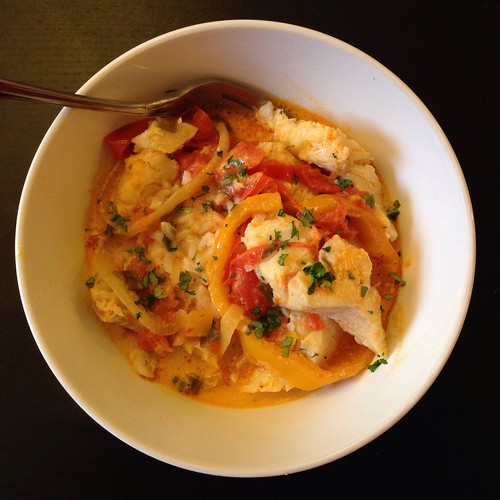
Bahian Style Moqueca (Brazilian Fish Stew)


A few years ago, I visited Rio de Janeiro with my friend Ellen, a fellow foodie.  Our second night there, we had planned to walk from our hotel in Copacabana to Azul Arinho, a restaurant on Ipanema known for their moqueca.  Along the way, we found a cute gelato shop, Beijo Carioca, and, upon realizing that they would be closed by the time we would be done with dinner, we had to stop and get a pre-dinner treat.  The gelato was so good that on our last day in Rio, with only an hour left before we had to head to the airport, we made a mad dash back for a last taste of paradise.

Continuing on to dinner, we passed by a Koni Store, and since I had read about this trendy new restaurant, we just had to stop and try a salmon hand roll.  Then there was the churro cart around the corner...but we decided that we absolutely could not eat anything else before we got to dinner (and hoped that the churro cart would still be there on the way home).

Despite not being the last bit hungry due to all the pre-dinner snacking, I found myself absolutely loving the moqueca.  We got ours Bahian style, which means it's cooked with coconut milk, palm oil, and cilantro and served with white rice, pirão (a gravy made from fish broth and cassava flour), and dendê farofa (cassava flour cooked in palm oil).

I haven't been able to find palm oil, but this recipe from The Perfect Pantry uses annatto seeds simmered in canola oil to make a similarly bright orange oil.  If you can't find annatto seeds, you can just use sweet paprika instead.  When a recipe calls for adding salt at the end to taste, I've started using adobo seasoning instead of just plain salt, especially for Latin-inspired dishes, for even more flavor.  Other than that I pretty much followed this recipe from Simply Recipes to make the rice and stew.  I've made the stew with haddock and cod and had a slight preference for the haddock version.  I can only imagine how good it would taste with sea bass instead.


Bahian Style Moqueca (Brazilian Fish Stew)
serves 4

For the annatto oil:
1/2 teaspoon annatto seeds
1/4 cup canola oil

For the rice:
1 tablespoon olive oil
1/2 onion, chopped
1 clove garlic, minced
1 1/2 cups white rice
1 teaspoon kosher salt

For the stew:
1 1/2 - 2 lbs. of fillets of firm white fish such as haddock, cod, or sea bass, rinsed in cold water, pin bones removed, cut into large portions
3 cloves garlic, minced
4 tablespoons lime juice
Kosher salt
Freshly ground black pepper
Olive oil
1 medium yellow onion, sliced
1 yellow or red bell pepper, seeded, de-stemmed, and chopped (or sliced)
1 tablespoon paprika (optional)
Pinch red pepper flakes
2 cups sliced plum tomatoes
1/4 cup green onion greens, chopped
1 large bunch of cilantro, chopped with some set aside for garnish
14-ounce can coconut milk
Adobo seasoning, to taste (optional)


In a small saucepan, combine the annatto seeds and canola oil. Cook over medium heat for 10 minutes, until the oil turns orange. Remove from heat, strain out the seeds (and discard), and set the oil aside to cool. This can be done far in advance.


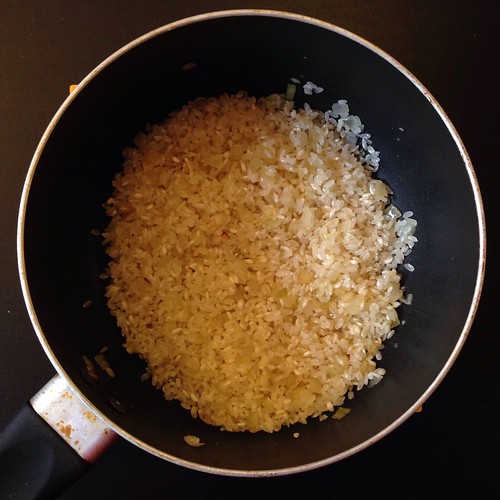
To make the rice, heat one tablespoon of olive oil in a medium saucepan on medium high heat. Add the chopped 1/2 onion and cook, stirring, until the onion is translucent. Add the garlic and cook for 30 seconds more, until the garlic is fragrant. Add the raw white rice and salt and stir to coat completely with the oil, onions, and garlic.  Transfer to a rice cooker and add the recommended amount of water (mine uses 2 cups water for 1 1/2 cups of rice).  Cook the rice in the rice cooker while you make the stew.


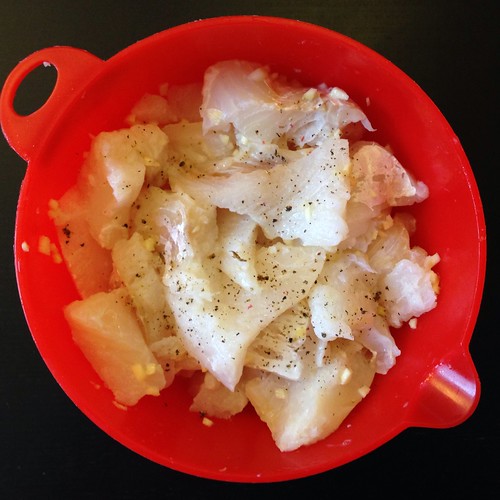
Place the fish in a bowl and add the minced garlic and lime juice so that the pieces are well coated. Sprinkle generously all over with salt and pepper. Keep chilled while preparing the rest of the soup.


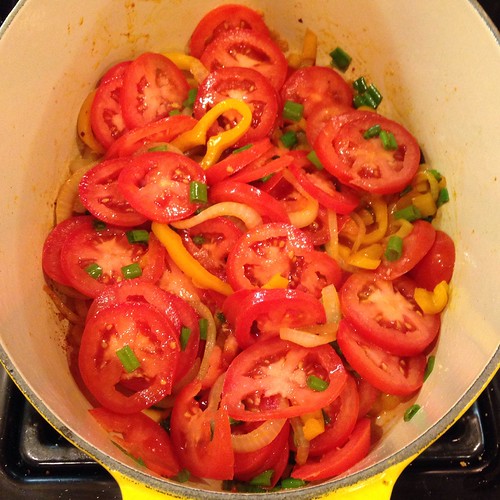
In a large covered pan (such as a Dutch oven), coat the bottom with about 2 tablespoons of olive oil and heat on medium heat. Add the onion and cook a few minutes until softened. Add the bell pepper, paprika (if using), and red pepper flakes. Sprinkle generously with salt and pepper.  Cook for a few minutes longer, until the bell pepper begins to soften. Stir in the tomatoes and green onion. Bring to a simmer and cook for 5 minutes, uncovered. Stir in the chopped cilantro.


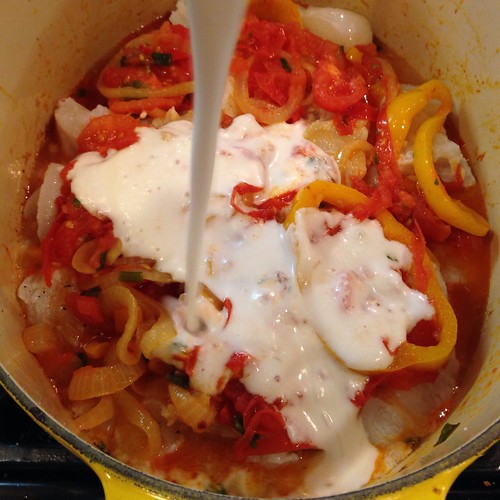
Use a large spoon to remove about half of the vegetables (you'll put them right back in). Spread the remaining vegetables over the bottom of the pan to create a bed for the fish. Arrange the fish pieces on the vegetables. Sprinkle with salt and pepper. Then add back the previously removed vegetables, covering the fish. Pour the coconut milk and annatto oil over the fish and vegetables.


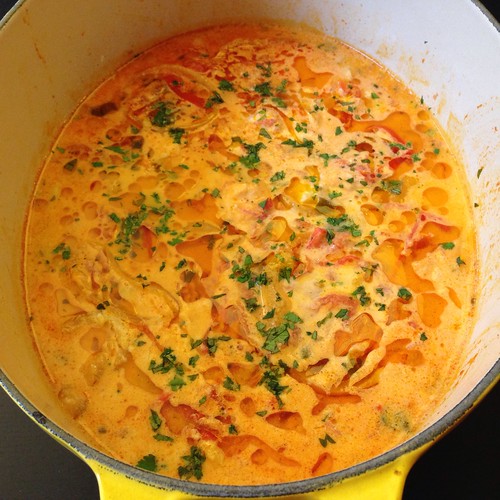
Bring soup to a simmer, reduce the heat, cover, and let simmer for 15 minutes. Taste and adjust seasonings. You may need to add more salt or adobo seasoning, lime juice, paprika, pepper, or chili flakes to get the soup to the desired seasoning for your taste.  Garnish with cilantro and serve with the rice.


I was actually pretty surprised at how close to the real thing this tasted considering how exotic the flavors are to me.  As with most stews, this tastes even better the next day and the day after that, when the flavors have had a chance to meld together more.

Next:  Pão de Queijo (Brazilian Cheese Bread)
Previously:  Pluot Lambic Sorbet
Last year:  Crispy Kale Pizza
Friday, August 23, 2013

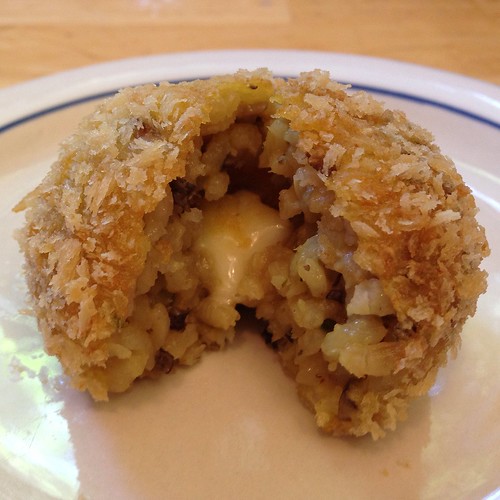
Mozzarella Stuffed Arancini (Risotto Balls)

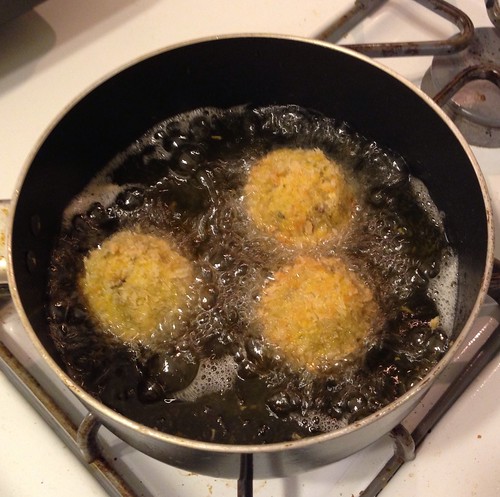
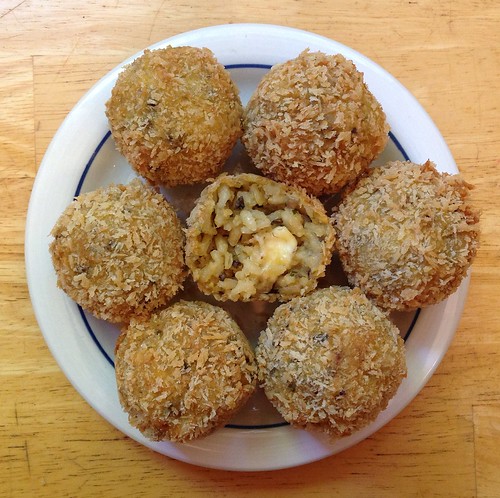
While I love making risotto, I love eating arancini even more!  So every time I make risotto, I make sure I have enough leftover to make some of these fried risotto balls.  The traditional breading would be breadcrumbs with Italian seasonings, but I make mine with panko flakes for some added crunch.  And if you cut up a stick of mozzarella string cheese and stick them inside the arancini, it gets all warm and gooey after you fry it up and makes for even more of a texture contrast.


Mozzarella Stuffed Arancini
makes 6-7 balls

About 1 1/2 cups leftover risotto
1 stick mozzarella string cheese, cut into 6 pieces
Flour for coating
1 egg, beaten
Panko bread crumbs
Oil for frying

Scoop up about 1/4 cup of risotto into your hand and place a piece of the cheese in the middle.  Mold the risotto up and around the cheese to enclose it.  Pat the risotto into a ball (it will be too sticky to properly roll).  Repeat 5 more times.  Place the risotto balls on a plate a refrigerate for at least half an hour.


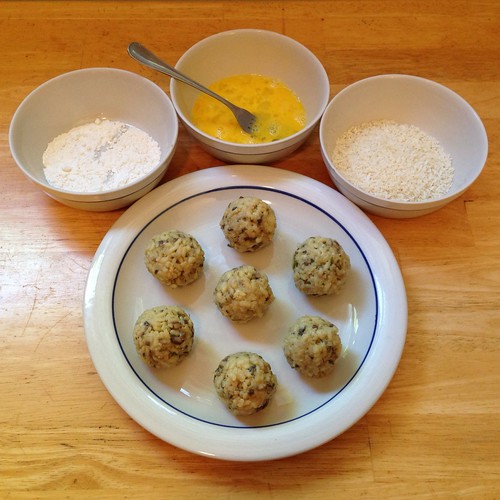
Prepare your breading station:  place some flour into a wide bowl, the beaten egg in another wide bowl, and some panko bread crumbs in another wide bowl.  Pour enough oil into a saucepan to reach a depth of 2 inches and start heating on high to 350°F.


Remove the balls from the fridge and one at a time, roll them in the flour to coat, the beaten egg to coat the flour, and the panko bread crumbs to coat the egg.


When the oil has reached 350°F, fry the risotto balls a few minutes on each side until golden brown.  Drain on a rack set over paper towels.  Serve warm.


These are also good at room temperature and great to pack and eat on the run.  You can also add other leftovers to the risotto balls:  cooked peas, chopped up chicken, ham, or sausages, etc. I would refrain from adding anything too wet like tomatoes for fear of making the arancini a soggy mess, though.

Next:  Jim Lahey's No-Knead Bread
Previously:  Crimini Mushroom Risotto

Wednesday, August 21, 2013

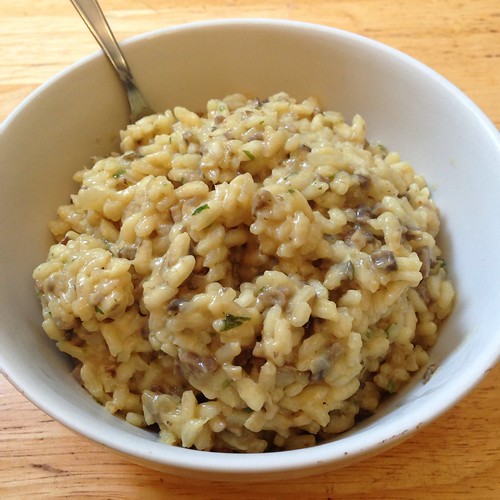
Crimini Mushroom Risotto

If I had to pinpoint the one dish that made me love cooking, it'd be risotto. It's not one of those quick, easy recipes that you can throw together in 15 minutes or less. It takes time and almost-constant attention, which you can only give something you love.

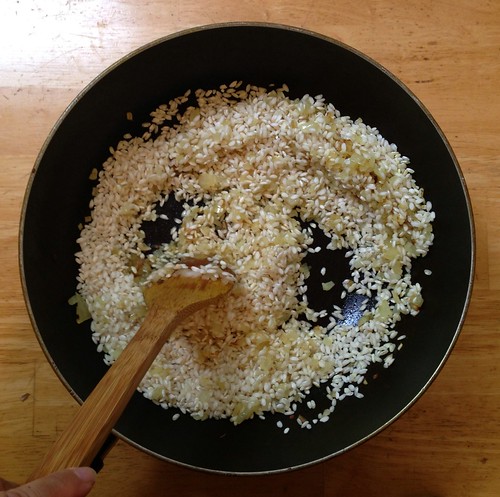
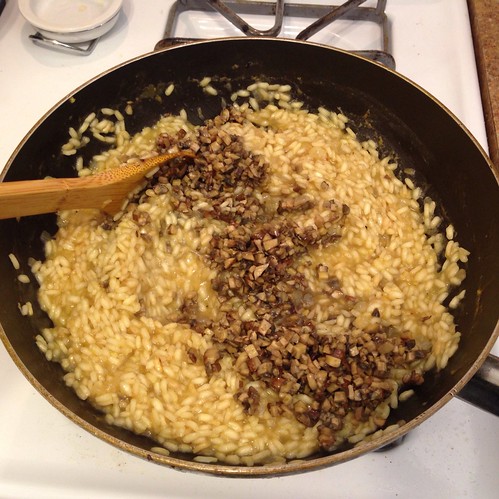
You start with arborio rice, a short grain rice, which is chewier and starchier than long grain rice. The rice is sauteed first before any liquids are added, until the edges start to get translucent and the center is still opaque. Then some white wine is added to deglaze the pan and add some depth of flavor. Once the wine has been fully absorbed, hot stock is added a ladleful at a time. In between each addition of stock, you need to stir the risotto and make sure that all the liquid has been absorbed before adding the next ladleful. This is what gives the risotto the velvety, creamy texture.  That, and love.

I love mushroom risotto because it's a great way to showcase the sometimes subtle flavor of mushrooms.  I finally got a shipment of crimini mushrooms in my Boston Organics delivery last week so I was excited to make this dish with them.  It's even better if you have wild mushrooms, though, like morels if you can get your hands on them.


Crimini Mushroom Risotto
makes 4 servings

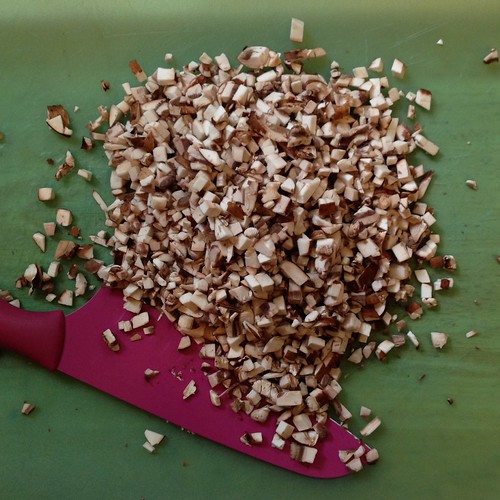
1/2 lb. crimini mushrooms, finely chopped
1 tablespoon olive oil
6 tablespoons unsalted butter, divided
Kosher salt
1 small onion, chopped
1 garlic clove, minced
1 2/3 cup arborio rice
1/4 cup white wine
1 quart mushroom, vegetable, or chicken stock, hot
1 teaspoon parsley, chopped
1/3-1/2 cup Parmesan reggiano cheese, grated
Truffle salt (optional)


Heat the olive oil and 2 tablespoons of butter in a large saute pan on medium heat.  Add the mushrooms and saute until softened.  Season to taste with salt, transfer to a bowl (along with the juices), and set aside.


In the same pan, melt 2 more tablespoons of butter and add the chopped onions.  Once the onions start to sweat, add the garlic and cook for another minute or two until softened.


Add the arborio rice and stir so that it doesn't stick to the bottom of the pan.  After about 5 minutes, once the rice has started to turn translucent on the edges but is still opaque in the center, add the white wine and stir to deglaze the pan.


Once the wine has been absorbed, add a ladleful of hot stock and keep stirring.  Continue to add the stock a ladleful at a time once the rice has absorbed all the liquid.


When all the stock has been used up, add the mushrooms along with their juices back into the rice and stir.  Cover the rice for 2 minutes to finish cooking.


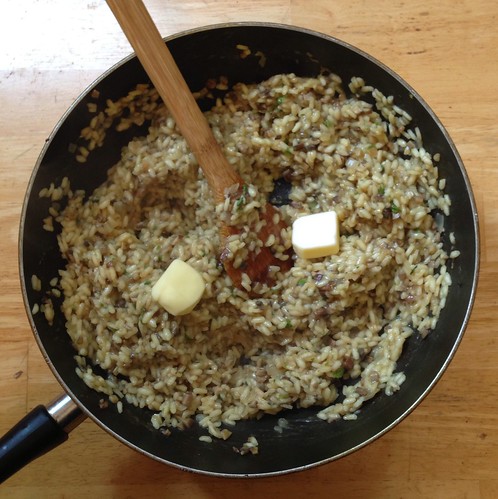
Remove from heat and stir in the chopped parsley, remaining 2 tablespoons of butter, and cheese.  Finish with truffle salt, if using.  Serve immediately.


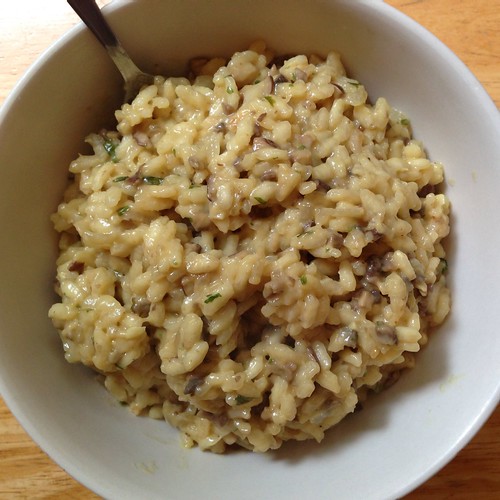
Even though the dish gets all creamy, the rice should still have some bite to it and not be all mushy.  If you do happen to have leftovers, make sure you refrigerate them so that you can make arancini (risotto balls) out of them (recipe coming up next)!

Next:  Mozzarella Stuffed Arancini (Risotto Balls)
Previously:  Shakshuka Pizza
Thursday, June 20, 2013

Mango Coconut Rice Pudding Pops and Ice Cream

I've had this recipe bookmarked for a while now, but it wasn't until I found some cute, cheap popsicle molds at Ikea that I was able to make them.   The original recipe made 12 large popsicles, so I adapted the recipe for 6, but even that was way too much for my tiny popsicle molds.  So I decided to add some cream and throw it into my ice cream maker to see how that would turn out.
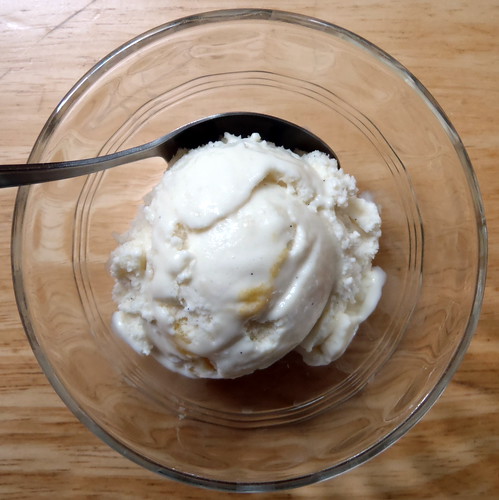
Considering how much water there is in the mixture, the ice cream came out surprisingly well.  It freezes a little harder than I'm used to, but I was more than satisfied with the taste.  If I were to make this as an ice cream again, I'd try switching out the water for whole milk or half and half.  And I'd probably add a little sugar to the coconut milk so that the rice absorbs some sweetness, and it'd probably also help the rice stay a little softer once frozen, too.

As a popsicle, it's perfect. The creamy coconut milk and bright mango bits complement each other, and the rice gives it a nice chewiness.  My favorite part, though, is the sweetened condensed milk that kind of floats to the top of the mold (and therefore ends up at the bottom of the popsicle) giving it the perfect ending. 


Mango Coconut Rice Pudding Pops and Ice Cream (adapted from The Kitchn)
makes six 2 oz. popsicles and about a quart of ice cream

One 15-ounce can coconut milk, shaken
1/2 vanilla bean, halved lengthwise
1/2 cup short-grain or arborio rice
1 cup sweetened condensed milk
1 cup water
1/2 teaspoon vanilla extract
1/4 teaspoon coconut extract (optional)
1/4 teaspoon kosher salt
1 cup fresh or frozen mango, diced
1/4 cup heavy cream (for the ice cream)


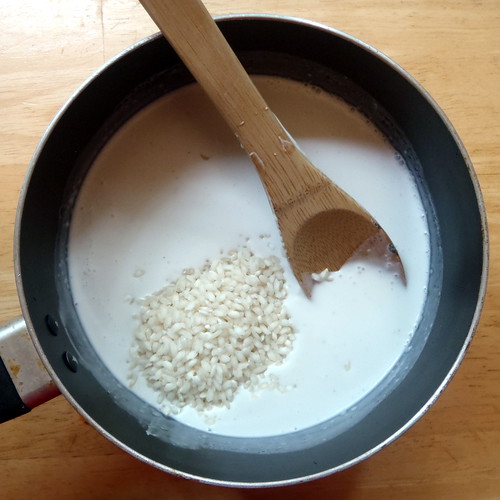
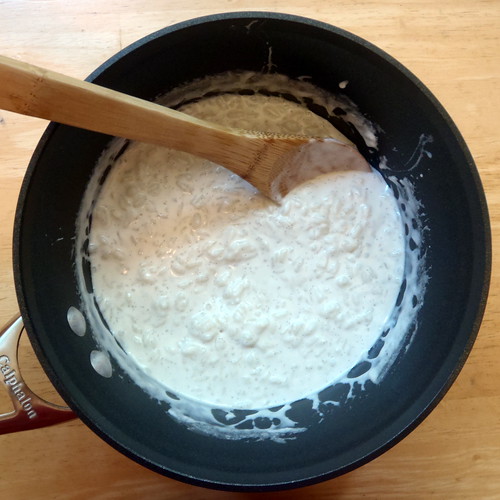
Add the contents of the can of coconut milk into a large saucepan. Scrape the seeds out of the vanilla bean and stir in. Stir in the rice, and bring the whole mixture to a simmer over medium heat.


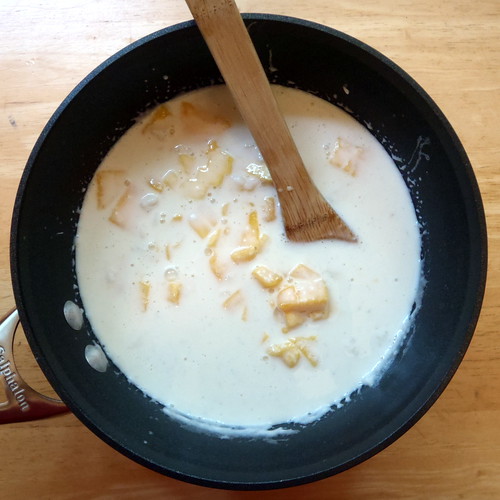
Turn the heat down to low and cook for about 25 minutes, or until the rice is tender.  Whisk in the sweetened condensed milk, water, vanilla extract, coconut extract (if using), and salt. 


Fold the mango into the rice mixture.


Transfer the rice and mango mixture to six 2-ounce popsicle molds. Insert sticks and freeze until solid — 3 to 4 hours.  To release the pops from the molds, run the molds briefly under warm water.


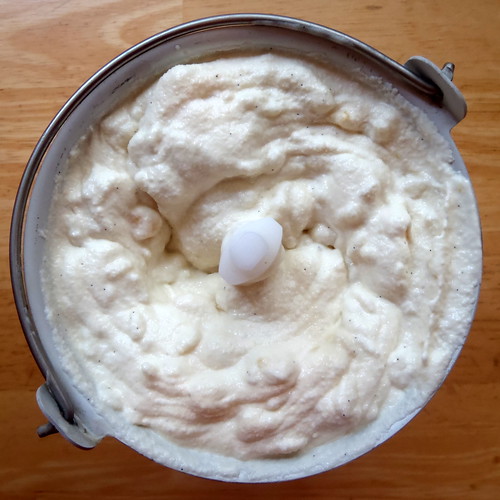
Add the rest of the mixture to an ice cream machine and churn according to the manufacturer's directions.  Transfer the ice cream to an air-tight container and freeze for at least 4 hours to harden.


Next:  Passion Fruit Macarons
Previously:   Homemade Cronuts
Three years ago:  World Peace Cookies