Showing posts with label cake. Show all posts

Wednesday, August 28, 2019

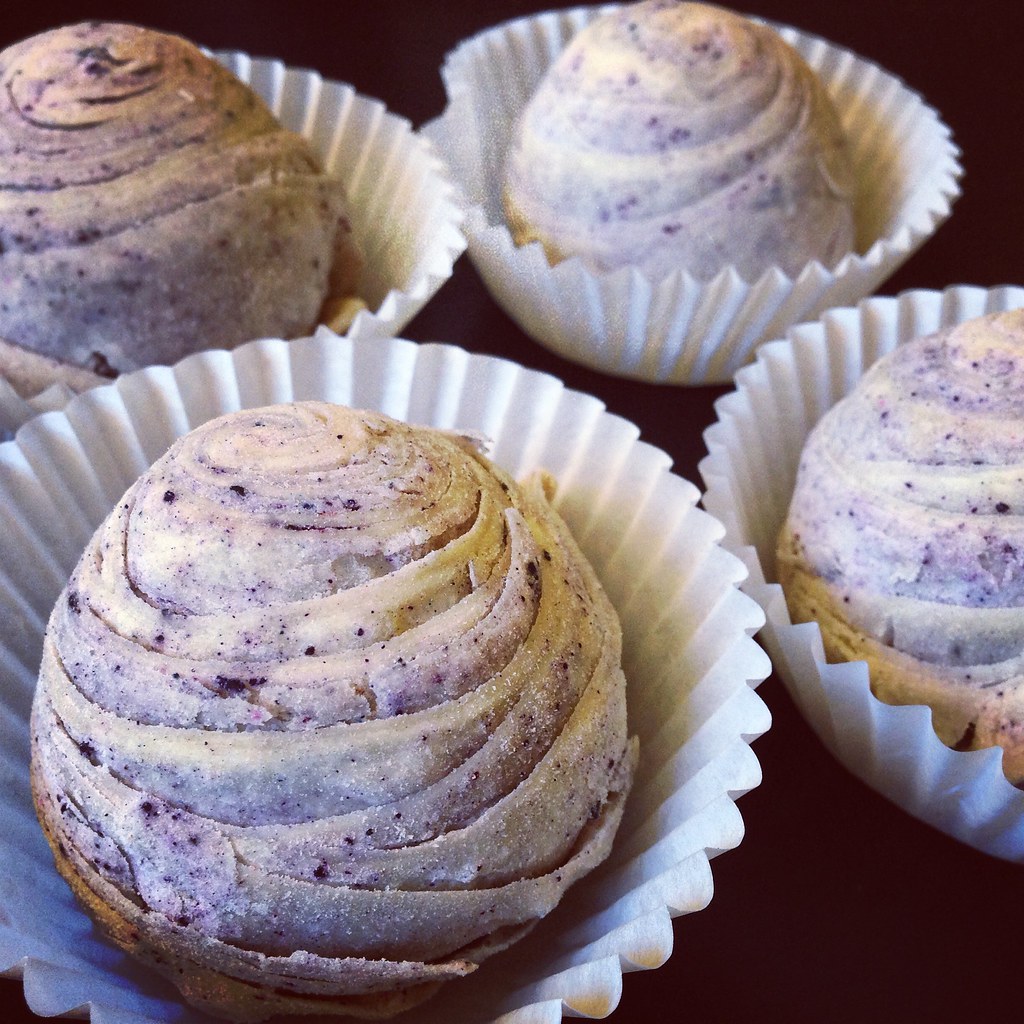
Snowskin Cake Truffle Mooncakes


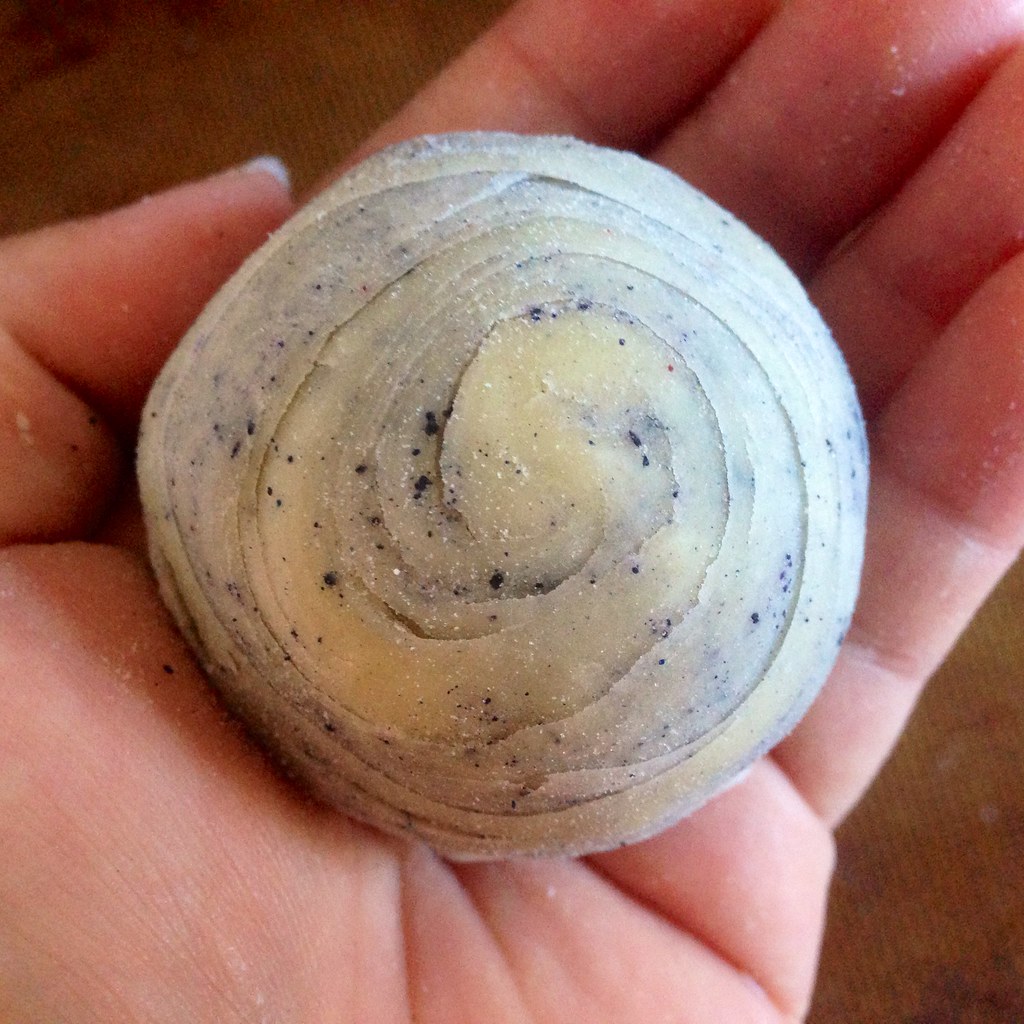
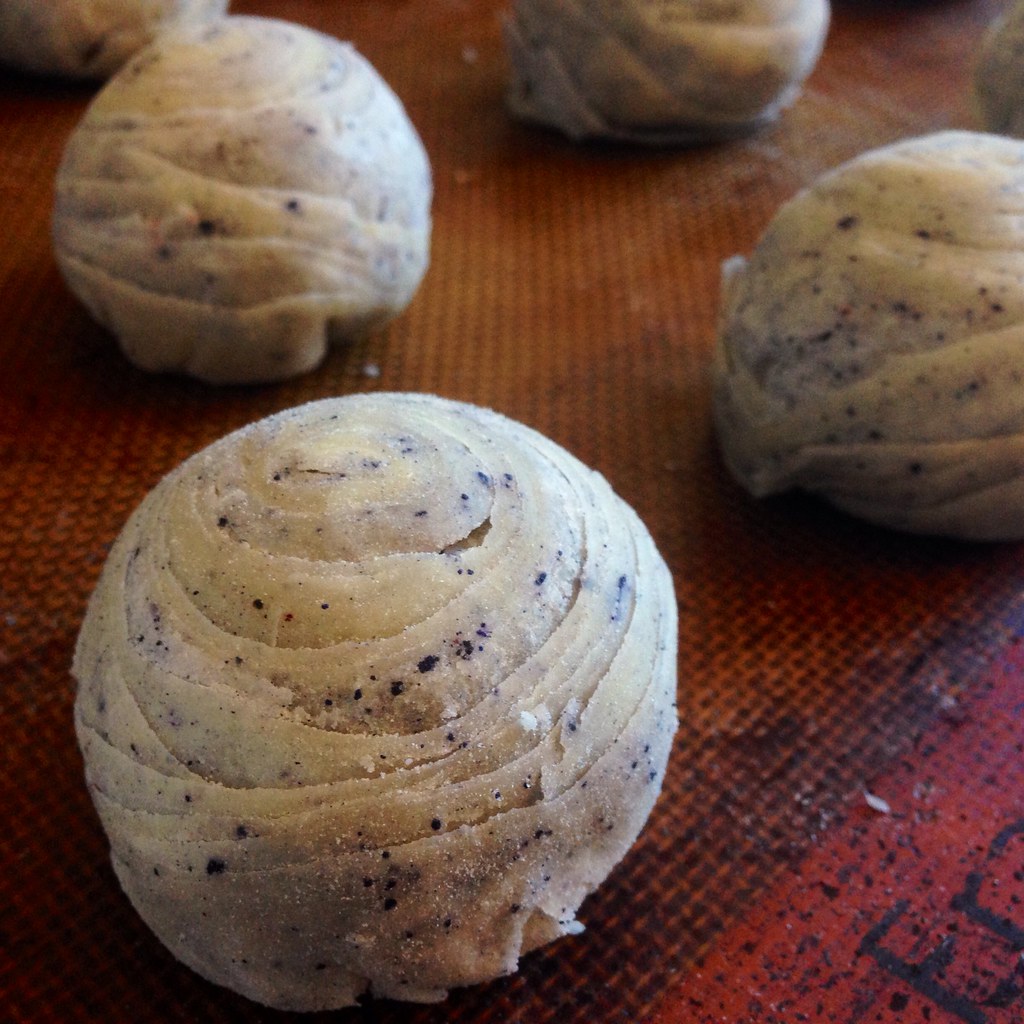
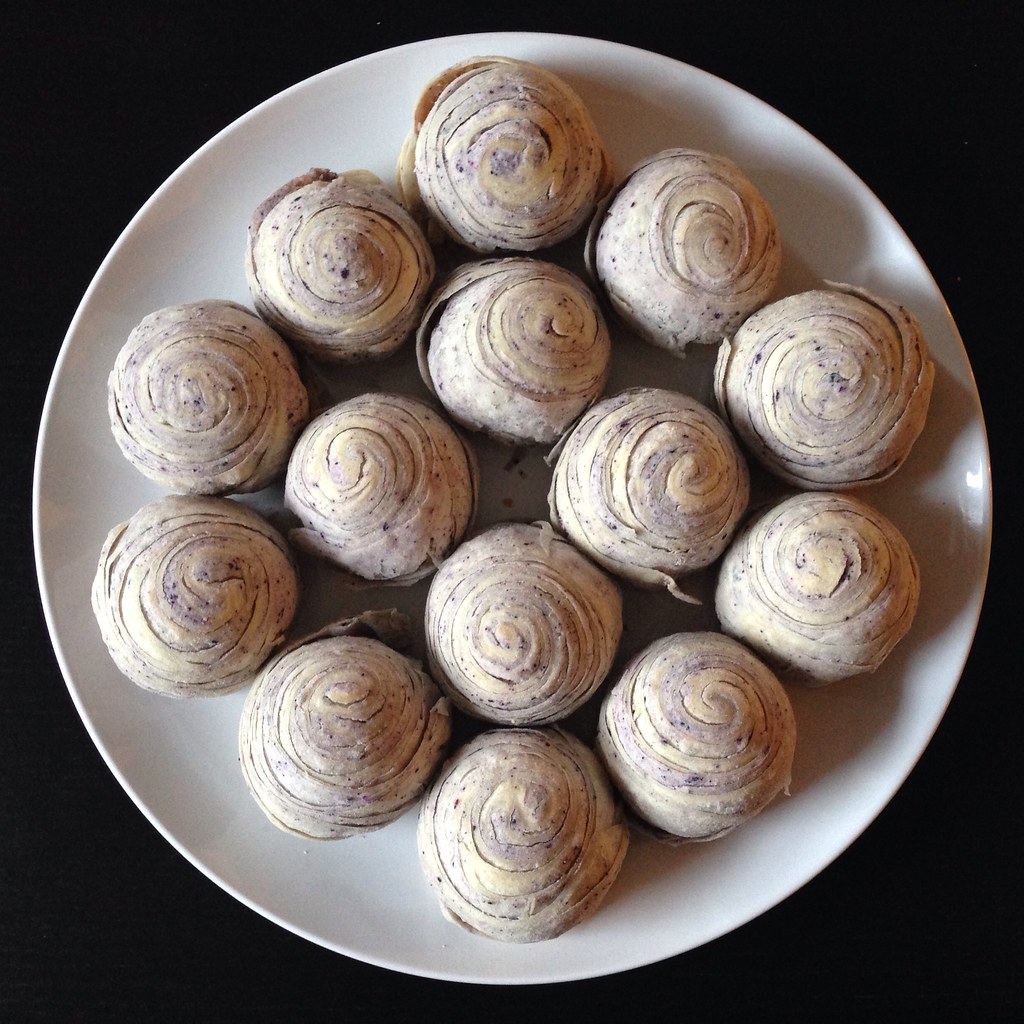
The mooncakes I grew up eating were the golden, baked kind--usually filled with red bean or lotus seed paste and sometimes even a salted egg yolk inside.  It's so ubiquitous that iOS has an emoji for them (while there still isn't an emoji for waffles??).  They were good, but oh so heavy and dense; it was hard to eat more than a few tiny slices.  Luckily, a few different kinds have popped up since I was a child like the swirly, flaky Taiwanese version I made a few years ago.  Even more recently, I've been seeing snowskin mooncakes where the skin is made with glutinous rice flour resulting in a soft, translucent skin.


I did some research on how to make them, and it looks like there's a hard way with a lot of ingredients and steps and an easy way with just a few ingredients and no steaming involved.  I already know how difficult it can be to work with mochi, so I went with the easy way by following the directions from Kirbie's Cravings and Tiny Urban Kitchen.

The first step is either sourcing roasted glutinous rice flour or making your own.  Since I already had some flour at home, I tried dry roasting it in my wok.  It's not hard to do, but it does take a little patience and a lot of stirring before you get that first wisp of smoke.  Then you sift it together with powdered sugar before rubbing in a fat like shortening.  I've tried using coconut oil and butter and both tasted great, but since butter has a slightly higher melting point, it's easier to work with.

The hardest part for me was figuring out how much liquid to add to make the dough.  If you don't add enough it'll be too crumbly to work with, and if you add too much, it'll be too sticky.  I found the hard way that if you overdo it with the liquid, you can add in some more powdered sugar to bring it back to the right consistency.


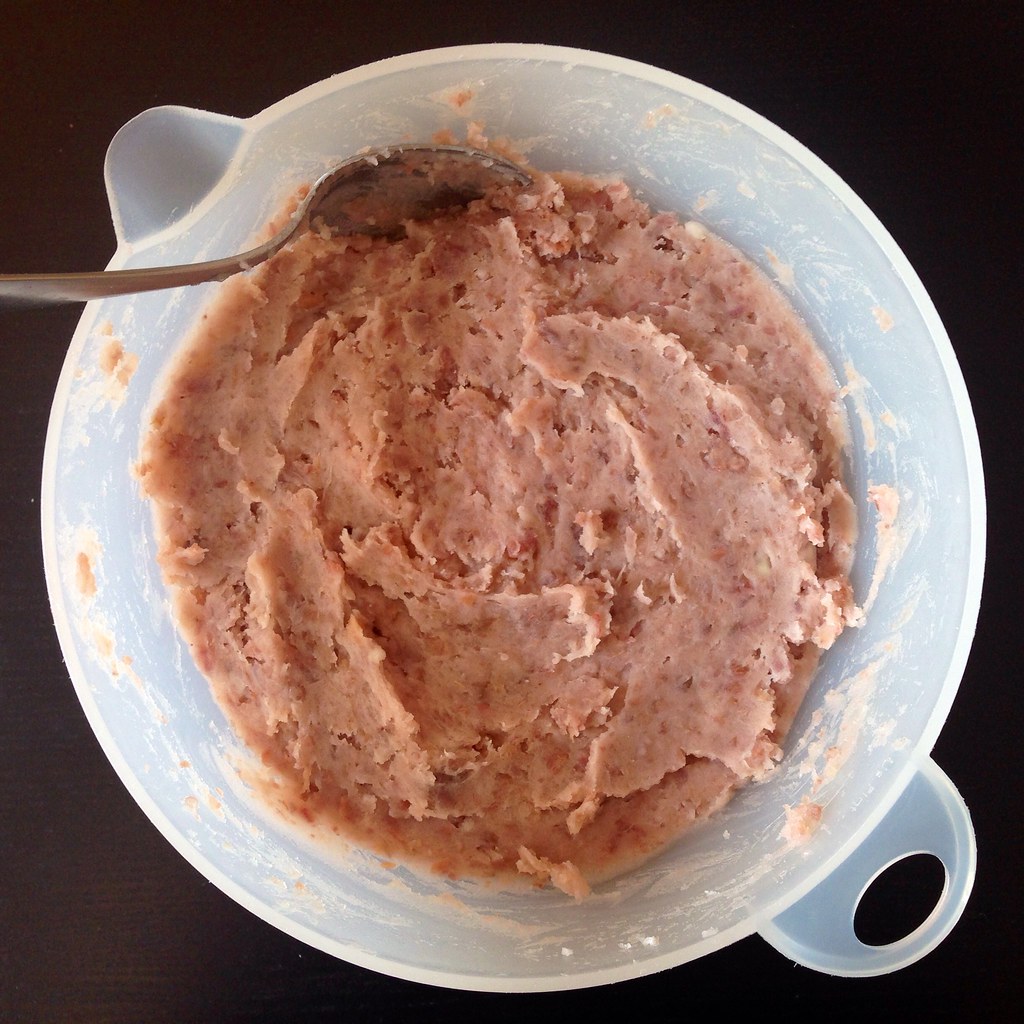
Then there's the matter of the filling.  I knew I didn't want to go with the traditional heavy fillings and wanted to come up with something that might be more accessible for the American pantry and palate.  It had to be something pliable enough to mold, firm enough to keep its shape, wouldn't need additional cooking, and hopefully stable at room temperature.  I considered a cheesecake type filling or cookie dough before I thought of an even better idea:  cake truffles!  You may know them as cake balls or cake pops, but it's what you get when you mix cake crumbs with frosting or another binder, roll them up and cover with chocolate or candy melt.


It's incredibly easy to make and there's a million different variations.  I made some to bring to a friend's birthday party, and since she loves watermelon, I baked a strawberry box mix cake, mixed it with some frosting and mini-chocolate chips, and wrapped it with pandan flavored snowskin so it looked like a watermelon.  I also make some with non-dyed snowskin and Funfetti cake inside for a birthday cake mooncake.  My favorite version so far has been using the chocolate chip-passion fruit cake truffle from All About Cake and wrapping it with a snowskin made with passion fruit pulp instead of water.


Snowskin Cake Truffle Mooncakes
makes about 35 mooncakes using a 50 g mooncake mold

For the cake truffle filling:

9"x13" cake, baked and cooled
Mix-ins like mini-chocolate chips or sprinkles (optional)
Binder, like frosting or fruit juice

Use your hands to crumble the cake into crumbs.  Add your mix-in, if using, and toss to combine.  Add your binder, a little at a time, until you can squeeze the mixture and it holds its shape.  Use a cookie dough scoop to form about 35 balls.

For the snowskin:

250 grams sweet glutinous rice flour
225 grams powdered sugar, plus more for rolling
75 grams butter or coconut oil
125 grams water or other liquid like fruit juice
Food coloring and/or flavor extract, optional

In a large skillet or wok, dry roast the rice flour over medium heat, stirring constantly, until it starts to smoke and change color.  Allow to cool to room temperature, then sift together with the powdered sugar into a medium bowl.  Add the butter or coconut oil and then rub it into the dry mixture until well combined.  If using the food coloring and/or flavor extract, add to the water.  Add half of the liquid to the bowl and mix together.  Gradually add more of the liquid until the mixture is soft and pliable but not tacky.  It's a fine line between a crumbly and sticky texture so go slowly.

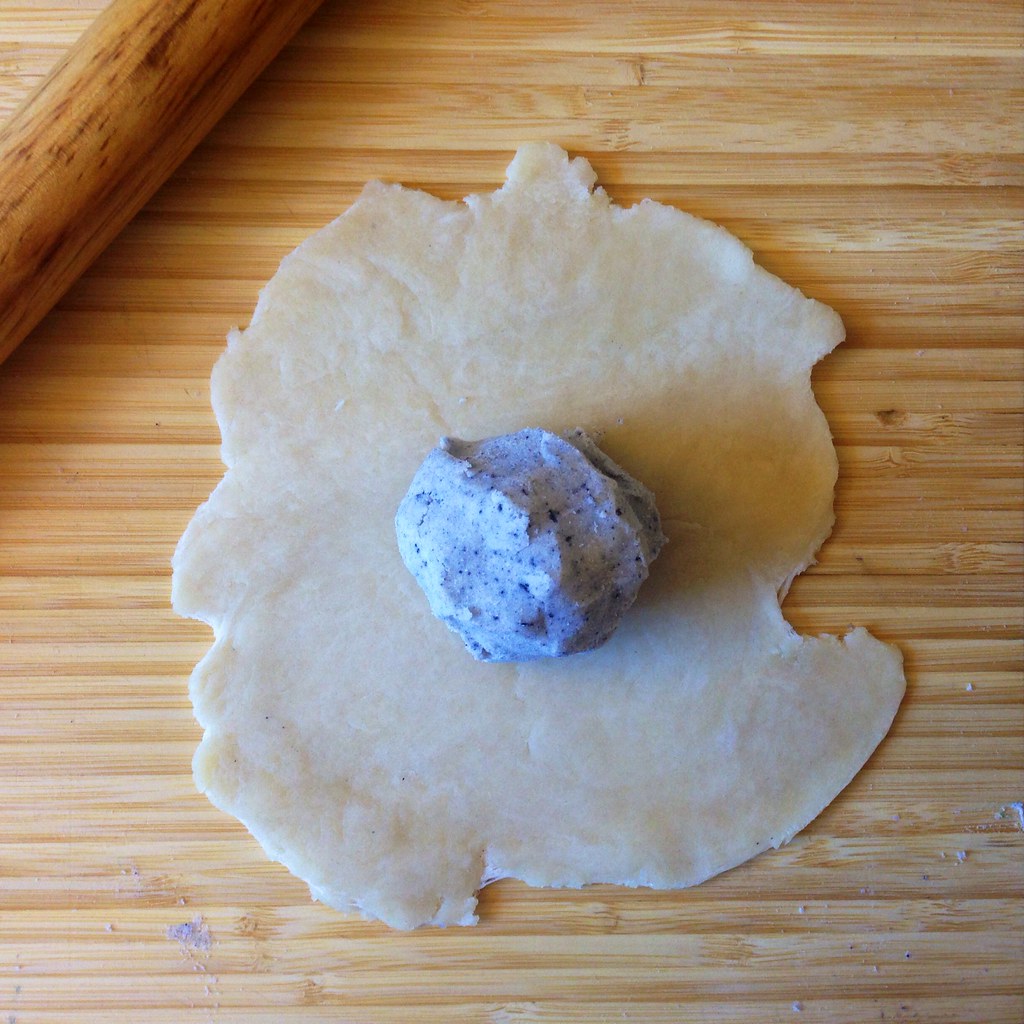
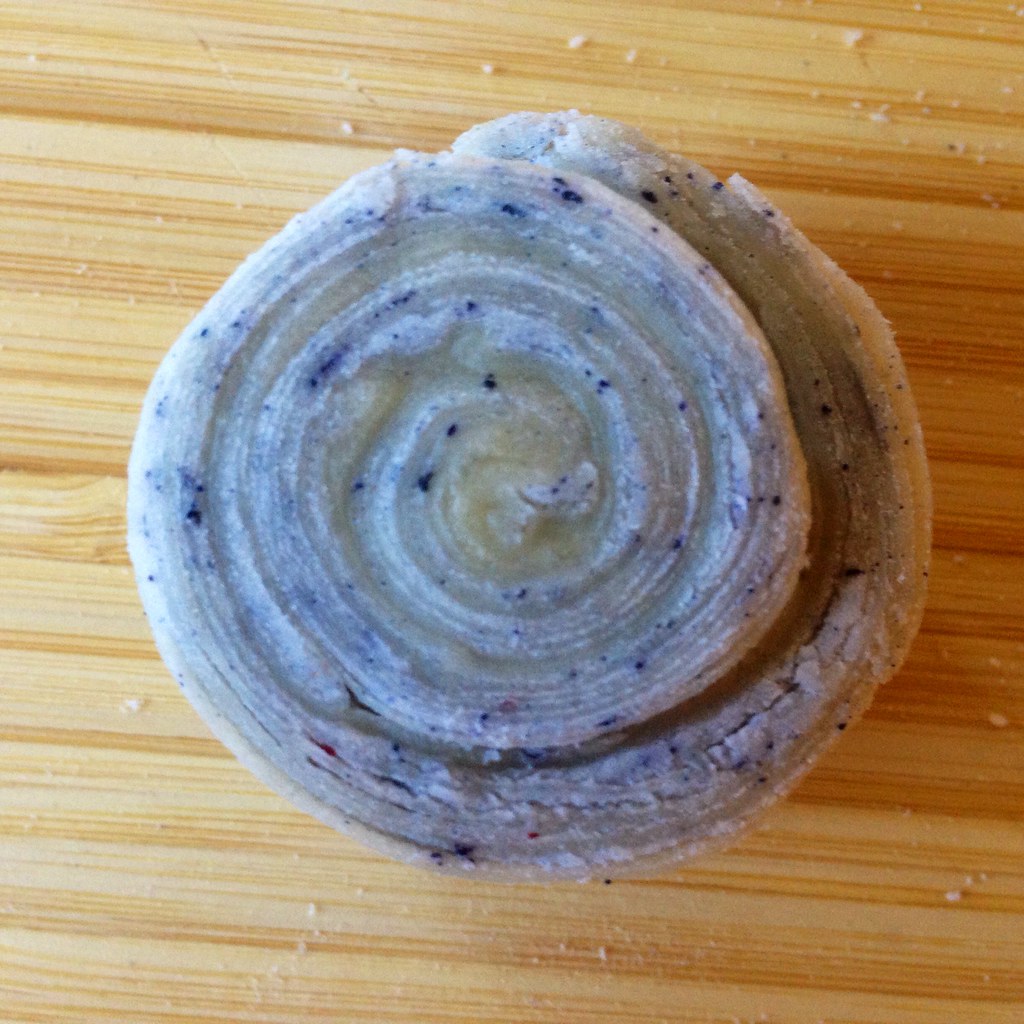
Pinch off about a walnut size lump of the mixture and roll out into a thin disc on a surface dusted with powdered sugar.  Wrap the snowskin around one of the cake balls.  If there is extra snowskin after wrapping the cake ball, pinch it off and return it to the rest of the mixture.  If you need more, pinch off a bit from the mixture and patch up the hole.  Place the wrapped cake ball on the counter, seal side down, and make sure it will fit into the mooncake mold.  If it is too wide, use your hands to gently shape it narrower and taller.  Use a 50 g mooncake mold to press it into shape and release.  Repeat with the rest of the snowskin dough and cake balls.  You can store the mooncakes in an airtight container in the fridge for 1-2 days or 1-2 weeks in the freezer.  Let thaw before serving.


Previously:  Mochi Waffles

Friday, March 10, 2017

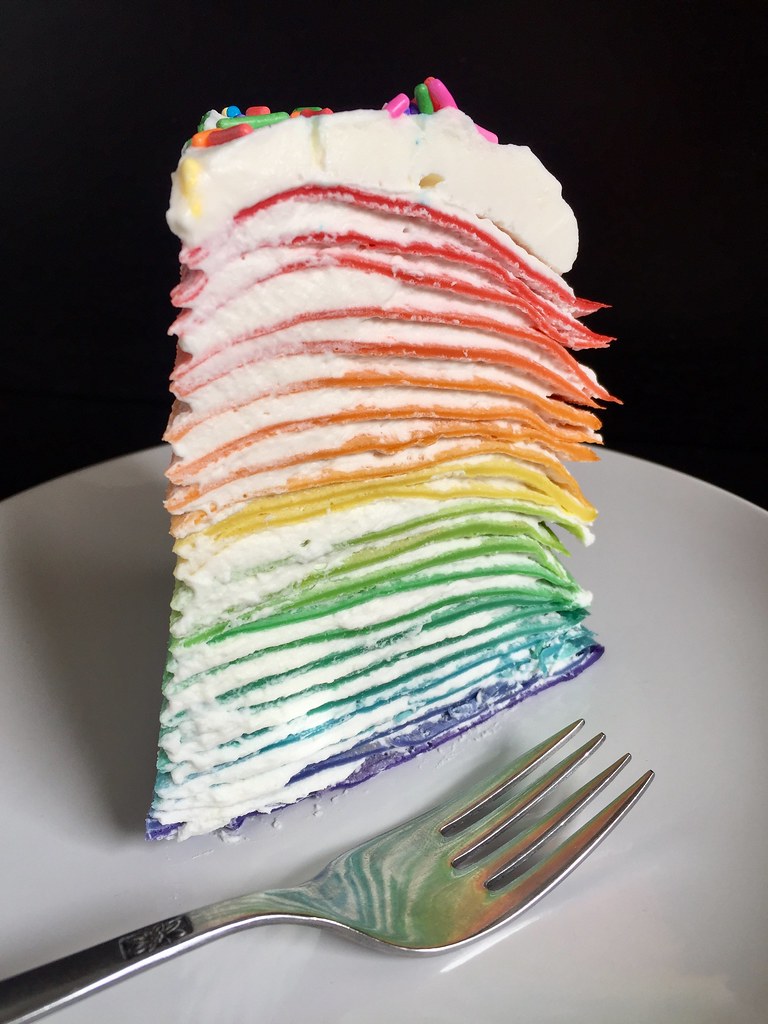
Rainbow Crepe Cake


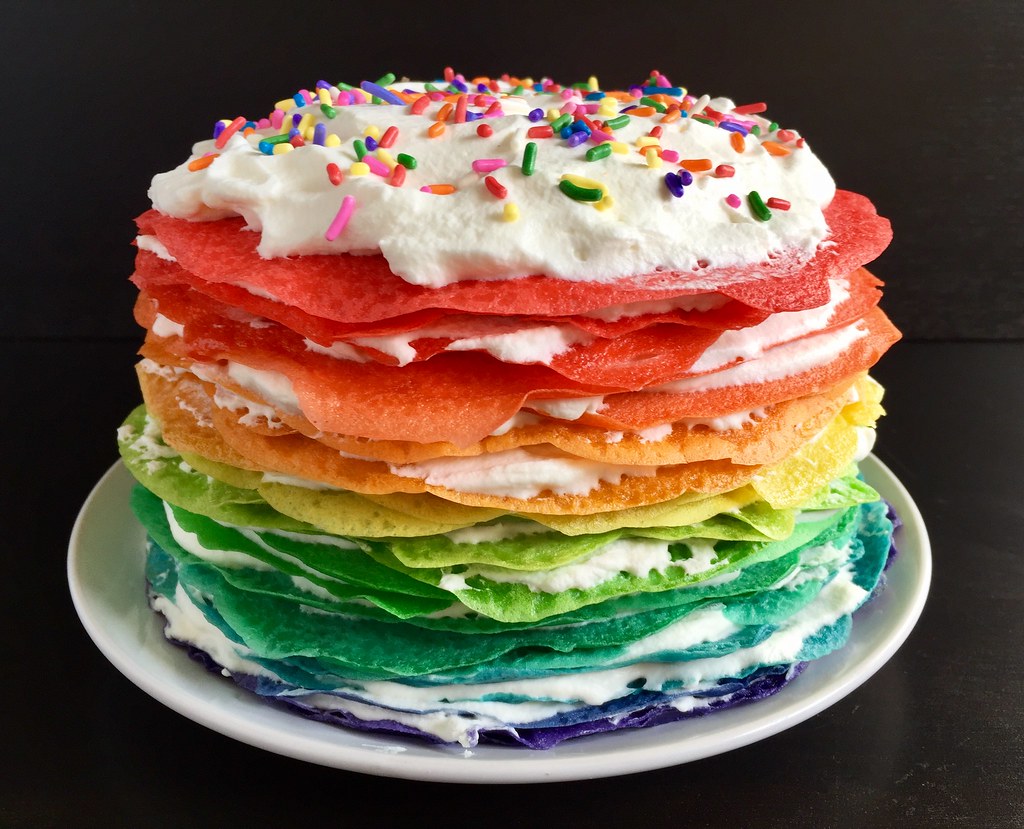
I've been wanting to try making a full-size crepe cake ever since I made those Nutelle mini crepe cakes 3 years ago, and seeing a recent picture of my friend Serene's matcha crepe cake re-inspired me.  But when I couldn't decide which flavor crepe cake to make, my other friend Christine reminded me of a rainbow crepe cake she had shown me on Instagram before.  I knew what I must do.


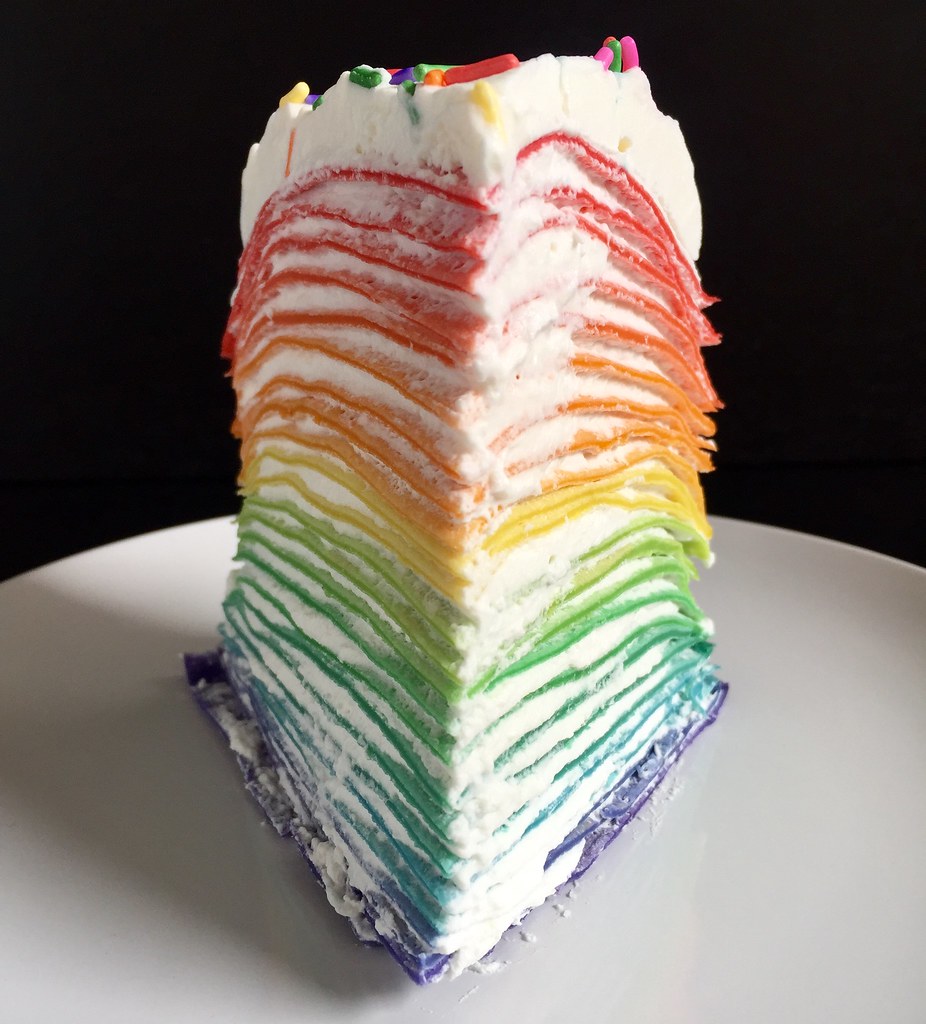
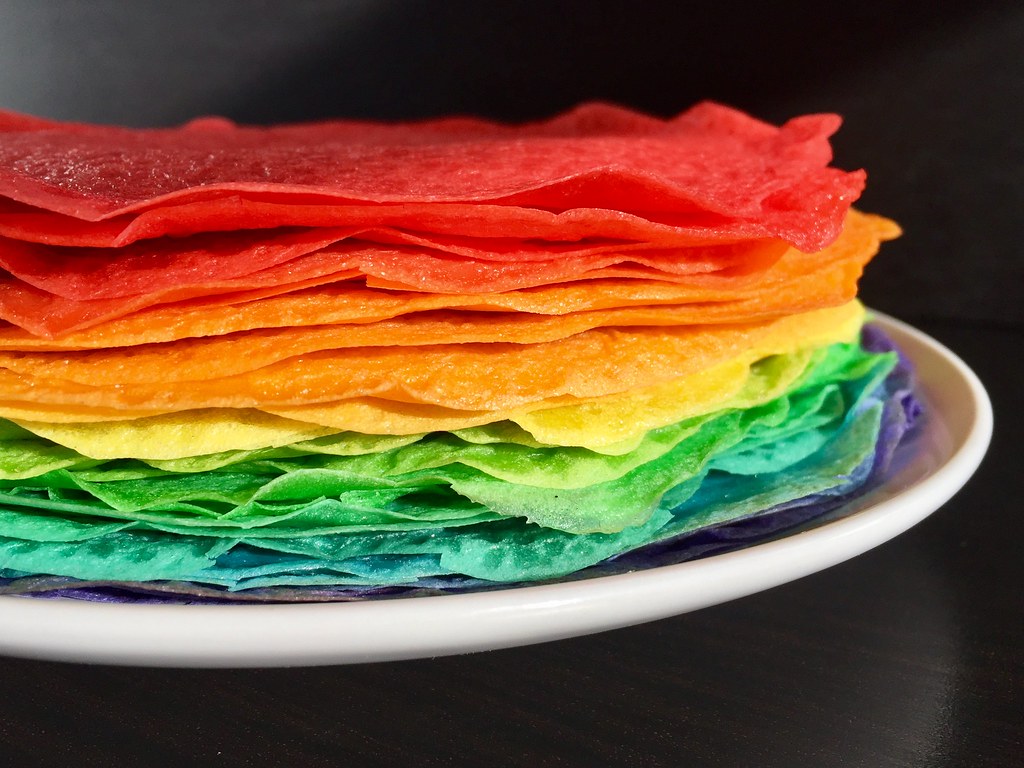
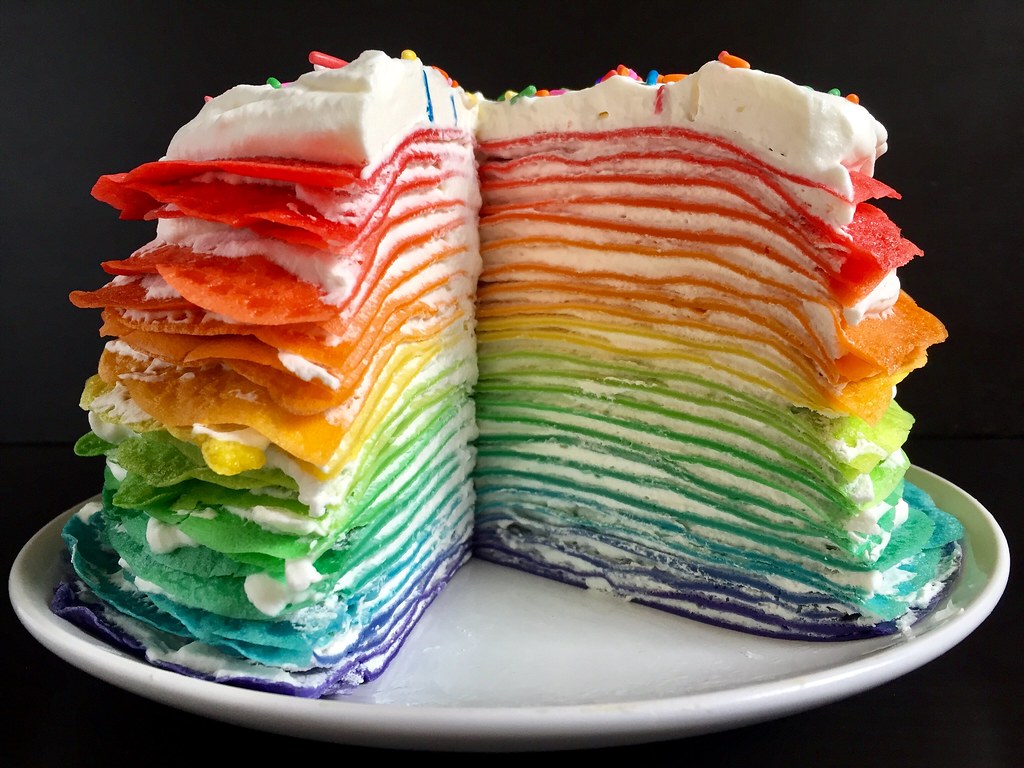
After some research on-line, it seemed that most rainbow crepe cakes used 6 discrete colors of crepes, but I wanted to try to blend them together so that the color of the crepes was more progressive.  I figured I'd make 2 crepes of each color, then start mixing the leftover batter together a little at a time.  This just made an already complicated process even more complicated, but I'm rather pleased with the result.  If you'd rather just leave it as 6 discrete colors, just divide the batter evenly between 6 bowls before coloring.  But if you'd like to try the ombré approach, you can put 1/3 less batter in the bowls for the red and purple since you're only blending those one way instead of two (a scale makes it a lot easier to figure out).


I decided to just use sweetened whipped cream for the filling (a recommendation from Serene) instead of pastry cream plus whipped cream like a lot of other recipes use because it was easier, and I liked the pure white color of the filling against the rainbow of colors.  Serene also suggested freezing the cake if not serving right away to help stabilize it and prevent weeping.


Rainbow Crepe Cake (crepe recipe from Alton Brown)
makes a 24-layer crepe cake

4 large eggs
1 1/2 cup milk
1 cup water
2 cups all-purpose flour
5 tablespoons sugar
6 tablespoons melted butter
1 tablespooon vanilla extract, divided
Oil, for greasing
2 cups heavy cream
1/3 cup powdered sugar
Rainbow sprinkles (optional)

Combine the eggs, milk, water, flour, sugar, butter, and 2 teaspoons of vanilla extract in a blender and pulse for 10 seconds.  Let rest in the fridge for at least an hour or overnight.

Divide the batter into 6 bowls, with about 1/3 less in two of the bowls.  Color the bowls with less batter in them red and purple.  Color the other bowls orange, yellow, green, and blue.

Lightly grease a non-stick pan with oil and heat over medium-low.  Pour a scant 1/4 cup of the purple batter into the middle of the pan and swirl to spread into an even circle.  Cook for 30 seconds and flip carefully.  Cook for another 10 seconds, then transfer to a cutting board or baking sheet lined with parchment paper.  Repeat, making 2 crepes each of all 6 colors.  Once the crepes have cooled on the parchment paper you can start stacking them on a plate.

Gradually mix the rainbow-adjacent colors together to make the rest of the crepes.  You should end up with about 24 crepes, more if you don't mess any up.  I messed up 2 or 3 (the first one is always a fail) and ended up with 24.

Beat the heavy cream to soft peaks, then add the powdered sugar and remaining teaspoon of vanilla extract.  Beat again to barely stiff peaks.

Place a purple crepe on a plate and spread a thin layer of the whipped cream on top, leaving a little bit of a border.  Top with another crepe and continue with alternating layers of crepes and whipped cream.

If you have any whipped cream leftover, frost the top and garnish with sprinkles, if you like.  Chill until ready to serve.


To be honest, I thought the cake looked a lot prettier than it tasted.  This happened the last time I made a rainbow confection too.  I think I was so focused on the looks I forgot that I never really flavored the crepes or whipped cream, and Alton Brown's crepes are made to be filled with something tasty not just eaten alone.  Luckily, Serene sent me her crepe recipe so I'll probably use that one next time.  =)

Next:  Rhubarb Strawberry Coconut Cream Tart
Previously:  Japanese Chicken Curry Rice
Last Year:  The 4-Hour Baguette
Two Years Ago:  Homemade Squid Ink Pasta
Three Years Ago:  Miso-Glazed Eggplant
Four Years Ago:  Happiness Cake
Seven Years Ago:  Momofuku's Crack Pie
Eight Years Ago:  Korean Pancake Face-Off

Sunday, July 3, 2016

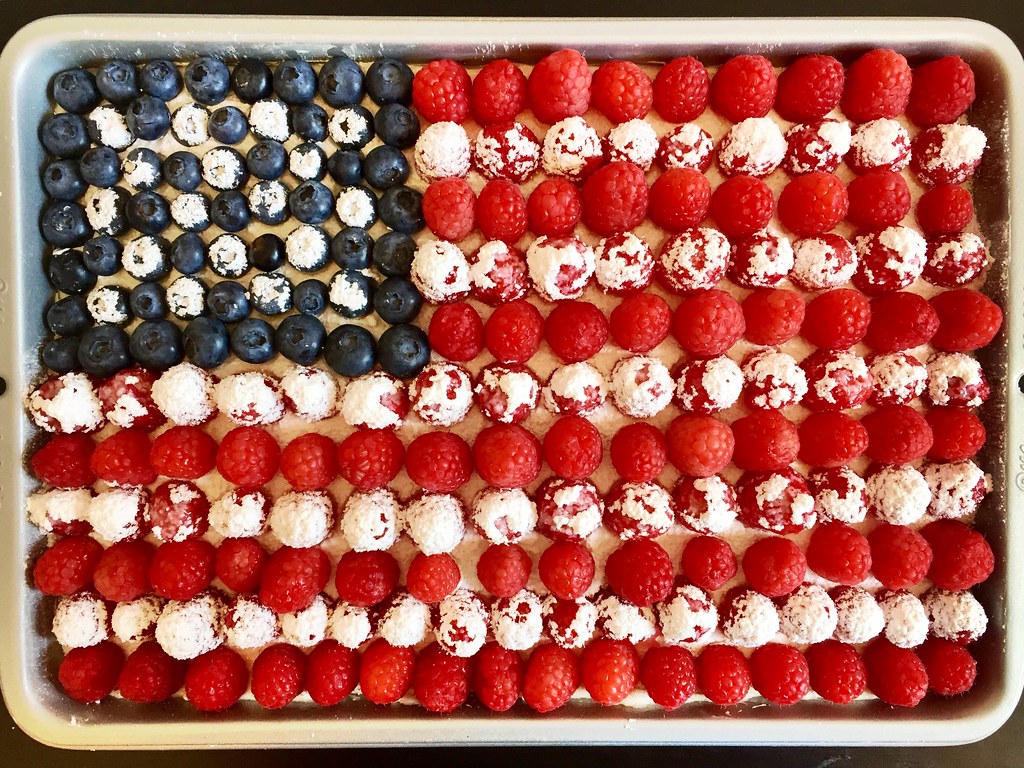
How to Make an American Flag Cake

https://www.flickr.com/photos/joyosity/27435114804/in/dateposted-public/

I've been wanting to make an American flag cake for the 4th of July and had pinned several possible versions including this one from Food52 and this ice cream cake version from the Food Network.  But the problem with those round layer cakes though is that I only had one round cake pan and no way to transport the finished product.  I wasn't too keen on having to pull out my piping bag to make Ina Garten's (or as Brit + Co called it, Taylor Swift's) version either, so when I came across Smitten Kitchen's version from four years ago, I was truly smitten.  Not only was it a single layer rectangular cake, but all you needed was some powdered sugar to make the "stars" and stripes!

https://www.flickr.com/photos/joyosity/27760048970/in/dateposted-public/

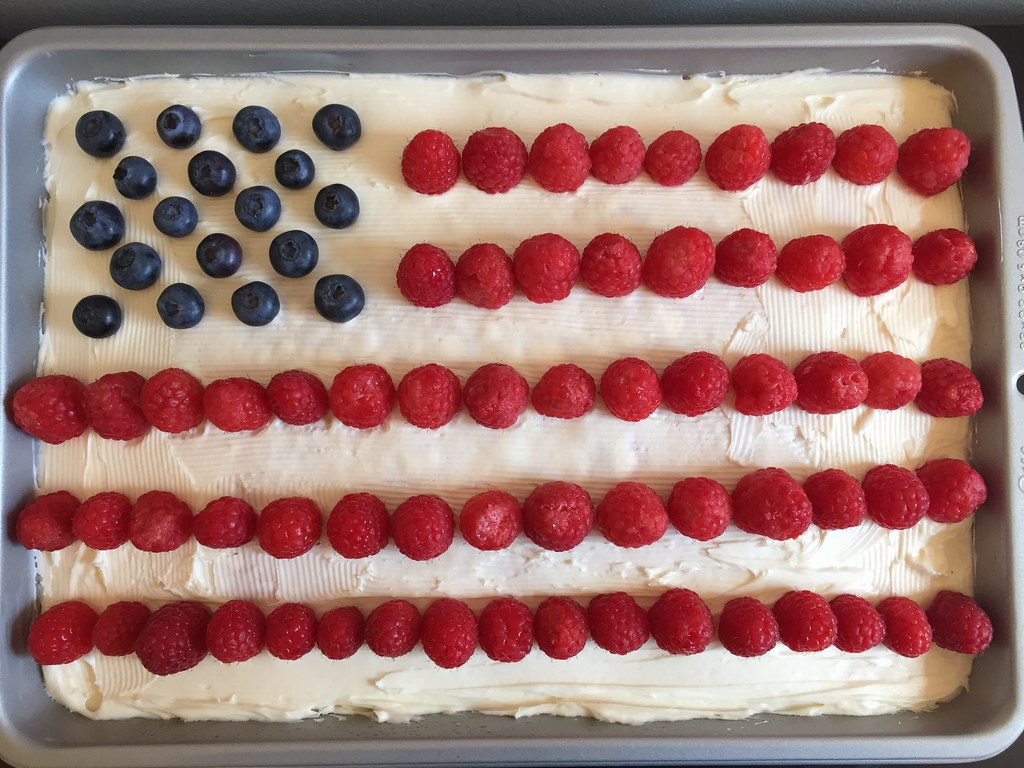
In her post, she includes a recipe for the cake and frosting, but I cheated by making the cake with a box mix and using store bought frosting.  After baking the cake, allow it to cool completely before frosting.  If it's domed on top, you can level it with a serrated knife or just do as I did and "spackle" in the sides with frosting so the top is level.

https://www.flickr.com/photos/joyosity/28040557855/in/dateposted-public/

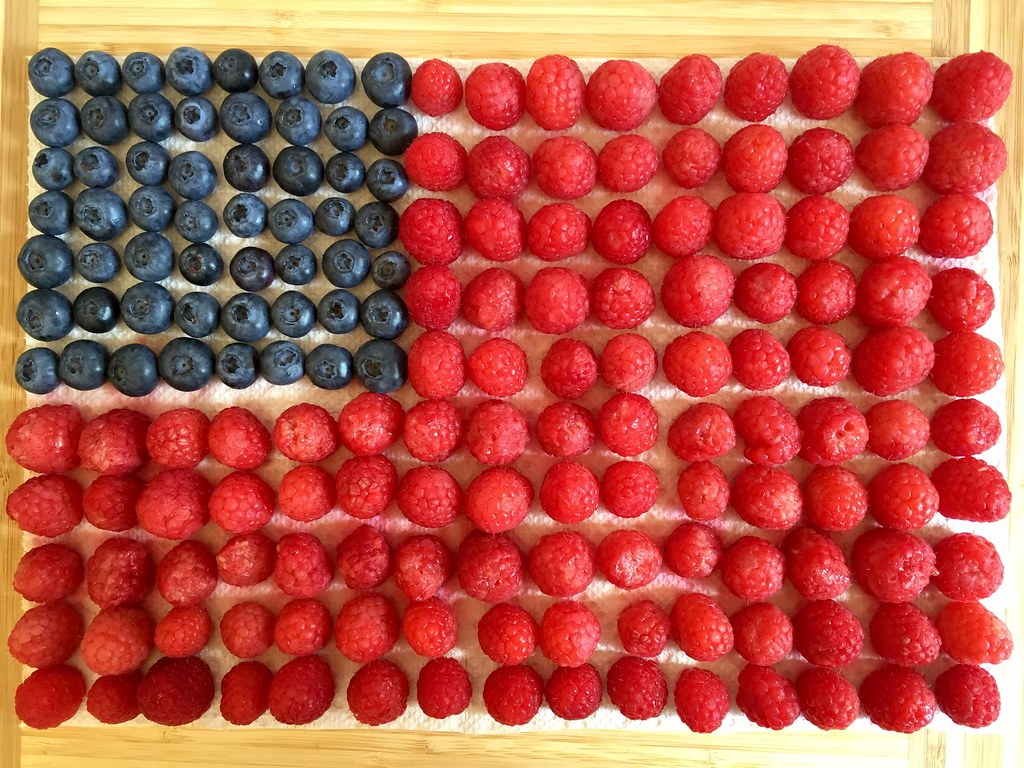
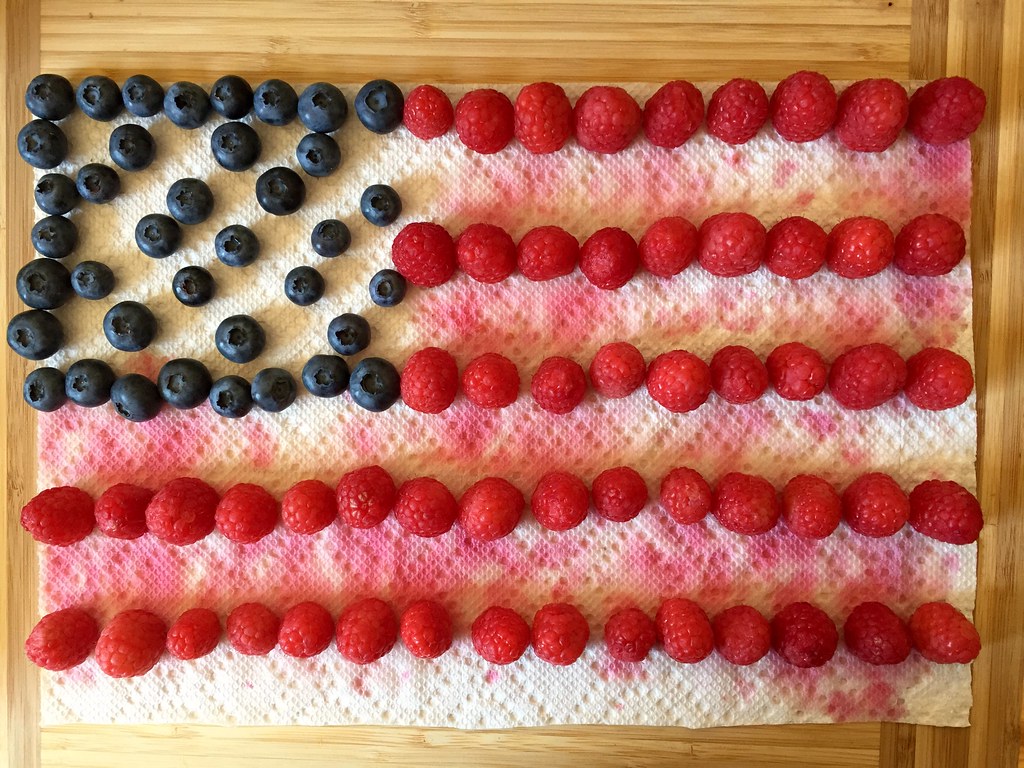
While the cake is baking, wash and dry the berries.  While the cake is cooling, you can start arranging the berries to make sure you have enough.  I used a piece of paper towel that was the same size as the cake to plot out the berries on.  The blue part takes up about half the short side of the flag and extends about a third of the way across.  There are 13 stripes (one for each of the original colonies; yay AP American History!) but you probably won't be able to fit that many on the cake.  If you can, try to make an odd number of stripes so that the top and bottom stripe will be red.

https://www.flickr.com/photos/joyosity/27938008522/in/dateposted-public/

After frosting the cake, start putting the berries that you want to appear white on the cake, leaving room for the other berries.

https://www.flickr.com/photos/joyosity/27426568173/in/dateposted-public/

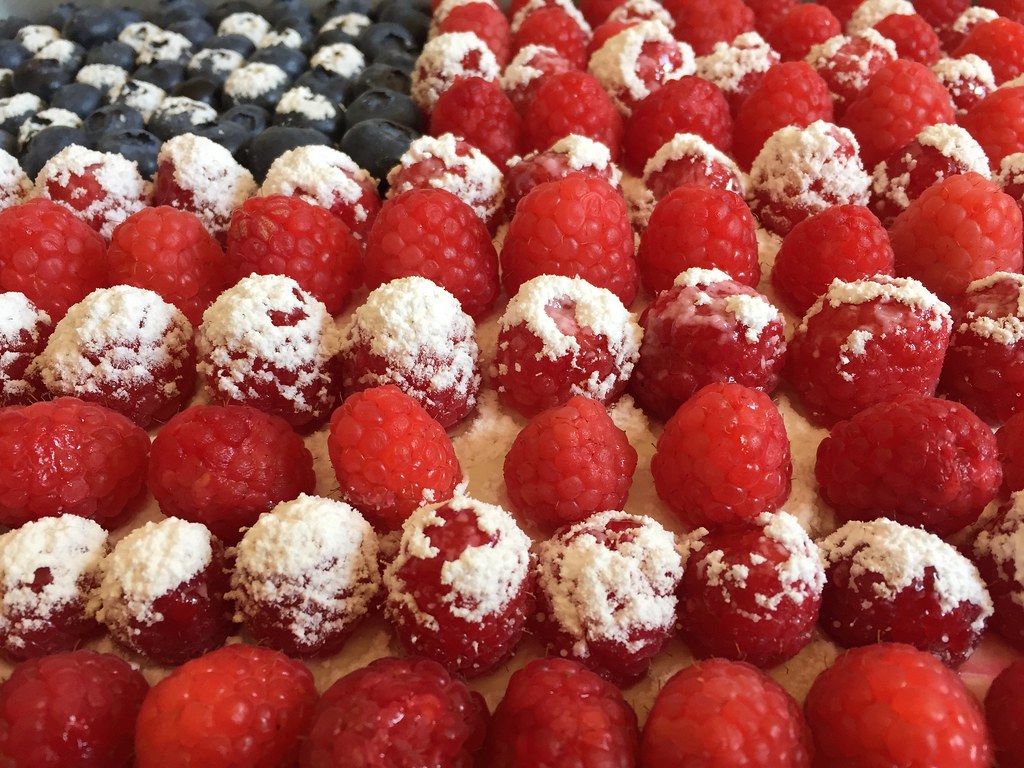
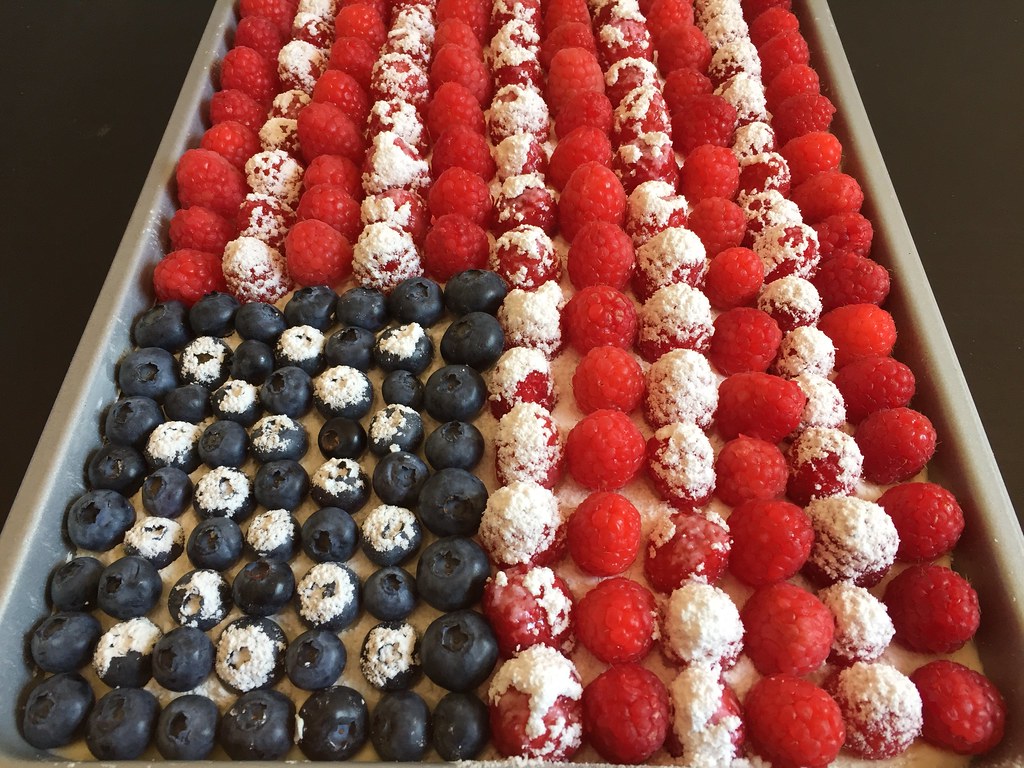
Dust these with powdered sugar, then arrange the rest of the berries into the spaces left for them. 

https://www.flickr.com/photos/joyosity/27426575094/in/dateposted-public/

In reality, it took a lot longer to make than I thought.  The first batch of raspberries I bought were overripe and broke apart when I was washing them, so I had to go back to the store to buy another pint.  Then I made the mistake of not completely drying the raspberries before decorating the cake, so the powdered sugar started to melt before I could even take any pictures.  But if you learn from my mistakes, it's actually not that hard to make and totally worth it!  Not only is it super impressive to bring to a party, the fresh fruit on top of the cake is really, really delicious!

Fun fact:  if you can someone figure out how to make the starburst design, you can also use this template to make the Taiwanese (or more accurately, the R.O.C.) flag!

Next:  My Mom's Beef and Broccoli Stir Fry
Previously:  Maine Blueberry Gateau
Last Year:  Pasta con le Sarde
Two Years Ago:  Papaya Milk and Papaya Milk Popsicles
Three Years Ago:  Bubble Tea Popsicles
Six Years Ago:  Coconut Lime Sorbet

Thursday, June 23, 2016

Maine Blueberry Gateau


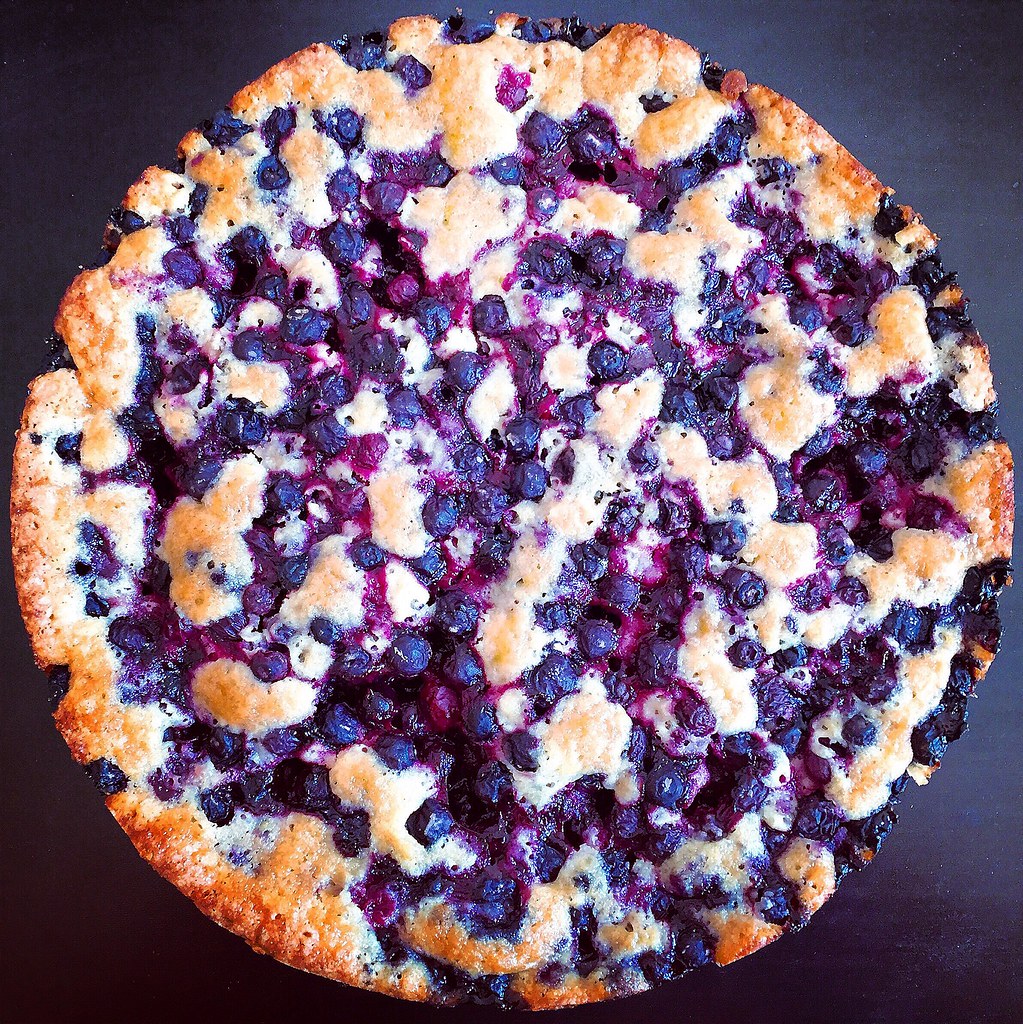
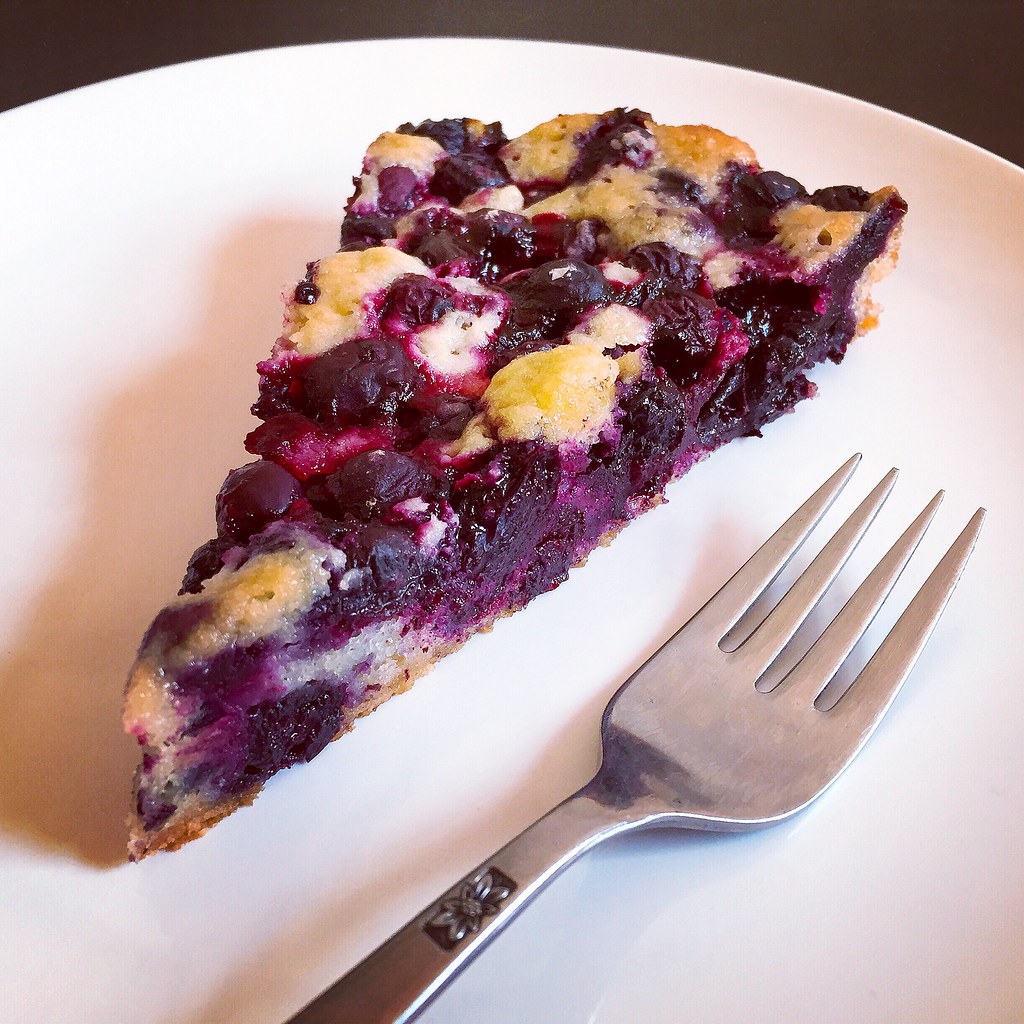
I first had this cake at my friend Evie's Epiphany Party last year, and it was truly an epiphany.  I never knew homemade cake could taste so good--so buttery and moist and bursting with blueberries!  I e-mailed Evie immediately after the party to ask for her friend's recipe, and it turns out it's from a bed & breakfast in Maine.

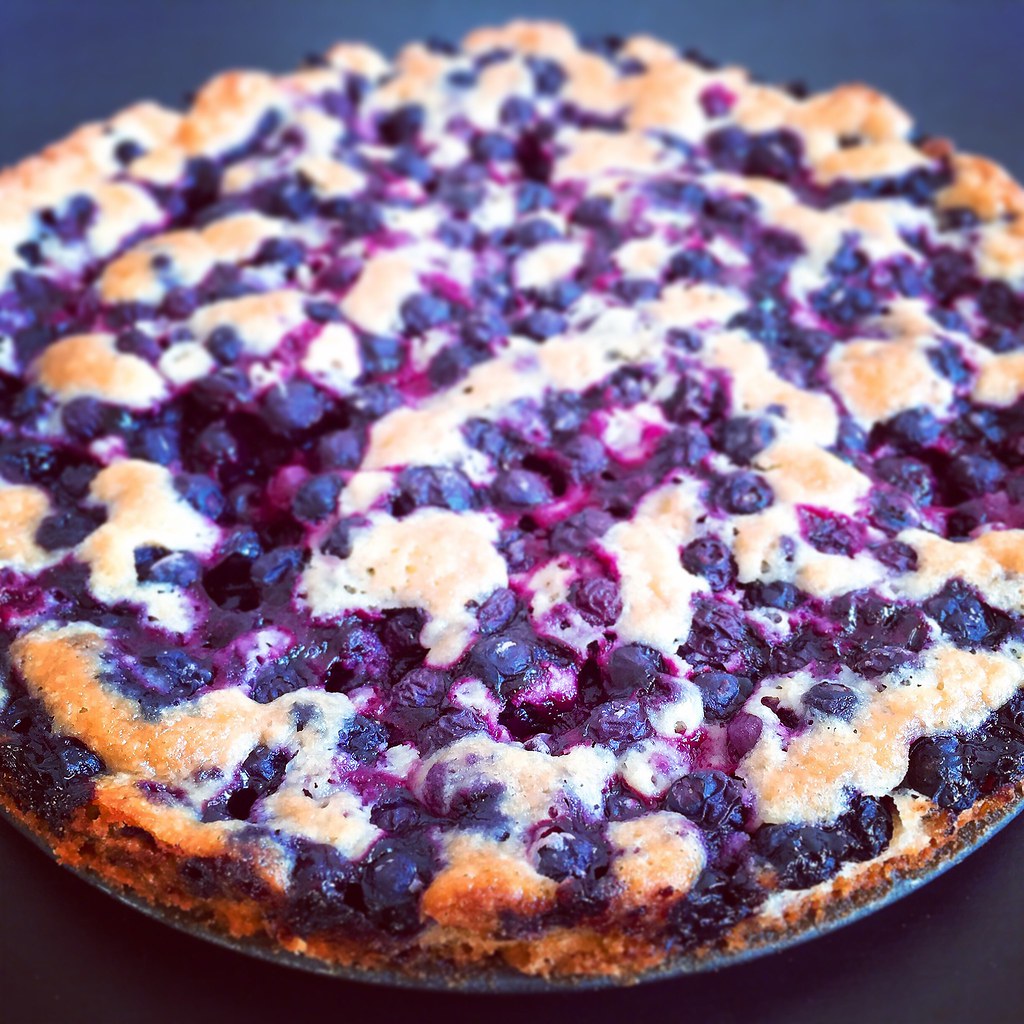
The first time I made this cake I made it in a pie pan (because I didn't have a 9" pan) and used frozen wild blueberries.  It was quite tasty but not as pretty so I dusted it with powdered sugar as instructed in the original recipe.  When I made it this time I used a 10" springform pan and fresh blueberries, and it looked nice enough to forgo the powdered sugar dusting.


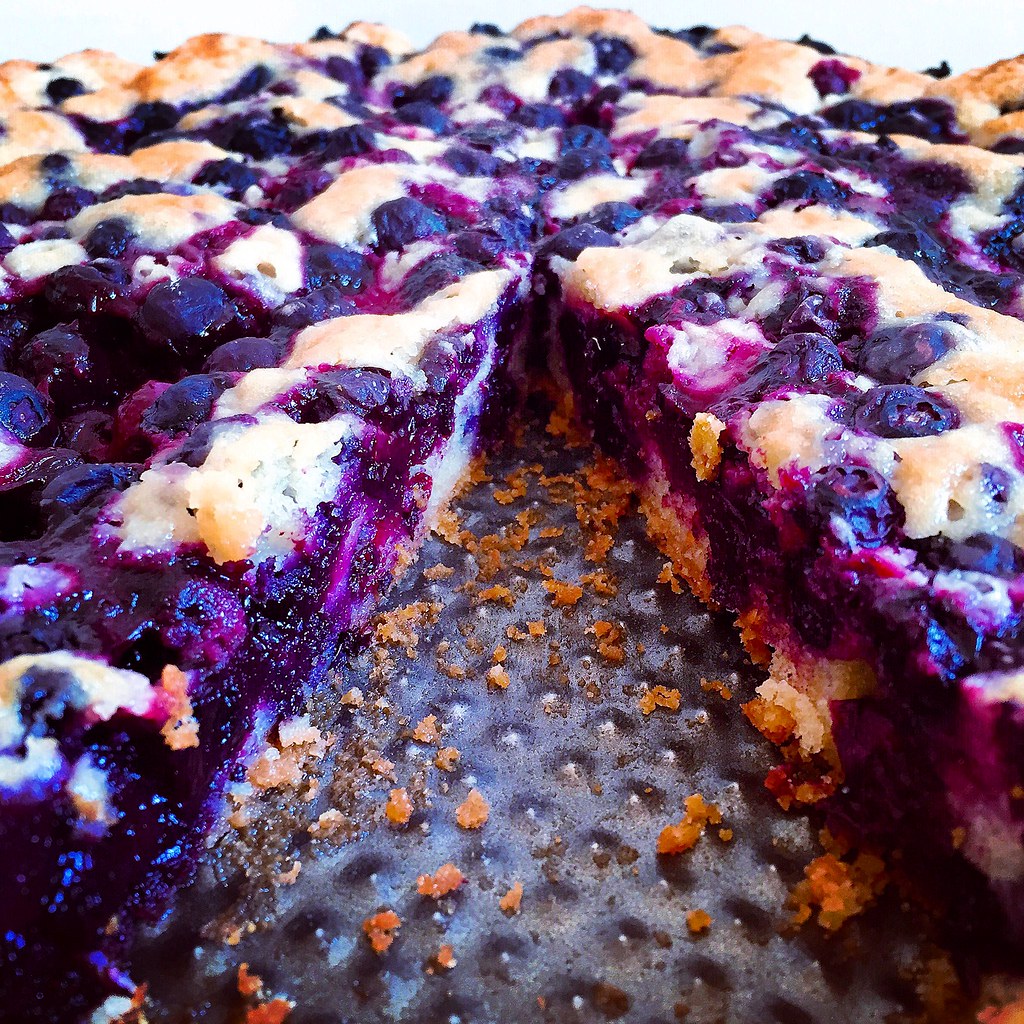
Don't worry if you think the cake batter to fruit ratio is off.  You will be spooning a lot of blueberries on top of the batter, but while the cake bakes in the oven the blueberries sink while the cake rises so it's perfect by the end.


Maine Blueberry Gateau (lightly adapted from the Benjamin F. Packard House via The Washington Post)
serves 6

1 cup and 1 teaspoon all-purpose flour, plus more for dusting the pan
1 teaspoon baking powder
1/2 teaspoon kosher salt
1/2 cup (1 stick) unsalted butter, softened
1 cup sugar
1/4 teaspoon vanilla extract
2 large eggs
1 pint fresh blueberries, rinsed and drained (may substitute frozen wild blueberries)
1 teaspoon fresh lemon juice
Confectioners' sugar, for garnish (optional)

Preheat the oven to 350°F.

Lightly grease a 9- or 10-inch springform pan and dust with flour.

In a small bowl, combine 1 cup of the flour with the baking powder and salt and set aside.

Using an electric mixer on medium-high to high speed, cream the butter, sugar, and vanilla until light and fluffy, about 3 minutes. Add the eggs one at a time and continue beating until well blended. Reduce the speed to low and gradually add the flour mixture. Beat until smooth. Pour the batter into the prepared pan.

In a medium bowl, combine the blueberries with the remaining teaspoon of flour and the lemon juice. Spoon the berry mixture over the batter.

Bake for 50-55 min, or until a cake tester or toothpick inserted in the center comes out clean. Remove from the oven and let the cake cool in the pan for 10 minutes. Slide a thin knife around the edges of the cake to release it from the pan before you release and remove the springform.

Dust the cake with confectioners' sugar before serving, if you want.


Next:  How to Make an American Flag Cake
Previously:  Tortilla Española (Spanish Potato Omelet)
Last Year:  Garlic Naan
Two Years Ago:  Speculoos (Cookie Butter) Ice Cream and Mini Stroopwafel Ice Cream Sandwiches 
Three Years Ago:  Homemade Cronuts
Six Years Ago:  Elote (Mexican Grilled Corn)
Seven Years Ago:  Bulgogi Dumplings

Monday, March 30, 2015

Chocolate Mochi Snack Cake

https://www.flickr.com/photos/joyosity/16306102183/

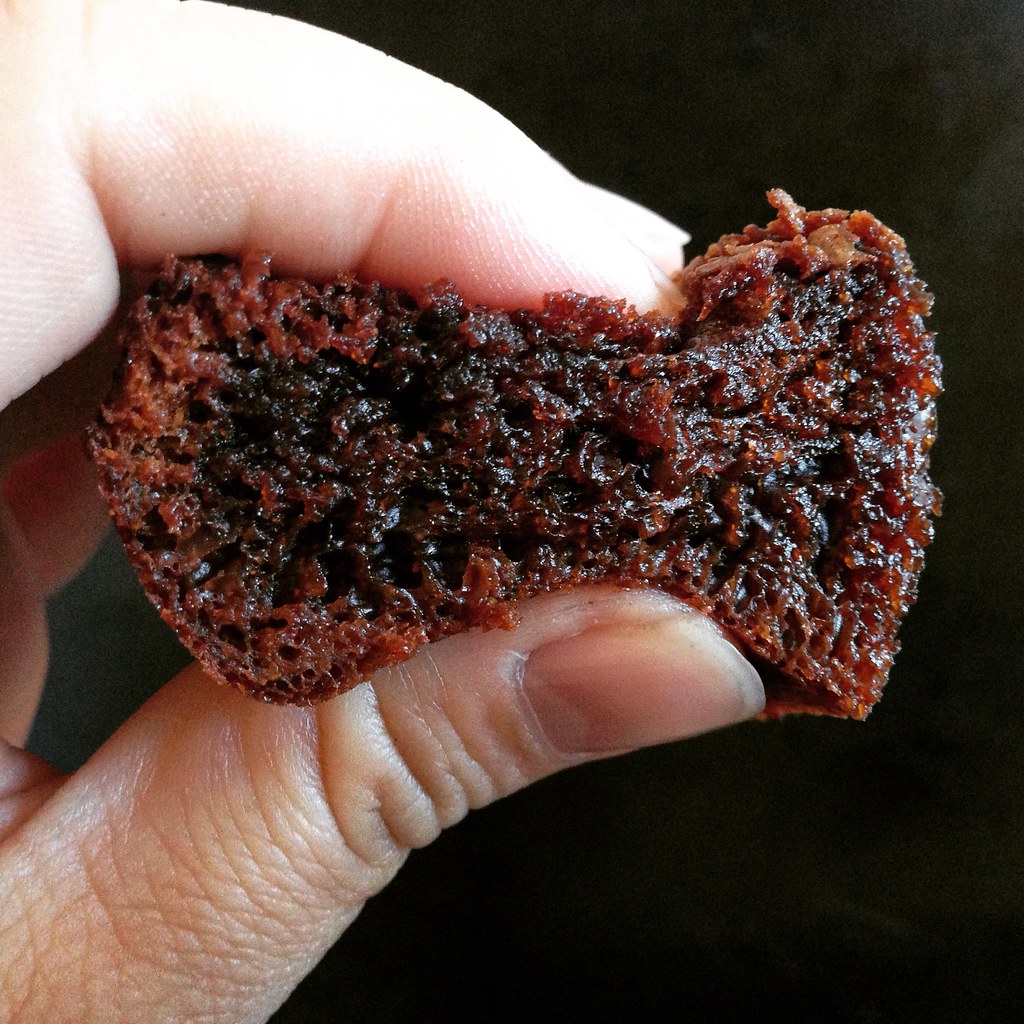
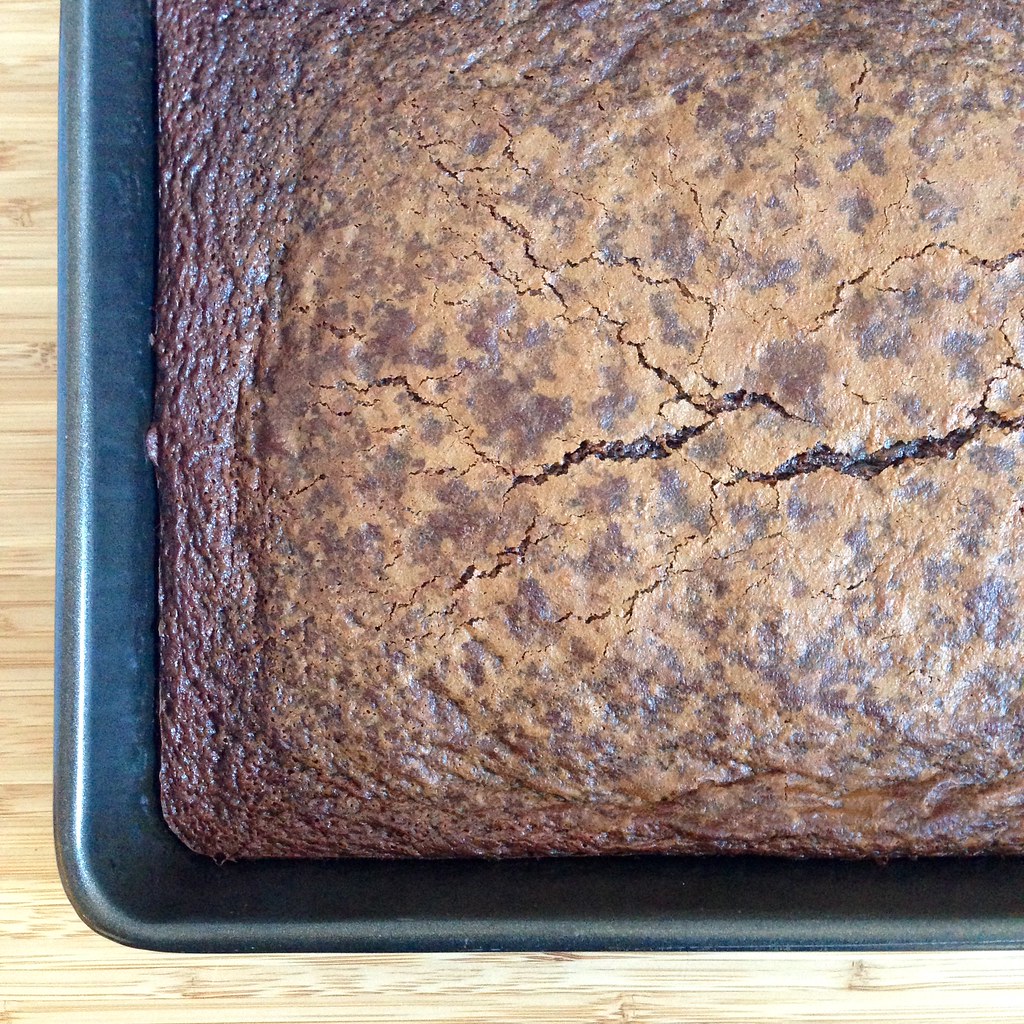
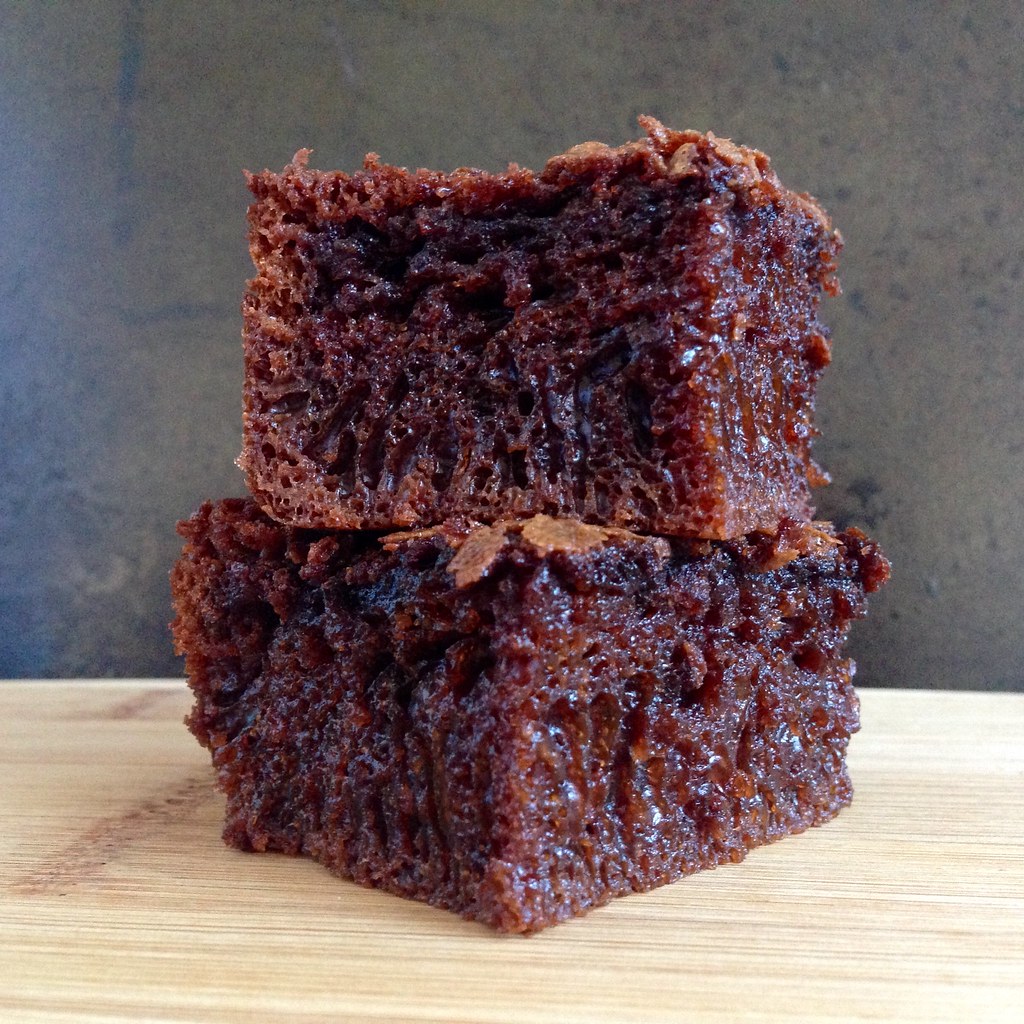
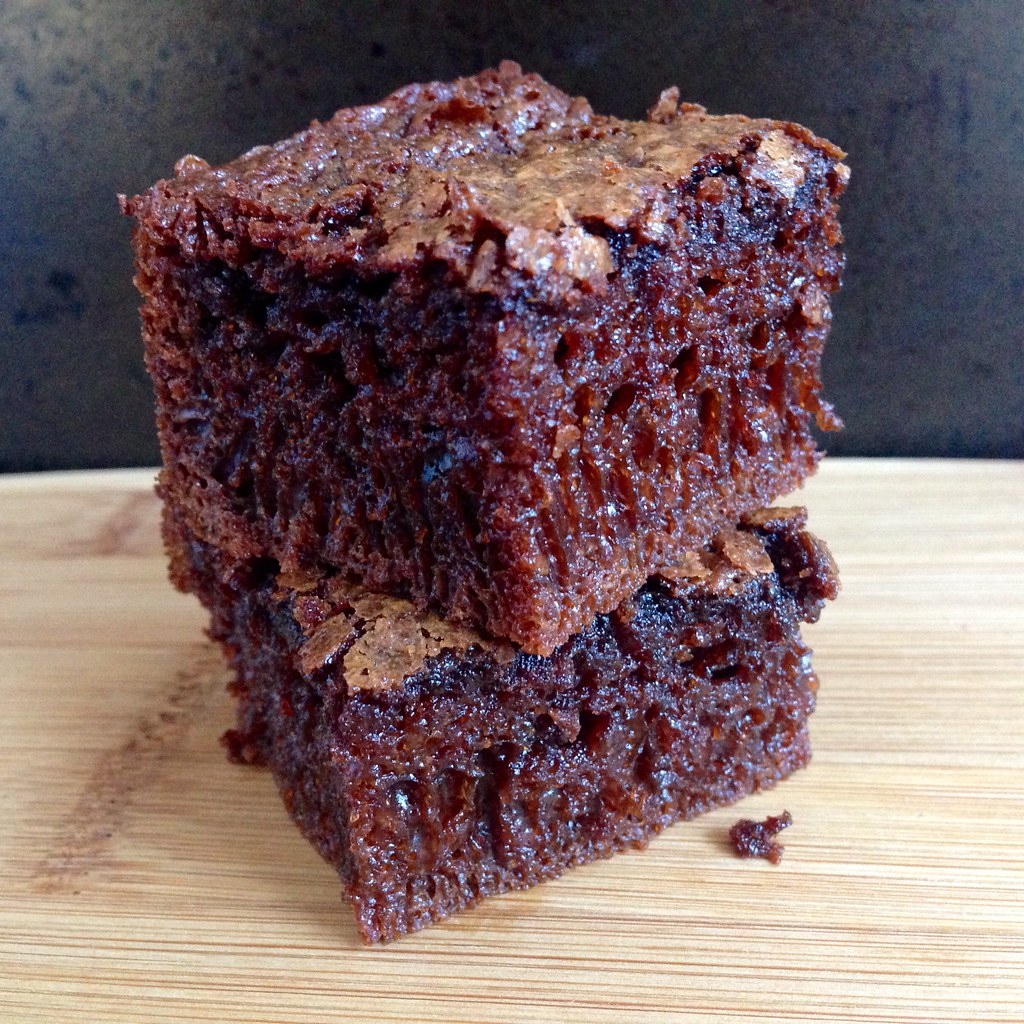
Bouncy.  Chewy  Springy.  Squishy.  These are probably not words you usually associate with a chocolate cake, and yet this Chocolate Mochi Snack Cake is all of those things.  Just looking at this cake you'd think it would be dense and crazy sweet like a brownie, but it's actually rather light and just sweet enough that you keep wanting another bite.  It reminds me of a steamed cake, like the kind you get at dim sum.

https://www.flickr.com/photos/joyosity/16738691150/

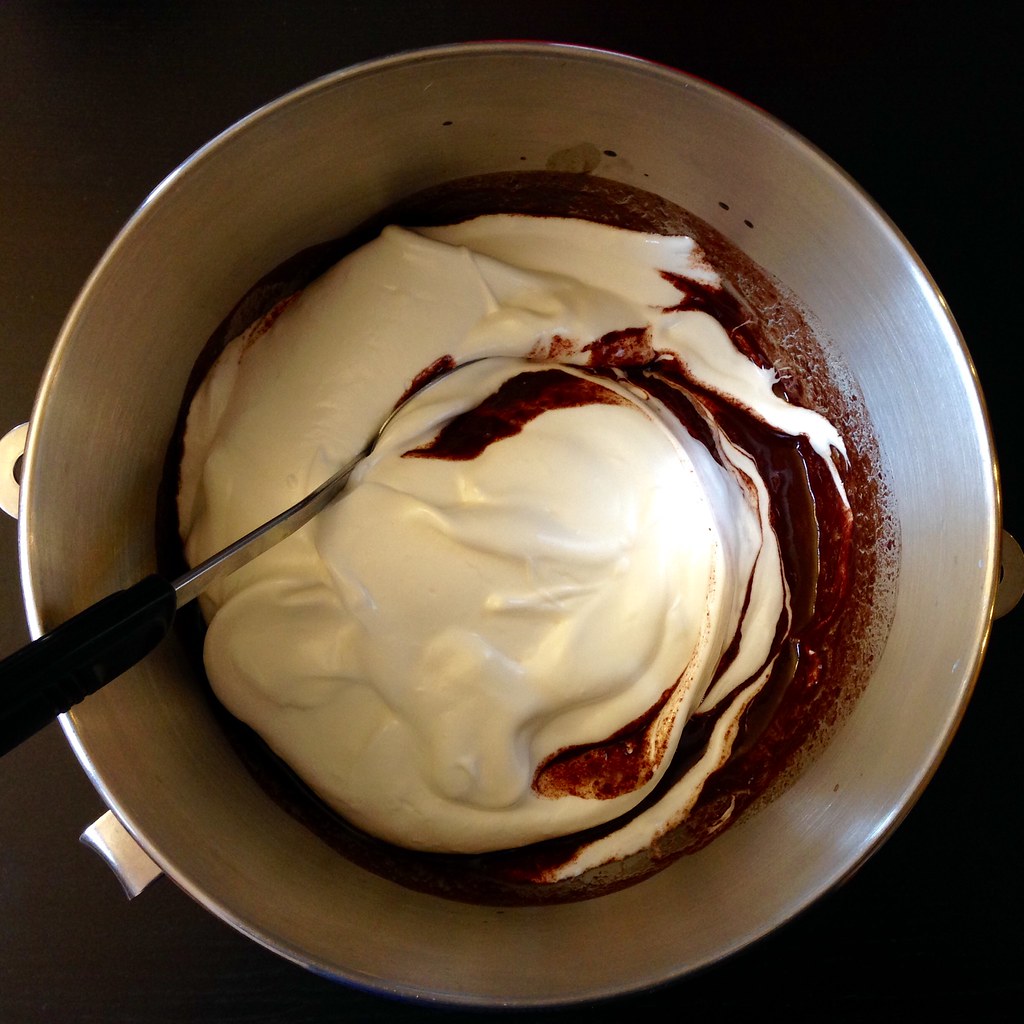
I found the recipe on Food52 and modified the directions a bit by melting the butter and chocolate right in the metal bowl of a stand mixer over a pot of simmering water.  This way you don't have to worry about possibly burning the chocolate and it's one less transfer to worry about.  If you don't have a stand mixer, you can melt the butter and chocolate in a metal bowl set over a pot of simmering water and proceed with an electric beater.  I also mixed the eggs with the evaporated milk and vanilla extract before adding to the melted butter/chocolate mixture to help prevent the eggs from cooking and curdling. 

Since this cake is made with rice flour, it is totally gluten free!  I'm not sure how you could make this without the eggs to make it vegan, but I bet you could substitute coconut milk and coconut oil for the evaporated milk and butter to make it dairy free.  Update:  I tried making the dairy free version, and it was awful. 

https://www.flickr.com/photos/joyosity/16738691000/

Chocolate Mochi Snack Cake (adapted from Food52)
makes one 9" x 13" cake

2 cups glutinous rice flour
2 scant cups sugar
1 tablespoon baking soda
1/2 cup (1 stick) unsalted butter, cut into pieces
1 cup semisweet chocolate chips
24 oz. evaporated milk
2 teaspoons vanilla extract
2 eggs, beaten

Preheat the oven to 350°F and grease a 9" x 13" baking pan.
   
Whisk together the flour, sugar, and baking soda in a large bowl.  Whisk together the evaporated milk, vanilla extract, and eggs in another bowl.  Set aside.

Melt the butter and the chocolate chips together the metal bowl of a stand mixer set over a pot of simmering water, stirring frequently until you have a smooth mixture. 
   
Remove the bowl from the pot and set it back in the stand mixer with the paddle attachment.  With the mixer running on low, add the evaporated milk, vanilla, and eggs mixture and mix until incorporated.
   
Add the dry ingredients and mix on low until the batter is smooth and lump free. Pour into the prepared pan and bake for 45 to 55 minutes, until the cake no longer jiggles. Remove from oven and let cool before serving.
   
This cake should be stored at room temperature rather than refrigerated.

https://www.flickr.com/photos/joyosity/16738468798/

Next:  Gordon Ramsay's Sublime Scrambled Eggs
Previously:  Homemade Squid Ink Pasta
Five Years Ago:  Duck Fat French Fried with Rosemary, Maldon Salt, and Truffle Oil, Apple Tarte Tatin
Six Years Ago:  Cincinnati Chili, Hong Kong Style Pan-Fried Noodles

Thursday, February 26, 2015

Matcha Financiers with White Chocolate Centers

https://www.flickr.com/photos/joyosity/16431927348/

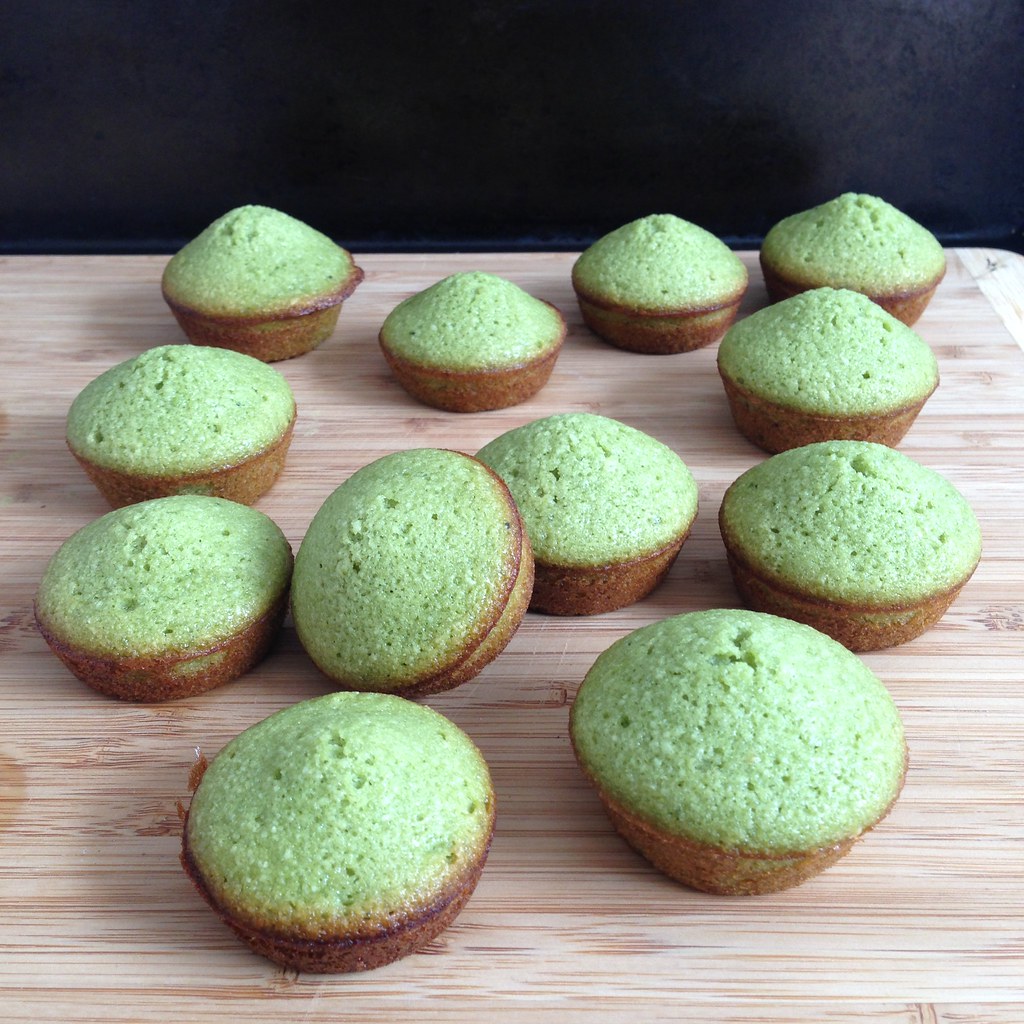
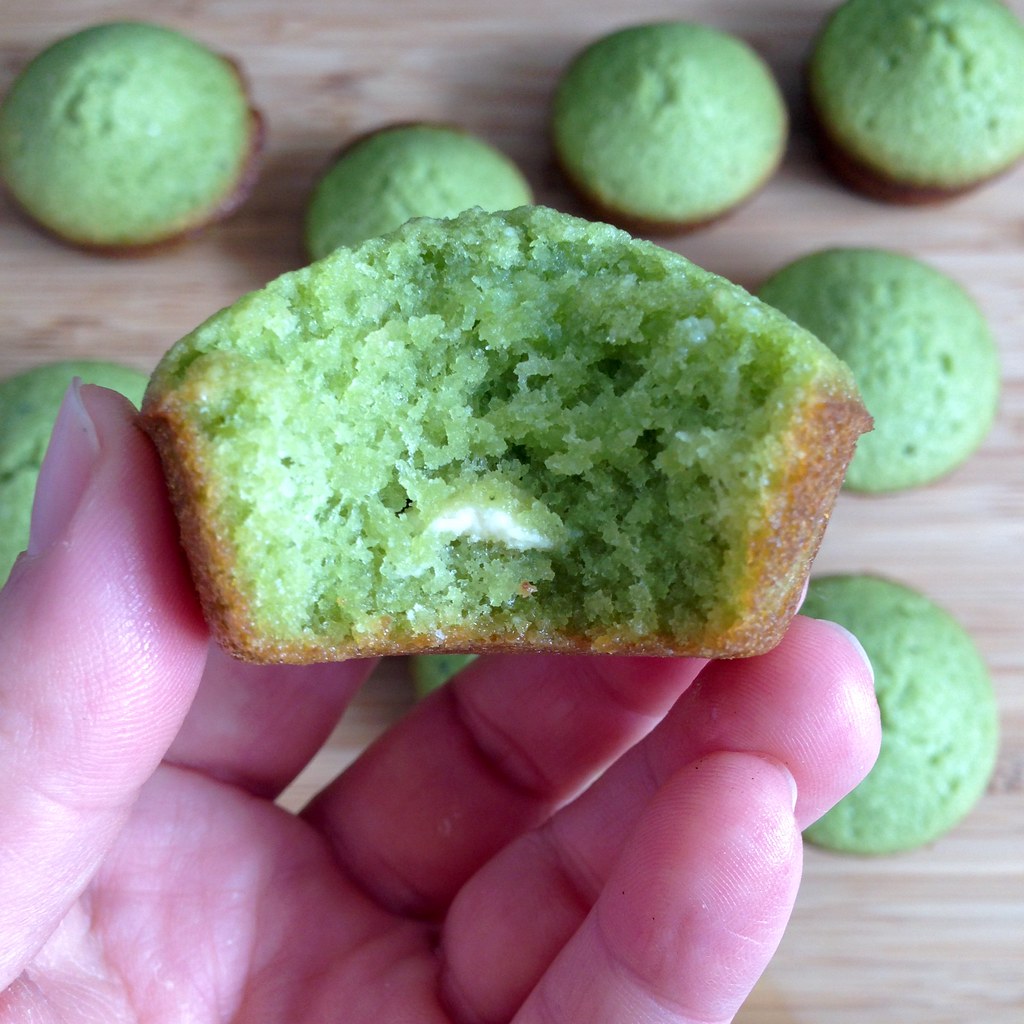
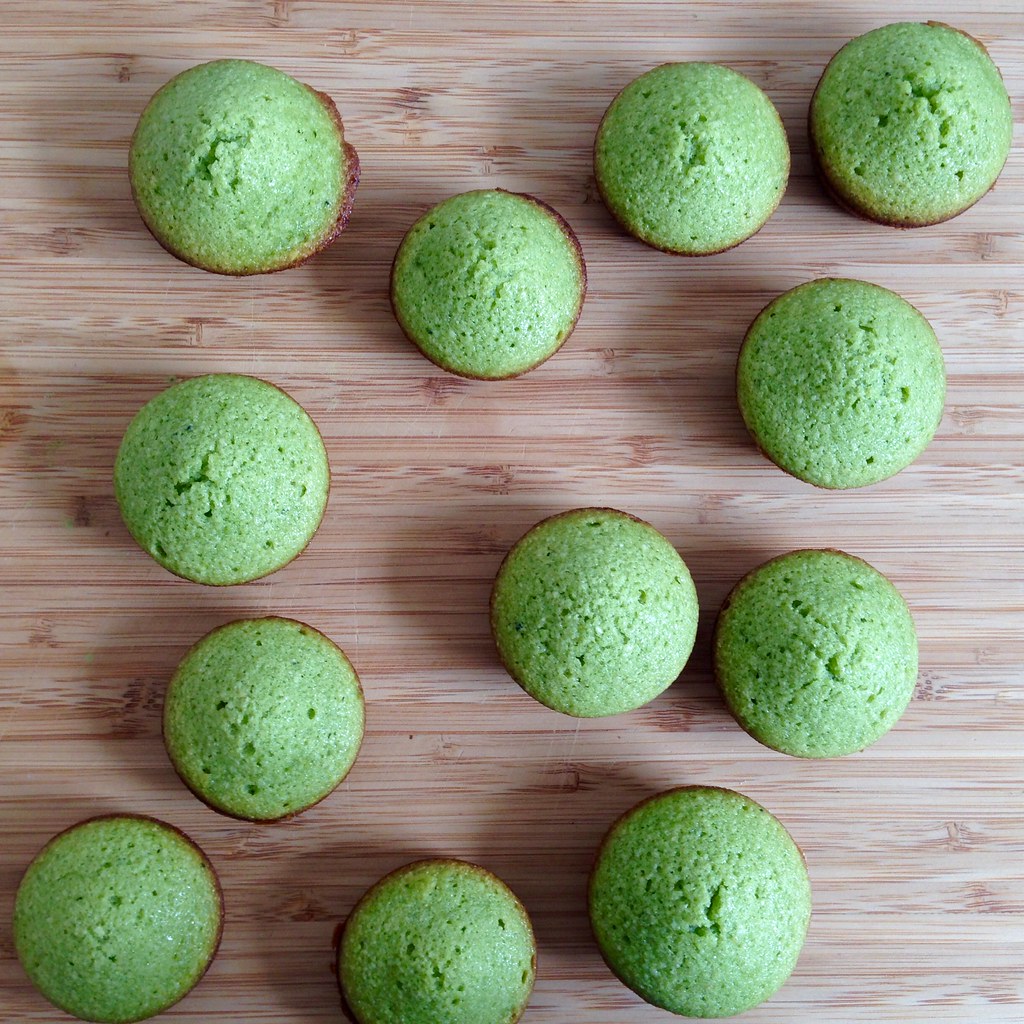
Here is yet another recipe from Dorie Greenspan's Baking Chez Moi (and probably not the last)!  I first discovered financiers at Eric Kayser's bakery near my hotel in Paris. They looked like perfect little miniature cakes that were basically unadorned--a distinct change from all the super-frosted and decorated cupcakes that were all the rage in America at the time.  They're just one or two bites each and less sweet than a cupcake, more substantial than a muffin.  Perfect for packing and eating on the go without having to worry about getting a crazy sugar rush.

https://www.flickr.com/photos/joyosity/16432101110/

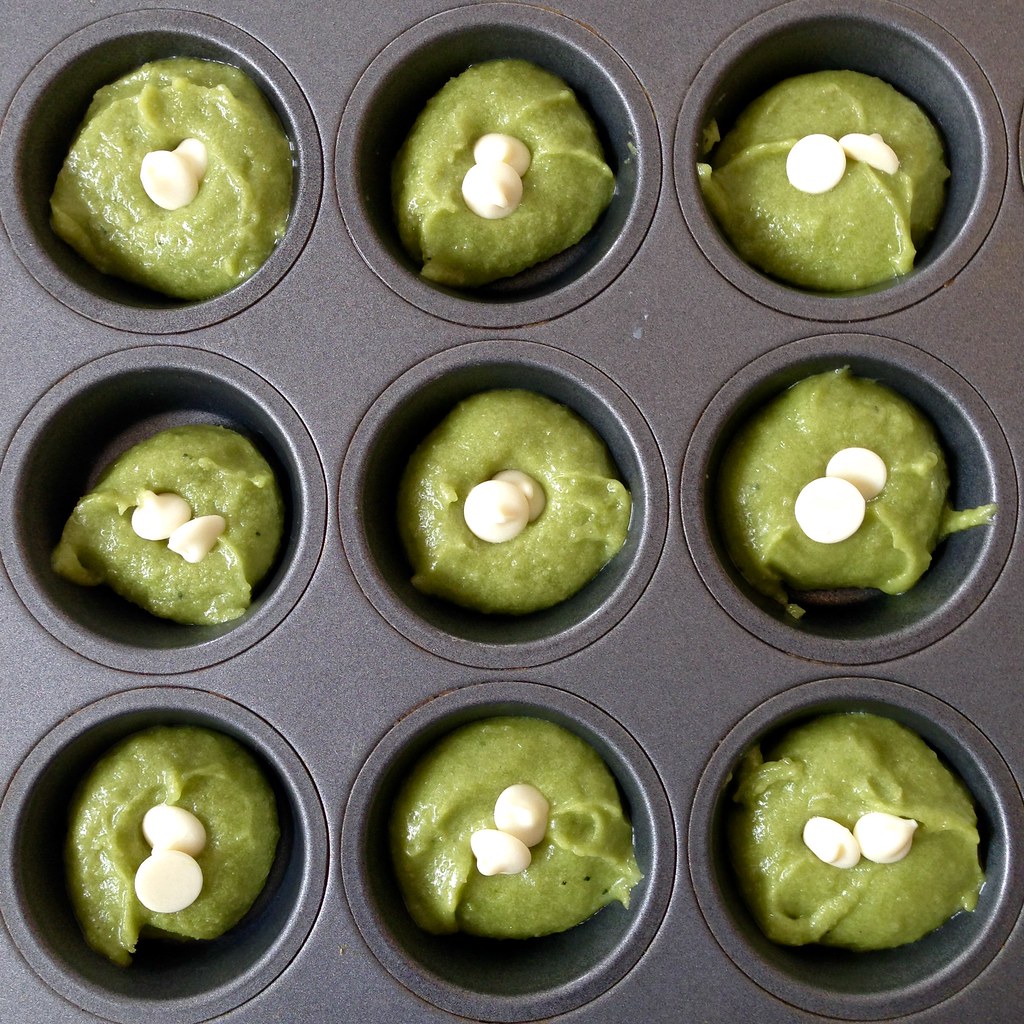
Since I'm currently in love with the matcha/white chocolate flavor combination, I was excited when I saw Dorie's "bonne idée" for her matcha financier recipe:  baking chunks of white chocolate in the center of each financier.  I used 2 white chocolate chips per financier, but I think I would at least add a third if not more next time since it just wasn't enough (for me, anyway).  I also increased the amount of matcha slightly since I could barely taste the matcha in the first batch I made.

https://www.flickr.com/photos/joyosity/16411822117/

Matcha Financiers with White Chocolate Centers (slightly adapted from Dorie Greenspan's Baking Chez Moi)
makes 12 small cakes

6 tablespoons unsalted butter, cut into chunks
1/3 cup all-purpose flour
1 teaspoon matcha green tea
Pinch of fine sea salt
1/2 cup sugar
1/2 cup almond flour
3 large egg whites, at room temperature, lightly beaten
White chocolate chips

Heat the butter in a small saucepan over medium heat until it starts to boil, then boil for 1 minute; it may color ever so slightly, but you don’t want it to brown. Remove the pan from the heat and set it aside (you want the butter to be warm when you add it).

Whisk the all-purpose flour, matcha, and salt together in a small bowl.

Using a flexible spatula, stir the sugar and almond flour together in a large bowl. Gradually add the egg whites, stirring to moisten the dry ingredients.

When all the whites are in, give the mix a few vigorous stirs. Stir in the all-purpose flour mixture, mixing only until it’s evenly blended, then start adding the melted butter, a little at a time, folding and stirring the batter until all the butter is in.

Press a piece of plastic film against the surface of the batter and refrigerate for at least 1 hour. (The batter can be refrigerated for up to 3 days.)

Preheat the oven to 400°F. Butter the wells of a mini muffin tin, dust with flour and tap out the excess.

Spoon the batter into the muffin cups, filling them about halfway.  Drop 2-4 white chocolate chips into each, then spoon on additional batter, almost to the top of the well.

Bake the financiers for 12 to 14 minutes, or until they have crowned and feel springy to the touch.  Remove from the oven, wait 1 minute, then tap them against the counter to encourage the financiers to tumble out. Pry any stragglers from their molds with a table knife. Transfer the financiers to a rack and let cool until they are just warm or at room temperature.

https://www.flickr.com/photos/joyosity/16411820587/

By the way, don't throw out the 3 egg yolks after separating them from the 3 egg whites needed for this recipe!  You can use them to make really good pasta dough!

Next:  A Better Homemade Pasta
Previously:  Hugo & Victor's Pink Grapefruit Tart
Last Year:  Hotter Crash Potatoes
Five Years Ago:  Faux Momofuku Brussels Sprouts
Six Years Ago:  Wok-Fried Edamame with Garlic

Friday, February 13, 2015

Odile's Fresh Orange Cake

https://www.flickr.com/photos/joyosity/16309101170/

I came across Dorie Greenspan's Baking Chez Moi cookbook at my local library the other day and borrowed it without even opening it.  I've made some of her recipes in the past and totally trust her authority in all things baking, just like I trust Jeni's in all things frozen.  I was a little disappointed that there weren't pictures for every recipe in the book, but maybe that's a good thing because otherwise I'd want to make (and eat) every single last thing in there.

https://www.flickr.com/photos/joyosity/16495536932/

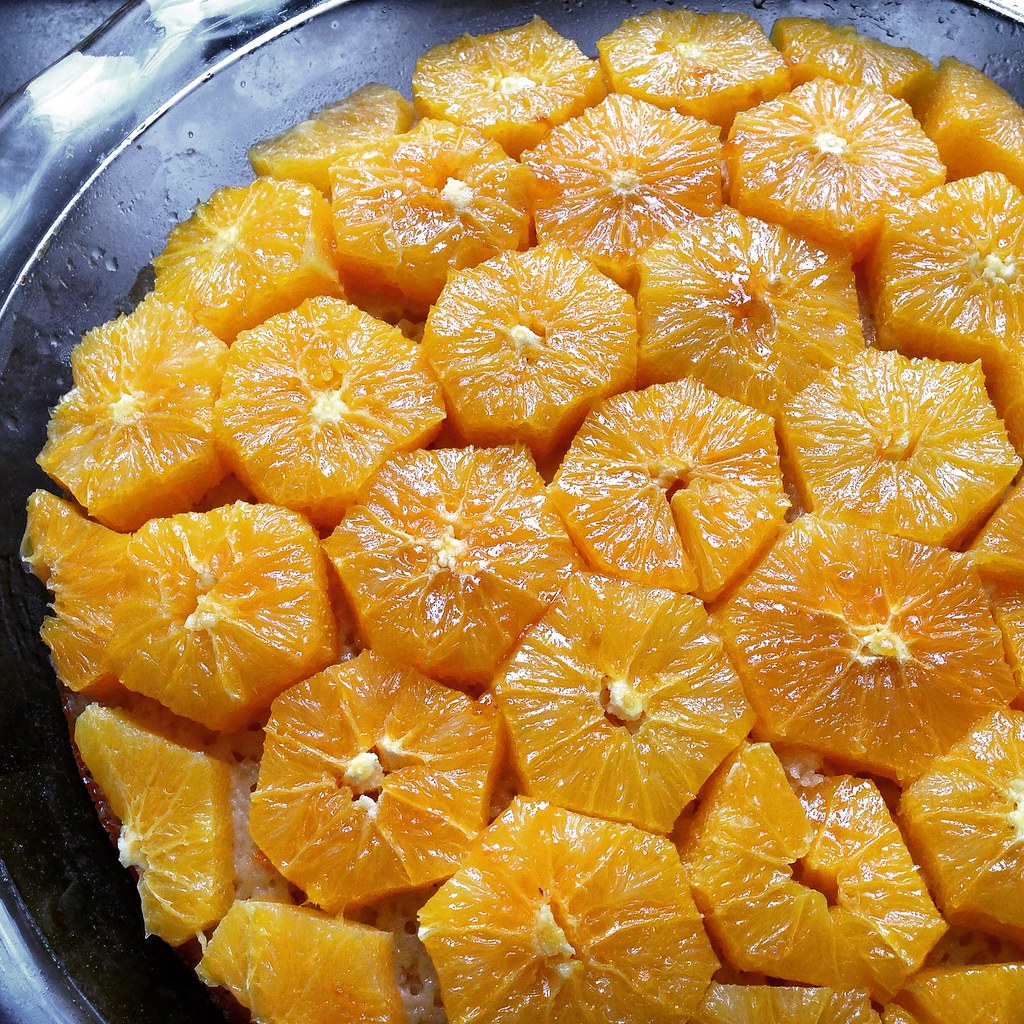
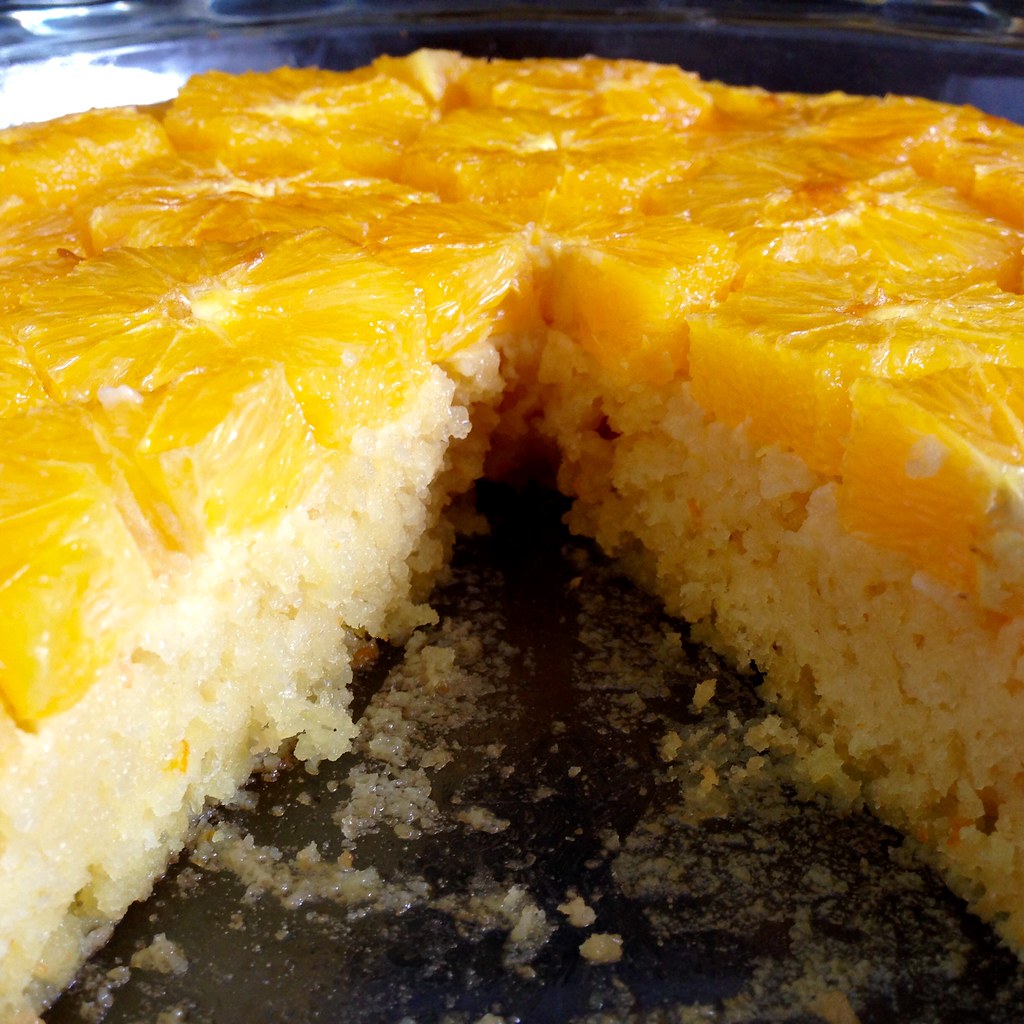
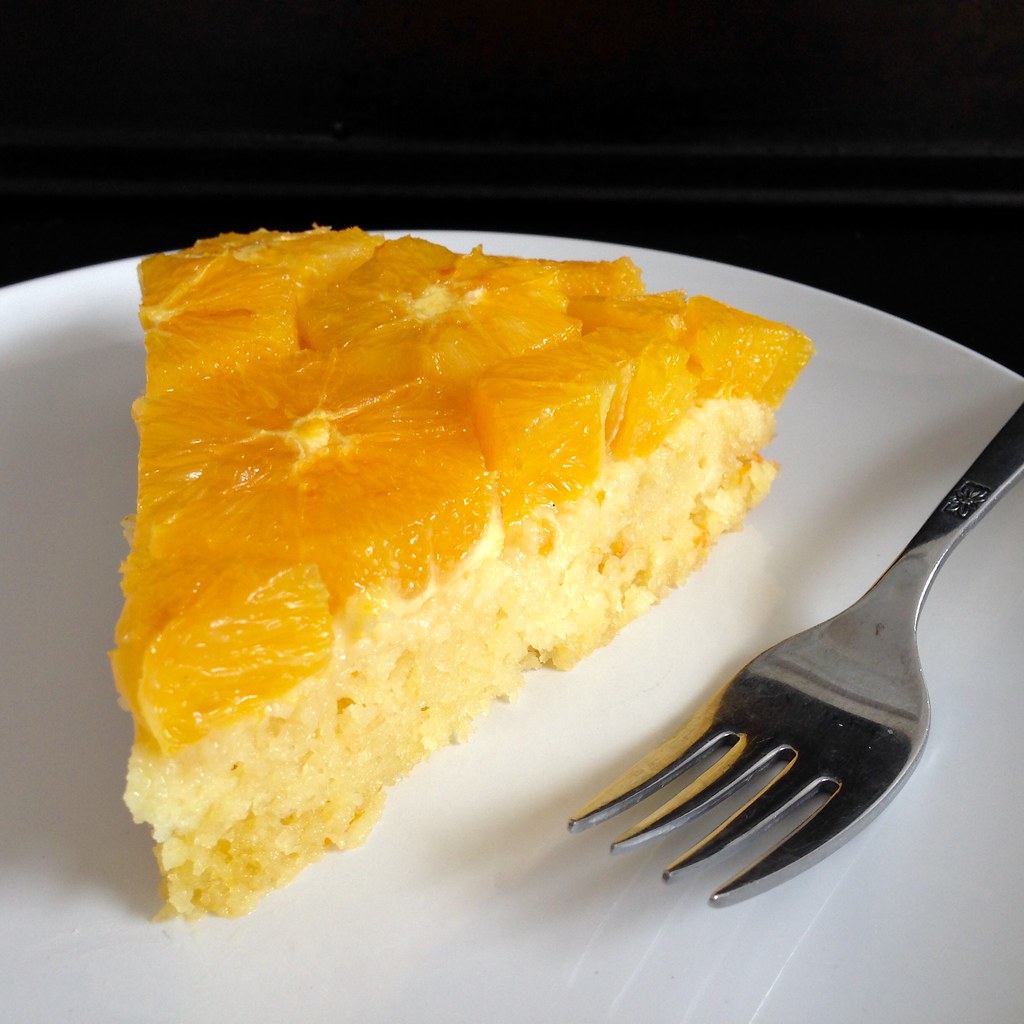
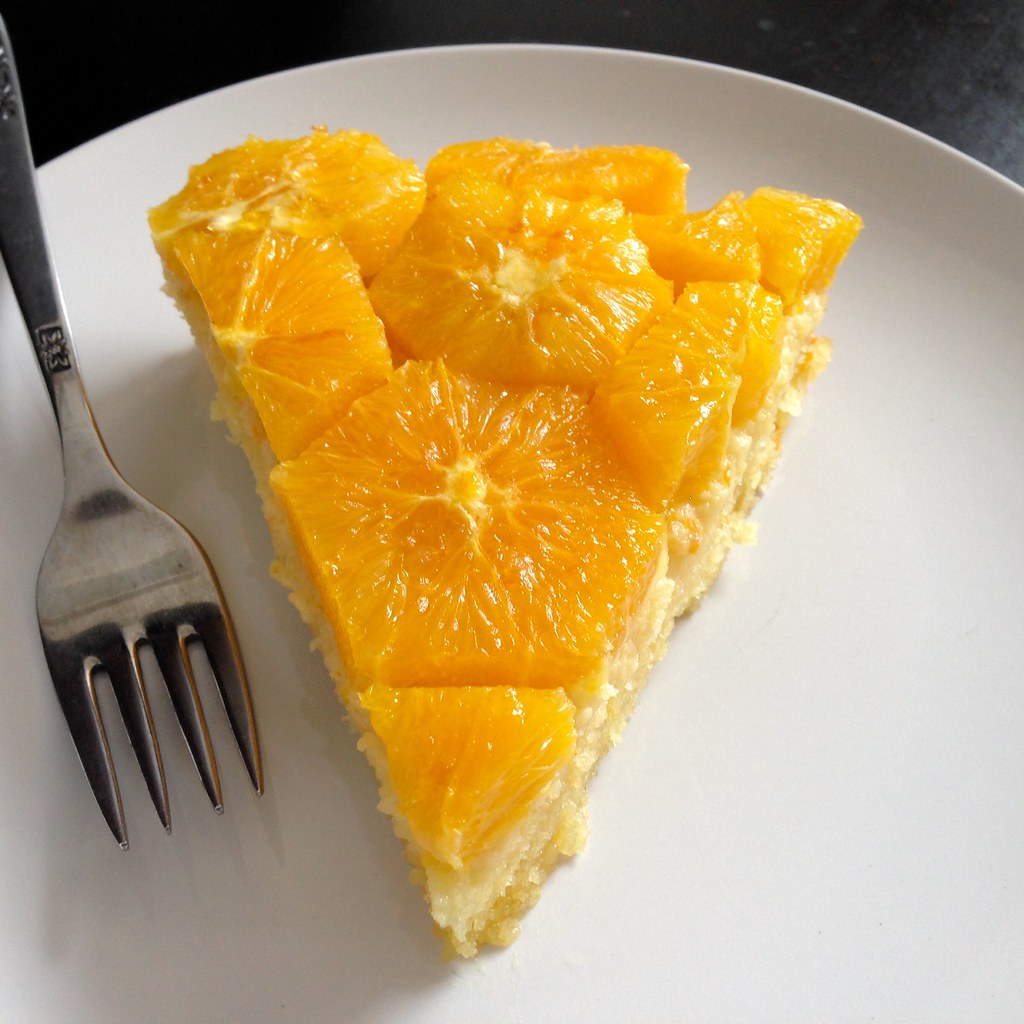
The first thing that caught my eye was this fresh orange cake that had beautiful slices of glistening oranges on top.  As I was currently sitting at home in the midst of the third snowstorm to hit in as many weeks, I desperately needed a reminder of something warm and sunny.

https://www.flickr.com/photos/joyosity/16470530396/

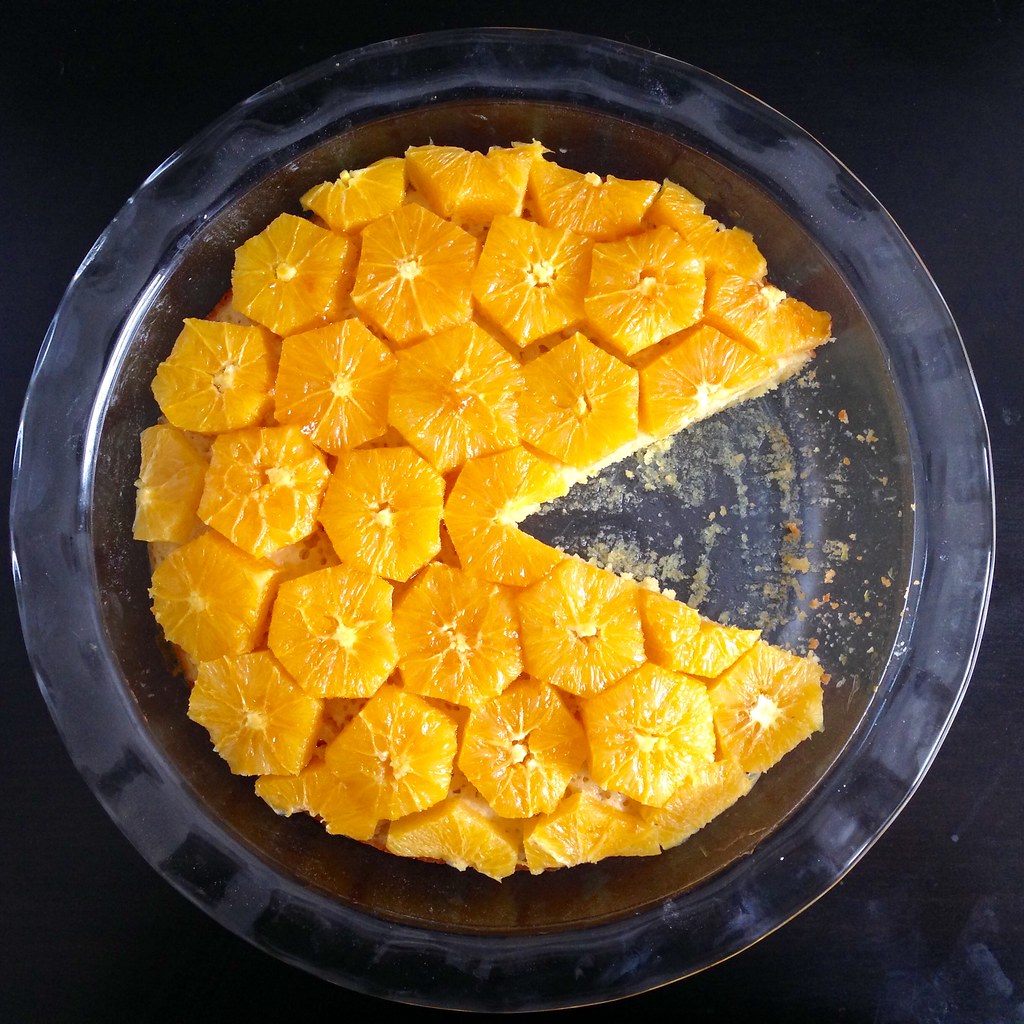
I made just a few adjustments to her recipe; since I didn't have an 8" cake pan, I used a pie pan, which was 8" at the bottom but wider on top.  This just meant more space for the showstopping orange topping.  And after cutting a few of the oranges into her suggested pentagon shape, I realized I was wasting a lot less of the orange if I cut them into hexagons instead.  I think hexagons are easier to arrange together than pentagons anyways (or maybe I've just been playing too much Civilization V).  In her recipe, she says you only need 3 oranges to fill the top of your cake, but I found I needed a lot more, like almost the whole bag.  I guess it depends on the size of your oranges, but one way you can estimate how many slices you need is to poach them in a pot the same diameter as the top of your cake.  If you arrange them in a single layer in the pot, you'll see if you need to keep cutting up more oranges to cover the bottom.

https://www.flickr.com/photos/joyosity/15876386963/

Odile's Fresh Orange Cake (slightly adapted from Dorie Greenspan's Baking Chez Moi)
makes 1 cake

For the cake:
3/4 cup plus 2 tablespoons all purpose flour
1 1/2 teaspoons baking powder
1/2 teaspoon salt
1/2 cup sugar
1 large orange
1 stick unsalted butter, at room temperature
2 large eggs, at room temperature

For the topping:
At least 3 oranges, possibly a lot more
1 cup sugar
1 cup water
1 cinnamon stick (optional)
2 tablespoons orange marmalade

Center a rack in the oven and preheat the oven to 350°F.  Butter an 8-inch round cake pan, dust with flour and tap out the excess. Whisk together the flour, baking powder, and salt in a small bowl. Put the sugar in the bowl of a stand mixer or in a large bowl in which you can use a hand mixer. Grate the zest of the orange over the sugar. Squeeze the juice into a measuring cup–you should have about 1/3 cup, but a little more or a tad less won’t throw things off.

Rub the sugar and zest together with your fingertips until the sugar is moist and fragrant. If you’re using a stand mixer, fit it with the paddle attachment and attach the bowl. Add the butter to the bowl and beat on medium speed for about 2 minutes, until the mixture is smooth and creamy. Add the eggs one at a time, beating for 1 minute after each one goes in, then pour in the juice and beat to blend. Reduce the mixer speed to low and add the dry ingredients, mixing only until they disappear into the batter. The batter may look a little lumpy and grainy, but that’s fine. Turn the batter out into the cake pan and smooth the top.  Bake the cake for 20 to 25 minutes, or until a knife inserted into the center comes out clean.

In the meantime, make the topping.  Cut the tops and bottoms off each orange, stand the orange up and remove the remaining peel by cutting straight down the sides of the orange 6 times, to shape it into a hexagon.  Then turn the oranges on their sides and slice them about 3/8" thick.

Bring the sugar, water, and cinnamon stick to boil in a medium saucepan, then reduce the heat and simmer for 2 minutes.  Gently drop the orange slices into the syrup and cook over low heat for 3 minutes.  Carefully remove the slices with a slotted spoon; strain and reserve the syrup.

Arrange the orange slices on top of the cake and pour about a 1/2 cup of the poaching syrup over the oranges and cake.  Melt the marmalade and brush it over the fruit.  Cool the cake completely before slicing and serving.

https://www.flickr.com/photos/joyosity/16308802508/

Next:  First Night in Florence Spaghetti
Previously:  Heart-Shaped Tamagoyaki (Japanese Omelet)
Last Year:  Squid Ink Spaghetti Aglio e Olio
Two Years Ago:  Jjajungmyeon (Korean Black Bean Noodles)

Thursday, October 23, 2014

Nigel Slater's Chocolate Beet Cake

https://www.flickr.com/photos/joyosity/15604589962/

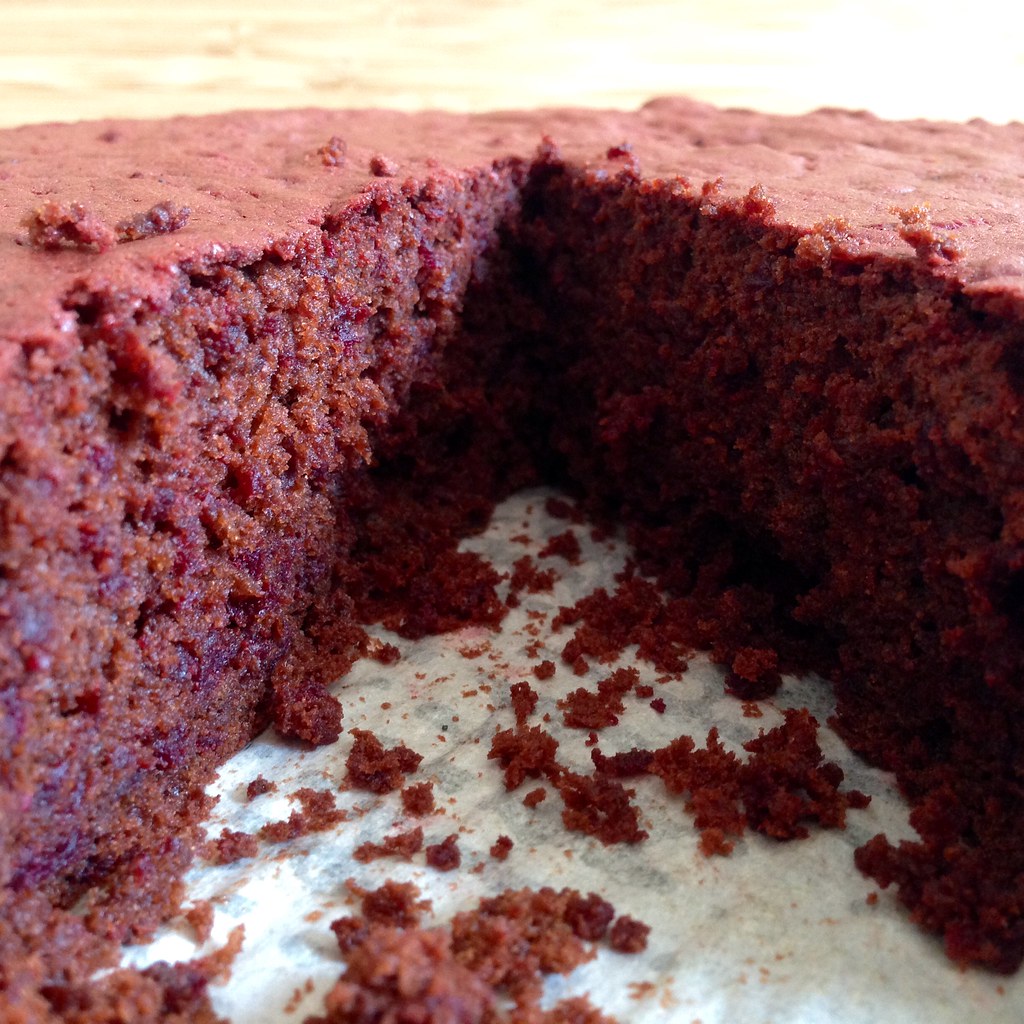
Everyone once in a while I'll look at my Boston Organics no-list and decide to update it so I can try something new.  That happened last week with beets.  I ended up getting 4 beets and no idea what to do with them after I remembered I don't particularly like beets, which is why they were on the no-list to begin with.  Sigh.  When my friend, Evelyn, suggested that I make red velvet cake I looked up a couple of recipes but didn't feel like making a cream cheese frosting to go along with it.  Then I found Nigel Slater's genius recipe for an extremely moist Chocolate Beet Cake on Food52.  I was sold.

https://www.flickr.com/photos/joyosity/15589730351/

The directions are a little fussy (boiling the beets whole and then peeling after they're cooked, not stirring the chocolate while it's melting, etc.) but I pretty much followed them to a T except I did add the sugar gradually into the egg whites while they were being beaten instead of folding it in afterwards.  Since folding something into egg whites is already such a precarious operation and beating sugar into egg whites helps to stabilize the whites, I figured it was a win-win situation.  I also decided I didn't want to risk dyeing my food processor bright pink and just grated the cooked beets into a coarse purée using a box grater, which David Lebovitz suggested in his post about this same recipe.  While this recipe isn't the quickest or simplest, I agree with David when he says that it tastes better the second day (or even the third, if it lasts that long), so you can totally make this the day before you need it if you're in a time crunch.

https://www.flickr.com/photos/joyosity/15405774579/

Two words of caution:  make sure you do not overmix the batter and make sure you don't overbake.  Overmixing will cause you to lose the precious air pockets you created when whipping the egg whites.  This is what keeps the cake from being a dense brick.  Also, if you overbake the cake, you'll lose all the delicious moistness from the beets. 

https://www.flickr.com/photos/joyosity/15406392827/

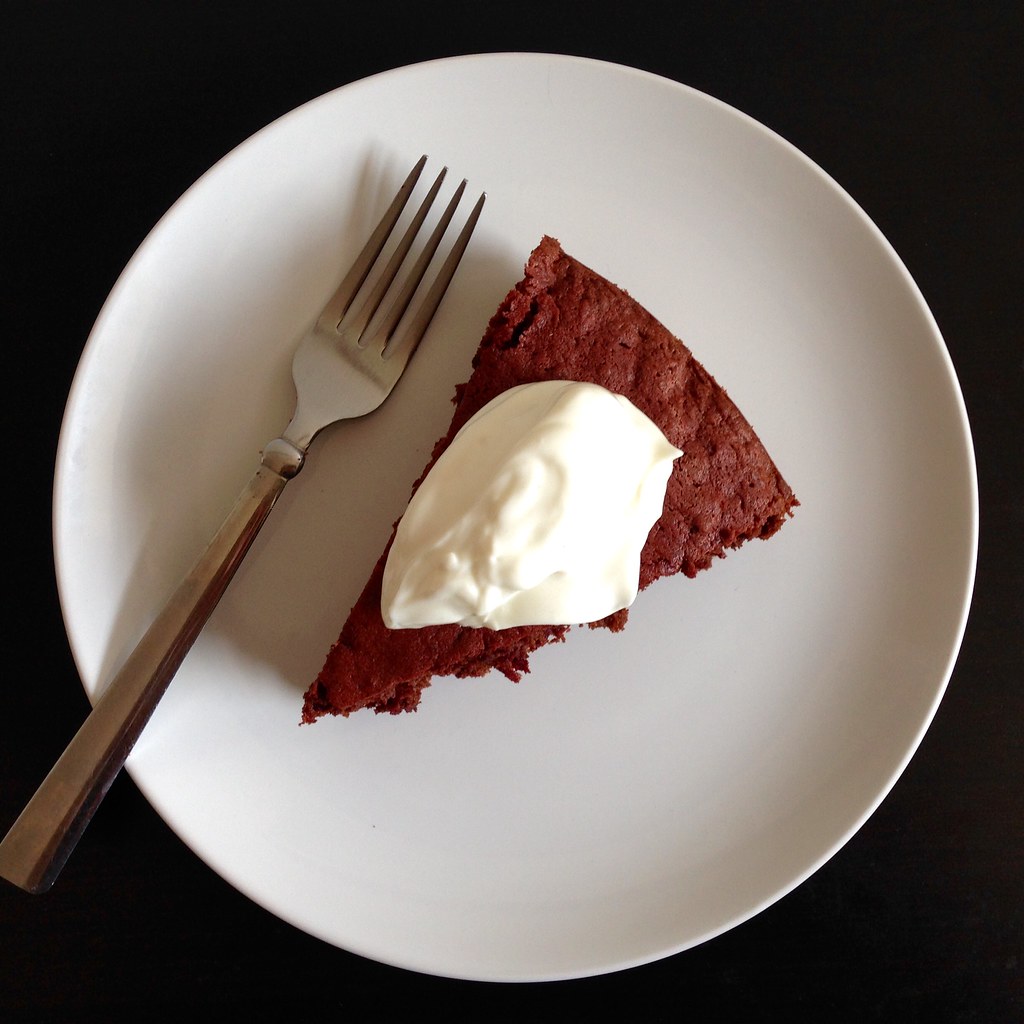
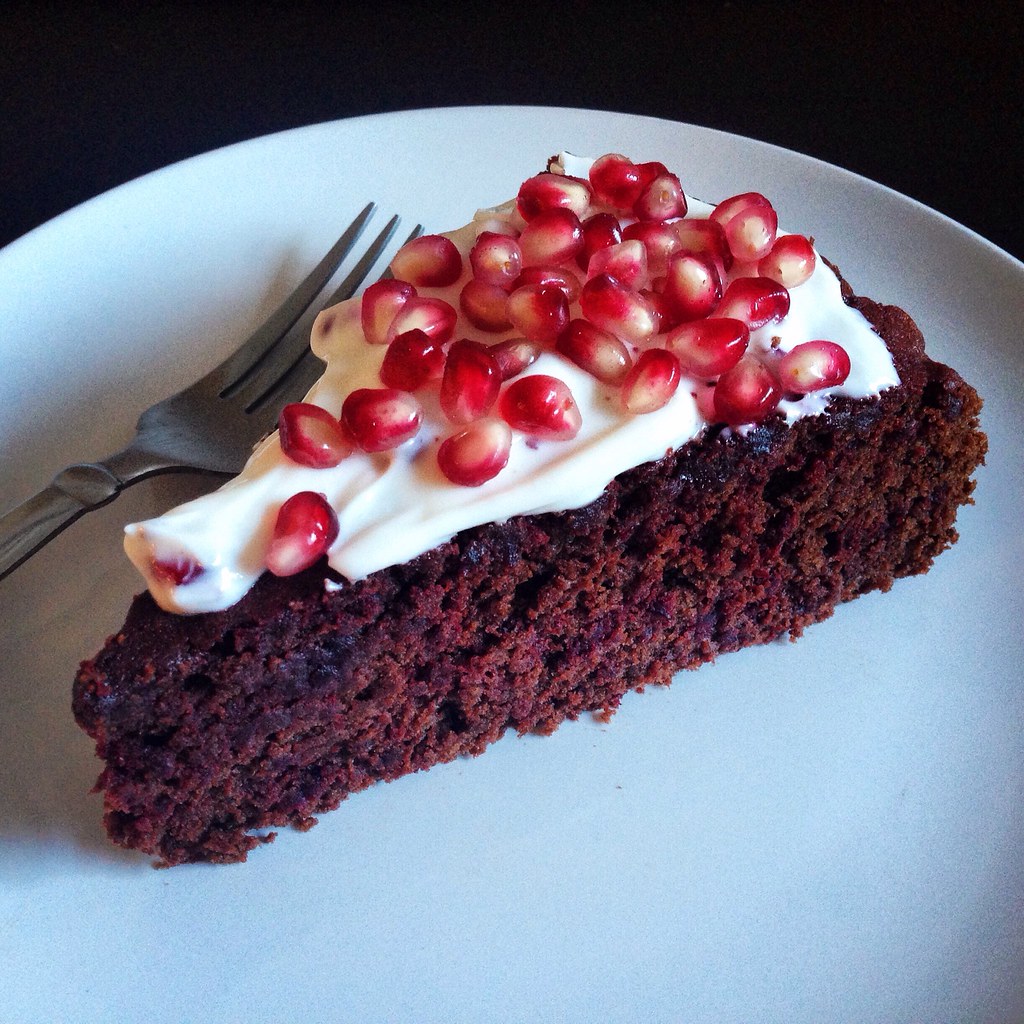
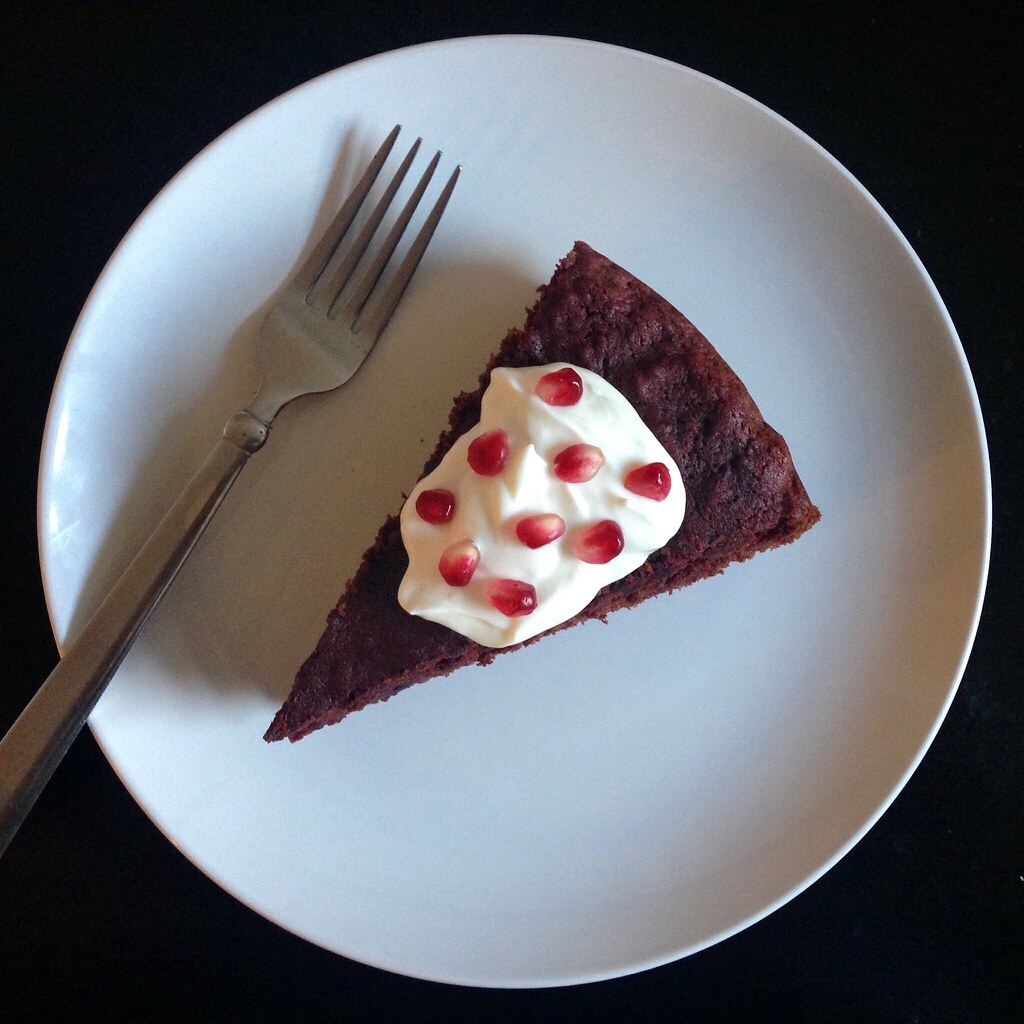
Since I didn't have any crème fraîche (who does?!) I topped my cake with Greek yogurt instead.  I imagine sour cream, coconut whipped cream, or a good vanilla ice cream would work just as well.  And since I didn't have any poppy seeds on hand, I sprinkled on some pomegranate arils instead.  I like how the pomegranate echoed the color of the beets used in the cake and also enhanced the tartness of the Greek yogurt.

https://www.flickr.com/photos/joyosity/15418097350/

Nigel Slater's Chocolate Beet Cake (from Food52)
serves 8

8 ounces fresh beets
7 ounces fine dark chocolate (70%)
1/4 cup hot espresso
3/4 cup + 2 tablespoons butter
1 cup + 2 tablespoons all-purpose flour
1 1/4 teaspoons baking powder
3 tablespoons good quality cocoa powder
5 eggs
Scant 1 cup superfine sugar
Crème fraîche or Greek yogurt
Poppy seeds or pomegranate arils, to serve

Lightly butter an 8-inch springform cake pan and line the base with a round of parchment paper. Heat the oven to 350°F.
   
Cook the beets, whole and unpeeled, in boiling unsalted water. Depending on their size, they will be tender within 30 to 40 minutes. Young ones may take slightly less. Drain them, let them cool under running water, then peel them, slice off their stem and root, and grate or process in a blender or food processor until a coarse purée.
   
Melt the chocolate, broken into small pieces, in a small bowl set over a pot of simmering water. Don’t stir.
   
When the chocolate looks almost melted, pour the hot espresso over it and stir once. Cut the butter into small pieces and add to the melted chocolate. Push the butter down under the surface of the chocolate with a spoon (as best you can) and leave to soften.
   
Sift together the flour, baking powder, and cocoa. Separate the eggs, putting the whites in a large mixing bowl. Beat the yolks together.
   
Remove the bowl of chocolate from the heat and stir until the butter has melted into the chocolate. Let sit for a few minutes, then stir in the egg yolks. Do this quickly, mixing firmly and evenly so the eggs blend into the mixture instead of cooking. Fold in the beets.

Whisk the egg whites until they form soft peaks, then add the sugar gradually as you continue to whip until all the sugar has been incorporated and the egg whites form stiff peaks. Fold the beaten egg whites into the chocolate mixture and then fold in the flour and cocoa.
   
Transfer quickly to the prepared cake pan and put in the oven, decreasing the heat immediately to 325°F. Bake for 40 minutes. The rim of the cake will feel spongy, the inner part should still wobble a little when gently shaken. Test with a cake tester or toothpick too -- if it is still gooey in the center, continue baking just until moist crumbs cling to the tester.
   
Set the cake aside to cool, loosening it around the edges with a thin icing spatula after half an hour or so. It is not a good idea to remove the cake from its pan until it is completely cold. Serve in thick slices, with crème fraîche or Greek yogurt and poppy seeds or pomegranate arils.

https://www.flickr.com/photos/joyosity/15415634899/

This cake is definitely on the less sweet side, and because I used the coarse grater to process the cooked beets, there were several moist chunks of beets laced throughout the cake, which I didn't mind.  Other than that, if no one had told me there were beets in this cake, I probably would never have guessed.  If you want to get rid of all traces of beets in this cake, you'll probably want a finer purée.

Next:  Faux Phở
Previously:  Elote-Style Cornbread Waffles
Two Years Ago:  Coconut Whipped Cream and Coconut Dulce de Leche

Monday, September 8, 2014

Taiwanese Taro Swirl Mooncakes

https://www.flickr.com/photos/joyosity/14985736599/

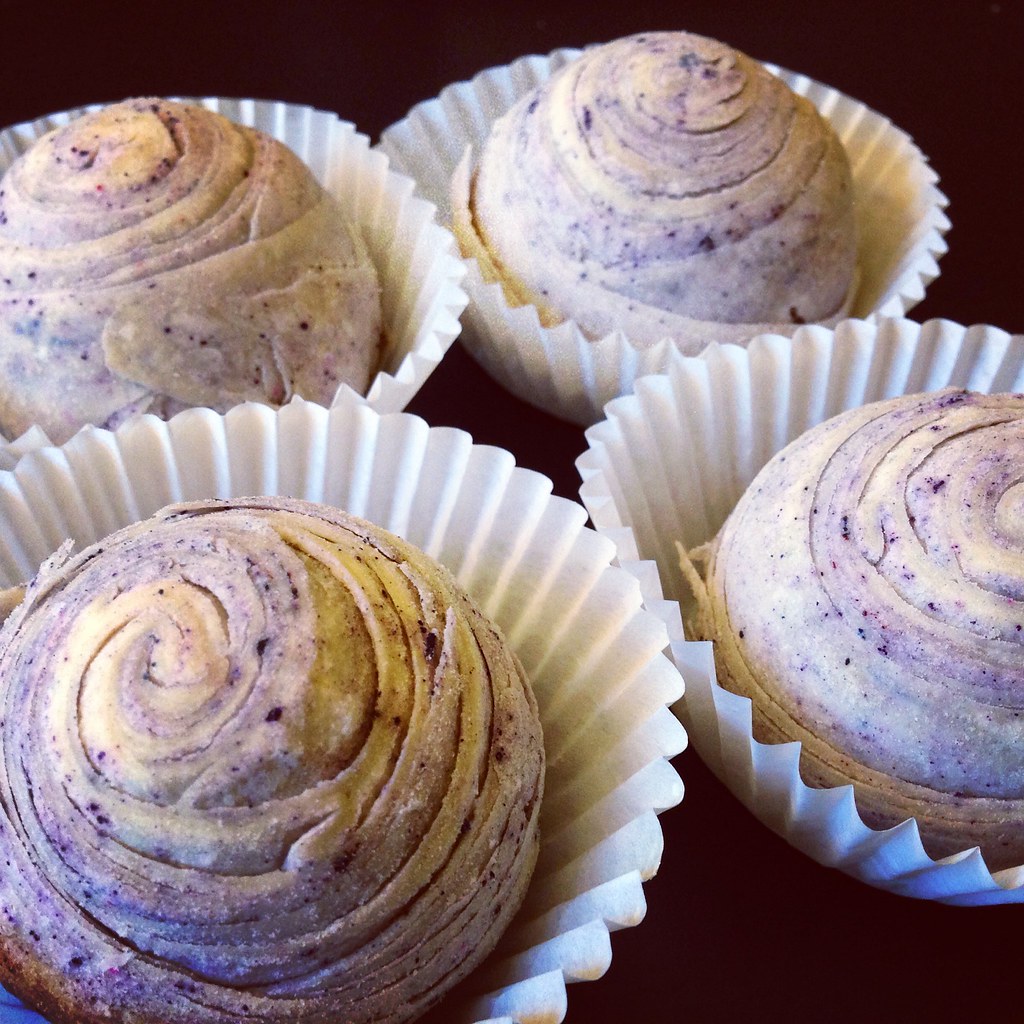
Today is the Mid-Autumn Moon Festival, which to me means mooncakes!  Most of my life, when I thought of a mooncake, I pictured a heavy, rich pastry filled with red bean or lotus seed paste and maybe a salted egg yolk inside.  They're good, but you can only eat a couple of bites before it gets to be too much.  Then I discovered Taiwan's version:  light, flaky layers of pastry wrapped around sweetened taro root paste.  Not only are they delicious, they're really gorgeous!

I never imagined they'd be something I could make at home, but then I came across a few recipes and just had to try.  Some of the recipes use unsalted butter or shortening in the dough and/or taro paste, but I personally like the subtle coconut flavor you get from using coconut oil so I used that instead.  Note:  This took way longer than I thought it would take to make.  I made the taro paste the day before, and it still took me over 3 hours to make the mooncakes the day of.

https://www.flickr.com/photos/joyosity/15149442246/

Taiwanese Taro Swirl Mooncakes (adapted from The 350 Degree Oven)
makes 20 pastries

For the taro paste:
2 lb. taro root
1 teaspoon kosher salt
3/4 cup sugar
1/4 cup coconut oil

For the white dough:
1 3/4 cup flour
1/4 cup powdered sugar
1/2 teaspoon kosher salt
6 tablespoons coconut oil
Water

For the purple dough:
1 1/2 cup flour
1/2 teaspoon kosher salt
7 tablespoons oil
Purple food coloring

Peel and cube the taro.  Steam for about 30-40 minutes until the taro is fork tender.  Use a ricer or mash the taro into a paste.  Mix with the the salt, sugar, and coconut oil.  Set aside to cool.

https://www.flickr.com/photos/joyosity/14984930580/

Sift together the flour, powdered sugar, and salt for the white dough in a medium bowl.  Add the coconut oil and 1/4 cup of water.  Stir and add more water if necessary, a tablespoon at a time, until the dough comes together.  Knead for a few minutes until smooth.

In a separate bowl, sift together the flour and salt for the purple dough.  Add the oil and a few drops of purple food coloring.  Add more food coloring as necessary to get a pale but noticeably purple dough.  (I used a gel food coloring, and for some reason it never really spread very well throughout the dough and mostly stayed in little specks.)  This dough will look and act more like wet sand than pastry dough.

Divide both doughs into 10 pieces and refrigerate for about 20 minutes to rest and chill slightly.

Preheat the oven to 350°F.

https://www.flickr.com/photos/joyosity/15148565016/

Roll one of the balls of white dough into a rough circle and wrap it around a ball of the purple dough, sealing it completely.  Roll the combined dough into a long oval and then roll it up into a spiral.  With the seam on the bottom, rotate the dough 90 degrees and roll out again into a long rectangle.  Roll the rectangle up into a spiral again and slice in half.  You'll now have two pieces of dough with beautiful spirals showing on the cut sides.

https://www.flickr.com/photos/joyosity/14985028217/

Place the cut side down and flatten the dough with your hands.  Roll out into a rough circle.  It's okay if the layers tear a little through this whole process.  Take a spoonful of the taro paste and place it in the center of the dough.  Gently pull the dough upward and around the paste to seal it inside.  Don't worry if the edges don't seal all the way; the dough doesn't stick to itself very easily.  Flip the ball over and gently reshape so that the spiral is centered on top and the bottom is slightly flattened.

https://www.flickr.com/photos/joyosity/15168601091/

Place on a Silpat- or parchment-lined baking sheet and bake for 30 minutes.  Remove from oven and allow to cool before eating.

https://www.flickr.com/photos/joyosity/15171225352/

I ended up with a lot of leftover taro paste, so I used it to make taro swirled Hokkaido milk bread!

https://www.flickr.com/photos/joyosity/15154417156/

Next:  Ginger Scallion Lobster Buns
Previously:  Thomas Keller's Caramelized Scallops
Last Year:  Ramen Lobster Rolls

Thursday, July 10, 2014

Cleveland Cassata Cake (Bonus: In a Jar!)

https://www.flickr.com/photos/joyosity/14579865401/

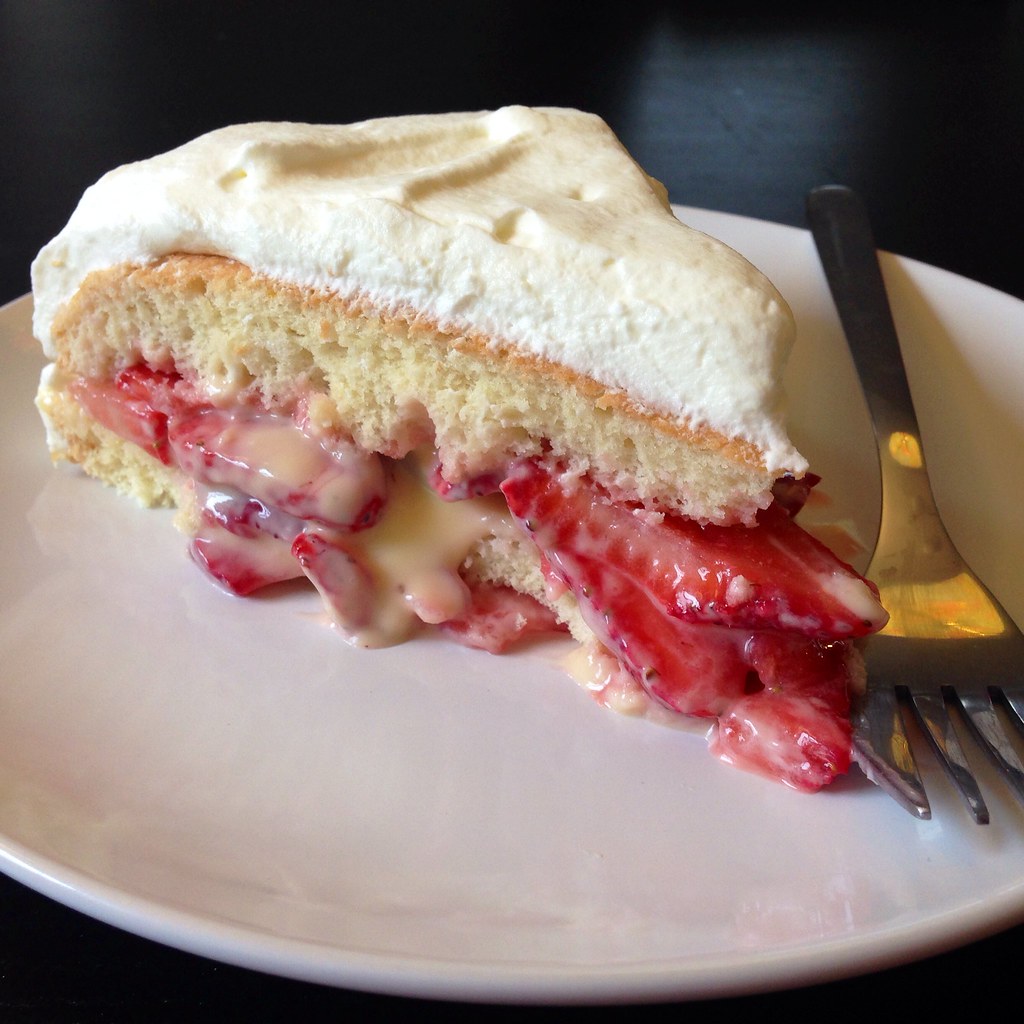
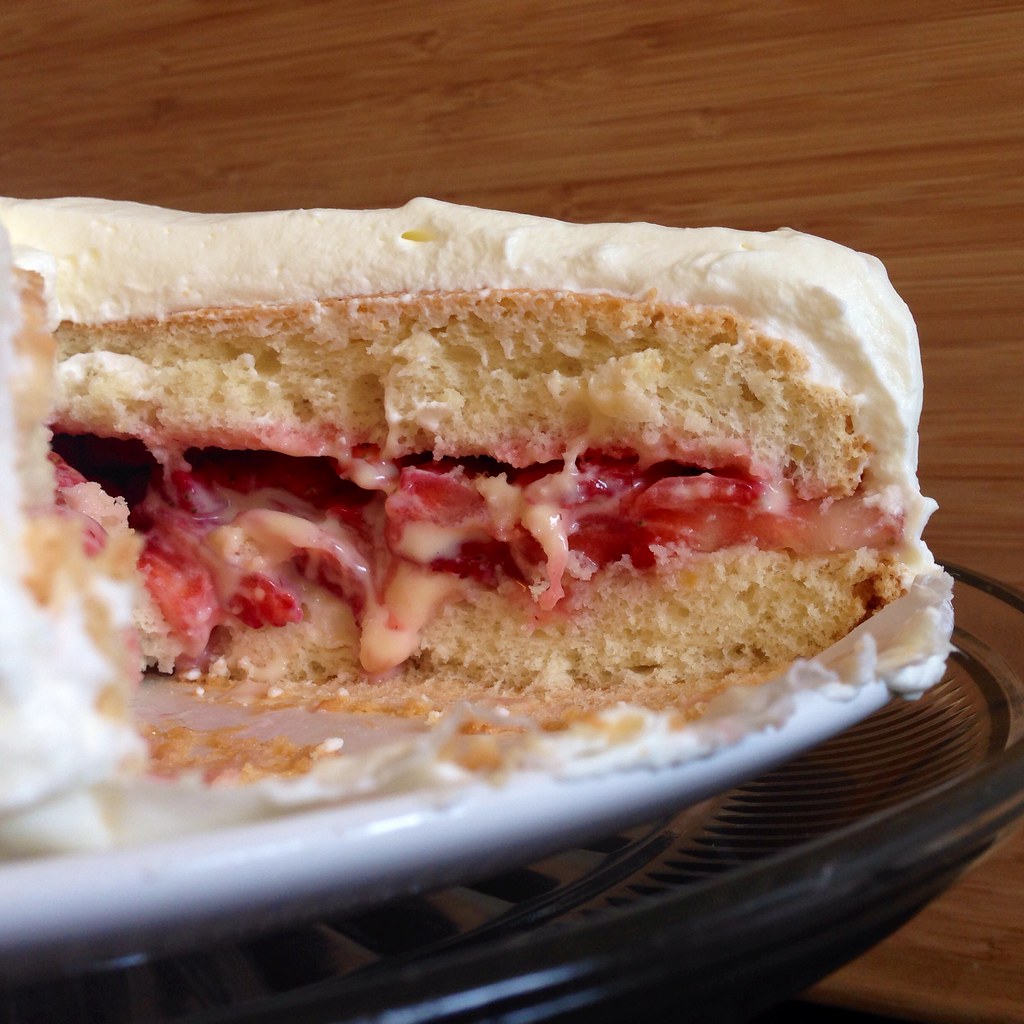
Growing up in Cleveland, I knew this as "the really yummy cake with the fresh strawberries."  I was aware it had a name, but because I had only heard people say it and never saw it in writing, I always thought it was a "cascada" cake.  It was only after leaving Cleveland that I realized you can't get this cake everywhere, which is so, so sad for everyone else in the world.

https://www.flickr.com/photos/joyosity/14560138156/

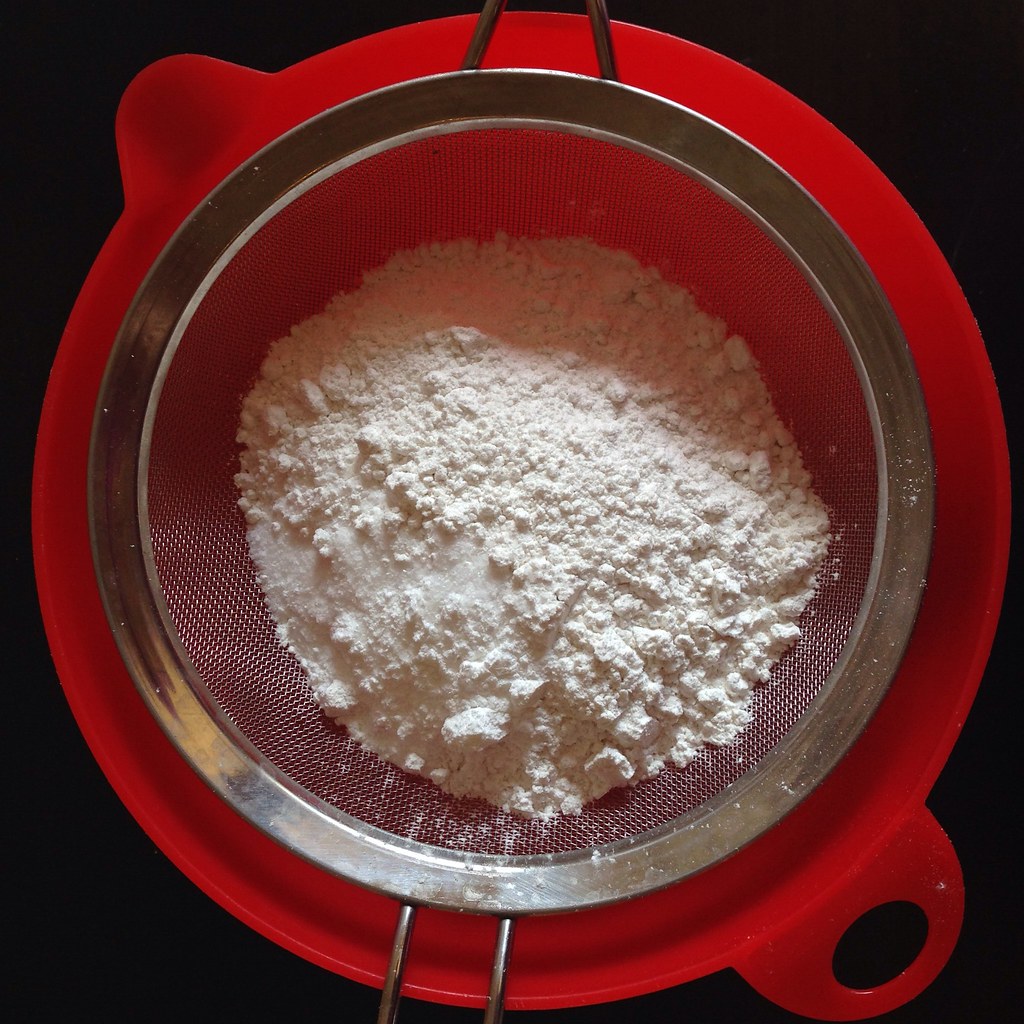
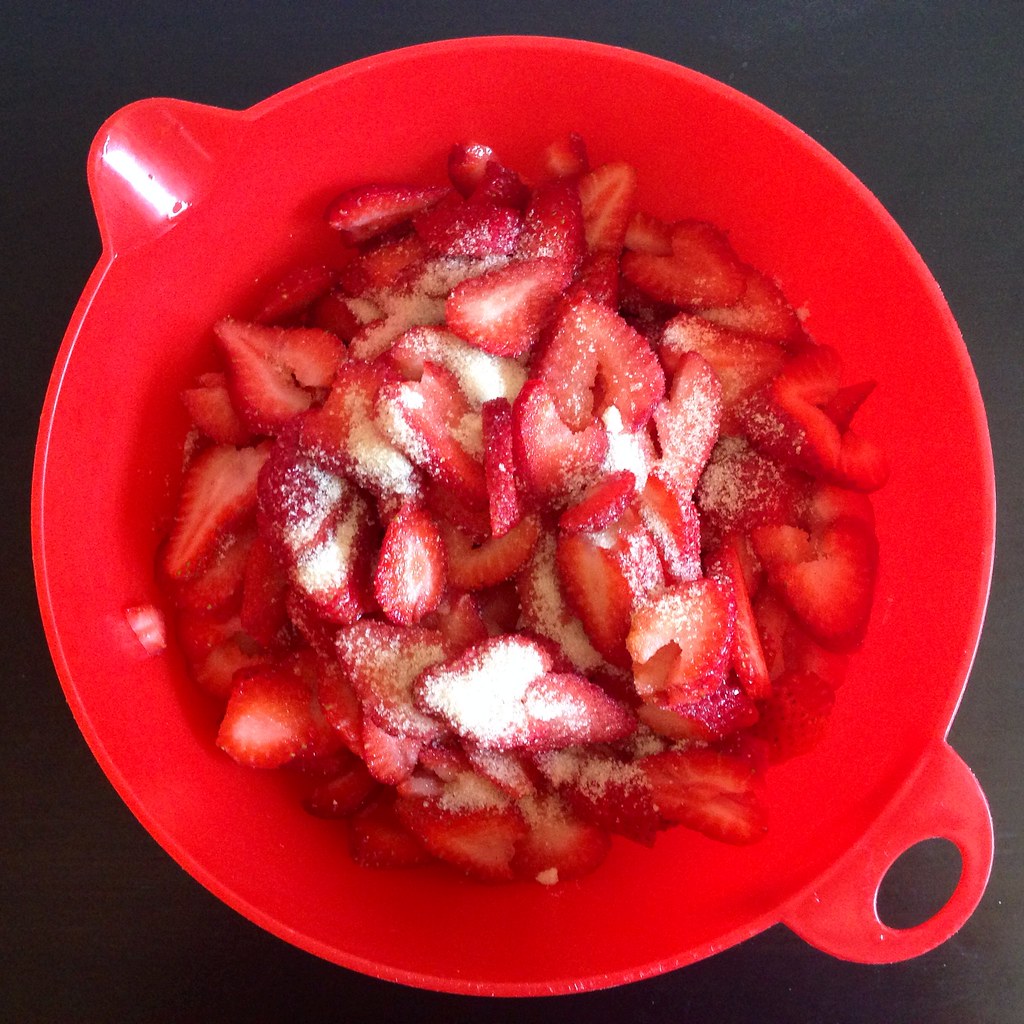
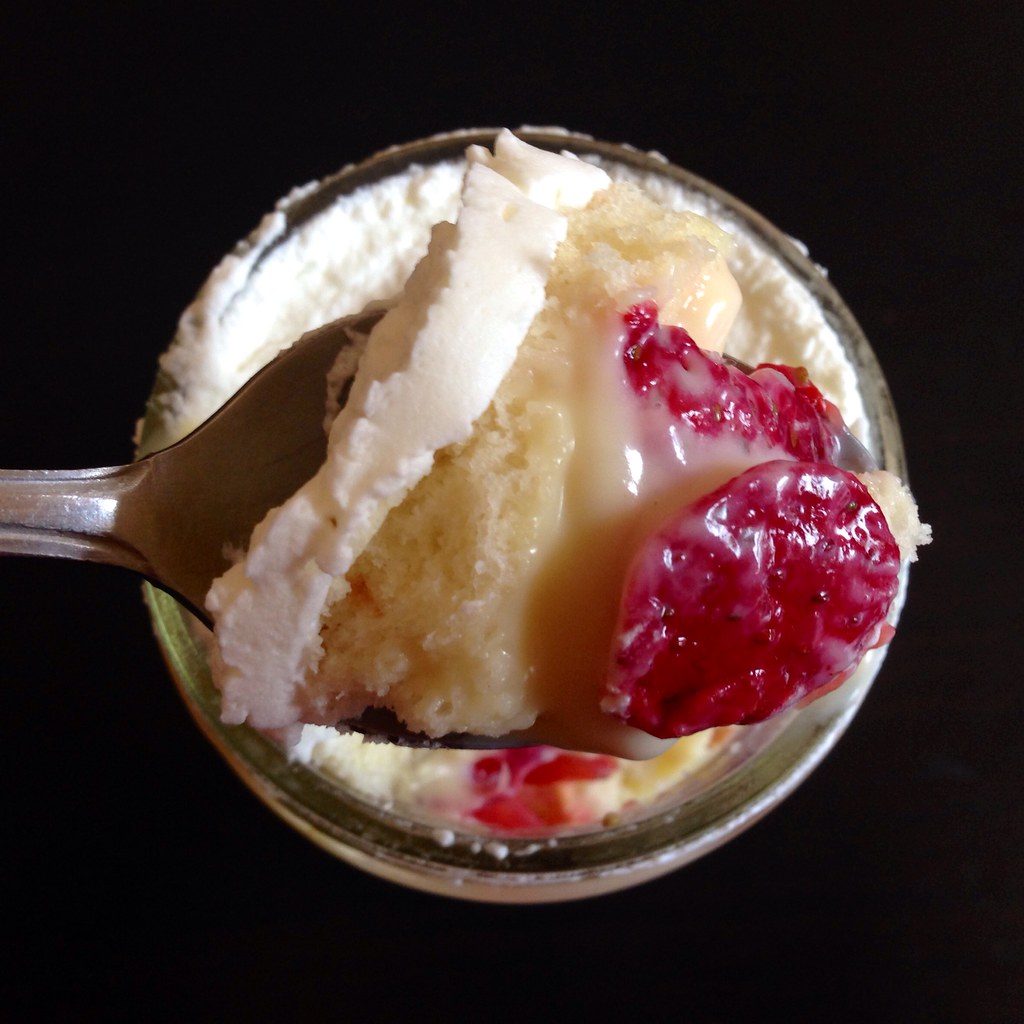
Think of it as the strawberry shortcake of your dreams:  layers of light, moist chiffon filled with fresh strawberries and custard and frosted with whipped cream.  For me, it's the fresh strawberries that really make this cake; they're tossed with just a couple spoonfuls of sugar to release their juices but still stay firm and almost have a little crackle because of the seeds.

https://www.flickr.com/photos/joyosity/14579875291/

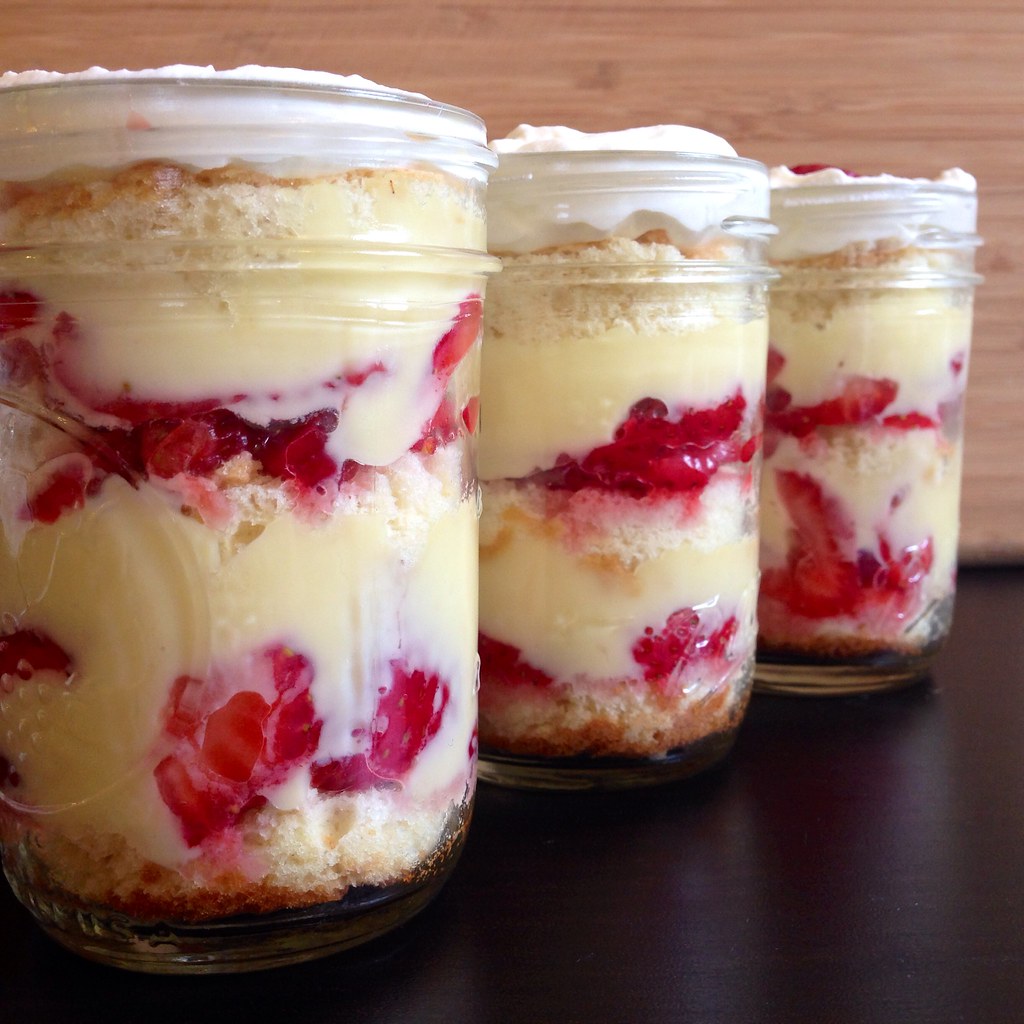
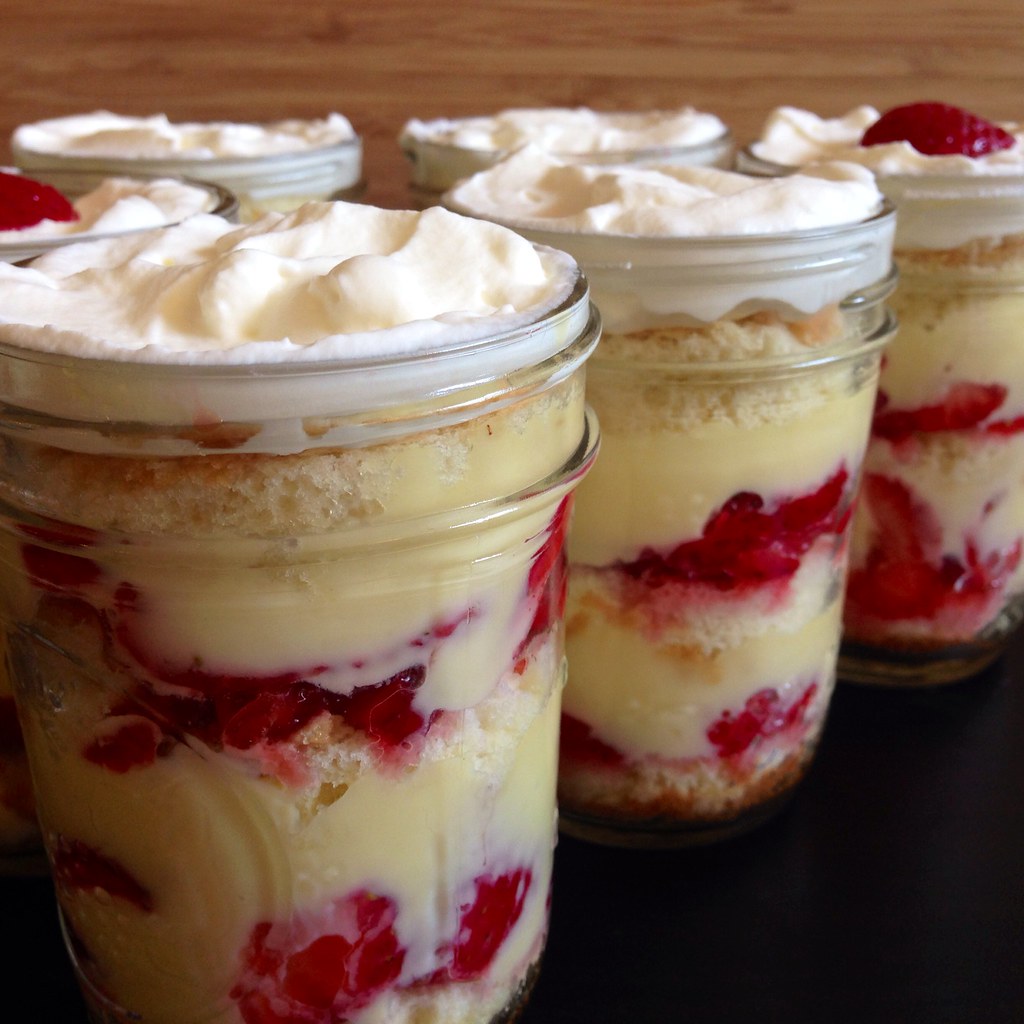
I pretty much followed this recipe from Sweet Amandine, except I decided to only make a two-layer cake with half the recipe and try to make three-layer cakes-in-a-jar with the other half (similar to my Happiness Cake in a Jar).  For the two-layer cake, I chose to put the strawberries on top of the custard only because I figured it would be easier spreading the strawberries over the custard than the other way around.  Since you're not really spreading around the fillings for the cakes-in-a-jar, and it actually looks nicer for the custard to be seeping into the strawberry layer, I flip flopped it for the jar version.  I also decided to use vanilla sugar in the custard since I like the subtle additional flavoring and confectioner's sugar in the whipped cream.

https://www.flickr.com/photos/joyosity/14396545080/

Cleveland Cassata Cake (adapted from Sweet Amandine)
makes one 4-layer cake or one 2-layer cake and ten small (8 oz.) jars or twenty small (8 oz.) jars

For the custard:
6 large egg yolks
1/2 cup vanilla sugar (or regular sugar if you don't have vanilla sugar)
2 cups half and half
3 tablespoons cornstarch

For the cake:
2 1/4 cups cake flour
1 1/4 and 1/4 cups sugar, divided
1 tablespoon baking powder
1 teaspoon salt
3/4 cup cold water
1/2 cup vegetable oil
1 teaspoon lemon zest
1 teaspoon vanilla extract
5 large egg yolks at room temperature
8 large egg whites at room temperature
1/2 teaspoon cream of tartar

For the strawberries:
3 pounds strawberries
2 tablespoons sugar

For the whipped cream:
2 cups chilled heavy cream
1 tablespoon confectioner's sugar

https://www.flickr.com/photos/joyosity/14560131796/

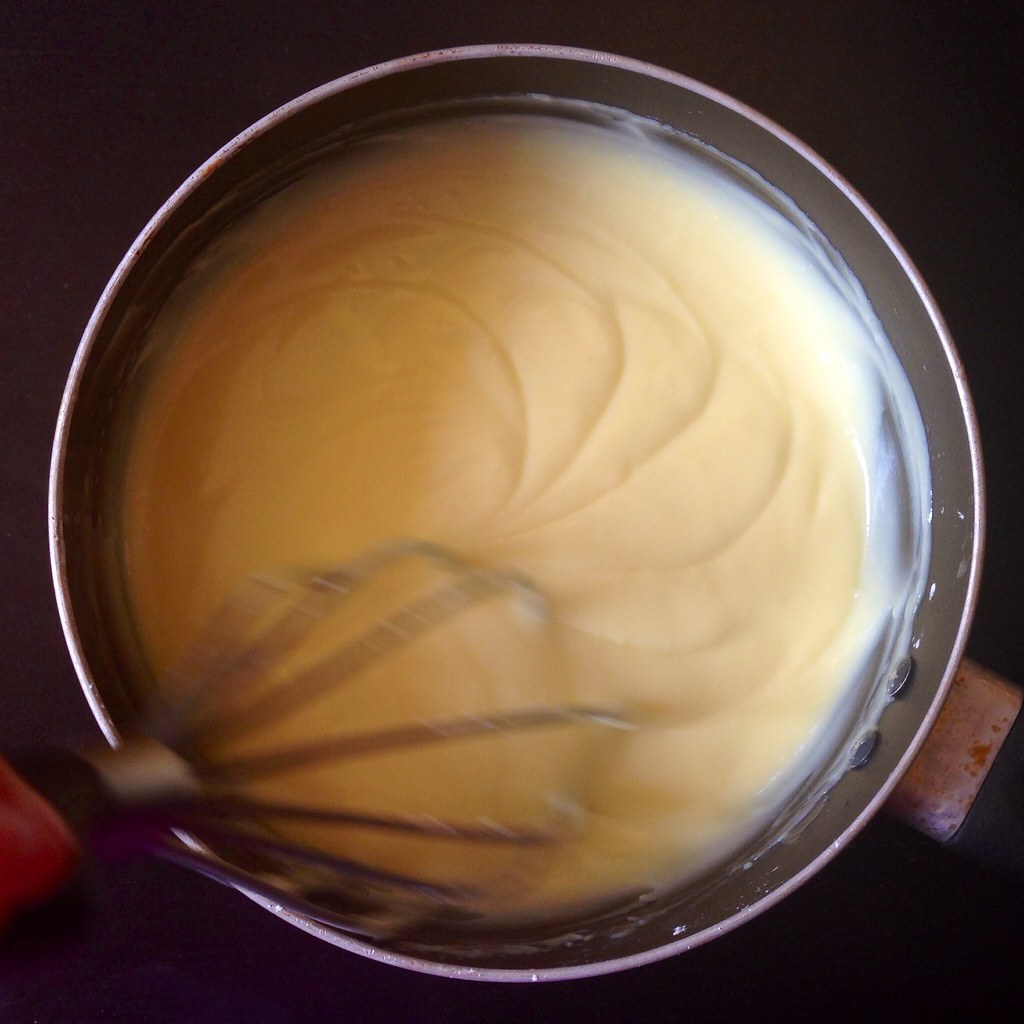
Whisk together all of the custard ingredients in a saucepan.  Heat over medium-low heat, whisking constantly until thickened.  Turn down the heat if it starts to simmer.  Transfer the custard to a bowl, cover with plastic wrap, and cool to room temperature.  Transfer to the refrigerator and chill for at least 3 hours, or up to 2 days.

Preheat the oven to 325°F. Line the bottoms of two 9" round cake pans with lightly oiled parchment paper.  Sift or whisk together the flour, 1 1/4 cup sugar, baking powder, and salt in a large mixing bowl.

https://www.flickr.com/photos/joyosity/14603289003/

In a separate bowl, beat together the yolks, water, oil, lemon zest, and vanilla until smooth. Stir into the flour mixture. In another large bowl beat the egg whites with the cream of tartar until soft peaks form. Add the remaining 1/4 cup sugar and beat on high until the peaks are stiff but not dry.

https://www.flickr.com/photos/joyosity/14603287933/

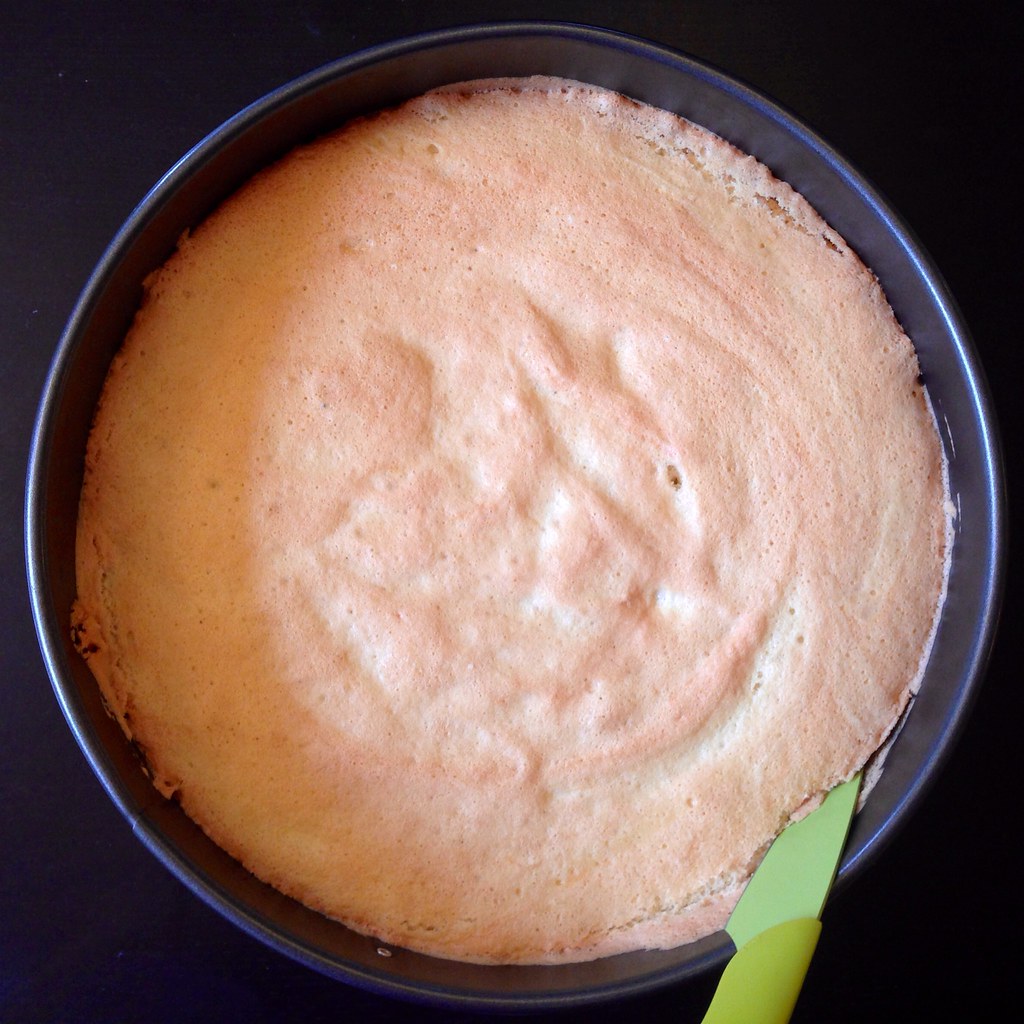
Using a rubber spatula, fold about a quarter of the fluffy egg whites into the egg yolk mixture. Then very gently fold in the remaining whites. As soon as the egg whites are no longer visible, stop folding. Scrape the batter into the prepared cake pans and spread evenly. Bake for approximately 35 minutes or until the top springs back when lightly pressed and a toothpick inserted into the center comes out clean.

https://www.flickr.com/photos/joyosity/14582437592/

In the meantime, hull and slice the strawberries thinly, reserving a few to garnish the top of the cake with.  Sprinkle with the sugar and stir. Allow the strawberries to macerate for 1 hour, giving them a stir every so often. Strain the berries, reserving the released juices.

https://www.flickr.com/photos/joyosity/14582440632/

Allow the cakes to cool in their pans on a cooling rack for at least an hour. When completely cool, run a knife around the sides to release the cakes, cover each pan with a wax paper-lined plate, and flip. Gently lift the pans off of the cakes.

Carefully slice the cakes in half with a bread knife so you have four layers (or two, depending on how many cakes you made). Place each layer on a wax paper-lined baking sheet or plate.

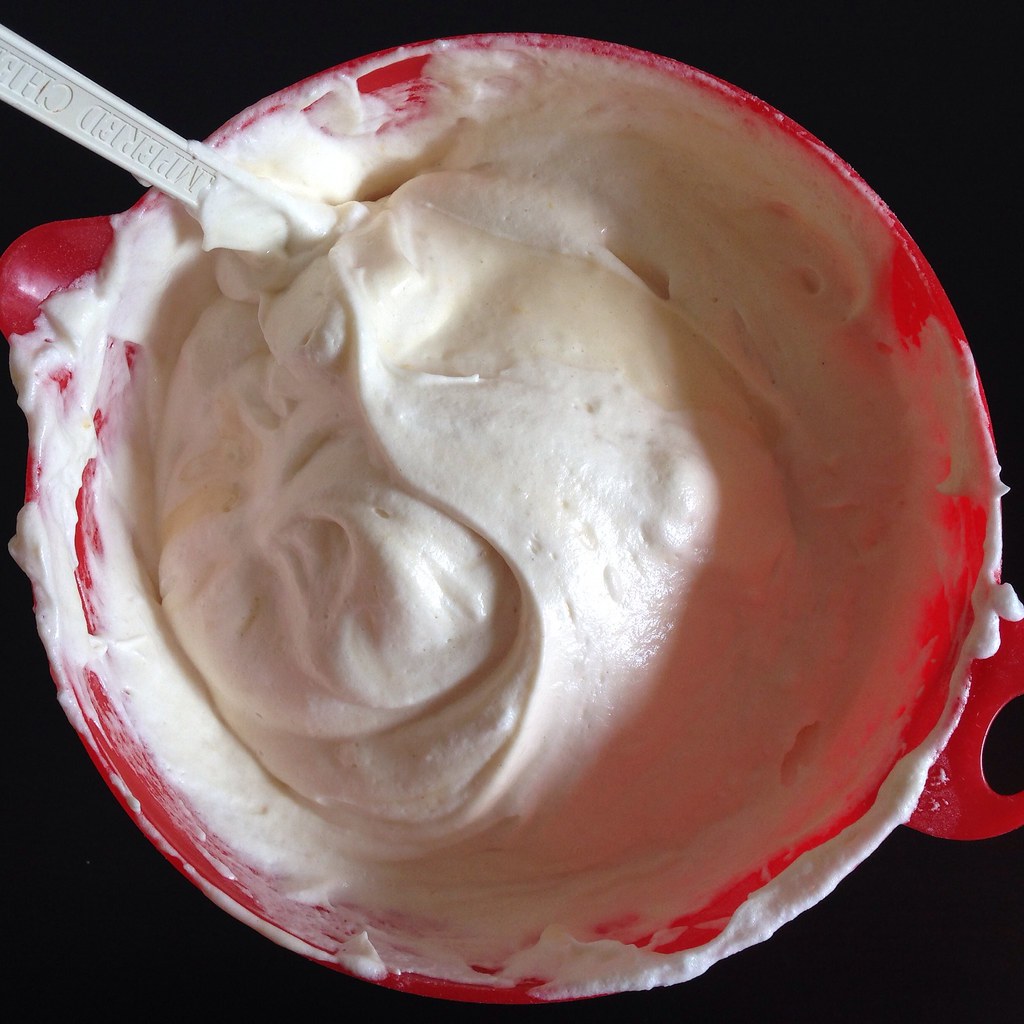
Whip the cream and sugar together until stiff, making sure not to overwhip (or else you'll be making butter!).

https://www.flickr.com/photos/joyosity/14581373324/

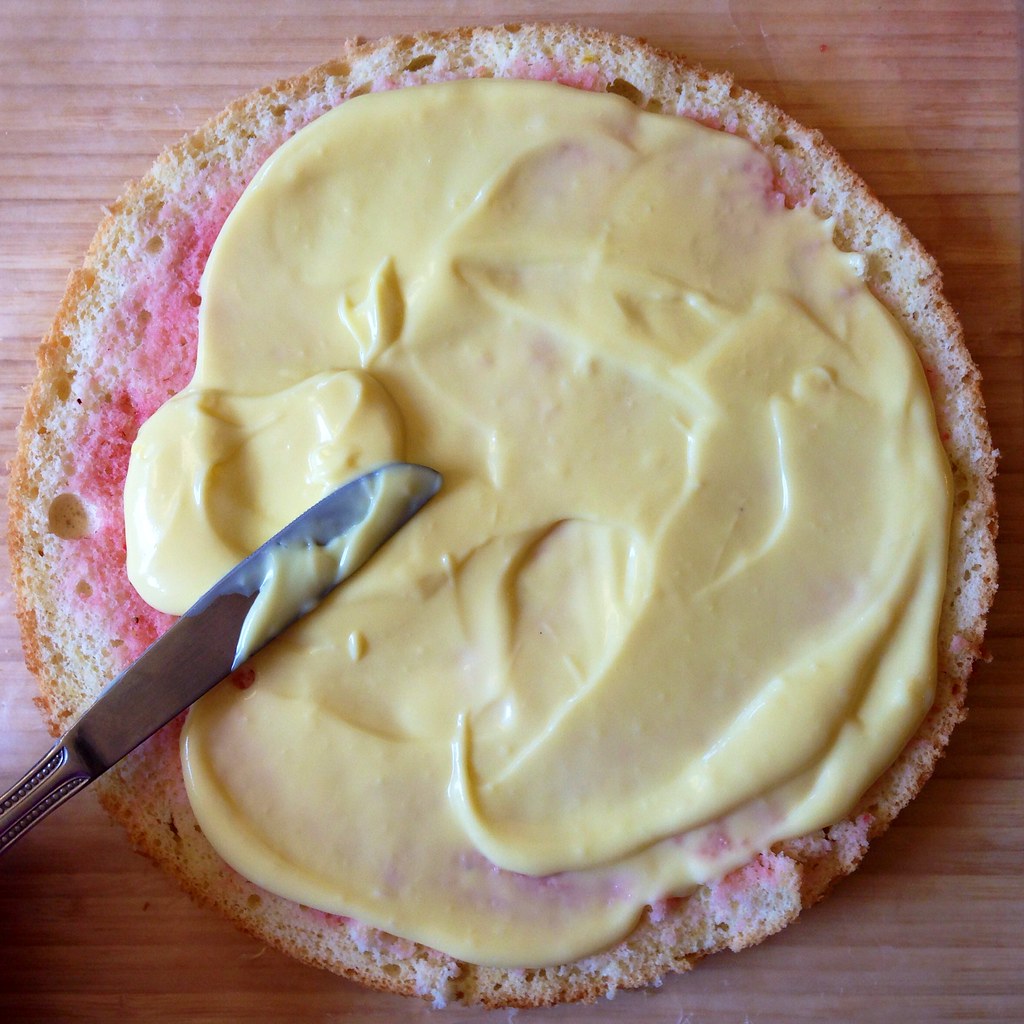
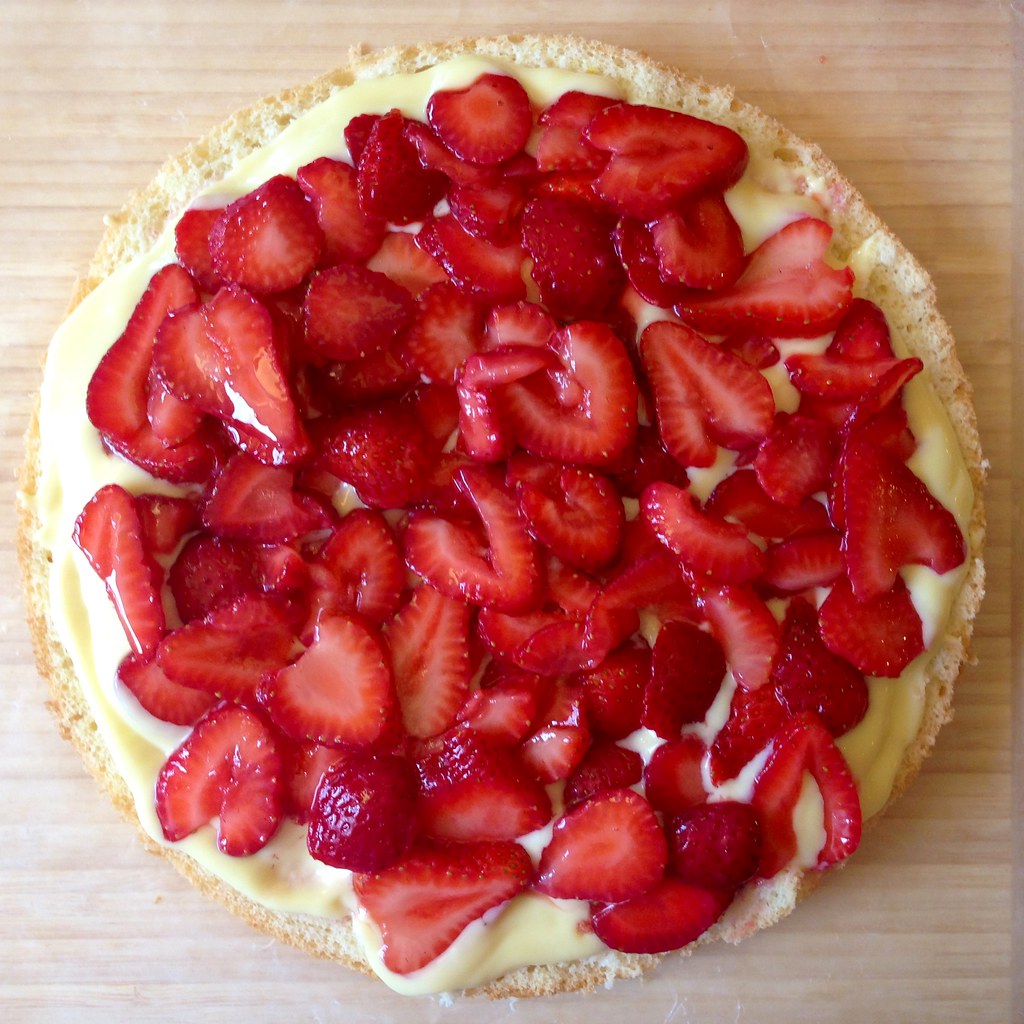
Place one cake layer on a wax paper-lined baking sheet. Brush with the reserved strawberry juice. Cover with a layer of custard, and then a layer of strawberries.

https://www.flickr.com/photos/joyosity/14396570728/

Repeat for the following layers if you are making more than a two-layer cake.

https://www.flickr.com/photos/joyosity/14583177325/

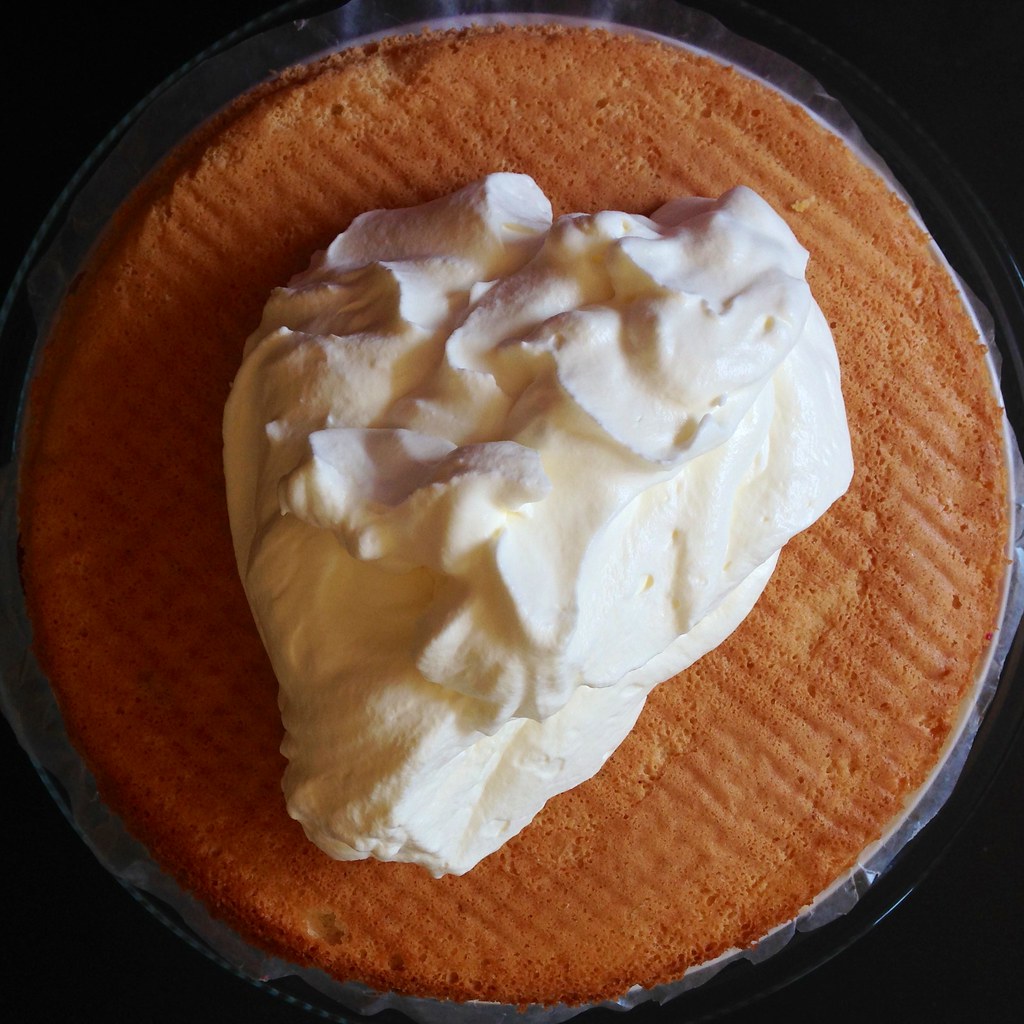
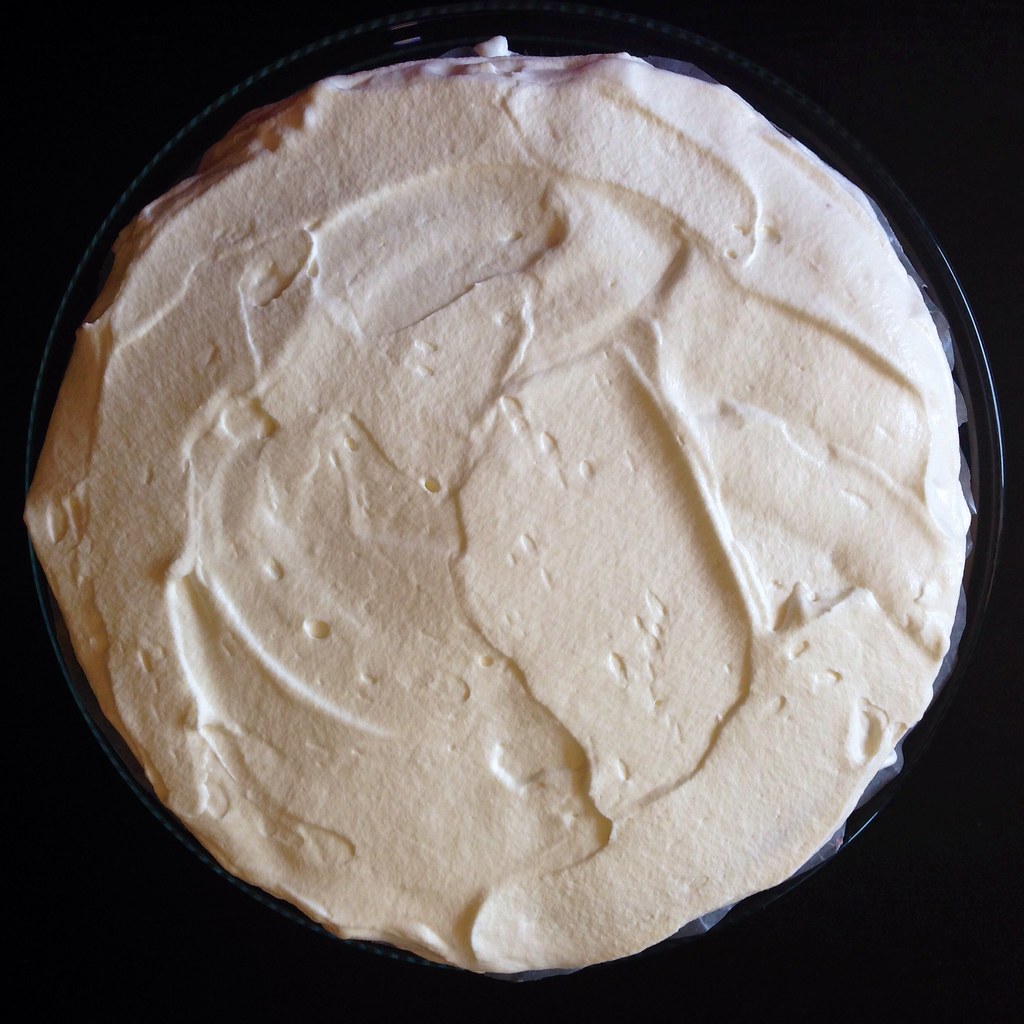
Plop the whipped cream on top of the cake.  Use a spatula to spread the whipped cream across the top and then over the sides of the cake.  Top with the reserved strawberries, if you remembered to save any (which I didn't).

https://www.flickr.com/photos/joyosity/14583179315/

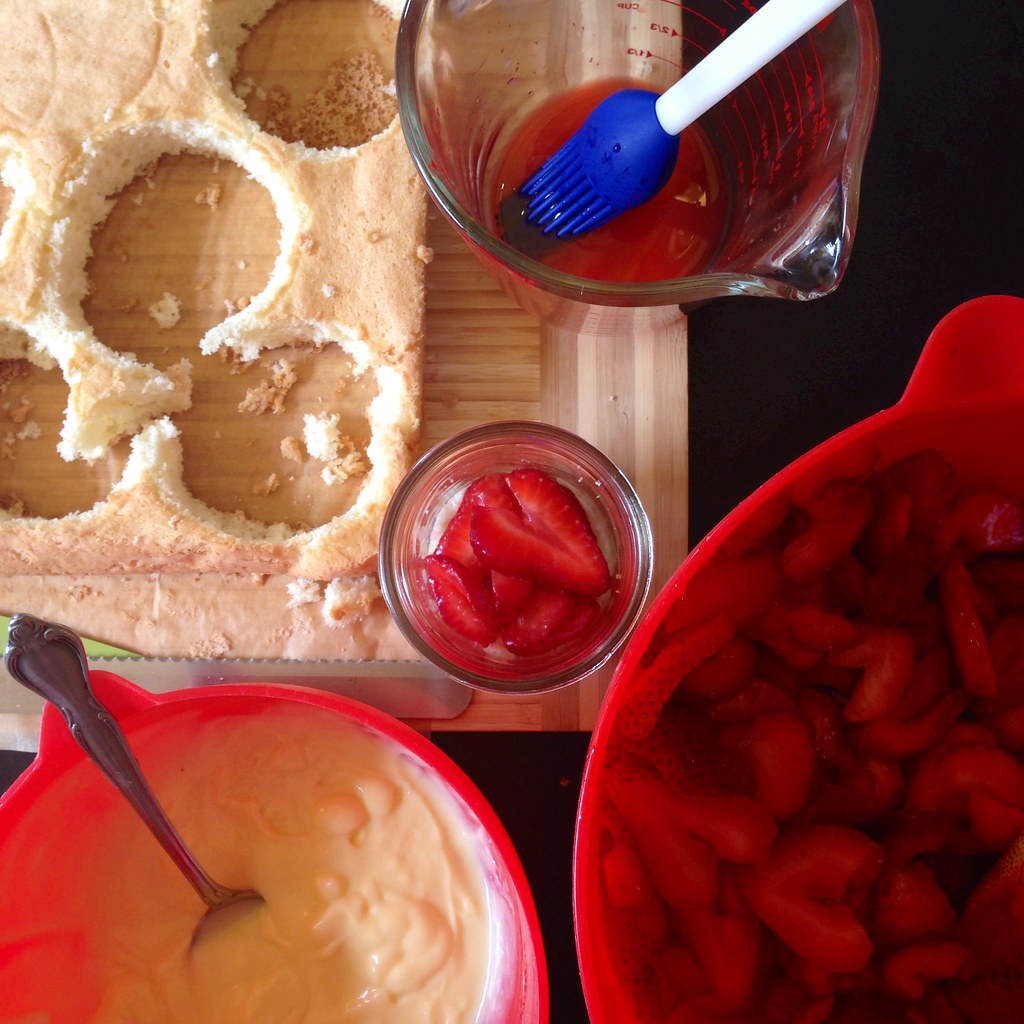
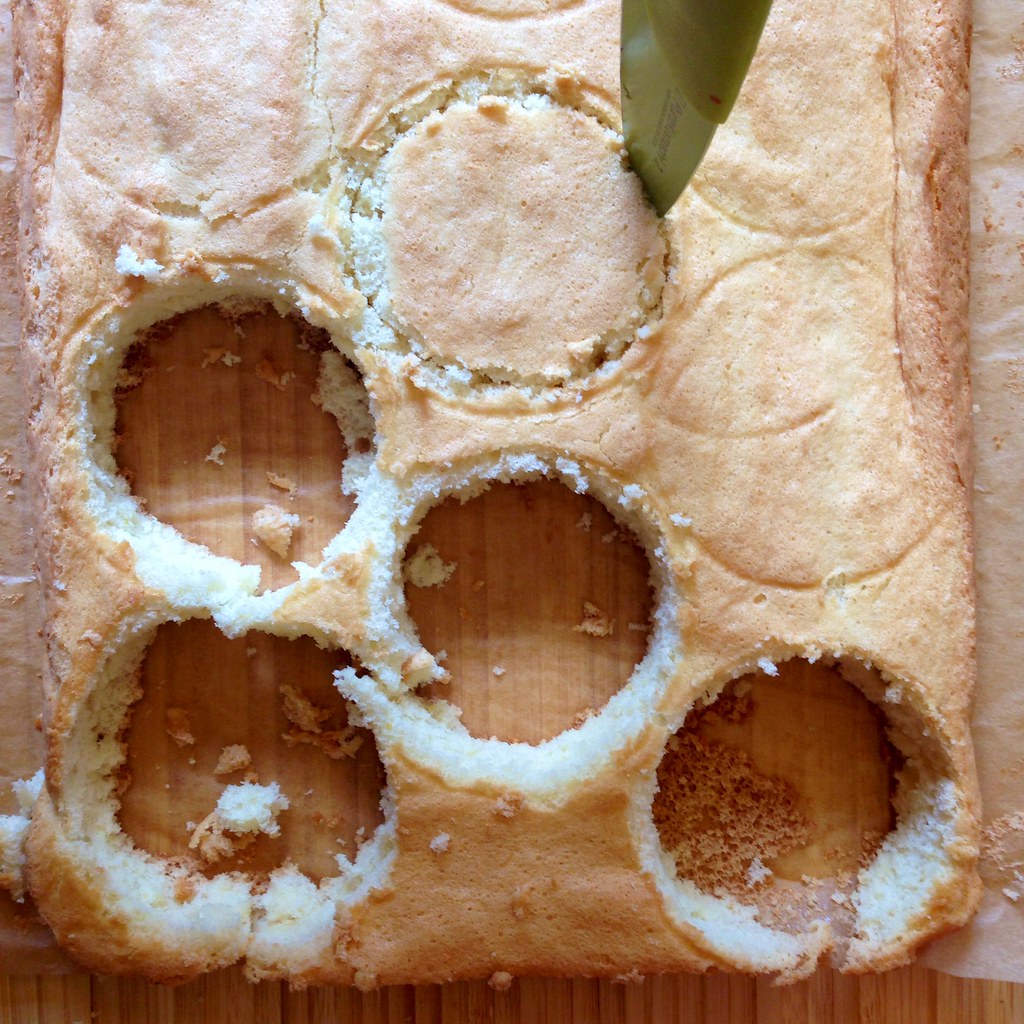
To make the cakes in a jar, bake the batter in two lightly oiled parchment paper-lined 9"x13" cake pans.  Once the cakes are cooled, use the lid of the jar as a template to cut out 10 (I was able to get 11, but 10 is a nicer, round number) circles, making sure to cut slightly inside the outline so that the cake will fit inside the jar.

https://www.flickr.com/photos/joyosity/14579872041/

Tear the remaining cake scraps into large crumbs (you will use this for the middle layer of each jar). 

https://www.flickr.com/photos/joyosity/14583187435/

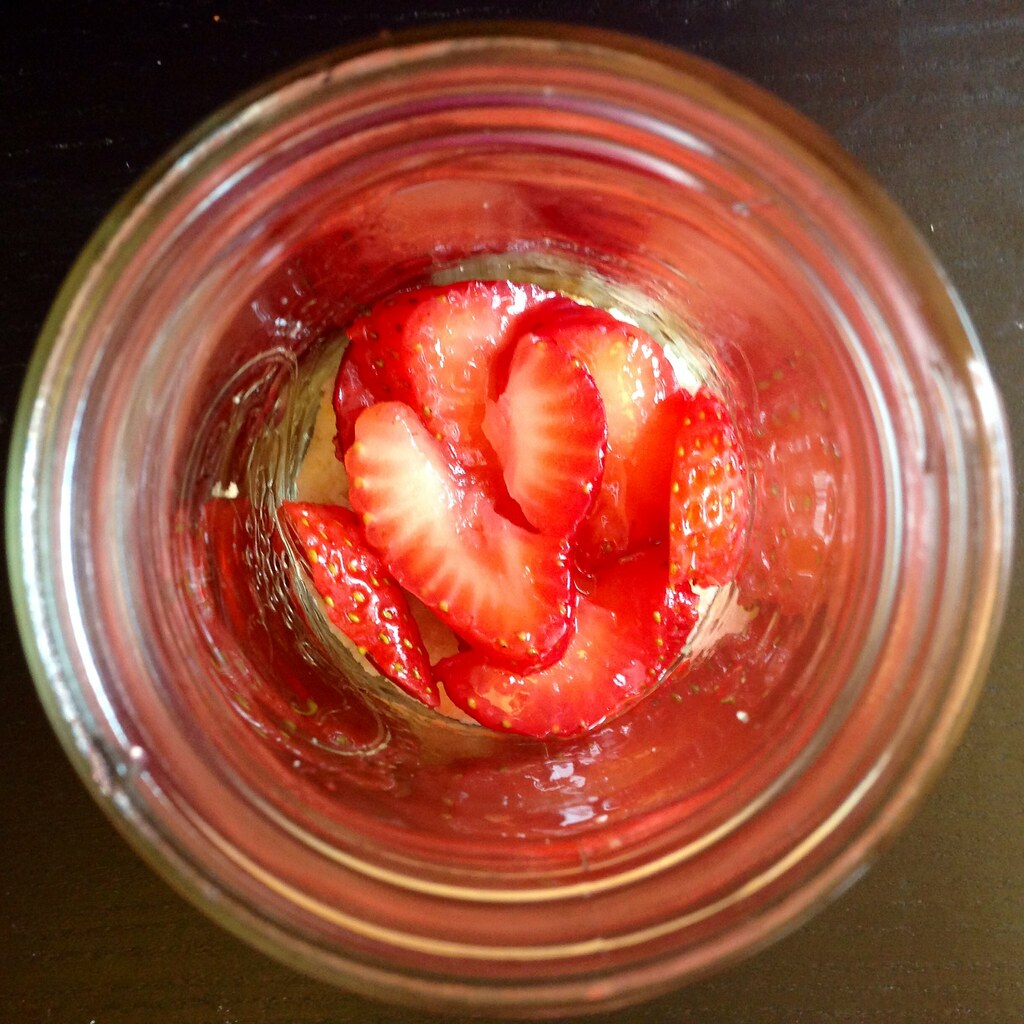
Slice each cake circle in half.  Place the bottom half in the bottom of a jar.  Top with a spoonful of the sliced strawberries (including some juices) and then a spoonful of custard.  Tap the jar a few times to make sure everything is settled.  Top with a layer of the cake crumbs and then another layer of the strawberries and custard.  Place the top half of the cake circle on top of the second layer of custard and top it all off with a dollop of whipped cream.

https://www.flickr.com/photos/joyosity/14396784537/

I'm not going to lie, making this cake is definitely a labor of love, but well worth it.  When I was finally done and took my first bite, I tasted exactly like childhood. ^_^

https://www.flickr.com/photos/joyosity/14396600119/

Next:  Homemade Choco Tacos
Previously:  Watermelon Agua Fresca and Popsicles
Last Year:  BLT with Avocado and Basil Mayonnaise