Thursday, April 29, 2010

Compost Cookies

P4242817

When my friend, Stephen, turned 30, I asked him what he'd like me to make for his birthday party, and he replied, "I am a fan of all types of cookies." Which was great, because I've been wanting to make Momofuku Milk Bar's Compost Cookies for a long time now, but I kind of needed the right occasion to make them because there was no way I was going to be able to eat them all by myself. And these cookies deserve an audience.

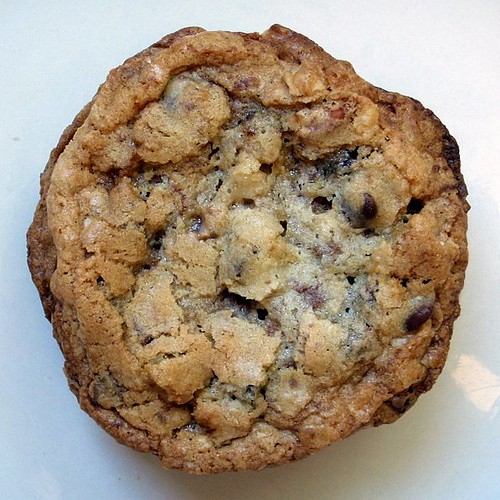
Sure, the name might cause people to pause, but I'm guessing the reason behind it is that you throw a little bit of everything into these cookies: potato chips, pretzels, chocolate chips, etc. If you're a fan of the sweet and salty, you'll love these cookies. I ended up making a batch of the 6 oz. cookies and a batch of cookies where I portioned out the dough into 1" balls, which ended up giving me about 50 "normal" sized cookies. And to save time, I alternated between using a parchment lined stoneware baking sheet and a silpat lined metal baking sheet, both of which worked well in protecting the cookies from getting burnt.

P4242829

Compost Cookies (from here)
makes 15 big cookies or 50 smaller cookies

1 cup unsalted butter
1 cup sugar
3/4 cup light brown sugar
1 tablespoon corn syrup
1 teaspoon vanilla extract
2 large eggs
1 3/4 cups AP flour
2 teaspoons baking powder
1 teaspoon baking soda
2 teaspoons kosher salt
1 1/2 cups your favorite baking ingredients! (I used semi-sweet chocolate chips and Heath toffee bits)
1 1/2 cups your favorite snack foods (I used Wavy potato chips and peanut butter pretzel sandwiches)

P4242803

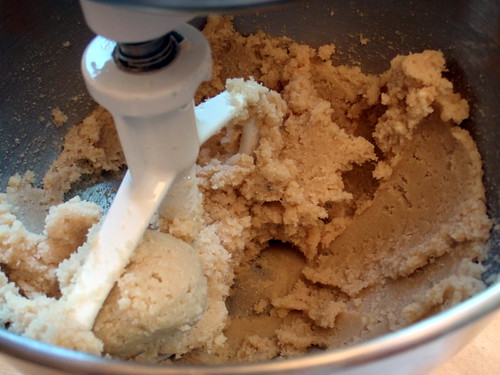
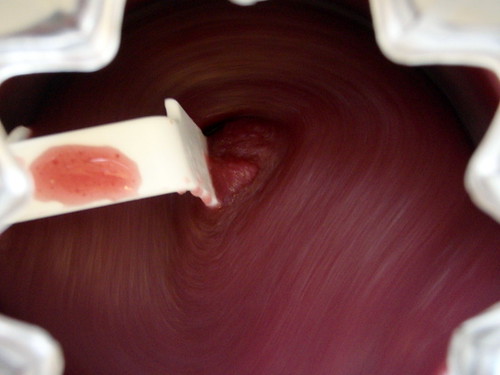
In a stand mixer with the paddle attachment, cream butter, sugars and corn syrup on medium high for 2-3 minutes until fluffy and pale yellow in color. Scrape down the sides of the mixing bowl with a spatula.

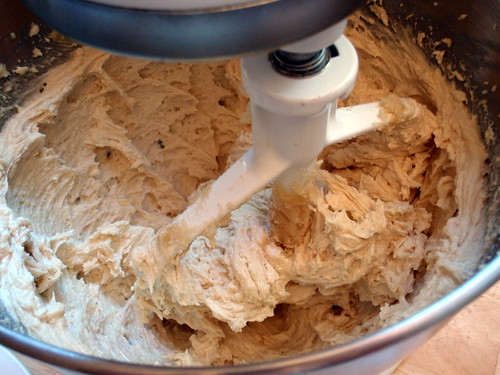
On a lower speed, add eggs and vanilla to incorporate. Increase mixing speed to medium-high and start a timer for 10 minutes. During this time the sugar granules will fully dissolve, the mixture will become an almost pale white color and your creamed mixture will double in size.

P4242804

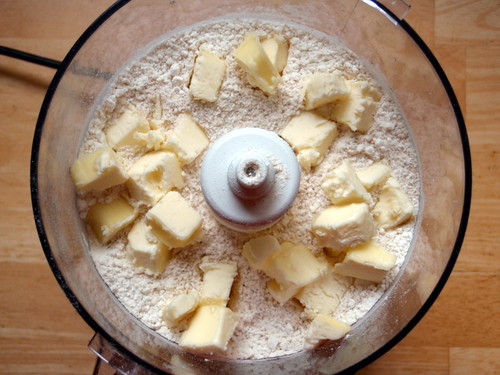
When time is up, add the flour, baking powder, baking soda, and salt. Mix by hand just until your dough comes together and all remnants of dry ingredients have incorporated. Scrape down the sides of the mixing bowl with a spatula.

P4242805

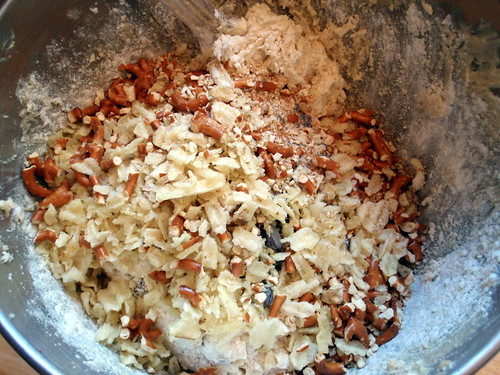
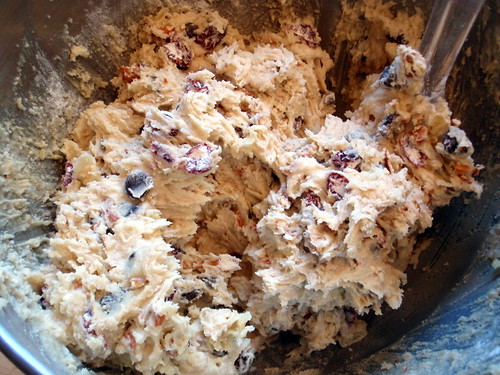
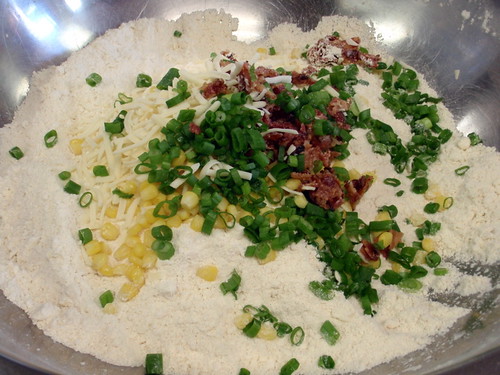
Add in the hodgepodge of your favorite baking ingredients and mix until they are evenly incorporated into the dough. Add in your favorite snack foods last, until they are just incorporated.

P4242807

Portion cookie dough into 6 oz. mounds onto a plate. Wrap portioned cookie dough tightly with plastic wrap and refrigerate for a minimum of 1 hour or up to 1 week.

DO NOT BAKE your cookies from room temperature or they will not hold their shape.

Preheat the conventional oven to 400°F.

P4242827

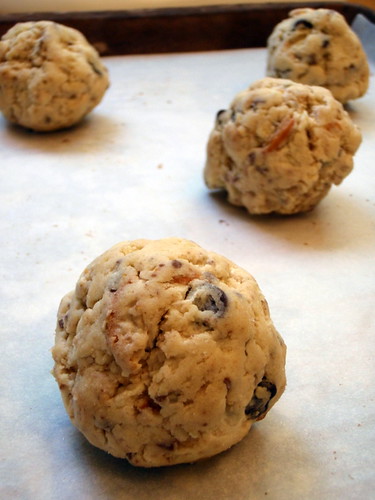
When the oven reads 400°F and your cookie dough has been chilled at least an hour, roll the cookie dough mounds into balls and arrange on a parchment or silpat-lined sheet pan a minimum of 4" apart in any direction.

Bake 9-11 minutes. While in the oven, the cookies will puff, crackle and spread.

P4242834

At 9 minutes the cookies should be browned on the edges and just beginning to brown towards the center. Leave the cookies in the oven for the additional minutes if these colors don't match up and your cookies stills seem pale and doughy on the surface.

Cool the cookies completely on the sheet pan before transferring to a plate or an airtight container or tin for storage. At room temperature, cookies will keep fresh 5 days. In the freezer, cookies will keep fresh 1 month.

P4242818

Monday, April 26, 2010

Lilikoi Malasadas (Portuguese Donuts filled with Passion Fruit Curd)

About a month ago, I got an e-mail from my brother with a link to a recipe for lilikoi malasadas. He asked if I thought they would be hard to make because he had had some in Hawaii and they were "amaaazing". I skimmed through the recipe quickly and replied, "Doesn't sound that hard as long as you can get me some unsweetened lilikoi (or passion fruit) concentrate and unsweetened guava concentrate. No idea where I'd even find that stuff.... Also, if you can get me a stand mixer with a dough hook, I'd be all set." And that was the end of that conversation.

Until last week when I announced on Facebook that I had finally caved in and bought a KitchenAid stand mixer. While most of my friends were congratulating me on the purchase, Timmy's only comment was "can you try making those lilikoi malasadas now?" Can you tell he's a younger brother?

There was still the issue of finding lilikoi concentrate and guava concentrate in the Boston area. I checked Shaws and Harvest and even Whole Foods with no luck. Then I looked on-line, and there were some suggestions of trying a local Brazilian grocery store, but then I saw some posts that mentioned I should be able to find it at Shaws in the frozen foods section where the Goya products are. So I went back to Shaws, and lo and behold, there was frozen passion fruit pulp! And when I went back to Harvest later on, I was able to find frozen guava pulp there!

Now that I had all the ingredients and equipment I needed (I actually had to borrow a stand mixer from Susan because mine hadn't come in yet; thanks, Susan!), I had no more excuses, so I spent this past Saturday making these beauties. Note: this recipe does take quite a bit of time what with making the dough, letting it rise, then chilling it for 2 hours, then shaping and letting it rise again, then frying it, and finally filling the malasadas with the passion fruit curd. But it's so, so worth it, especially if you don't live in Hawaii and can't just buy these at a local bakery whenever you want. Also, I did make the guava coulis from the original recipe, but I thought the resulting coulis was way too watery, so I'm not including it here. The malasadas were more than fine without it.

P4242876

Lilikoi Malasadas (from here)
makes 50 donuts

Lilikoi Curd
1 cup sugar
1/2 cup butter
1 1/2 tablespoons fresh lemon juice
1/4 cup thawed lilikoi (passion fruit) pulp
6 egg yolks, beaten

In a small saucepan, mix together the sugar, butter, lemon and lilikoi pulp; bring to a boil.

In a small mixing bowl, whip the eggs yolks with 1/4 of the hot lilikoi mixture; pour the yolk mixture back to the saucepan.

Simmer, uncovered, whisking continuously until thickened and starts to bubble. Do not allow the lilikoi curd to come to a to a full boil or the eggs will start curdling. Strain and chill.

Malasadas
3 cups bread flour
1/4 cup sugar
1 tablespoon + 1/2 teaspoon dry yeast
7 eggs
2 teaspoons salt
1 1/2 cups butter, softened to room temperature
Vegetable oil for deep frying
Sugar

In a large bowl of an electric mixer use the dough hook to mix together the flour, sugar, and yeast.

Mix in the eggs, one at a time to form a thick paste; continue to mix at medium speed for 15 more minutes, then add the salt. Add the softened butter, 1/2 cup at a time, while continuing to mix at medium speed.

P4242864

Transfer dough to a large bowl, cover, and allow to rise at room temperature until doubled in bulk.
Refrigerate for 2 hours. Form the dough into 1-inch balls and allow it to rise once more at room temperature.

Heat oil to 375°F. Fry the dough until golden brown. Drain on paper towels. Roll in sugar.

P4242868

Fill the malasadas with the lilikoi curd using a pastry bag.

P4242873

The lilikoi curd is seriously one of the best things I have tasted in a long time. It's tart and sweet and buttery and custardy all at the same time, and you just want to start spreading it on everything. Then I tried a freshly fried malasada, and I knew the lilikoi curd had met its match. The outside was crispy from the frying and crunchy from the granulated sugar while the inside was soft and chewy and slightly sweet. I only wish I had been able to pipe in more of the lilikoi curd because the little squirt I got in there just wasn't enough.

Tuesday, April 20, 2010

Red Wine and Pear Sorbet

I made this a while ago before this blog was born and really liked it so when my stash of pears from Boston Organics started building up, I thought it was high time to make this again. The original recipe from Martha Stewart has directions for how to make this without an ice cream maker, but seeing as how I have one, it seemed silly not to use it.

P4182794

Red Wine and Pear Sorbet (adapted from Everyday Food)
makes about 1 quart
1 cup dry red wine
3/4 cup sugar
1 pound ripe pears, peeled, cored, and cut into 1-inch pieces (2 cups)
2 tablespoons fresh lemon juice
Coarse salt

In a medium saucepan, bring wine, 1 1/4 cups water, and sugar to a boil over medium heat, stirring often, until sugar dissolves. Add pears; reduce heat, and simmer until tender.

Stir in lemon juice and a pinch of salt; cool completely. Transfer to a blender or use an immersion blender to puree the mixture. Chill thoroughly in the refrigerator for several hours or overnight.

Once chilled, churn in your ice cream machine according to the manufacturer's directions. Transfer to a container, cover, and freeze overnight or for several hours to harden.

P4162771

Although the original recipe said it would only take 5-10 minutes, I ended up having to cook the pears for over 20 minutes before they were tender. This may have been because I used one Bartlett pear and one green pear instead of just Bartlett pears like the original recipe said. Because I was cooking the mixture for that long, I figured I would have boiled off most of the alcohol, but there was still enough left to make this a pretty soft sorbet. It's also kind of gritty in the way that pears are naturally gritty. Not a bad thing, but if you don't like the texture of pears, you might want to pass on this recipe. But if you like poached pears, you definitely need to try this out. It tastes elegant and sophisticated, like something that should be served in a goblet vs. a normal dessert bowl. I would totally serve this as a palate cleanser or at the end of a heavy dinner of say, steak.

Thursday, April 8, 2010

Alphabet and Rosemary Cheddar Crackers

I LOVE CHEESE

I love Pepperidge Farm Goldfish crackers, so when I saw this post on how to make your own, I was really excited to try it out. I don't have any teeny, tiny goldfish cookie cutters, but I do have rather small alphabet fondant cutters, so I thought it'd be fun to make alphabet crackers.

Cutting out the alphabet crackers

Alphabet crackers

Baked alphabet crackers

I'm used to the bright orange color of the original crackers, so I wanted to find some bright orange cheese to use, but I couldn't find any. So I tried the next best thing and added some yellow food coloring to half the dough since I don't have any orange food coloring, and didn't want to end up with a peach color like I did the last time I tried mixing red and yellow. But the dough was too stiff coming out of the fridge, and I didn't have the patience (or the daylight left) to knead it through properly, so it ended up looking kind of marbled. Which is fine because you can't even tell in the finished product, and ironically enough, the non-yellowed crackers turned out more orange-ish!

Baked alphabet crackers

While the dough was chilling overnight in the fridge, I remembered that I still had some fresh rosemary left from making the duck fat French fries and thought it'd be nice to add some to the cheese cracker dough. So I added some rosemary leaves to the other half of the dough (after all, rosemary cheddar crackers are for adults and don't need artificial food coloring).

Rosemary Cheddar Crackers (adapted from Ellie's Home Cooking)
makes about 1 quart of crackers

1/2 cup all-purpose flour
1/2 cup white whole wheat flour
3/4 teaspoon salt
1/2 teaspoon ground pepper (optional)
4 tablespoons cold unsalted butter, cut into small pieces
8 ounces shredded cheddar cheese
1 tablespoon fresh rosemary leaves
3-4 tablespoons water

Flour, salt, and pepper

Pulse the flour, salt and pepper in a food processor, then add butter and pulse until the mixture resembles coarse meal.

Add unsalted butter

Add grated cheese a little at a time until the mixture again resembles coarse meal.

Add shredded cheese

Pulse in 3 to 4 tablespoons of water, one tablespoon at a time, until the dough forms into a ball. It will probably take a minute or so.

Add the rosemary

Remove from the food processor and knead in the rosemary. Wrap the dough in plastic wrap and chill for 20 minutes or up to 24 hours.

Roll out the dough

Roll the dough out to 1/8th-inch thickness directly onto a baking sheet. You don't want to roll them paper thin, neither do you want to roll them too thick. If they are too thin, they will not puff up as much. If they are too thick, they will not be as crispy.

Using a knife, pizza cutter, or cookie cutters, cut into desired shapes.

Cut out the crackers

Bake at 350° F for 15-20 minutes or until crackers are golden brown. Watch them after the 10 minute mark.

Rosemary cheese crackers

I didn't roll the dough out as thin as I should have for some of the crackers, and they were definitely not as crispy as the thinner ones. They did puff up so that they were almost cubical, though, so I threw them on top of a salad because as someone pointed out, they looked just like croutons.

I don't think these tasted exactly like Goldfish crackers, but that's because they don't taste like something you can buy in a store. Which is to say, these tasted like the fresh ingredients they were made out of. I definitely preferred the rosemary crackers to the ones without; the herb added a nice aromatic, almost astringent note to the richness of crackers. Next time I might try adding a bit of Tabasco sauce to the dough to add some heat.

Lastly, you can make this using only all-purpose flour or only whole wheat flour. I tried using half all-purpose and half white whole wheat and will probably try all whole wheat next time since it doesn't seem to make a huge difference.

Wednesday, April 7, 2010

Jean-Georges Vongerichten's Fried Rice

Jean-Georges Vongrichten's Fried Rice

When I first saw this recipe on Bitten, I knew I had to make it the very next time I received leeks in my Boston Organics delivery. Finally, my patience paid off. This fried rice recipe is familiar in some ways--using day old rice and eggs--but quite novel in others. There are no vegetables other than the leeks or any chopped, leftover meat. Instead, minced fresh garlic and ginger are fried until crisp and then sprinkled on top to dress the rice along with a drizzling of sesame oil and soy sauce.

Thinly sliced leeks

In the article, Mark Bittman writes that Jean-Georges uses rendered chicken fat; since I had duck fat leftover from making the duck fat fries, I used that instead. Also, instead of using day-old cooked rice, I used rice that had been cooked a month ago and frozen in the freezer. Whenever I have leftover cooked rice, I always divide it into first-sized portions and wrap them in plastic wrap and stick them in the freezer when they're still warm. That way I can just heat it up in the microwave for a minute to thaw, and none of the moisture is lost. Of course, after sitting in the freezer for a whole month, some of the moisture is lost, which makes it perfect to use for fried rice.

Jean-Georges Vongerichten's Fried Rice (from Bitten)
makes 2 servings
1/4 cup duck fat
1 tablespoon minced garlic
1 tablespoon minced ginger
Kosher salt
1 cup thinly sliced leeks, white and light green parts only, rinsed and dried
2 cups day-old cooked rice, preferably jasmine, at room temperature
2 large eggs
1 teaspoon sesame oil
2 teaspoons soy sauce

Leeks, ginger, and garlic

In a large skillet, heat 2 tablespoons duck fat over medium heat. Add garlic and ginger and cook, stirring occasionally, until crisp and brown. With a slotted spoon, transfer to paper towels and salt lightly.

Reduce heat under skillet to medium-low and add 1 tablespoon duck fat and leeks. Cook about 10 minutes, stirring occasionally, until very tender but not browned. Season lightly with salt.

Raise heat to medium and add rice. Cook, stirring well, until heated through. Season to taste with salt.

In a nonstick skillet, fry eggs in remaining tablespoon of duck fat, sunny-side-up, until edges are set but yolk is still runny.

Divide rice among two dishes. Top each with an egg and drizzle with 1/2 teaspoon sesame oil and 1 teaspoon soy sauce. Sprinkle crisped garlic and ginger over everything and serve.

Jean-Georges Vongrichten's Fried Rice

I added a sprinkle of toasted sesame seeds and chopped scallions on top as well just for a little more texture and color. I was a little scared that the ginger might be too strong for my liking, but it was a lot more mild after frying, and the crunch it delivers is a real highlight to the dish.

This recipe is truly inspired. There are very few ingredients, but because each is an aromatic, and you keep using the same fat to cook the ginger, garlic, and leeks, you end up building a lot of flavor in the final dish. At the same time, I finally know what they mean on Top Chef when they talk about simple, clean food. Thank you, Jean-Georges and Mark, for sharing this recipe. Now I really want to go to one of Vongerichten's restaurants. Luckily, he's opened one in Boston, and it's also participating in Taste of the Nation Boston tomorrow!

Next:  Alphabet and Rosemary Cheddar Crackers
Previously:  The Best Scones in the World

Monday, April 5, 2010

The Best Scones in the World

For Easter this year, my church wanted to serve scones for Soul Cafe. Two thousand scones, to be exact. And thanks to everyone's help, we made two thousand one hundred and twelve!

Thankfully, one of my good friend, James, has the best scone recipe in the world, which we used to make sweet blueberry scones and savory candied bacon, cheese, corn, and scallion scones. Guess which ones were more popular....

P4042682

The Best Scones in the World (courtesy of James W. Cheng)
makes ~100 scones

8 cups all-purpose flour
4 tablespoons baking powder
2 teaspoons salt
1 1/4 cup sugar
4 sticks unsalted butter
1 cup chopped candied bacon*
1 cup frozen corn kernels
1 cup shredded cheddar cheese
3/4 cup chopped scallions
1 quart heavy cream

Preheat oven to 375°F.

*To make candied bacon, sprinkle brown sugar over bacon slices and bake at 375°F until crisp.

Combine flour, baking powder, salt, and sugar.

P4032653

Cut the cold butter into small pieces and then press into the dry mixture until the texture is like corn meal. Mix in the bacon, corn, cheese, and scallions.

Add heavy cream and mix just enough to form a dough. If you have the time, stick this back in the fridge to chill.

P4032656

Line a large baking sheet with parchment paper. Drop rounded tablespoons of the dough onto the sheet, leaving at least 1" between scones. Bake for 10-12 minutes or until golden brown.

To make the blueberry scones, just substitute 3 cups of frozen blueberries for the bacon, corn, cheese, and scallions. Ideally, we'd have glazed the blueberry scones with a lemon glaze, but there wasn't enough time. According to one Family Ministry pastor, however, they were still super delicious. =)

P4042678

We made the scones pretty small because we wanted to be able to feed everyone, but you could definitely double the size of these if you wanted larger scones. Just make sure you increase the baking time appropriately.

Next:  Jean-Georges Vongerichten's Fried Rice
Previously:  Apple Tarte Tatin