Showing posts with label coffee. Show all posts

Friday, August 8, 2014

Sea Salt Cold Brew Coffee

https://www.flickr.com/photos/joyosity/14631293897/

I was in Irvine recently for a family vacation, and one of the places I looked forward to going to the most was 85°C, a cafe and bakery chain from Taiwan.  Their most popular drink is probably the sea salt coffee, an iced coffee drink with cream and a pinch of sea salt for that salty-sweet flavor dimension.

https://www.flickr.com/photos/joyosity/14631174759/

Since I had some extra cream from making the mango passion caramels, I decided to try to recreate the sea salt coffee at home using cold brew coffee.  Instead of making a simple syrup in order to sweeten the iced coffee, I just added brown sugar to the ground coffee like I do for the magical cold brew coffee.  The sugar naturally dissolves all on its own during the overnight cold brew process.

https://www.flickr.com/photos/joyosity/14794845856/

For extra funsies, I topped the drink with some Hawaiian black lava sea salt, but you can use regular sea salt or skip that step if you like.  I particularly liked how it looked once I started swirling it around.

https://www.flickr.com/photos/joyosity/14837670083/

Sea Salt Cold Brew Coffee
makes 3-4 drinks

1/2 cup coffee beans, ground
3 tablespoons brown sugar
1/2 cup heavy cream, chilled
1/4 teaspoon sea salt, plus more for garnishing if desired
Ice cubes

Combine the ground coffee with the brown sugar in a 2-cup French press or measuring cup.  Add enough cold, filtered water to reach the 2 cup line.  Stir to make sure all the coffee grounds get wet.  Let sit a few minutes and then stir one more time to disperse all the coffee grounds that have floated to the top.  Cover and let sit overnight at room temperature.

The next day, press and/or filter the cold brew coffee.  Store in the refrigerator until needed.

Whip together the heavy cream and 1/4 teaspoon sea salt until the cream has thickened but before it reaches soft peaks.

https://www.flickr.com/photos/joyosity/14631200118/

Add 3-4 ice cubes to each glass and fill with coffee, leaving at least a half inch of space on top. Spoon the cream on top and garnish with additional sea salt, if desired.  Serve with a straw and stir to combine the coffee and cream layers.

https://www.flickr.com/photos/joyosity/14815474374/

The next time I make coconut whipped cream, I might try to see if it would work well as a replacement for the heavy cream here.

Next:  Coconut Ice Cream with Mango Passion Caramel Swirl
Previously:  Jacques Genin's Mango Passion Caramels
Last Year:  Matcha Green Tea Ice Cream with Matcha Mochi Bits

I am submitting this post to Asian Food Fest #10 Aug 2014 : Taiwan hosted by travelling-foodies.

Monday, June 23, 2014

Orange Mocha Frappuccino!

https://www.flickr.com/photos/joyosity/2567370431

Ten years ago I paddled in my first dragon boat race.  Two years later, I started my own team and named it The Boat for Kids Who Don't Paddle Good.  Every year, before the Boston Dragon Boat Festival, we get together for a potluck and watch Zoolander.  Every year, in the official program, our team bio reads, "We're pretty sure there's a lot more to life than being really, really, ridiculously good looking, and we plan on finding out what that is."  Every year, I look forward to paddling with my team, making new friends, and leaving it all on the water.

Every year, that is, until this year.  =(  So when the team admiral told me I could make up for not being on the team by bringing orange mocha frappuccinos to this year's potluck, I thought, "challenge accepted."  Unfortunately, the same busy travel schedule that kept me from joining the team kept me from making these in time for the potluck, but I hope creating this recipe from scratch and posting it goes toward making amends.  Because you know what can really help you sort through these important issues?

https://www.flickr.com/photos/joyosity/14450993935/

Orange Mocha Frappuccino!
makes 3 large frappes

3/4 cup coffee beans, ground
1 large orange
2/3 cup sugar
1/3 cup plus 1 tablespoon cocoa powder
Pinch of salt
1 1/2 cups milk
3 cups ice
Whipped cream (optional)

Zest and juice the orange.  Combine the ground coffee and orange zest in a 2-cup French press or measuring cup.  Add enough water to reach the 2 cup line.  Stir to make sure all the coffee grounds get wet.  Let sit a few minutes and then stir one more time to disperse all the coffee grounds that have floated to the top.  Cover and let sit overnight at room temperature.

https://www.flickr.com/photos/joyosity/14264380670/

Add the orange juice to a measuring cup and add enough water to reach 2/3 cup.  Pour into a small saucepan and add the sugar, cocoa powder, and pinch of salt.  Whisk and heat over medium-low heat until it starts to simmer and is slightly thickened.  Cool and transfer to another container.  Store in the refrigerator until needed.

https://www.flickr.com/photos/joyosity/14471164813/

The next day, press and/or filter the cold brew coffee. 

For each frappuccino, combine 1/2 cup of orange cold brew coffee, 1/2 cup of milk, 3 tablespoons of the orange chocolate syrup, and a cup of ice in a blender.  Blend until frothy and pour into a tall glass.  Garnish with whipped cream (I used coconut whipped cream) if desired and more orange chocolate syrup.  Enjoy!

https://www.flickr.com/photos/joyosity/14264559107/

Alternatively, you could also freeze the cold brew coffee into ice cubes and blend those with the milk for a stronger frappe.  And you could also add some finely chopped candied orange peel or orange sugar on top for even more garnish.  You'll have more than enough orange chocolate syrup left over which you can use to make orange chocolate milk (seriously yum), drizzle over ice cream, eat with a spoon straight out of the jar....

Note:  No gasoline fights were started as a result of drinking these frappuccinos.

Next:  Plum, Nectarine, and Peach Galette
Previously: Tofu and Shiitake Potstickers
Last Year:  Passion Fruit Macarons
Four Years Ago:  Amnesty Bread

Friday, March 8, 2013

Happiness Cake

I've been wanting to make this cake ever since I first saw it in the Momofuku Milk Bar cookbook where it's just called a Chocolate Chip Layer Cake.  I think that simple name does not even begin to describe what it is:  mini chocolate chip butter cake layered with passion fruit curd, chocolate cake crumbs, and coffee buttercream frosting.  Hello.  So I decided to rename it Happiness Cake, because this is what happiness is.  =)

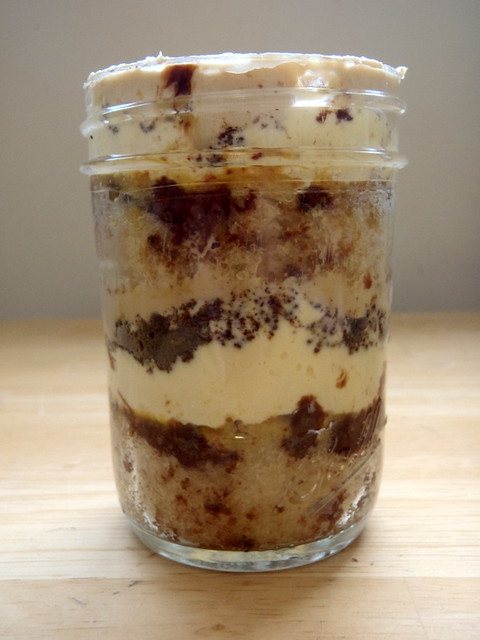
The main reason why it took me so long to make this cake is because according to the cookbook, you needed a cake ring and acetate lining to build up the layers.  I wasn't interested in acquiring any more random stuff for my kitchen so I just kept drooling over the recipe but not making it.  At one point I started thinking about making it into a cupcake form, but then I got the bright idea to just put all the layers in small Mason jars, which I already had!  I love that they can be kept in the freezer for a while and are totally portable, so they make really good gifts for friends!

Assembling the jars
 
There are a lot of different parts to this cake, and some parts take more time than others and need to chill before using or need to use immediately, so this is how I would suggest going about it:
  1. Make the cake and put it in the oven to bake.
  2. While the cake is baking, make the passion fruit curd and let it chill in the fridge.
  3. After the cake is done, let it cool and lower the oven temperature to 300°F.  Make the chocolate crumbs, which will also need to cool after baking.
  4. Just before you are ready to assemble everything, start making the coffee frosting.  This will take a while to come together, so you can go ahead and start with the assembly process while you are waiting.
Another note about the coffee frosting, even after mixing in my stand mixer for more than half an hour, I still wasn't getting it to come together, so eventually I just poured out the liquid coffee milk that was left and paddled until everything was homogenous.  Then I found that I needed a lot more of the coffee frosting than the original recipe called for, so in the recipe below, I increased the amount of frosting but decreased the coffee milk to butter ratio a little.

After assembling the 6 jars, you'll end up with a lot of leftover components.  Feel free to make a Happiness Scrap Heap out of them just for yourself or, if you have more jars, you can try making more Happiness Cakes, just without the perfect circles.

Chocolate Chip Layer Cake
 
Happiness Cake (adapted from Momofuku Milk Bar)
makes 6 small (8 oz.) jars with lots of leftover scraps perfect for snacking on

1 recipe Chocolate Chip Cake (below)
1/3 cup passion fruit puree
1 recipe Passion Fruit Curd (below)
1 recipe Chocolate Crumbs (below)
1 recipe Coffee Frosting (below)

Chocolate Chip Cake
makes one 9"x13" cake

1/2 cup butter, at room temperature
1 1/4 cup sugar
1/4 cup light brown sugar, tightly packed
3 eggs
1/2 cup buttermilk
1/2 cup canola oil
1 tablespoon vanilla extract
1 1/2 cups cake flour
1 teaspoon baking powder
1 teaspoon kosher salt
Nonstick cooking spray
3/4 cup mini chocolate chips

Preheat oven to 350°F.

Combine the butter and sugars in the bowl of a stand mixer fitted with the paddle attachment and cream together on medium-high for 2-3 minutes.  Add eggs and mix on medium-high again for 2-3 minutes.

On low speed, stream in the buttermilk, oil, and vanilla.  Increase the mixer speed to medium-high and paddle for 4-6 minutes, until the mixture is practically white, twice the size of your original fluffy butter-and-sugar mixture, and completely homogenous. 

On very low speed, add the cake flour, baking powder, and salt.  Mix for 45-60 seconds, just until your batter comes together and any remnants of dry ingredients have been incorporated.

P2123186
 
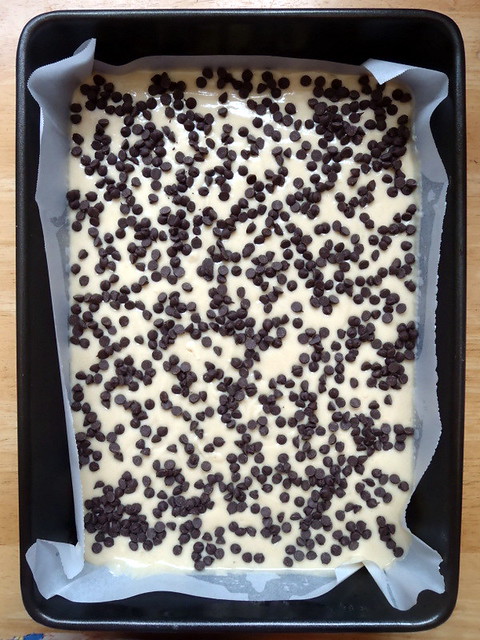
Spray a 9"x13" pan with nonstick cooking spray and line with a piece of parchment paper.  Using a spatula, spread the cake batter in an even layer in the pan.  Give the bottom of the pan a tap on the counter top to even out the layer.  Sprinkle the chocolate chips evenly over the cake batter.

P2123191
 
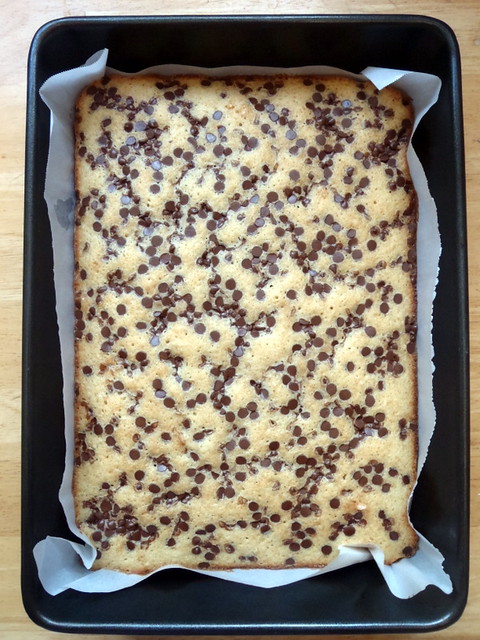
Bake the cake for 30-35 minutes.  At 30 minutes, gently poke the edge of the cake with your finger; the cake should bounce back slightly and the center should no longer be jiggly.  Leave the cake in the oven for an extra 3-5 minutes if it doesn't pass these tests.

Chilling in the snow
 
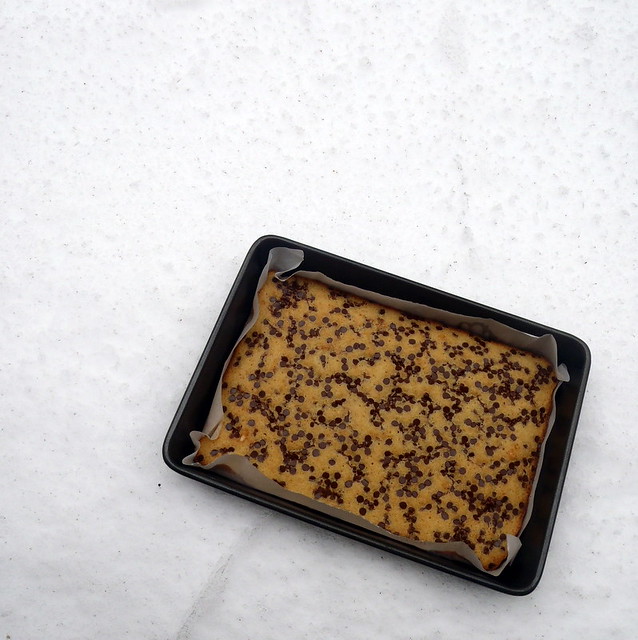
Take the cake out of the oven and cool on a wire rack, or in a pinch, in the fridge, freezer, or snow (just make sure, you know, it's stopped snowing).  The cooled cake can be stored in the fridge, wrapped in plastic wrap, for up to 5 days.

Passion Fruit Curd
makes about 1 1/2 cups

1/2 cup passion fruit puree
1/3 cup sugar
2 eggs
1/2 teaspoon powdered gelatin
3/4 cup butter, very cold
1/2 teaspoon kosher salt

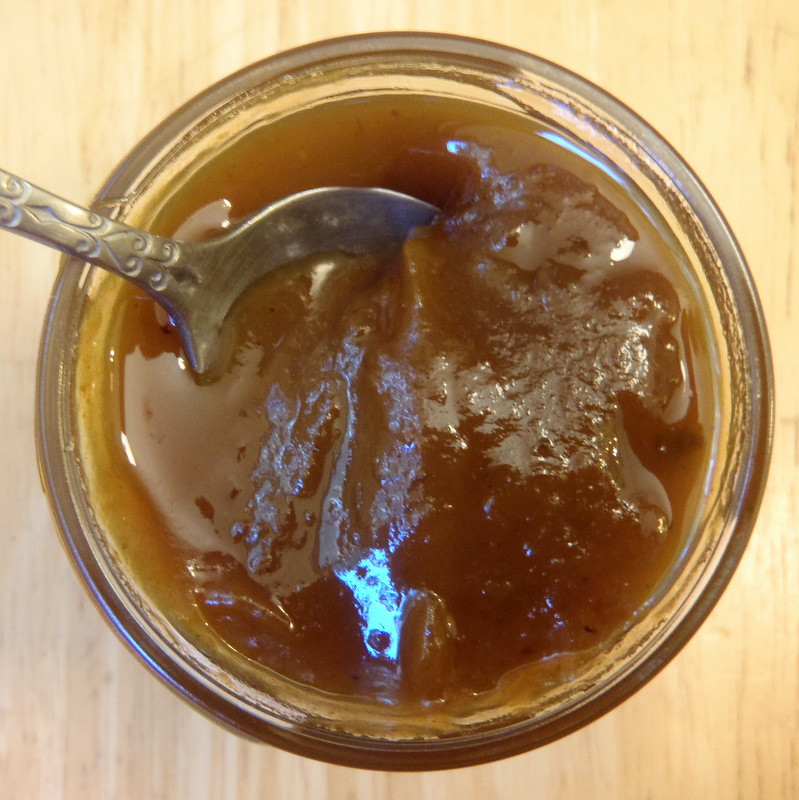
Put the passion fruit puree and sugar in a blender and blend until the sugar granules have dissolved.  Add the eggs and blend on low until you have a bright-orange-yellow mixutre.  Transfer the contents of the blender to a medium saucepan.  Clean the blender canister.

Bloom the powdered gelatin in 2 tablespoons of cold water.

P2123189

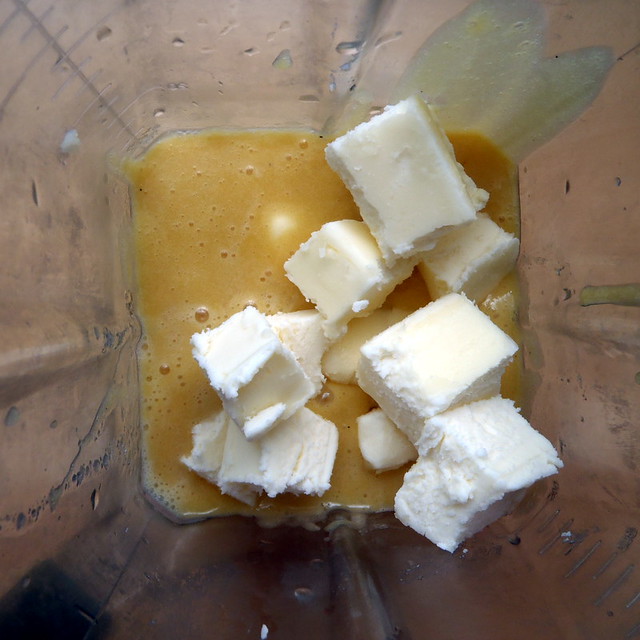
Heat the passion fruit mixture over low heat, whisking regularly.  Once it boils, remove it from the stove and transfer it to the blender.  Add the bloomed gelatin, butter, and salt and blend until the mixture is thick, shiny, and super-smooth.

Passion fruit curd
 
Transfer the mixture to a heatproof container and put in the fridge until the curd has cooled completely, at least 30 minutes.  The curd can be refrigerated for up to 1 week; do not freeze.
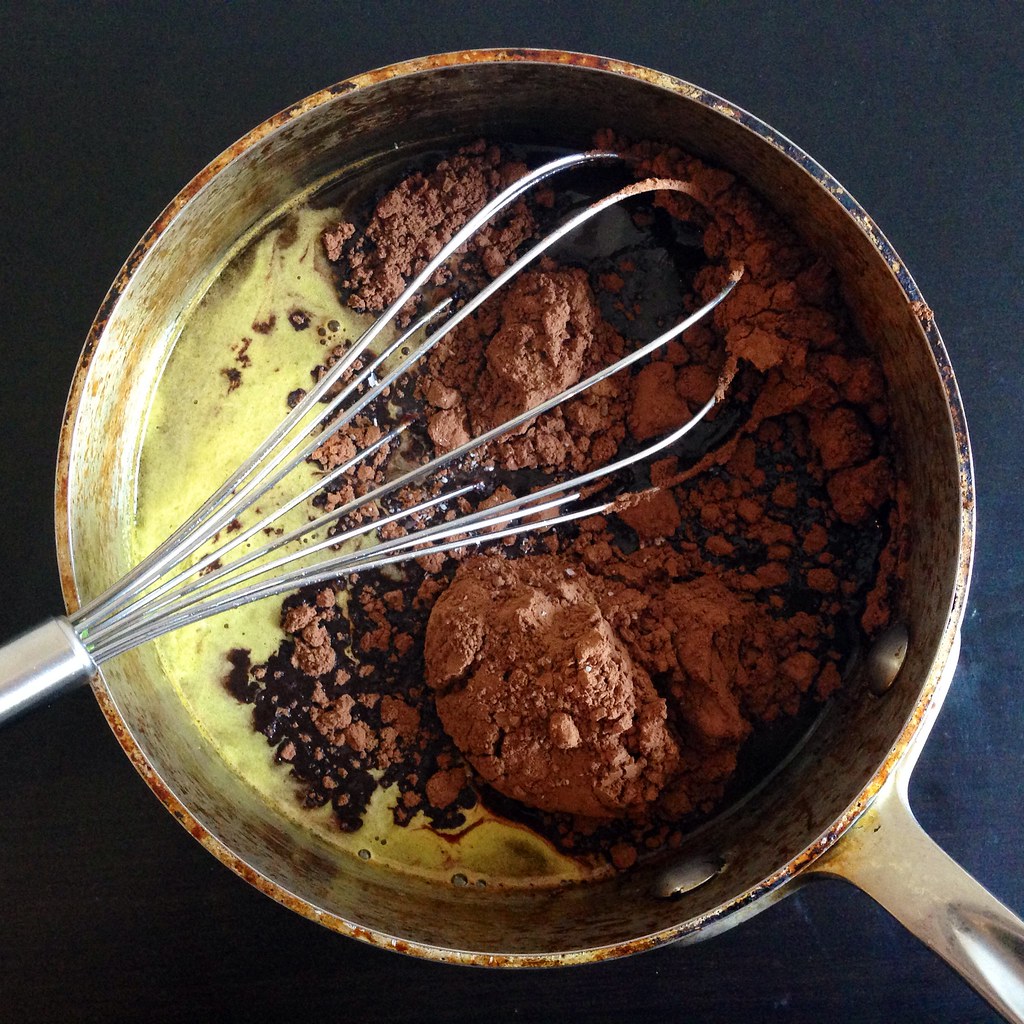
Chocolate Crumbs
makes about 1 1/4 cup

1/3 cup flour
1/2 teaspoon cornstarch
1/4 cup sugar
1/3 cup cocoa powder
1/2 teaspoon kosher salt
3 tablespoons butter, melted

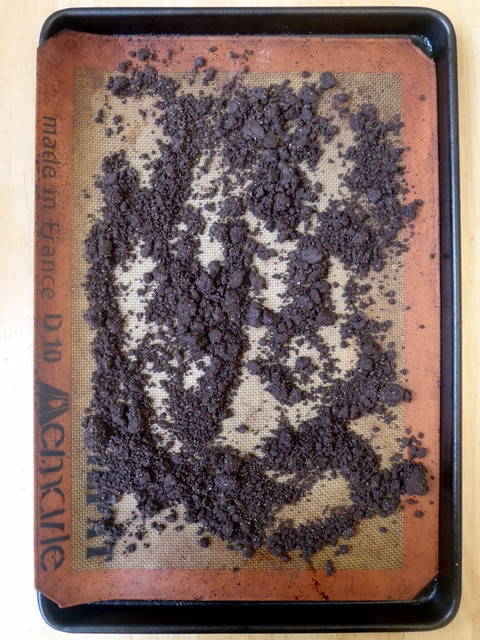
Preheat the oven to 300°F.

Combine the flour, cornstarch, sugar, cocoa powder, and salt in the bowl of a stand mixer fitted with the paddle attachment and paddle on low speed until mixed.

Add the butter and paddle on low speed until the mixture starts to come together in small clusters.

Chocolate crumbs
 
Spread the clusters on a parchment- or Silpat-lined baking sheet.  Bake for 20 minutes, breaking them up occasionally.   The crumbs should still be slightly moist to the touch at that point; they will dry and harden as they cool.

Let the crumbs cool completely before using.  Stored in an airtight container, they will keep fresh for 1 week at room temperature or 1 month in the fridge or freezer.

Coffee Frosting
makes about 2 cups

1 cup butter, at room temperature
1/2 cup confectioners' sugar
1/3 cup milk
1 1/2 teaspoons instant espresso powder
1/2 teaspoon salt

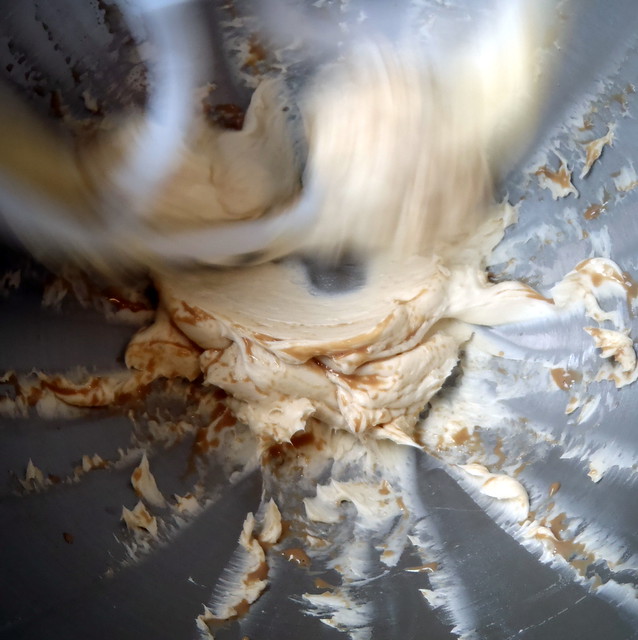
Combine the butter and confectioners' sugar in the bowl of a stand mixer fitted with the paddle attachment and cream together on medium-high for 2-3 minutes, until fluffy and pale yellow.

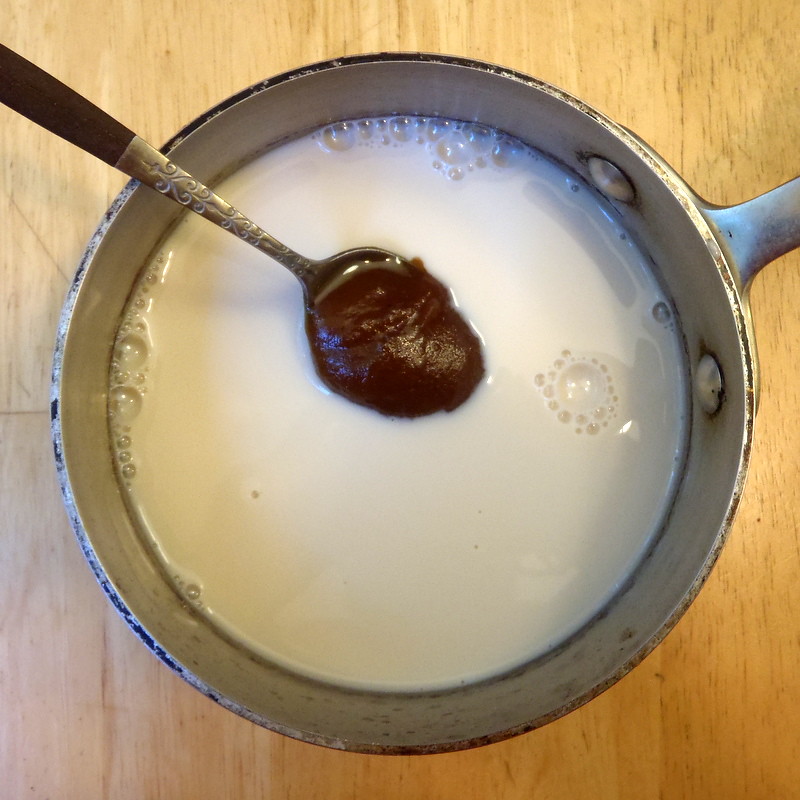
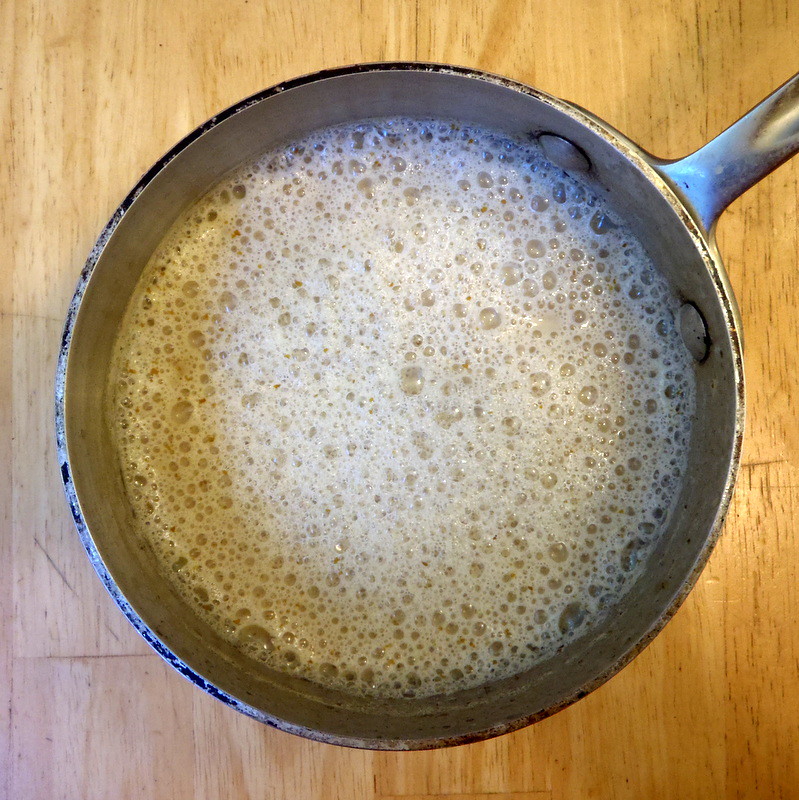
Meanwhile, make a quick coffee milk:  whisk together the milk, instant espresso powder, and salt in a small bowl.

P2123204
 
On low speed, gradually stream in the coffee milk.  You are essentially forcing liquid into fat, so be patient.  The butter mixture will clump up and separate upon contact with the coffee milk. 

Coffee buttercream
 
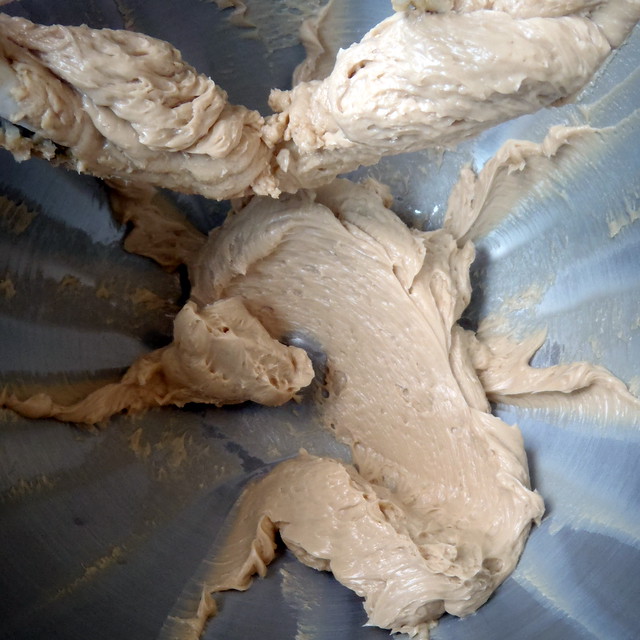
Do not stream more coffee milk into the butter mixture until the previous addition is fully incorporated; keep the mixer on and remain patient.  The result will be a wildly fluffy coffee frosting, pale brown, and super-shiny.  Use immediately.
 
Happiness Cake in a Jar Assembly

P2123201
 
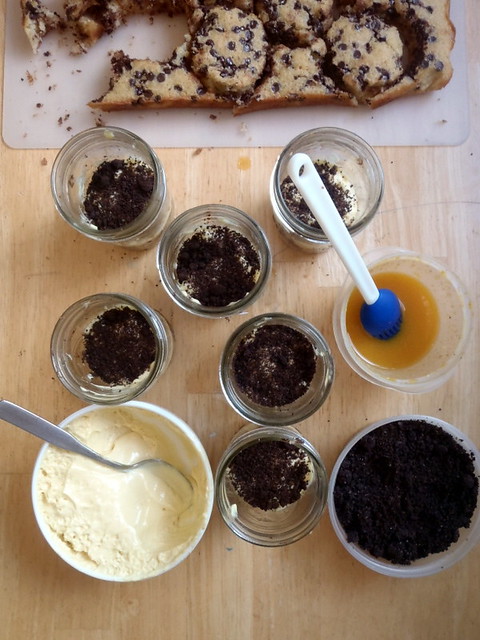
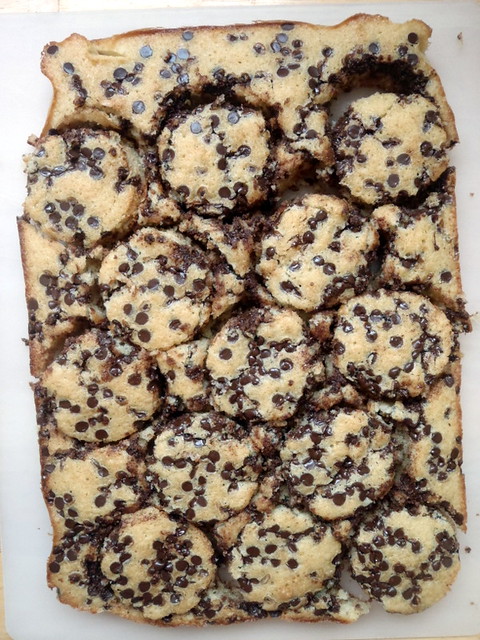
Using an empty jar as a cookie cutter, cut out 12 circles from the chocolate chip cake.  (Yes, there are 13 circles cut out above.  I had to eat one.  For science.)

First layer of chocolate chip cake
 
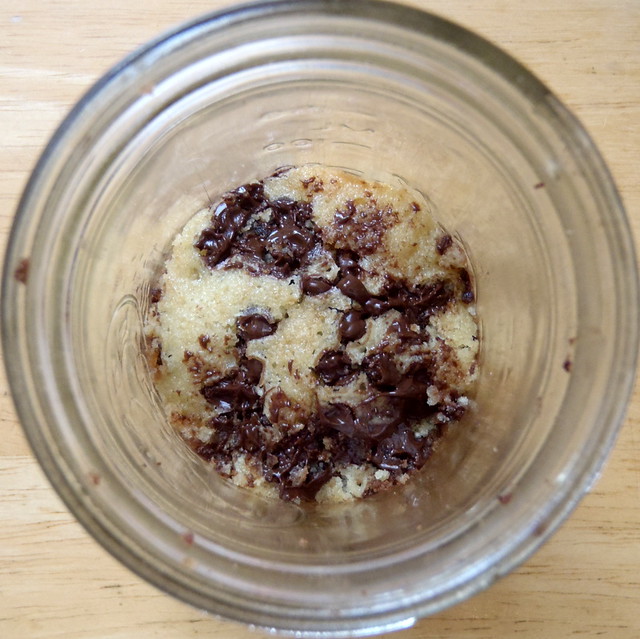
Press one circle into the bottom of a jar.  Brush with a generous amount of passion fruit puree.

Topped with passion fruit curd and chocolate crumbs
 
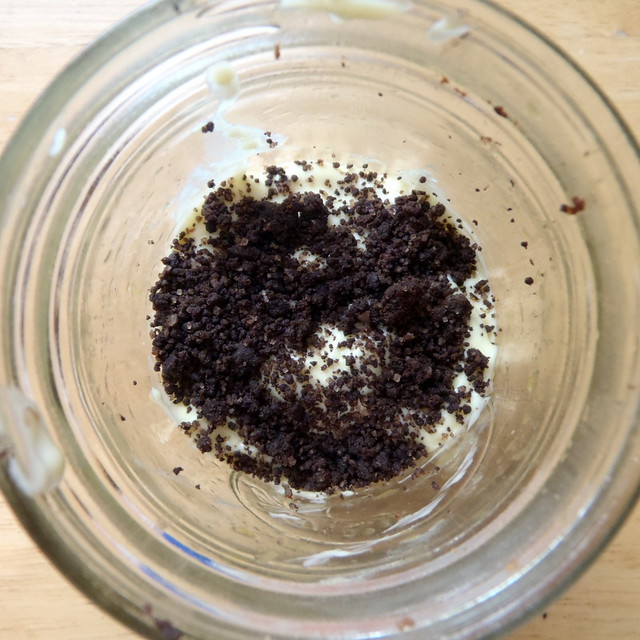
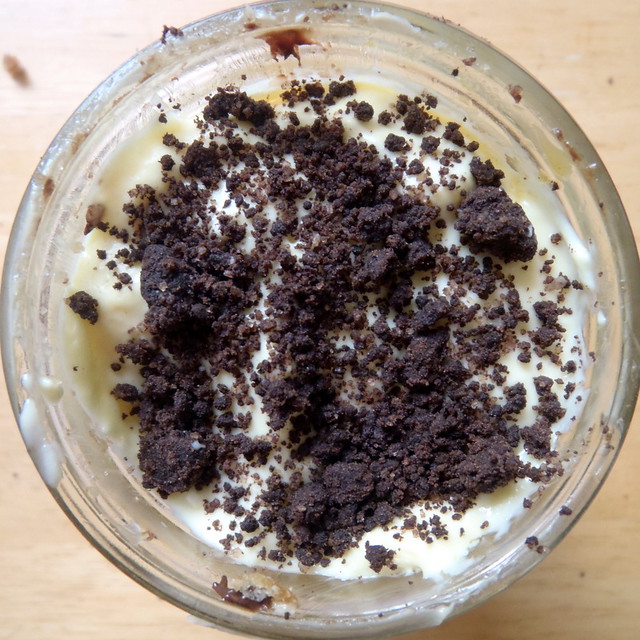
Spoon in a layer of the passion fruit curd.  Top with a layer of the chocolate crumbs.

Topped with coffee buttercream
 
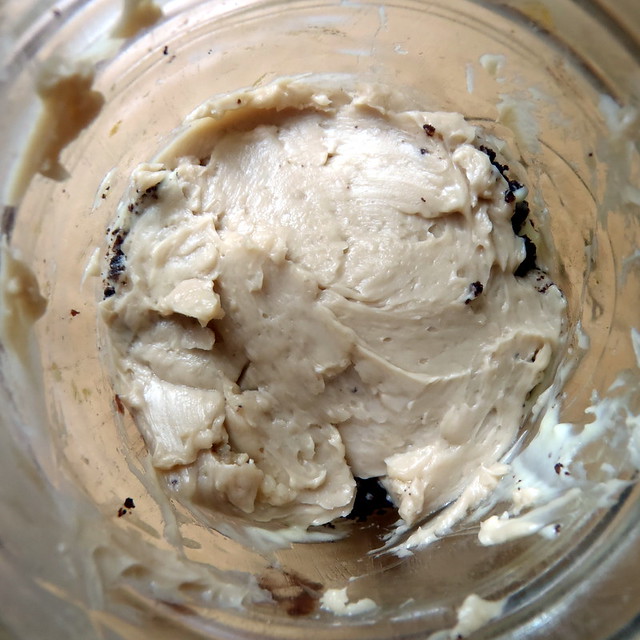
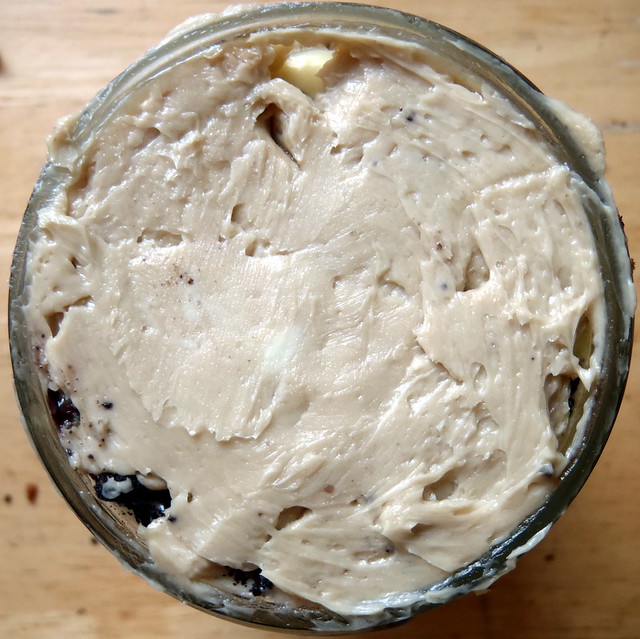
Carefully spread a layer of the coffee frosting on top.

Second cake layer soaked in passion fruit pulp
 
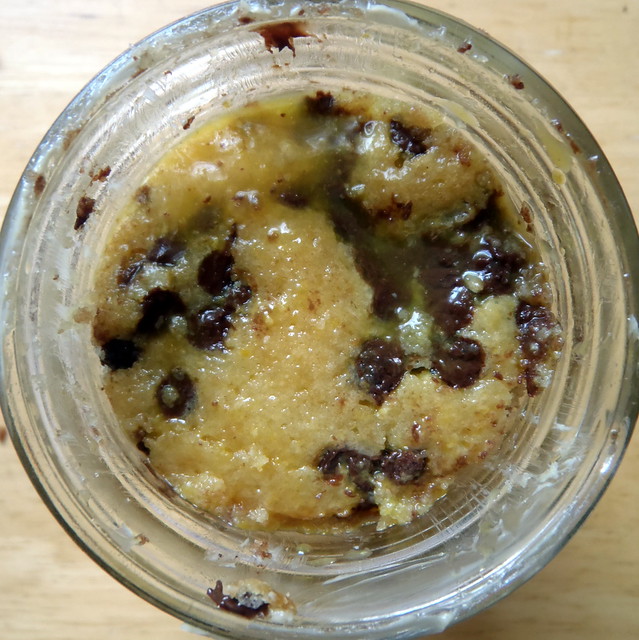
Repeat with another layer of cake, passion fruit puree, passion fruit curd, and chocolate crumbs.

More passion fruit curd and chocolate crumbs
 
Finish with a final layer of coffee frosting.

Final coffee buttercream layer
 
Repeat with the remaining 5 jars.  Cover and place in the freezer for at least 12 hours to set the cake and filling.  The cakes will keep in the freezer for up to 2 weeks.  Defrost in the fridge for at least 3 hours before serving.

P2143177
 
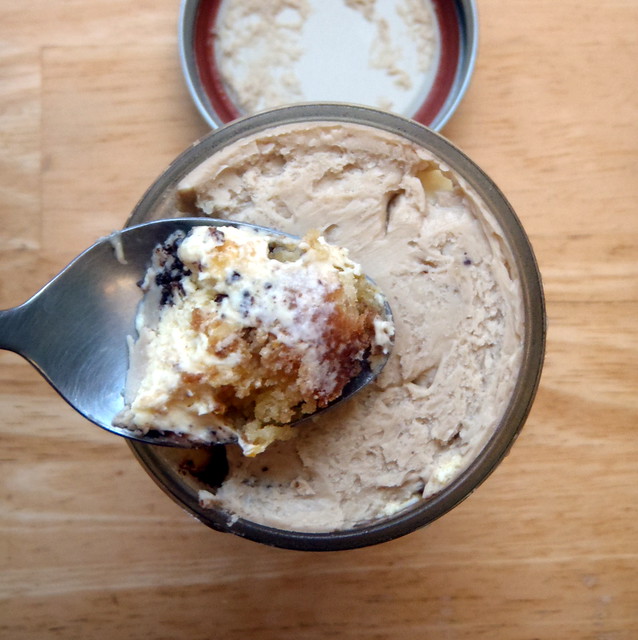
Dig in with a spoon and experience happiness.

Next:  Rosemary Honey & Lemon Frozen Yogurt
Previously:  Peking Duck Pizza
Four years ago:  Panna Cotta, Take 2; The Feng Family Secret Peking Duck Recipe; Korean Pancake Face Off

Monday, October 15, 2012

Magical Pumpkin Spice Latte

PA113109

Now that I had my morning magical coffee routine down pat, I wanted to see if I could make a pumpkin spice latte with the magical coffee.  There's quite a few recipes on-line which use pumpkin puree, sugar, and store bought pumpkin spice, but I decided to mix it up a little and use pumpkin butter (I got mine from Trader Joe's) instead of the puree and sugar and make my own pumpkin spice since I had all the ingredients already.

PA113117

For the pumpkin spice, I ground up a tablespoon of cinnamon, a half teaspoon of nutmeg, and a half teaspoon of cloves and added a teaspoon of ground ginger.

Pumpkin Spice

For an easy, iced magical pumpkin spice latte, I cold brew a half cup of coffee with a teaspoon of pumpkin spice, 2 tablespoons of brown sugar, and 2 cups of water.

Pumpkin Butter

Then I spoon some of the pumpkin butter into a mug, add a dash of the magical coffee and stir so that the pumpkin butter is dissolved.  I add more coffee and vanilla soy milk, and if I'm feeling decadent, some coconut whipped cream and top it off with a little more pumpkin spice.

PA113129

When I want a hot pumpkin spice latte, I make an extra strong cold brew since I'm going to be diluting it with a lot of hot milk.  I heat up vanilla soy milk and pumpkin butter until it just starts to simmer and then whip it up so it's nice and frothy.

PA113130

Transfer the pumpkin milk to a mug and add the extra strong magical coffee, topping off with coconut whipped cream and pumpkin spice.

Pumpkin Spice Latte

Since the pumpkin butter, vanilla soy milk, and magical coffee already contain sugar, I find that I don't need to add any more, but feel free to add more sweetener to taste.  I like that this homemade pumpkin spice latte isn't super sickening sweet like the Starbucks' one and doesn't have that weird fluorescent orange color either.

Pumpkin Spice Latte

As another option, you can make a pumpkin spice frappuccino by blending ice with extra strong cold brew, pumpkin butter, and milk.  I've found that the pumpkin butter is also excellent on toasted amnesty bread.  =)

Monday, October 1, 2012

Magical Cold Brew Coffee

P9293152 

One big change that happened this summer is that I got to start working from home full time.  When I was given the option, I hesitated at first because all I could think about was the fact that I wouldn't be able to get free coffee at work anymore.  It's not super great coffee or anything, but it's there.  And it's free.  And I need coffee in the morning.  Then I remembered cold brew coffee.

I've known about it since last summer when this article came out, but never got around to trying it out myself, mostly because I don't have any coffee filters.  Now that I had the motivation, I grabbed a box of filters from Trader Joe's and started cold brewing away.  I discovered that cold brew coffee was smoother than hot brewed coffee and super convenient to keep in the fridge for whenever I wanted some iced coffee.  Life was good.

Then I came across this recipe for Magical Coffee and my life changed.  This coffee isn't just good or better; this coffee is MAGICAL.  It's like there's a party in my cup and everyone is invited.  The flavors sing, the aromas dance.  I used to use coffee to wake me up in the morning.  Now I wake up in the morning to taste this coffee.

Magical Cold Brew Coffee
makes 2-3 servings

1/2 cup coffee beans
1/2 teaspoon cinnamon
1 pinch fresh ground nutmeg (optional)
2 tablespoons brown sugar
2 cups water

P9283130

Grind the coffee to a medium-fine texture (stop before you get to espresso fine).

P9283140

In a French press, add the ground coffee, cinnamon, nutmeg, and brown sugar.

Pour in 2 cups of cold water, stir, and wait 2 minutes for the coffee to float and "bloom".

Stir again and cover.  At this point you can put it in the fridge to steep or leave it on the counter at room temperature.  If I want to drink it in less than 8 hours, I'll leave it on the counter.  Let steep overnight or longer, up to 24 hours.

P9293147
 
Press the grinds and pour through a coffee filter.  You can store this coffee base in the refrigerator for a week.

To serve, pour over ice cubes and add cream, milk, or half & half if you like.  I prefer vanilla soymilk.

Die of happiness.

P9293151

I tweaked the proportions a bit from the original recipe because I like to add a lot of soymilk to my coffee so I wanted the coffee base to be a little stronger.  Now that it's getting colder, I may end up using the French press to brew hot coffee but I'll still probably add the cinnamon, nutmeg, and brown sugar.

Check out how to make magical pumpkin spice latte here!

Update:  I just tried making this with a small handful of torn mint leaves, and it totally reminds me of Philz' Mint Mojito Iced Coffee!

Monday, December 7, 2009

Tim Tam Slam Ice Cream

A couple of years ago, I was having dinner with this other girl who kept talking about all the homemade ice cream she made. After repeated mentions, I couldn't stand it anymore and threw down the proverbial gauntlet and challenged her to an "ice cream throw down". We rounded up two other friends who also made their own ice cream and drew up a list of rules. We were all to make 3 churned, frozen desserts: one vanilla ice cream for a baseline, one sorbet, and one free-for-all. Forty people came to judge, and I'm proud to say that I won the vanilla and sorbet categories with my "Triple Vanilla Threat" (frozen custard made with vanilla bean, vanilla sugar, and vanilla bourbon) and Coconut Lime Sorbet, which is really the simplest and yummiest sorbet recipe ever.

So for the one category that I lost, I had made a Tim Tam Slam ice cream. At the time, Tim Tams had yet to be imported into the US, so I actually had saved a package that a co-worker from Australia had sent special to me after I told her how much I loved the cookies. I was introduced to Tim Tams back when I lived in Taiwan by a couple from New Zealand. Crunchy chocolate cookies sandwiching a smooth chocolate mousse all dipped in rich chocolate fudge. You can really only eat one or two at time before going into chocolate overdose.

The inside of a Tim Tam
(This is actually a picture I took of the Tim Tams I had 2 years ago; the ones from Pepperidge Farms have a different packaging.)

But the best way to enjoy a Tim Tam is to do the Tim Tam Slam! This involves biting off the ends of the rectangular cookie and using it as a straw to sip up some coffee (or milk or tea). Just as the liquid reaches your lips, you toss the whole cookie in your mouth and close your eyes in delight as you experience the Tim Tam Slam.

Luckily for us, Tim Tams are now available stateside, at least during the colder months of the year, through Pepperidge Farms. I spied some at the local Shaws the other day, and decided it was high time to try to make a better Tim Tam Slam ice cream, because the Tim Tam Slam really deserved to be enshrined in such a hallowed way.

The previous time, I had tried David Lebovitz's recipe for making the coffee ice cream and used Dunkin' Donuts' hazelnut coffee beans. For whatever reason, the ice cream didn't really turn out as I had hoped. It's been over two years now so I can't remember exactly what I didn't like about it, but it was just off, somehow. As a note, my favorite coffee ice cream is the first one I ever tried: Breyers. It's the whole reason I even like coffee.

Since I've moved away from making frozen custards, I decided it was time to try Jeni's recipe for making no-egg ice cream again since let's face it, the last time was kind of a fail. And I think I know what the issue was last time. I bet I didn't let the mixture get a chance to cook enough after adding the corn starch so that it thickened before cooling it. Because let me tell you, when it starts boiling and thickening, you better get that pot off the heat fast or else it'll boil over. And I'm sure I'd have remembered something like that happening before.

Tim Tam Slam ice cream

Tim Tam Slam Ice Cream (based on Jeni's ice cream recipe)
makes about 1 quart

3 tablespoons cream cheese, softened
1 tablespoon plus 1 teaspoon corn starch
3 1/2 cups half and half
2/3 cup sugar
1 1/2 tablespoons corn syrup
1/8 teaspoon salt
1 tablespoon instant coffee crystals (I used Nescafe)
1 package Tim Tams

In the bottom of a medium bowl, beat the cream cheese until soft and loose and set aside.

In a small bowl, whisk together the cornstarch and 2 tablespoons of the half and half, making sure the cornstarch is dissolved. Pour the rest of the half and half into a large pot and whisk in the sugar, corn syrup, and coffee crystals. Bring to a boil over medium-high heat, and then simmer, stirring frequently, for 4 minutes.

Remove from heat and whisk in the cornstarch mixture. Return the pot to medium-high heat, bring back to a boil, and cook for 1 more minute, stirring or whisking constantly, until the mixture is slightly thickened.

Pour the milk mixture into the bowl with the cream cheese and whisk until the cream cheese is combined. Add the salt. Set the bowl into a larger bowl filled with snow or an ice bath and cool, stirring every few minutes, until the liquid is at least down to room temperature. Transfer the inner bowl to the refrigerator and allow to chill thoroughly.

Chopped up Tim Tams

Roughly chop the Tim Tams into small bits.

Once the ice cream base is chilled, freeze in an ice cream maker, adding the chopped Tim Tams at the very end. Transfer the ice cream to a container and freeze for several hours until firm.

Tim Tam Slam ice cream

I liked this version of the Tim Tam Slam much better, although it still doesn't taste as good as Breyer's coffee ice cream. Maybe it's something to do with the amount of coffee flavoring or the way I introduced it. Perhaps it would've been better to add espresso powder or coffee extract. But the addition of the Tim Tam bits definitely compensates for any faults the ice cream itself may have. I actually used caramel Tim Tams, which added a nice non-chocolatey dimension to the ice cream, kind of similar to Ben & Jerry's Coffee Heath Bar Crunch ice cream. The only thing is the caramel gets pretty hard when frozen, but does eventually soften in your mouth.

One year ago:  Pan-Fried Pasta with Butternut Squash, Fried Sage, and Pine Nuts