Showing posts with label potatoes. Show all posts

Wednesday, March 1, 2017

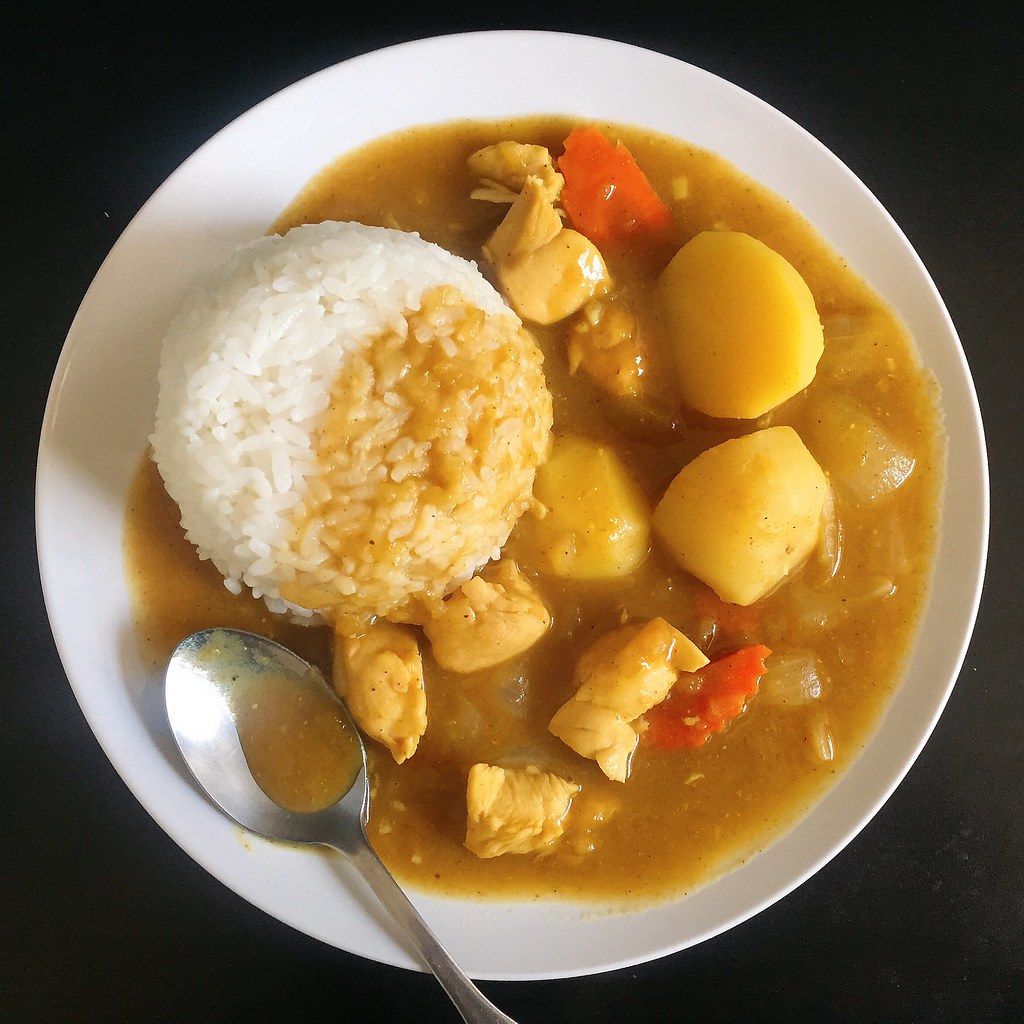
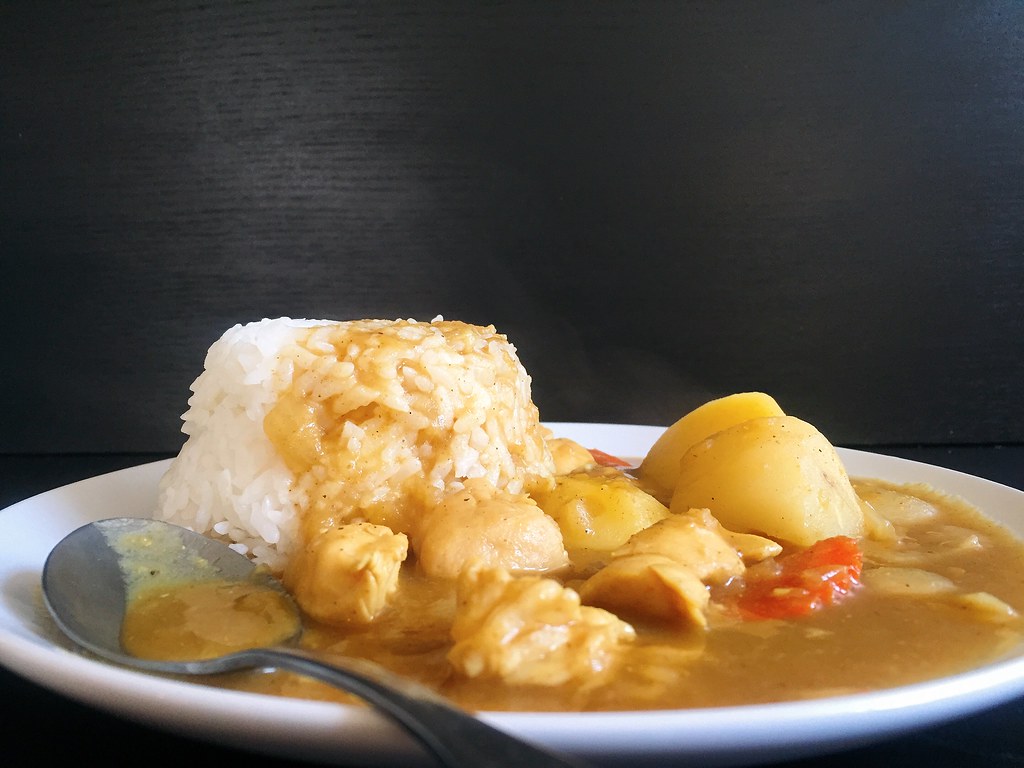
Japanese Chicken Curry Rice


If you’ve ever made Japanese curry rice from one of those store-bought curry blocks, you know how delicious and easy it is, but did you know it’s almost as easy to make it from scratch?  And considering the palm oil, MSG, and preservatives used in the blocks, it’s probably a lot healthier to make your own.
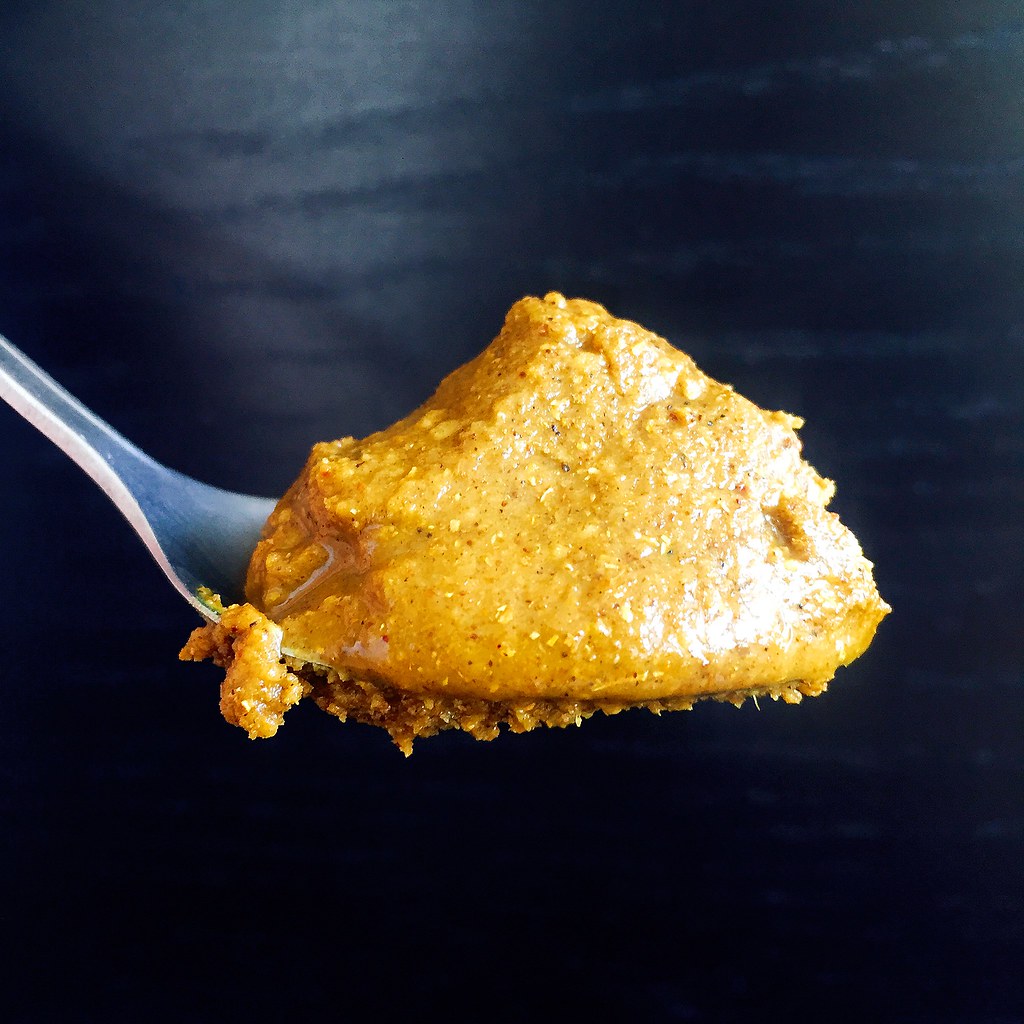

I pretty much followed the chicken curry rice recipe from Just One Cookbook except I caramelized the onions as recommended by Marc from No Recipes and Serious Eats.  I also used chicken breast instead of chicken thighs because I really, really hate dark meat.  Another great thing about making your own curry roux is that it’s easily customizable.  If you prefer it spicier, add cayenne pepper; if you prefer it sweeter add honey, etc.  This recipe makes a slightly sweet, medium-mild spicy curry.
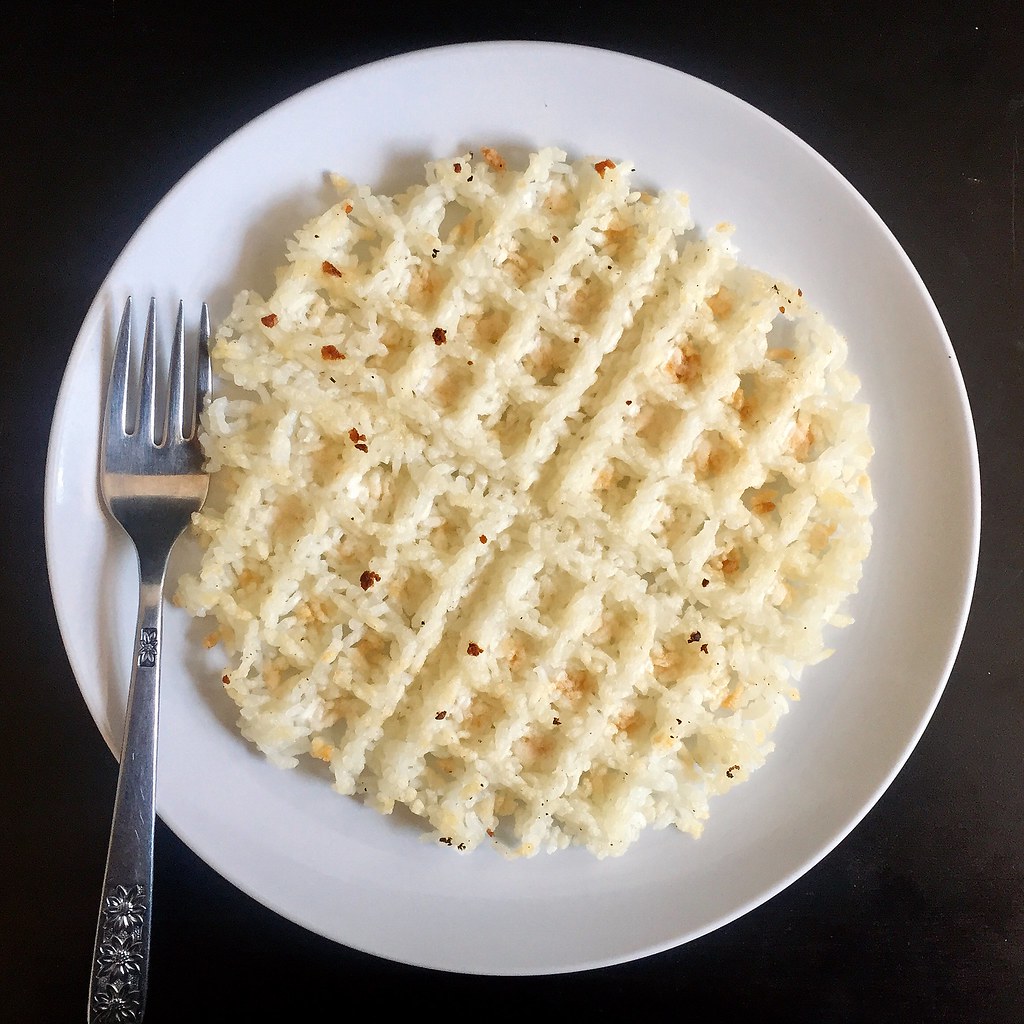

Japanese curry is usually served with steamed rice, but if you want to have a little more fun, I’d highly suggest waffling some day-old cooked rice.  The rice gets crispy-crunchy-toasty-chewy and adds a really interesting texture. 
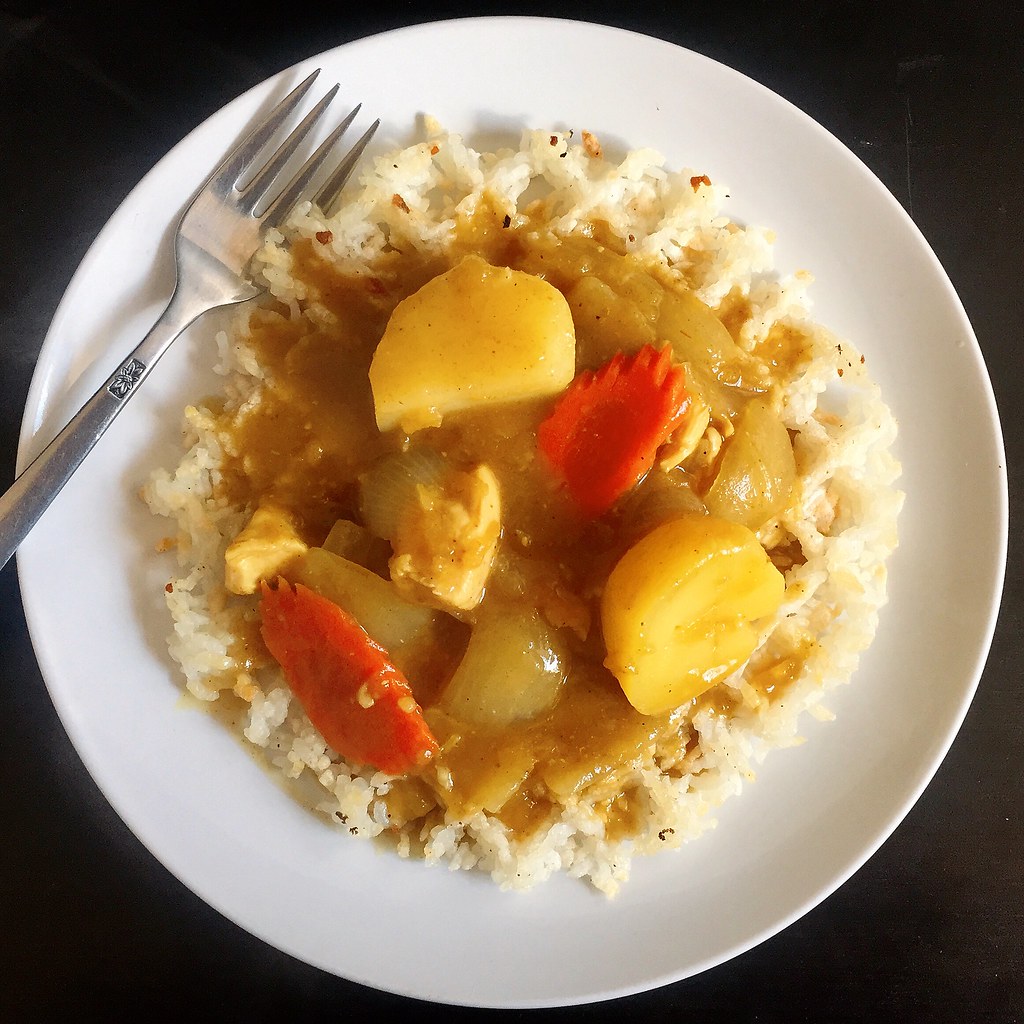

Japanese Chicken Curry Rice (adapted from Just One Cookbook)
serves 4-6

1 lb. boneless chicken, skinless thighs or breast
Kosher salt and black pepper
2 tablespoons oil
2 onions, coarsely chopped
2 garlic cloves, minced
1 teaspoon grated ginger
1 carrot, peeled and coarsely chopped
1 qt. chicken broth
1 apple
2 large Yukon gold potatoes
3 tablespoons unsalted butter
4 tablespoons all-purpose flour
1 tablespoon garam masala
1 tablespoon curry powder
2 tablespoons soy sauce
1 tablespoon ketchup
1 tablespoon honey (optional)
Cooked rice

Cut the chicken into bite-sized pieces and season with salt and pepper.

Add the onions to a large pot or Dutch oven over medium heat.  Cook with a large pinch of salt until dry and just starting to color.  Add a tablespoon of oil, mix, and continue to cook until the onions start sticking to the bottom again.  Add the rest of the oil and continue to cook until caramelized.  Add the minced garlic, grated ginger, and chicken.  Cook until the chicken turns white.  Add the chopped carrot and chicken broth and bring to a boil.

Peel the apple, coarsely grate, and add to the pot.  Peel the potatoes, cut into bite-sized chunks, and add to the pot.  Simmer for 20 minutes until the potatoes are tender.

In the meantime, make the curry roux by melting the butter in a small pan over medium-low heat.  Add the flour and stir until the roux starts to get darker, about 5-10 minutes.  Mix in the garam masala and curry powder and take off the heat once combined.

When the potatoes are done, add some of the hot liquid to the roux and whisk until the roux is loose, adding more liquid as necessary.  Add back to the pot and bring back to a boil.  Stir in the soy sauce and ketchup.  Taste, and add the honey if you'd prefer it sweeter.  Simmer until the curry has thickened.  Serve with cooked rice.

Next:  Rainbow Crepe Cake
Previously:  Quintessential Apple Pie with Bacon Fat Crust
Last Year:  Tropical Pulled Pork on Griddled Banana Bread Sandwiches
Two Years Ago:  A Better Homemade Pasta Recipe
Three Years Ago:  Mushroom Marsala Pizza
Four Years Ago:  Peking Duck Pizza
Seven Years Ago:  Bacon Fat Caramels
Eight Years Ago:  Potato Leek Soup with Bacon

Tuesday, February 7, 2017

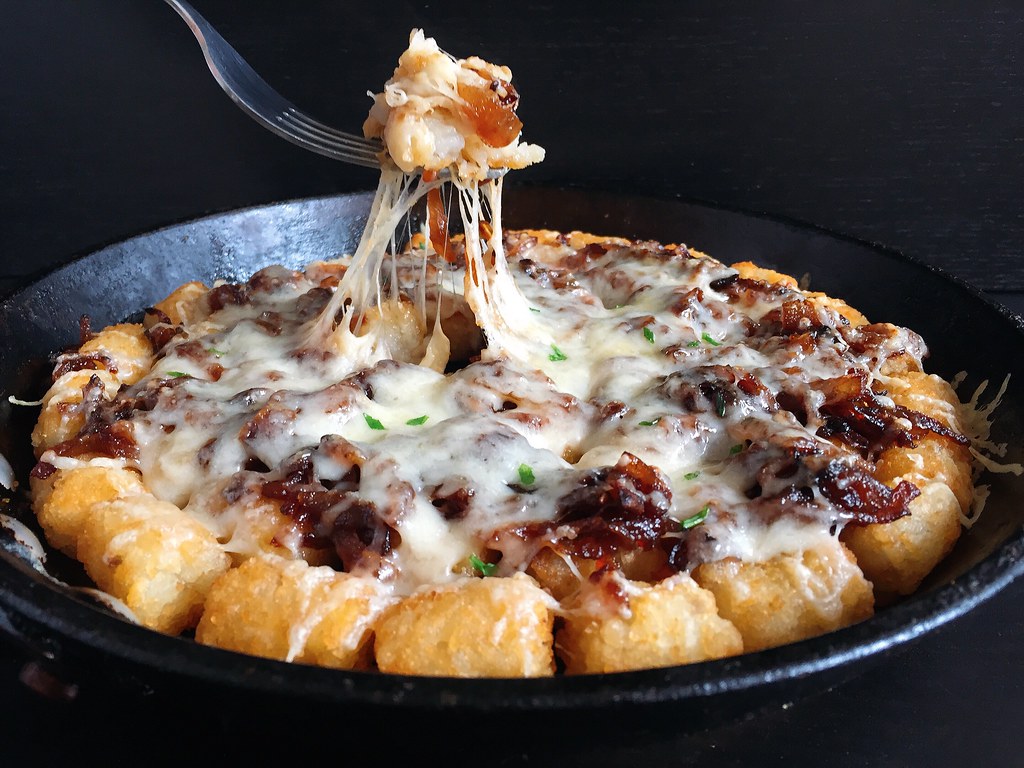
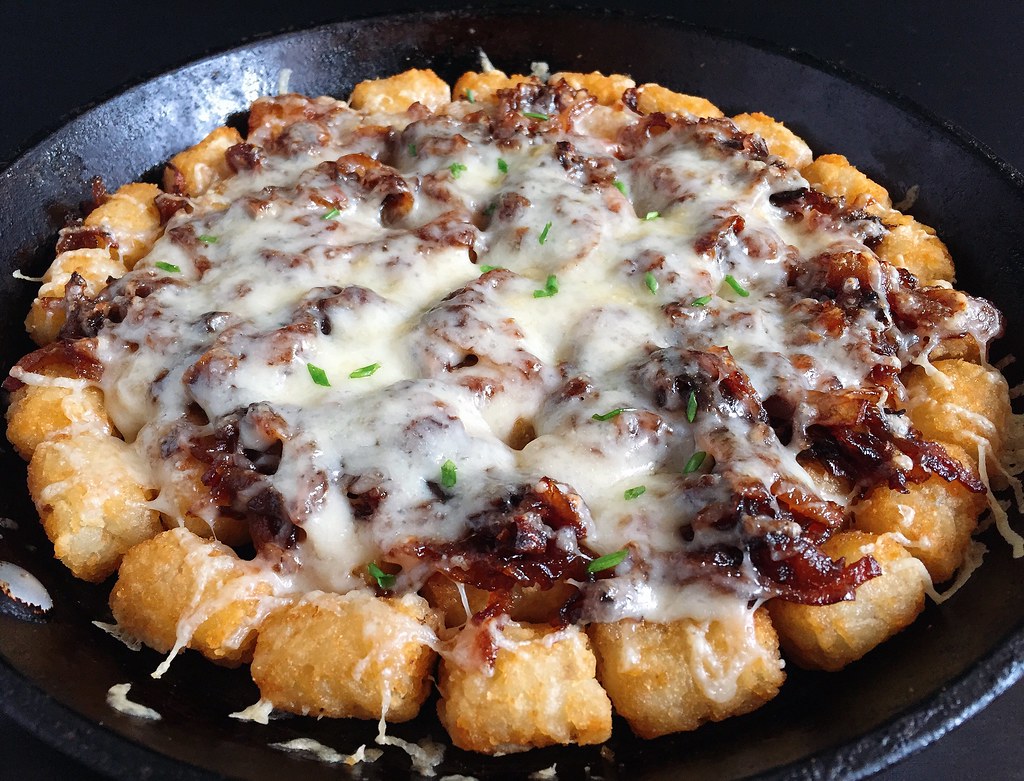
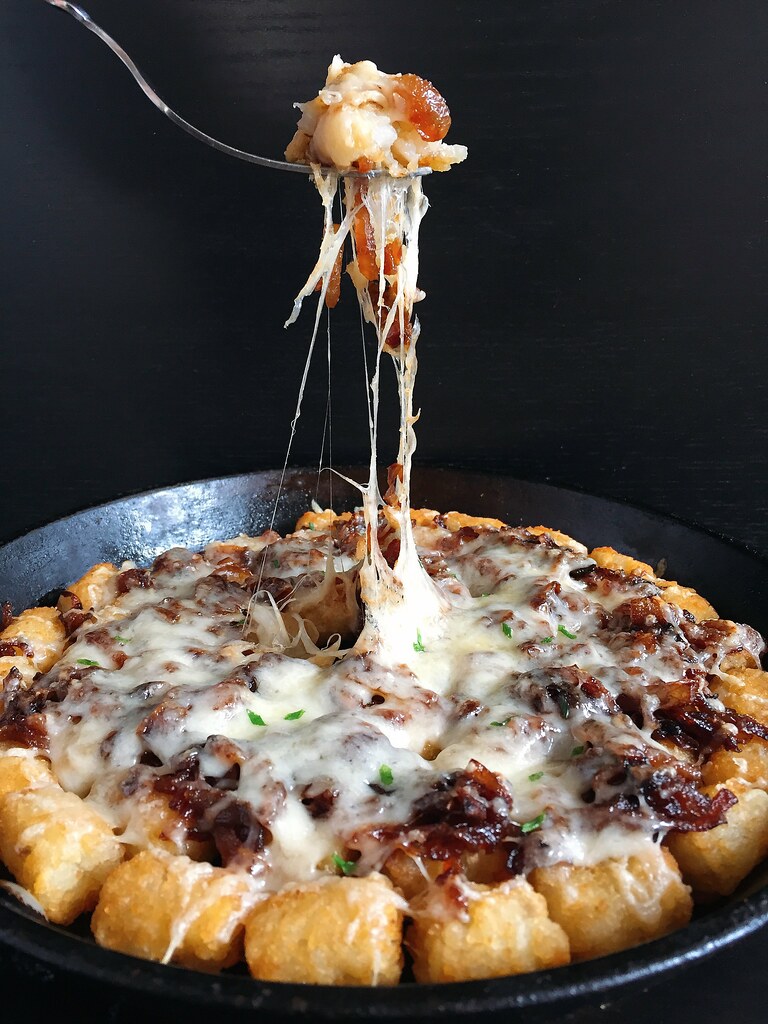
French Onion Tater Totchos


I had a good handful of Gruyere cheese leftover from making zucchini pizza the other day but no more squash so I was trying to figure out a good way to use it up.  I considered sprinkling it over some fingerling potatoes that I had gotten in my Boston Organics delivery, but then I had an eureka moment and decided to make French onion tater totchos!

They're French onion because I caramelized onions and then deglazed the pan with sherry and beef bouillon.  They're totchos because it's melted cheese and other toppings on top of tater tots that you'd eat like nachos.  But whatever you want to call them, they're amazing.

I ended up using a 10" skillet to bake the totchos in, but you could use another similarly sized pan or even double the recipe and make this in a sheet pan.  Using a full bouillon cube in the recipe as is makes a pretty salty dish, so if that's a concern for you, you can use half a cube; I was just too lazy to try to halve the cube myself.


French Onion Tater Totchos
serves 2-4

14 oz. frozen tater tots
1/2 cup cooking sherry
1 beef bouillon cube
2 medium onions, finely sliced
2 tablespoons unsalted butter
4 oz. shredded Gruyere cheese

Arrange the tater tots in a single layer and bake according to the instructions on the bag.


While the tots are baking, dissolve the bouillon cube in the sherry.  Heat a large nonstick pan over medium-high heat and add the onions.  Start cooking them without any butter until they dry up and start to color.  Turn the heat down to medium-low, add the butter, and continue cooking until the onions are soft and evenly browned.  Add the bouillon-sherry to deglaze the pan and continue cooking until most of the liquid is gone.


When the tater tots are done, remove from the oven and set the oven to broil.  Top the tots with the onion mixture and then the shredded cheese.  Broil for a few minutes until the cheese is nice and melty.  Serve immediately.


Next:  Quintessential Apple Pie with Bacon Fat Crust
Previously:  Salted Egg Yolk Mochi Ice Cream
Two Years Ago:  Burmese Coconut Noodles with Tofu
Three Years Ago:  Homemade Tagliatelle with Shaved Truffles
Four Years Ago:  Passion Fruit Marshmallows
Seven Years Ago:  Nutella Ice Cream
Eight Years Ago:  Tomato and Eggs Over Rice

Friday, June 3, 2016

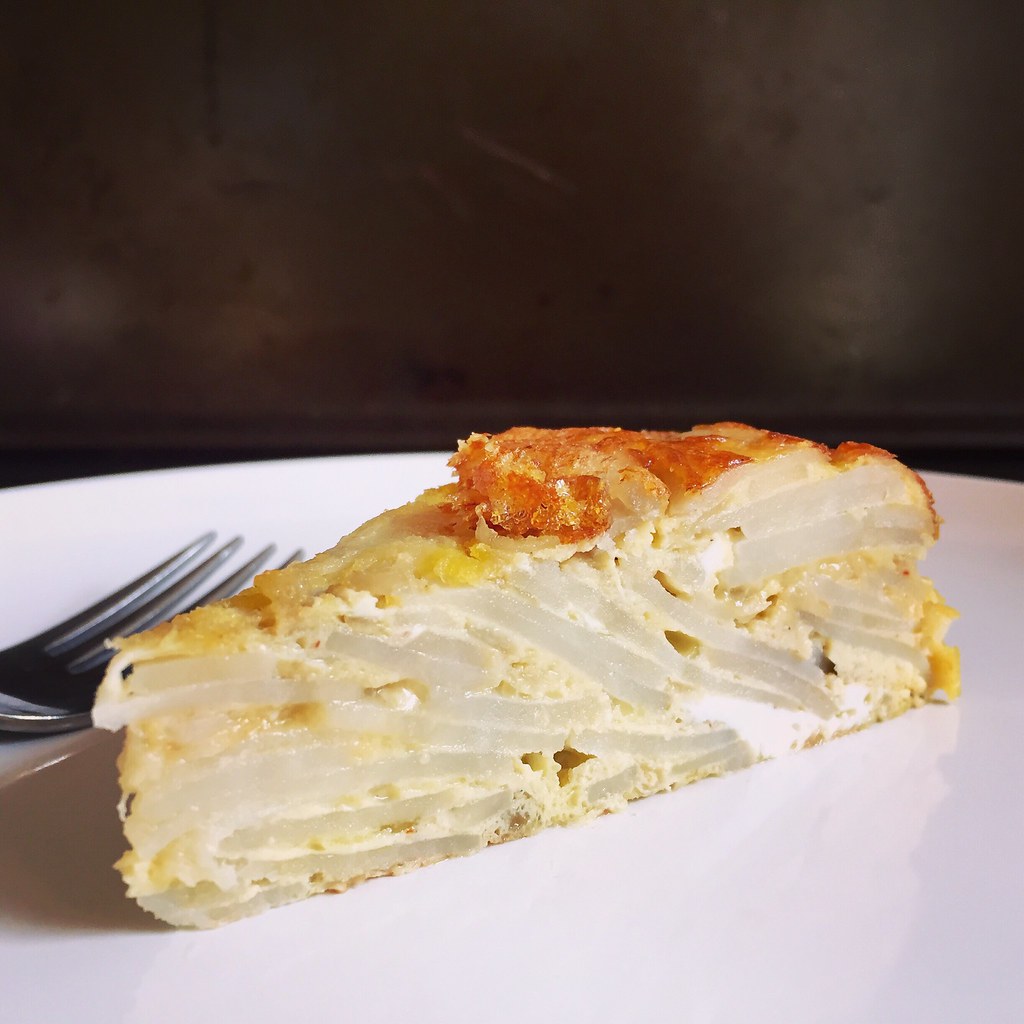
Tortilla Española (Spanish Potato Omelet)


I already had a trip to France and Italy planned when I found out I would need to be in Madrid the following week for work.  So after some quick thinking and planning, I managed to extend my time in Europe for another week and head out to Madrid a few days early before the meeting!


It was my first time in Spain, and I wanted to make the most of it.  My friend Sarah Ruth (the one who taught me my favorite brownie recipe) joined me from Sweden, and we managed to hit a lot of the capital and even took a day trip to the nearby town of Segovia.  Some highlights of the trip:


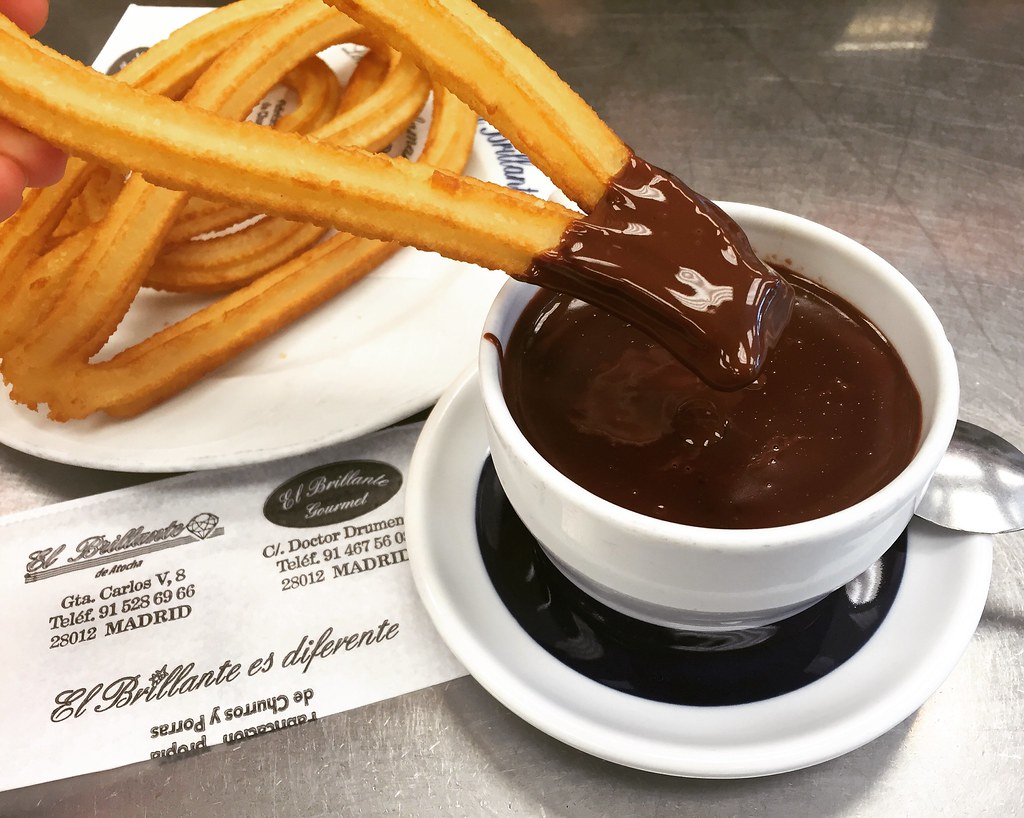
Eating chocolate con churros every day for breakfast!  We liked going to El Brillante for the authentic Madrileño experience and learned about purros there, which are basically, bigger, fatter churros that really remind me of Taiwanese you tiao.  We also tried them at Chocolatería San Ginés since everyone says they have the best ones, and I did like them more because they were less greasy and the hot chocolate wasn't as sweet.


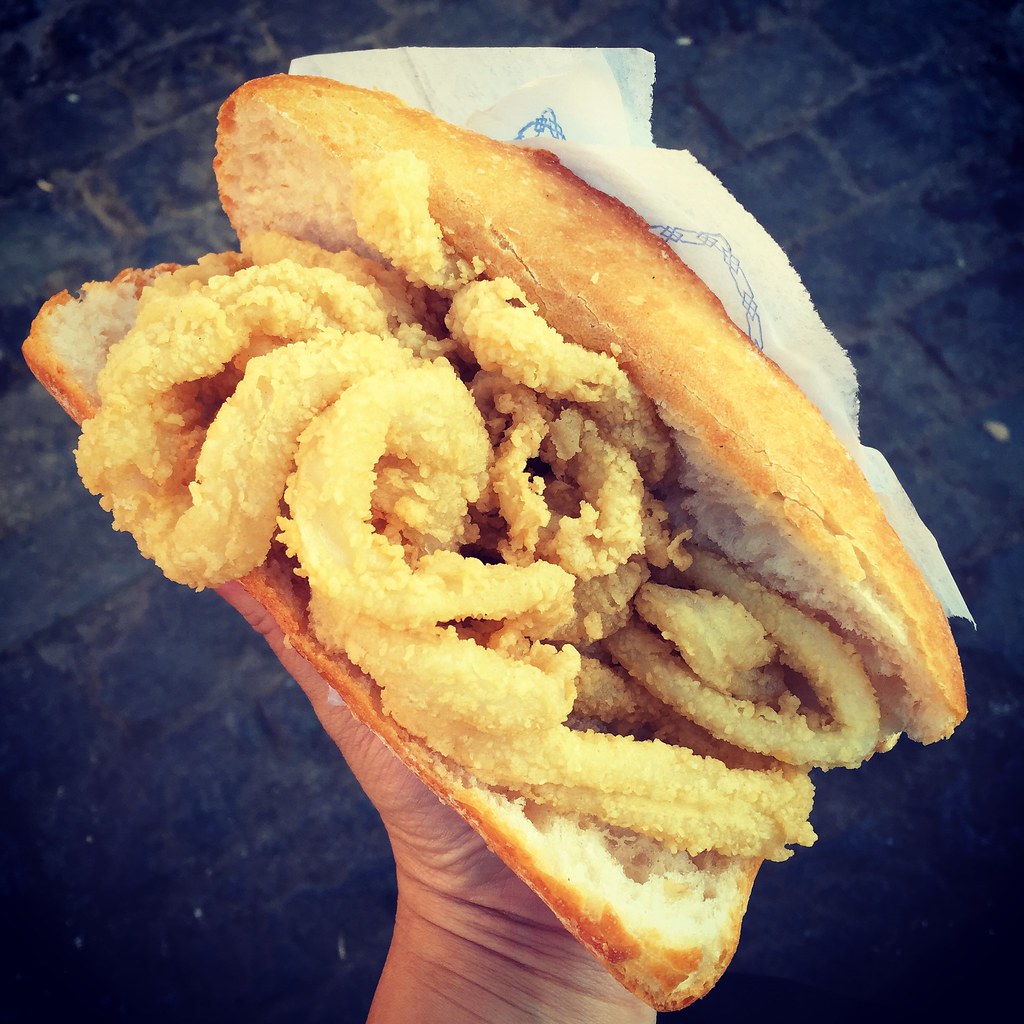
One of Sarah Ruth's friend's boyfriend was a local, and he was kind enough to take us around 2 of the 3 nights we were free.  I really wanted to try Madrid's specialty--bocadillo de calamares--which is basically like a fried calamari po'boy.  He took us to La Campana just off of Plaza Mayor, and the sandwich was a lot bigger than I expected!  It was pretty good, but I would've appreciated some type of sauce on there like a spicy remoulade or an aioli or something.  I bet it would be really good at 3 am after a night of partying!

Another one of his suggestions was a Chinese restaurant that was located...in an underground parking garage.  I totally thought it wouldn't be worth even seeking, but then we looked on-line for it, and it seemed like the real deal.  So after more than 10 days without Asian food, I was desperate enough to try it out.  You guys, it was awesome!  It honestly tasted like something my mom would make!  To find it, go to the southeast corner of Plaza de Espana and look for the stairs that go down.  Can't miss it.


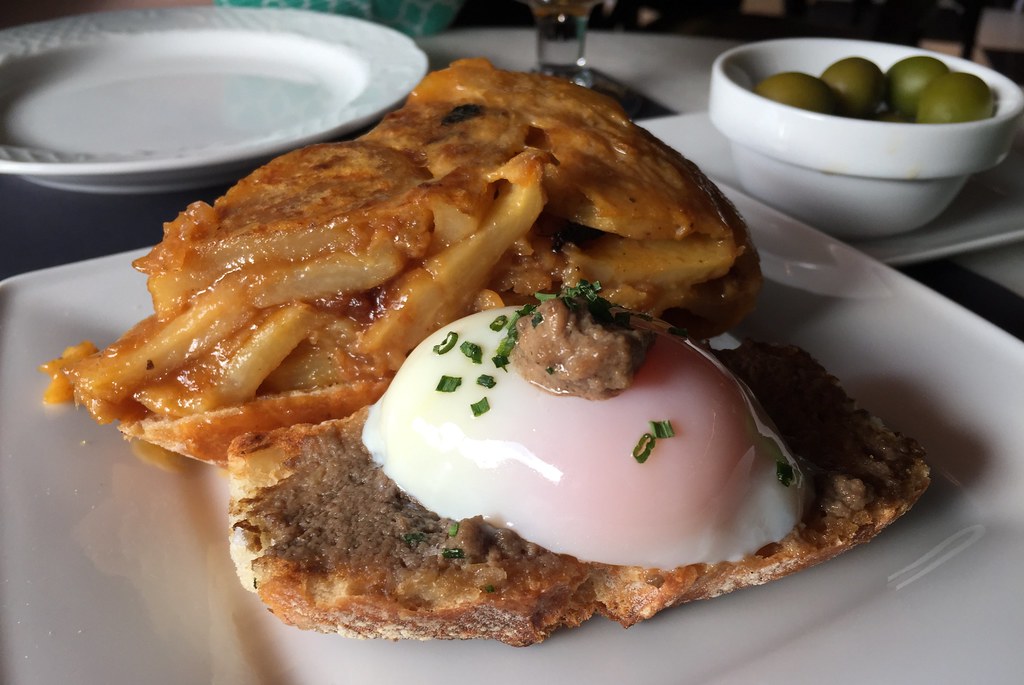
We went to La Latina for tapas one night, but I was so tired we only made it to two bars . My favorite was Juana La Loca.  They had the best tortilla I had in Madrid, probably because they caramelized their onions for extra flavor.  They also had El Increible, a soft-cooked egg with truffle paste on bread.  It was amazing.  I loved that they also had some dessert options for tapas, although we didn't try any.


Mercado de San Miguel is like the Fanueil Hall/Quincy Market of Madrid (super touristy food court) but it's so beautiful I can't help loving it.  They have a paella stall with four kinds of paella, and you can get a ración (single serving) instead of having to order enough for at least 2 people like every other restaurant.  I tried the paella negra which was colored with black squid ink.  The guy scraped up some of the crusty bits from the bottom of the pan so it had a nice combination of textures.


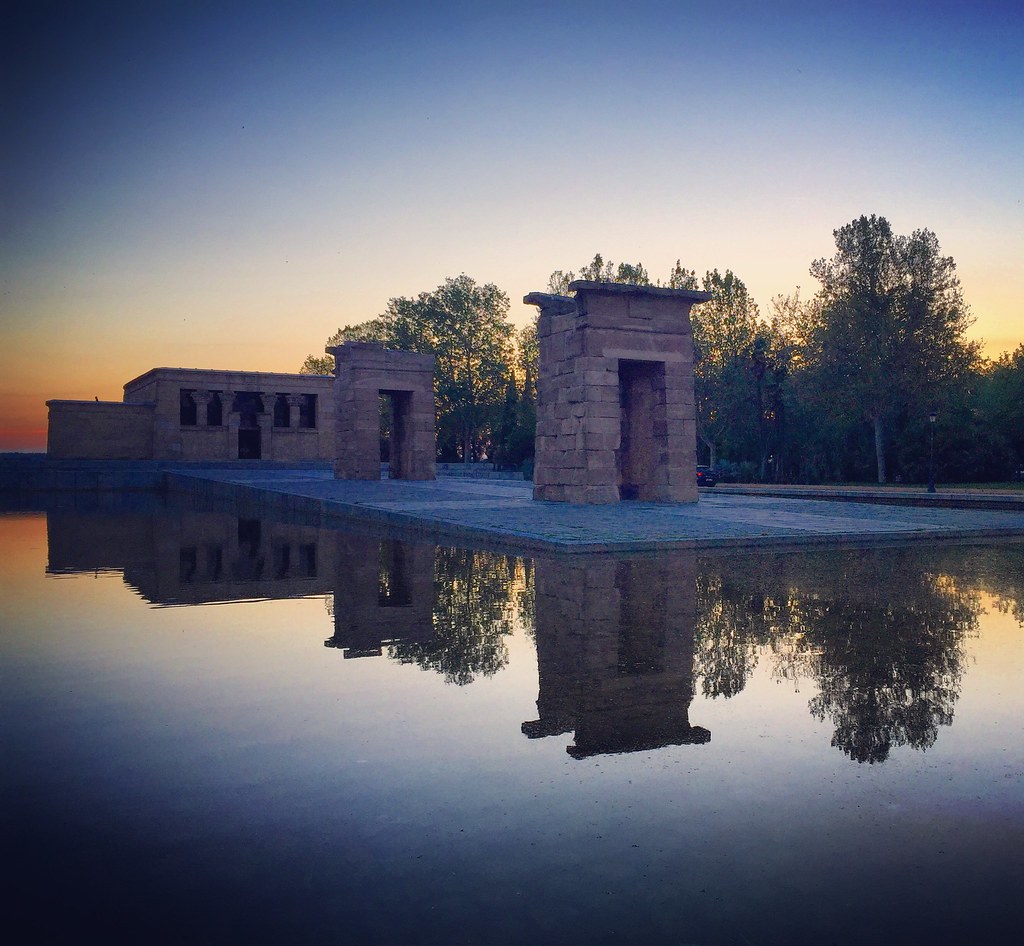
There were a lot of great places to watch the sunset.  Two of mine were next to the Royal Palace and the Temple of Debod, which was moved from Egypt when the building of a dam threatened to flood it (similar to how the Met in NYC got the Temple of Dendur).


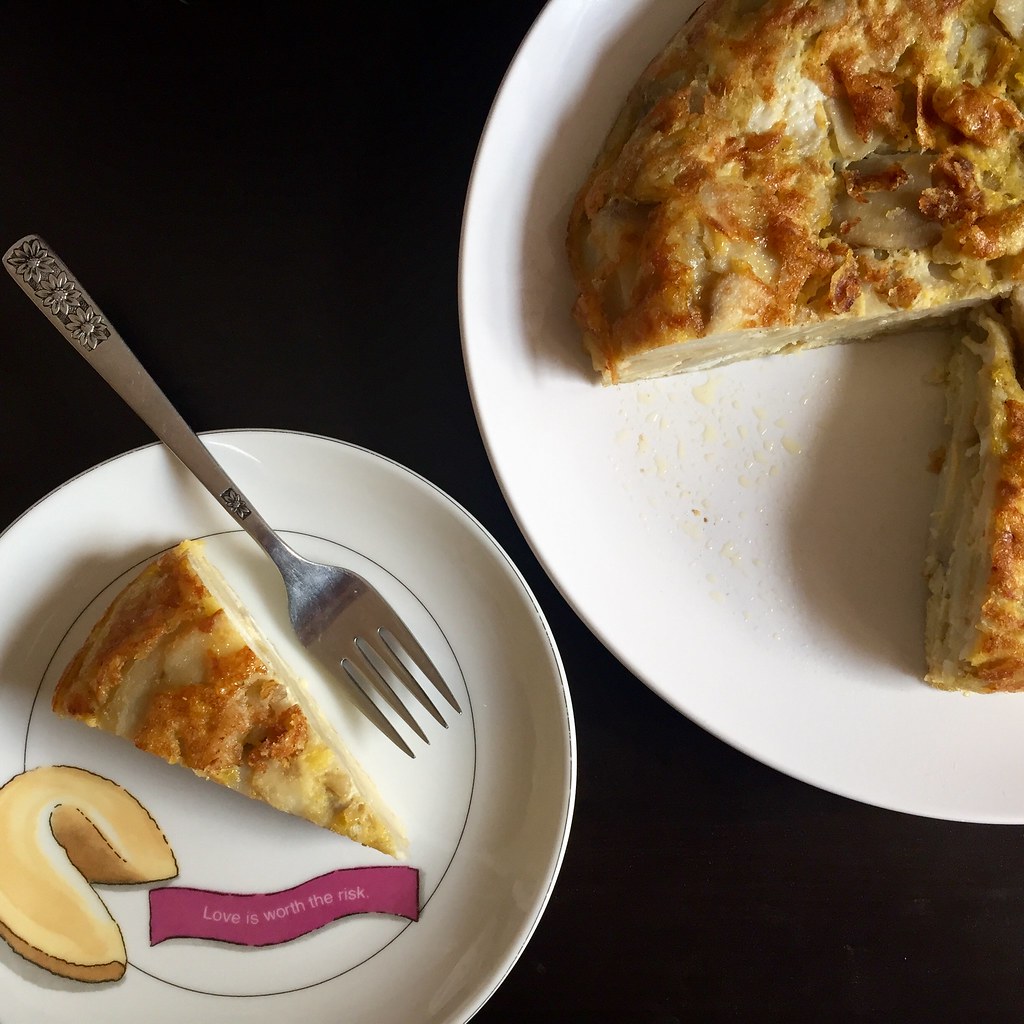
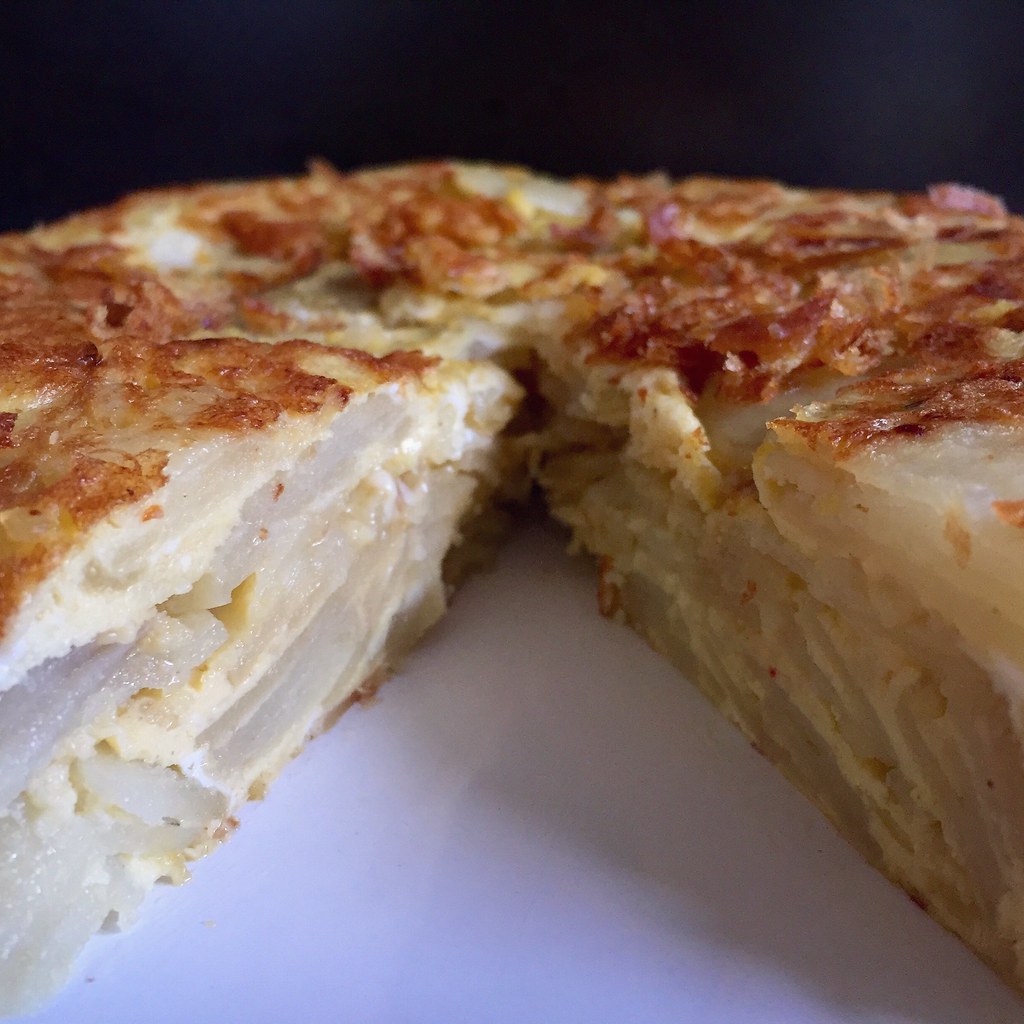
After returning from Madrid, I knew I wanted to try making the iconic tortilla española at home.  I settled on Mark Bittman's recipe with a few tweaks.  Instead of a whole cup of olive oil, I used half olive oil, half vegetable oil, mostly for budgetary reasons.  It's still a lot of oil, though, but you can strain it and save it in the refrigerator for the next time you make tortilla española.  I also started cooking the onions before the potatoes to try get some caramelized flavor into the tortilla, à la Juana La Loca.  They were just starting to brown on the edges when I added the potatoes, but I think next time I'll wait even longer since they didn't really end up caramelized by the time the potatoes were done.


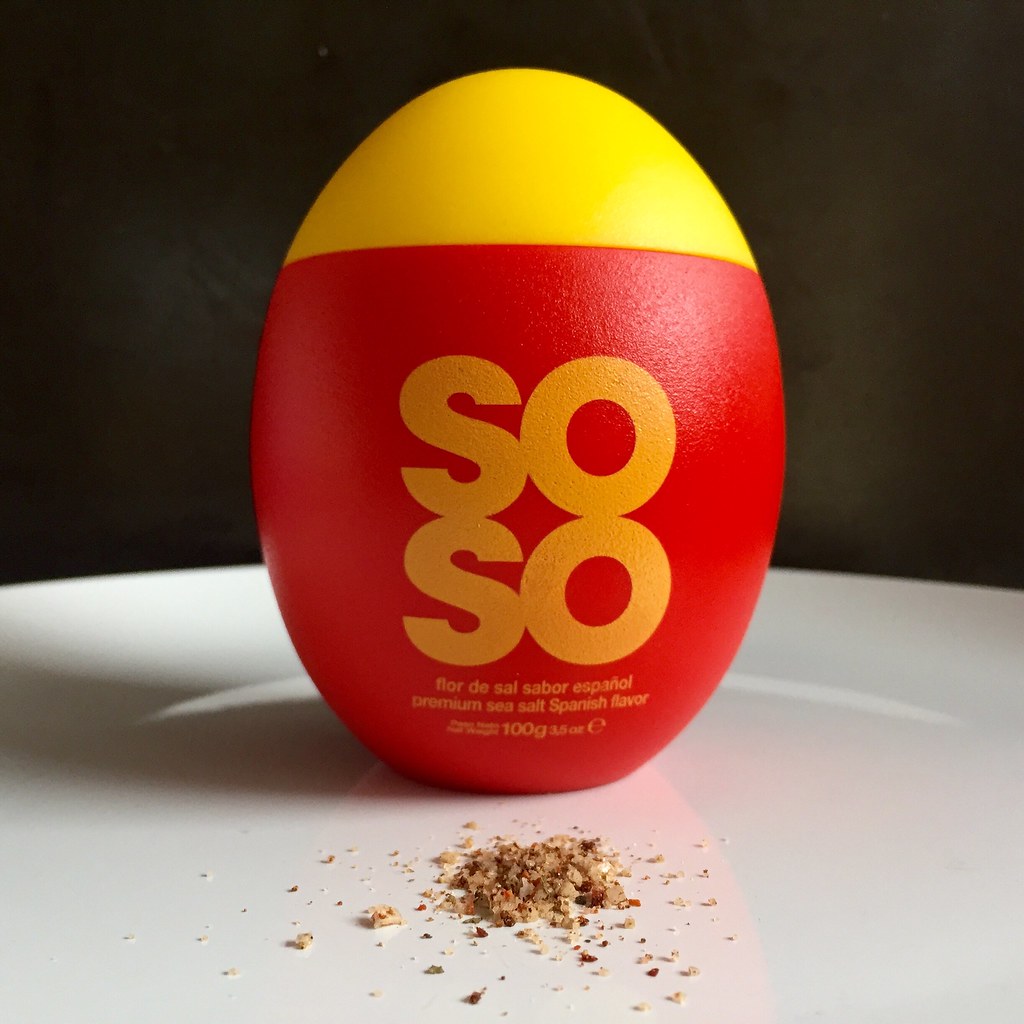
Lastly, instead of just salt and pepper, I used this awesome Spanish flavored sea salt I picked up from El Corte Inglés that was seasoned with hot pepper, rosemary, black pepper, garlic, onion, parsley, and tomato.


Tortilla Española (adapted from Mark Bittman)
serves 3 as a main course and 6 as an appetizer

1 1/4 lbs. potatoes (I used Russet, but Yukon Golds would work too)
1 medium onion
1 cup olive oil (or use 1/2 olive oil 1/2 vegetable oil)
Salt and freshly ground pepper
6 large eggs

Heat the oil in an 8- or 10-inch non-stick skillet over medium heat.  Chop the onions and add to the oil with some salt and pepper.  Stir occasionally while you prepare the potatoes.

Slice the potatoes thinly, using a mandoline if you have one.  Add to the oil along with some more salt and pepper and adjust the heat so that it bubbles lazily.  Cook until the potatoes are tender, but not brown.  While the potatoes are cooking, beat the eggs with some salt and pepper.

Drain the potatoes and onions in a colander, reserving the oil.  Wipe the skillet clean and add two tablespoons of oil back to it.  Heat over medium heat.  Add the potatoes to the egg mixture and mix gently.  Transfer to the skillet.  After the edges firm up, about a minute or so, reduce the heat to medium-low and cook for 5 more minutes.

Use a heat-proof rubber spatula to loosen the edges of the tortilla.  Place a large plate on top of the skillet and flip the tortilla onto it.  Add another tablespoon of oil into the skillet and slide the tortilla, cooked side up, back in.  Cook for another 5 minutes, using the spatula to coax the sides of the tortilla into a domed shape.  Slide onto a plate and serve warm or at room temperature.


Next:  Maine Blueberry Gateau
Previously:  Sesame Soba Noodles with Avocado Rose
Last Year:  Taiwanese Oyster Omelet (Without the Oysters)
Two Years Ago:  Candied Bacon Chocolate Chip Pancakes
Three Years Ago:  Rosemary Honey and Lemon Frozen Yogurt
Six Years Ago:  Passion Fruit Ice Cream
Seven Years Ago:  Kalbi (Korean Barbecue Short Ribs)

Tuesday, January 13, 2015

Zuppa Toscana

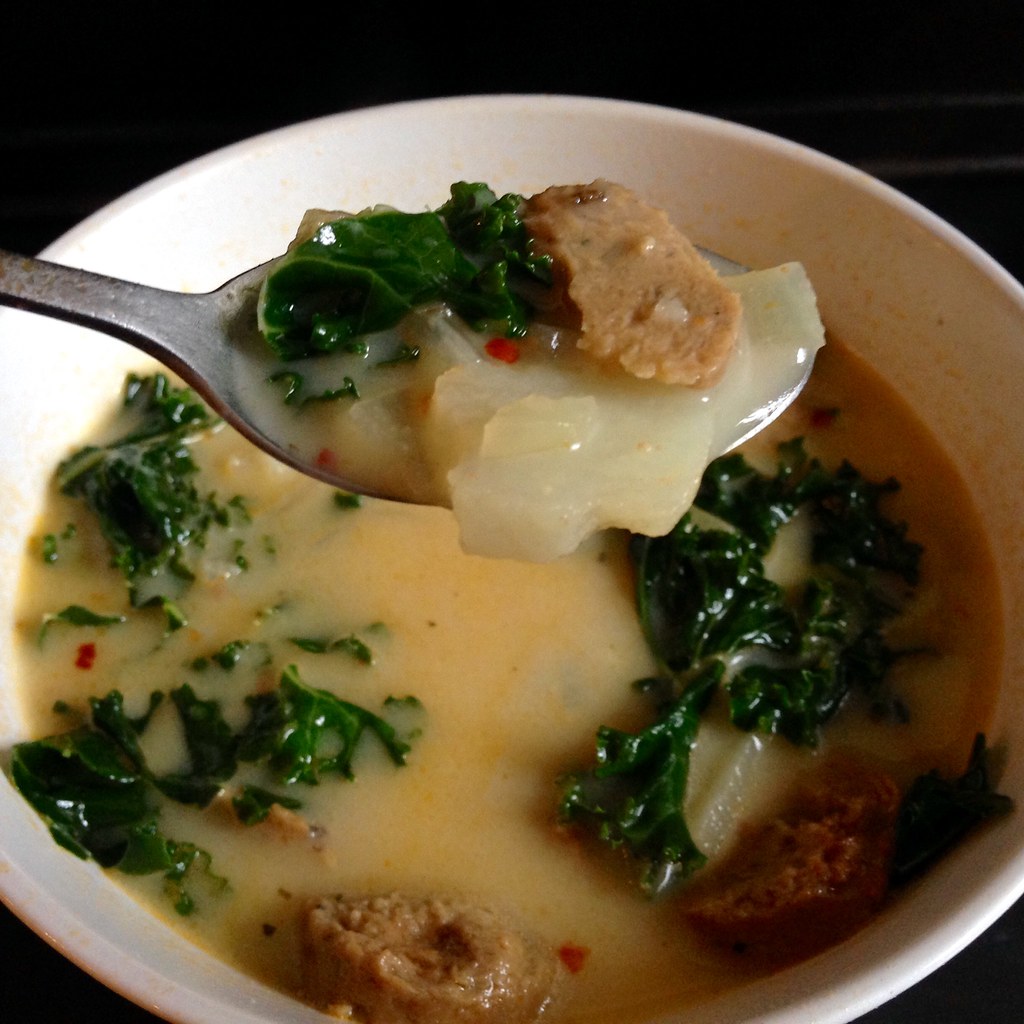
https://www.flickr.com/photos/joyosity/16079098977/

I live in one of those rare regions of the United States that isn't big on chain restaurants, other than Dunkin' Donuts.  To explain how drastic it is, I'm pretty sure there isn't a single McDonalds located in the city I live in (population > 50,000)!  I don't really mind that much, but it means that going to restaurants like Olive Garden are actually a special occurrence to me, especially when I find myself in a town like Morgantown, West Virginia on a business trip and have no clue where to eat (true story).

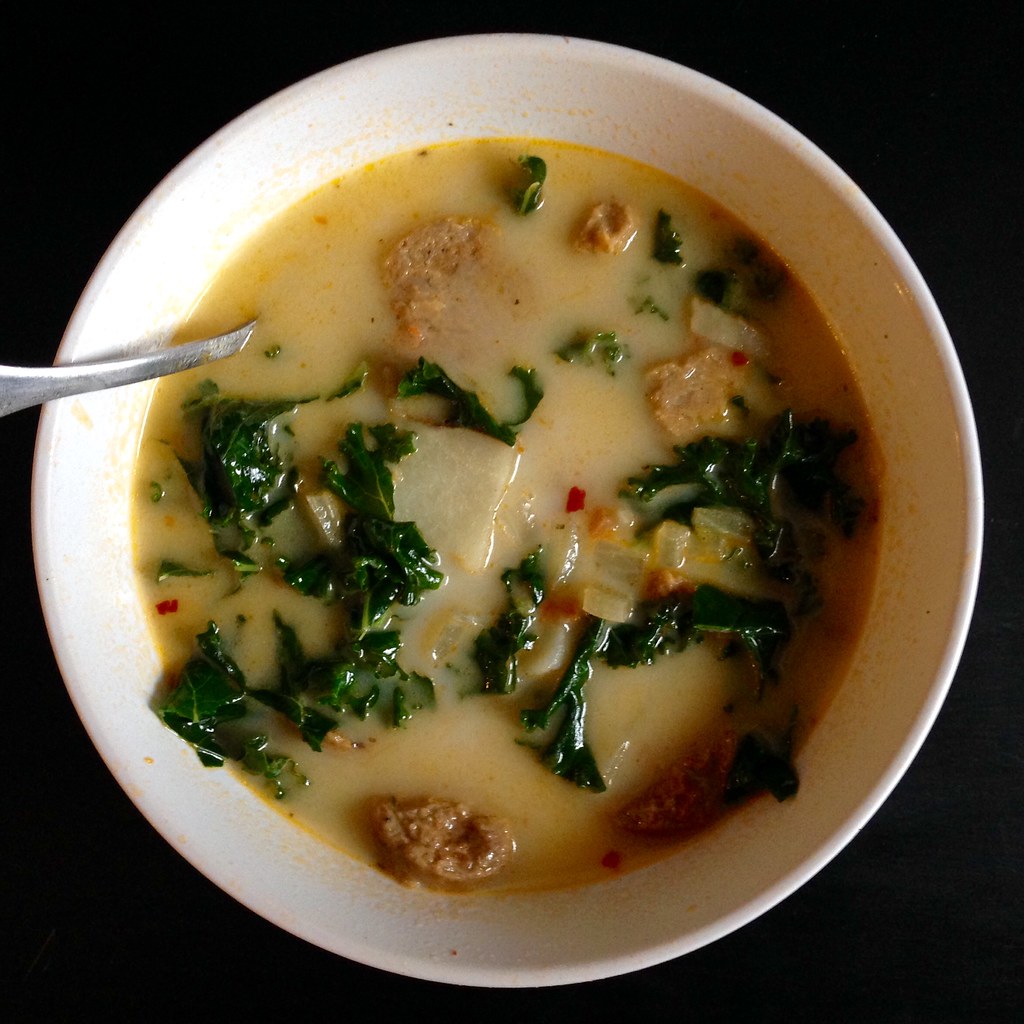
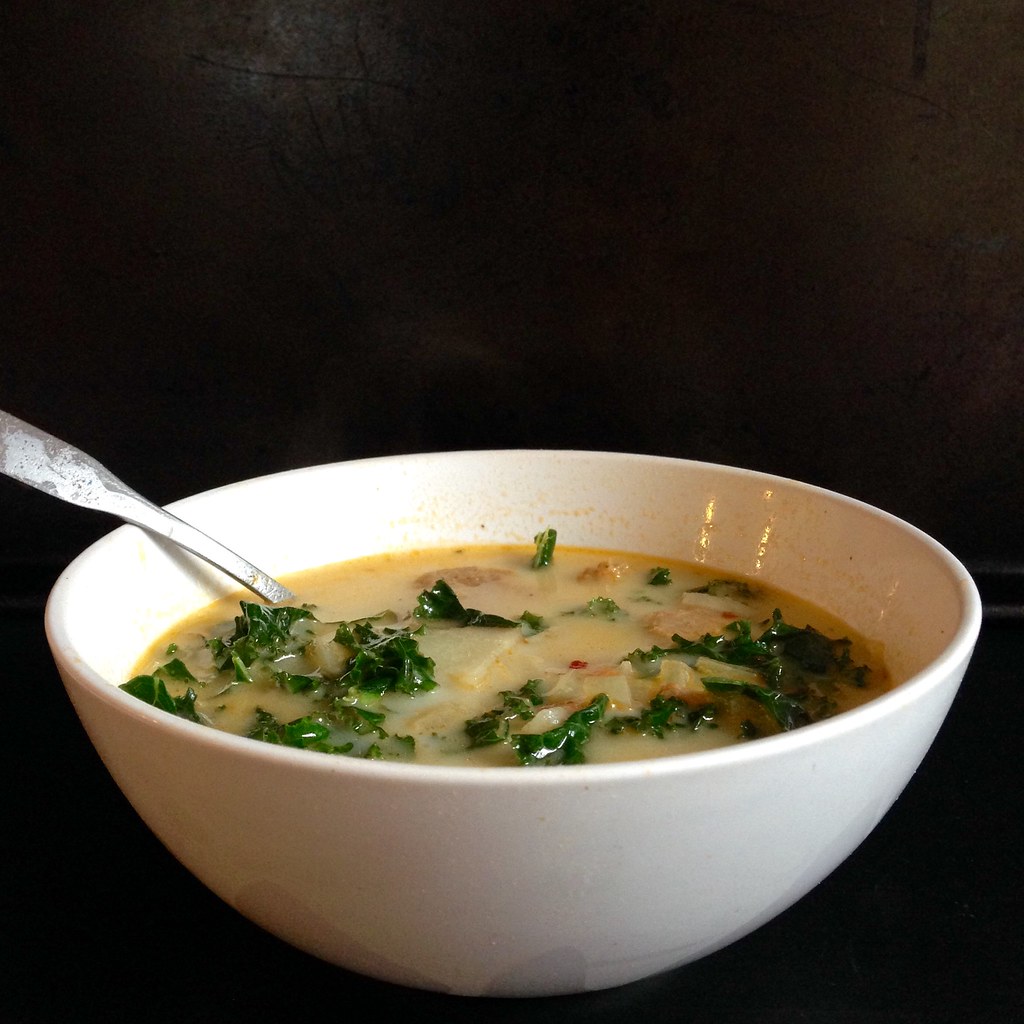
I am easily satisfied with their endless soup, salad, and breadsticks and always get the Zuppa Toscana.  I have no idea if it's an authentic soup to Tuscany, but I don't care.  It's frickin' amazing.  Now that I'm back home, I looked for copycat recipes on-line, and there are like hundreds of them, even vegetarian and vegan ones!  I ended up just following the first hit that came up except I used vegan Italian "sausage" and whole milk instead of the heavy cream.  It's a bit healthier, but definitely not as rich as what you'd get with the cream.  I also added more kale and potatoes since I had a bunch of kale to use up from my Boston Organics box, and I love me my potatoes.  Since the chicken or vegetable broth you use will be one of the main flavor components in the soup, make sure you use a really good one.  Better yet, make your own!

https://www.flickr.com/photos/joyosity/16077438738/

Zuppa Toscana (adapted from Food.com)
serves 4

1 1/2 tablespoons olive oil
1 lb. Italian sausage or vegan sausage, sliced or crumbled into small pieces
1 large onion, chopped
2 garlic cloves, minced
2 cups good quality chicken or vegetable broth
4 cups water
3 large Russet potatoes
Kosher salt and fresh ground pepper
Red pepper flakes, to taste
2-4 cups kale, ribs removed and torn into pieces
1 cup whole milk, half & half, or heavy cream

Heat the olive oil over medium in a large pot and add the sausage and chopped onions.  Stir occasionally until the sausage is browned (but not the onions).  Add the minced garlic and cook for another minute.  Add the broth and water and bring the pot to a boil. 

Halve the potatoes lengthwise and then slice into 1/4" pieces.  Add to the soup.  Lower the heat so that the soup is simmering and cook until the potatoes are done.  Salt and pepper to taste, and add a pinch of red pepper flakes.  Adjust the seasonings as needed.  (Potatoes absorb a lot of salt, so you may need more than you think.)

Add the torn kale leaves and milk and stir.  Cook for another 5 minutes until the kale has wilted.  If you like, smoosh some of the potatoes into the soup to make it creamier and slightly thicker.  Serve hot.

Note:  Because of the addition of dairy and potatoes in this soup, it does not freeze well.  It does, however, taste better the next day after sitting in the fridge!

https://www.flickr.com/photos/joyosity/16264969395/

Next:  Peanut Butter Noodles
Previously:  Puppy Chow Pie
Last Year:  Salade Indochinoise
Two Years Ago:  Tartine's Lemon Cream Tart
Five Years Ago:  Gaufres de Leige (Belgian Waffles)
Six Years Ago:  Hua Juan (Steamed Scallion Buns)

Monday, November 10, 2014

Spatchcock Chicken with Roasted Root Vegetables

https://www.flickr.com/photos/joyosity/15718609966/

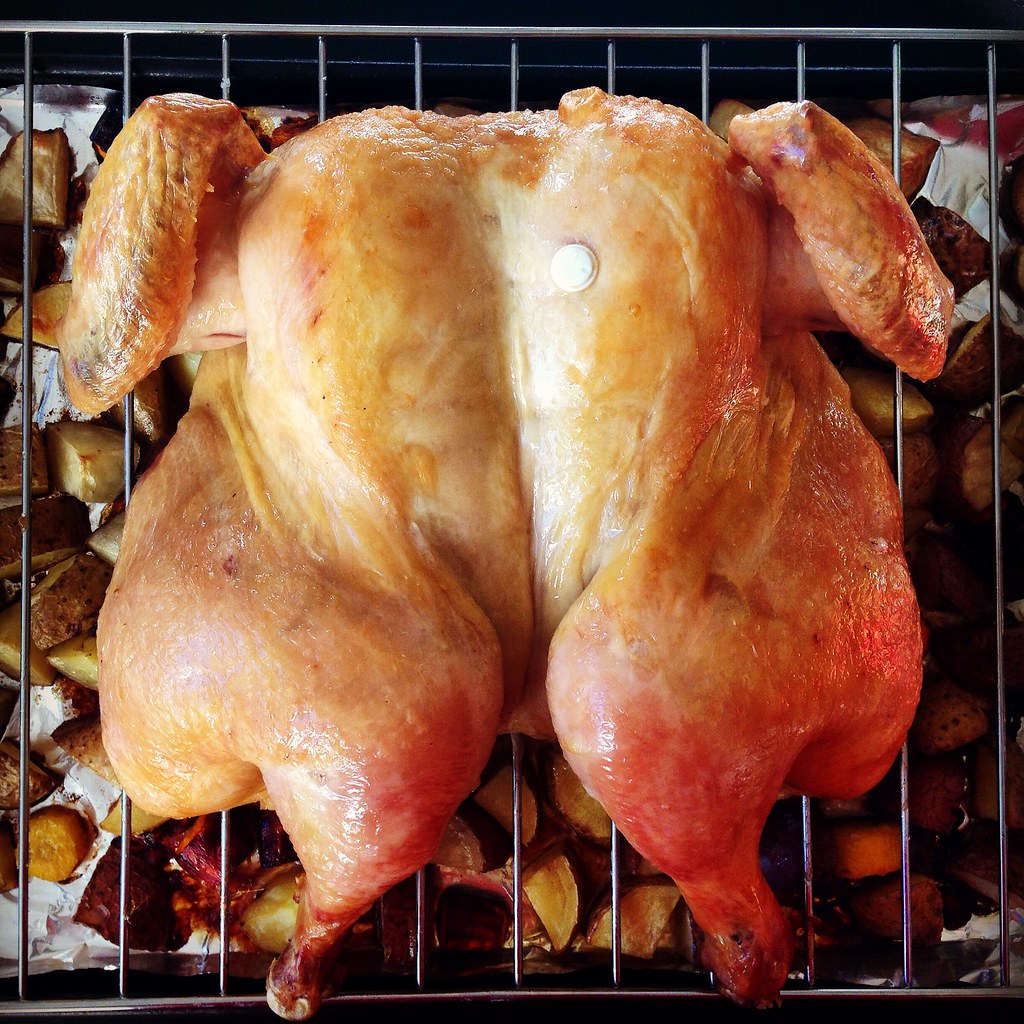
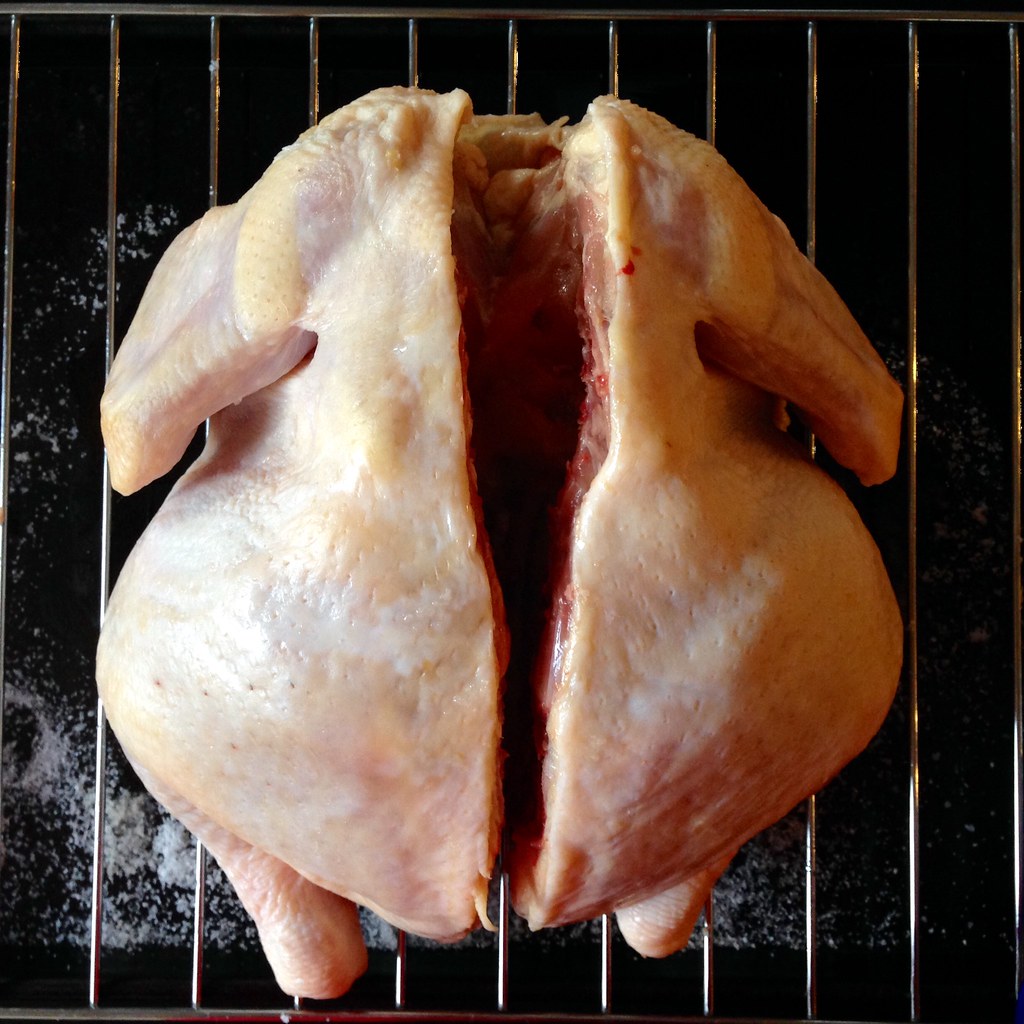
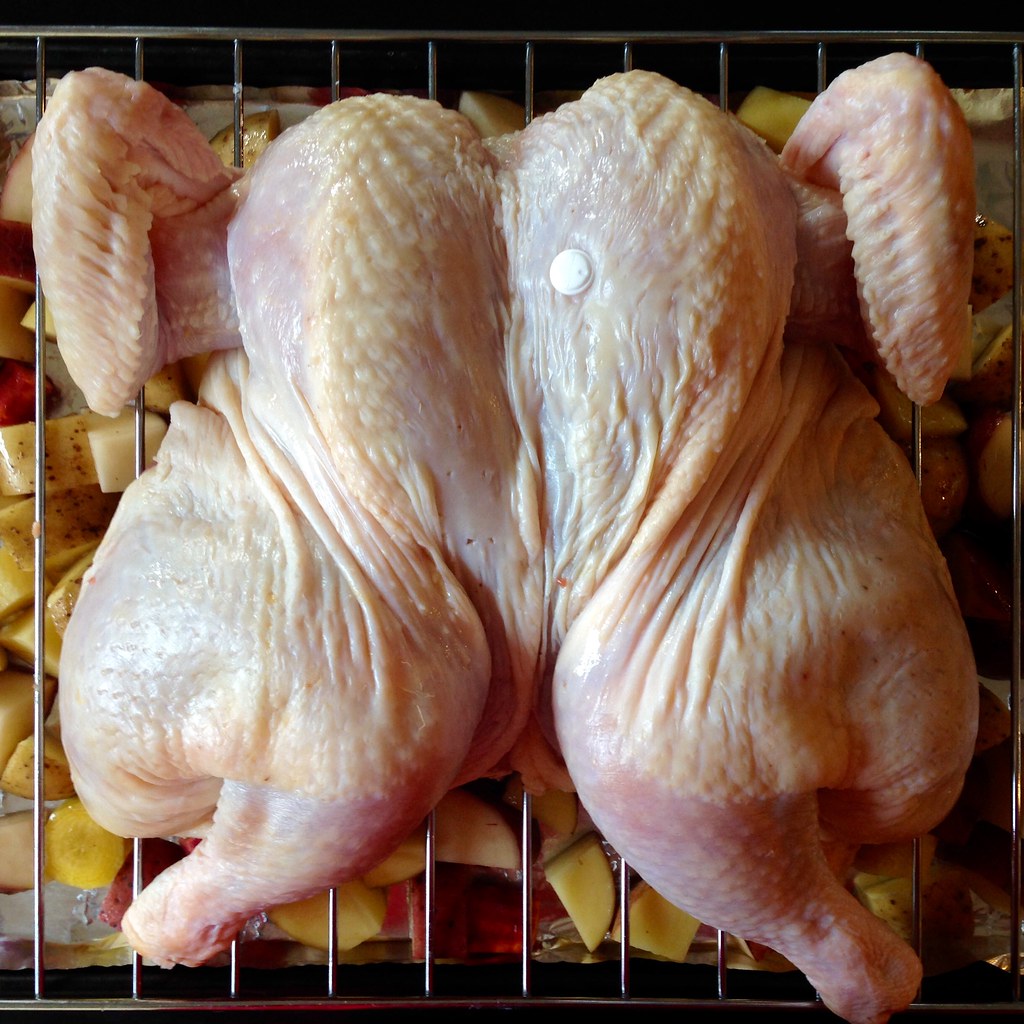
A few months ago my friend Ellen posted a gorgeous picture of the best roast chicken she had ever made and challenged us to name the technique she used to make it.  From the picture, I knew immediately it was a spatchcocked chicken, and I've been wanting to try it ever since.  Well, this weekend we needed some cooked chicken to make curry chicken tea sandwiches for Amy's baby shower, so I volunteered to make the chicken instead of just buying a rotisserie chicken.

https://www.flickr.com/photos/joyosity/15122914673/

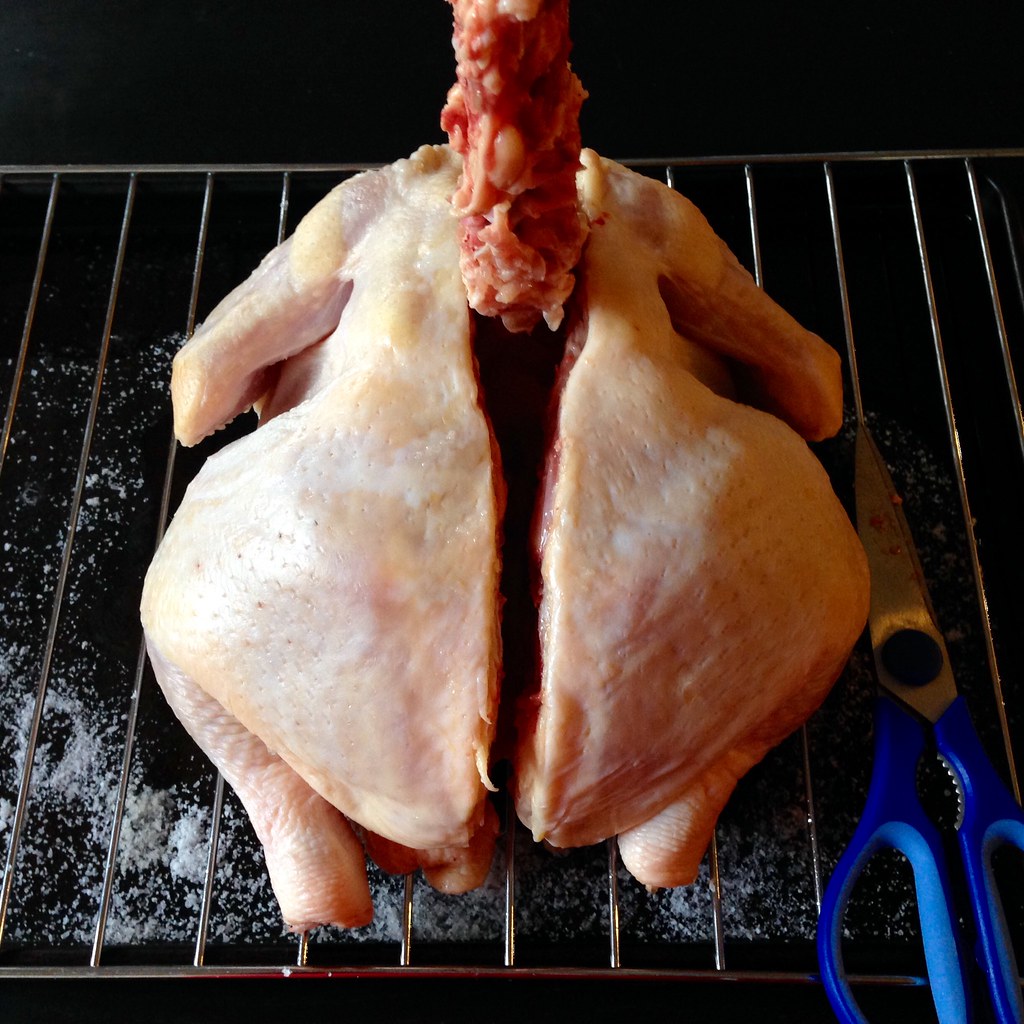
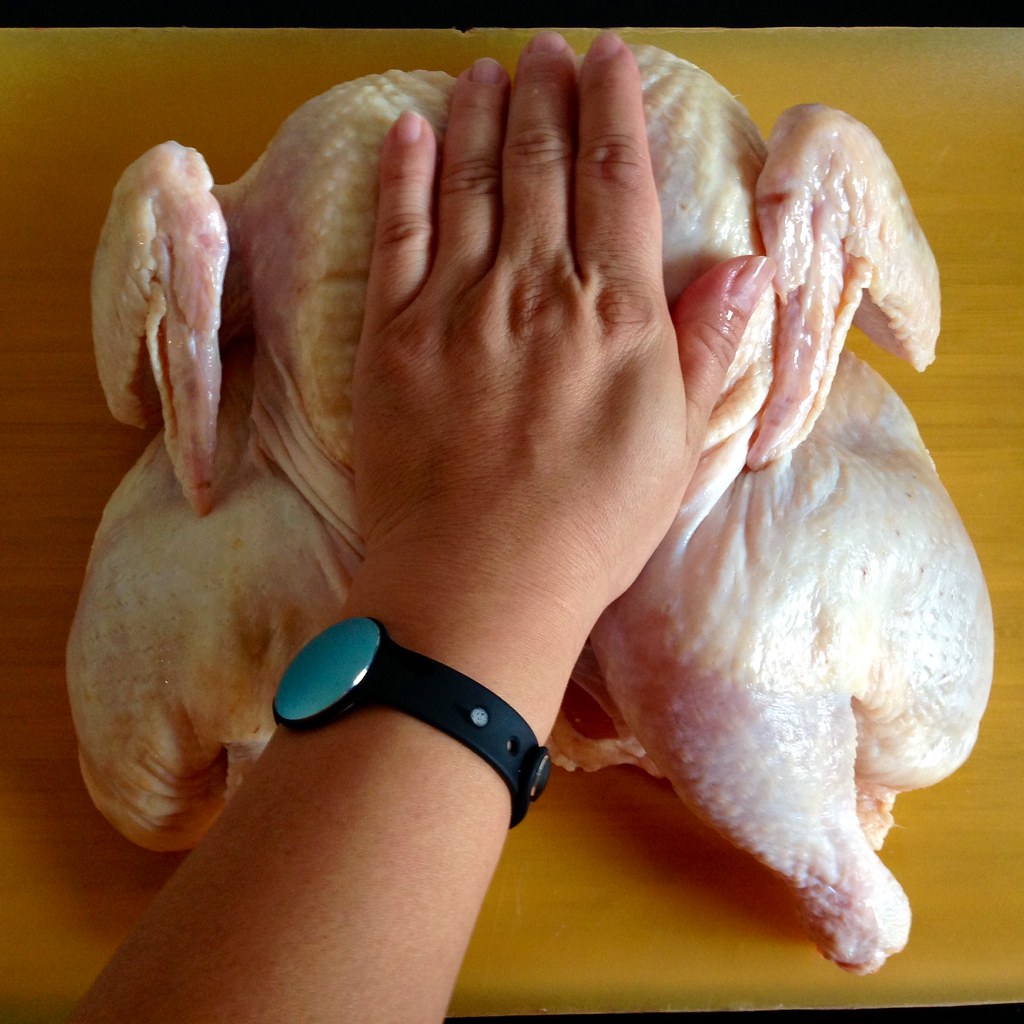
Spatchcocking a chicken just means cutting out the backbone and then butterflying the chicken so that you can roast it flat.  This way the dark meat and white meat cook more evenly, and you can also cook it a lot faster than roasting it whole.  Usually you have to use a lot of pressure to force the bird to "crack" open, but this post from Epicurious mentions making a notch on the sternum bone/cartilage before flipping the bird over which makes it a lot easier. 

https://www.flickr.com/photos/joyosity/15718606686/

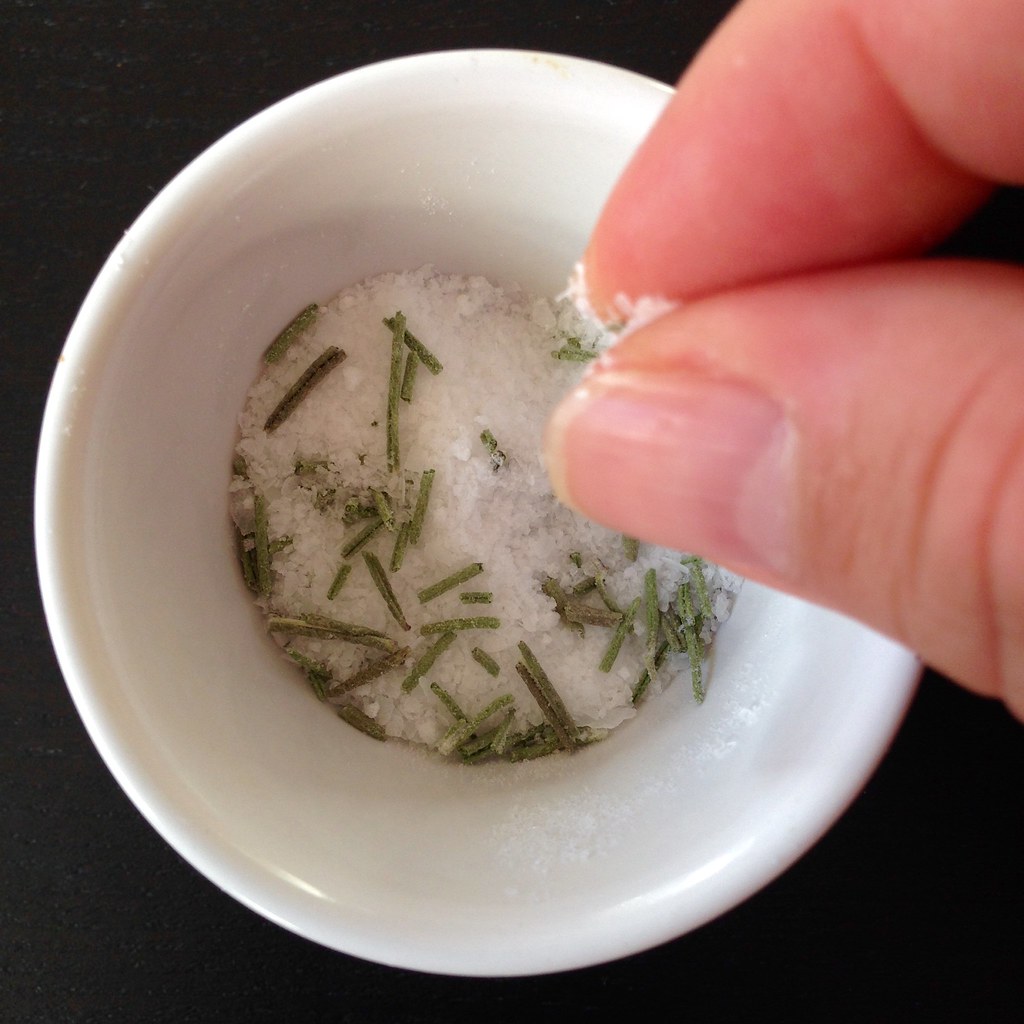
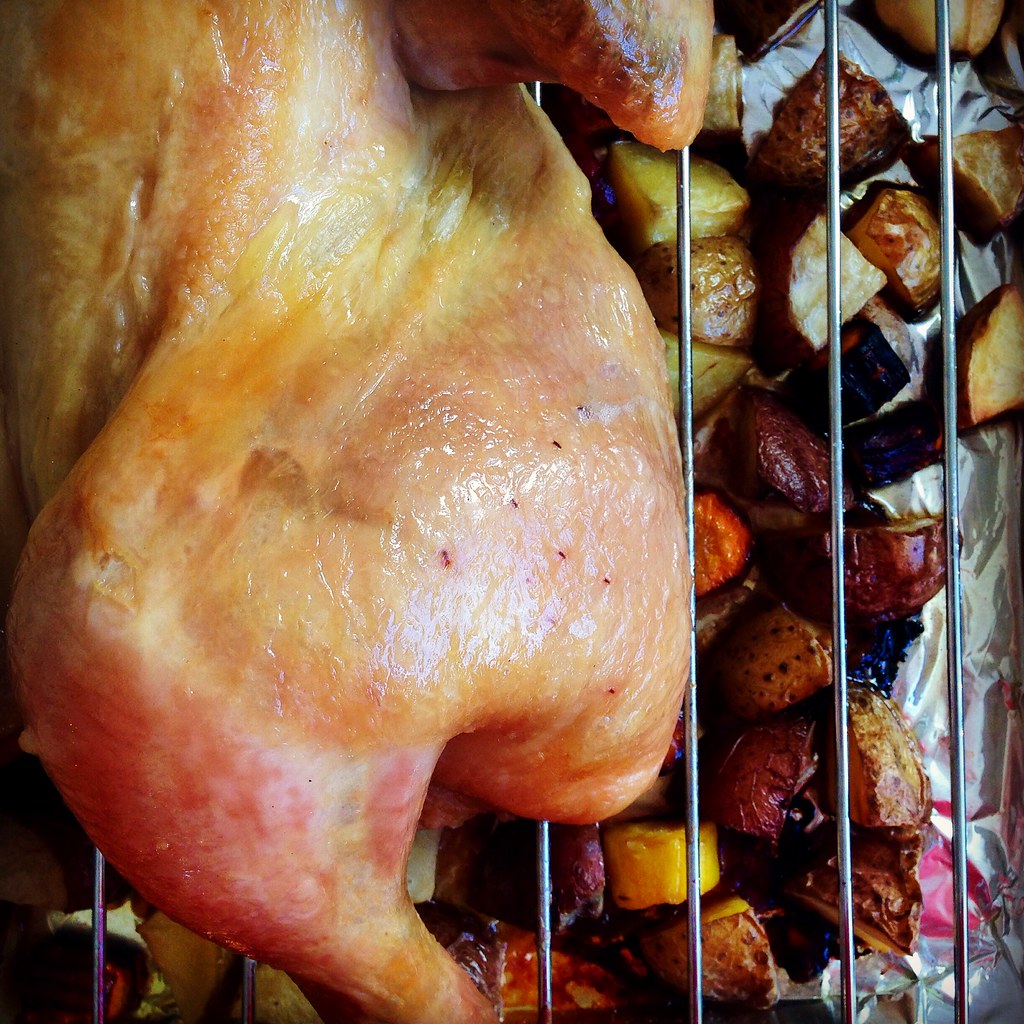
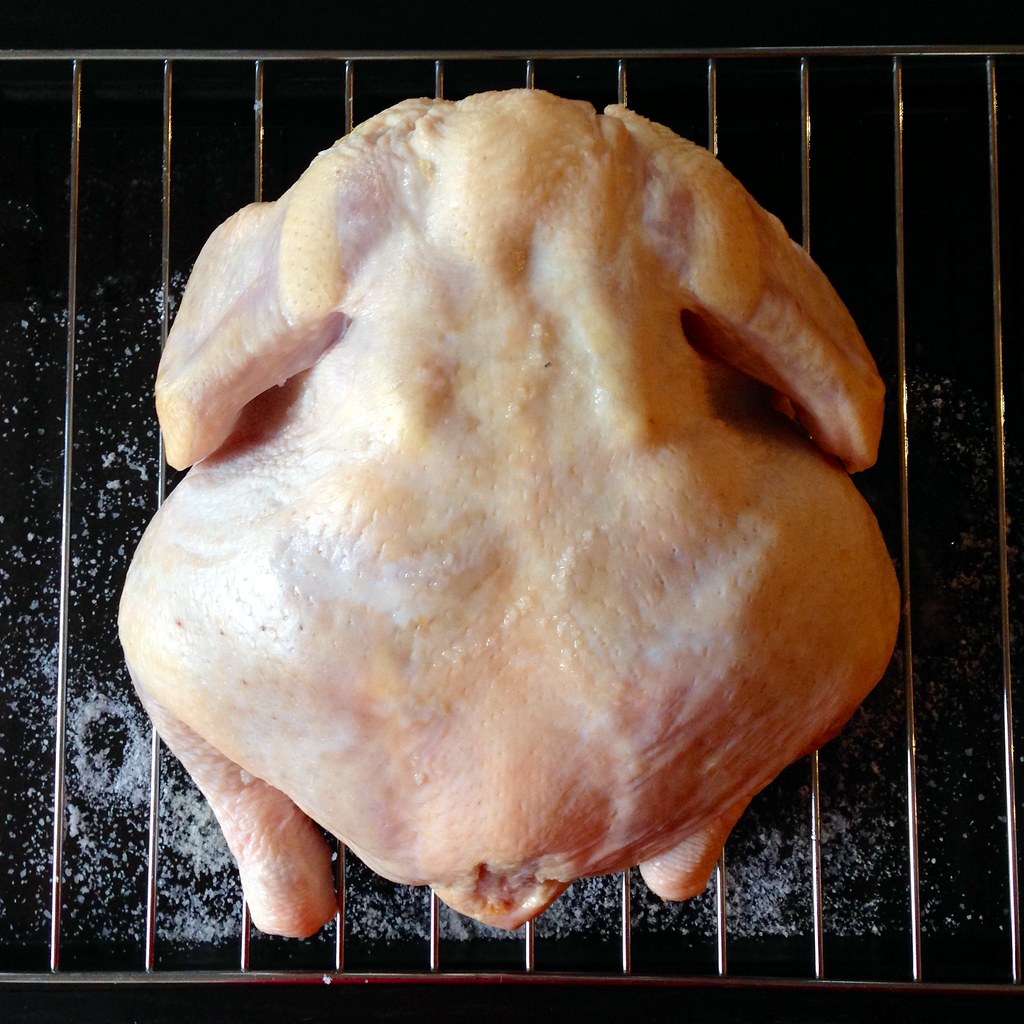
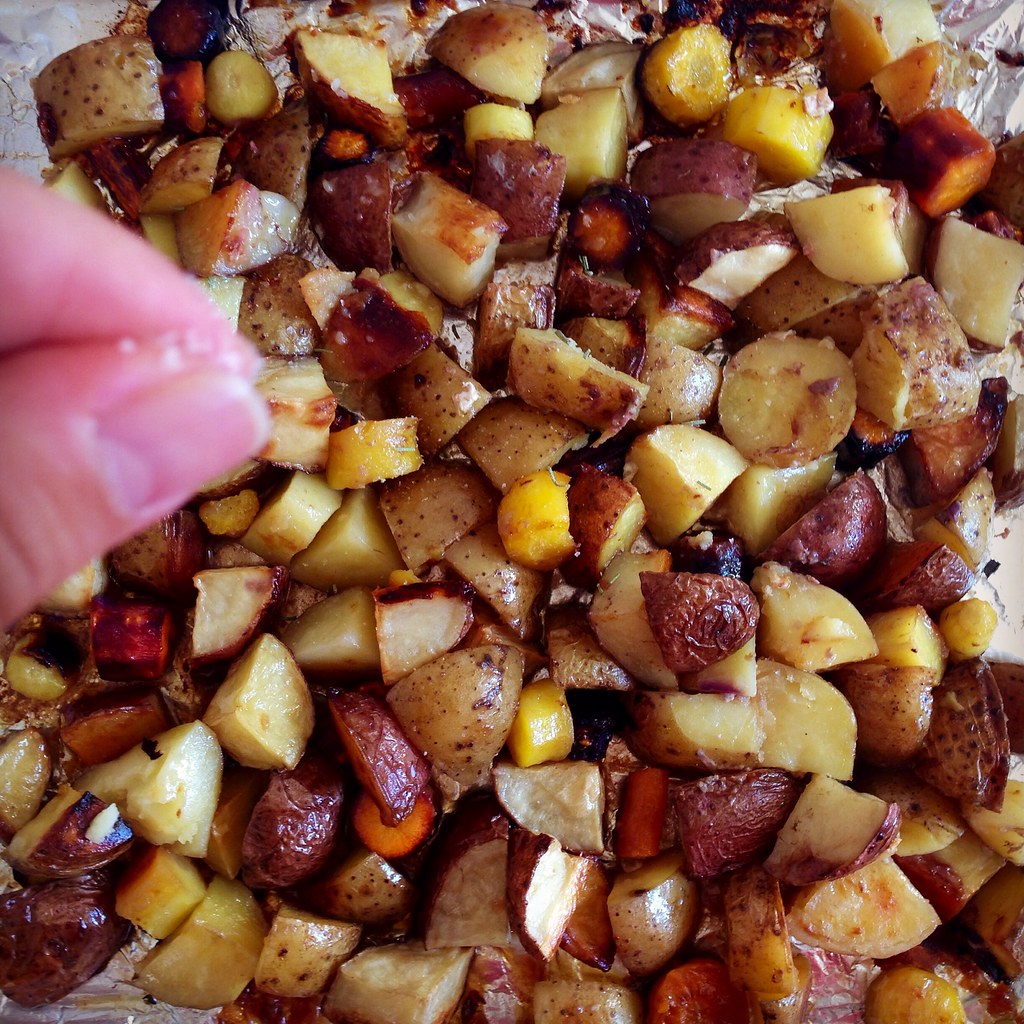
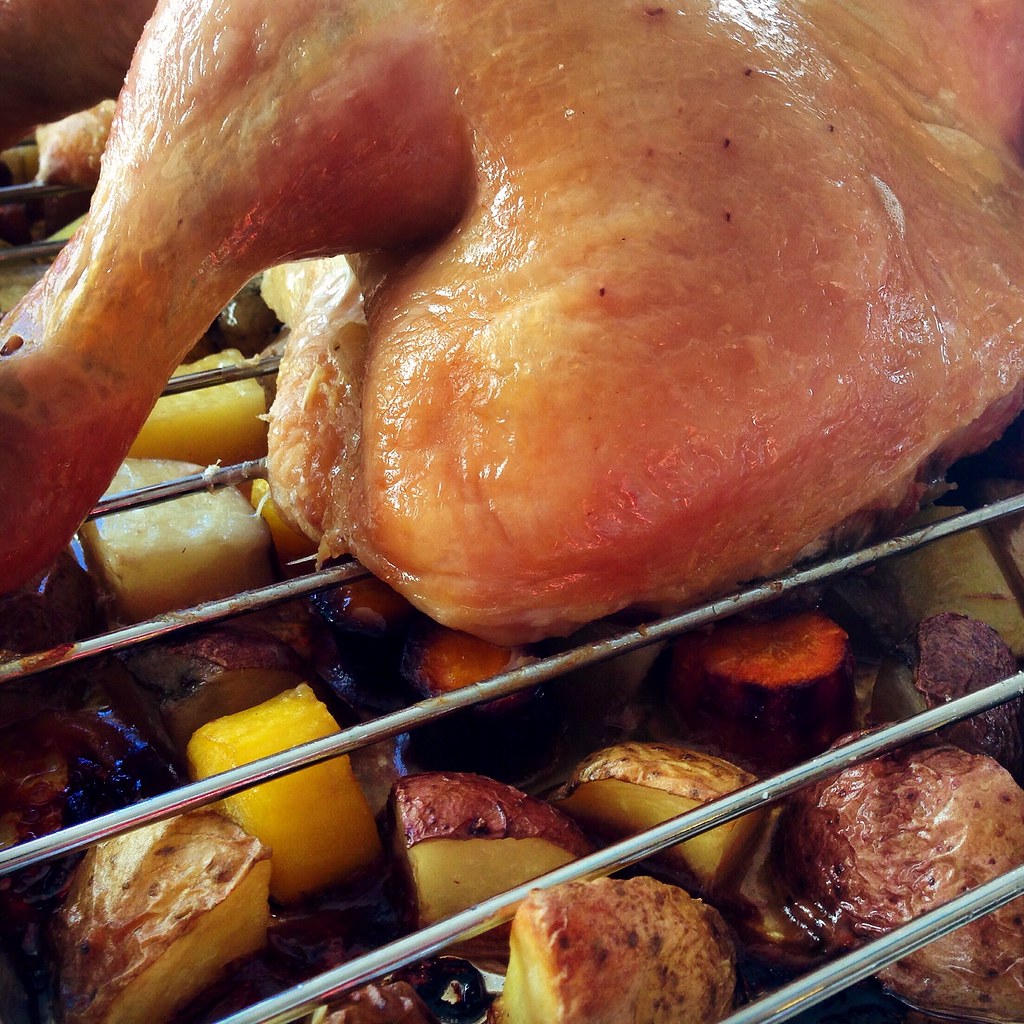
I was also inspired by The Crepes of Wrath's post to dry brine the chicken overnight and roast it on top of vegetables to catch all the delicious drippings.  It reminded me of the roasted potatoes from the Roli Roti food truck at the San Francisco Ferry Building Farmers market. They're piled underneath the spinning rotisserie meat so they absorb all the dripping goodness and then topped with a sprinkle of rosemary salt, which I totally copied here on the potatoes and multi-colored carrots I got in my recent Boston Organics delivery.

https://www.flickr.com/photos/joyosity/15556901088/

The end result is a gloriously moist, crispy skinned chicken with amazingly flavored vegetables using a bare minimum of ingredients.  You can use this same technique to make your Thanksgiving turkey, too!

https://www.flickr.com/photos/joyosity/15122371234/

Spatchcock Chicken with Roasted Root Vegetables
serves 4-6

1 large chicken
Kosher salt
Olive oil
3 lbs. root vegetables, chopped into 3/4" chunks (potatoes, carrots, onions, etc.)
1 teaspoon chopped fresh rosemary

https://www.flickr.com/photos/joyosity/15743862652/

The night before you want to roast the chicken, pat the chicken dry with paper towels.  Rub about 1/2 cup of kosher salt all over and inside the chicken, even under the skin if possible.  Place a cooling rack on top of a rimmed baking sheet and place the chicken on top of the rack.  Transfer to the refrigerator to dry brine overnight.

https://www.flickr.com/photos/joyosity/15740424491/

The next day, preheat the oven to 450°F.  Place the chicken breast side down on a cutting board.  Using kitchen shears or a sharp knife, cut out the backbone starting from the tail end.  You can save the backbone for making chicken stock and/or gravy.  Pull the bird open wider and cut through the bone in the center of the breast.  Flip the bird over and flatten so that the thighs are knock-kneed.  Fold the wings underneath.  Brush all over with olive oil.

https://www.flickr.com/photos/joyosity/15743855292/

Wash the baking sheet and line with aluminum foil.  Toss the root vegetables with a few drizzles of olive oil.  Spread on top of the foil and replace the cooling rack.  Place the chicken breast side up on the cooling rack and place the whole thing in the oven.  Roast for 30 minutes at 450°F, then turn the temperature down to 400°F and continue to roast until a thermometer stuck into the thickest part of the thigh reads 165°F (about 15-30 minutes, depending on the size of the bird).

https://www.flickr.com/photos/joyosity/15556440369/

Allow the chicken to rest at least 10 minutes before carving.  Mix a tablespoon of kosher salt with the chopped rosemary.  Sprinkle on top of the vegetables and serve alongside the chicken. 

https://www.flickr.com/photos/joyosity/15556904918/

Next:  Sriracha Popcorn
Previously:  Caramel Apple Cinnamon Rolls
Two Years Ago:  Duchikey (or Simplified Turducken)

Thursday, July 24, 2014

New England Clambake at Home

https://farm4.staticflickr.com/3915/14633377936_95dc8bf433_b.jpg

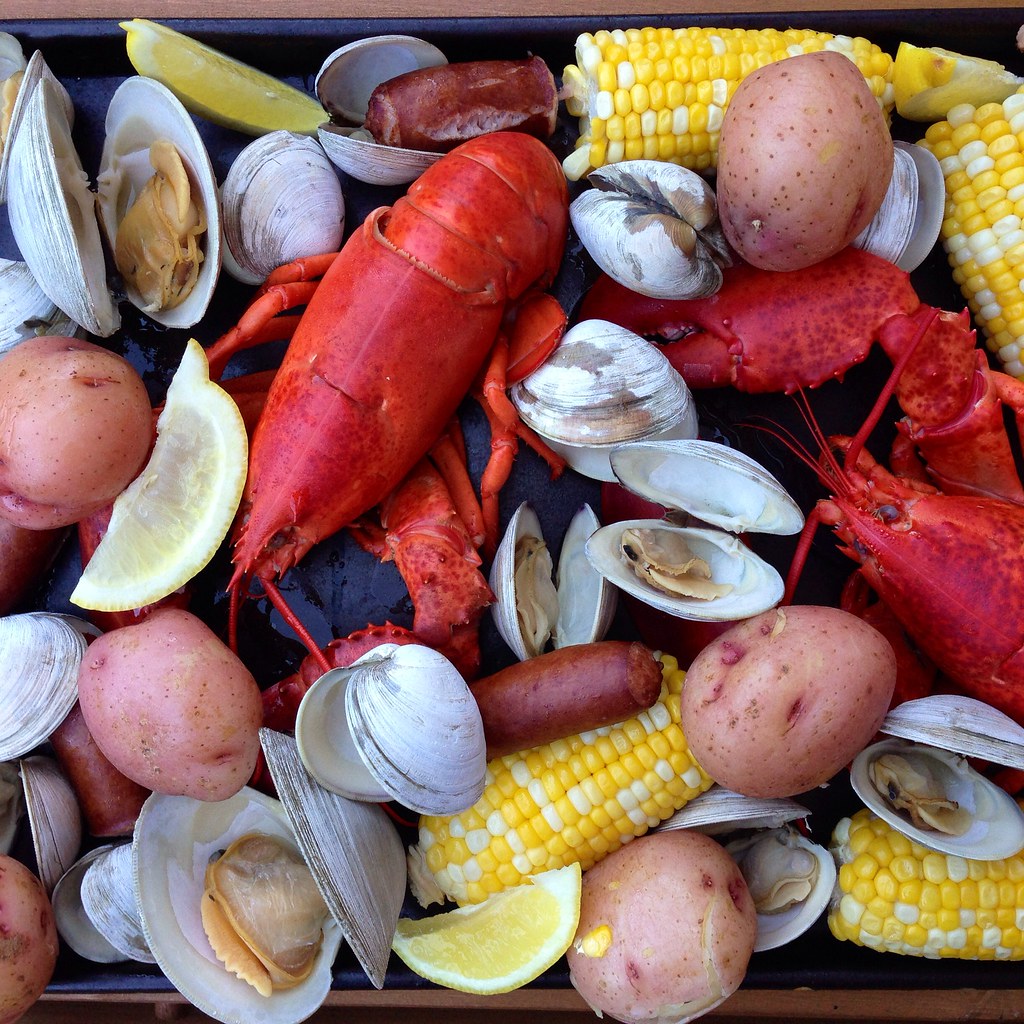
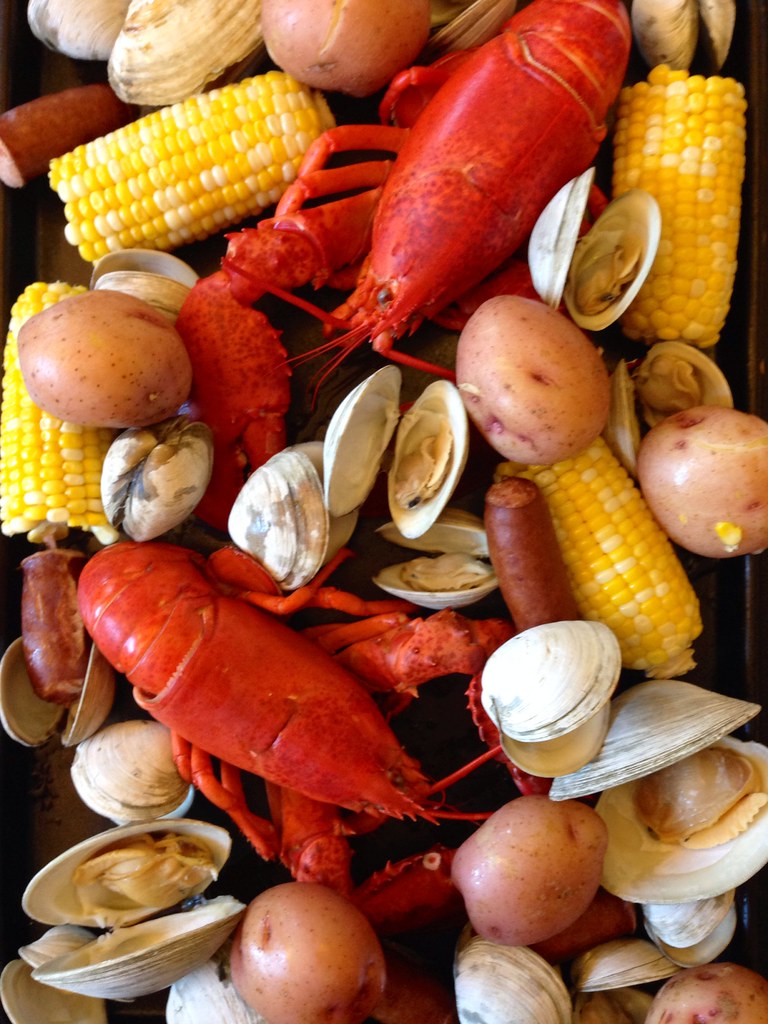
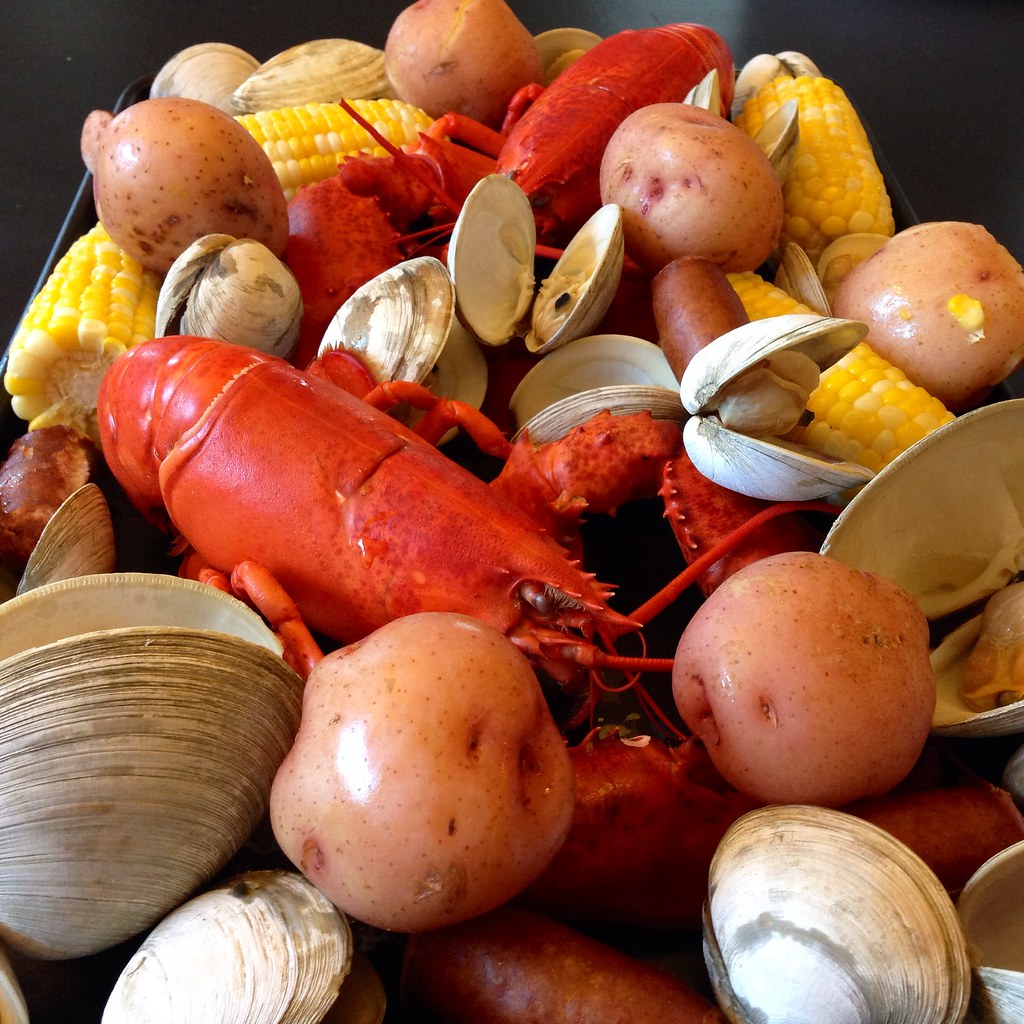
After making a low country boil, I couldn't not also do a clambake!  A traditional New England clambake involves digging a pit in the sand, building a fire, adding rocks to the pit, covering them with seaweed, layering on the food, and then covering it all up with a tarp and waiting forever for it all to cook through.  It's something I'd love to do someday, but in the meantime, here's how to do it much more easily at home (and much quicker, too!).

https://www.flickr.com/photos/joyosity/14676259523/

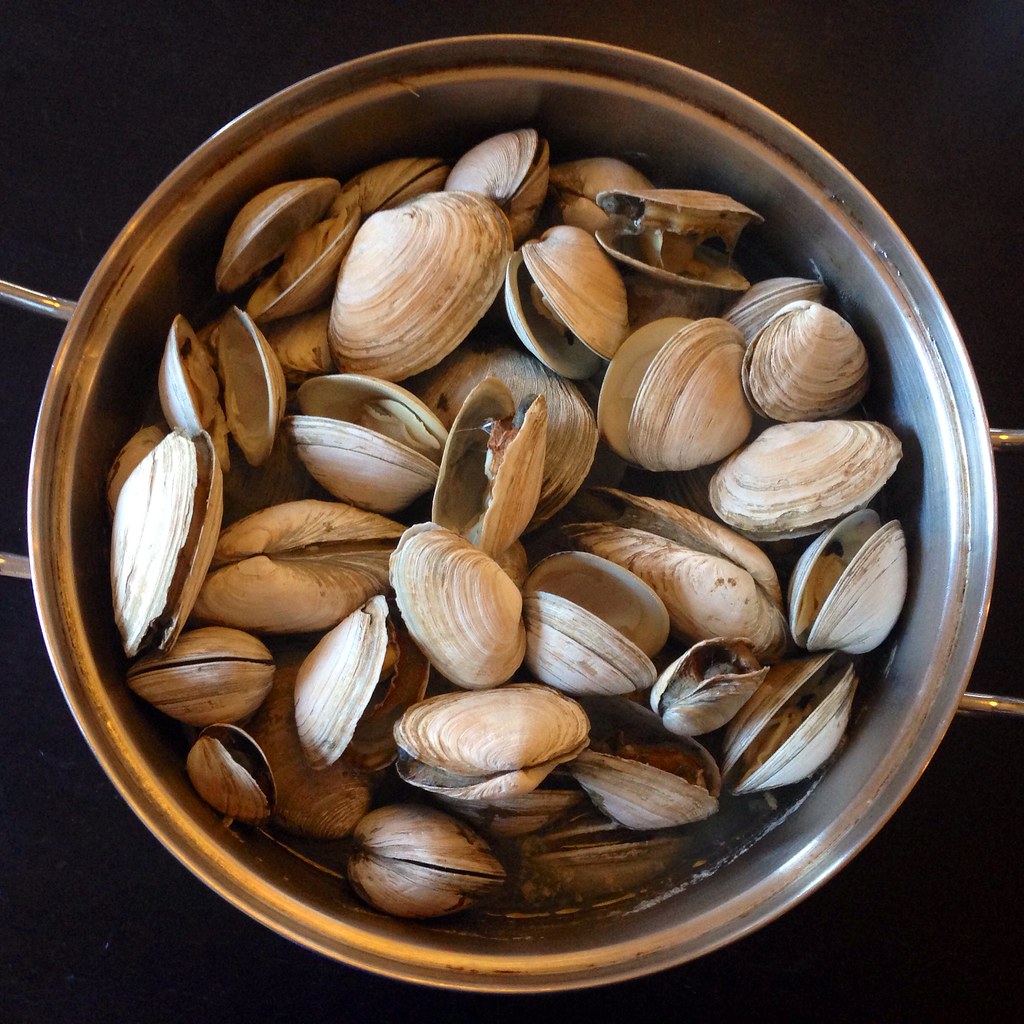
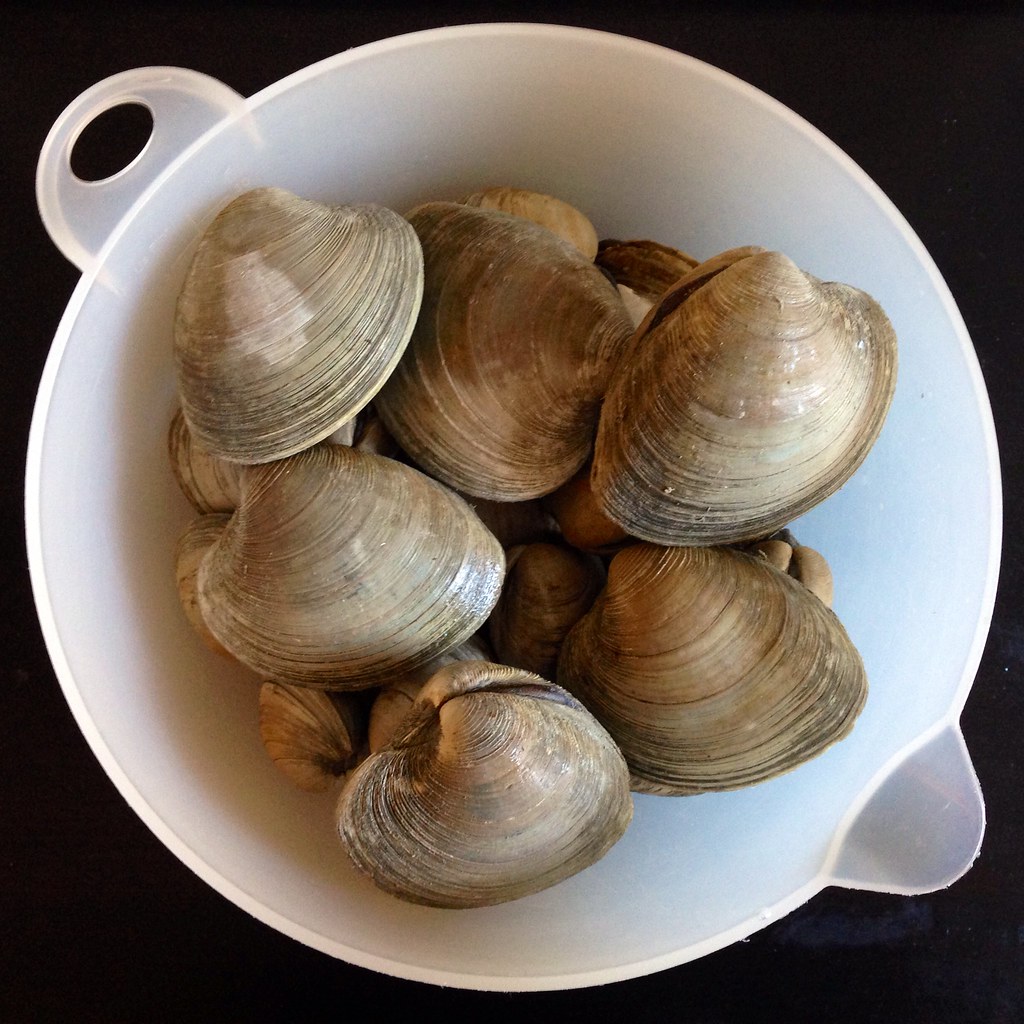
I pretty much followed this recipe from Bon Appétit, except I tried using a couple of different types of clams:  littlenecks, cherrystones, and steamers.  I decided I like littlenecks the best; the steamers were too sandy, even after letting them spit out sand in cornmeal and salt water bath, and the cherrystones were just too big and chewy.  I really only got the cherrystones, which I learned are just older, bigger littlenecks, because they were on sale for 99¢/lb!

https://www.flickr.com/photos/joyosity/14633373146/

I like how this recipe cooks the lobster first instead of steaming them at the end on top of all the other food.  My 7-quart stockpot definitely wouldn't have fit two lobsters on top of the rest of the food, and the thought of having to hold the lid down on even just one live lobster in a pot of steaming water is too much for me to deal with.  I was actually hoping to have the store just steam them for me (most grocery stores will do so for free), but there was a long wait for them to be steamed, so I just ended up doing it myself.  Since you use the water that you cook the lobsters in to cook the rest of the food, it ends up being a nice, flavorful broth that you can serve with the rest of the clambake. I use the broth to dip the clam meat in to rinse off any last bits of sand before I pop it into my mouth.

https://www.flickr.com/photos/joyosity/14469733868/

New England Clambake at Home (adapted from Bon Appétit)
serves 4

4 dozen littleneck clams (or a mix of littlenecks and steamers), scrubbed
1/4 cup yellow cornmeal
Kosher salt
Fresh ground pepper
1 lemon, sliced into rounds
1 large onion, peeled and quartered
2 celery stalks, cut in half
6 large fresh parsley sprigs
6 fresh thyme sprigs
2 small dried bay leaves
1/4 teaspoon whole black peppercorns
2 live lobsters, 1 to 1 1/2 lb. each
2 lbs. small red potatoes
4 ears of corn, husked and halved
14 oz. kielbasa links, halved
1 1/2 sticks butter
3 large garlic cloves, finely chopped
1 teaspoon dried oregano
1 teaspoon dried basil
Lemon wedges, for serving

Place the clams and cornmeal in a very large bowl and fill with enough cold, salted water to cover.  Set aside for at least 30 minutes and up to an hour for the clams to spit up excess sand.

Fill a stock pot about a quarter of the way with cold water and bring to a boil over high heat.  Add one lobster headfirst and cover.  Cook for 10 minutes, until done, and transfer to a large platter or rimmed baking sheet.  Repeat with the other lobster.

Add the potatoes and quartered onion to the pot and bring to a boil.  Cover and cook for 10 minutes.

Layer the sausages and corn on top of the vegetables and cover again, cooking for another 10 minutes.

Rinse the clams thoroughly and add on top of the corn and sausages (if there isn't enough room in the pot, you can remove the corn, which should be cooked through).  Cover the pot tightly and boil until the clams open, about 12 minutes.

In the meantime, melt the butter in a small saucepan and add the garlic, oregano and basil.  Season with salt and pepper, to taste.

With a slotted spoon, transfer the clams, corn, sausage, and potatoes to the baking sheet with the lobsters.  Sprinkle with salt and pepper and garnish with lemon wedges.  Strain the broth and pour into 4 soup cups.  Serve seasoned butter and broth alongside the vegetables, sausages, and seafood.

https://www.flickr.com/photos/joyosity/14656339795/

The next time I make this, I'll probably try reducing the amount of water in the pot, and adding some white wine or beer to steam the food with and add more flavor to the broth.

Next:  Ginger Beer Sherbet
Previously:  Taiwanese Grilled Corn
Last Year:  Vanilla Sugar Lemonade and Mint Lemonade Slushies, Martha Stewart's Perfect Macaroni and Cheese

Thursday, July 3, 2014

Low Country Boil

https://www.flickr.com/photos/joyosity/14531594466/

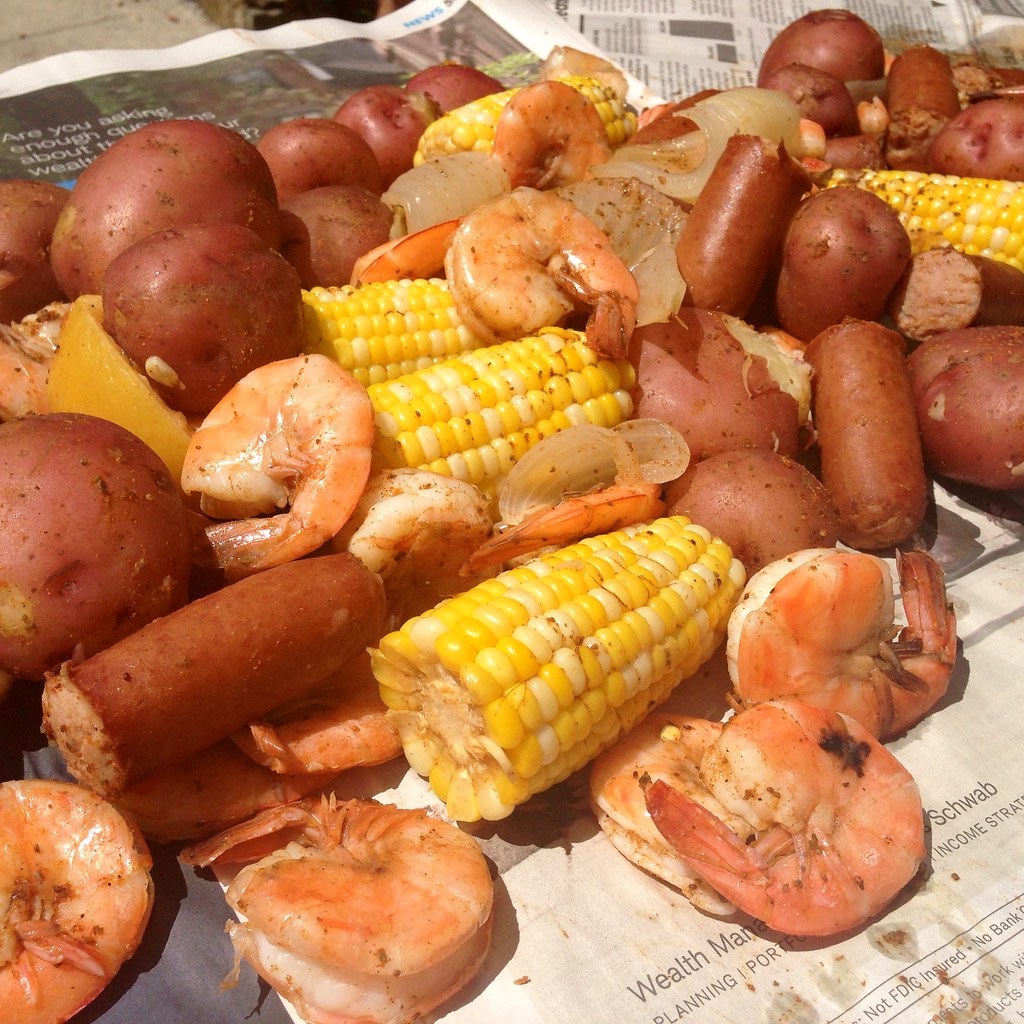
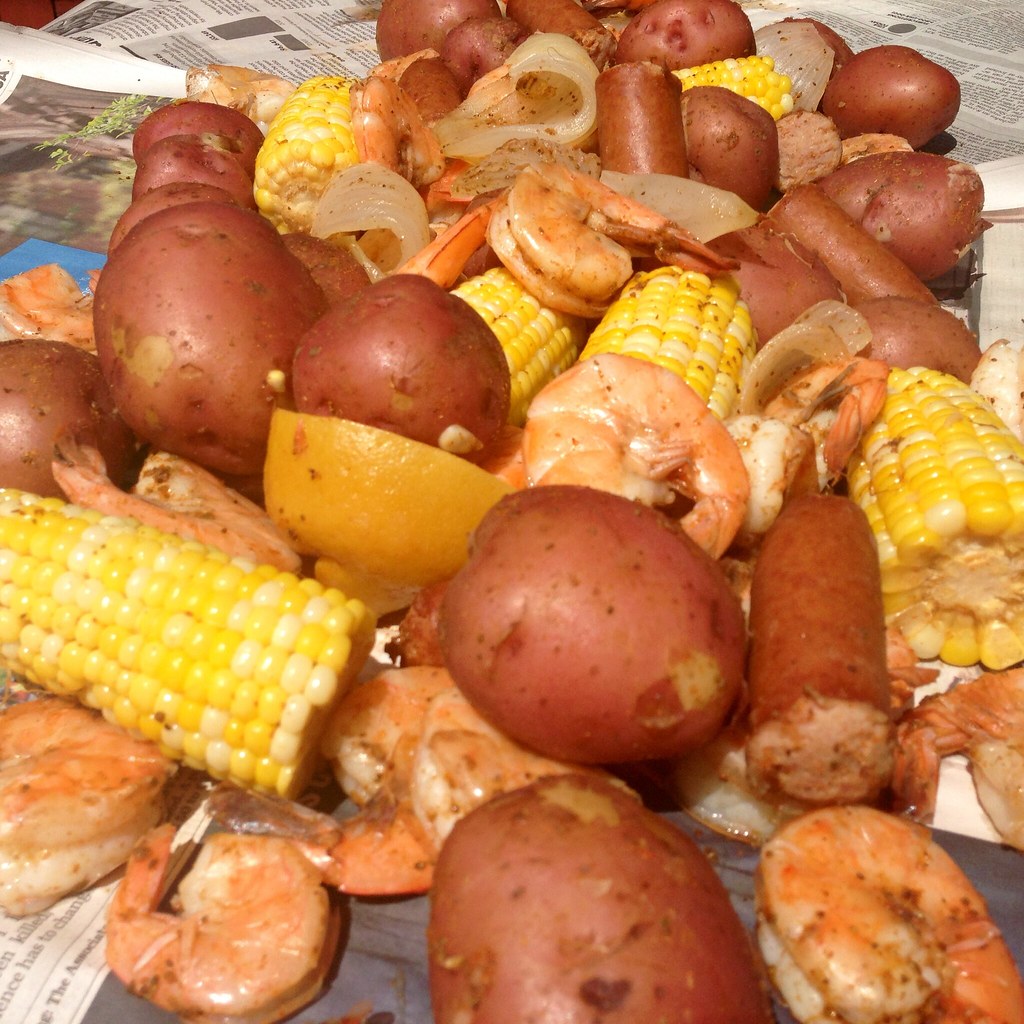
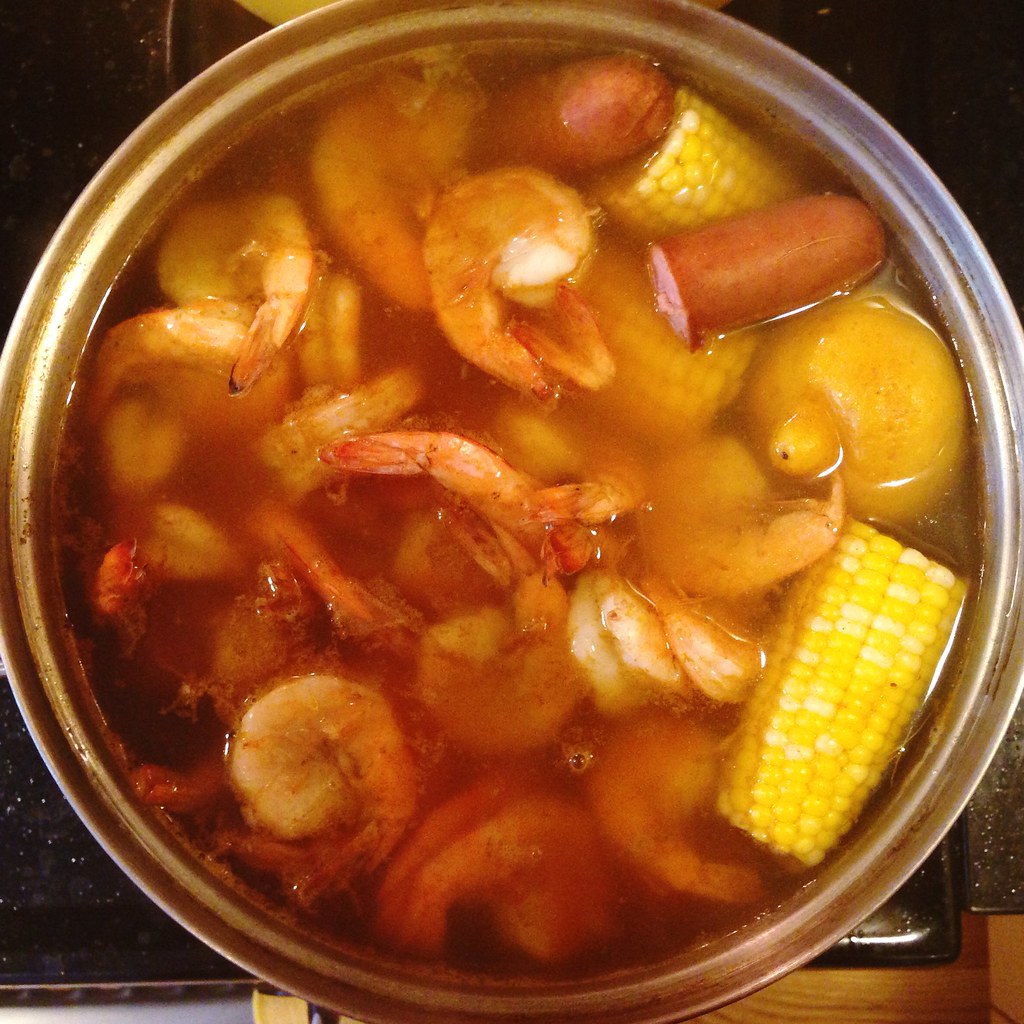
The first time I heard of low country boil was when someone posted on reddit asking for a recipe.  Intrigued, I looked it up to discover it was kind of like a clam bake, but with shrimp.  Basically, you boil a large pot of water, douse it with Old Bay or crab boil (which apparently is a spice sachet you can buy, but I couldn't find any at my local grocery store in Boston) and then add potatoes, corn, smoked sausage, and shrimp in succession.  Then you drain it, and--here's my favorite part--dump it onto a newspaper-lined table to eat outside without any plates and utensils.  How fun is that?  (Apologies for the vertical filming.)


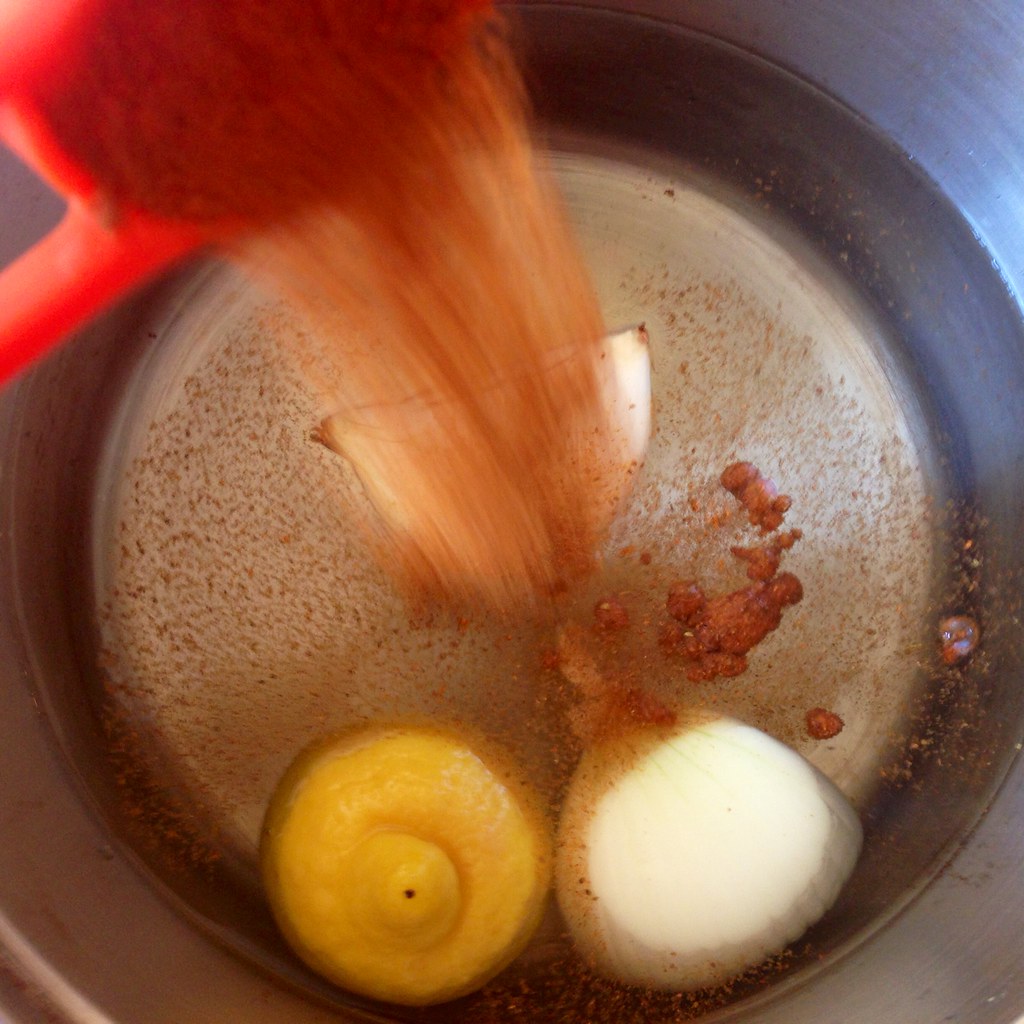
After looking up a bunch of recipes, I decided to also add a lemon and onion to the water, although I only had half a lemon and half an onion left in my fridge.  Feel free to use a whole lemon (halved) and a whole onion (quartered) if you like.  You could probably also use less potatoes, but I really wanted to leftover potatoes to make some hash the next morning, so I threw in the whole 3 lb. bag of potatoes.

Low Country Boil
serves 4

4 quarts water
1/2 lemon
1/2 onion, quartered
1/4 cup Old Bay (plus more for serving)
3 lbs. red potatoes
4 ears of corn, shucked and cut in half
14 oz. kielbasa links, cut in half
2 lbs. shell-on raw shrimp

https://www.flickr.com/photos/joyosity/14368073579/

Add the lemon, onion, and Old Bay to the water in a large pot and bring to a boil.  Add the potatoes and let cook for 15 minutes.

Add the corn and kielbasa and cook for 5 minutes.  Add the shrimp, give it a good stir, cover the pot, and turn off the heat.  Let sit for about 4 minutes, until the shrimp are pink.

https://www.flickr.com/photos/joyosity/14368227697/

Drain the contents of the pot (I just poured everything into the pasta insert that I set in my sink).  Line an outdoor table with lots of newspapers, and dump the low country boil onto the newspaper.  Serve with additional Old Bay.  Enjoy!

https://www.flickr.com/photos/joyosity/14553796462/

Next:  Watermelon Agua Fresca and Popsicles
Previously:  Papaya Milk and Papaya Milk Popsicles
Last Year:  Potatoes Boulangère
Four Years Ago:  Slow Cooker Bolognese Sauce

Friday, February 21, 2014

Hotter Crash Potatoes

http://www.flickr.com/photos/joyosity/12665582143/

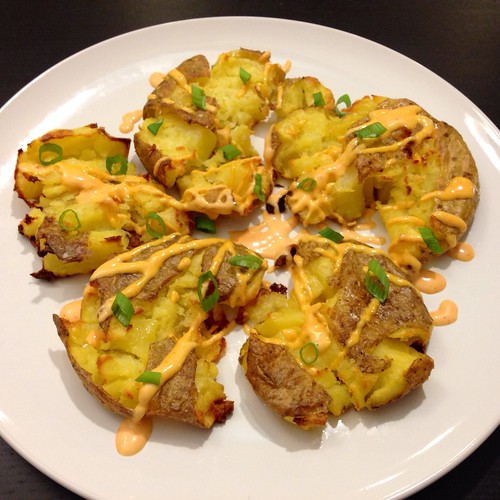
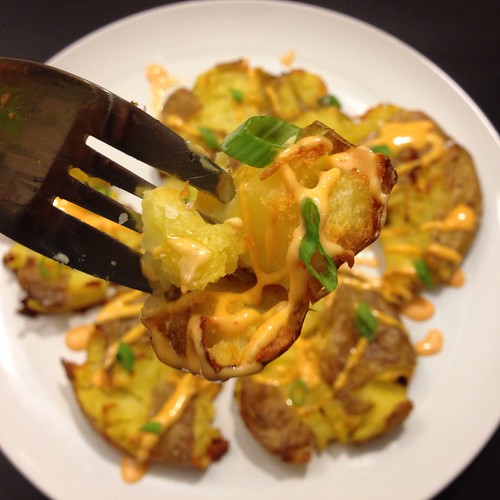
I still make hot crash potatoes almost every time I get small, waxy potatoes from Boston Organics, but this time, I wanted something with a little more kick.  So I made a quick sriracha mayonnaise and drizzled it on the finished potatoes along with a sprinkle of chopped scallions, and tada!  Hotter crash potatoes!

I also took a suggestion from one of the comments in my original post to microwave the potatoes instead of boiling them first.  The result is basically the same but in a quarter of the time!

http://www.flickr.com/photos/joyosity/12665926224/

Hotter Crash Potatoes
serves 2 as an appetizer

6 waxy potatoes
Vegetable oil
Kosher salt
2 tablespoons kewpie or regular mayonnaise
1/2 teaspoon sriracha sauce
1 tablespoon scallions, chopped

Preheat the oven to 450°F.

Place the potatoes in a microwave-safe bowl and cook for 5 minutes.  Check for doneness; if a knife pierces through the potatoes easily, it's done.  If not quite done, cook for another minute or two until done.

Line a sheet pan with aluminum foil or a Silpat.  Drizzle generously with oil.  Transfer the potatoes onto the oiled pan and smoosh with a potato masher or slotted spoon or large fork.  Crowd the potatoes close to each other and carefully drizzle more oil on top, making sure that almost all the surfaces are covered with oil.  Sprinkle with a few generous pinches of kosher salt.

Bake for 20-25 minutes until golden brown.  In the meantime, mix the mayonnaise and sriracha sauce together to make sriracha mayonnaise.

When the potatoes are done, plate and drizzle with the sriracha mayonnaise.  Garnish with a healthy sprinkle of chopped scallions.  Serve warm.

http://www.flickr.com/photos/joyosity/12665587983/

Next:  Mushroom Marsala Pizza
Previously:  Okonomiyaki
Four Years Ago:  Faux Momofuku Brussels Sprouts
Five Years Ago:  Boston Cream Cupcakes

Wednesday, July 3, 2013

Potatoes Boulangère


I got yet another pound of potatoes in my Boston Organics delivery and was trying to figure out a new way to eat it.  I love potatoes, but I was a little tired of having them crashed or dominoed.  Then while watching the season 1 premiere of Gordon Ramsay's The F Word, inspiration struck.  He made something called potatoes boulangère, which look like scalloped potatoes but without all the cheese or cream.  I had never heard of it before, and I didn't even know how to spell it, so I had to look up the episode to figure it out.

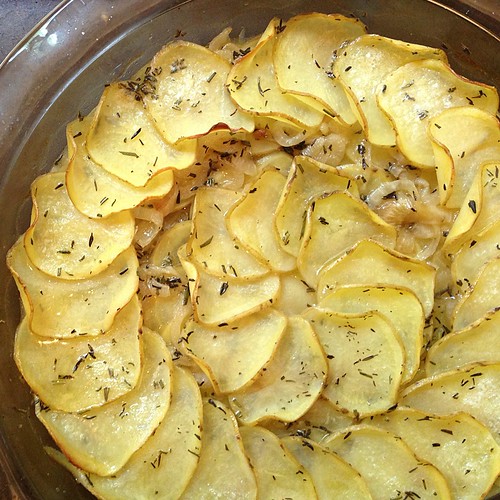
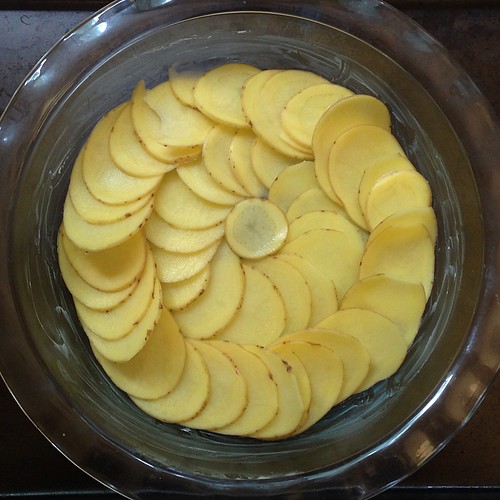
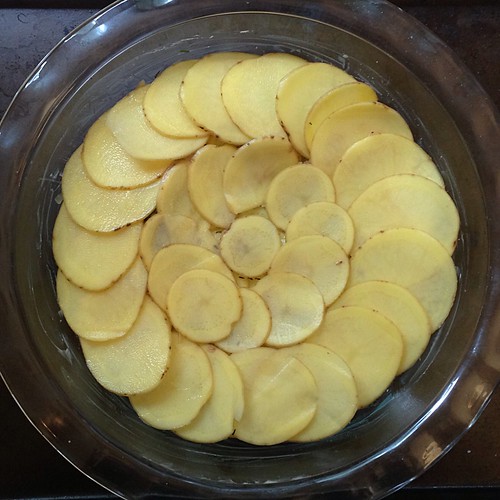
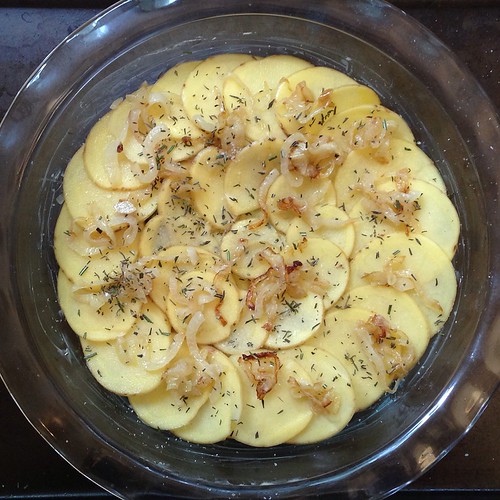
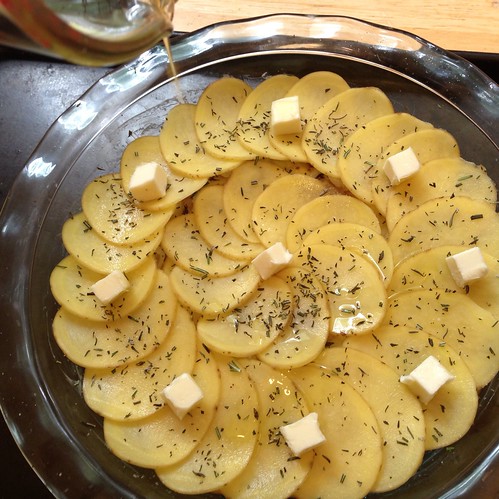
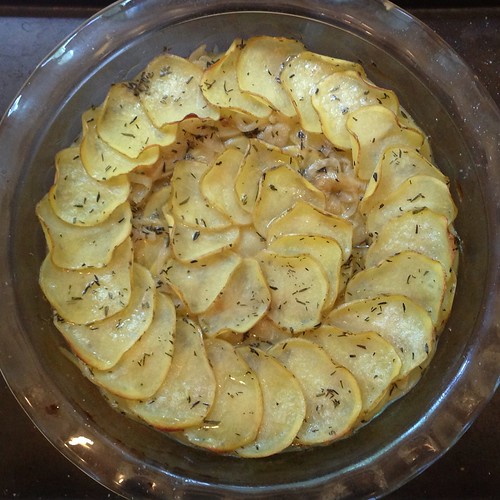
Basically, you layer thinly sliced potatoes with onions and then braise the whole thing in the oven with some stock.  It's amazingly simple, but if you take the time of arrange the layers, can look very elegant.  I chose to follow the recipe from the James Beard Foundation which has you sweat the onions first until golden, adding a some depth to the flavor.  I also sprinkled in some chopped rosemary and thyme, adding another dimension of flavor.

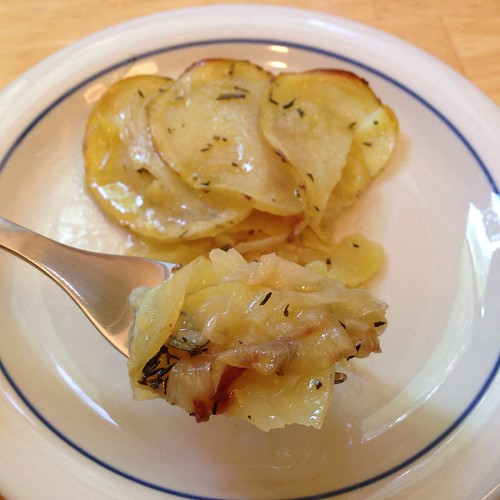
The addition of the stock and the braising method of cooking is what sets this dish apart from a potato galette.  The stock you add is absorbed by the potatoes and onions and really infuses it all with a nice shot of umami.  By braising it in the oven, you get a nice gradient of texture, from the crispy browned edges to the soft, melt-in-your-mouth layers in the middle.  It's so good I have to admit I ate half the dish in one sitting.


Potatoes Boulangère (adapted from the James Beard Foundation)
makes 2 servings

2 medium-large potatoes
3 tablespoons butter
1 tablespoon oil
1 medium onion
1 tablespoon chopped fresh rosemary and/or thyme
Salt and pepper, to taste
1 cup of chicken, beef, or vegetable stock

Preheat oven to 375ºF.


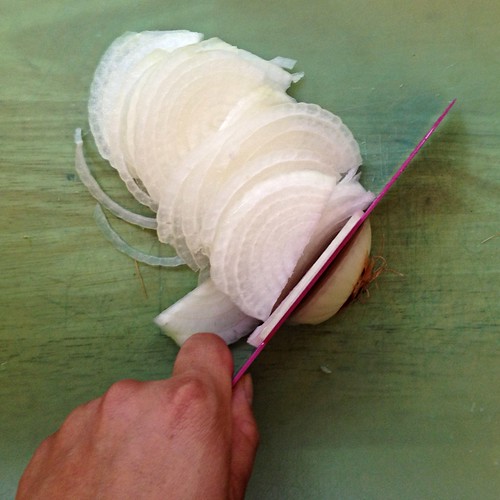
Thinly slice the onion.


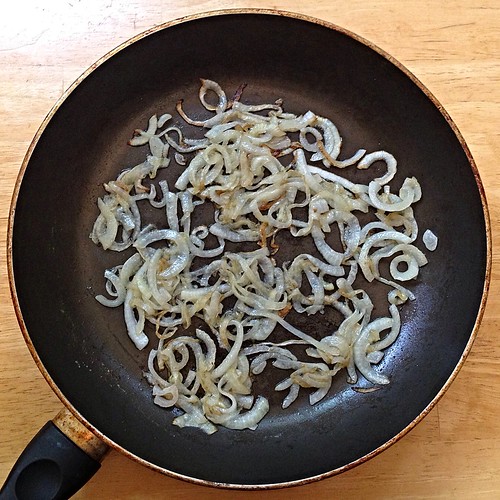
Heat 2 tablespoons of the butter and the oil in a skillet and add onions. Cook until golden and soft (not brown), shaking the pan occasionally. Drain, saving the liquid.


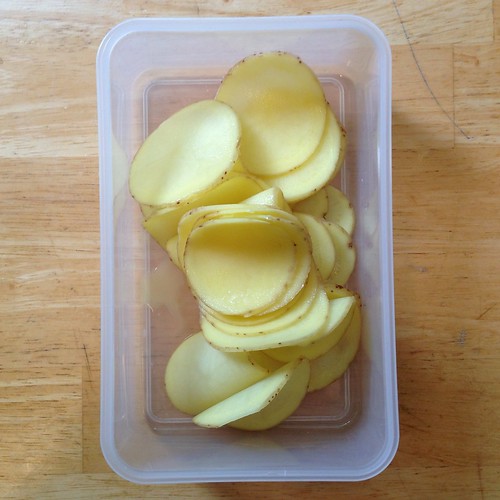
Using a mandoline, slice the potatoes into paper-thin slices.  (I left the skin on this time, but you can also peel the skin off beforehand.)


Liberally butter a 1-quart baking dish (I used a pie pan).


Put in a layer of potatoes, followed by a layer of onions. Season with the chopped herbs, salt, and pepper.


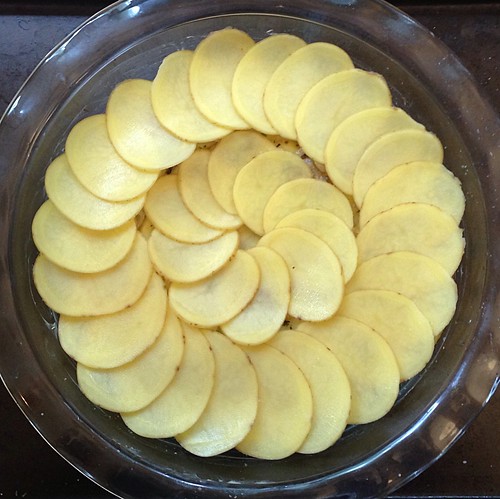
Continue to make layers of potatoes and onions, seasoning the layers, and end with a top layer of potatoes.


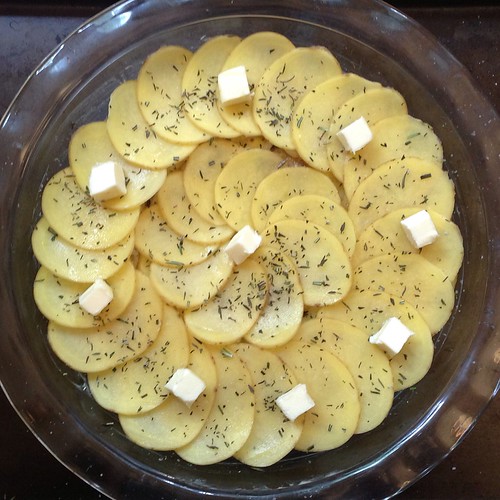
Season with more chopped herbs, salt, and pepper and dot with remaining butter.


Pour on the liquid from the onions and the stock.


Bake about 30 or 40 minutes, until the liquid has been absorbed and the potatoes test tender with a fork.


Honestly, you could just fill in all the bottom layers haphazardly and just make the top layer look all pretty, and you'd get the same effect!

Next:  Zuni Cafe's Fried Eggs in Bread Crumbs
Previously:  Bubble Tea Popsicles
Three years ago:  Slow Cooker Bolognese Sauce