1 1/4 cups granulated sugar
1 tablespoon grated Key lime zest
2 large eggs
3/4 cups self-rising flour
3/4 cup milk
3/8 cup fresh Key lime juice, divided
1 cup confectioners sugar
1 tablespoon coconut rum (optional)
Preheat oven to 350°F with rack in middle. Line a muffin tin with cupcake liners.
Toast coconut in a small baking pan in oven, stirring once or twice, until golden, 8 to 12 minutes. Cool. Leave oven on.
Beat together butter, granulated sugar, and zest with an electric mixer until fluffy. Beat in eggs 1 at a time. Stir together flour and 1/2 cup coconut (reserve remainder for topping). Stir together milk and 1/4 cup lime juice. At low speed, mix flour and milk mixtures into egg mixture alternately in batches, beginning and ending with flour.
Spoon batter into cupcake liners, filling them a little more than halfway. Bake until golden, 20 to 22 minutes.
Whisk together confectioners sugar, remaining 2 tablespoons lime juice, and rum (if using) and spoon over cakelets. Sprinkle with remaining coconut.
Showing posts with label lime. Show all posts
Monday, October 20, 2014
Elote-Style Cornbread Waffles
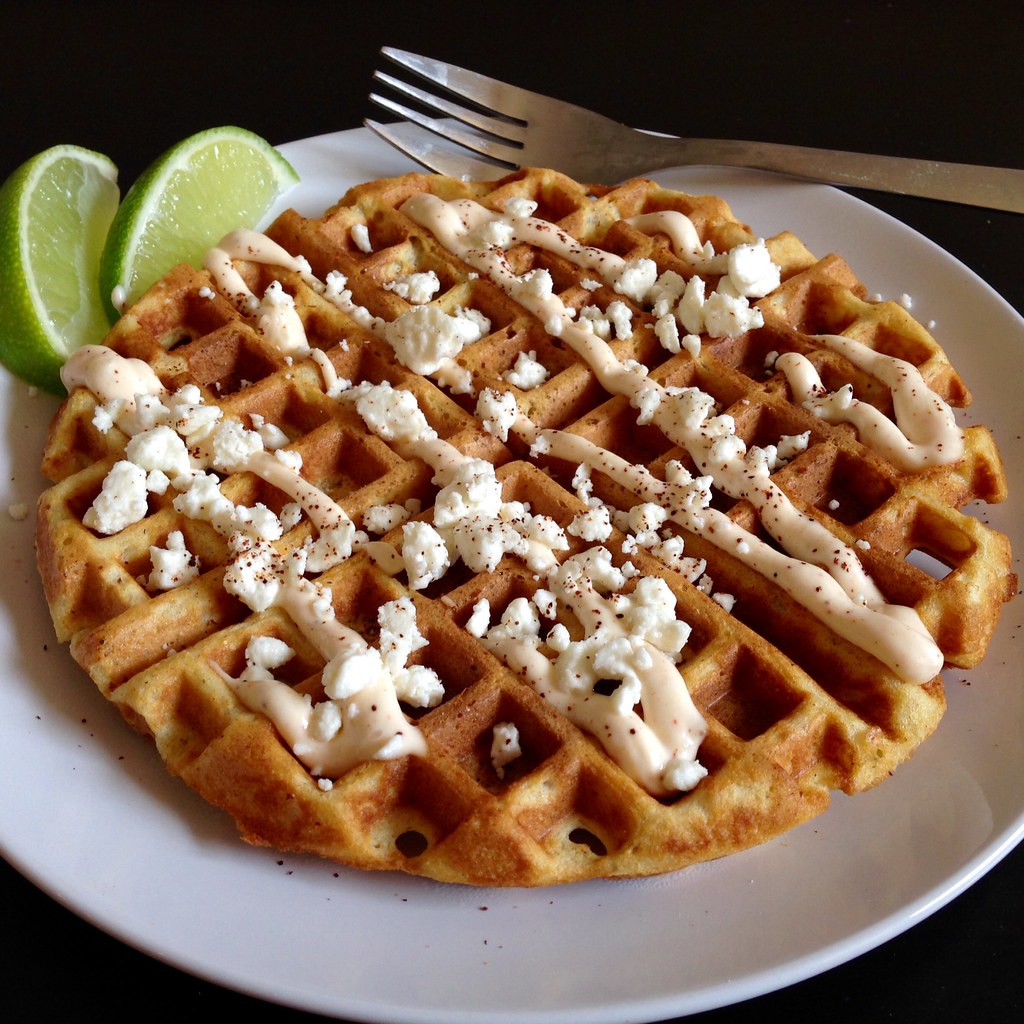
In case I haven't mentioned how much I love my church, Highrock, recently, here's another reason: we recently had a fundraiser for the Tokyo Life Church called Highrocktoberfest. How awesome is that? In addition to a competition for the best home brew, there was also a chance to win a prize for the best cornbread. At first I thought about making a sweet cornbread with honey butter, but then I came up with the idea to make cornbread waffles topped with the seasoned mayonnaise and crumbled cheese that usually goes on elote (Mexican grilled corn)!
I used the crunchy cornbread waffle recipe from King Arthur Flour and made the same mayo I had used before for elote, except I added a squirt of sriracha this time to add a bit more color and flavor. I couldn't find any cotija cheese so I just substituted with feta. I'm happy to say I won the cornbread competition with this recipe!
Elote-Style Cornbread Waffles (adapted from King Arthur Flour)
makes about 10 waffles
For the waffles:
1 3/4 cups buttermilk
2 eggs
5 tablespoons butter, melted and cooled
1 1/2 cups all-purpose flour
1 cup yellow cornmeal
2 tablespoons sugar
2 teaspoons baking powder
1 teaspoon baking soda
1 teaspoon salt
For the toppings:
1 cup mayonnaise
2 garlic cloves, minced
Juice from 1/2 a lime
Cayenne pepper
Chili powder
Paprika
Sriracha (optional)
1 cup crumbled cotija or feta cheese
In a medium-sized mixing bowl, whisk together the buttermilk, eggs, and melted butter or oil. In a separate bowl, blend together the dry ingredients, then quickly and gently combine the wet and dry ingredients. Let the batter sit for 10 minutes, to allow the cornmeal to soften.
In the meantime, mix the mayo, minced garlic, and lime juice together. Add cayenne pepper, chili powder, paprika, and sriracha (if using) to taste.
Drop the batter by 1/3-cupfuls onto a hot waffle iron and bake until the waffle iron stops steaming. Top with the spicy mayonnaise and crumbled cheese. Sprinkle on more cayenne pepper and/or chile powder as desired, and serve with lime wedges.
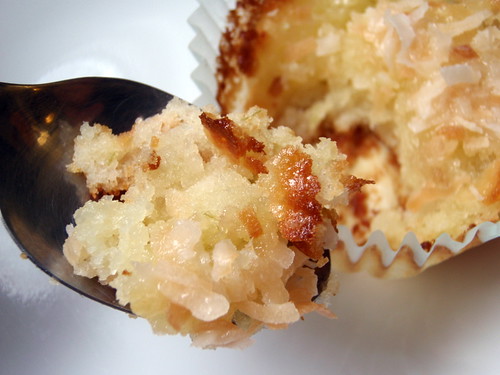
The waffles are best fresh out of the waffle iron because they start to get soft once they get to room temperature. You can always reheat them in the oven to get them to crisp up again. Since I was making these for a lot of people, I ended up cutting each waffle into eighths and serving them nacho-style. If you have the corn-shaped pans for making cornbread sticks, I think it would be really cute to dress those up elote-style as well!
Next: Nigel Slater's Chocolate Beet Cake
Previously: Jeni's Salty Vanilla Frozen Custard
Two Years Ago: Cranberry Royale Sorbet
Wednesday, August 20, 2014
Bill Smith's Atlantic Beach Pie
I've never heard of an Atlantic Beach Pie, but once I saw this post on Food52, I knew I had to make it. It's an amalgam of some of my favorite things: a salty-sweet buttery crust made out of saltines, a tart citrus filling, and a simple topping of whipped cream garnished a sprinkle of flaky sea salt. It kind of reminds me of the Momofuku Milk Bar Grapefruit Pie I made once, but a whole lot easier to make. It's no surprise that I would love a pie with this name since I'm such an East Coast kind of gal. =)
For the citrus juice that goes into the filling, I just used a half cup of the juice I got from juicing the zested lemon, lime, orange, and grapefruit I used for making the citrus cured salmon. The next time I make this, I will probably use the recommended lemon and/or lime mixture so that the tartness really shines through.
Bill Smith's Atlantic Beach Pie (adapted from Food52)
makes 1 pie
1 1/2 sleeves of saltine crackers (about 6 oz. or 60 crackers)
1/2 cup softened unsalted butter
3 tablespoons sugar
14 oz. can of sweetened condensed milk
4 egg yolks
1/2 cup citrus juice
3/4 cup heavy whipping cream, chilled
Coarse sea salt, for garnish
Preheat oven to 350°F.
Crush the crackers finely, but not to dust. You can use a food processor or your hands. Add the sugar, then knead in the butter until the crumbs hold together like dough. Press into an 8-inch pie pan. Chill for 15 minutes, then bake for 18 minutes or until the crust is golden brown.
While the crust is cooling (it doesn't need to be cold), whisk the egg yolks into the milk, then whisk in the citrus juice. Continue whisking until the mixture thickens.
Pour into the shell and bake for 16 minutes until the filling has set. Cool on a wire rack until the pie has reached room temperature and then transfer to the refrigerator. The pie needs to be completely cold to be sliced.
Whip the heavy cream just until stiff peaks appear (if you keep whipping too much you'll make butter). Top the chilled pie with the whipped cream and garnish with a sprinkling of sea salt.
By the way, this is what happens when you try to carefully cut a slice and transfer it to a plate to take a picture. Fail. Still yummy, though!
Next: Crispy Skinned Salmon Teriyaki
Previously: Citrus Cured Salmon
Last Year: Crimini Mushroom Risotto
Thursday, August 14, 2014
Citrus Cured Salmon
Ever since I saw Jen's post for Thomas Keller's citrus marinated salmon, I've wanted to try it out. I love cold-smoked salmon, and the thought that I could make something similar at home was really intriguing to me. I was in Seattle again recently, and went to Pike Place Market specifically to get another Copper River sockeye salmon just for this purpose. Since the salmon is never actually cooked, you'll want to get the freshest sushi-grade salmon available and treat it as you would if preparing sushi by keeping it chilled as much as possible.
Jen's recipe calls for a teaspoon and a half each of lime zest, lemon zest, orange zest, and grapefruit zest, but it's okay if you don't have all four citrus fruits; you just need about 2 tablespoons total of citrus zest for this recipe. Since I had the time to cure my salmon for a full 24 hours, I chose not to press the salmon while curing it, trusting that time and salt would perform the necessary osmosis.
The change in texture of the cured salmon is pretty spectacular. It's a lot more dense and almost gummy like pâte de fruit. By itself, the cured salmon can be pretty salty, but served with some crème fraîche or sour cream and crackers, it makes for a wonderfully impressive appetizer!
Citrus Cured Salmon (adapted from Tiny Urban Kitchen)
serves 6-8
Zest from 1 pink grapefruit
Zest from 1 orange
Zest from 1 lemon
Zest from 1 lime
1/2 cup kosher salt
1/2 cup sugar
1 salmon filet, skin removed (about 2 lbs.)
Mix the zests, salt, and sugar together.
Feel along the salmon and if there are any pin bones, remove them with tweezers or pliers.
Line a large tray with enough plastic wrap to completely wrap the filet. Spoon half of the salt mixture onto the tray in the shape of the filet. Place the filet on top, and spoon the rest of the salt mixture on top of the salmon. Spread the salt mixture evenly over the fish.
Wrap well with the plastic wrap, and transfer the tray to the refrigerator. Let cure for 24 hours.
Unwrap the salmon and rinse under cold water. Pat dry and transfer to a cutting board. With a sharp knife, cut thin slices at an angle against the grain.
Serve with crème fraîche, sour cream, or cream cheese and crackers or bread. I served mine with chive cream cheese and hearty crispbread.
After you've zested the fruits, you'll want to use them right away for something else or else they'll dry up really quickly. I recommend juicing them; I used the juice to make an Atlantic Beach Pie!
Next: Bill Smith's Atlantic Beach Pie
Previously: Coconut Ice Cream with Mango Passion Caramel Swirl
Last Year: Shakshuka Pizza
Tuesday, July 8, 2014
Watermelon Agua Fresca and Popsicles
I've never been a huge fan of watermelon because I think it's too hard to eat. If it's cut up in slices, I inevitably get it all over my face, and even if it's already cut up into nice cubes, I have a hard time spitting out the seeds (and even "seedless" watermelons have those little white seeds in them!).
Enter the watermelon agua fresca: all the yumminess of watermelon in drinkable form! I find that I don't even need to add any water to the blended watermelon because it's diluted enough for me over ice, but you might want to if your watermelon happens to be really sweet.
Like I did with the papaya milk, I decided to try churning the drink and then freezing it in popsicle form. I took the extra step of mixing in some chopped chocolate chips to look like (edible!) watermelon seeds, but I don't think I added enough to really get the effect I was going for so I doubled the amount below.
Watermelon Agua Fresca and Popsicles
makes 6 drinks or twenty 3 oz. popsicles
8 cups seedless watermelon flesh, cubed
2 tablespoons fresh lime juice
2 tablespoons honey, plus more for the popsicles
6 tablespoons chocolate chips, coarsely chopped (for the popsicles, optional)
Blend the watermelon, lime juice, and honey in a blender. Strain through a fine mesh sieve; you should end up with almost 5 cups of liquid.
For the agua fresca, pour over ice, dilute with water as desired, and enjoy!
For the popsicles, add another 2 tablespoons of honey and taste. Add more, if necessary, until it almost tastes too sweet. Churn the watermelon juice in an ice cream machine. When it is mostly frozen (you can stop before it reaches soft serve consistency), stir in the chopped chocolate. Fill your popsicle molds and freeze. I used about 1 1/2 cups of liquid to fill six of my 3 oz. popsicle molds.
Next: Cleveland Cassata Cake (Bonus: In a Jar!)
Previously: Low Country Boil
Five Years Ago: Curried Carrot Soup
Thursday, July 1, 2010
Coconut Lime Sorbet
Every once in a while I'll scan Craigslist to see if anyone's selling an ice cream maker with its own compressor. They're usually several hundred dollars, so it's something that would be nice to have, but definitely not necessary, especially since I have such a reliable Cuisinart ICE-20. But a couple of weeks ago, I found one being sold for only $80. I was a little suspicious so I asked the seller why he was selling it, and he said that he was getting married, and his wife-to-be wanted him to get rid of stuff. Well, I was more than happy to help him out. It was a nice surprise when he included four ice cream sundae glasses, an ice cream scoop, and two ice cream recipe books with it as well!
The ice cream maker in question is a Lello 4070 Gelato Junior, and I love it! No more needing to pre-freeze the canister; I don't even need to chill the ice cream base before starting up the machine! The only thing I miss about my Cuisinart is that I can't really get any good pictures of the ice cream as it's churning....
One recipe I really wanted to try out in my new ice cream maker was this one for coconut lime sorbet. It's definitely one of my all-time favorite ice creams to make, and even won the ice cream thrown down I participated in a couple of years ago. But it doesn't always freeze well. There's definitely been a couple of times when the Cuisinart canister started melting before the sorbet was done churning. So I knew that it would be a good way to test how well the Lello ice cream maker worked.
I've used bottled lime juice before in a pinch when I didn't have any fresh limes, and it tasted just as good. I would definitely NOT substitute coconut milk for the cream of coconut, though. Cream of coconut is a lot sweeter and fattier than coconut milk; if you use coconut milk instead it just won't have the right amount of sweetness or texture. Trust me on this one. One last thing, just as this sorbet doesn't freeze well, it also melts rather quickly, so make sure you take it out only right before you want to serve it.
The ice cream maker in question is a Lello 4070 Gelato Junior, and I love it! No more needing to pre-freeze the canister; I don't even need to chill the ice cream base before starting up the machine! The only thing I miss about my Cuisinart is that I can't really get any good pictures of the ice cream as it's churning....
One recipe I really wanted to try out in my new ice cream maker was this one for coconut lime sorbet. It's definitely one of my all-time favorite ice creams to make, and even won the ice cream thrown down I participated in a couple of years ago. But it doesn't always freeze well. There's definitely been a couple of times when the Cuisinart canister started melting before the sorbet was done churning. So I knew that it would be a good way to test how well the Lello ice cream maker worked.
Coconut Lime Sorbet (from epicurious)
makes about 1 pint
15-ounce can cream of coconut (preferably Coco Lopez)
3/4 cup water
1/2 cup fresh lime juice
In a bowl whisk together ingredients. Freeze mixture in an ice-cream maker. Transfer sorbet to an airtight container and put in freezer to harden.
I love the fact that there are only three ingredients for this sorbet; two, if you don't count the water. Also, you don't need to heat or chill the base before freezing. In fact, you shouldn't chill the base because then the coconut fat would solidify out of the mixture. What I think is kind of interesting is that it does harden when you're churning it, but since it's dissipated throughout the sorbet, it almost forms chips of coconut fat, adding a little bit of texture. I think it's almost a misnomer to label this treat a sorbet because, even though it doesn't contain any dairy, it's so super rich! The sweetness from the cream of coconut and the tartness from the fresh lime juice is also really intense. makes about 1 pint
15-ounce can cream of coconut (preferably Coco Lopez)
3/4 cup water
1/2 cup fresh lime juice
In a bowl whisk together ingredients. Freeze mixture in an ice-cream maker. Transfer sorbet to an airtight container and put in freezer to harden.
I've used bottled lime juice before in a pinch when I didn't have any fresh limes, and it tasted just as good. I would definitely NOT substitute coconut milk for the cream of coconut, though. Cream of coconut is a lot sweeter and fattier than coconut milk; if you use coconut milk instead it just won't have the right amount of sweetness or texture. Trust me on this one. One last thing, just as this sorbet doesn't freeze well, it also melts rather quickly, so make sure you take it out only right before you want to serve it.
Monday, April 6, 2009
Rainy Day Coconut Lime Cakelets
So Opening Day today got rained out. =( I had already taken the day off so when I woke up this morning (before I found out about the rainout), I decided to make the key lime coconut cake recipe from Gourmet but in cupcake form. Only I didn't have any key limes, so I just used regular limes. But I accidentally used all 1/4 cup of lime juice in the batter instead of only half the amount. And I didn't have self-rising flour, so I substituted a mixture of all-purpose flour, baking powder, and salt, only I completely misread the recipe and used 3/4 cups instead of 1 3/4 cups. Um, so what I ended up with wasn't really a cupcake, and for lack of a better term I renamed them cakelets. =)
I baked the first batch of cakelets for 20 minutes and noticed that the middle of the cakelets fell in and they were pulling away from the liner as they cooled. Also, they were still quite soft when I removed them from the tin. So I baked the next batch for 22 minutes, and while they came out a little more firm, they were a lot harder to remove from the liners. So I just used a spoon to eat those.
Even though they didn't turn out how I expected them to, much like my plans for today, at least they were still quite yummy (unlike my plans for today). They totally remind me of eating a lemon bar but in cakelet form.
Coconut Lime Cakelets (adapted from Gourmet)
makes 24 cakelets
1 cup sweetened flaked coconut
1 stick unsalted butter, softened
makes 24 cakelets
1 cup sweetened flaked coconut
1 stick unsalted butter, softened
Even though they didn't turn out how I expected them to, much like my plans for today, at least they were still quite yummy (unlike my plans for today). They totally remind me of eating a lemon bar but in cakelet form.
Subscribe to:
Posts (Atom)