Showing posts with label Chinese. Show all posts

Wednesday, August 28, 2019

Snowskin Cake Truffle Mooncakes


The mooncakes I grew up eating were the golden, baked kind--usually filled with red bean or lotus seed paste and sometimes even a salted egg yolk inside.  It's so ubiquitous that iOS has an emoji for them (while there still isn't an emoji for waffles??).  They were good, but oh so heavy and dense; it was hard to eat more than a few tiny slices.  Luckily, a few different kinds have popped up since I was a child like the swirly, flaky Taiwanese version I made a few years ago.  Even more recently, I've been seeing snowskin mooncakes where the skin is made with glutinous rice flour resulting in a soft, translucent skin.


I did some research on how to make them, and it looks like there's a hard way with a lot of ingredients and steps and an easy way with just a few ingredients and no steaming involved.  I already know how difficult it can be to work with mochi, so I went with the easy way by following the directions from Kirbie's Cravings and Tiny Urban Kitchen.

The first step is either sourcing roasted glutinous rice flour or making your own.  Since I already had some flour at home, I tried dry roasting it in my wok.  It's not hard to do, but it does take a little patience and a lot of stirring before you get that first wisp of smoke.  Then you sift it together with powdered sugar before rubbing in a fat like shortening.  I've tried using coconut oil and butter and both tasted great, but since butter has a slightly higher melting point, it's easier to work with.

The hardest part for me was figuring out how much liquid to add to make the dough.  If you don't add enough it'll be too crumbly to work with, and if you add too much, it'll be too sticky.  I found the hard way that if you overdo it with the liquid, you can add in some more powdered sugar to bring it back to the right consistency.


Then there's the matter of the filling.  I knew I didn't want to go with the traditional heavy fillings and wanted to come up with something that might be more accessible for the American pantry and palate.  It had to be something pliable enough to mold, firm enough to keep its shape, wouldn't need additional cooking, and hopefully stable at room temperature.  I considered a cheesecake type filling or cookie dough before I thought of an even better idea:  cake truffles!  You may know them as cake balls or cake pops, but it's what you get when you mix cake crumbs with frosting or another binder, roll them up and cover with chocolate or candy melt.


It's incredibly easy to make and there's a million different variations.  I made some to bring to a friend's birthday party, and since she loves watermelon, I baked a strawberry box mix cake, mixed it with some frosting and mini-chocolate chips, and wrapped it with pandan flavored snowskin so it looked like a watermelon.  I also make some with non-dyed snowskin and Funfetti cake inside for a birthday cake mooncake.  My favorite version so far has been using the chocolate chip-passion fruit cake truffle from All About Cake and wrapping it with a snowskin made with passion fruit pulp instead of water.


Snowskin Cake Truffle Mooncakes
makes about 35 mooncakes using a 50 g mooncake mold

For the cake truffle filling:

9"x13" cake, baked and cooled
Mix-ins like mini-chocolate chips or sprinkles (optional)
Binder, like frosting or fruit juice

Use your hands to crumble the cake into crumbs.  Add your mix-in, if using, and toss to combine.  Add your binder, a little at a time, until you can squeeze the mixture and it holds its shape.  Use a cookie dough scoop to form about 35 balls.

For the snowskin:

250 grams sweet glutinous rice flour
225 grams powdered sugar, plus more for rolling
75 grams butter or coconut oil
125 grams water or other liquid like fruit juice
Food coloring and/or flavor extract, optional

In a large skillet or wok, dry roast the rice flour over medium heat, stirring constantly, until it starts to smoke and change color.  Allow to cool to room temperature, then sift together with the powdered sugar into a medium bowl.  Add the butter or coconut oil and then rub it into the dry mixture until well combined.  If using the food coloring and/or flavor extract, add to the water.  Add half of the liquid to the bowl and mix together.  Gradually add more of the liquid until the mixture is soft and pliable but not tacky.  It's a fine line between a crumbly and sticky texture so go slowly.

Pinch off about a walnut size lump of the mixture and roll out into a thin disc on a surface dusted with powdered sugar.  Wrap the snowskin around one of the cake balls.  If there is extra snowskin after wrapping the cake ball, pinch it off and return it to the rest of the mixture.  If you need more, pinch off a bit from the mixture and patch up the hole.  Place the wrapped cake ball on the counter, seal side down, and make sure it will fit into the mooncake mold.  If it is too wide, use your hands to gently shape it narrower and taller.  Use a 50 g mooncake mold to press it into shape and release.  Repeat with the rest of the snowskin dough and cake balls.  You can store the mooncakes in an airtight container in the fridge for 1-2 days or 1-2 weeks in the freezer.  Let thaw before serving.


Previously:  Mochi Waffles

Friday, December 15, 2017

Pork, Cabbage, and Tofu Dumplings


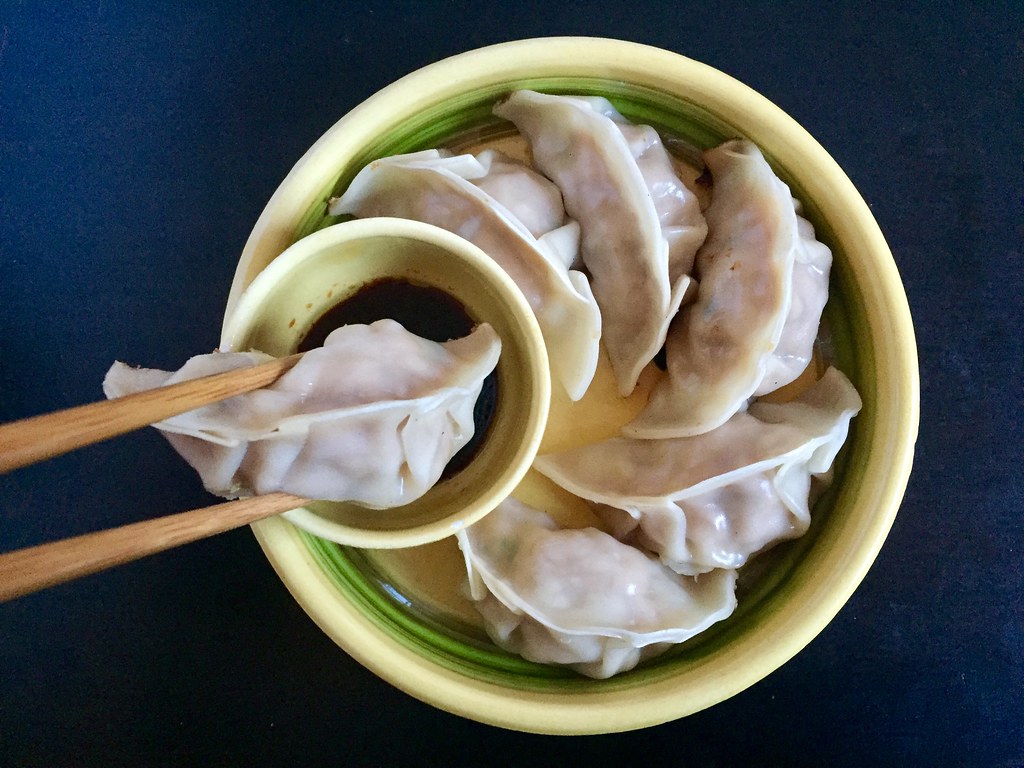
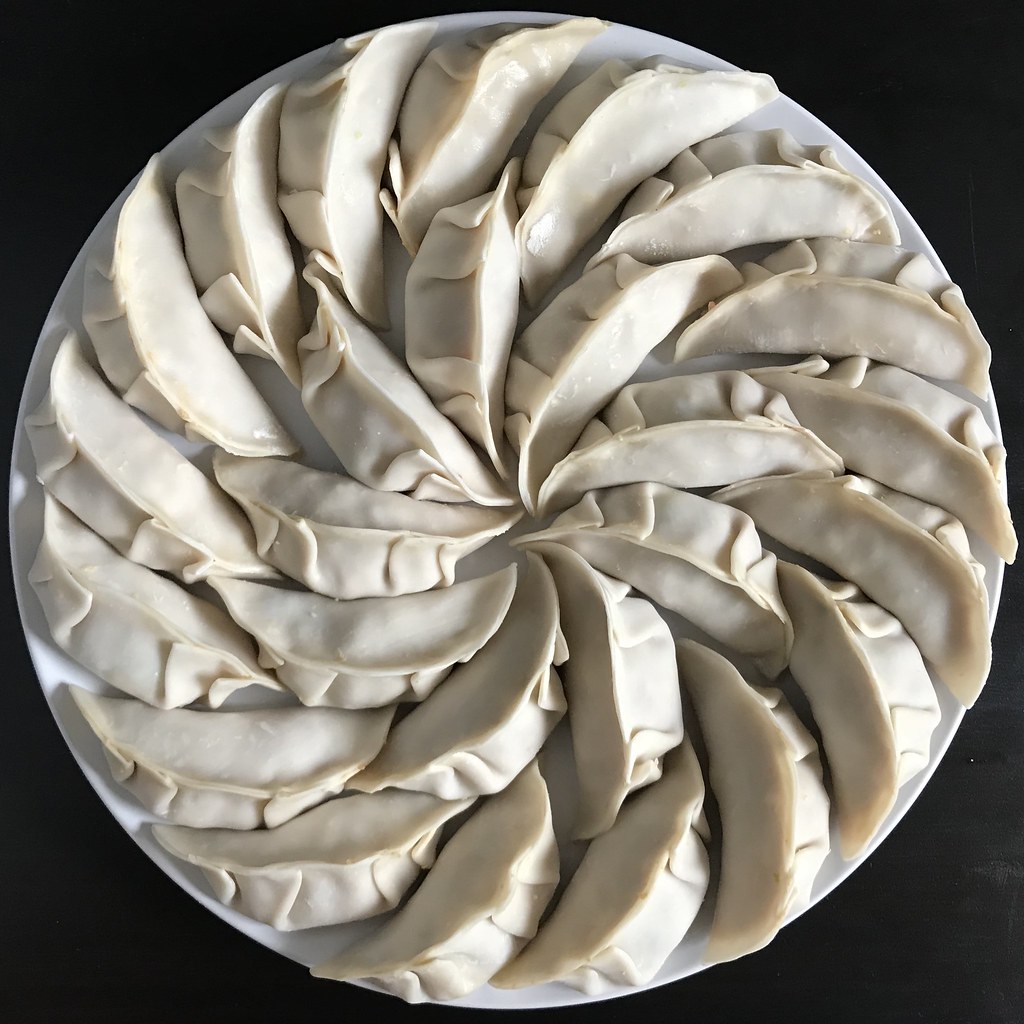
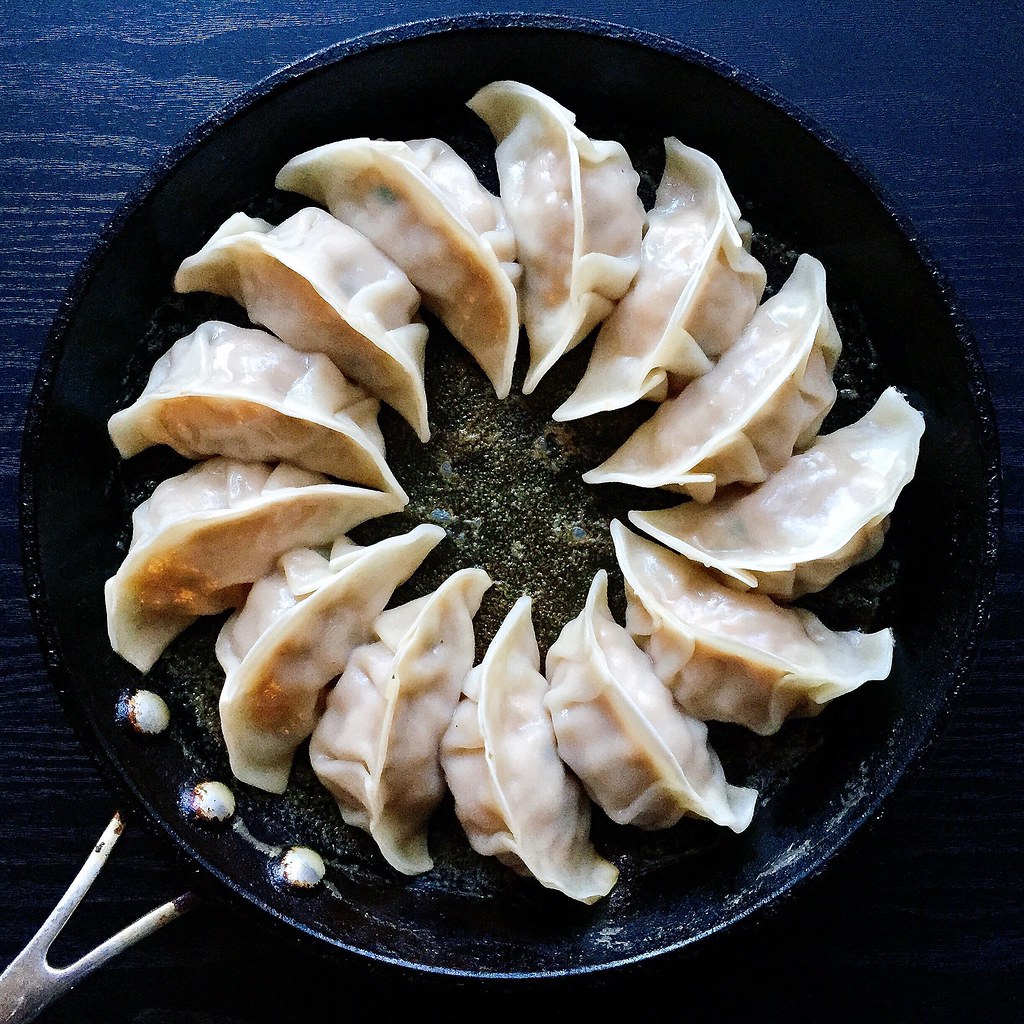
Next up in my updated posts is my mom's pork and cabbage dumplings!  I made these slightly healthier by substituting some of the pork for tofu and reducing the soy sauce, sesame oil, and sugar a bit.  See my original post from 9(!) years ago for a lot of tips and tricks to making and cooking the dumplings (as well as to see how my photography skills have improved over the years, haha).


Pork, Cabbage, and Tofu Dumplings
makes about 80

1-1.5 lbs. ground pork
1 medium head of napa cabbage, roughly chopped
1/2 teaspoon salt
19 oz. firm tofu
2 bundles of bean thread vermicelli
4 scallions, chopped
1/2 cup soy sauce
4 tablespoons sesame oil
1 tablespoon sugar
80 dumpling skins (about 2 packs)

Press the tofu between a couple layers of paper towels for 15 minutes.  Soak the bean thread vermicelli in lukewarm water for 15 minutes.

Use a food processor to finely chop the napa cabbage and transfer to a large bowl.  Mix the salt in and let rest for 15 minutes.  Squeeze handfuls of the cabbage over a sink to discard the water that's been released.  Add the squeezed cabbage back to the large bowl after drying it out.  Chop the softened noodles and add to the cabbage.  Crumble the tofu into the bowl and add the pork.  Add the scallions, soy sauce, sesame oil, and sugar and mix well.

Fill the dumpling skins and seal the wrappers with a little water on the edges.  Boil or steam-fry the dumplings and serve.  If not eating immediately, place the plates of filled dumplings in the freezer until firm, then transfer to freezer bags.


Next:  Candied Carrot Rose Tart
Previously:  My Mom's Steamed Bao Buns
Last Year:  Pull-Apart Scallion Swirly Bread
Three Years Ago:  Puppy Chow Pie
Four Years Ago:  Miso Pumpkin Soup
Five Years Ago:  Homemade Ramen Noodles
Eight Years Ago:  Tim Tam Slam Ice Cream
Nine Years Ago:  Pork and Cabbage Dumplings

Wednesday, December 6, 2017

My Mom's Steamed Bao Buns


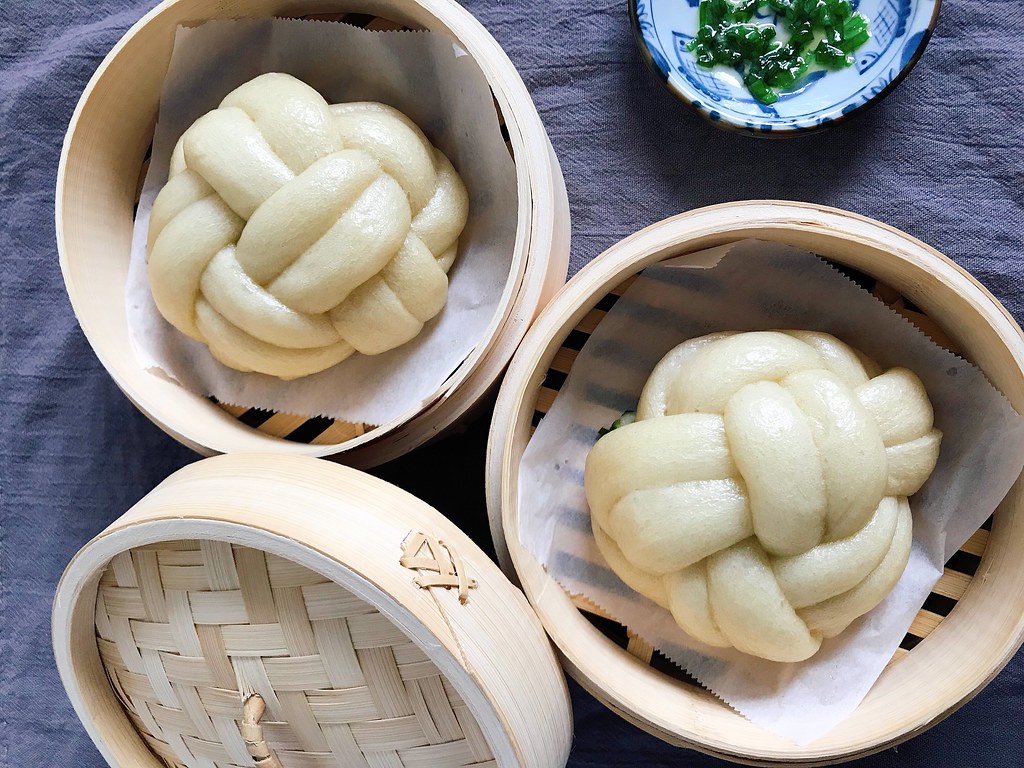
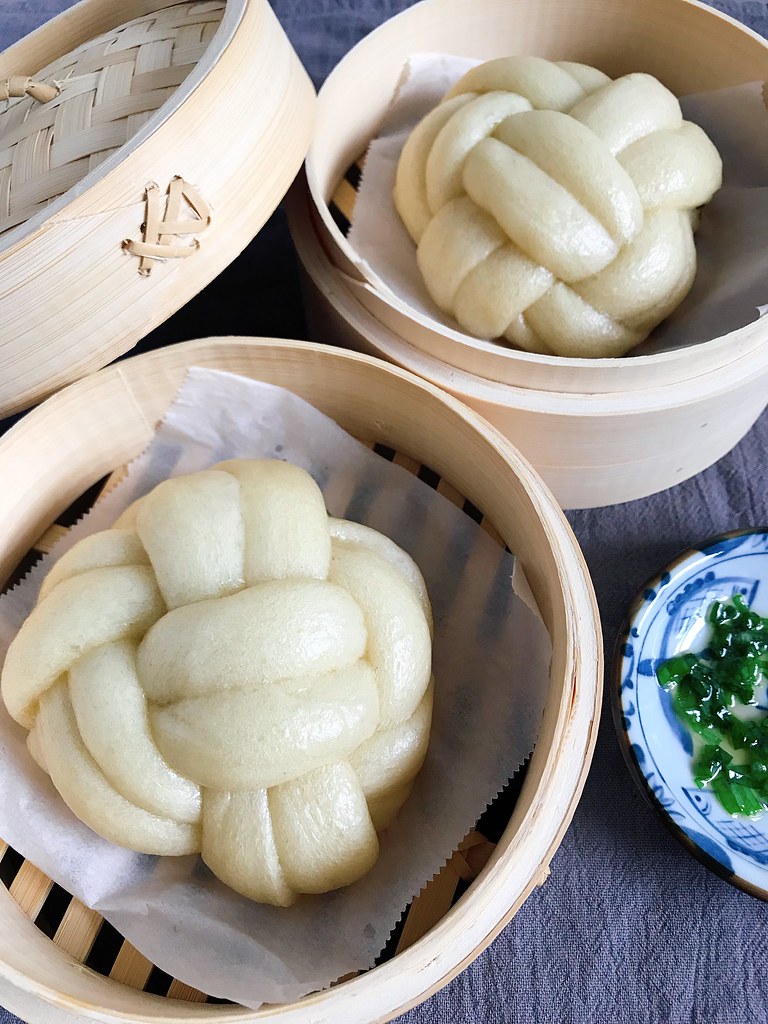
I first wrote up my mom's hua juan recipe almost 9 years ago so I figured it's time to give a little update.  You can use this recipe to make regular steamed mantou, or fill them to make different types of baozi, but my favorite is still hua juan, which is just the regular bao dough with a sesame-scallion glaze twisted into a flower shape.

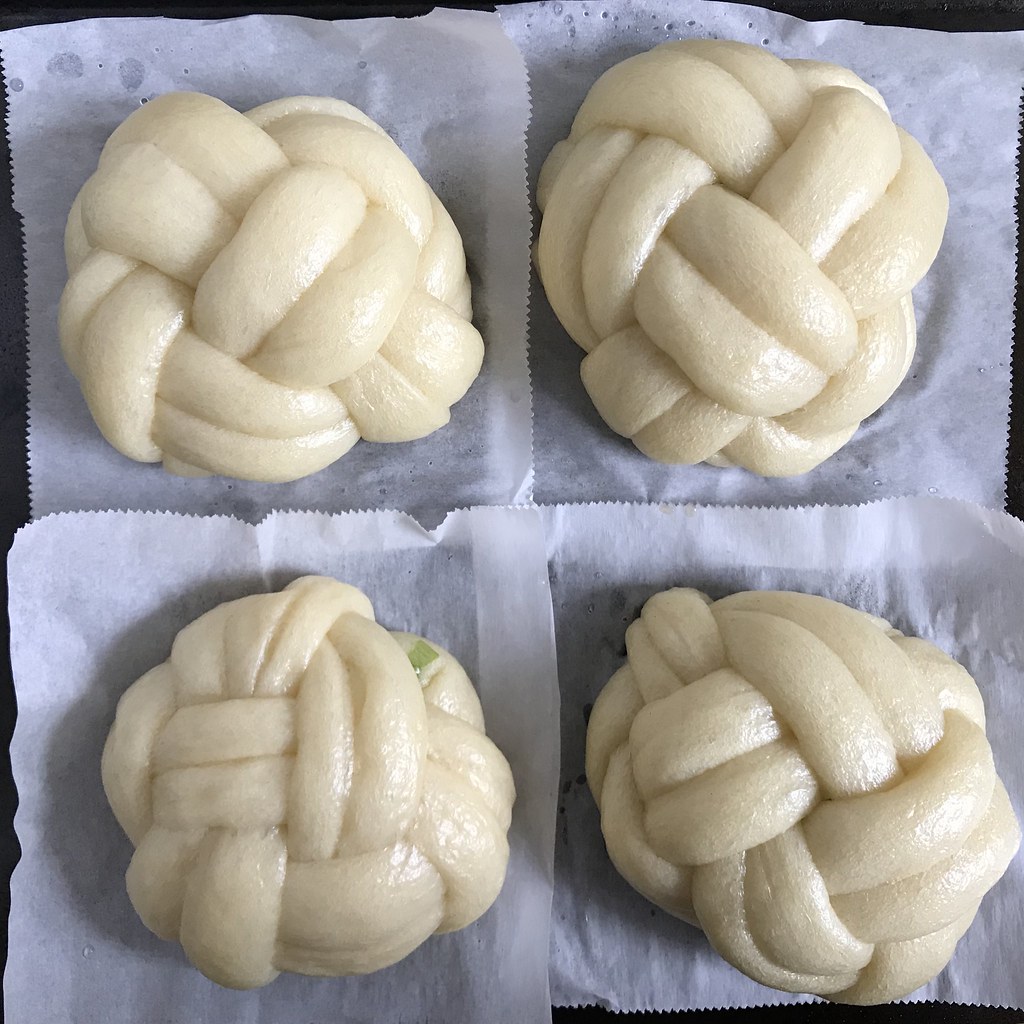
I recently came across this new way to shape bread called a Winston knot.  There aren't many videos of how to make it online, and the one I used wasn't even that good, but once you get the idea it's pretty easy.  You can make it with two single strips or two double strips like I did here.  I think the most popular one I've seen is with two triple strips; the resulting bun looks like a volleyball!

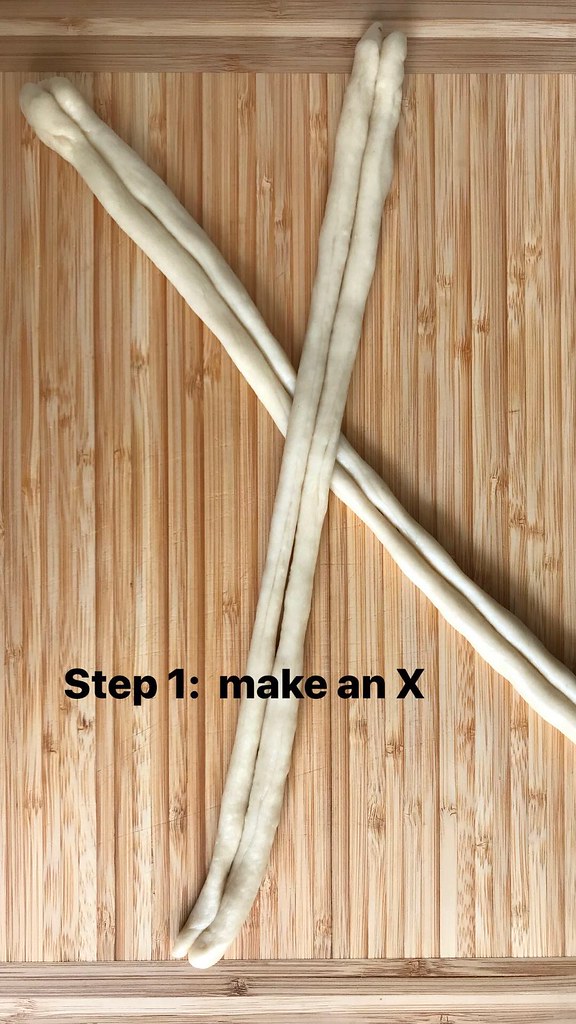
The first step is to make an X with the strips.


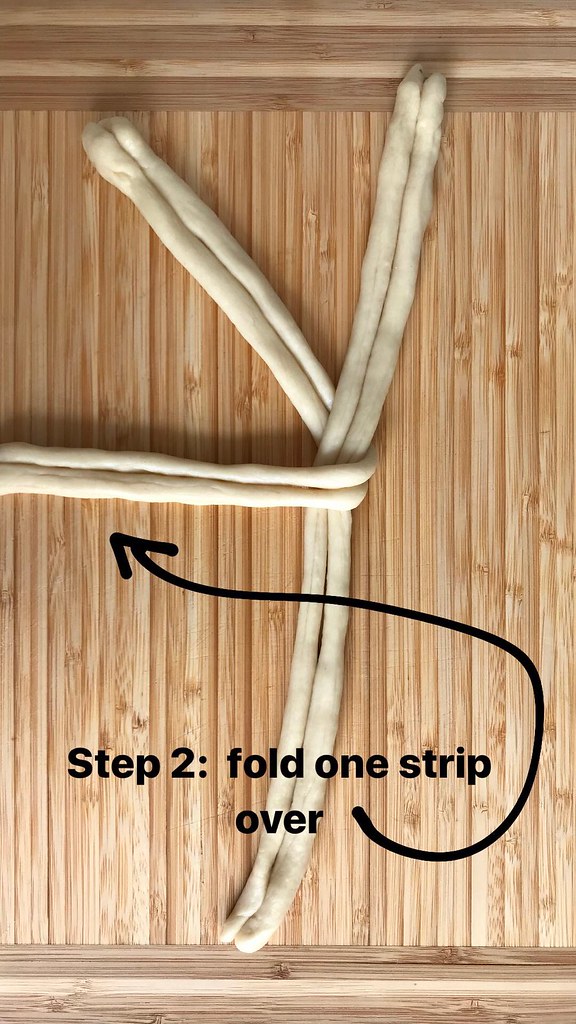
Then you'll cross one half of the bottom strip over.


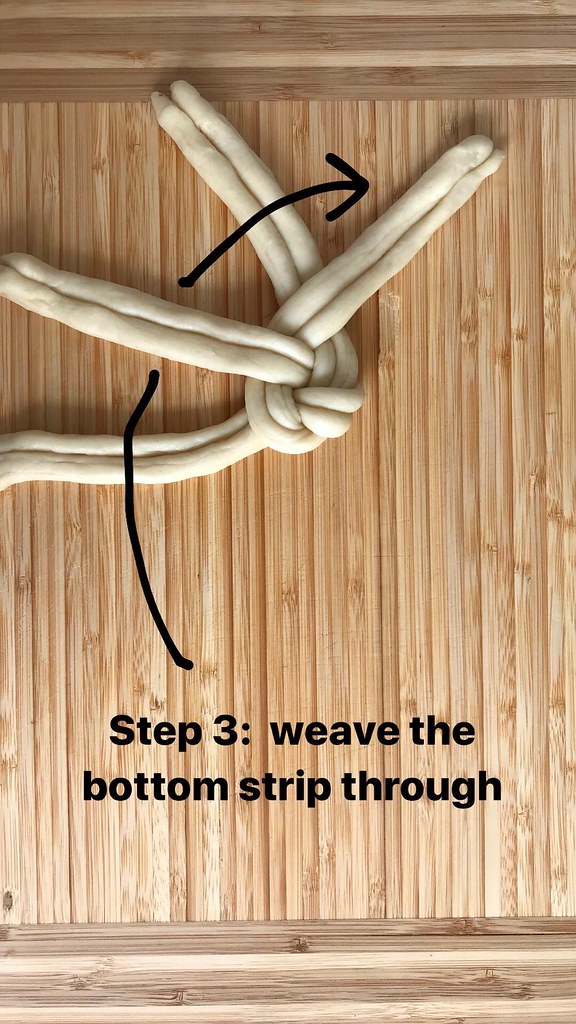
Now take the strip that's on the bottom of this picture and weave it through the other 3 strips.


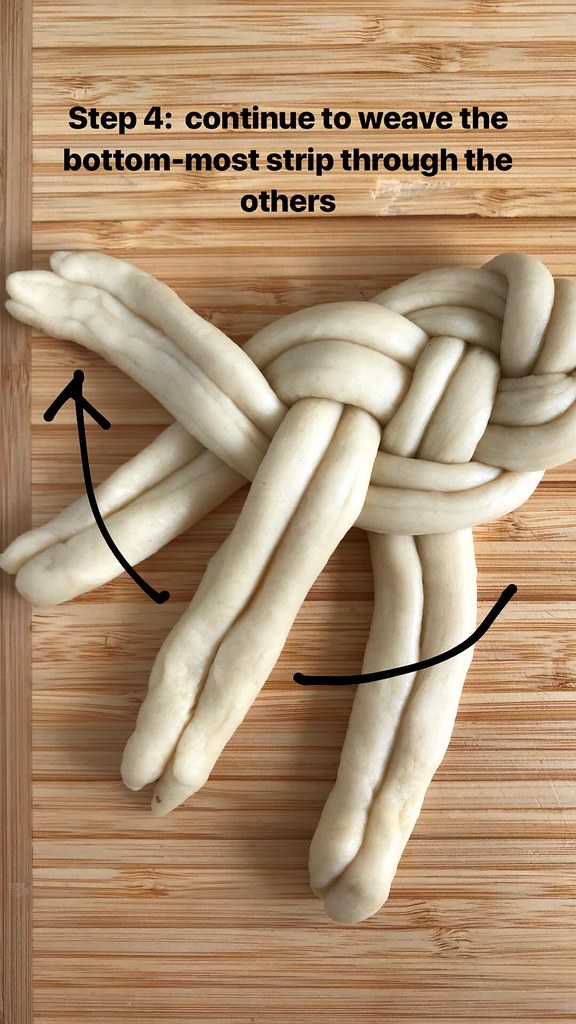
Continue taking the strip on the bottom (or on the right after rotating 90 degrees) and weaving it through the other 3 strips.


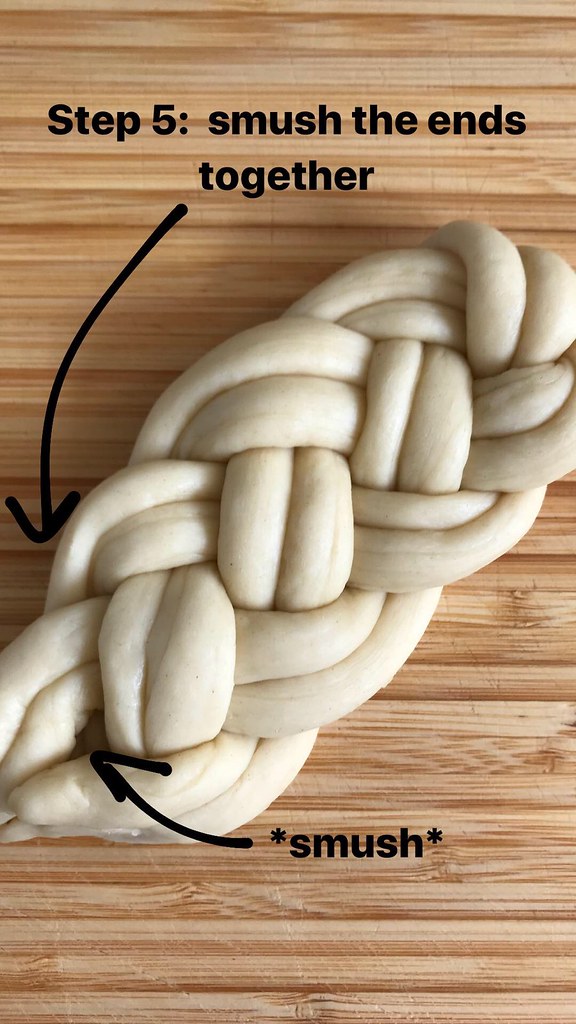
When you run out of dough to weave, smush the ends all together.


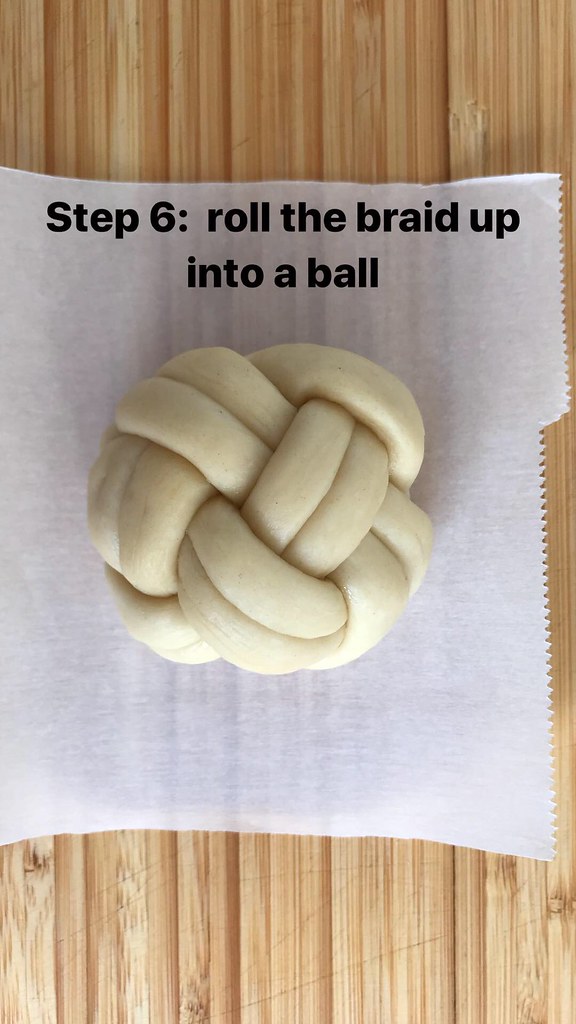
Then roll the braid up into a ball with the smushed end on the inside.


That's it!  For these buns I decided to apply the sesame-scallion glaze only on the inside of the bun so the outside would stay immaculately white.


My Mom's Steamed Bao Buns
makes 12 buns

A heaping teaspoon of active dry yeast
1 cup milk, warmed to 100-110°F
3 cups all-purpose flour
6 tablespoons of sugar
1/4 cup vegetable oil

Turn the oven on to the lowest setting (mine is 170°F).

Dissolve the yeast in the warm milk.  If you don't have a thermometer, the milk should feel a little warmer than a fever.

Combine the flour and sugar, then add the milk mixture and oil.  Mix together until a dough forms and knead a few minutes until smooth.  Cover the bowl and place in the oven.  Turn off the heat and let the dough proof for an hour or until doubled.

Once the dough has doubled, remove from the oven and turn the oven on again to the lowest setting.  Punch the dough down and knead a few more times.  Divide into twelve equal pieces (I divide in half twice and then divide each quarter into thirds).  Shape and fill the dough at this point if desired.  Place each bun on a square of parchment paper.  Cover and place in the oven, turning off the oven again.  Let proof another 40-60 minutes.

Steam the buns for 13 minutes.  I use my stockpot with the pasta insert as one level and the steamer insert as a second level so I can steam 6 at a time.

If not eating immediately, freeze and reheat in the microwave before eating.


Next:  Pork, Cabbage, and Tofu Dumplings
Previously: Slow-Roasted Ginger Scallion Salmon
Last Year:  Cranberry Curd Tart
Three Years Ago:  Puppy Chow Pie
Four Years Ago:  Thai Coconut Sticky Rice with Mango
Five Years Ago:  Vanilla Passion Caramels
Eight Years Ago:  Wah Guay (Taiwanese Rice Cake with Meat Sauce)
Nine Years Ago:  Beef Noodle Soup and Lu Dan

Thursday, November 30, 2017

Slow-Roasted Ginger Scallion Salmon


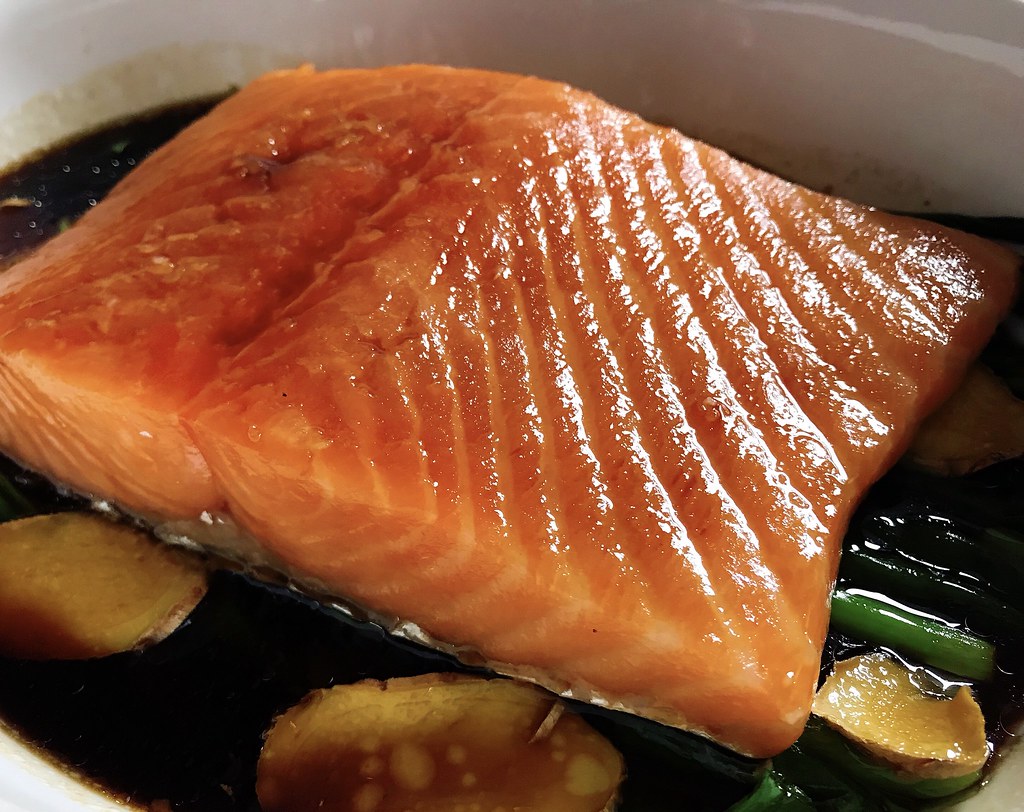
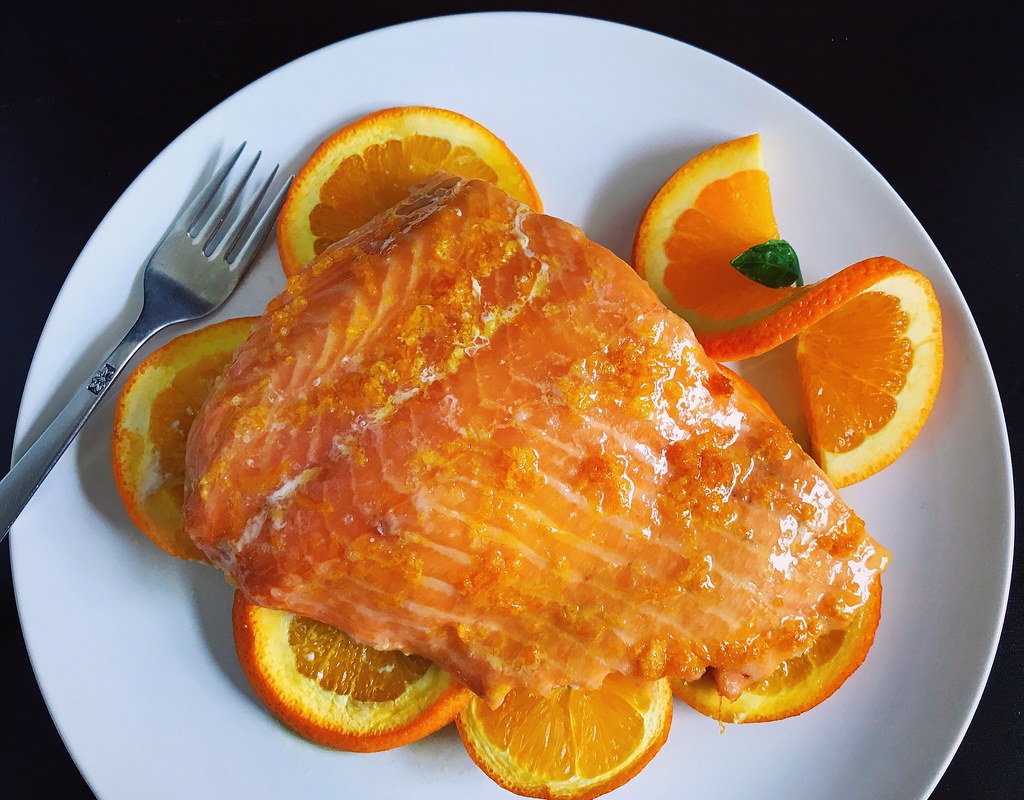
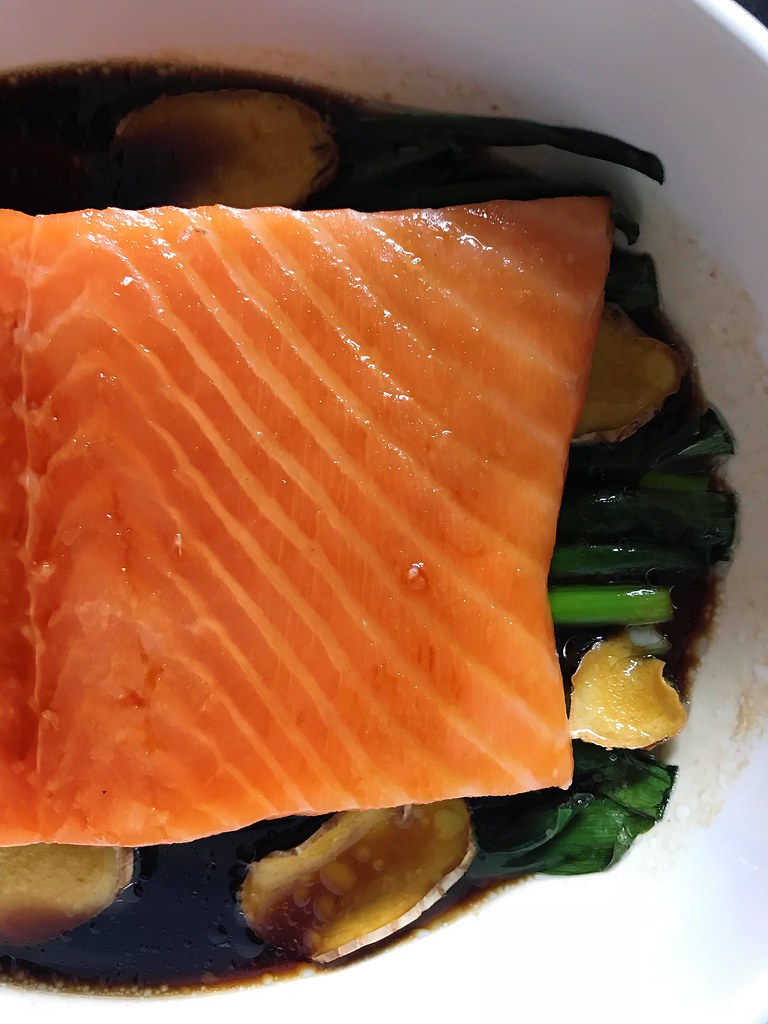
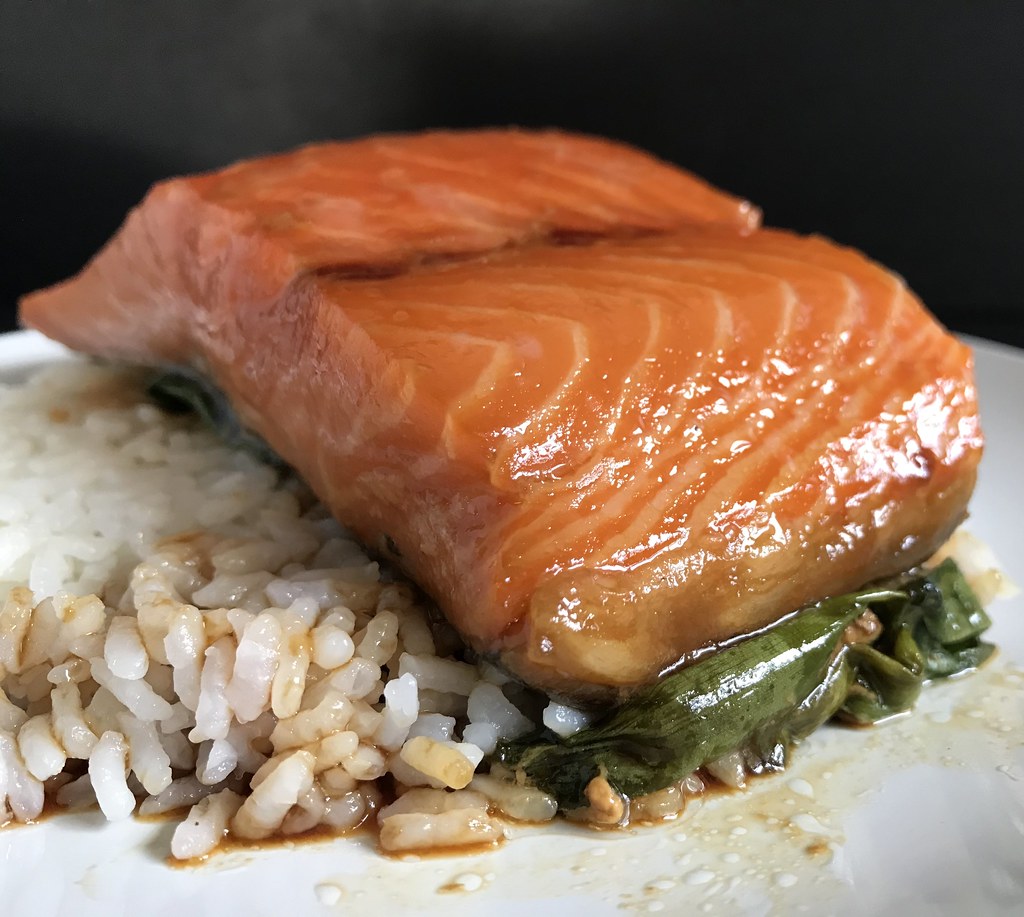
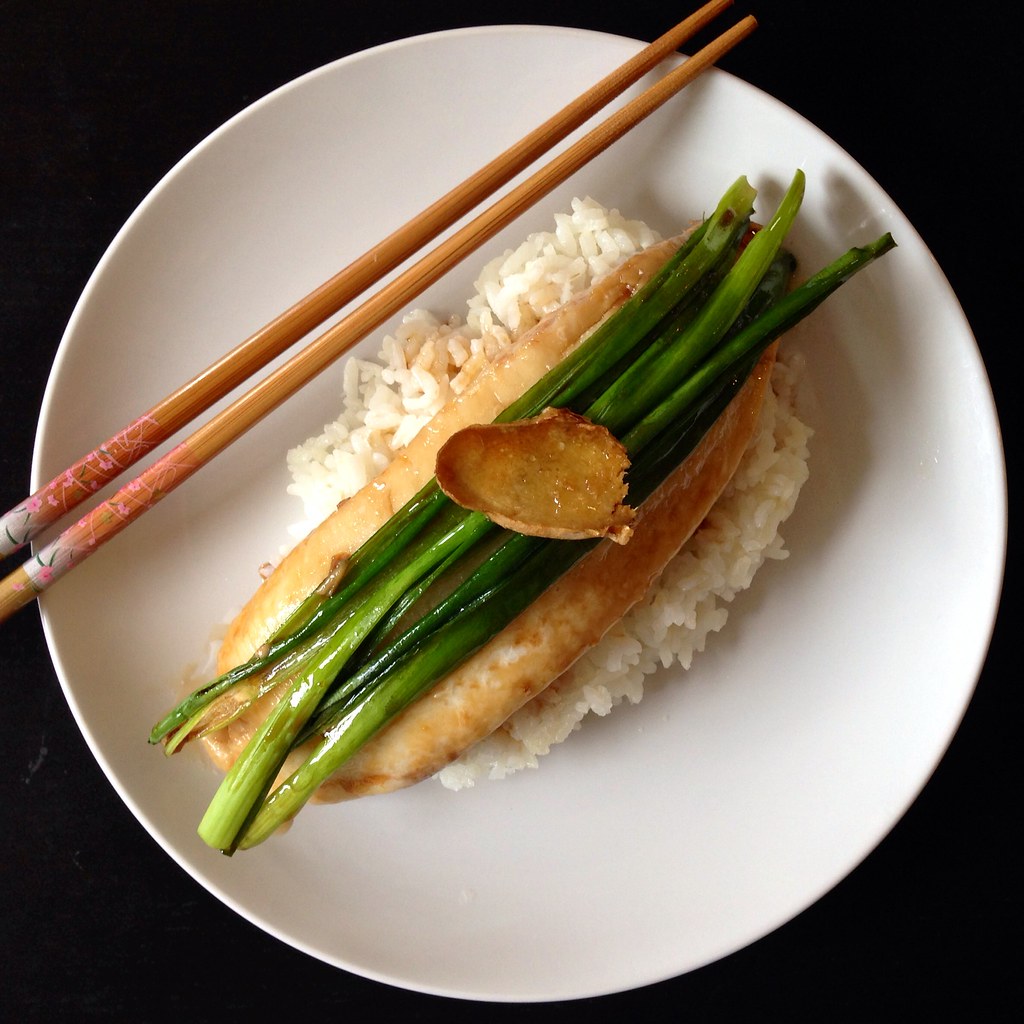
I was first introduced to slow-roasted salmon when the Food52 Cookbook Club was going through Samin Nosrat's Salt Fat Acid Heat back in September.  I tried the citrus version with lemon vinaigrette first and was absolutely smitten.  As incredible as the citrus and vinaigrette were, I think it was the salt and slow-roasting that made the dish truly exceptional.  It made a regular farm-raised salmon filet taste like a wild-caught Copper River King salmon!  The salmon was moist, rich, and buttery without being slimy or fishy.  I also tried her soy-glazed version, and it turned out amazing as well, but having to baste the fillet every 15 minutes was kind of too fussy for me.


I decided I needed to combine the recipe for Grace's ginger scallion fish with this method of cooking salmon and found some friends who were interested in testing out the recipe.  I also found some friends who had poor reading comprehension and thought I was offering them free food, haha.

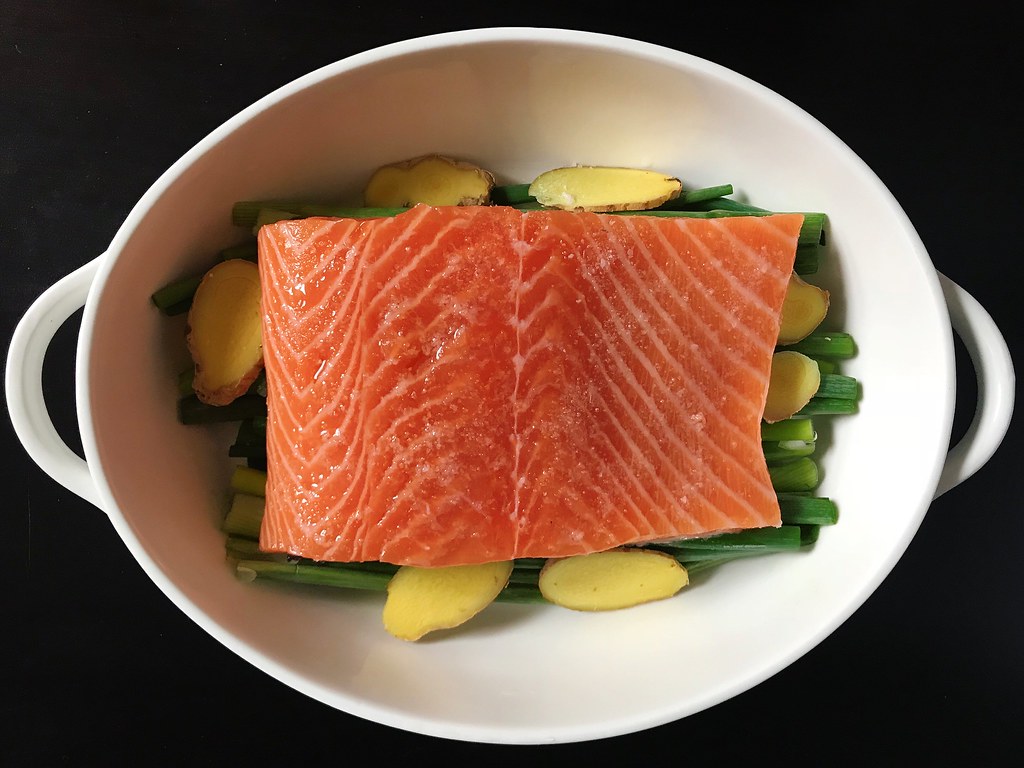
We tested roasting the salmon with the skin side up, down, and skinless, and I found that skin side down worked the best.  The skin shielded the fish from too much heat from below, and this version produced the least dry fillet.  The skin never really gets crispy, though, so unless you enjoy rubbery skin, I wouldn't serve that part.


Also, the reason I wrote that the salmon should be straight from the fridge is because some people were using frozen salmon which they let thaw on their counter before using.  Their salmon came out overdone in the time frame I gave so, if you are also making this with warmer-than-refrigerator salmon, reduce the time in the oven accordingly.


Slow-Roasted Ginger Scallion Salmon

1 lb. salmon fillet, straight from the fridge
2 tablespoons sugar
4 tablespoons soy sauce
2 tablespoons rice wine (if you don't have any, just use more water)
2 tablespoons water
1 bunch scallions (about 6 oz.), green parts only
1-2 inch knob of fresh ginger, thinly sliced
Kosher salt
Vegetable oil

Preheat the oven to 225°F.

Combine the sugar, soy sauce, rice wine, and water and heat for 1 minutes in the microwave.  Stir to dissolve the sugar.

Line a small baking dish with the scallions and ginger and place salmon on top, skin side down.  Season the salmon liberally with kosher salt and coat with oil.  Pour the soy sauce mixture over the fish and roast the salmon for about 40-50 minutes, or until a thermometer stuck into the thickest part reads 110-120°F.

The fish should still look a lot like how it did when it went in (i.e. almost translucent), so if you don't have a thermometer, check for doneness by poking the thickest part; it will start to flake once it is ready.

Serve with rice and spoon some of the sauce on top for extra saucy goodness.


Next:  My Mom's Steamed Bao Buns
Previously:  Deep Fried Apple Dumplings with Miso Caramel Dipping Sauce
Last Year:  Pear Apple Cranberry Slab Pie
Two Years Ago:  Pad Thai
Three Years Ago:  Raindrop Cake
Four Years Ago:  My Mom's Taiwanese Sticky Rice
Five Years Ago:  Grapefruit Pie
Eight Years Ago:  Nanaimo Bars
Nine Years Ago:  Homemade Crystallized Ginger

Monday, October 16, 2017

Crane Rangoons


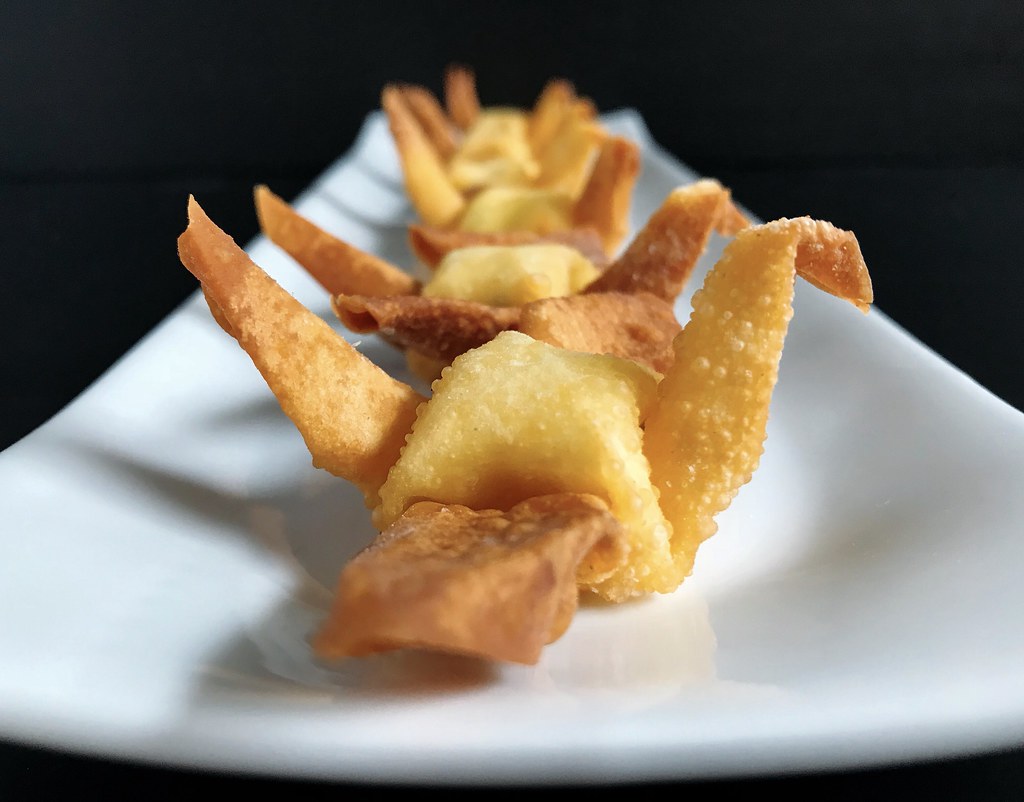
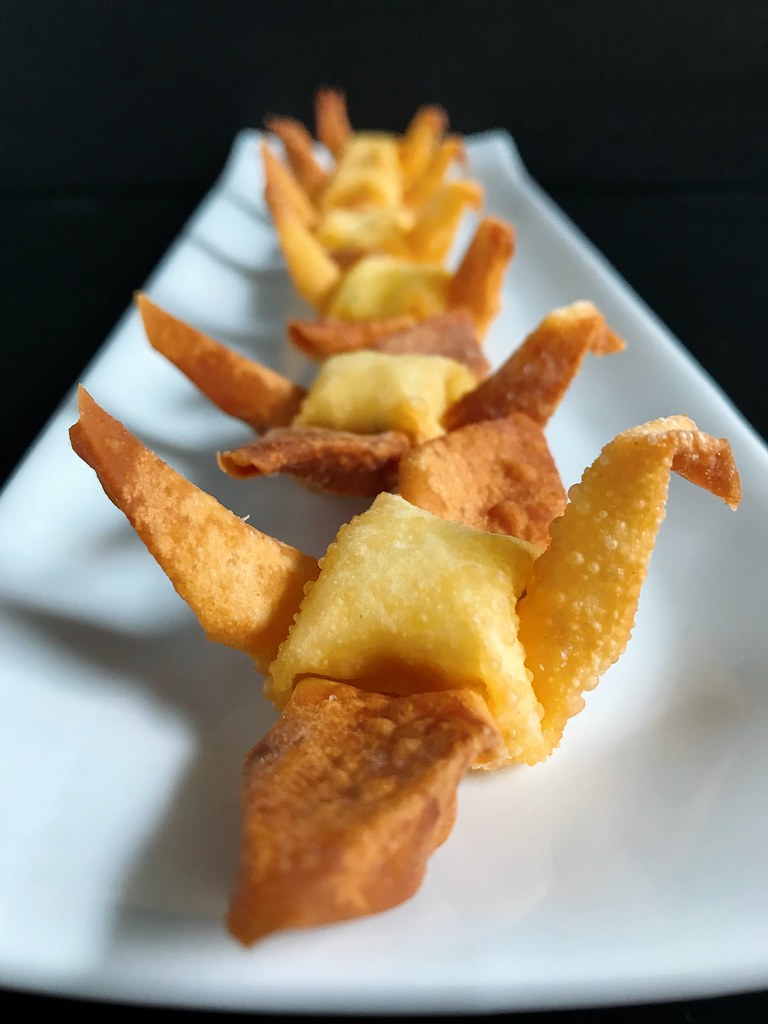
I've been toying with the idea to make these ever since I saw an article on Food52 about someone who folded wonton skins into origami cranes and deep fried them.  Naturally the only logical progression would be to stuff them with cream cheese and make crane rangoons, right?

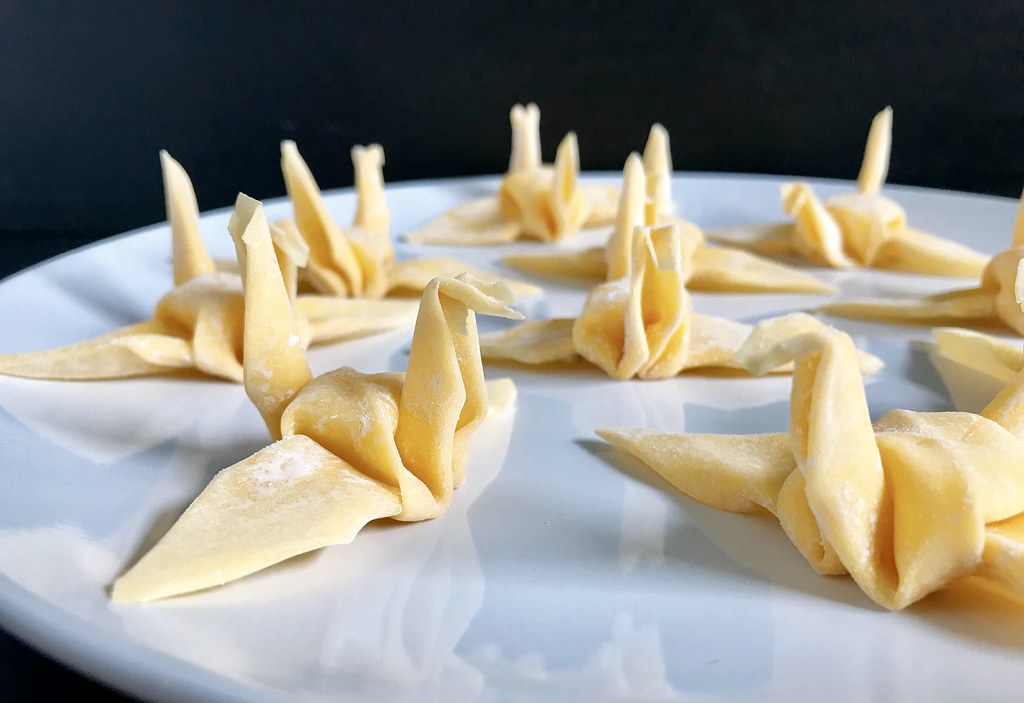
My mom taught me how to fold paper cranes when I was a kid, and it's basically muscle memory for me, but if you're not familiar with how to fold a crane you'll definitely want to practice with paper first.  One thing I realized as I was doing research for this post is that the way my mom taught me how to fold a paper crane is different than the most popular way on the internet.  In fact, I can't seem to find a single tutorial showing the method my mom taught me!  It's a very disorienting feeling to realize that something that you thought everyone else knew is actually just something only your family knows.

Anyways, for science, I tried both ways with a wonton skin, and there doesn't seem to be too much of a difference.  I think the hollow space in the crane's body may be a tad larger using my mom's method, and the tail and head are a bit fatter so it's a little easier to have a defined head.  Both honestly, I'm not sure those differences are a big enough of a deal to learn a new way to fold a crane, especially since it's hard enough folding one with a wonton skin.


You will want to get the freshest, most pliable wonton skins you can find, and the thinner the better.  The ones I used weren't a perfect square, but you can still get a pretty decent looking crane.  Also, instead of making perfect creases like you'd usually do with paper, you want to try not to press down too hard on any folds so that the wonton skin doesn't break.

After I finished folding the cranes, I microwaved them for 8-10 seconds, just enough to make them a little stiffer, but not totally cooked.  Basically I watched them as they microwaved and pulled them out as soon as they started to distort.  At that point, I was still able to manipulate them back into the desired shape.

Then I whipped up some softened cream cheese with some chopped scallions and a pinch or two of salt.  To fill the cranes, I used a piping bag with a no. 12 round tip.  A slightly smaller tip would probably have been a little better, but you don't want to use a tiny one or else the scallions might get stuck in the tip.

I deep fried the crane rangoons in 375°F oil until they were golden brown.  After some trial and error, it seemed like frying them upside down was the best way to get them to cook as evenly as possible.  When they were done, I let them drain on a paper towel-lined plate.


Monday, January 30, 2017

Salted Egg Yolk Mochi Ice Cream


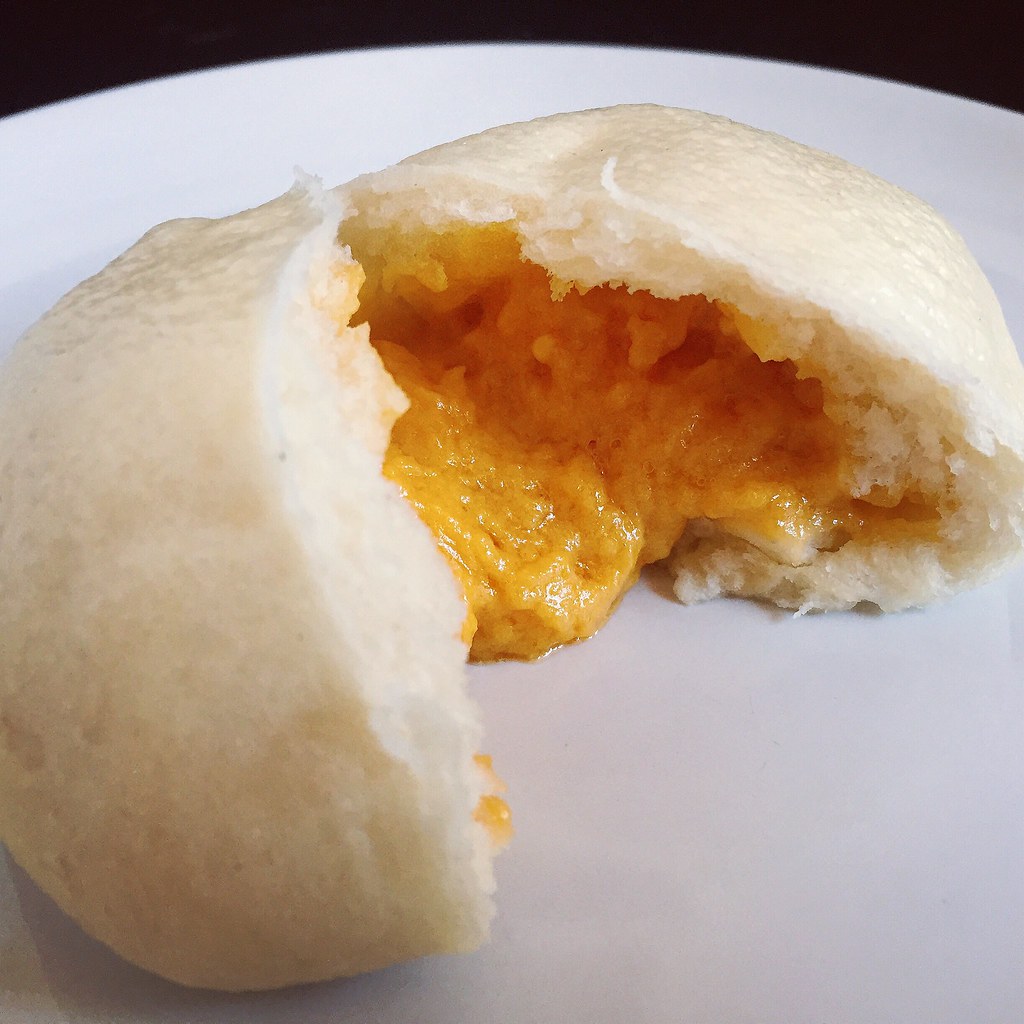
Earlier last year I discovered a new kind of steamed bun, the liu sha bao.  I think translated directly it means "quicksand bun" but it's actually a lot better tasting that it sounds.  Inside is a molten filling made of salted egg yolk custard, and I could probably eat 5 of them in a row.  I tried making some a few weeks ago, but the result was just okay and not really worth all the work when I can just get the perfected bun at dim sum.


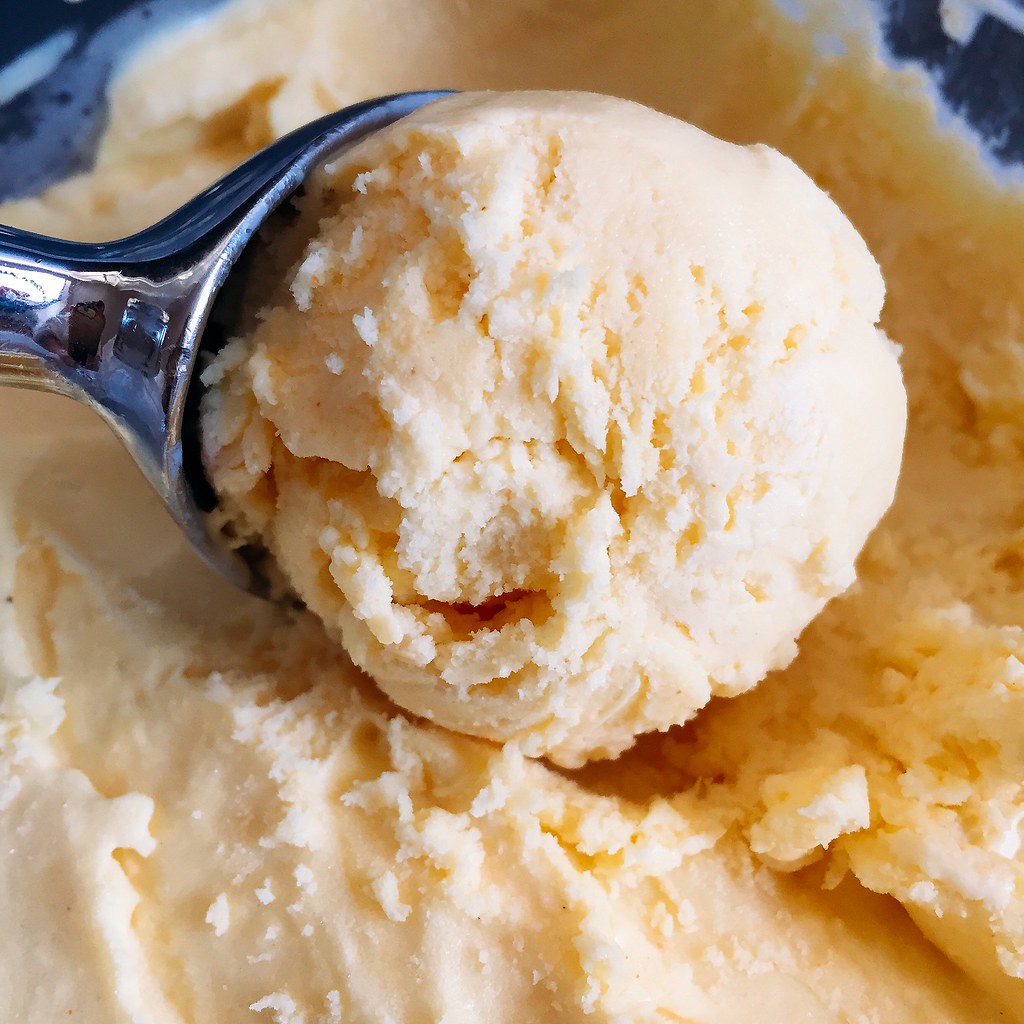
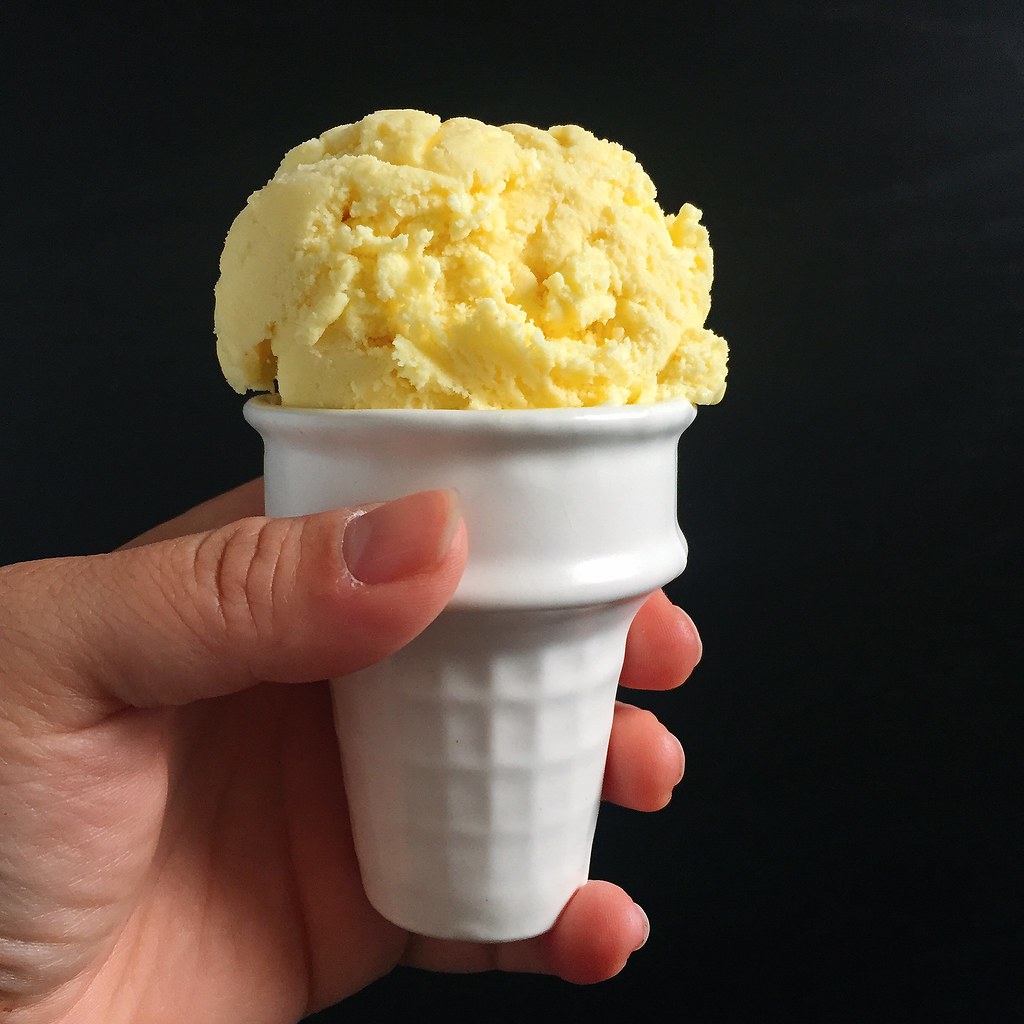
Because of that experiment I still had 3 cooked salted duck eggs sitting in my fridge, though, so I figured I'd try to make an ice cream out of them.  I followed the template of Jeni's Salty Vanilla Frozen Custard, but I replaced 3 of the raw egg yolks with 3 cooked salted duck egg yolks, which you can find in the egg section of a Chinese grocery store.  I reduced the salt a little because the egg yolks were already salted and added a little bit of turmeric to increase the yellow coloring of the ice cream.  It still comes out a rather pale yellow, but I didn't want to add any artificial food coloring.


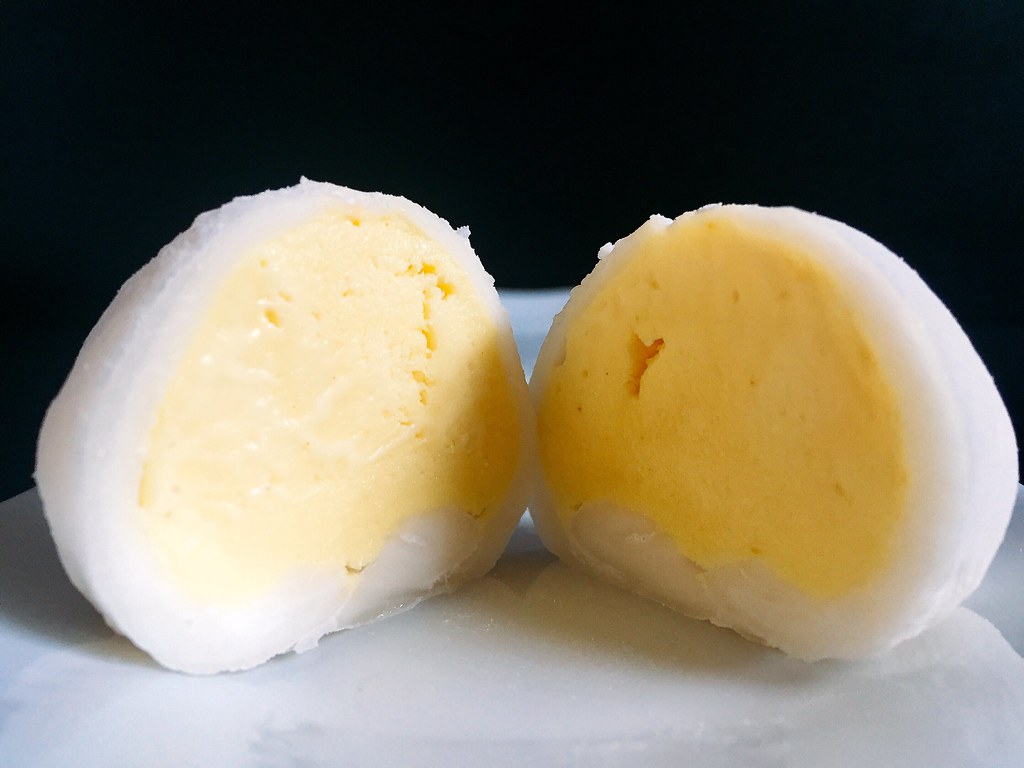
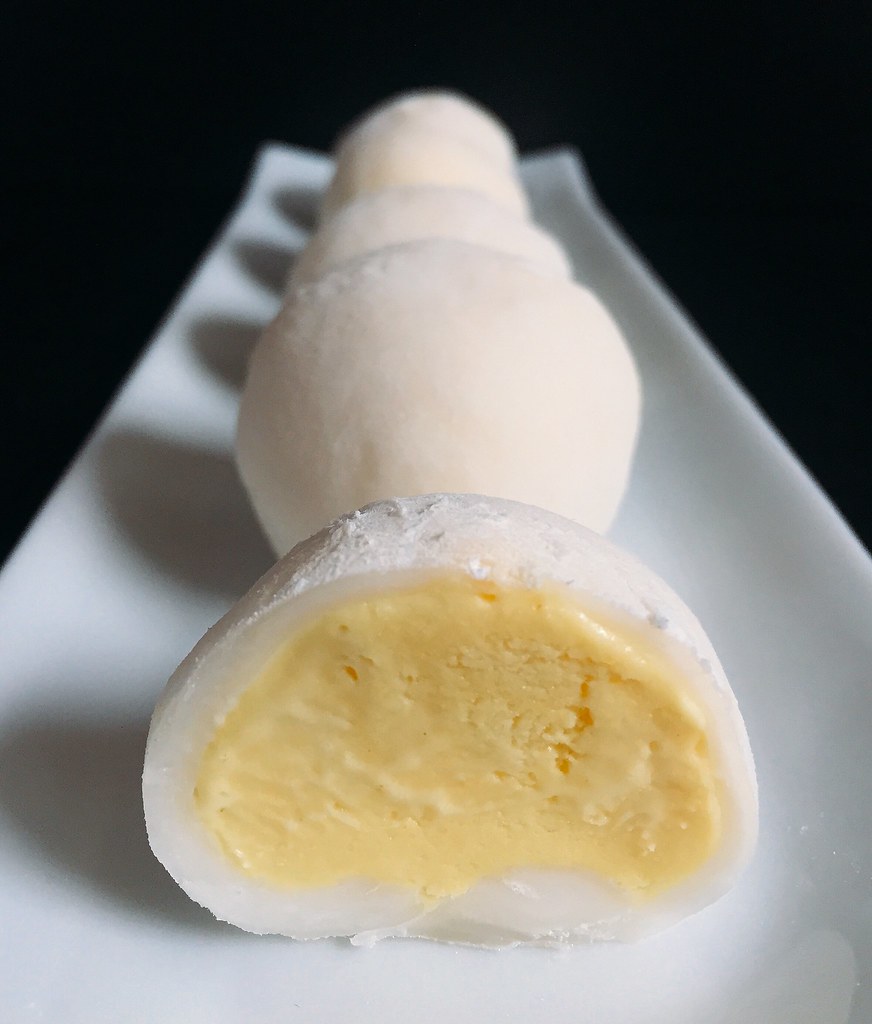
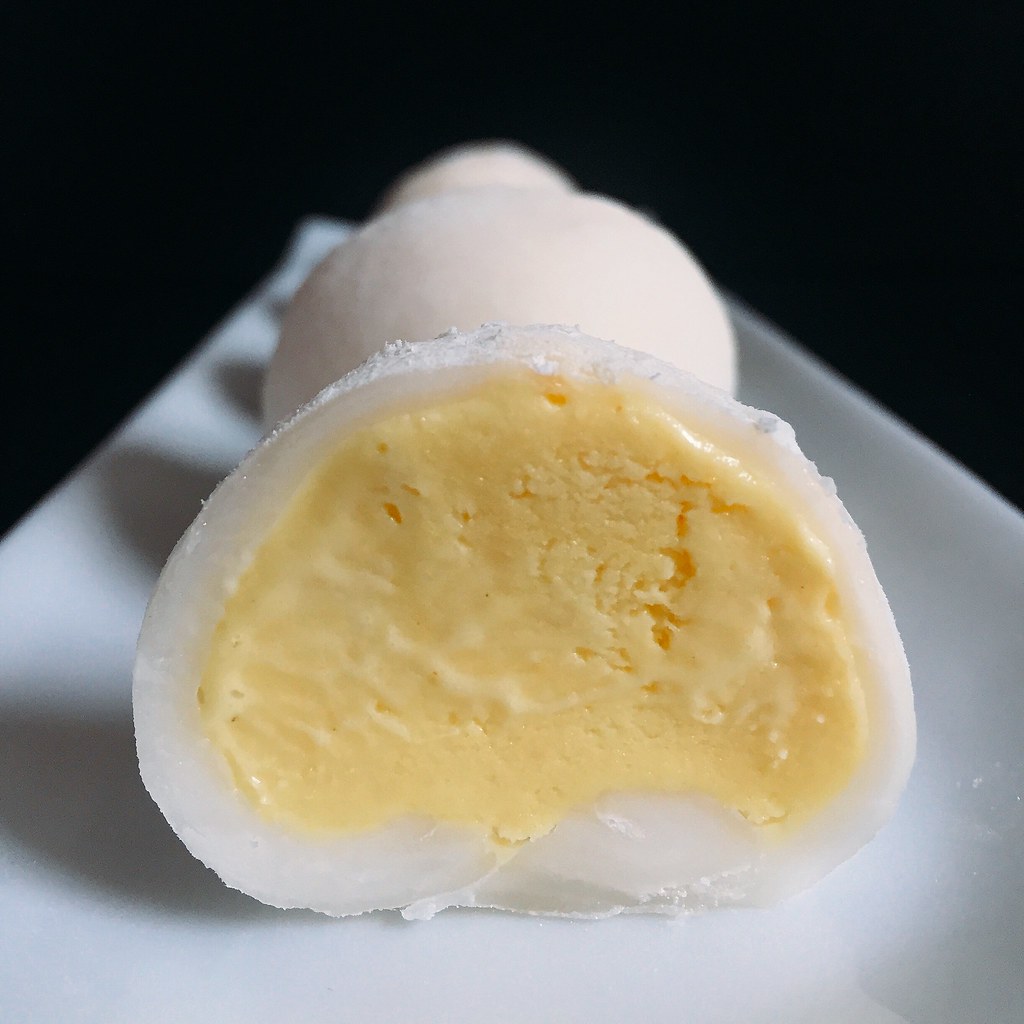
The resulting ice cream is incredibly rich, and tastes pretty much like the inside of a liu sha bao but in ice cream form.  So I decided to try making it into mochi ice cream to continue down that path.  I've tried making mochi ice cream before and that attempt was disastrous, to say the least, so this time I made sure to follow a trusted recipe.  I'm happy to say that the one from Just One Cookbook worked marvelously.  These salted egg yolk mochi ice creams are perfect because you only need a couple of bites of the ice cream, and the soft, chewy mochi helps keep the intense flavor from being too overwhelming.  Plus, I think they look super cute and remind me of liu sha bao!


Salted Egg Yolk Ice Cream (adapted from Jeni's Splendid Ice Cream Desserts)
makes about 1 quart

3 cooked salted duck eggs
2 tablespoons cream cheese, softened
1/2 teaspoon kosher salt
1/8 teaspoon turmeric
2 3/4 cups whole milk
3 large raw egg yolks
1 tablespoon plus 2 teaspoons cornstarch
1 cup heavy cream
3/4 cup sugar
2 tablespoons light corn syrup

Carefully crack and peel the salted duck eggs, removing the whites until you are left with only the egg yolks.  Mash the egg yolks in a medium bowl, then add the cream cheese, salt, and turmeric and whisk until smooth.

Mix about 2 tablespoons of the milk, the raw egg yolks, and cornstarch in a small bowl and set aside.  Fill a large bowl with ice and water.

Combine the remaining milk, the cream, sugar, and corn syrup in a 4-quart saucepan, bring to a boil over medium-high heat, and boil for 4 minutes. Remove from the heat and gradually add about 2 cups of the hot milk mixture to the egg yolk mixture, one ladleful at a time, stirring well after each addition. Pour the mixture back into the saucepan and heat over medium heat, stirring constantly with a heatproof spatula, just until the mixture thickens. Remove from the heat and strain through a sieve if necessary.

Gradually whisk the hot milk mixture into the cream cheese mixture until smooth. Pour the mixture into a 1-gallon Ziploc freezer bag and submerge the sealed bag in the ice bath. Let stand, adding more ice as necessary, until cold, about 30 minutes.

Remove the frozen canister from the freezer, assemble your ice cream machine, and turn it on. Pour the custard base into the canister and spin until thick and creamy.

Pack the custard into a storage container. Press a sheet of parchment directly against the surface and seal with an airtight lid. Freeze in the coldest part of your freezer until firm, at least 4 hours.


Mochi Ice Cream (adapted from Just One Cookbook)
makes about 6-8 pieces

Ice cream
3/4 cup glutinous rice flour
1/4 cup sugar
3/4 cup water
1/2 cup cornstarch

Place a cupcake pan in the freezer to chill.  Use a cookie dough scooper to scoop 6-8 balls of ice cream.  Place each ball on an aluminum cupcake liner in the cupcake pan and freeze for several hours until hard.

Whisk together the glutinous rice flour, sugar, and water in a medium microwaveable bowl.  Cover and microwave for 30 seconds.  Stir with a wet rubber spatula then microwave for another 30 seconds.  Continue to stir and microwave in 30 second increments until the mochi comes together in a slightly translucent, sticky mass.

Generously dust a Silpat or parchment paper with cornstarch.  Transfer the mochi on top and dust with additional cornstarch.  Dust a rolling pin with cornstarch and roll out the mochi into a thin layer, about 1/8".  Chill in the refrigerator for 15 minutes.

Use a 3 1/2" cookie cutter to cut the mochi into circles.  I was able to easily cut out 6 circles, and if you want, you can reroll the scraps to make more circles, just make sure to redust with cornstarch.

Place one of the scoops of ice cream in the center of a mochi circle.  Bring the edges of the mochi up and over the ice cream and seal together, working quickly so that the ice cream doesn't melt.  Wrap in plastic wrap and return to the freezer.  Repeat with the other scoops of ice cream and mochi circles.

When ready to eat, let sit at room temperature for a few minutes so that the mochi can soften.


Next:  French Onion Tater Totchos
Previously:  Marion Cunningham's Yeast-Raised Waffles
Two Years Ago:  San Bei (Taiwanese Three Cup) Tofu and Ramen
Three Years Ago:  Grilled Cheese Egg in a Hole
Four Years Ago:  Homemade Bagels
Seven Years Ago:  Sweet Potato Gnocchi with Maple Cinnamon Sage Brown Butter
Eight Years Ago:  Dutch Babies

Tuesday, July 26, 2016

My Mom's Beef and Broccoli Stir Fry

https://www.flickr.com/photos/joyosity/27932366904/in/dateposted-public/

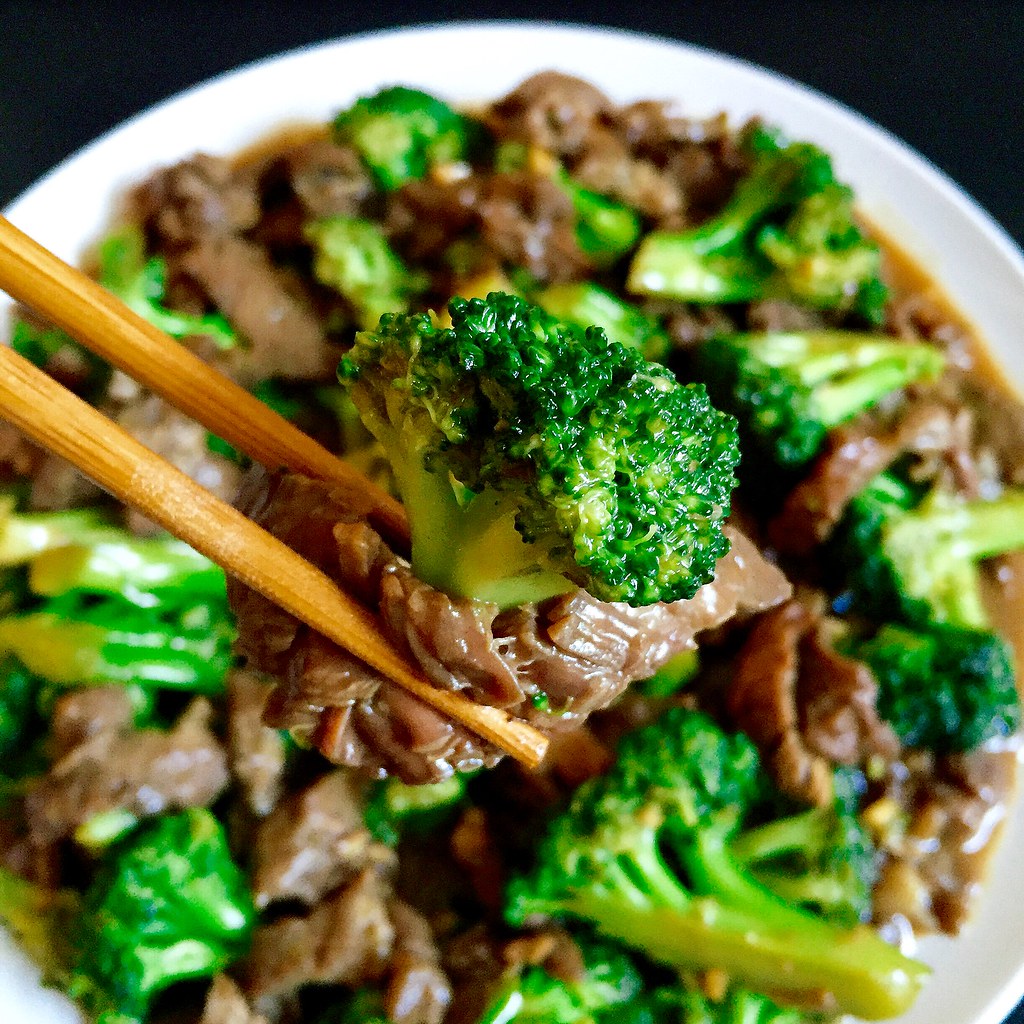
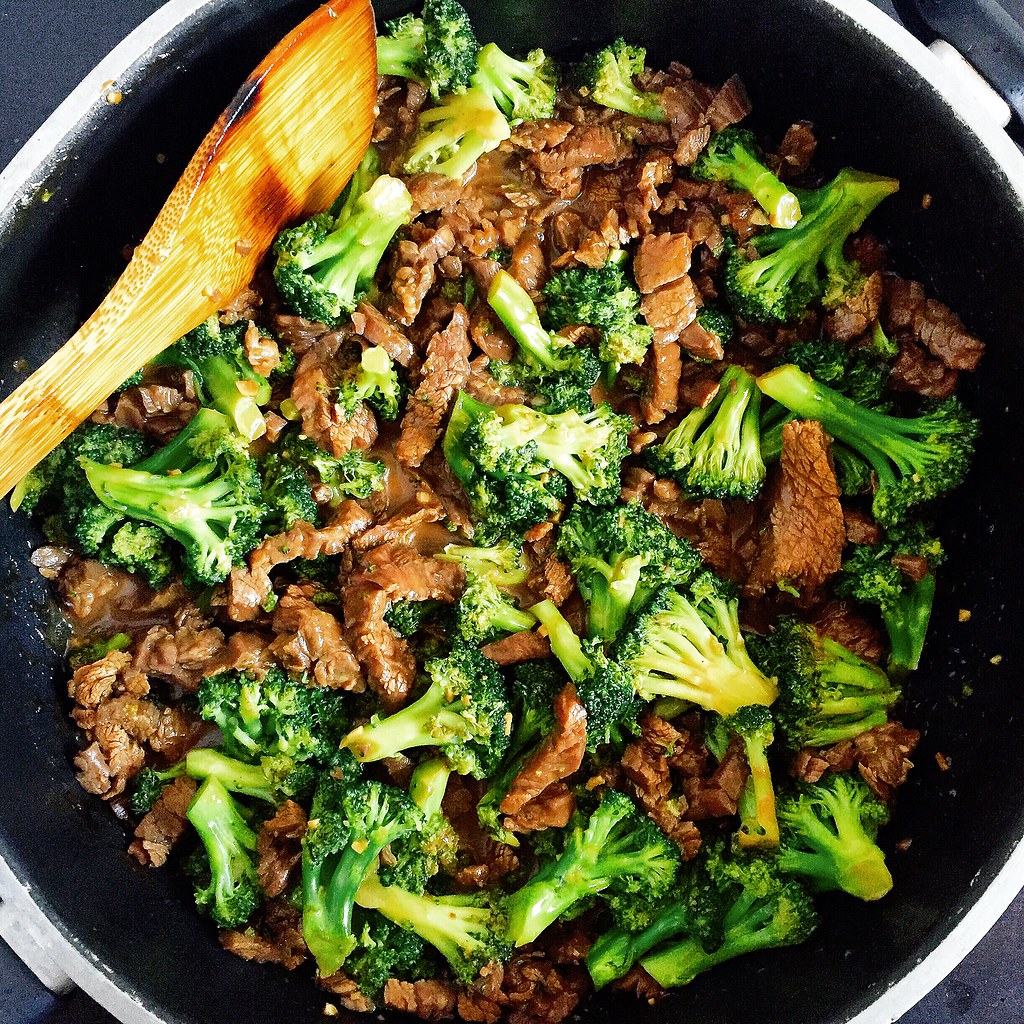
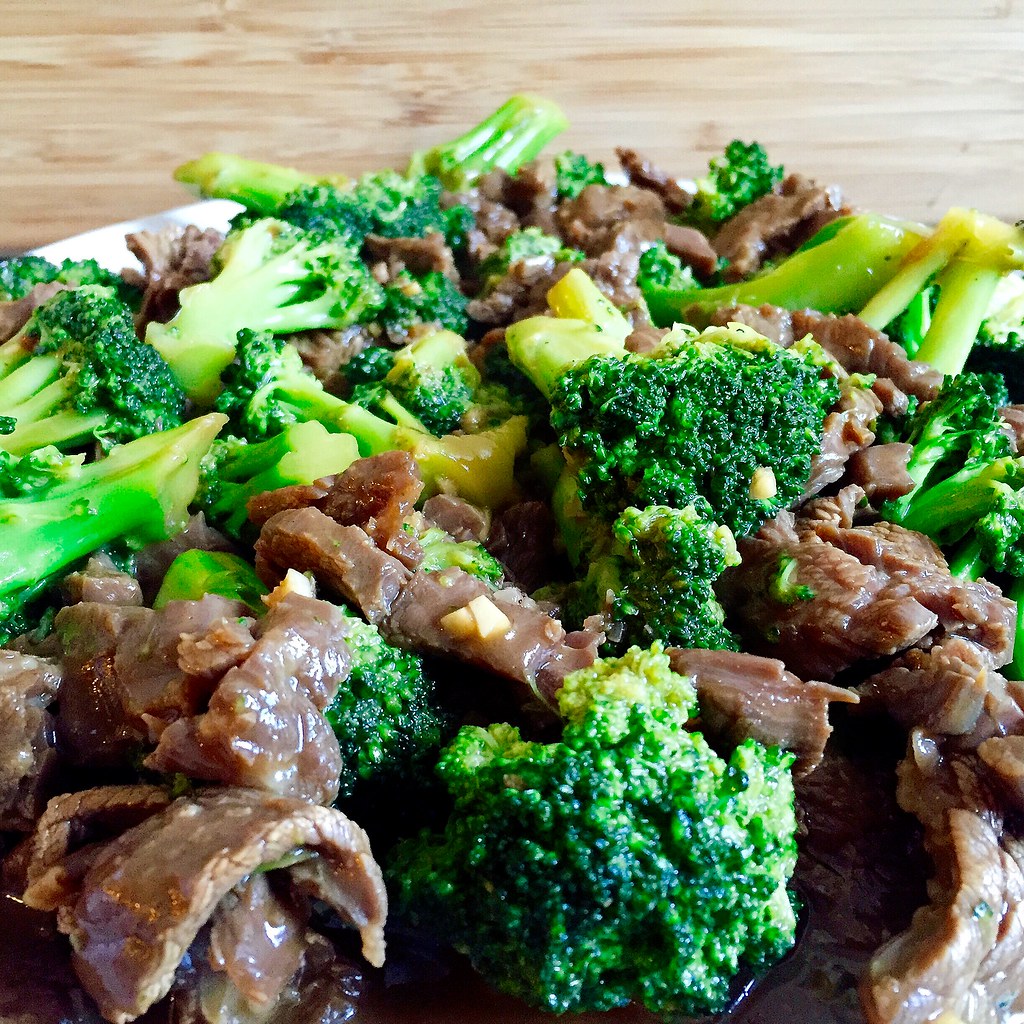
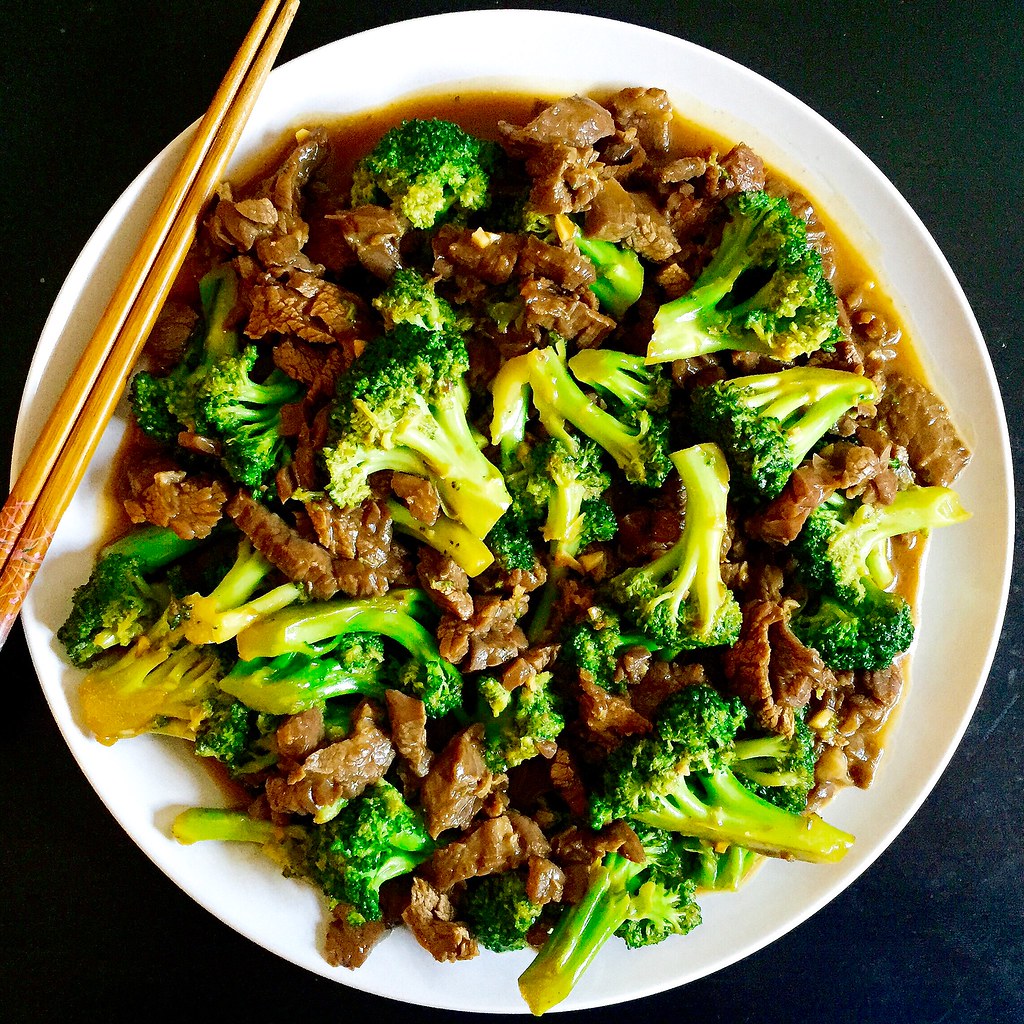
This is one of the original recipes in the cookbook that I made for my mom's Christmas gift 8 years ago.  I would've shared it earlier, except I thought I'd shared it already!  It's a classic dish to order from a Chinese restaurant--velvety strips of marinated beef stir fried with tender crisp broccoli in a flavorful brown sauce--and perfect served over steamed white rice.

To keep the beef tender and not chewy, it's important to slice the strips against the grain.  The addition of cornstarch in the marinade further helps improve the texture of the beef.  Since the broccoli takes a lot longer to cook than the beef, it is cooked separately while the beef is marinating and then added back in at the end.  You'll want to use a large pan with a lid so that you can steam the broccoli after a quick stir fry.

https://www.flickr.com/photos/joyosity/28421948532/in/dateposted-public/

My favorite part about this recipe is the marinade which ends up becoming the sauce upon stir frying with the beef.  It is already quite fragrant due to the soy sauce, garlic, and sesame oil, but my mom adds a secret ingredient that really brings it over the top:  cinnamon!  Only a tiny amount is added that you can't really taste it, but the aromatic spice somehow boosts all the other flavors in the sauce in a way you wouldn't expect.

https://www.flickr.com/photos/joyosity/28549364325/in/dateposted-public/

My Mom's Beef and Broccoli Stir Fry
serves 4

1 lb. flank or sirloin steak, sliced thinly against the grain
1/4 cup soy sauce
2 tablespoons cornstarch
1/4 cup rice wine
1 teaspoon sesame oil
1 1/2 tablespoons sugar
2 garlic cloves, minced
1/4 teaspoon ground cinnamon
3 tablespoons vegetable oil, divided
6 cups broccoli florets
Salt, to taste
1 cup water, divided

Whisk together the soy sauce, cornstarch, rice wine, sesame oil, sugar, minced garlic, and cinnamon.  Toss with the sliced steak and marinate for at least 30 minutes.

In a large wok, heat 1 tablespoon of oil on high and add the broccoli florets.  Season with salt and stir fry until bright green.  Add 1/2 cup water and cover.  Steam until the broccoli is done.  Transfer the broccoli to a bowl, and wipe down the wok.

Add another 2 tablespoons of oil and heat on high again.  Add the steak and marinade to the wok.  Rinse out the container you used to hold the beef with 1/2 cup of water and add to the wok.  Stir fry until the beef is just done and no longer red.  Add the broccoli back into the wok and continue to stir fry for another minute or two to combine.  Serve hot.

https://www.flickr.com/photos/joyosity/28265304420/in/dateposted-public/

Next:  Zucchini Pizza
Previously:  How to Make an American Flag Cake
Two Years Ago:  Cleveland Cassata Cake (Bonus:  In a Jar!)
Three Years Ago:  Backyard Mint Ice Cream with Dark Chocolate Freckles
Six Years Ago:  Slow Cooker Bolognese Sauce
Seven Years Ago:  Curried Carrot Soup

Thursday, August 28, 2014

Salt and Pepper Tofu

https://www.flickr.com/photos/joyosity/14838698529/

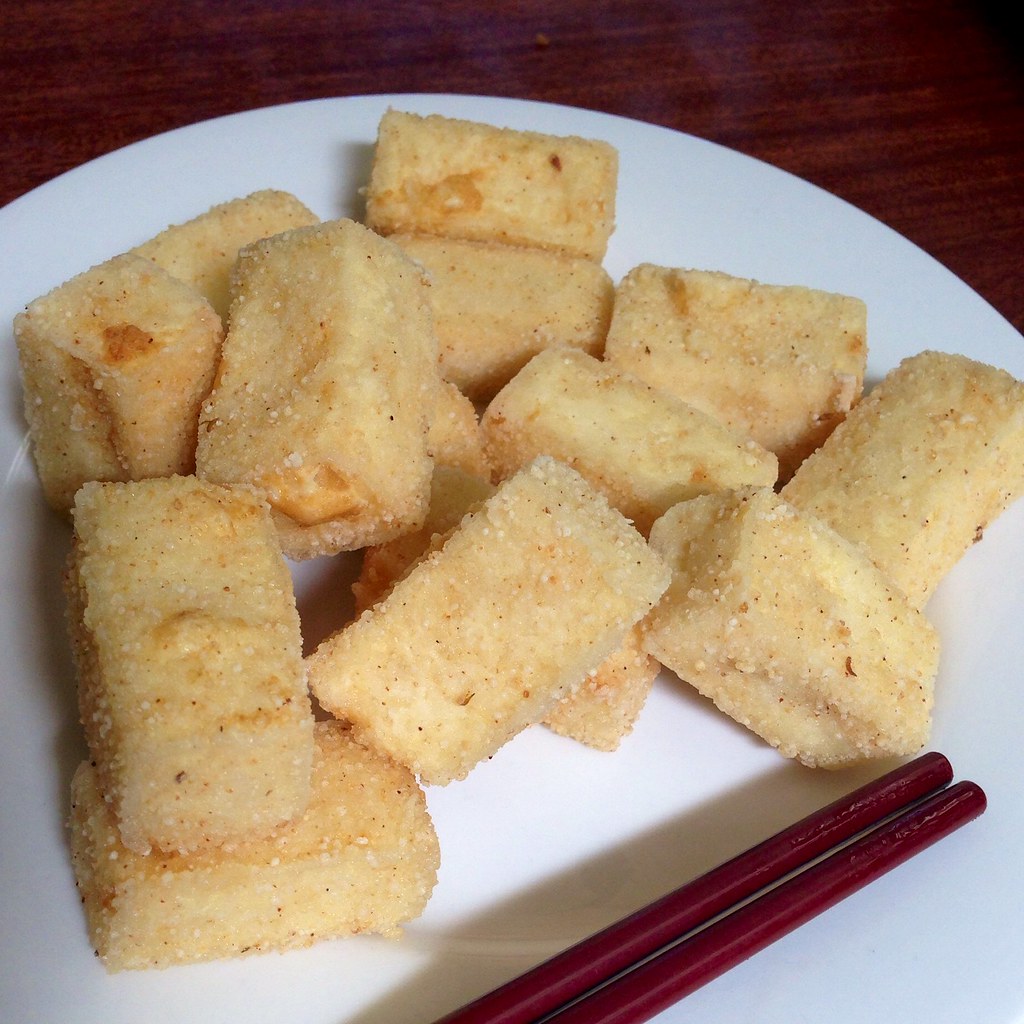
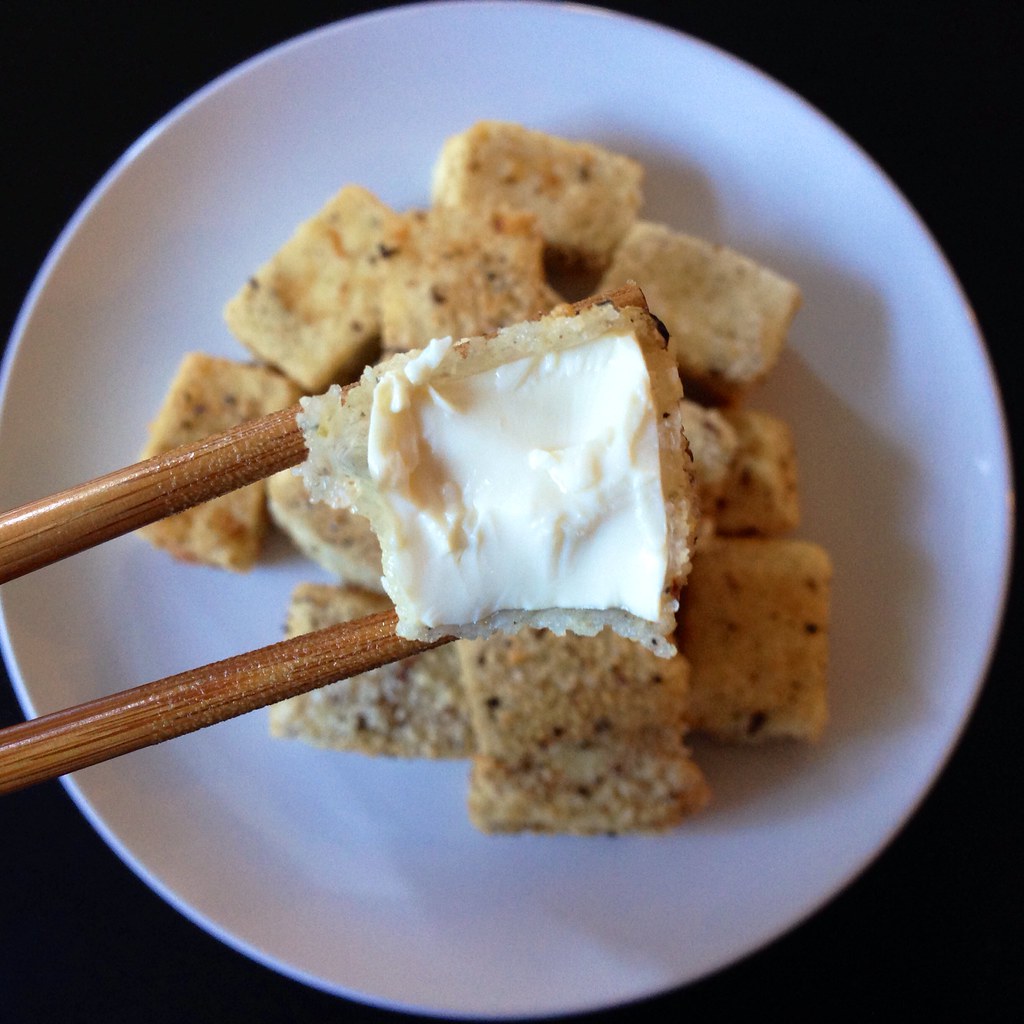
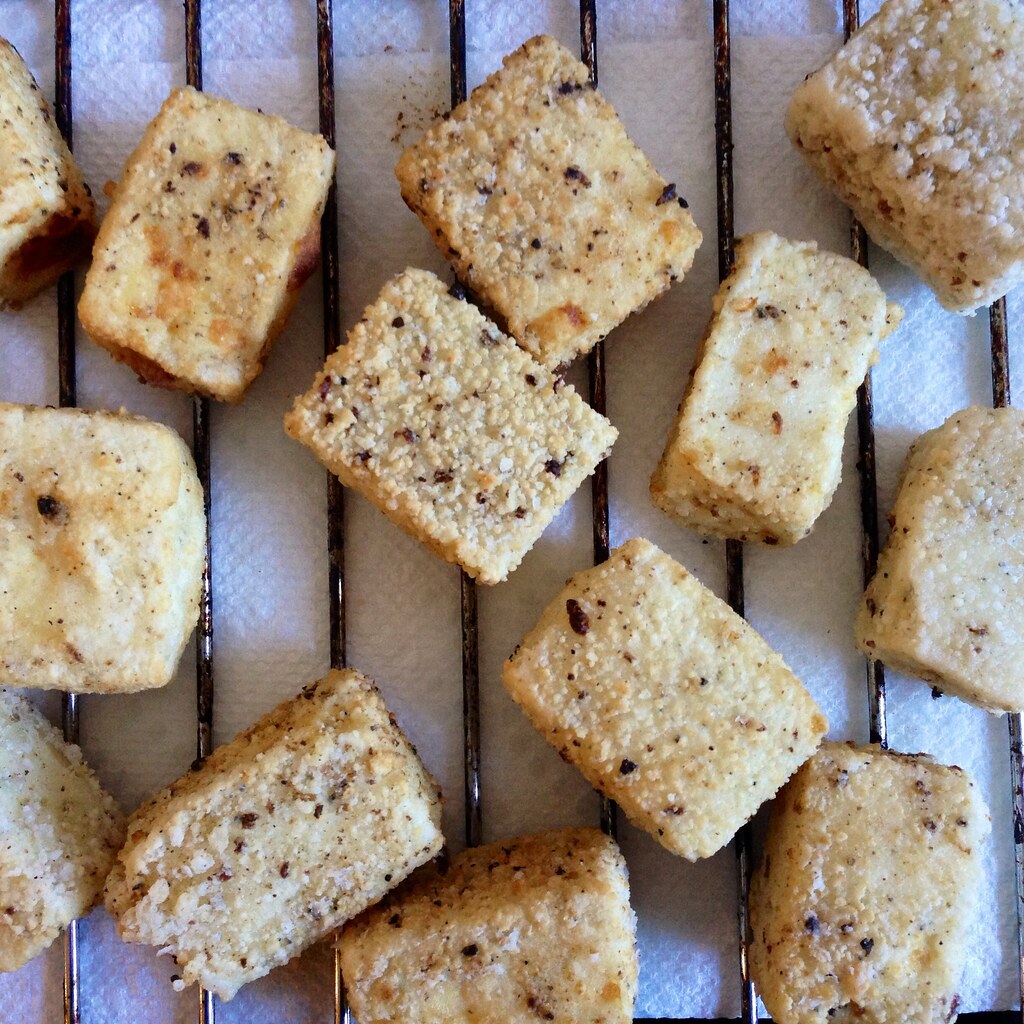
The picture above probably doesn't look that impressive, but that there was the best tofu I've ever had in the Western Hemisphere.  It's the salt and pepper tofu from Northwest Tofu, which my friend Mitchell recommended to me the last time I was in Seattle.  It's a simple enough dish--tofu dusted with starch, salt, and pepper and then deep fried--but that description barely does it justice.  The crust is super thin and light, but full of crispy texture and perfectly seasoned.  The tofu itself is so soft and custardy it pretty much melts in your mouth.
https://www.flickr.com/photos/joyosity/14838888117/

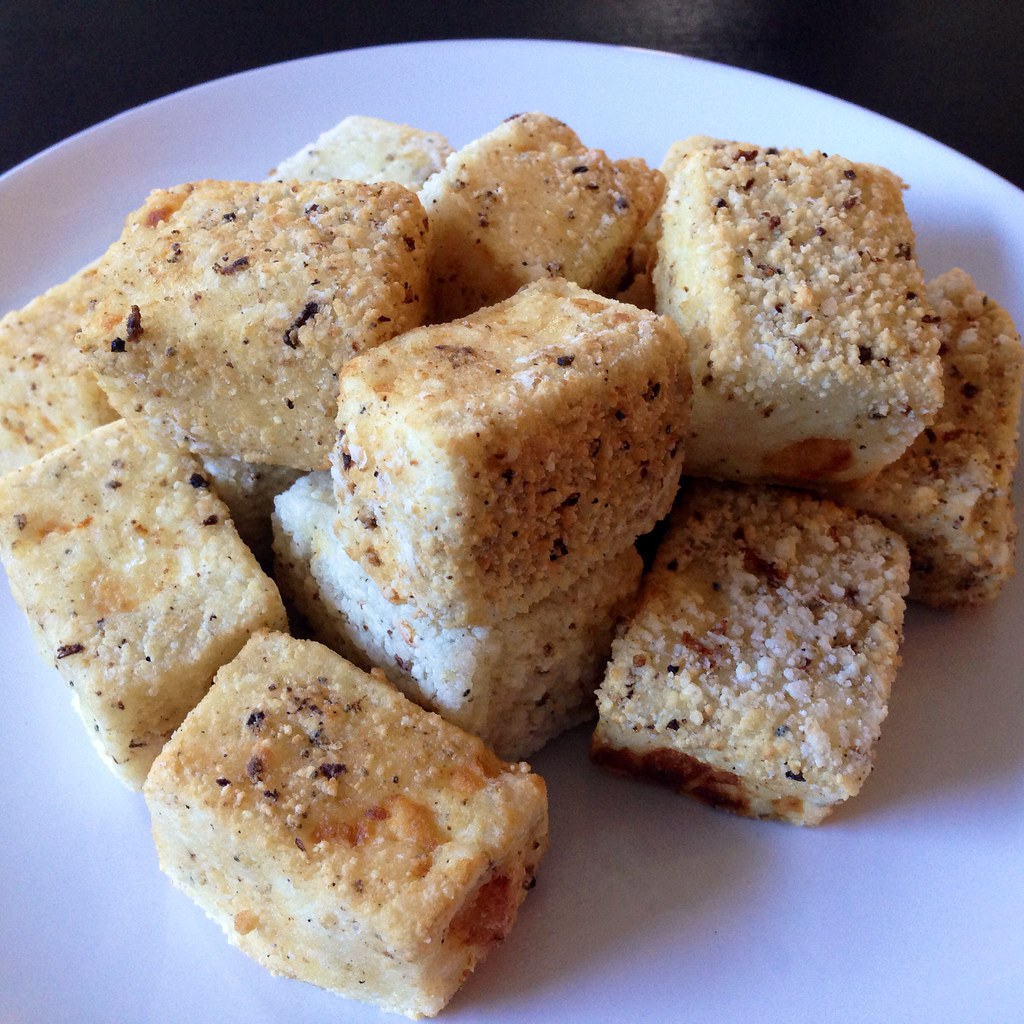
I tried to recreate the dish at home using firm silken tofu, cornstarch, and finely ground Sichuan peppercorns and sea salt.  I think it turned out pretty well for my first attempt, but the coating got a little thicker than I wanted, and the tofu was firmer than I remember the original being.  I can't imagine trying to keep a cube of soft silken tofu intact through the coating and frying phases though; the firm tofu was already breaking up a bit even though I was trying to be very careful.  That said, I think my version was still really tasty.  =)  Next time I might try using tapioca flour or potato starch instead of cornstarch just to see if that ends up being closer to what I remember.

https://www.flickr.com/photos/joyosity/14838680909/

Salt and Pepper Tofu
serves 1-2

12 oz. package of firm silken tofu
5 tablespoons cornstarch
2 teaspoons sea salt, finely ground
1 teaspoon Sichuan or black peppercorns, finely ground
Vegetable oil, for frying

Pat the tofu dry with paper towels.  Cut into 1" cubes.

Mix together the cornstarch, salt, and ground pepper.  Pour enough oil into a saucepan to reach 1" depth and heat over medium high.  The oil is ready for frying when it reaches 350°F or bubbles start to form when you dip a wooden utensil in the oil. 

Working in small batches, carefully coat the tofu cubes in a thin layer of the cornstarch mixture, the thinner the better.  Fry the tofu, turning after a minute or so, until all sides are a pale, golden brown.  Remove with a slotted spoon and let drain on paper towels.  Serve immediately.

https://www.flickr.com/photos/joyosity/15025416745/

Next:  Melanzane alla Parmigiana (Eggplant Parmesan)
Previously:  Crispy Skinned Salmon Teriyaki
Last Year:  Jim Lahey's No-Knead Bread

Friday, August 1, 2014

Grace's Ginger Scallion Fish

https://www.flickr.com/photos/joyosity/14748592291/in/photostream/

One of my friends posted a picture of some steamed fish she made on Facebook, and it looked so good I had to ask for the recipe.  Turns out the fish isn't so much steamed as baked in the oven, but it's so moist and tender, it might as well have been steamed!

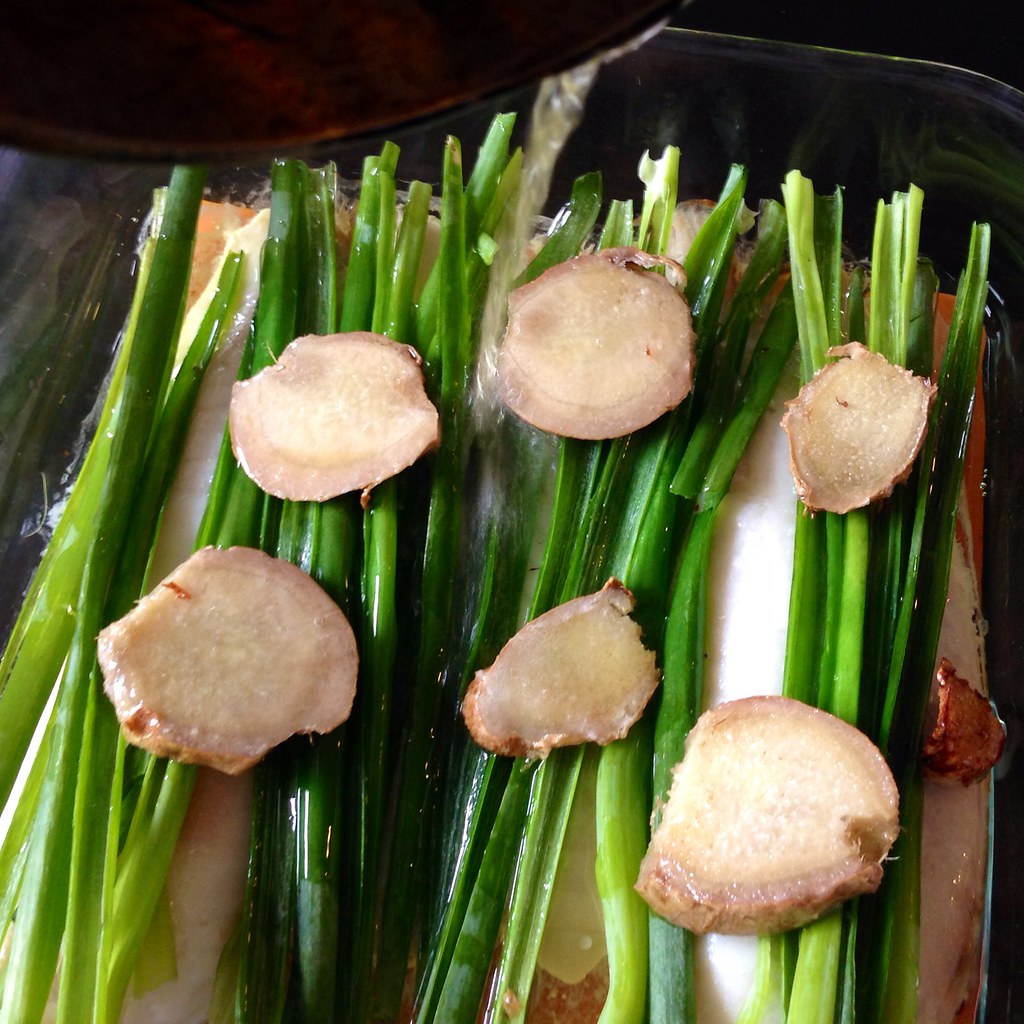
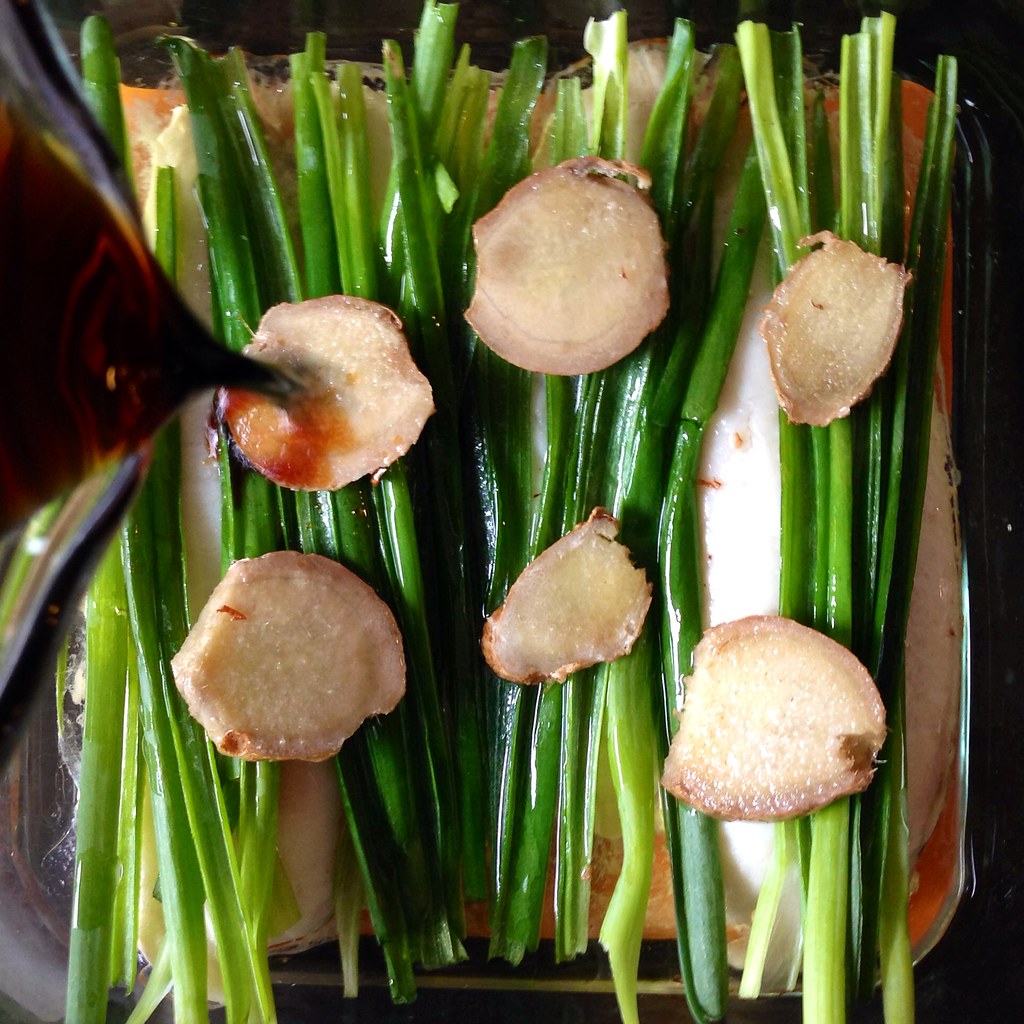
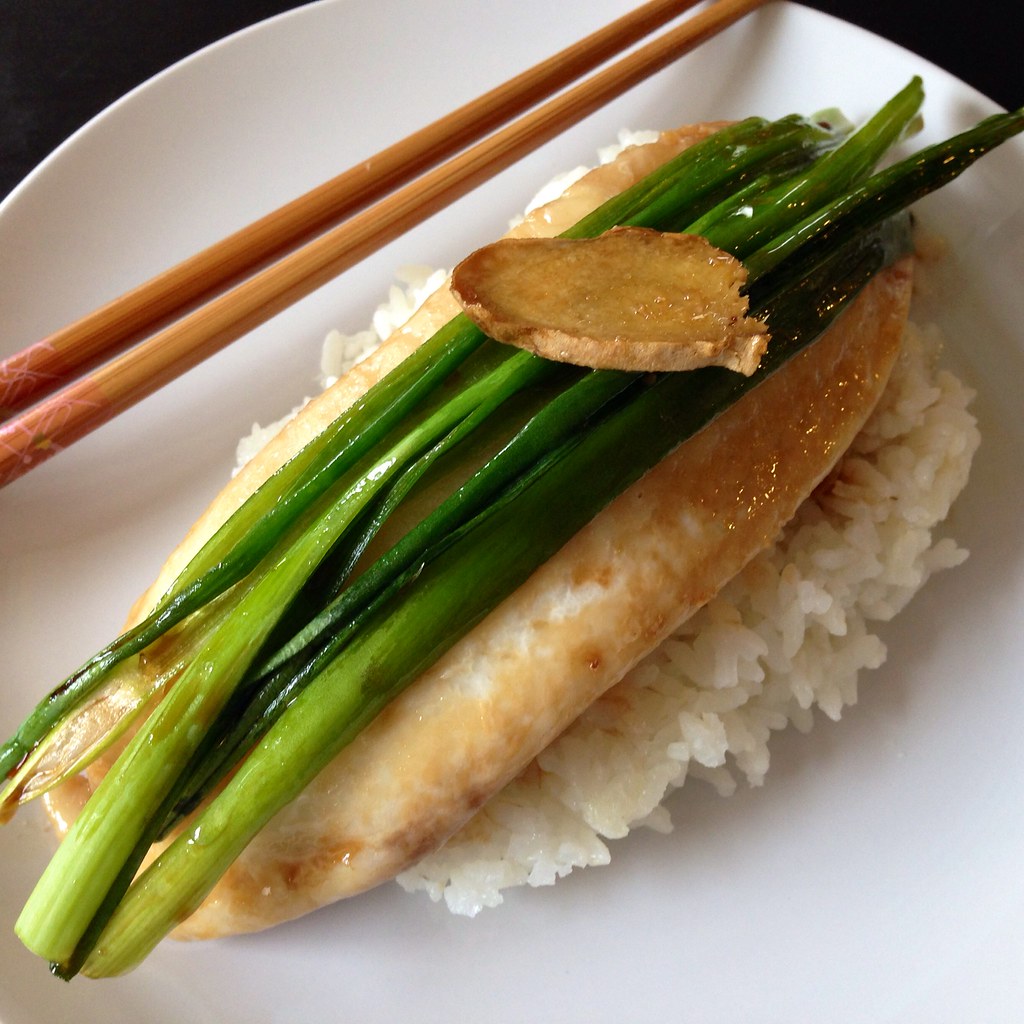
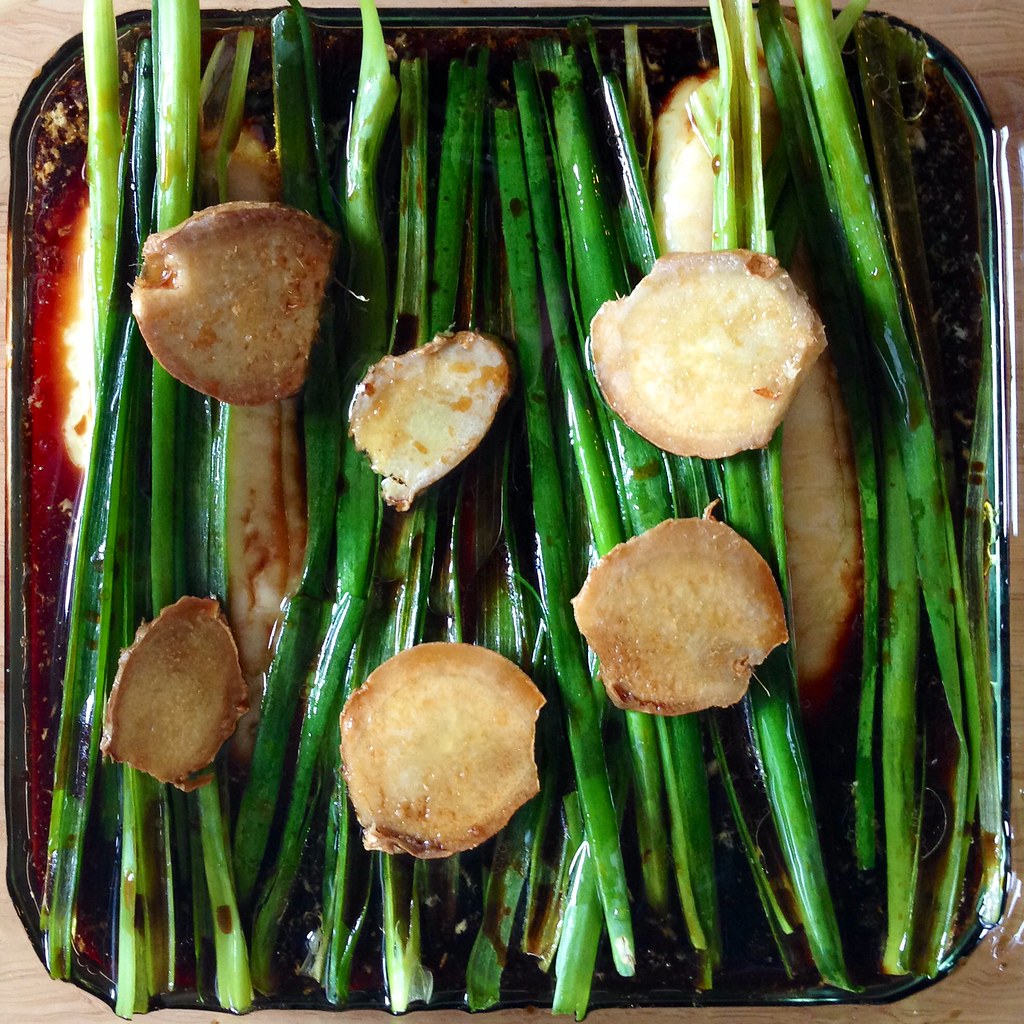
First you bake the fish with some rice wine and ginger slices just until the fish is barely done.  The ginger slices are then added to some oil being heated on the stove, and the fish is topped with scallions.  Then comes my favorite part:  you pour the ginger-infused hot oil over the scallions and fish to seal in moisture and flavor.  Finally a sweet soy based sauce is poured over everything.  This is great served over steamed rice, and in my opinion, is even better the next day when the fish has absorbed some of the sauce!

https://www.flickr.com/photos/joyosity/14565102988/

Grace's Ginger Scallion Fish
serves 2-4

1-2 lbs. white fish filets (I've used cod and tilapia, but I bet sole, flounder, and orange roughy would work well, too)
5 tablespoons rice wine, divided 
2 inch ginger root, thinly sliced
1/4 cup vegetable oil
1 bunch scallions, green parts only
6 tablespoons soy sauce
4 tablespoons sugar
5 tablespoons water

Preheat the oven to 400°F.

https://www.flickr.com/photos/joyosity/14771618693/

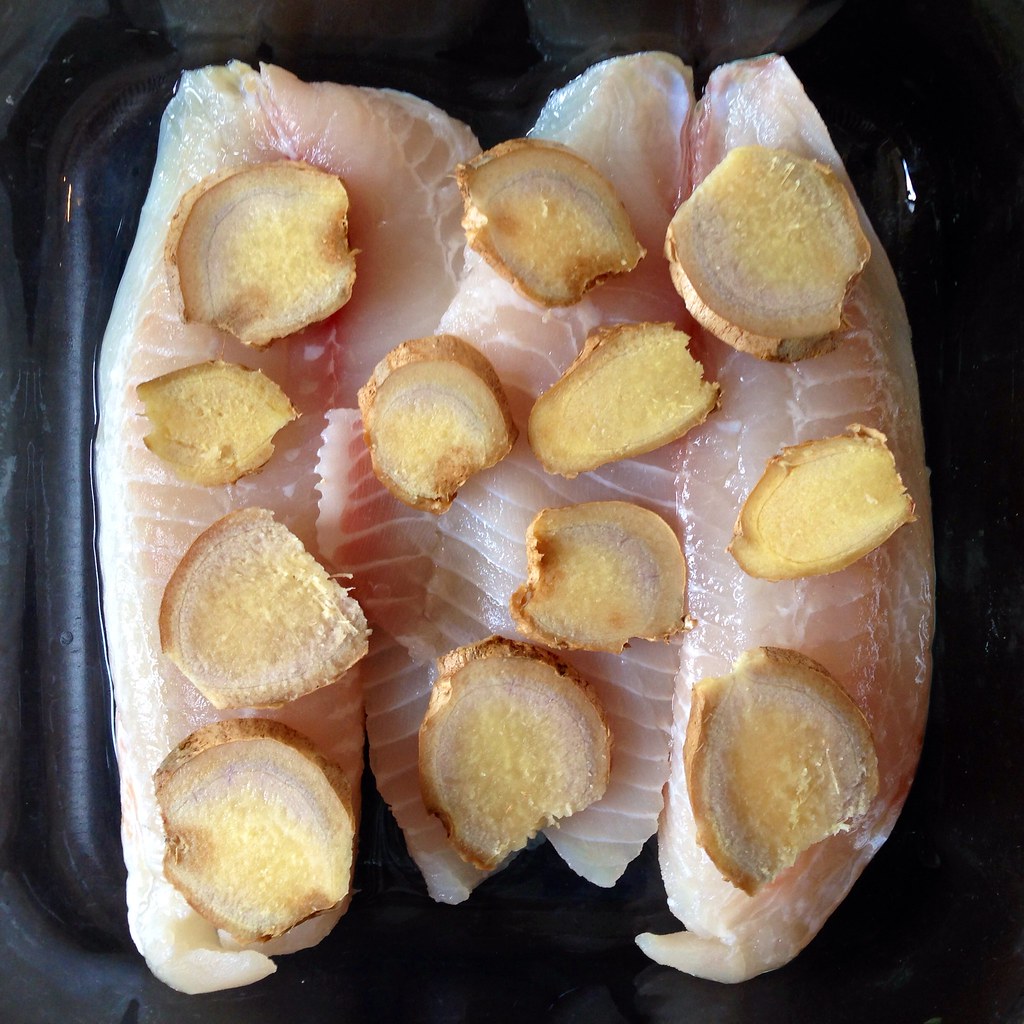
Place the fish filets in a small baking pan.  Sprinkle 2 tablespoons of rice wine over the fish and then arrange the ginger slices on top.  Bake for 12 minutes or until the fish is just cooked through (do not overcook).

Meanwhile, heat up the oil in a small saucepan over medium low.  Mix the remaining 3 tablespoons of rice wine with the soy sauce, sugar, and water and heat for 1 minute in the microwave.  Stir to dissolve the sugar.

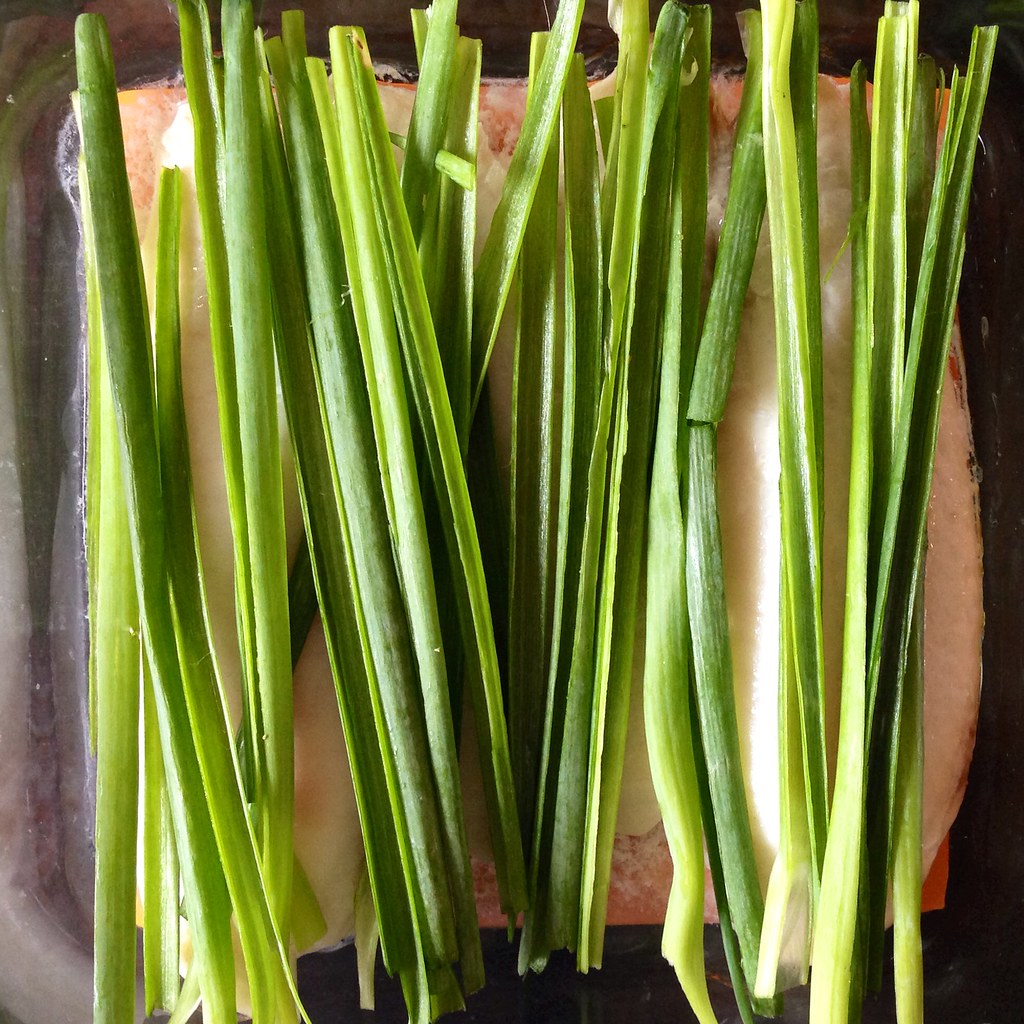
Slice the scallions in half lengthwise or julienne, if you can be bothered.

https://www.flickr.com/photos/joyosity/14751438622/

When the fish is done, remove the ginger slices and transfer to the hot oil.  Arrange the scallion on top of the fish.

https://www.flickr.com/photos/joyosity/14748590261/

Bring the heat up on the oil to medium high and cook until the ginger just starts to brown.  Immediately pour the hot oil onto the fish.  (It's okay with the ginger falls out.)

https://www.flickr.com/photos/joyosity/14751163114/

Pour the soy sauce mixture over the fish and serve warm with rice.

https://www.flickr.com/photos/joyosity/14771622413/

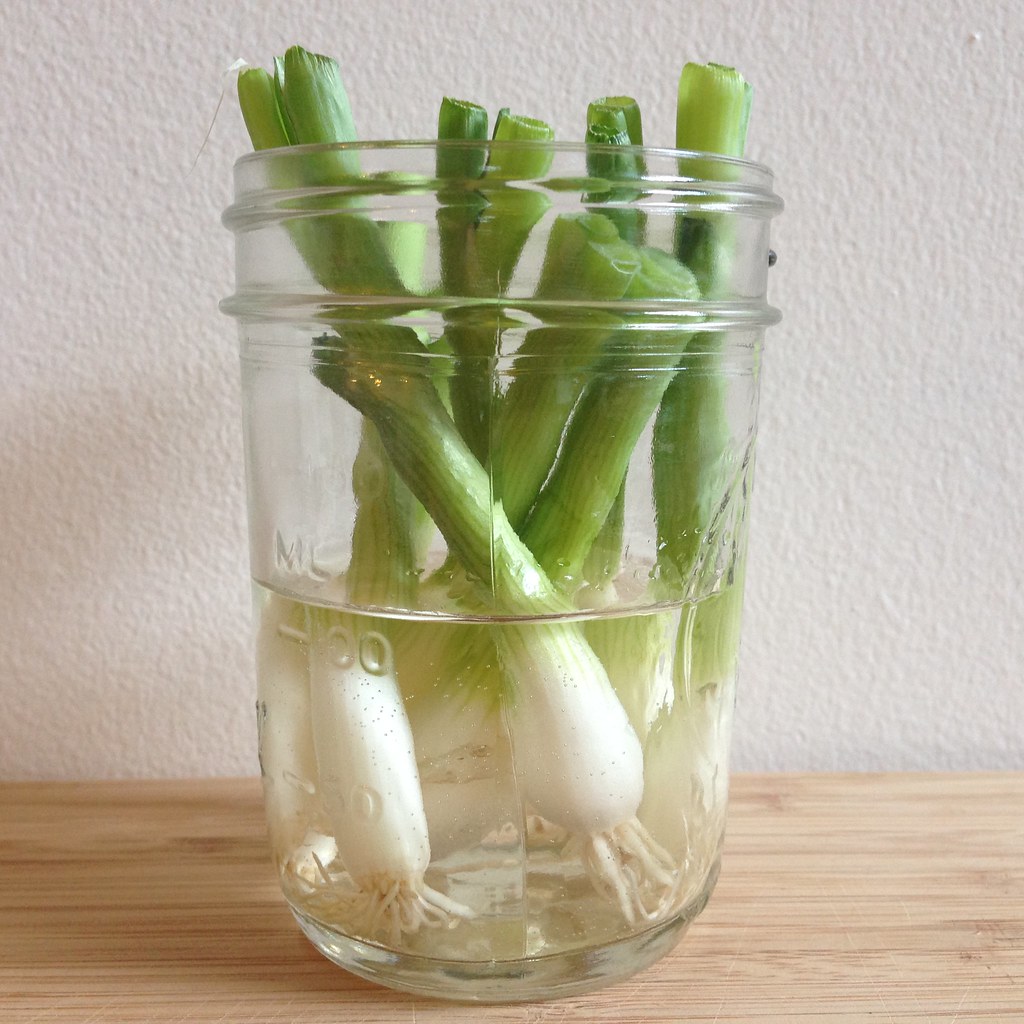
Pro-tip:  Don't throw out the scallion roots after you've chopped off the green part!  Put them in some water and leave them in a sunny place. 

https://www.flickr.com/photos/joyosity/14603396277/

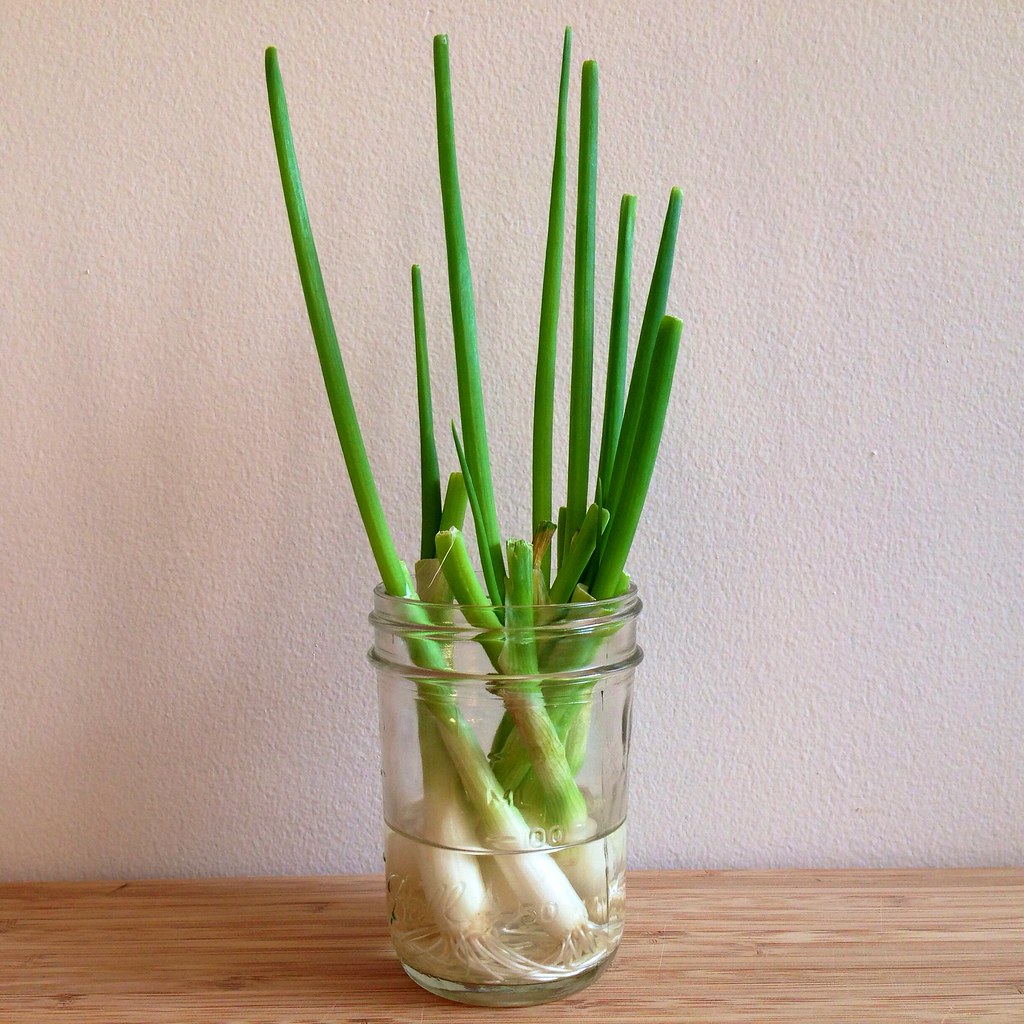
They'll start regrowing, and you can get a lot more mileage out of them.  The picture below shows how much they grew in only 5 days!  That's enough to make some tomato and eggs over rice.  =)

https://www.flickr.com/photos/joyosity/14770672126/

Next:  Jacques Genin's Mango Passion Caramels
Previously:  Strawberry Pop Tart Slab Pie
Last Year:  Cold Soba Noodle Salad with Bake Tofu and Edamame, S'mores Brownie Ice Cream Sandwiches

Monday, March 30, 2009

Hong Kong Style Pan-Fried Noodles

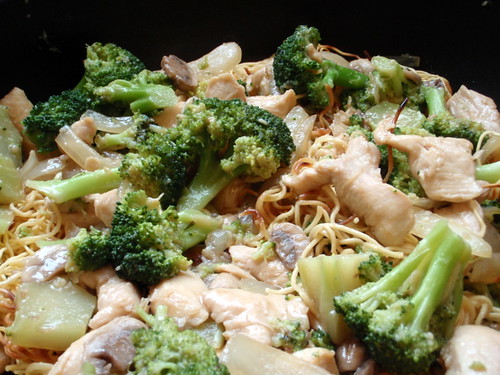
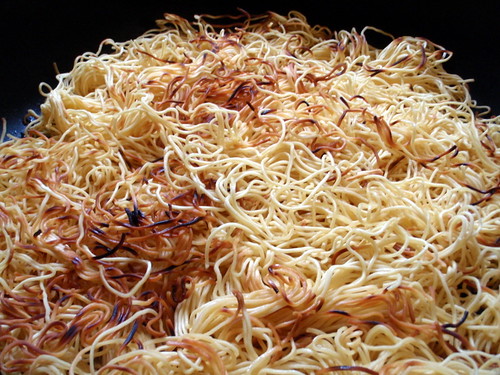
And now it's time to get back to some more Asian dishes. Pan-fried noodles are one of my favorite dishes at Cantonese restaurants, and I made this a couple of weeks ago when I needed to used up some (more) leftovers from hot pot as well as some broccoli from a Boston Organics delivery. I was really surprised at how easy it was; the hardest part was going to the Asian grocery store and finding the fresh Hong Kong style egg noodles. You could probably try making these with fresh or cooked semolina or non-Hong Kong style egg noodles, but the results won't be the same. The thin Hong Kong style egg noodles allow you pan-fry them while fresh so that they get crispy and cooked through without needing to boil them first, and they serve as the perfect medium for absorbing the gravy as well.

Other than the noodles, you can probably substitute any other meats and veggies you want: shrimp, beef, pork, chicken, squid, or baby corn, straw mushrooms, snow peas, baby bok choy, Chinese broccoli, etc.

Pan-fried Noodles with Chicken and Broccoli

Hong Kong Style Pan Fried Noodles (based on sugarlens' recipe)
serves 4

1 (16 oz.) package Hong Kong style noodles (I found these in the refrigerated aisle at the Asian grocery store)
2 small chicken breasts, sliced thinly
1 small onion, sliced thinly
2 cups broccoli, chopped
2/3 cup sliced mushrooms
3 cloves garlic, minced

Marinade:
2 teaspoons corn starch
2 teaspoons sesame oil
2 teaspoons soy sauce
2 teaspoons oyster sauce

Sauce:
2 tablespoons of oyster sauce
2 tablespoons of soy sauce
1 cup water
2 tablespoons of sugar
2 teaspoons of cooking wine

Thickening:
1 tablespoon of corn starch
1 tablespoon of water

Add oil to a heated pan. Add noodles. The noodles should brown very quickly. Use a pair of chopsticks or a spatula to make sure the noodles are getting browned evenly. If you need to, use the spatula to press the noodles against the pan or add some more cooking oil to make sure you brown most of the noodles. Plate the noodles and set aside.

Pan-fried Noodles

Mix together the ingredients for the marinade and add the sliced chicken. Set aside. In a separate bowl, combine the ingredients for the sauce. In a smaller bowl, combine corn starch and water. Set aside.

Add oil to a heated pan and saute garlic and broccoli for about 3 minutes or until garlic is starting to turn brown. Add a half cup of water and cover to let the broccoli finish cooking by steaming. After 5 minutes, remove cover and check to see if the broccoli is done. Salt to taste and dish out.

Add oil to a heated pan and cook onions, mushrooms, and chicken until done. Add broccoli back to the pan. Stir well. Add the sauce mixture. Bring it to a boil.

Add the corn starch mixture and give a quick stir. Bring it to a boil.

Pour gravy on top of the noodles. Serve immediately!

Yum

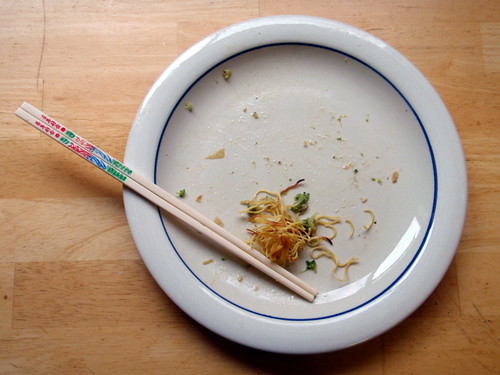
I'm definitely one of those "save the best for last" type eaters, so I almost always have a little bit of the crunchy noodles left at the end. Yum!