If you're not familiar with Hokkaido milk bread, it's that super soft, sweet bread you can get at Asian bakeries. You know how when you walk into an Asian bakery there's this awesome smell? It's buttery, milky, and sweet, but more than just the sum of those things. Well, I just discovered that making this bread will basically recreate that smell in your kitchen. It's incredible.
This bread is pretty much on the opposite end of the spectrum from no-knead bread. It involves a multitude of steps and lots of kneading, but the end result is like eating a fluffy cloud of bread. I think it's best when fresh, but after a few days, you can toast it for the best toast of your life, or even better, make French toast with it!
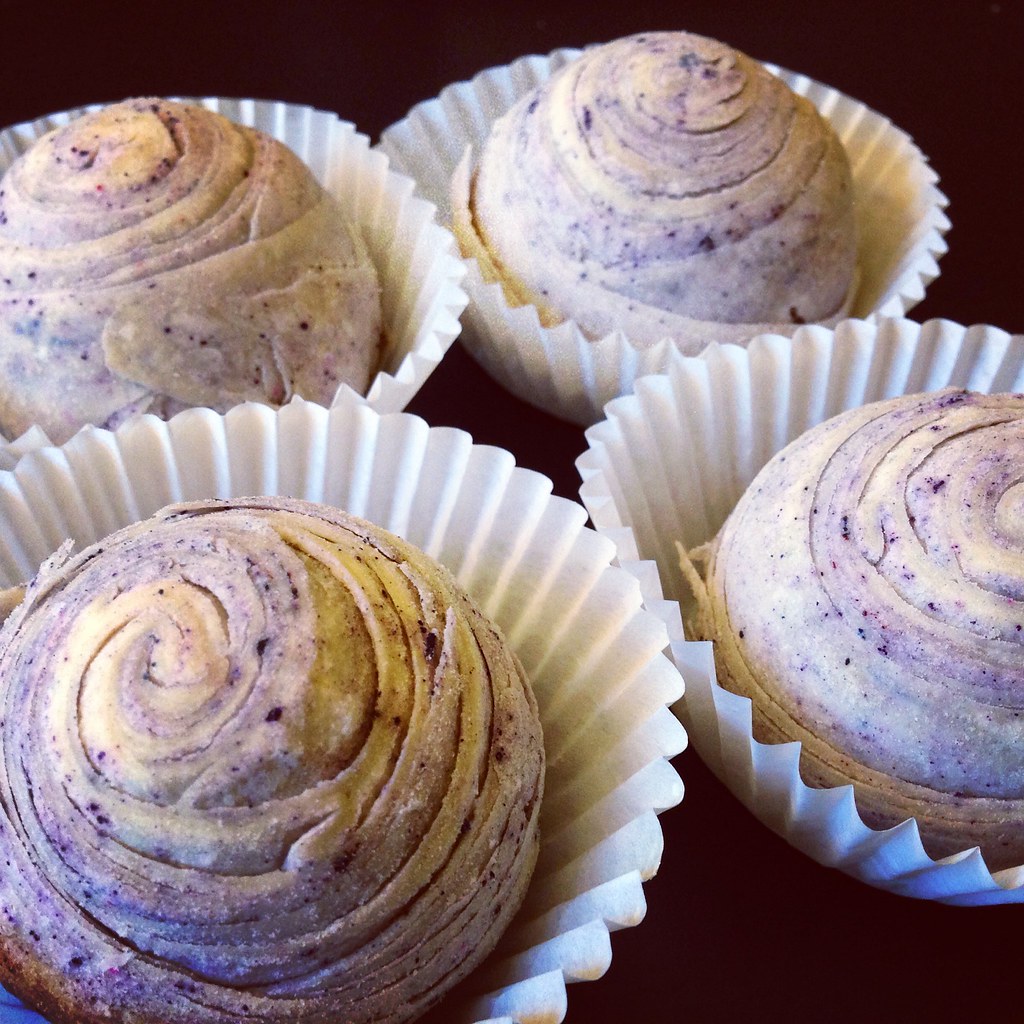
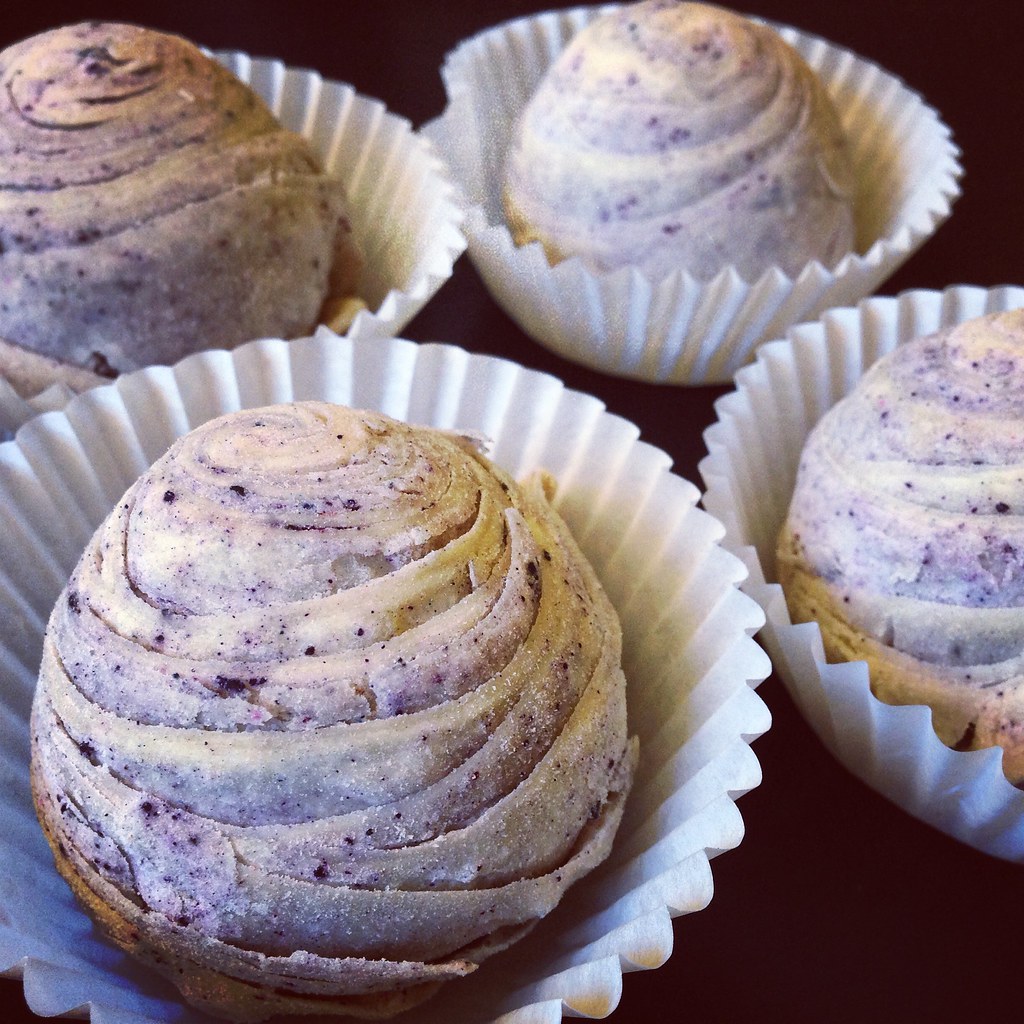
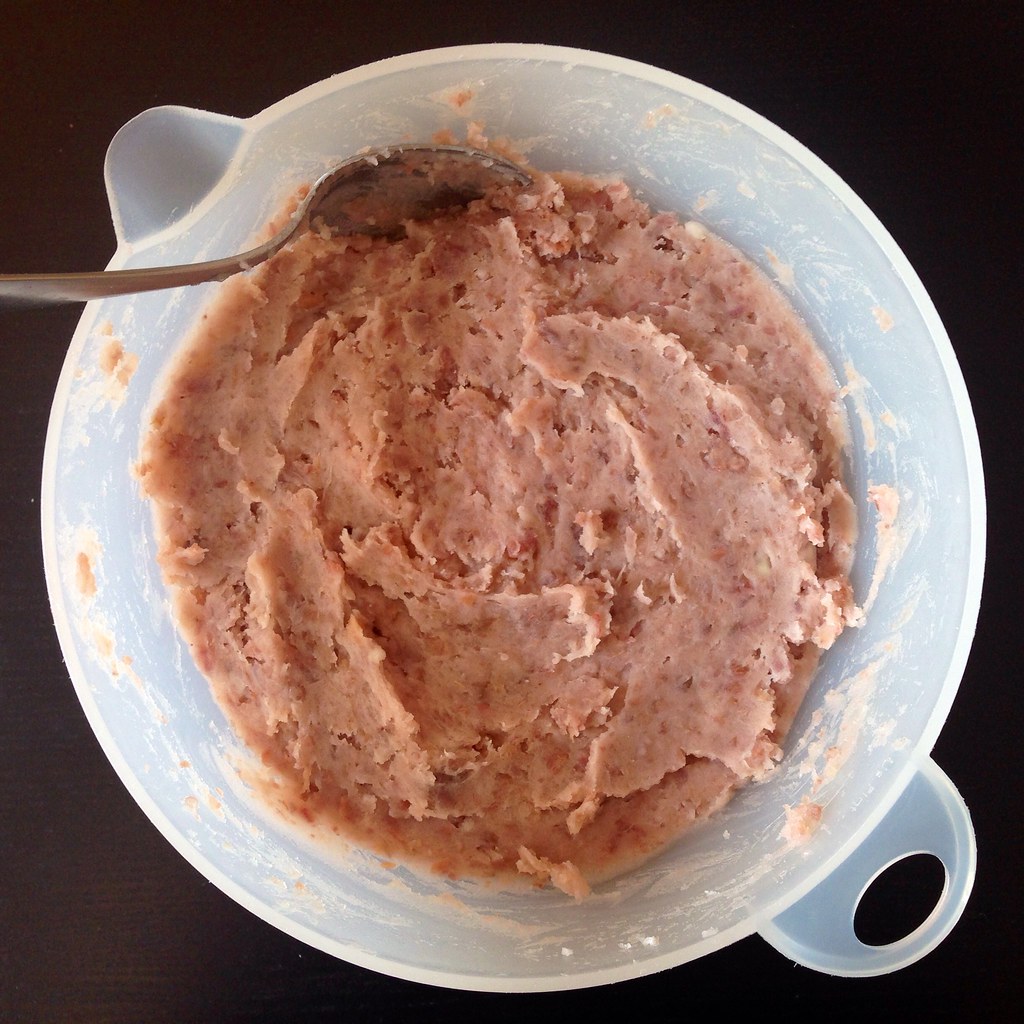
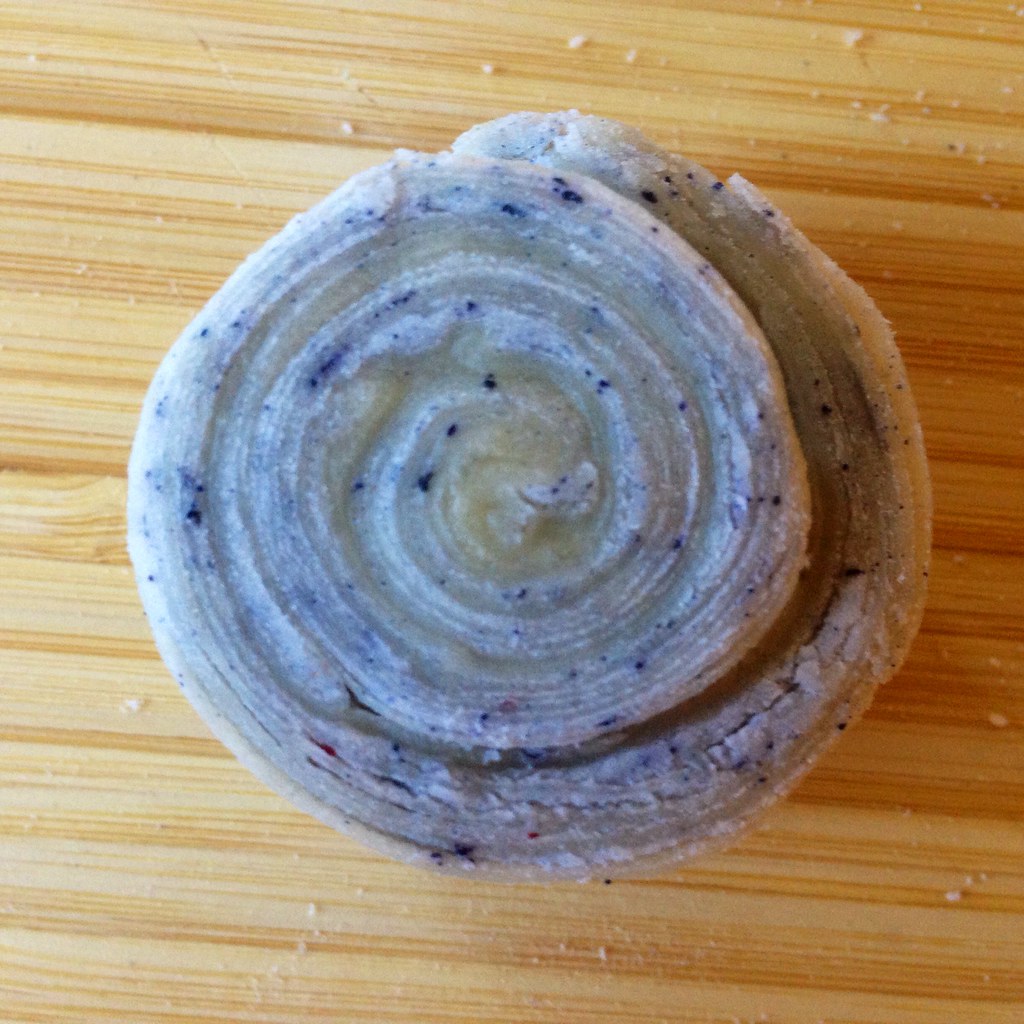
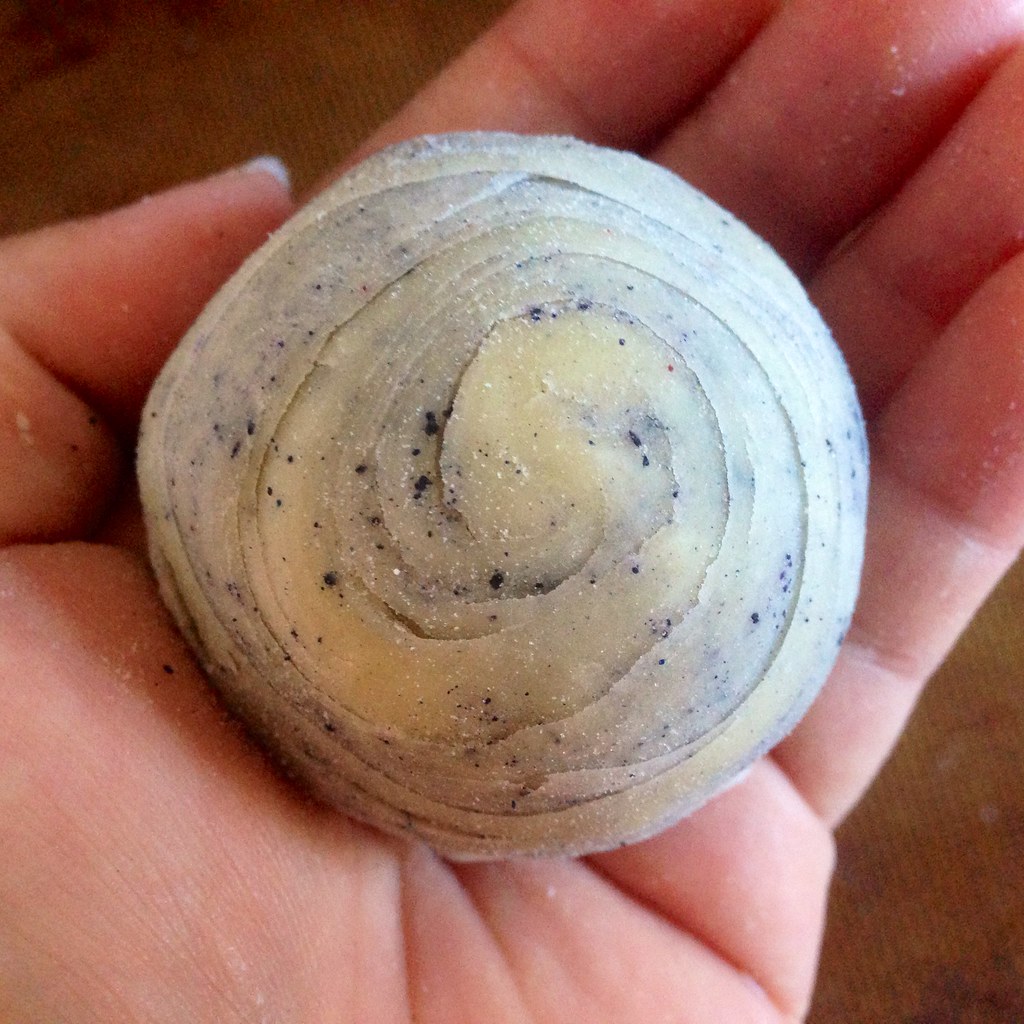
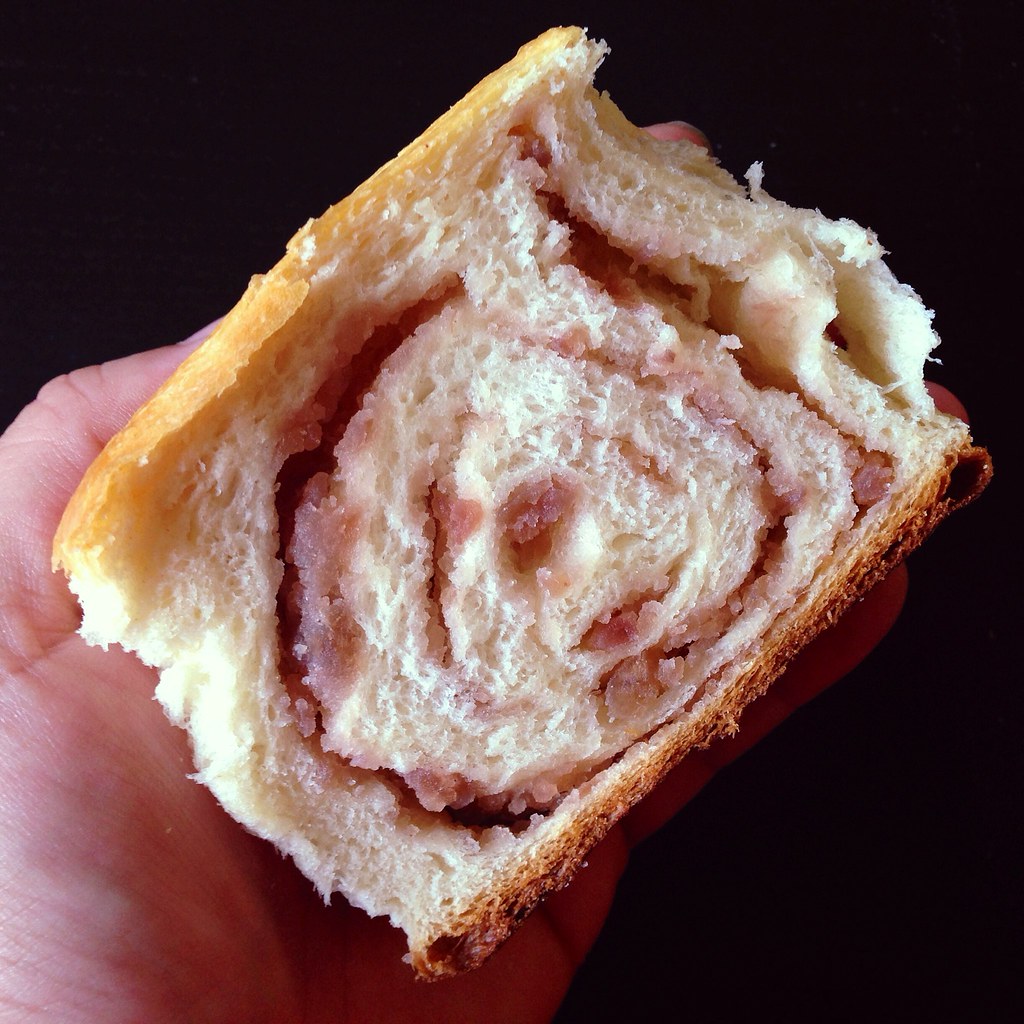
Since I had some leftover taro paste from making the Taiwanese taro swirl mooncakes, I decided to wrap some in the dough and make Taro Swirl Milk Bread. The bread didn't end up rising quite as much as I would like; I think next time I'll keep the dough a bit thicker before I add the taro and roll it up so that there's a higher bread to taro paste ratio.
makes 2 loaves
For first proofing:
600 grams bread flour
42 grams egg white
7 grams yeast
168 grams heavy cream
190 grams whole milk
12 grams unsalted butter, at room temperature
18 grams of sugar
For second proofing:
7 grams salt
5 grams yeast
90 grams sugar
50 grams egg whites
3 grams milk powder
12 grams unsalted butter, at room temperature
To finish:
40 grams butter
Kosher salt
1 egg
Combine the heavy cream, whole milk, butter, and sugar and warm it in the microwave to 110°F. In a stand mixer with the dough hook attachment, combine the bread flour, yeast, egg whites, and warm milk mixture. Knead until smooth on medium speed. Cover and proof in the refrigerator for 18-24 hours until doubled.
Once the dough has doubled, punch out the air. Cut the dough into small "bite-size" pieces and return it to the stand mixer. Add the salt, yeast, sugar, and egg whites and turn the mixture on medium. Work the dough until smooth and elastic (about 5 minutes), then add the butter. Keep the mixer on medium and work for another 3 minutes. Then turn the mixer on medium high and work the dough for another 6-10 minutes. The dough should pull away from the bowl and make "slapping sounds" against the bowl.
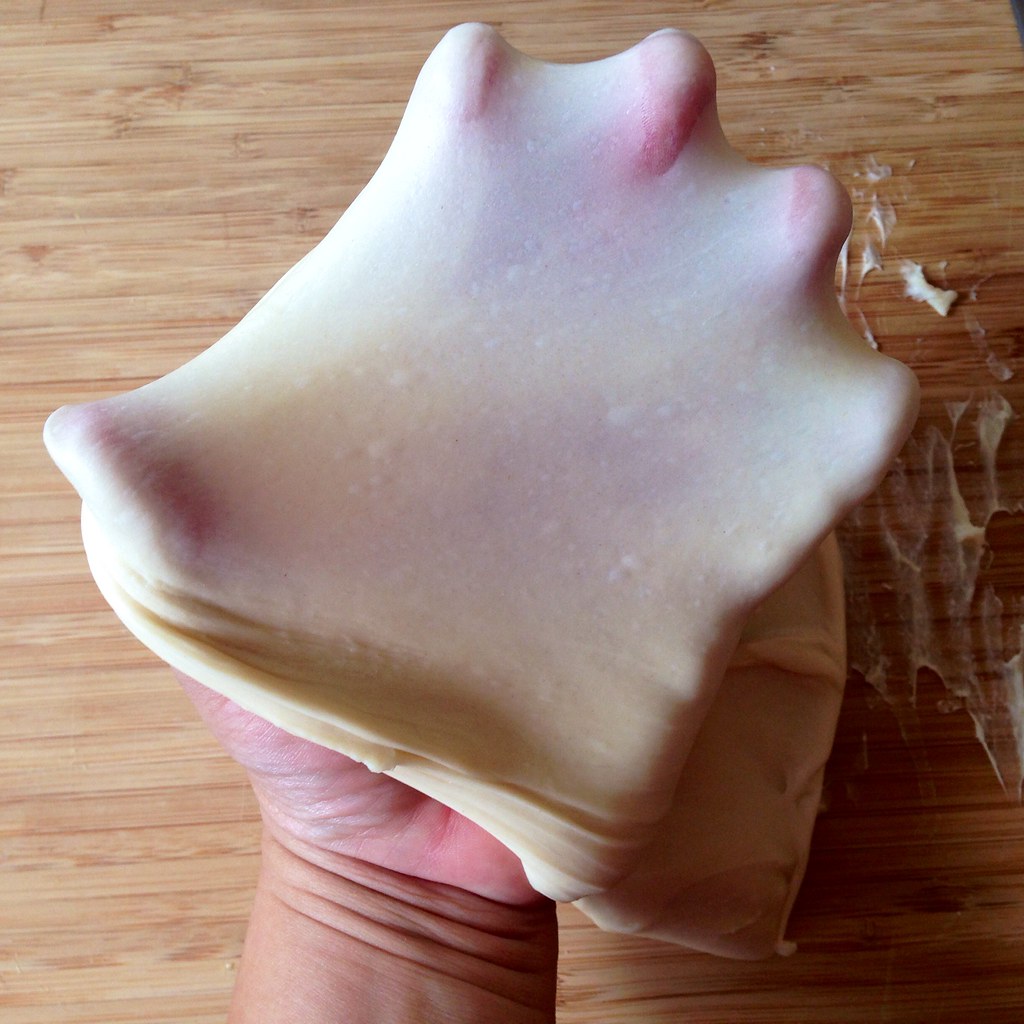
At this point, the dough shouldn't be too sticky but still moist and have developed enough gluten that you could slowly stretch it into a thin, translucent film without breaking it. Divide the dough into 2 equal portions and let rest for 30 minutes.
In the meantime, brown the 40 grams of butter in a small saucepan over medium-low heat. The butter will start to foam, then turn brown and smell nutty. Turn off the heat and set the browned butter aside.
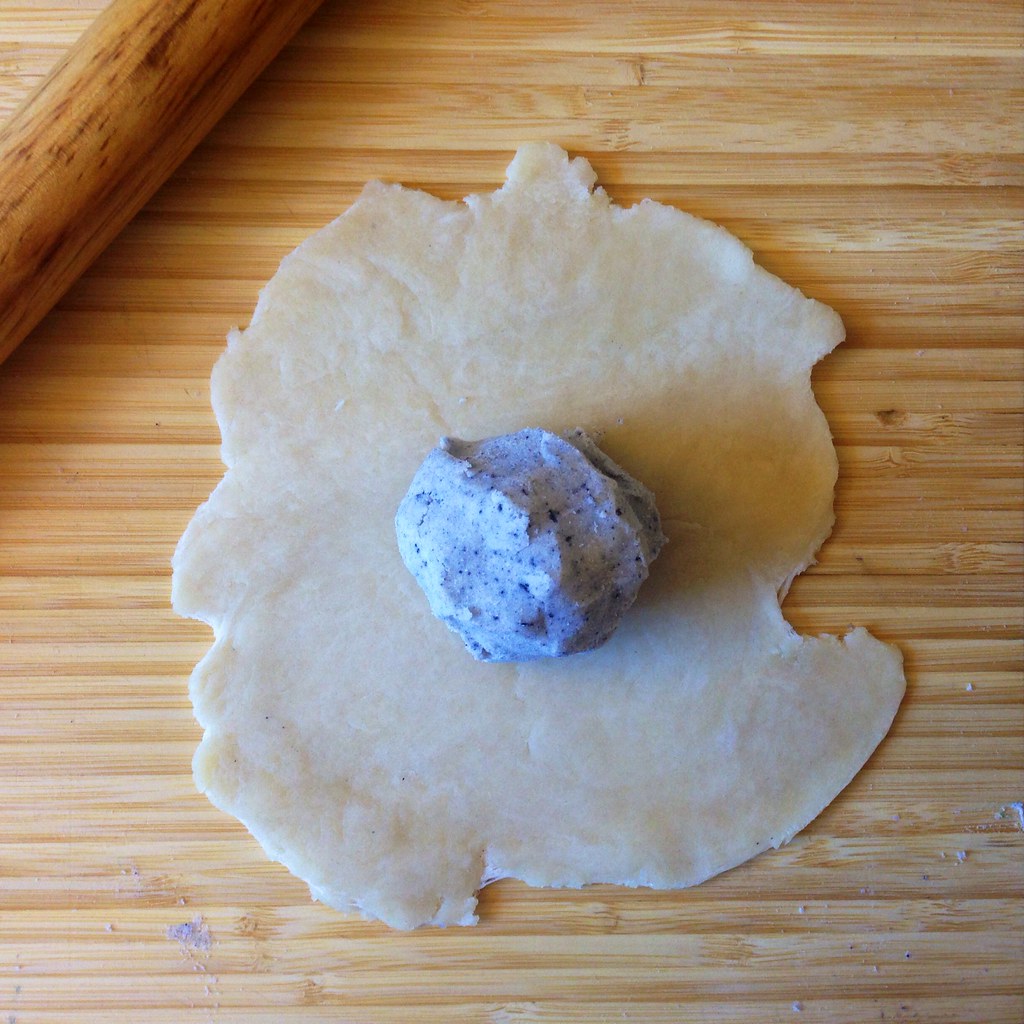
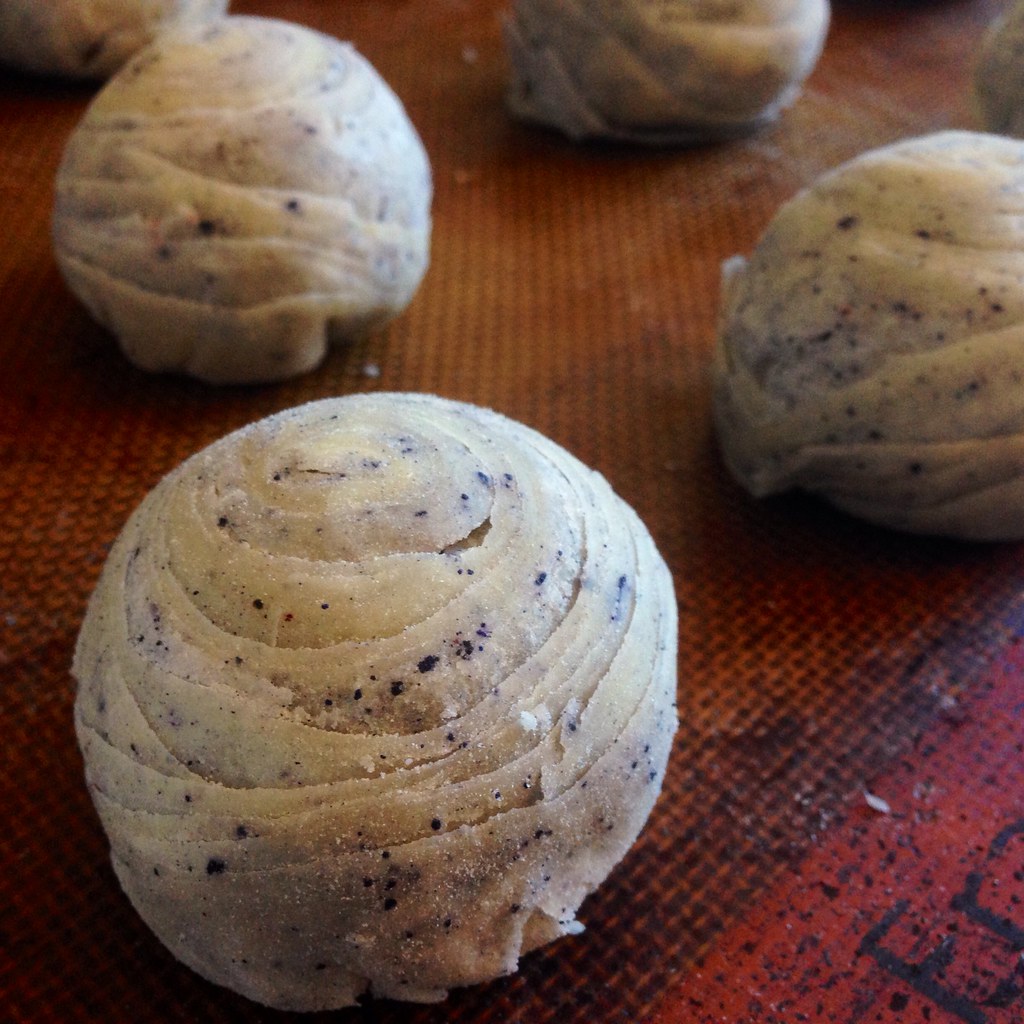
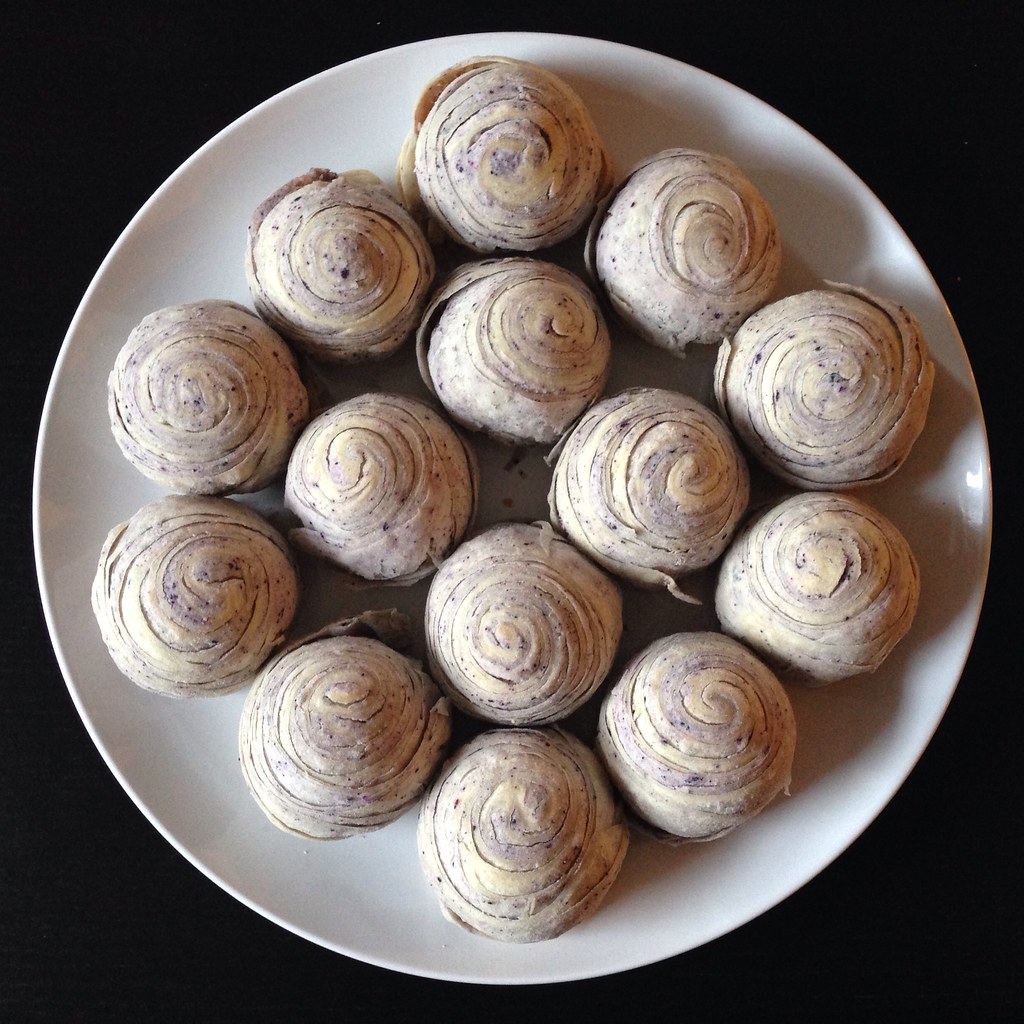
Once the dough is rested, divide each half into 3 equal parts. Roll each part into an long oval shape, then fold the sides toward the center (like folding a letter) and roll it out again into a long rectangle. Roll the long rectangle up into a spiral. Repeat for the other portions and let rest for another 15 minutes.

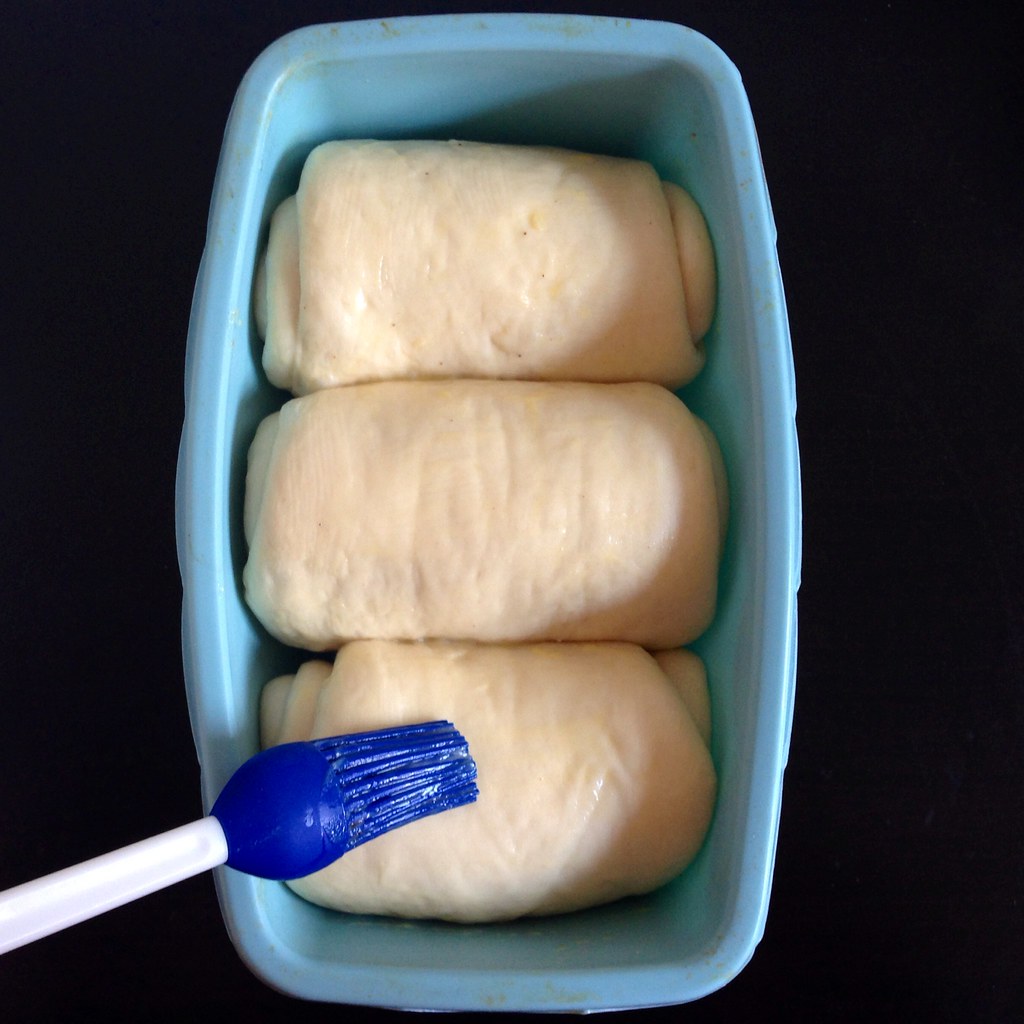
Variation #1: The traditional way is to take the 3 portions and roll each into a long oval. Brush with the browned butter and sprinkle with a little salt, then roll up into a spiral. Place the 3 spirals seam side down in a loaf pan.
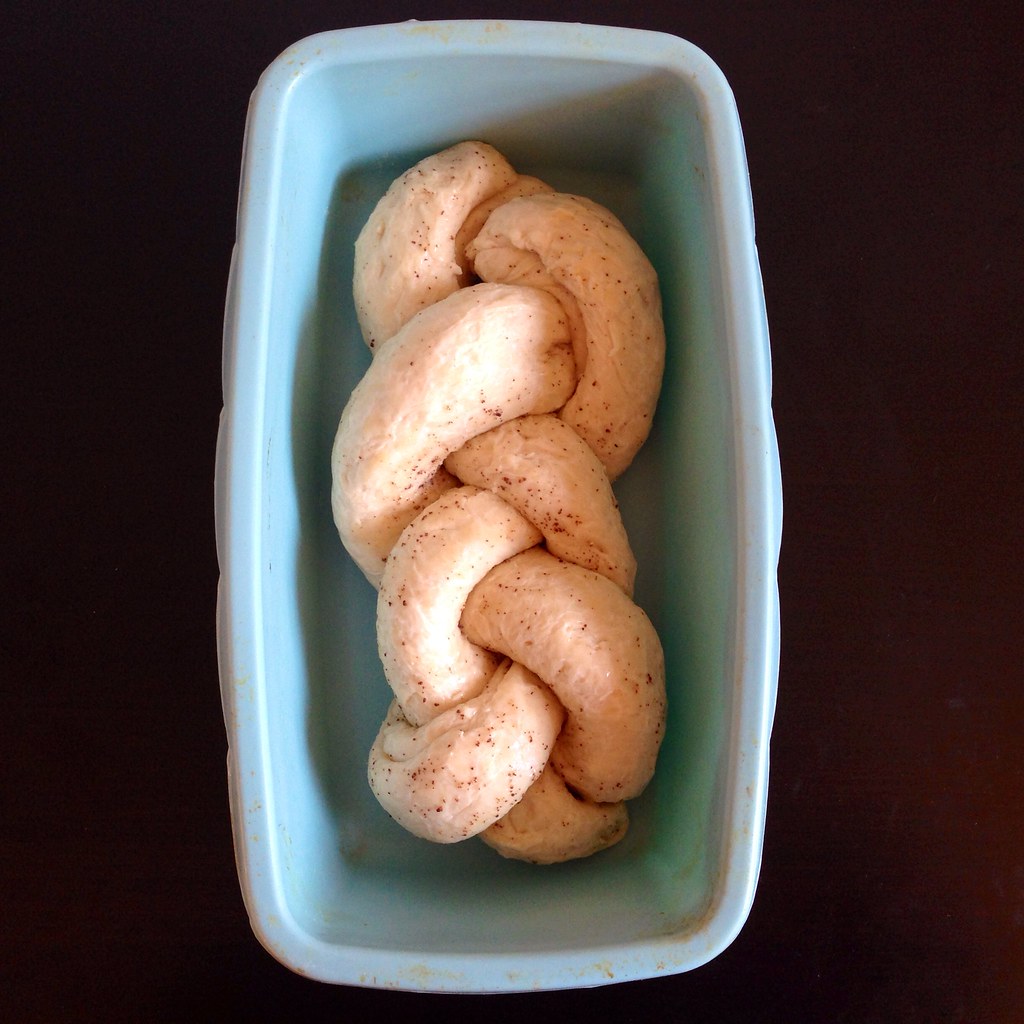
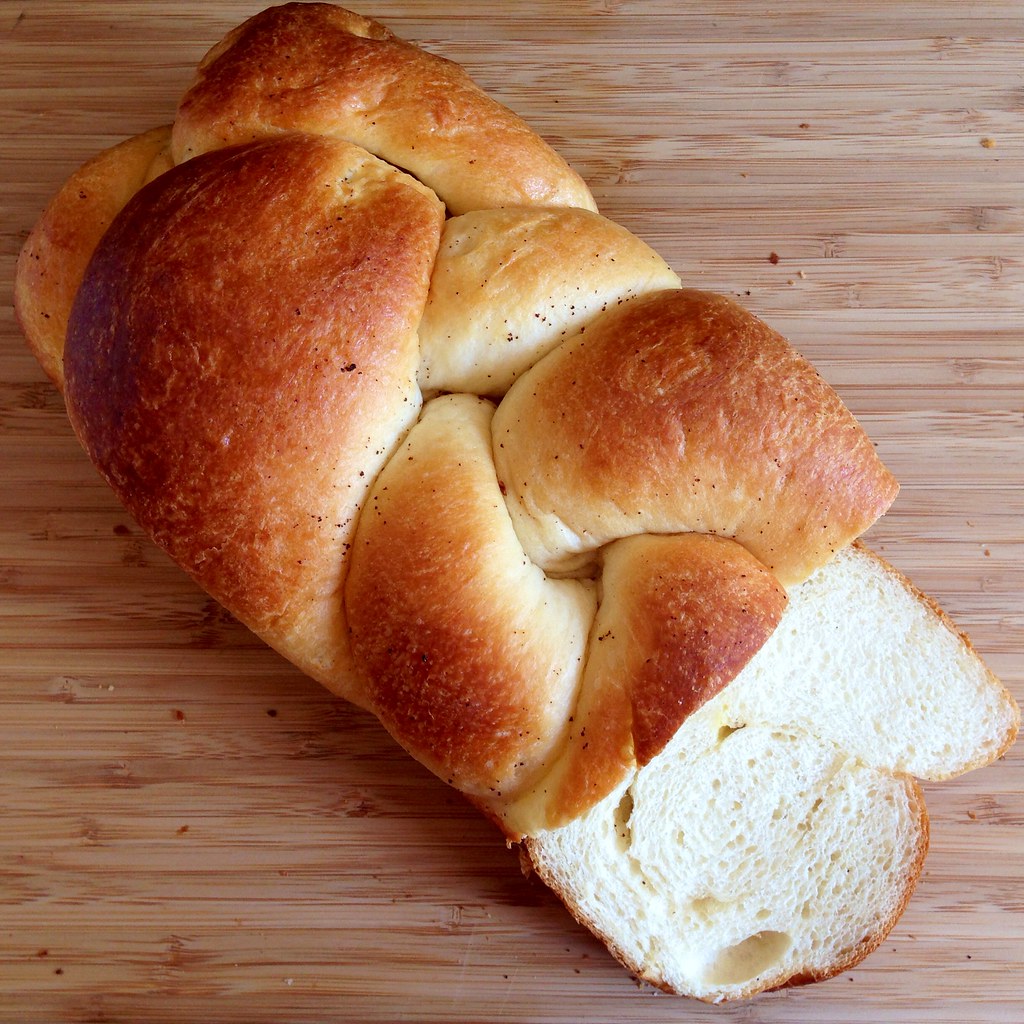
Variation #2: If you want to make a braided loaf, after brushing on the butter and salt, roll each of the portions lengthwise into a long snake. Braid the three snakes, tuck the ends underneath, and set into a loaf pan.
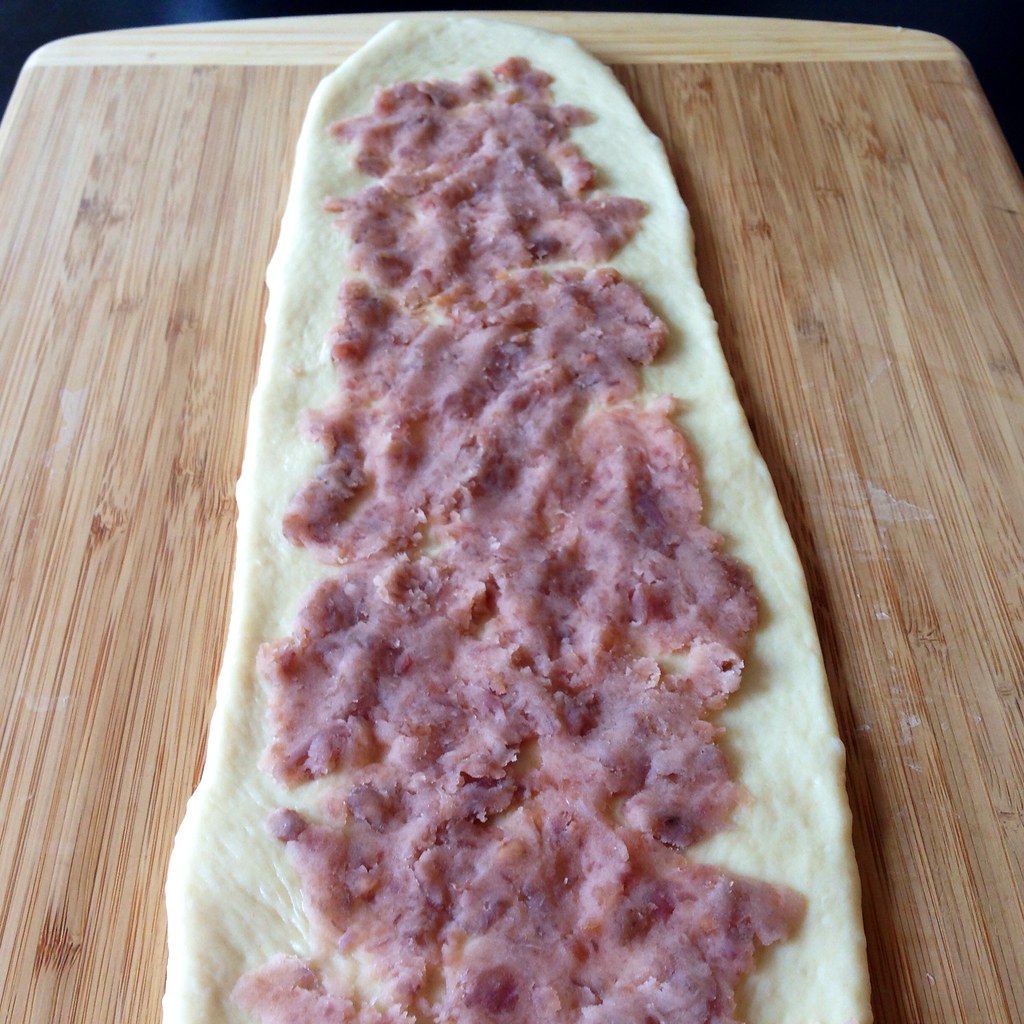
Variation #3: For the taro swirl bread, shape the dough the traditional way, but instead of brushing with butter and salt, spread a thin layer of sweetened taro paste on top of the long oval before rolling up into a spiral.
At this point, you can freeze the shaped dough if you want and just let it come to room temperature before moving on when you're ready to bake the bread.
Preheat the oven to 360°F. Let the dough proof to 80% full (not doubled, which would be 100%); this will probably take 60-90 minutes. Make an egg wash by beating the egg with a tablespoon of water. Once the dough is proofed, brush the top with the egg wash and cover with aluminum foil. Bake for 20 minutes, then remove the foil and back another 10-20 minutes until golden brown on top.
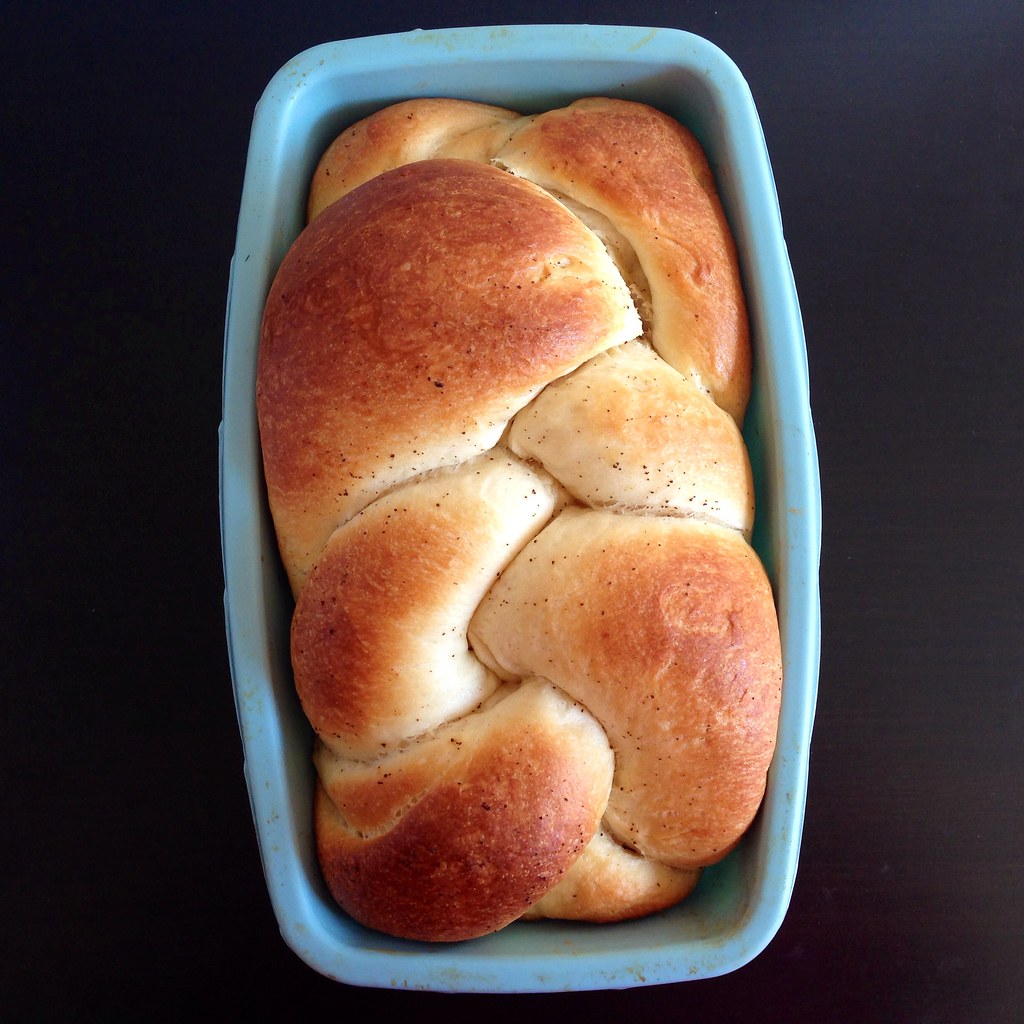
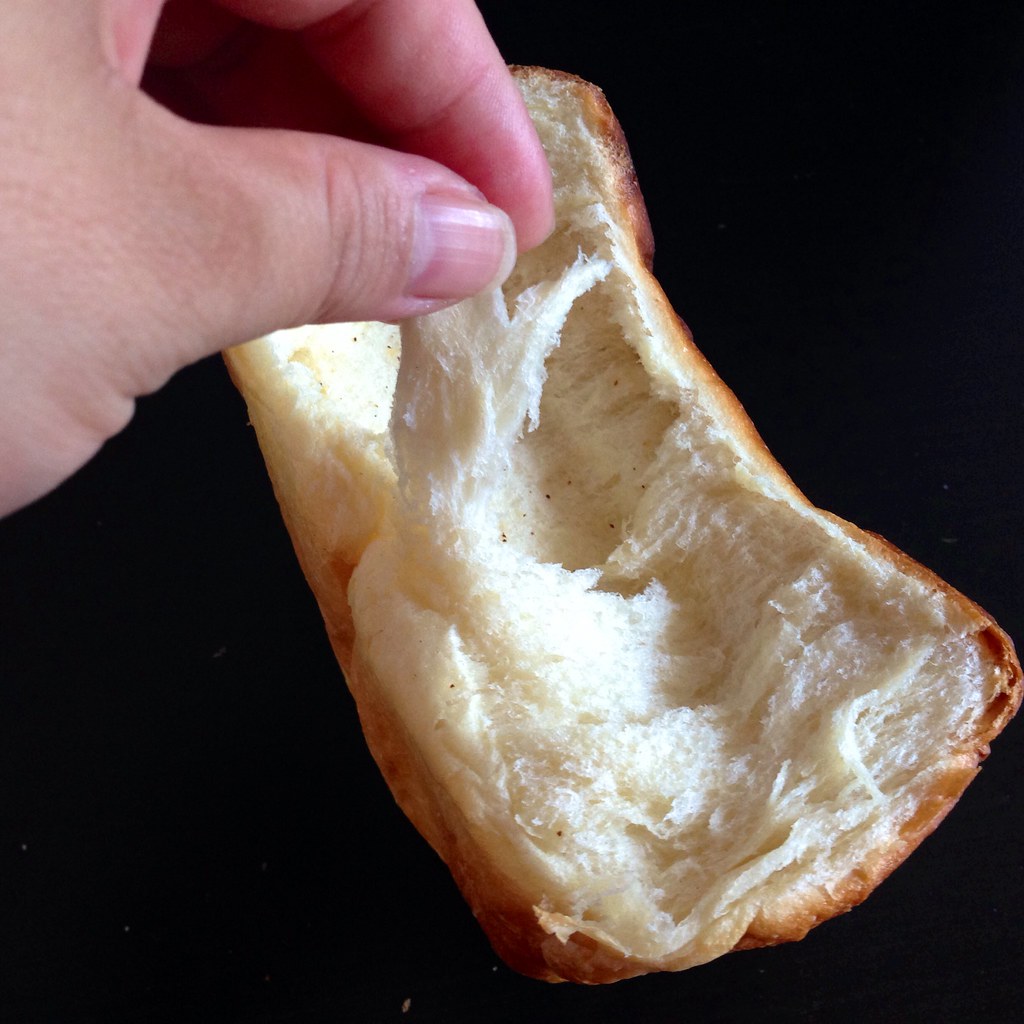
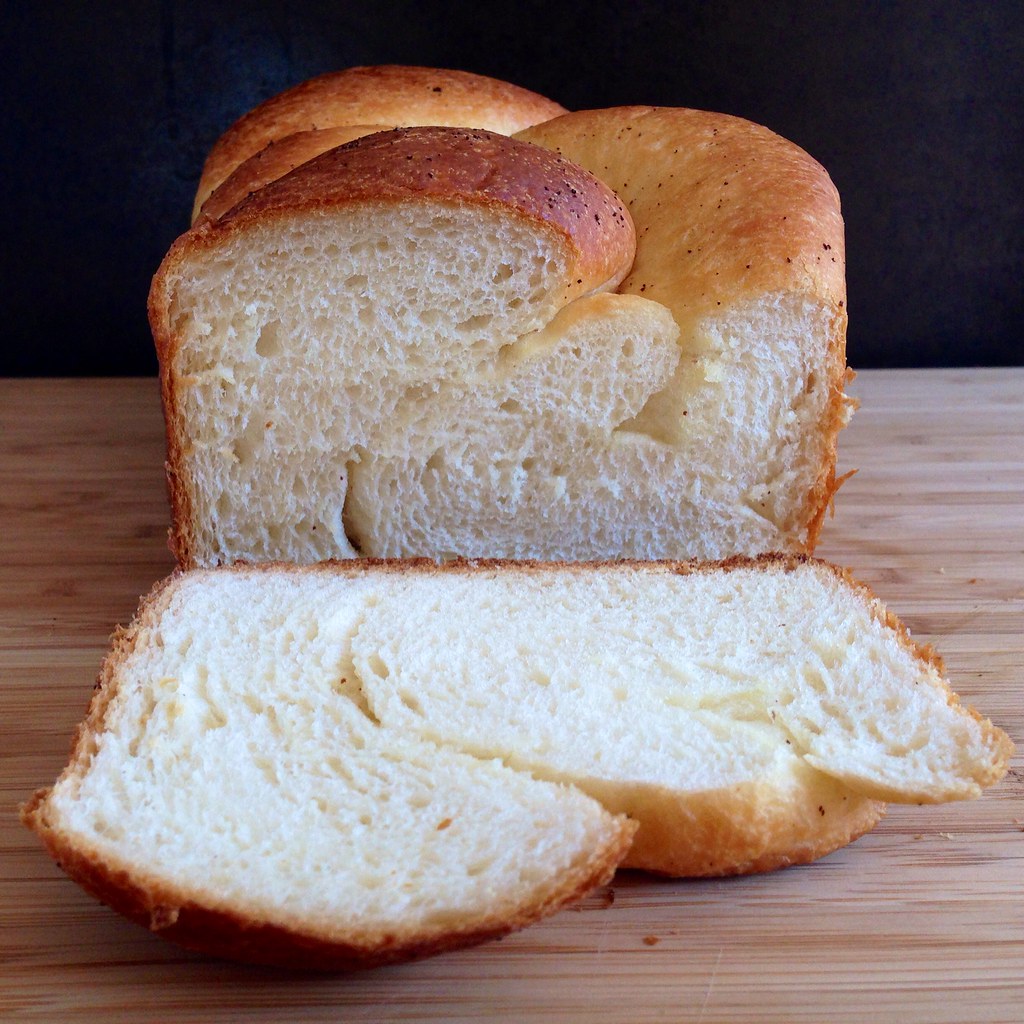
While the braided loaf turned out pretty well, I was a little disappointed with the final look of the traditional loaf (see the second picture from the top). I think since I used a flexible silicon loaf pan, the bread expanded outwards instead of just up so it ended up not rising as high as I would've liked it to. However, I liked the texture of the traditional loaf more because if you look at the cross sections of the two loaves, the traditional one has a much fluffier, almost stringy (in a good way) consistency. This is due to the way it is shaped, hence, the reason it is more traditional.
I also noticed that the bottom of my first loaf (third picture down) was pretty brown by the time I took it out of the oven, so for my next loaf I baked it on top of one of those AirBake cookie sheets, and it turned out much better.
Next: Ribollita (Tuscan Bread Soup)
Previously: Ginger Scallion Lobster Buns
Last Year: Sweet Corn Ice Cream with Black Raspberry Swirl