Thursday, January 29, 2009

Clementine Cupcakes

Clementine cupcake

Twas the same snowy morning, and two forlorn clementines were staring at me, beseeching me to do something with them other than throw them away. They were already several days past their prime, shriveled and sunken, although not yet spoiling. There must be something I can do with them, I thought. And then I remembered the clementine cake recipe I had noticed on Smitten Kitchen. A flourless cake made with whole clementines, almond flour, sugar, and eggs. Perfect, because I had some leftover almond flour from the macaron experiments that I needed to use up. Alas, two clementines do not a whole cake make. So then I thought, why don't I try cupcakes?

1 hour and 15 minutes later

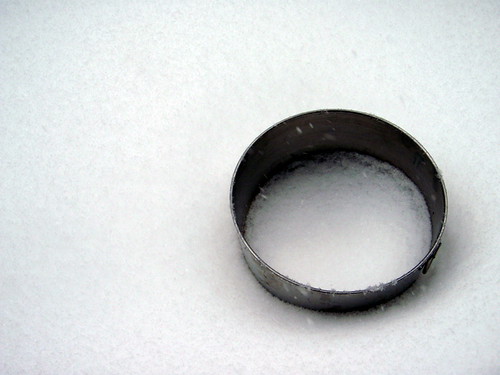
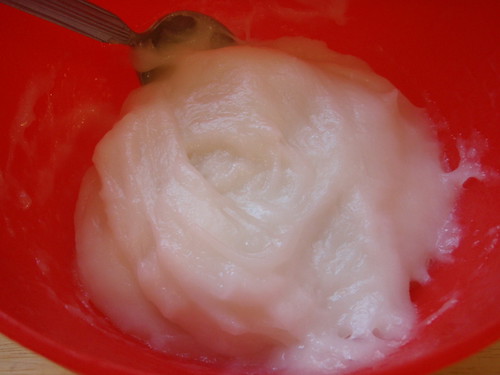
Since it was snowing, and I didn't have any ice in the freezer, I figured I'd try cooling the clementines outside in a snow bath instead of an ice bath. I put a metal bowl out, and an hour and 15 minutes later, it was halfway full of snow.

Cooling the boiled clementines in the snow

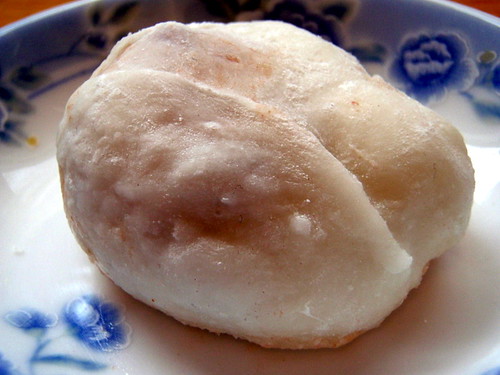
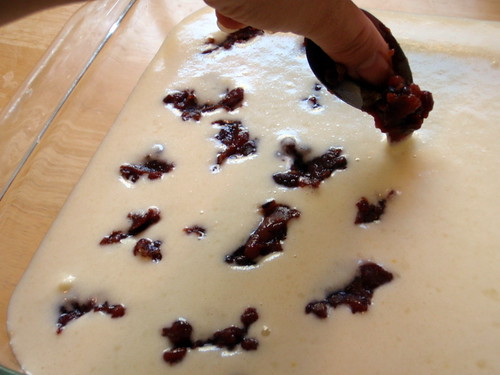
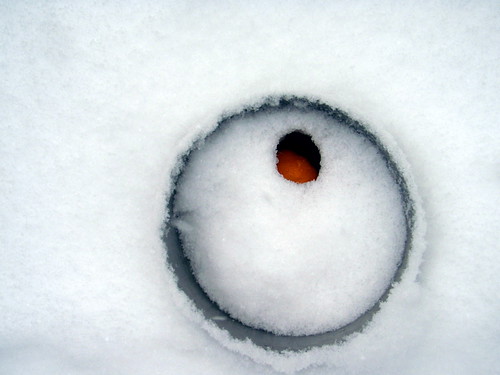
I plopped the two clementines in there and covered it with more snow and waited half an hour. When I looked back on it, this is what I found.

30 minutes later

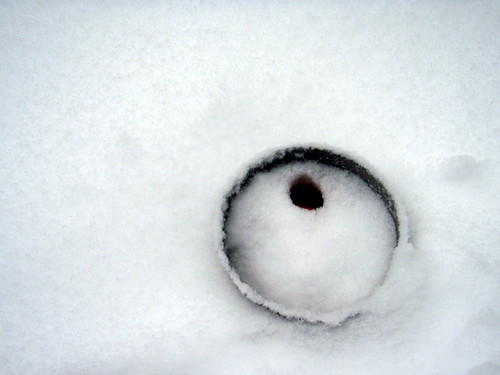
One of the clementines melted its own little chimney!

The hot clementine melted a hole in the snow!

If you don't happen to make this on a snowy day, go ahead and just use an ice bath or even a cold water bath. The clementines don't need to be chilled, just cool enough to cut in half and not worry about getting boiling clementine juice on your fingers.

Clementine Cupcakes (adapted from here)
makes 8 cupcakes

2 clementines
2 eggs
1/3 cup sugar
3/4 cup ground almonds
1/3 teaspoon baking powder
Powdered sugar for dusting

Put the clementines in a pot with cold water to cover, bring to the boil, and cook for 2 hours.
Boiling the clementines
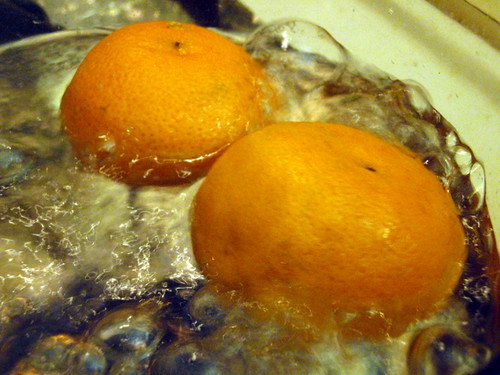
Drain and, when cool, cut each clementine in half and remove the seeds. Then finely chop the skins, pith, and fruit.
Boiled clementines
Preheat the oven to 375 °F.
Line a cupcake pan with 8 cupcake liners.
Beat the eggs. Add the sugar, almonds, and baking powder. Mix well, adding the chopped clementines.
Clementine cupcake batter
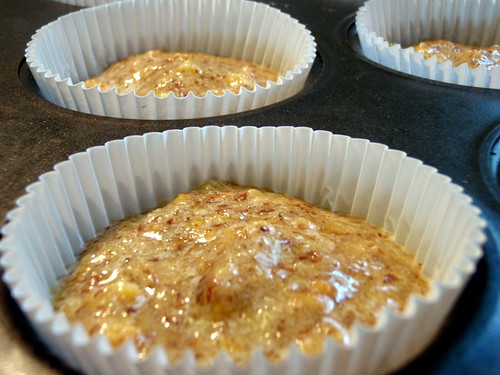
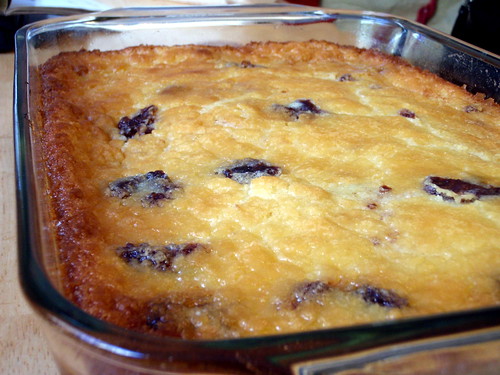
Pour the cake mixture into the cupcake liners, about 3/4 full, and bake for 30 minutes, when a skewer will come out clean. Remove from the oven and cool.
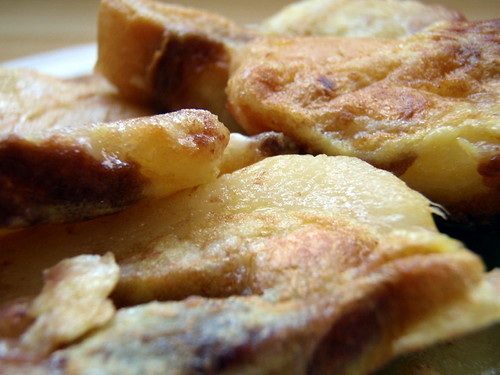
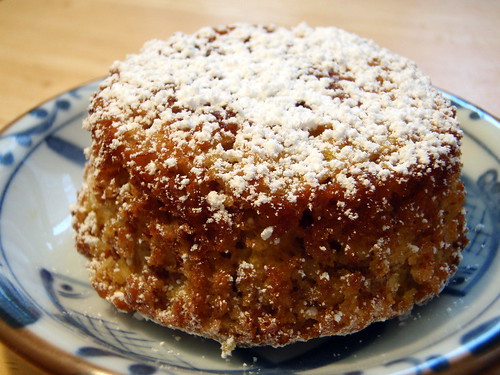
Remove the cupcake from the liner, turn upside down, and dust with powdered sugar. Serve at room temperature.
Inside of a clementine cupcake

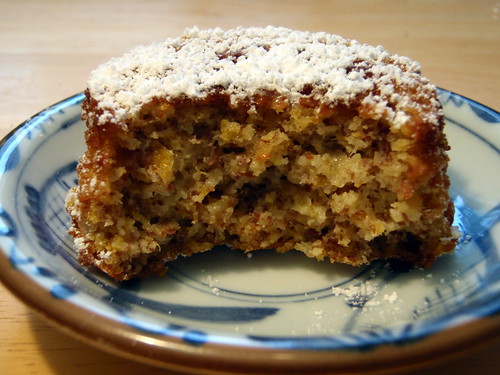
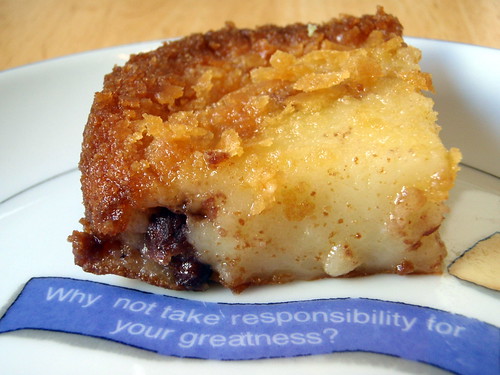
I was a little afraid that the clementines were too old to use, but boiling them in water for two hours really rehydrated them into their young, plump selves. I filled the liners to about 3/4 full but these cupcakes barely rose so you can probably fill them higher if you want. The cupcakes break easily when you remove them from the liner, so you can just dust them while they're still in their liners and serve them that way, but I like the look of the individual mini-cakes.

I like this recipe because you can definitely taste the clementines, but it's not an overly sweet or tart citrus dessert, like say, a lemon bar or key lime pie. If you do want something sweeter and more tart, you can always make a simple glaze with lemon juice and powdered sugar and glaze the cupcake with it. Also, the cupcakes were super moist even without the addition of any oil or butter, which is great if you're worried about that sort of thing. =)

Wednesday, January 28, 2009

Dutch Babies

Dutch baby pancake with blueberries

On snowy days like this when I get to work from home or on a lazy Saturday morning I like to treat myself and make a Dutch baby. Ellen first told me about these puffy pancakes and waxed poetically about how good they were. It wasn't until I was in Ft. Lauderdale with Angela that I got myself to Original Pancake House and finally tried one. We also ordered their other specialty, the Apple Pancake, but compared to that sugar-laden monstrosity, the Dutch baby was clearly the superior.
The Dutch baby contains a lot of egg in its batter and is baked in the oven in a skillet so that it rises to heights never before seen by any other pancake and finally settles down into a custardy shell ready to be topped with powdered sugar, fresh lemon juice, and melted butter. I actually forgo the additional melted butter don't let that stop you from trying it.

When I went looking for the recipe on-line to try to make myself I found two delightful blogs about it: this one from Orangette, who is one of my favorite food writers, and this one from Steamy Kitchen which showcases her adorable sons making the simple recipe. Notice that the latter is called a German Oven Pancake; I believe the Dutch moniker arose from a bastardization of the word Deutsch, which is German for German (yay for 3 years of high school German!). I chose to make the latter simply because I don't usually have half and half in the fridge unless I am making ice cream. I use a Calphalon Everyday Pan for this; make sure that whatever pan or skillet you use is oven safe. In other words, if there are any plastic bits, don't put it in the oven!

With this recipe we come across the same issue as with the nian gao recipe, namely, how to mix raw eggs, milk, and melted butter together without either cooking the eggs with the melted butter or solidifying the melted butter with cold milk. My solution is to use very warm milk--not hot enough cook the eggs and at the same time not cold enough to solidify the butter.

Dutch baby

Dutch Baby (adapted from here)
makes one pancake

1/3 cup of all-purpose flour, sifted
2 eggs, lightly beaten
1/3 cup milk
1 1/3 tablespoons melted butter
2/3 tablespoon sugar
1/6 teaspoon of salt
Lemon juice
Powdered sugar
Blueberries (optional)
Melted butter (optional)

Preheat oven to 450 °F.

Lightly beat eggs in a large bowl. In a glass measuring cup, heat the milk in the microwave for 30 seconds so that it is very warm but not too hot. Add to the eggs. In the same measuring cup, melt the butter in the microwave for 30 seconds. Add to the milk and eggs and stir. Add salt and sugar.

Gradually add flour to egg mixture, a spoonful at a time and whisk to incorporate until there are no lumps left.

Lightly spray a 9" oven-safe skillet with cooking spray. Pour batter in the skillet. Bake 12-18 minutes, just until the edges are golden. Check your pancake at the 12 minute mark.

Remove from oven and set on a trivet. Serve hot and top with lemon juice, powdered sugar, blueberries, and melted butter, if desired.

Dutch baby close-up

I've also seen posts where people have topped theirs with apples and cinnamon or caramelized pears, but I prefer the simple tartness of lemons and blueberries. Eating a Dutch baby requires some care, not only because the pan will be quite hot, but also because if you breathe in while bringing a piece into your mouth, you're likely to inhale quite a lot of powdered sugar.

Tuesday, January 27, 2009

Xiao Long Bao (Steamed Soup Dumplings)

New word of the day: aspic [as-pik]– noun, a savory jelly usually made with meat or fish stock and gelatin.

Of course, when you say it, it sounds like the action of relieving an itch in your butt crack. Anyways, aspic is the secret ingredient for making xiao long bao, or steamed soup dumplings. Because aspic is solid, you can easily wrap it in a dumpling along with the meat filling, and when you steam it, the aspic melts and becomes the hot, gushing soup that squirts out of the bun and burns your tongue.

You can make your own aspic by either making fresh stock and boiling it down and chilling it so that it solidifies or dissolving unflavored gelatin (like Knox) in chicken broth and chilling it. I found out that if I chilled the leftover braising liquid from making my mom's beer duck (sorry, it's a classified recipe now, but you can probably find it on-line somewhere else) it solidifies into an aspic. And since I had made some beer duck the night before and Liv and Ruth were making fresh dumpling skins, I figured we should try to make some xiao long bao as well!

First, to make the homemade dumpling skins, all you need is flour and hot water. Ruth doesn't really use measurements and mostly goes by feel, but I found this recipe on the chowhound forums that works pretty well.

Homemade dumpling skins

Homemade Dumpling Skins
(adapted from here)
makes 56 skins

3 cups all-purpose flour
1 cup boiling water
4 tablespoons cold water
Flour for dusting

Pour boiling water into the flour, quickly stir with a fork or chopstick, mix well, then add the cold water. Mix and knead into a soft dough about 5 minutes.

Cover with damp cloth or paper towel. Set aside and rest for 20 minutes.

Knead the dough for 1 minute and divide into 4 quarters. Roll one quarter into a long snake and pinch into about 1 inch lengths.

Dough waiting to be rolled

Dust flour on work surface. Roll each piece into a circle of about a 3 inch diameter.

Homemade dumpling skin

You'll want to make the edges a little thinner than the center, and for xiao long bao, you definitely want the edges very thin since you'll be doing a lot of pleating. The great thing about making your own skin for wrapping dumplings is that it's much stretchier than the kind you buy so you don't need to worry as much about overfilling. Also, you don't need to add that ring of water around the edge to make the dough stick. In fact, if you get the dough wet (from the filling or whatnot), it doesn't stick as well. If that happens, just set it aside and work on the next one. When it dries out a bit you can try pinching it again to make it stick.

Now back to making xiao long bao. Actually, this is a very un-traditional version since I was just using my mom's pork and cabbage dumpling filling and beer duck aspic. A more traditional xiao long bao filling wouldn't have the napa cabbage or bean thread vermicelli in it and maybe would have shrimp or crab meat in it instead. But I wasn't about to make a separate filling or aspic for this experiment so tough cookies.

Xiao long bao

Joy's Untraditional Xiao Long Bao
makes however many you want

Leftover braising sauce from Mama Huang's Beer Duck, chilled overnight to form an aspic
Pork and cabbage dumpling filling
Homemade dumpling skins (recipe above)
2 large napa cabbage leaves per steamer tray, washed
Ginger, peeled and julienned
Black vinegar

Take a dumpling skin, spoon some dumpling filling into it and spread it out to form a thin layer.

Add a 1/2 teaspoon of aspic. Add a little more dumpling filling on top.

Gather one edge of the dumpling skin and start pleating all the way around, twisting at the end to seal. (Here's a video of Ruth showing us how to do this, with Liv reminding us how to pronounce the gelatinous soup.)

Place two napa cabbage leaves on the bottom of each steamer tray, cutting off the white stem if necessary to fit.

Wrapped xiao long bao

Place the wrapped dumplings on the leaves and steam for 10 minutes.

Steamed xiao long bao

Serve with a dipping sauce of julienned ginger and black vinegar.

Ginger and black vinegar

I didn't really notice the addition of the cabbage and vermicelli in the filling that much because the duck aspic melts into this wonderful broth that almost overwhelms everything else. In fact, I wish the pork filling I used wasn't seasoned because the duck aspic was more than enough seasoning by itself. Just remember to be careful biting into the soup dumplings because the soup may be really, really hot!

Sunday, January 25, 2009

Luo Buo Gao (Chinese Turnip Cake)

Luo buo gao with oyster sauce

So for Chinese New Year's Eve I invited people over for a dumpling making party. I didn't even realize that making dumplings was a Chinese New Year's tradition, although I had thrown some in the past because I just figured it was an excuse to do something "Chinese" on the holiday. But apparently the shape of the dumplings resembles the gold that they used for money back in the day so it's an auspicious food to eat on New Year's Day.

I also decided to try my hand at making luo buo gao, or Chinese turnip cake. I usually see this at dim sum all fried up and served with soy sauce paste (or is it oyster sauce or hoisin sauce?), but according to the internets it is also something traditional to eat for Chinese New Year.

Steamed luo buo gao


Luo Buo Gao (Chinese Turnip Cake) (based on this recipe)
makes about 24 slices

2 1/2 to 3 cups daikon, peeled and julienned or shredded (about 1 1/2 to 2 lbs.)
1 Chinese sausage, finely diced
2 cups rice flour (do not use glutinous rice flour)
1 3/4 cups water, divided
1 teaspoon salt
1/4 teaspoon white pepper
Vegetable oil

Stir fry Chinese sausage in a large frying pan or work for 2 to 3 minutes. Add daikon, 3/4 cups water, salt, and white pepper. Bring to a boil, then remove from heat.

Grease a square cake pan or loaf pan and start the steamer.

Mix rice flour with 1 cup water. Add the daikon and sausage mixture and spread into the greased pan. Steam for 50 minutes.

Cool overnight in refrigerator. After cooling, cut the cake into 1/4" slices and pan fry in a liberal amount of oil until both sides are golden brown.

Serve with soy sauce paste (or oyster sauce or hoisin sauce).

Fried luo buo gao

You can also add shitake mushrooms and/or small dried shrimp, but I didn't have either and, as Annie said, you can't really go wrong with Chinese sausage.

The hardest part about making this was finding a dish to steam the cake in. Since I was using my stock pot and pasta insert to steam, I needed something that would fit, and none of my square (or even circular) cake pans were small enough. So I improvised with a large serving bowl, and it did the trick.

Another hard part? Reading the recipe correctly. For some reason, I thought it said 1 1/2 to 2 cups instead of lbs. so I only had about half as much daikon as I needed in there. The result was a drier cake than you get in the restaurants, but still edible, although boys will eat anything.... So learn from my mistakes and read the recipe correctly, okay?


Previously:  Scallion Pancakes
Next up: Xiao Long Bao (Steamed Soup Buns)

Thursday, January 22, 2009

Taiwanese Scallion Pancakes

Scalling pancakes

This is the first recipe in Sugar and Soy Sauce, and because it's not my mom's, I'm not forbidden to share it. =) Karen Kirkup taught me the recipe, which she learned while working at Icarus. I've tried making scallion pancakes from scratch before but could never get them quite as light and flakey as I like; they were always just a little too chewy. You don't get that problem with this recipe because the secret is in letting the dough rest so that the gluten relaxes enough to allow you to stretch the dough out really, really thin. The recipe is super simple, but just make sure you give yourself sufficient time; the results are worth it.

Scallion Pancakes (Cong You Bing)
makes 6 pancakes

1 lb. all-purpose flour
1 cup warm water

Chopped scallions
Vegetable oil
Salt

Mix the flour and water together and knead for 5 minutes. Cover and let sit for 30 minutes at room temperature. Knead for another 5 minutes and let rest for another 30 minutes at room temperature. Knead one more time for 5 minutes.

Divide into 6 (4 oz.) portions. Roll into balls and cover liberally with oil. Cover and let sit in the refrigerator for 1 hour.

Rolled out dough

Let the dough come back to room temperature. On an oiled stainless steel surface (I used my non-stick baking tray), roll out one ball of dough and stretch out as thin as possible into a rectangle, being careful not to make any holes in the dough. You should be able to cover almost the entire surface of the baking tray, if you're using one.

Brush the top with oil and sprinkle with salt and scallions.

Starting at one long end, start "flipping" inches of the dough towards the other long end so that you are kind of rolling it up into a long snake. Once it is all folded up, twist the dough like a rope and then coil it up into a spiral. Flatten the spiral with your hands to form pancake discs. Repeat with the other balls of dough.

Shaped dough

Heat a liberal amount of oil in a frying pan. When it is hot (but not smoking), add one pancake. After a few minutes, flip once it is golden brown on the bottom. Wait another few minutes until the second side is golden brown as well. Repeat with the other pancakes.

Frying second side

Slice the pankcake into wedges and serve hot with a dipping sauce of soy sauce mixed with vinegar, sugar, and sesame oil.

To store the pancakes, freeze them in a freezer bag and re-heat on the pan with additional oil. You can also try toasting them in the oven, but it will get dry.

Flaky!
Flaky!

Wednesday, January 21, 2009

Sugar and Soy Sauce: A Collection of Recipes from My Mom (and Other Recipes I Like)

It's my mom's birthday today, and I made her cry.

As you already know, I think my mom is the best home cook in the world, and I've been bugging her to teach me more of her recipes for the past couple of months. She gladly taught me, but I could sense she was a little confused and even slightly annoyed at how persistent I was about making sure I got every little measurement right since she almost never measured out her ingredients. What she didn't know was that I was getting all her recipes so that I could make her a cookbook for her birthday.

Well, she got the book in the mail, and when she called me she was crying. A lot. At first I was alarmed thinking something was wrong with her or my dad, but eventually she was able to stop crying long enough to tell me that she had gotten the book and to thank me for it. The funniest part is, I had called her about a week ago to let her know to expect something in the mail since the book was being delivered without a card or a message. Since my mom hates surprises, she demanded to know what it was, and I finally relented by telling her that she could guess. She figured out that it was a book, and then that it was a cookbook, to which she responded with indignation because, "what could [she] possibly learn from a cookbook?"

I titled the book "Sugar and Soy Sauce" because early on I had learned that just about every dish she makes includes at least some sugar and to a slightly lesser degree, soy sauce. The book includes 16 recipes, over half of which are my mom's. The other ones are some of my other favorite Chinese recipes that I've picked up over the years from friends like Karen's scallion pancakes, Jaleen's peanut butter noodles, and Joanna's nian gao.

Ever since I've been posting up my mom's recipes, she's been chiding me for giving away her secrets. Well, now that the book is published, I've decided to (partially) obey her and stop giving them away, at least for free. If you'd like a copy of the book, you can buy it yourself here at lulu.com. It's $30, and I make a whopping $1.24 per book so I'm obviously not in it for the money, more just for the fame. Haha, jk. It's a hardback book with lots and lots of full color pictures. There's a preview of the book if you follow the link, but here's a taste (pun intended) of what's inside:

cookbook collage (square)

And if you ask me really nicely, I might even sign the book for you. =)

Sunday, January 18, 2009

Char Siu Bao

Char siu bao

Liv and Ruth came over yesterday to make some bao zi, or more accurately, Ruth and I made bao zi and Liv washed the veggies, diced the meat, fixed my chairs, set up my HDTV, and cleaned up afterwards. I'm not complaining! =) At first we were going to just make veggie buns (su cai bao) and pork and cabbage buns, but I thought it might be fun to try to make char siu bao. I really like the big, fluffy, white char siu bao you can get a Cantonese dim sum, but after trying to find the recipe on-line, it looks like the only way to get that is with a Vietnamese mix, and I didn't really feel like heading back out to try to find some. And I was all ready to make char siu pork from scratch using a marinade of soy sauce, hoisin sauce, five spice powder, and honey, but then I found a jar of char siu sauce at the Asian grocery store, all mixed up and ready to go. So I copped out and bought that since, after all, this is my first time trying to make char siu, and I was making the dough from scratch.

Char siu

Char Siu Pork

makes enough for 16 buns and one or two servings over rice

1.6 lbs. pork butt or shoulder (you want something fatty, pork loin wouldn't work)
1 (8.5 oz.) jar of char siu sauce

Cut the pork into long strips about 1 cm thick. Using a fork, prick the strips all over to tenderize and also to help the sauce marinate the meat thoroughly. Add 5 tablespoons of the char siu sauce and marinate overnight in the refrigerator.

Pre-heat the oven to 350 °F. Boil 2 cups of water.

Making char siu

Place the pork strips on a grilling rack in a single layer. (I used the racks from my toaster oven with a baking pan underneath.) Add enough boiling water to the bottom of the pan to come to a depth of 1/2 inch. Roast for 10 minutes.

Turn the strips with tongs and baste with more char siu sauce. Repeat every 10-15 minutes until the pork has roasted for at least a total of 30 minutes.

Remove from the oven and allow to cool. Slice the pork on the diagonal against the grain. You can serve the pork with rice and vegetables, on top of ramen, or use as a filling for char siu bao.

Char siu

I liked how the sauce made the pork (artificially) red just like the kind you get from Cantonese restaurants, and the taste seemed similar enough, although the texture wasn't as crispy as what you get at a restaurant. Maybe next time I will try making this without the water bath or on a barbecue grill.

To prepare the char siu pork as filling for char siu bao, you'll need to dice the pork into small pieces and add a little more char siu sauce to bind it together.

Diced char siu

Char Siu Bao
makes 16 buns

1 recipe for hua juan dough, mixed, kneaded, risen once, and re-kneaded
1 lb. char siu pork, either homemade or from a store, diced
2 tablespoons char siu sauce

Toss the diced pork with the char siu sauce, adding a teaspoon or two of warm water if necessary.

Divide the dough into 16 equal parts. Take one piece, roll it into a ball, and flatten with your hands. Stretch the circle out so that it is about the size of your palm. (You could use a rolling pin to do this, but there's no need.)

Add about 1 tablespoon of filling to the middle of the dough. Cup your hand so that the dough comes up around the filling. Using the hand not holding the dough, pinch a bit of the edge, pull it up and away from you. Then grab another piece further away from you and continue around the dough, rotating as you go. Once you have gone all the way around, twist what you have left between your fingers and seal.

Here is a (mostly silent) video of Ruth showing how to do it with her su cai bao:


Place the bun sealed side down on a square of parchment paper. Return the filled buns to the oven (set at the lowest possibly setting) for 20-30 minutes to proof.

Add water to your steamer (I use my stock pot with the pasta insert and steamer insert for two levels) and heat on high. Once the water is boiling, place the buns in your steamer and steam for 13-15 minutes.

Char siu bao

I found that when I made this I had added too much char siu sauce to the diced pork so it was too salty, so I reduced the amount in the recipe above, and I would suggest adding a little water to dilute the sauce even further so that you have enough sauce to bind the meat all together.

If you're not going to eat all the buns right away, you can freeze them in a freezer bag and reheat them individually in the microwave for 1 minute, wrapped with plastic wrap or in a sandwich bag.

Thursday, January 15, 2009

Mayonnaise Shrimp with Candied Walnuts

Mayonnaise shrimp with candied walnuts

Back when I lived in Taiwan at the insistence of some of my friends I went prawn fishing once. It was a curious sport and consisted of sitting on an upended plastic bucket next to an artificial pool stocked with hundreds of prawns. You were equipped with a fishing rod, raw chicken meat, and a razor blade. Basically, you cut the chicken with the razor, hook it on the fish hook, dip it into the pool, and just wait. Much like crabbing, there's no tug, you just wait and pull up at irregular intervals and see if you caught anything.

I remember catching a good amount because every time I caught one, I'd start screaming. These prawn did not resemble the nice headless, frozen shrimp we can buy in grocery stores. No, these prawns were the size of my hand with long antennae and legs that still moved! It was more akin to an insect than a shrimp, and they scared the heck out of me. Fortunately, my friends had no such issues and were able to net them for me.

Apparently, part of the fee that you pay to fish for the prawn included grilling them and serving them for you when you were done. Then I ran into an even larger problem--I had never removed the head from a prawn before; whenever I had that particular issue I just had my mom do it for me. But my mom was half a world away, and the longer I hesitated, the less prawns were left as everybody else was grabbing them as fast as they could eat them. So I finally sucked it up and did it. I'm still really grossed out at pictures of prawn though.

Anyways, this recipe has nothing to do with those prawns other than the fact that it is a shrimp recipe, but I just thought I'd share. I believe it is Cantonese in origin, and the first time I learned how to make it was from a friend in college that had learned it from his mom.

The combination of juicy prawns lightly fried and tossed in a sweet and tangy mayonnaise based sauce is hard to resist. Add to that candied walnuts and a ring of bright green broccoli, and you've got yourself a dish that will definitely impress. The trickiest part is timing--you want to fry the shrimp at the last second so that it is still hot when you serve it. Otherwise, you can prepare everything else ahead of time.

I loosely followed the Honey Walnut Prawns recipe from About.com, but the next time I make this I will definitely try another method for making the candied walnuts. Their directions were pretty complicated, and I know I've made candied walnuts before via another method that involved toasting them rather than frying them. There are tons of recipes out there for making candied walnuts so I'll let you choose whichever one seems best for you.

Mayonnaise Shrimp (loosely based on the Honey Walnut Prawns recipe from About.com)
serves 6

1/2 cup walnuts
1 cup sugar
1 cup oil

1 cup broccoli crowns, cut into 1" pieces
1 tablespoon oil
salt to taste

3 tablespoons mayonnaise
3 tablespoons sweetened condensed milk
1 tablespoon fresh lemon juice

1 lb of large or medium shrimp, peeled and deveined
1 cup cornstarch
1/2 cup oil

Rinse walnuts, then boil in 5 cups water for 15 minutes. Start boiling another 2 cups of water separately. Drain and add 2 cups boiling water and sugar. Continue boiling and stirring occasionally until sugar dissolves.

In a small saucepan, heat oil until almost smoking, about 400 °F. With two slotted spoons, use the first to drain a small batch of walnuts. Carefully add to the oil and stir with the second slotted spoon. Deep fry walnuts until shiny and brown, no longer golden; this will only take a minute or two. Use the second slotted spoon to remove the walnuts from the oil and place in a heat-proof bowl lined with paper towels to drain. Continue frying walnuts in small batches. Store walnuts in an air-tight container until ready to use.

Candied walnuts

In a large saute pan heat 1 tablespoon of oil until hot. Add broccoli and salt and stir fry for 2-3 minutes, until the broccoli turns bright green. Add 1/2 cup water to the pan and cover, allowing the broccoli to steam for about 3-5 minutes until done. Remove from pan and line the edge of a large plate with the broccoli pieces. Alternatively, you can steam the broccoli instead of pan-frying/steaming them.

A ring of broccoli

Mix mayonnaise, sweetened condensed milk, and lemon juice in a medium bowl until smooth.

Place the corn starch in a shallow bowl and coat the shrimp well.

Heat 1/2 cup of oil until very hot, then deep fry the shrimp until golden brown, working in small batches. This is a very quick process; the shrimp only needs to be cooked for about 30 seconds each. Drain, then fold in mayonnaise mixture.

Mix well, sprinkle with walnuts, and transfer to the middle of the dish ringed with broccoli. Serve hot with rice.

Mayonnaise shrimp with candied walnuts

Wednesday, January 14, 2009

Mochi Ice Cream

Homemade red bean mochi ice cream

Since I had already made the red bean ice cream, I thought I'd try to make mochi ice cream with it. There a bunch of directions on-line, and it seemed simple enough. Heck, you didn't even need to turn on the stove; you cook the mochi in the microwave! But what the recipes don't tell you is that mochi is the stickiest thing on earth! It'll stick to your fingers, your hands, the bowl, the utensils you use, the utensils you use to try to unstick it from the utensils you use... I got so frustrated after trying to make 3 of them (2 of which ended up in my mouth rather than back in the freezer because they were so ugly), I gave up. But here's the recipe if you want to try. =)

Mochi Ice Cream (adapted from here)
makes 10

Ice cream flavor of your choice
100 grams glutinous rice flour
180 ml water
50 grams sugar
Cornstarch

Let the ice cream sit in room temperature for a few minutes or until it becomes soften. Scoop and roll the ice cream into 10 round balls. Put the ice cream balls back in the freezer to re-harden.

Red bean ice cream balls

Mix the water, sugar and flour together well in a microwavable mixing bowl. Cover and microwave for 2 minutes. Stir batter, re-cover, and microwave for another 30 seconds. Stir once more and allow to cool.

Making the mochi

Cover the bottom of a 9 x 13 inch glass baking dish with cornstarch. Once the mochi is cool, spread it out in the dish. Cut and divide into 10 pieces.

Pick up one piece of dough. Flatten it with your palm and wrap it around a ball of ice cream. Repeat this process for the other pieces of mochi and ice cream.

Place it in the freezer to re-harden the ice cream. About 10 minutes before serving, let sit at room temperature to soften slightly.

Homemade mochi ice cream
Honestly, it looks like a frozen thumb on a mini-bun....

I think next time (if there is a next time) I try to make mochi ice cream, I might try this recipe, which includes corn syrup in the mochi (to keep it soft and pliable when frozen) and freezing the mochi before wrapping the ice cream. I think this might make the mochi less sticky to work with and obviously prevent the ice cream from melting too much while you're working with it.

Monday, January 12, 2009

Red Bean Ice Cream

So I had some leftover sweetened condensed milk from making mayonnaise shrimp and some leftover sweetened red beans from making the nian gao and put them in the same container thinking I could make some shaved ice later. But then I realized that it's way too cold for shaved ice and decided to try to make red bean ice cream instead (don't ask me why ice cream is acceptable but shaved ice isn't; it just is, okay?) I also had some leftover heavy cream from making the peppermint ice cream so I added what I had left along with an equal amount of skim milk. Alternatively, you can use 1 1/2 cups half and half since half and half is half cream and half milk. And I just wrote "half" 6 times in that sentence. =)

Making red bean ice cream

Red Bean Ice Cream

makes 1 quart

1 (14 oz.) can sweetened condensed milk
3/4 cup sweetened red beans
3/4 cup heavy cream
3/4 cup milk

Mix the ingredients and chill in the refrigerator for a few hours until cold.

Churn in a ice cream maker according to the manufacturer's instructions.

Freeze for several hours or overnight until hardened.

Red Bean Ice Cream

Usually you don't add the non-liquid parts of an ice cream batter to the ice cream maker until the end, but I wanted to mash up the red beans a bit and get the red color incorporated into the ice cream so threw them in there from the really beginning. I love how you can taste the flavor of the sweetened condensed milk, and it reminds me of shaved ice without being all icy.

You know, I think this is the first recipe I've come up with all by myself without adapting anyone else's!

Next: My attempt at making red bean mochi ice cream....

Sunday, January 11, 2009

Nian Gao (aka Mochi Cake)

Nian gao

Another Chinese dessert that is traditionally eating in the winter, or more specifically, for the New Year, is nian gao. Similar to the Korean dduk and Japanese mochi, it is made from glutinous rice flour, which can be found in Asian grocery stores. Make sure you get the glutinous version (I buy the green bag with the 3 elephants on it) versus regular rice flour (the red bag with the 3 elephants on it). This recipe (from Joanna Lee) has sweetened red beans baked into it and is very rich because of all the butter. You could use a little less butter, but really, why would you want to?

Dropping the red beans

Nian Gao (Mochi Cake with Red Beans)
makes 24 pieces

1 stick unsalted butter, melted (and cooled to room temperature)
1 1/4 cups white sugar
3 eggs
1 teaspoon vanilla extract
3 cups milk, warmed to a little hotter than a fever
1 pound (16 ounces) glutinous rice flour (the green bag with the 3 elephants on it)
1 teaspoon baking powder
1 (18.75 ounce) can red bean paste or sweetened red beans

Preheat oven to 350 °F. Grease a 9x13 inch baking pan.

In a large bowl, mix together the butter, sugar, eggs, vanilla and milk. Stir in the rice flour and baking powder. Pour the batter into the prepared pan. Drop red bean paste by scant teaspoonfuls onto the top of the cake. If spoonfuls are too big, the filling will sink to the bottom.

Bake for 1 hour and 10 minutes in the preheated oven, or until cake springs back when lightly touched. It should be golden.

Serve small slices of this very rich cake at room temperature or slightly warmed.

Mochi cake

The hardest part about making this dish is getting all the ingredients to mix. You don't want the butter to be too hot or else it will cook the eggs, but if the milk is straight out of the fridge it will solidify the butter. If you do run into that problem, you could try microwaving the mixture just enough so that the butter melts again, but I think it is easier to get the milk warm before adding it to the butter.

For extra decadence, you can slice the nian gao into thin slices, dip them in beaten egg, and pan-fry for Cantonese-style nian gao.

Fried nian gao

Wednesday, January 7, 2009

Thin Crust Chicken Masala Pizza with Spinach and Parmesan Cheese

I'm supposed to be in Green Bay right now, only I'm not; I'm sitting in my own kitchen typing this. In my two years of working in a position where I travel 50%, this is the first time that my flights have been completely cancelled. Not just delayed, but cancelled. I consider myself lucky on two accounts: 1) that this is the first time, and 2) that I found out when I was still sitting in this chair at home 2 hours before the flight. I'm just grateful I didn't have to find out at the airport or worse, wasn't stuck waiting at the airport as they delayed the flight repeatedly before they cancelled.

So since I was stuck at home I decided to try making some chicken masala since I'd been thinking about learning how to make Indian food. I started off small, though, and bought the Trader Joe's masala simmer sauce instead of making my own and just added cut-chicken breast and some frozen spinach. Heaped on top of brown jasmine rice, it wasn't bad, but it wasn't...satisfying. My two roommates had already helped themselves to some, so I just had a little bit left, maybe a third of a cup. It wasn't exactly enough to toss, but not enough for another meal either.

And then I thought, why not try to make a pizza out of it? I seriously don't even know where the idea came from, but it didn't seem absolutely far-fetched. The masala was tomato-based, and I'd seen plenty of pizzas with chicken and spinach on them. The only cheese I had in the fridge was some shredded parmesan, but why not give it a shot? I dug out The Kitchn's old thin crust pizza recipe, which thankfully did not need a lot of time to make.

Less than an hour later, I was taking the first bite of this strange, new pizza. The crust was exactly as it had been described: slightly crunchy but with a bit of a chew to it, and innocuous enough for whatever you wanted to pile on top. The pizza as a whole kind of reminded me of California Pizza Kitchen's BBQ Chicken pizza except that instead of bbq sauce, it was masala sauce, so spicier and less sweet. I only added a very light sprinkle of the parmesan so that you can barely taste it, but something about the texture kind of tempers the spiciness of the masala sauce.

Copying Bon Appetit

Thin Crust Chicken Masala Pizza with Spinach and Parmesan Cheese

makes one 8"x11" pizza

1/2 jar Trader Joe's masala simmer sauce
9 oz. chicken breast meat, cut into 1" chunks
3/4 cup frozen spinach
1 thin crust pizza dough (I used half the recipe from here)
1/4 cup shredded parmesan or mozzarella cheese

Add 1/2 cup water and chicken to the simmer sauce. Heat to boiling and then reduce to simmer for 15 minutes, stirring occassionally. After 10 minutes, add the spinach and stir to mix.

Have 3 small girls eat their 3 small servings over rice and save the remaining 1/3 cup. Shred remaining chicken.

Heat oven to 500 °F and place a baking stone in the lower middle rack.

Place the pizza dough on a 12" sheet of parchment paper and use your hands to spread the dough out to 1/4" thickness or less. Top with the chicken masala mixture and spread out with a spoon. Add more masala simmer sauce if necessary to cover.

Transfer the pizza to the baking stone using a baking sheet or thin cutting board. Bake for 5 minutes and then turn 180° and bake another 3 minutes.

Sprinkle cheese on top and bake for another 2-3 minutes.

Remove from oven and let sit on a wire rack to cool for at least 5 minutes (this is when the crust gets crispy so it's worth the wait!).

Thin Crust Chicken Masala Pizza with Spinach and Parmesan Cheese

I still have one ball of pizza dough left so I think when I come back from Green Bay and Chicago I'll try making a breakfast pizza with eggs on top. Or maybe the bbq chicken pizza. We'll see....