Showing posts with label beef. Show all posts

Monday, March 14, 2022

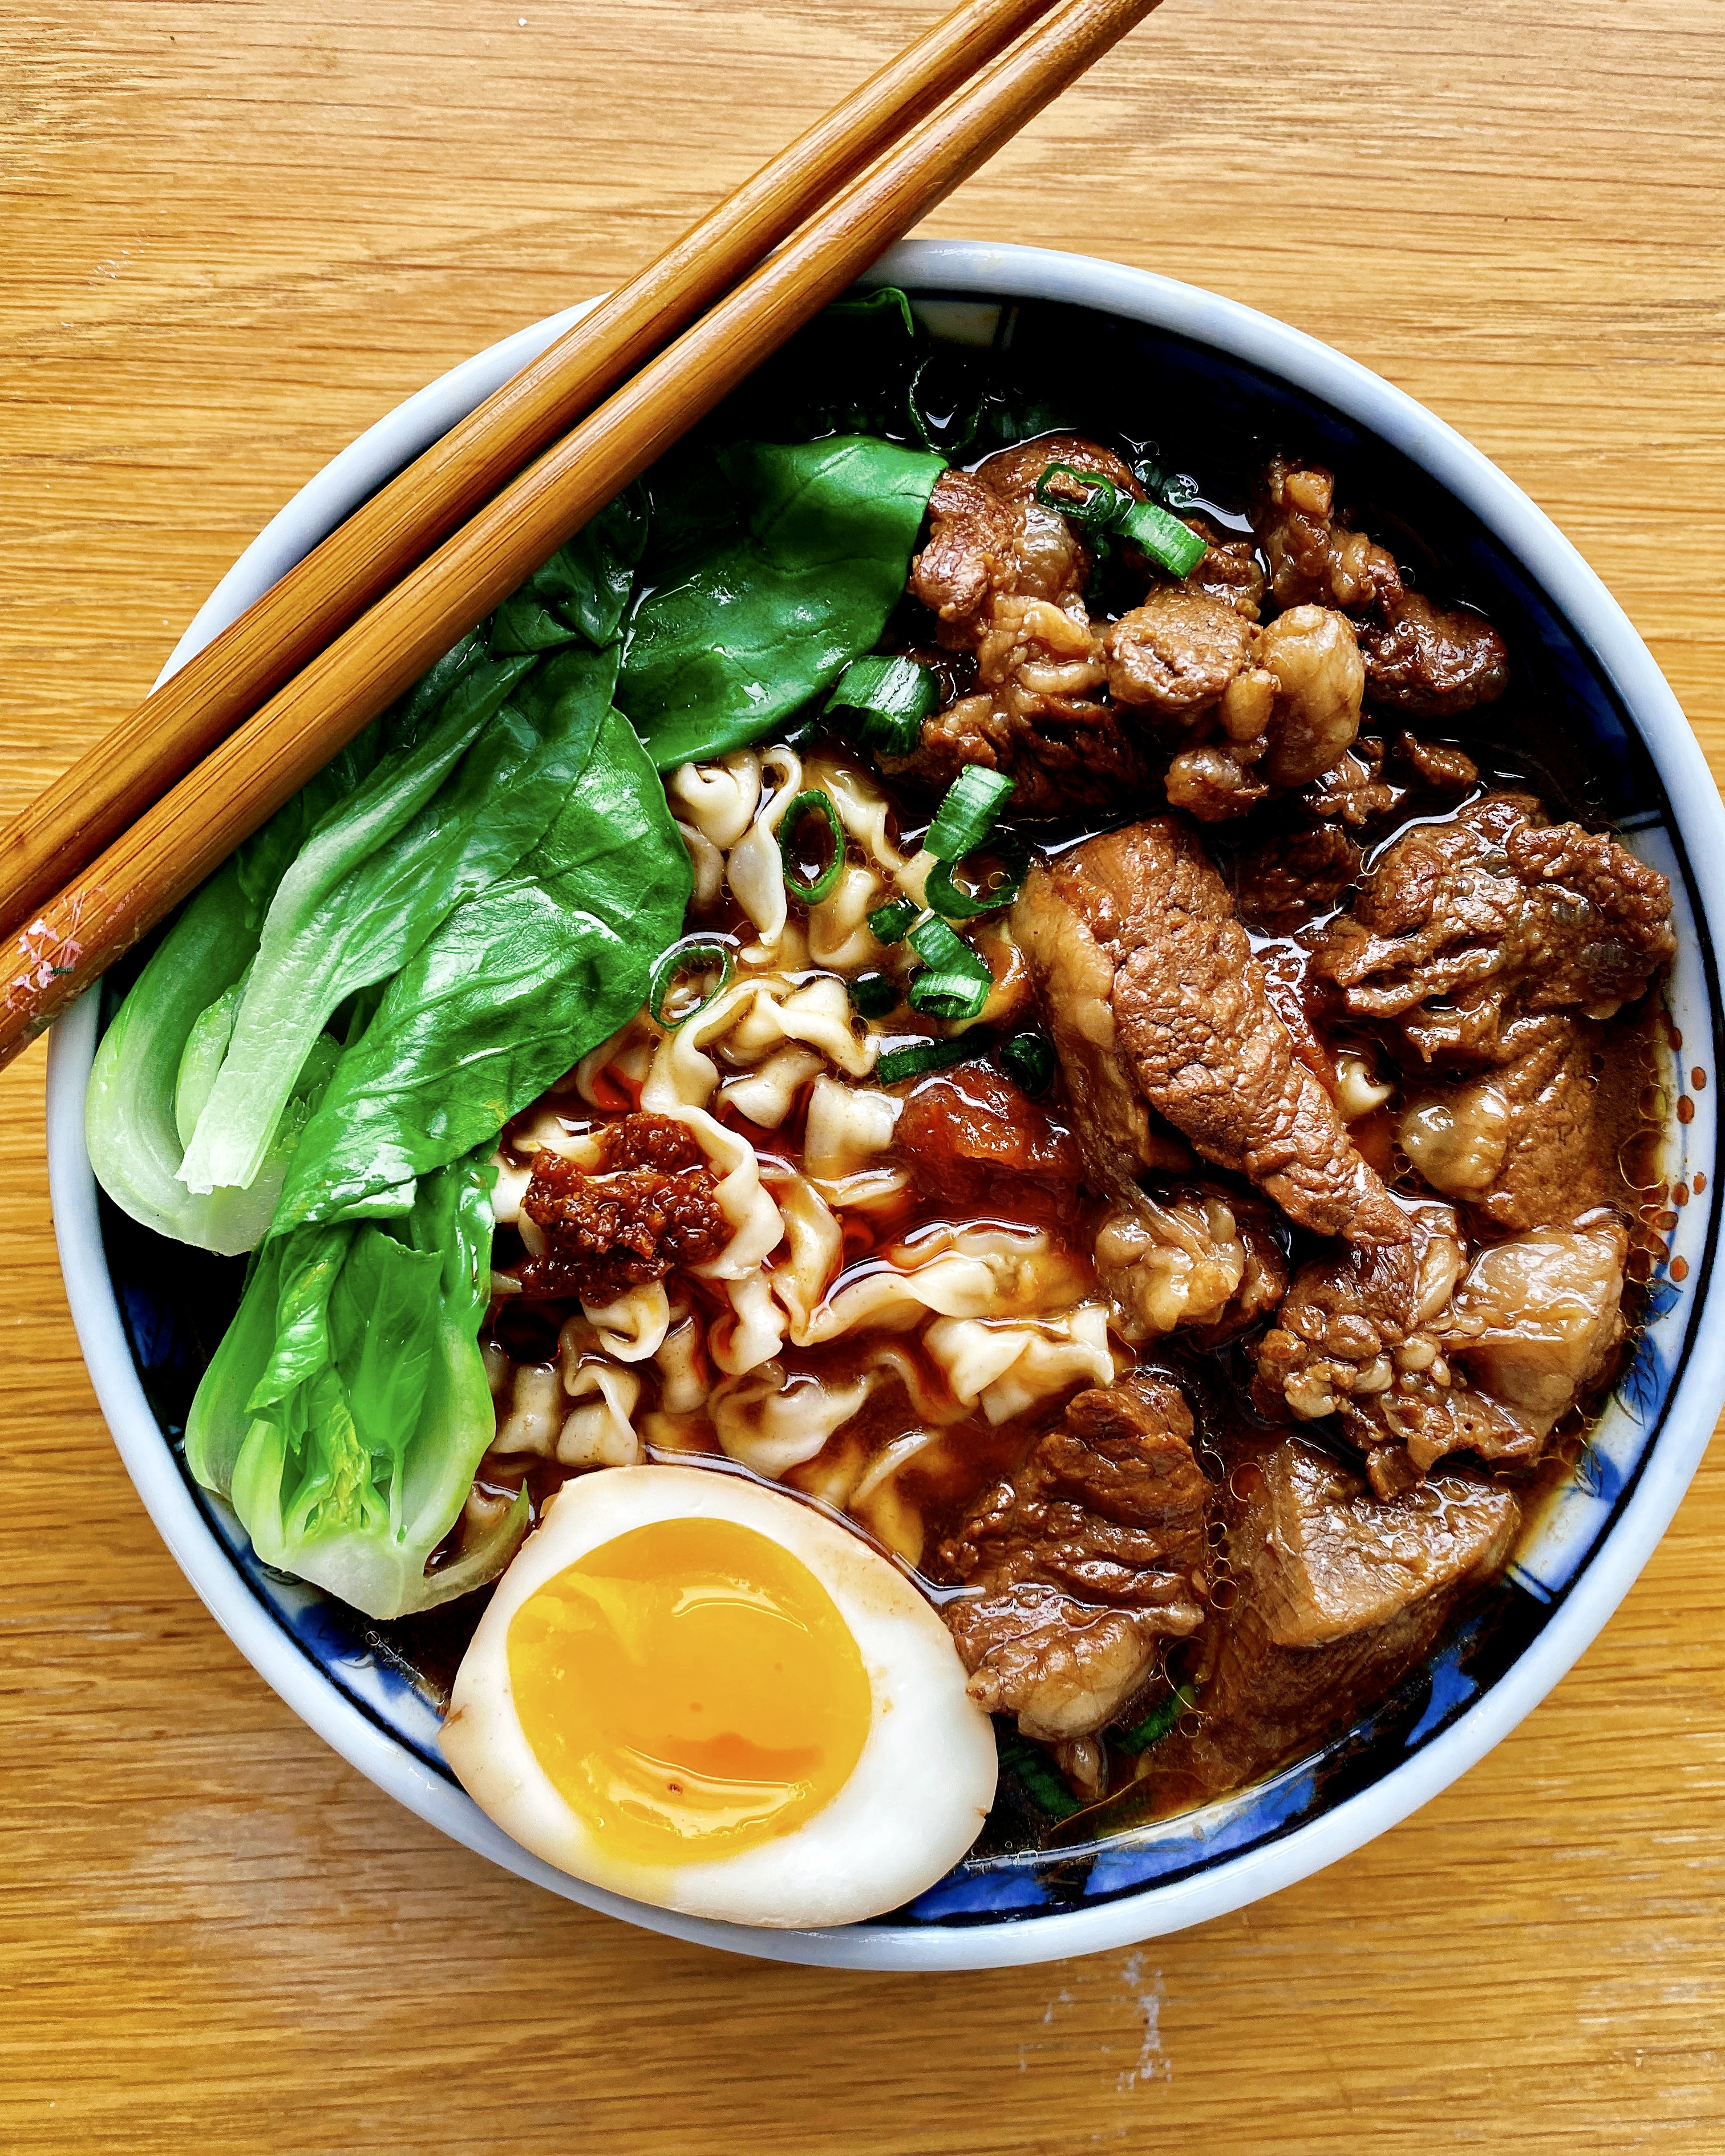
Taiwanese Beef Noodle Soup (Updated)

Quite a few things have changed since I posted my first rendition of beef noodle soup on this blog 14 years ago (it was my 3rd blog post ever!):  I've gotten better at cooking; I went through a vegan, then vegetarian, then pescatarian stint; and I started posting on Instagram

I'd say I'm more of a social carnivore now in that I do eat meat when I'm out with friends but very rarely cook it at home.  In fact, I think I've only made beef noodle soup maybe once or twice since I posted the original recipe.  But after seeing all the delicious BNS posts on the Taiwanese Home Cooking FB group and receiving a chuck eye steak from Vermont Wagyu, I knew it was time to fix that.

Looking back at the original BNS post, I was shocked to see that it called for 1.5 cups of soy sauce!  I chalk it up to one of those mistakes that happens when someone with little cooking experience tries to transcribe a recipe from someone who never measures anything when cooking.  I've since adjusted the quantity to a more reasonable 1/2 cup of low-sodium soy sauce.

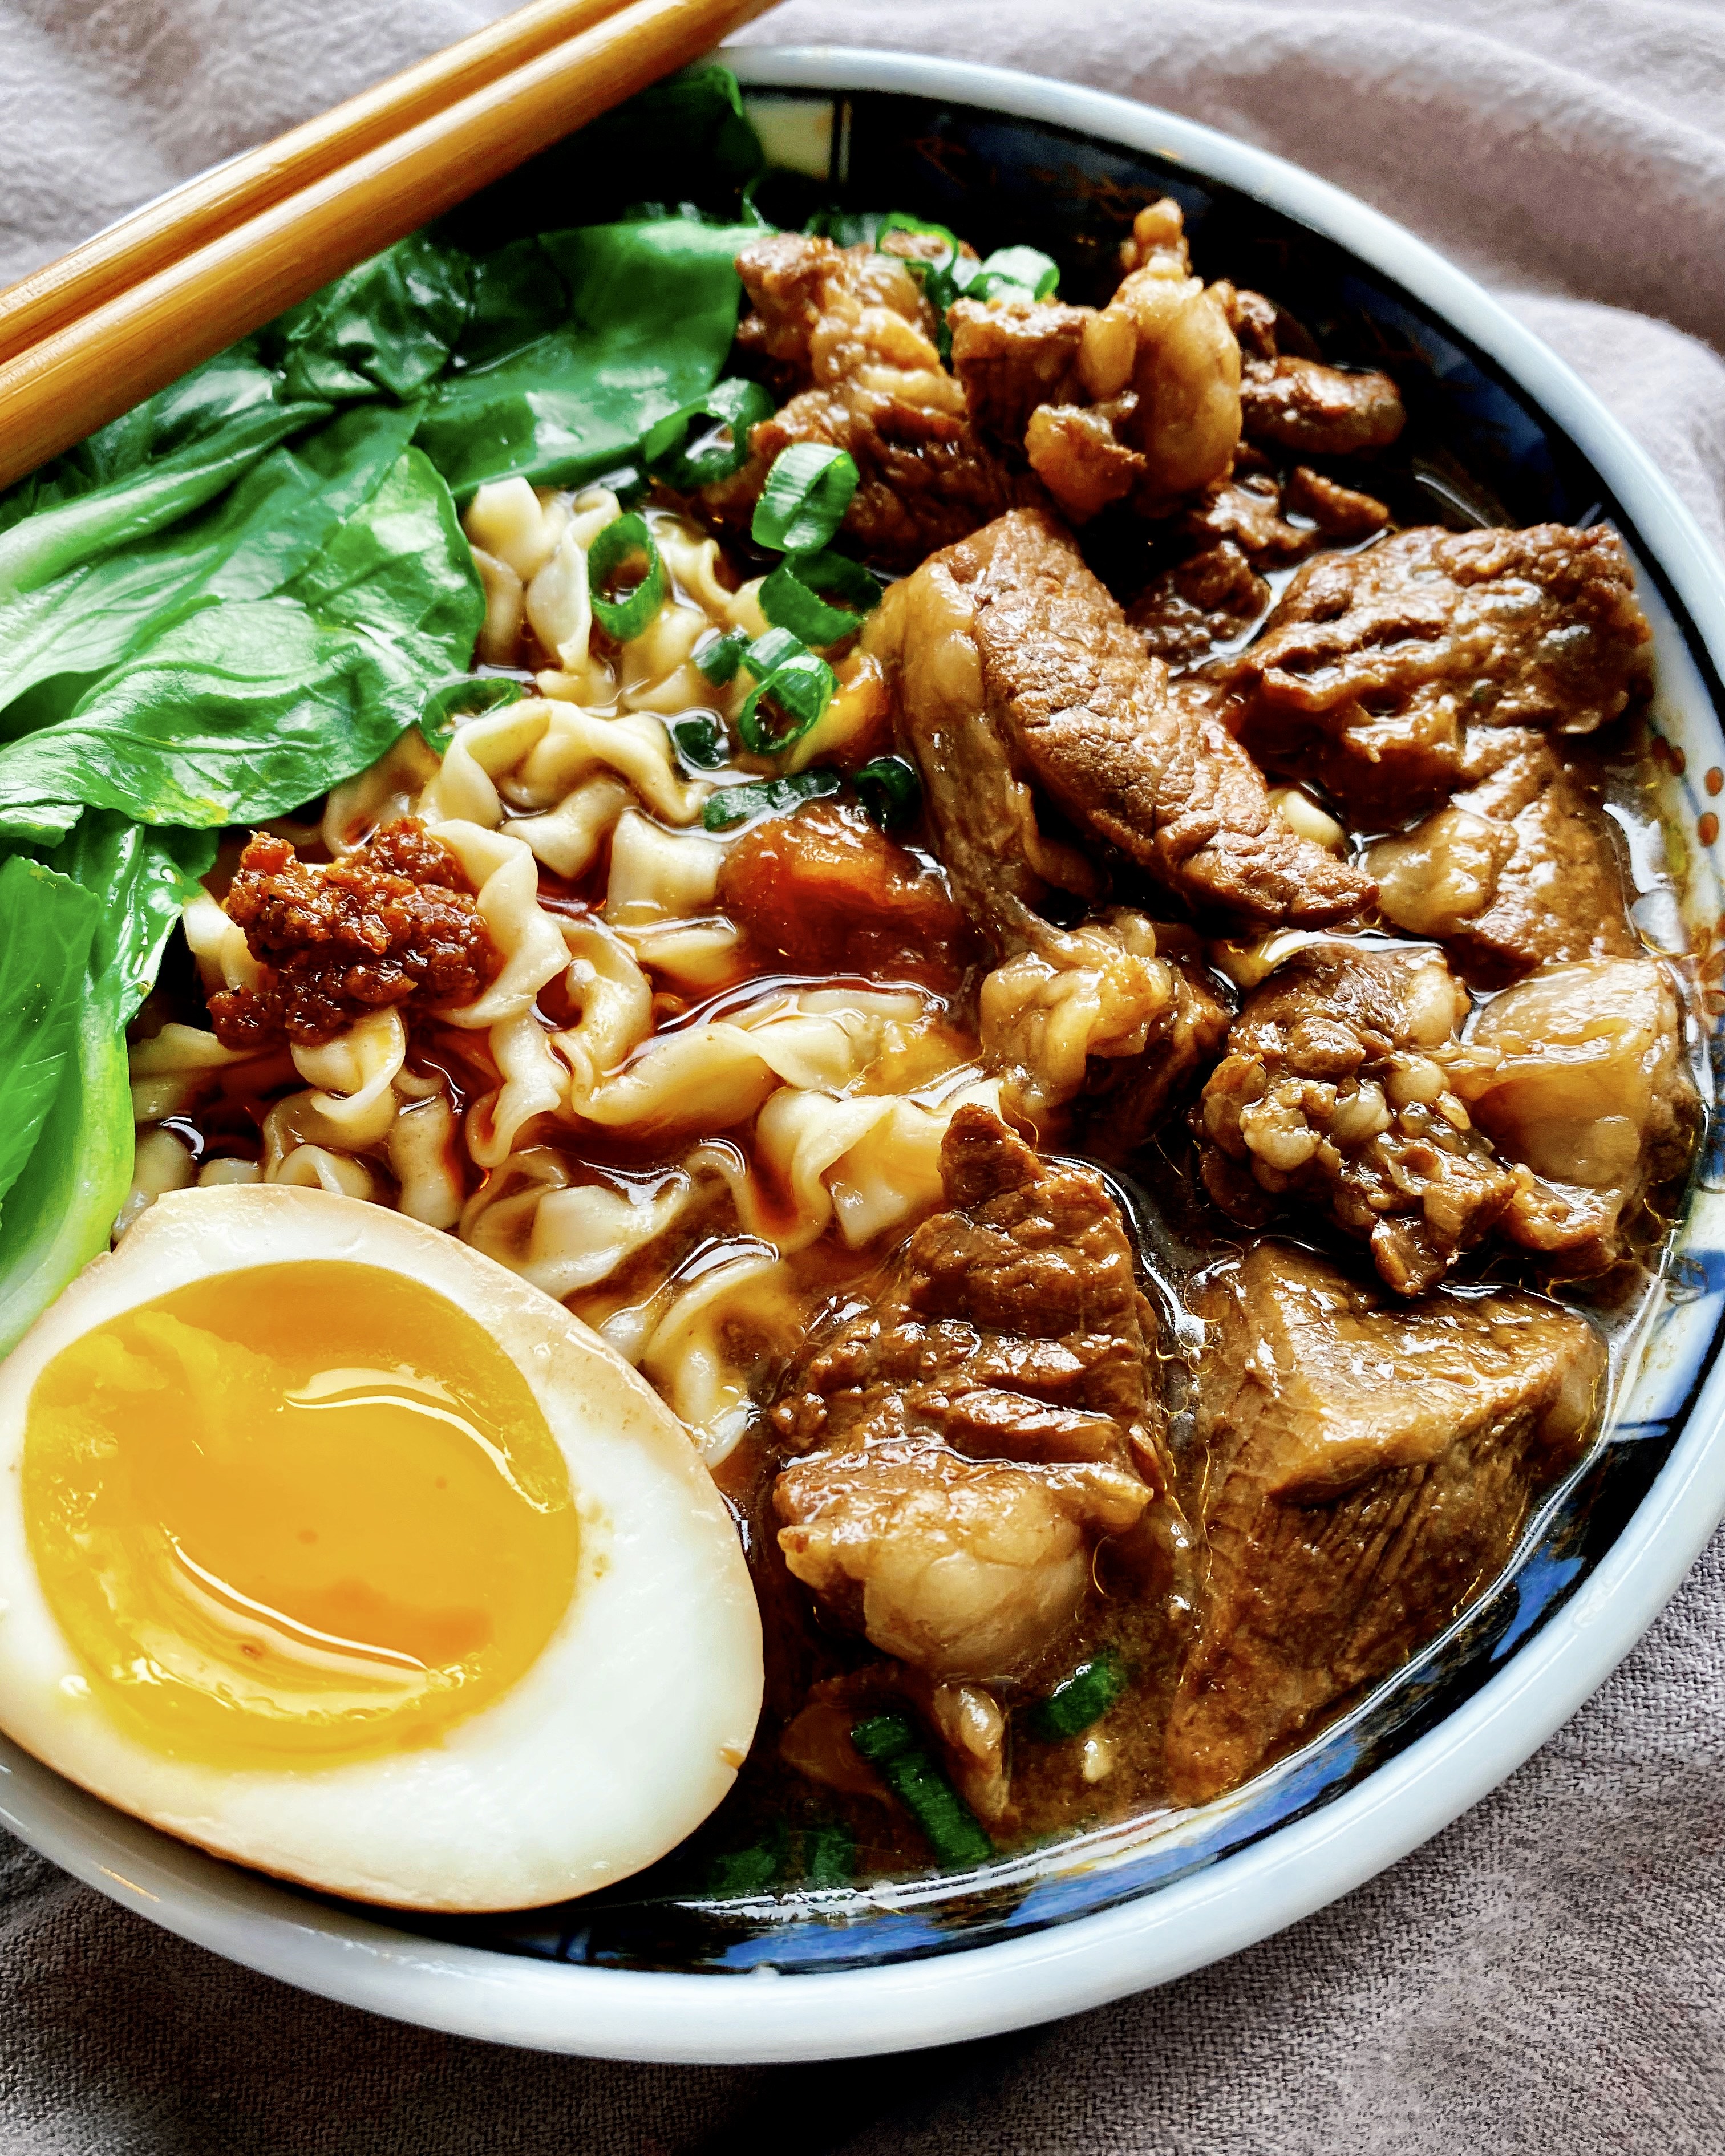
The original version calls for napa cabbage and angel hair pasta, and while both are perfectly fine to use, I now opt for the more photogenic baby bok choy and use more authentic Taiwanese dried noodles like A-Sha brand.  And for the lu dan, instead of cooking already hard-boiled eggs in the sauce, I prefer tucking chilled 7-minute boiled eggs in the soup after it's been strained and cooling.  This way the yolks remain nice and jammy while the whites absorb the delicious flavor.

A few other changes:  I've listed white peppercorns, a cinnamon stick, and bay leaf as optional spices in addition to the star anise.  If you don't have them it's fine, but if you have them it will add a nice complexity to the soup.  The star anise is an absolute must, though, to make this a Taiwanese beef noodle soup.  Lastly, I stole this idea from Kenji's recipe--since almost all soups taste better the next day, I remove the beef from the soup, then strain everything else out before letting it chill overnight in the fridge.

Taiwanese Beef Noodle Soup
makes about 2-3 servings

1 lb. chuck steak, cut into 1" chunks
1 tablespoon oil, if needed
2 scallions, cut into 2" pieces
1 inch ginger, sliced
3 garlic cloves, peeled and smashed
1 tomato, skinned and roughly chopped
1 star anise
1 teaspoon white peppercorns (optional)
1 cinnamon stick (optional)
3 tablespoons rock sugar
1/2 cup low-sodium soy sauce
1/2 cup Shaoxing rice wine
2 cups beef broth
1 bay leaf (optional)
3 large eggs
Baby bok choy or napa cabbage, blanched
Noodles, cooked
Chili oil/sauce (like Sze Daddy), optional

If there is a lot of extraneous fat on the steak, you can cut it off and render it in a large Dutch oven or pot (add it to the pot cold then turn the heat to medium).  Otherwise, heat the oil in the pot and add the beef.  Flip the beef around to brown all the sides, then remove from the pot. 

Add the scallions, ginger, garlic, star anise, tomato, and white peppercorns and cinnamon stick, if using, to the pot and cook for a couple of minutes until very fragrant.  Add the rock sugar and stir around until it has mostly dissolved.  Return the beef to the pot and deglaze the bottom with the soy sauce and wine.  Add the beef broth and bay leaf, if using, and bring to a simmer.  Cover and continue to simmer on low for an hour.

In the meantime, bring another pot of water to boil.  Add the eggs (straight from the fridge) to the pot and set the timer for 7 minutes.  Prepare an ice bath.  After 7 minutes, remove the eggs from the pot and plunge them into the ice bath.  Once they are cool enough to handle, peel the eggs and set aside in the fridge to chill.

After an hour, check the beef for tenderness and the soup for flavor.  Cook longer or adjust seasonings if needed.  When the beef is ready, transfer from the soup into another pot or container large enough to hold the soup.  Strain the rest of the soup into the pot/container with the beef in it.  Add the peeled eggs, cover, let come to room temperature, then place in the fridge overnight.

When ready to serve, reheat the soup (remove the eggs first if you want to keep them jammy).  Blanch the veggies in boiling water until bright green and tender.  Remove and then cook the noodles in the same boiling water.  Drain and portion the noodles into 3 bowls, ladle the soup and beef over the noodles and add the veggies.  Slice the eggs in half and add to the bowl.  Serve with chili sauce (I like Sze Daddy for additional Taiwanese flavors) if you like.

Previously:  No Knead Sourdough Focaccia
Next:  Hurricane Popcorn Marshmallow Treats
Tuesday, July 26, 2016

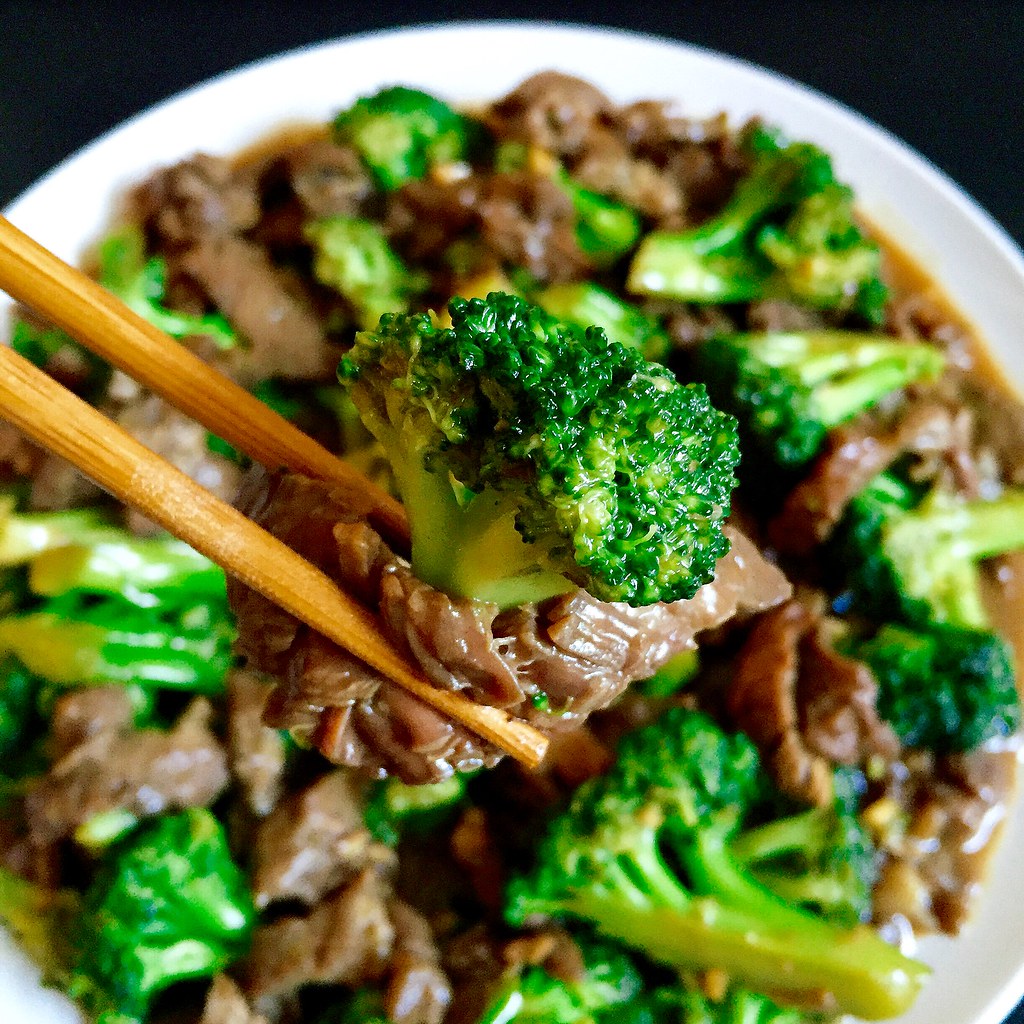
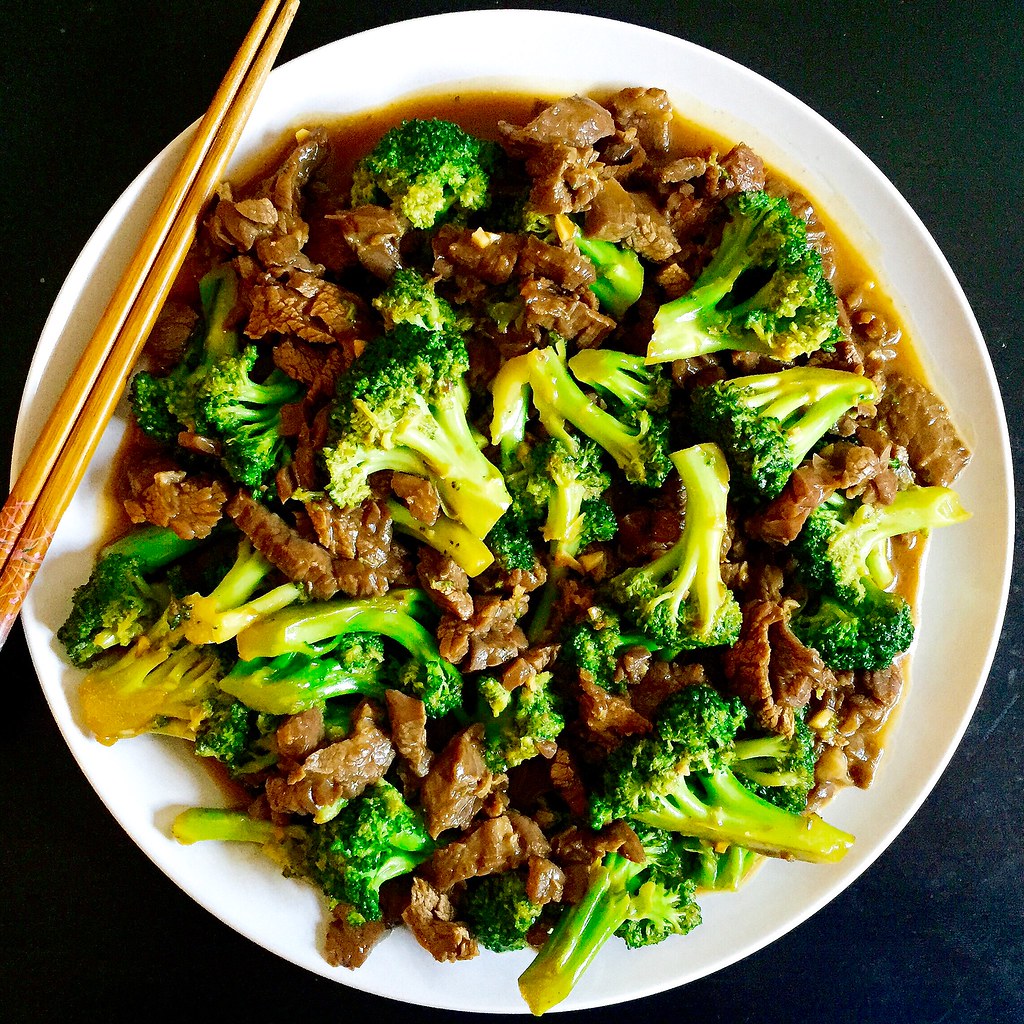
My Mom's Beef and Broccoli Stir Fry

https://www.flickr.com/photos/joyosity/27932366904/in/dateposted-public/

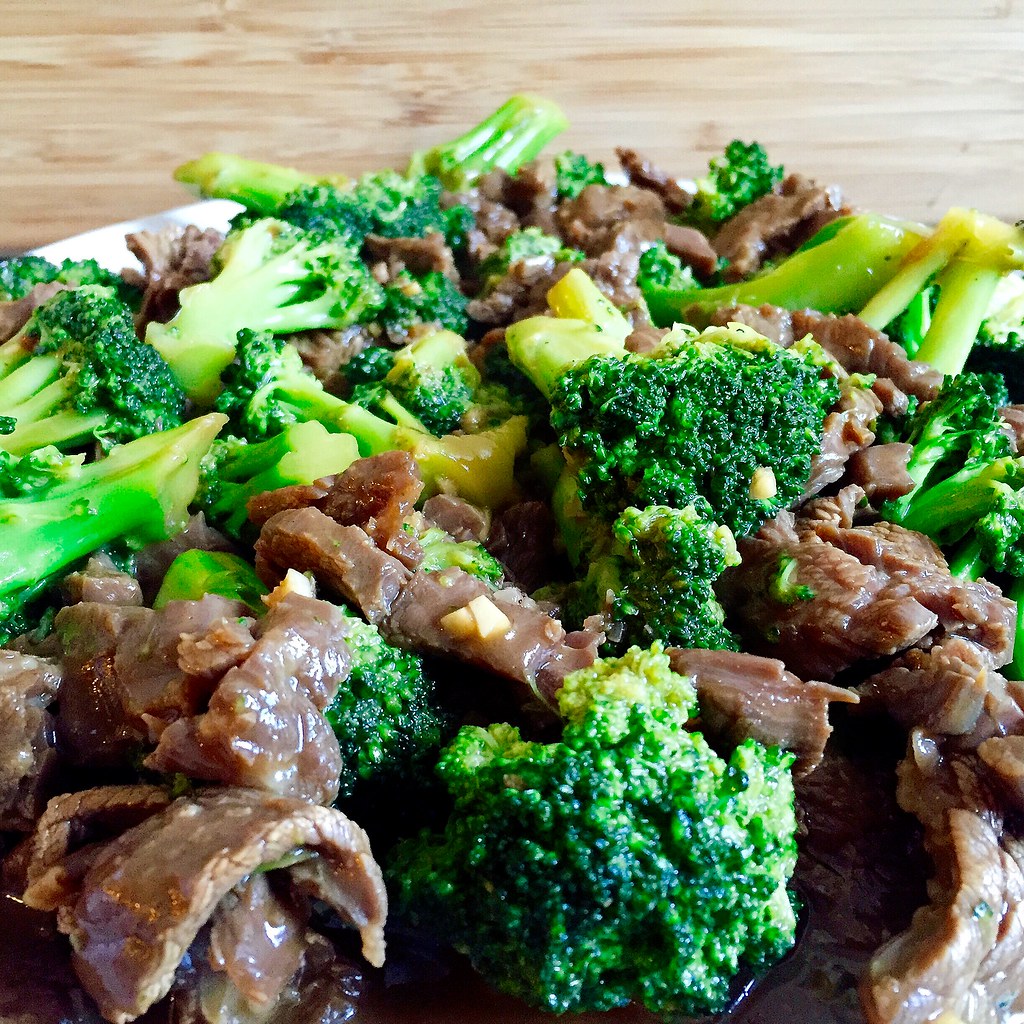
This is one of the original recipes in the cookbook that I made for my mom's Christmas gift 8 years ago.  I would've shared it earlier, except I thought I'd shared it already!  It's a classic dish to order from a Chinese restaurant--velvety strips of marinated beef stir fried with tender crisp broccoli in a flavorful brown sauce--and perfect served over steamed white rice.

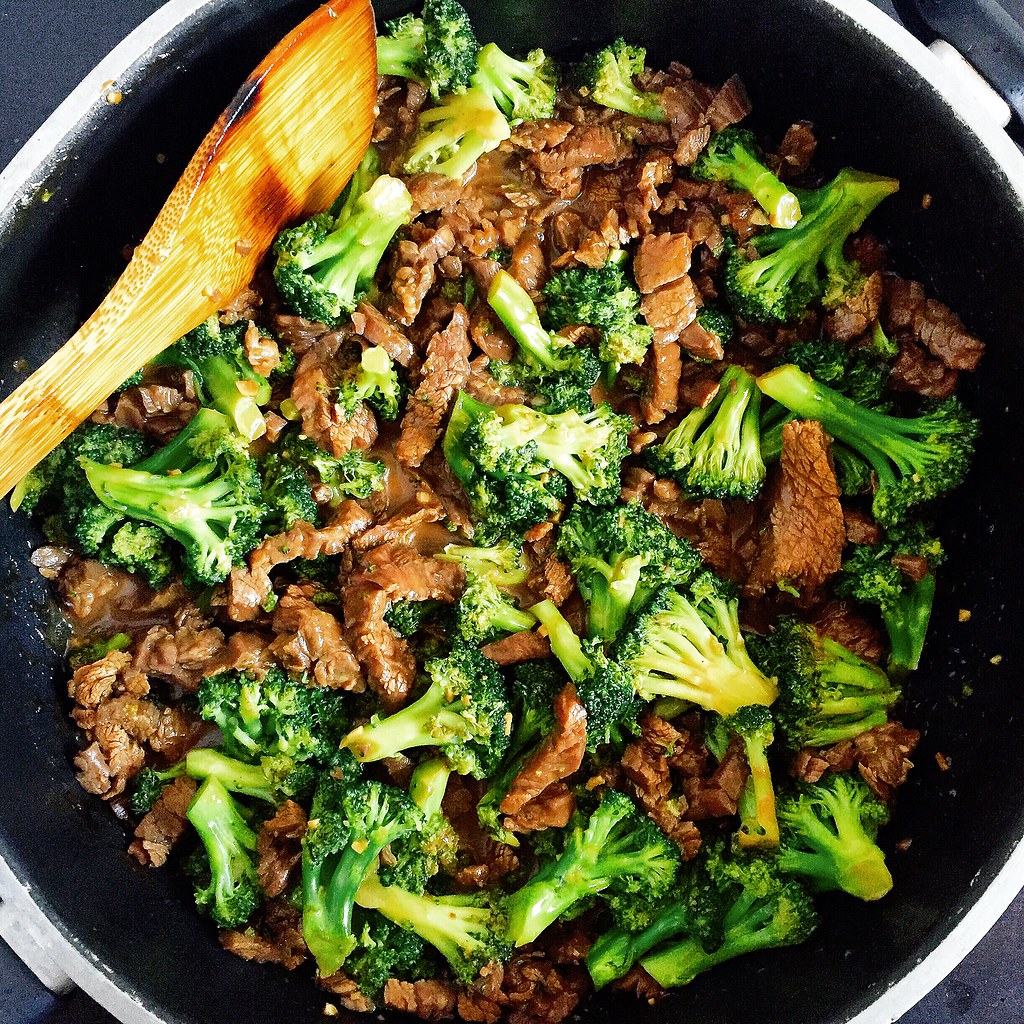
To keep the beef tender and not chewy, it's important to slice the strips against the grain.  The addition of cornstarch in the marinade further helps improve the texture of the beef.  Since the broccoli takes a lot longer to cook than the beef, it is cooked separately while the beef is marinating and then added back in at the end.  You'll want to use a large pan with a lid so that you can steam the broccoli after a quick stir fry.

https://www.flickr.com/photos/joyosity/28421948532/in/dateposted-public/

My favorite part about this recipe is the marinade which ends up becoming the sauce upon stir frying with the beef.  It is already quite fragrant due to the soy sauce, garlic, and sesame oil, but my mom adds a secret ingredient that really brings it over the top:  cinnamon!  Only a tiny amount is added that you can't really taste it, but the aromatic spice somehow boosts all the other flavors in the sauce in a way you wouldn't expect.

https://www.flickr.com/photos/joyosity/28549364325/in/dateposted-public/

My Mom's Beef and Broccoli Stir Fry
serves 4

1 lb. flank or sirloin steak, sliced thinly against the grain
1/4 cup soy sauce
2 tablespoons cornstarch
1/4 cup rice wine
1 teaspoon sesame oil
1 1/2 tablespoons sugar
2 garlic cloves, minced
1/4 teaspoon ground cinnamon
3 tablespoons vegetable oil, divided
6 cups broccoli florets
Salt, to taste
1 cup water, divided

Whisk together the soy sauce, cornstarch, rice wine, sesame oil, sugar, minced garlic, and cinnamon.  Toss with the sliced steak and marinate for at least 30 minutes.

In a large wok, heat 1 tablespoon of oil on high and add the broccoli florets.  Season with salt and stir fry until bright green.  Add 1/2 cup water and cover.  Steam until the broccoli is done.  Transfer the broccoli to a bowl, and wipe down the wok.

Add another 2 tablespoons of oil and heat on high again.  Add the steak and marinade to the wok.  Rinse out the container you used to hold the beef with 1/2 cup of water and add to the wok.  Stir fry until the beef is just done and no longer red.  Add the broccoli back into the wok and continue to stir fry for another minute or two to combine.  Serve hot.

https://www.flickr.com/photos/joyosity/28265304420/in/dateposted-public/

Next:  Zucchini Pizza
Previously:  How to Make an American Flag Cake
Two Years Ago:  Cleveland Cassata Cake (Bonus:  In a Jar!)
Three Years Ago:  Backyard Mint Ice Cream with Dark Chocolate Freckles
Six Years Ago:  Slow Cooker Bolognese Sauce
Seven Years Ago:  Curried Carrot Soup

Monday, October 27, 2014

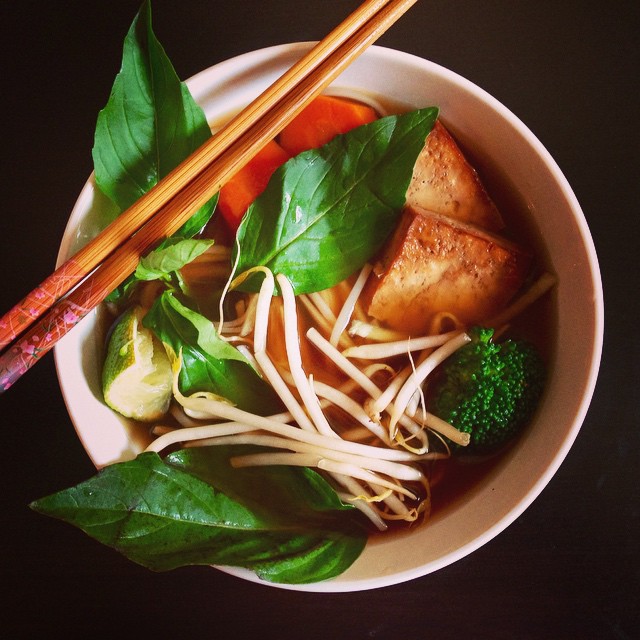
Faux Phở

https://www.flickr.com/photos/joyosity/15619751892/

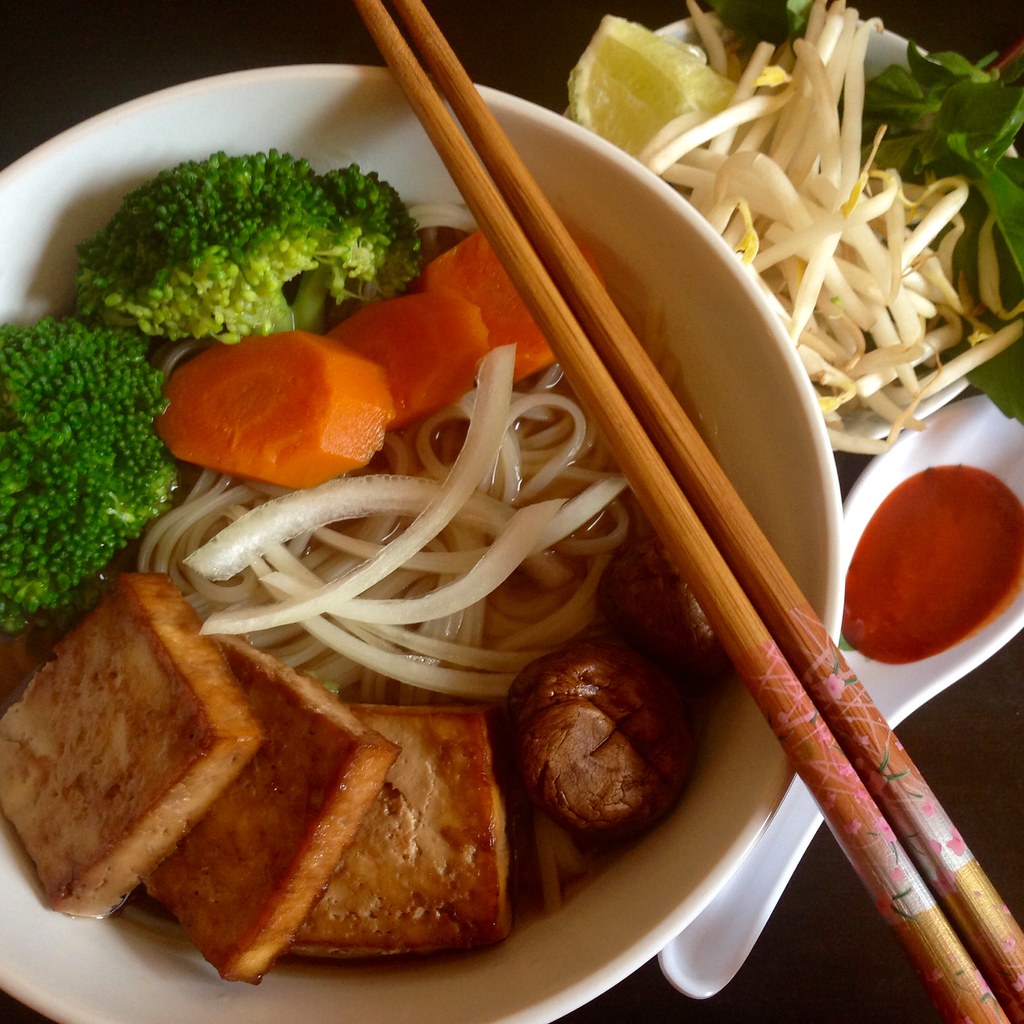
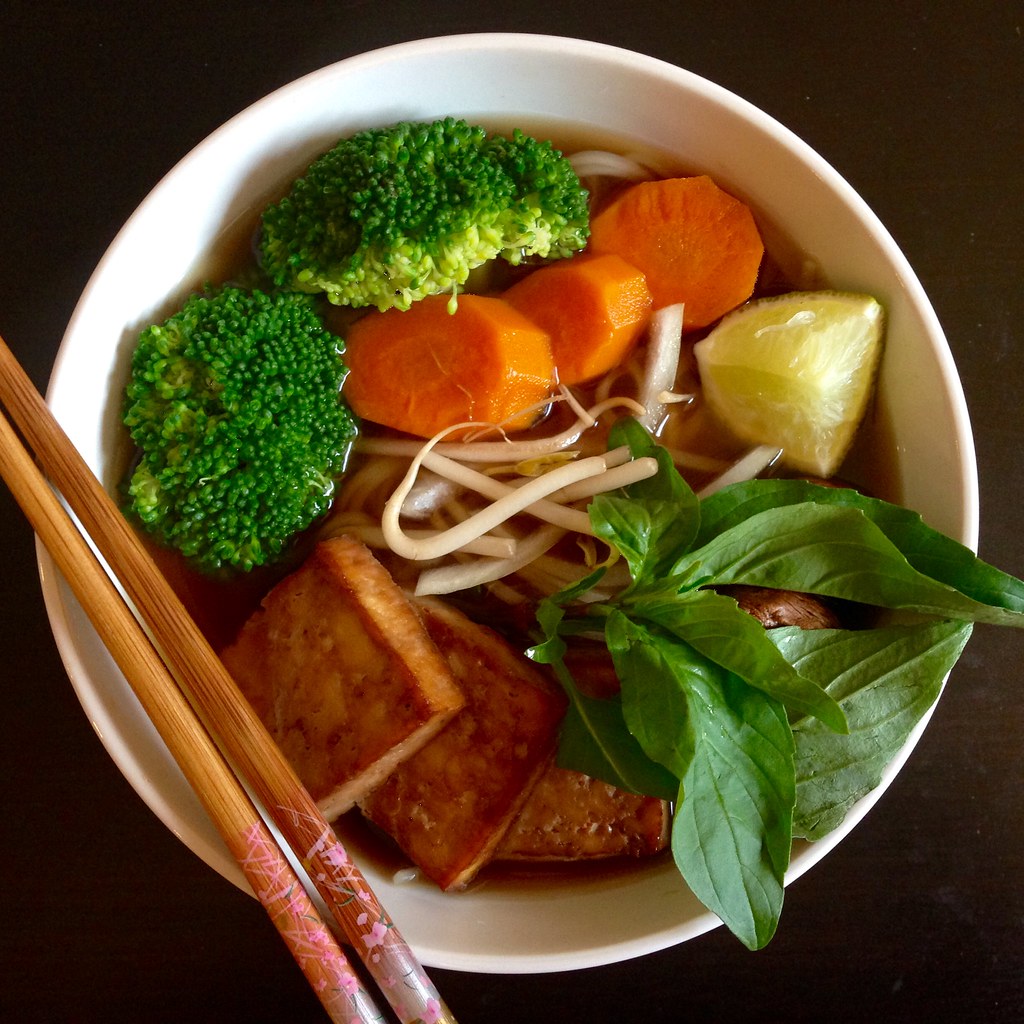
I'm ashamed to admit that I didn't have my first phở until maybe 3 or 4 years ago.  Every time I went to a Vietnamese restaurant before that fateful day, I'd always ordered the bún with fried spring rolls and roast pork because, let's face it, fried spring rolls are delicious.  But then one day I was with some friends who were determined to go to Turtle Tower for what was supposed to be the best chicken phở in San Francisco, so I figured I might as well try what they were famous for.  Suffice it to say, I realized I how much I had been missing out.

https://www.flickr.com/photos/joyosity/15430722368/

Since then, I've discovered that I prefer beef-based phở, especially with veggie and tofu toppings.  To try to recreate phở at home, I mostly followed this recipe from The Kitchn for a vegetarian phở but used beef broth and fish sauce instead of the vegetable broth and soy sauce.  I guess you could call it a faux phở (and in case you were wondering, phở is pronounced as if you were saying the first part of a very bad word).  The result is pretty close to what I'm used to, but definitely no where close to what you'd get from making your own broth from beef bones.  I also noticed the distinct lack of MSG, which I would've added if I had any.

https://www.flickr.com/photos/joyosity/14996075854/

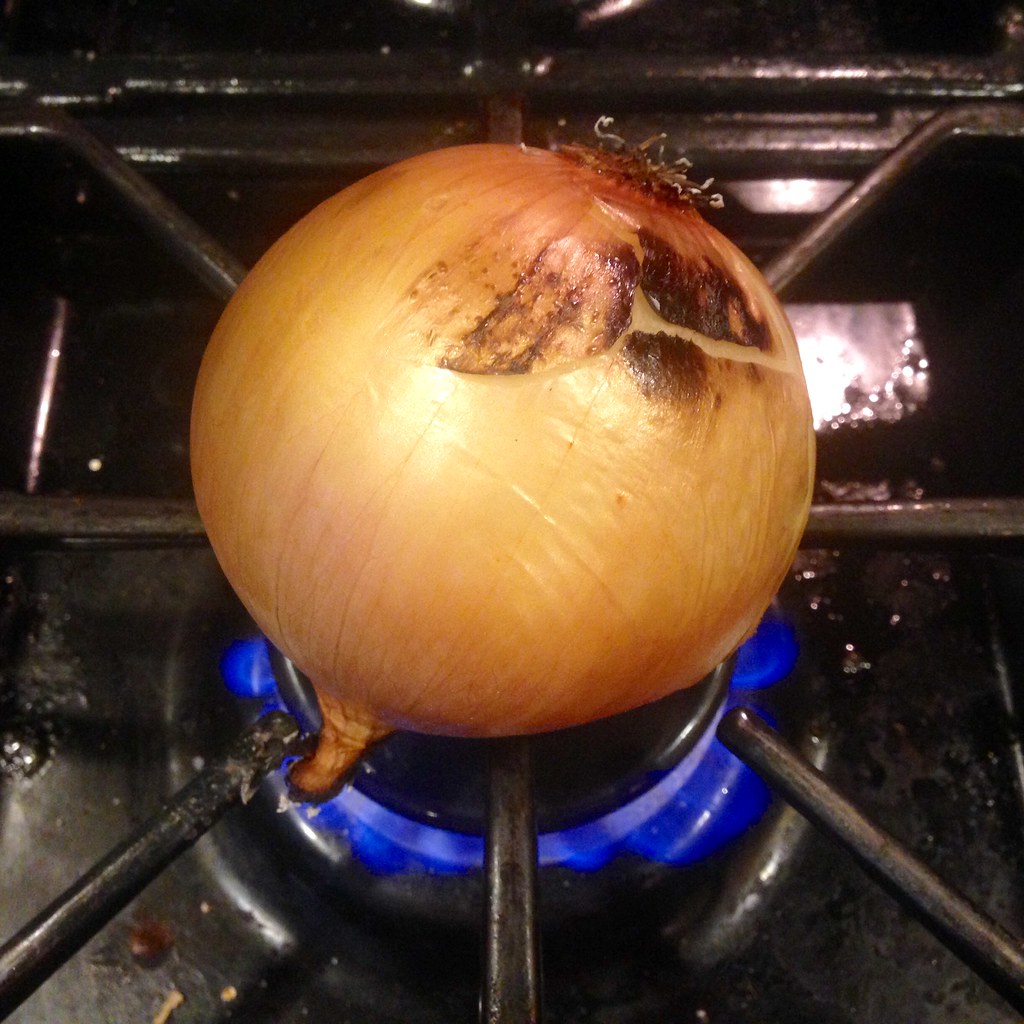
One of the first things you do in this recipe is char an onion and ginger over an open flame.  If you don't have a gas stove, you can also get the same type of result under a broiler.  Don't be afraid of getting them a bit burnt; that's the point.  You'll end up peeling off the burnt parts, anyways, revealing the softened, aromatic insides before adding it to the broth.  For the protein, I pressed, marinated, and baked some firm tofu similar to how I made the baked tofu for the soba noodle salad, but this time, I only baked it on each side for 10 minutes so that it was a bit softer.

https://www.flickr.com/photos/joyosity/15617669402/

Faux Ph (adapted from The Kitchn)
serves 2-3

Broth:
1 large onion
2-inch piece of fresh ginger
3-inch cinnamon stick
1 star anise
2 cloves
1 teaspoon coriander seeds
6 cups beef broth (you could also use vegetable or chicken broth)
2 carrots, peeled and coarsely chopped
2 celery stalks, coarsely chopped
2 tablespoons fish sauce or soy sauce
2 tablespoons rock sugar or granulated sugar
Salt, to taste

Noodles:
1/2 lb. dried flat rice noodles

Toppings:
Fried or baked tofu
Mushrooms
Vegetables such as baby bok choy or broccoli crowns, steamed or blanched

Garnishes:
1/2 onion, very thinly sliced
1 lime, cut into wedges
1/2 cup bean sprouts
1 chile pepper (Thai bird, serrano, or jalapeno), sliced
2 scallions, thinly sliced
Large handful of herbs:  cilantro, Thai basil, saw-leaf herb
Sriracha and/or hoisin sauce

Char the onion and ginger over an open flame or directly under a broiler until slightly blackened.  Allow to cool.

In a large pot, dry roast the cinnamon, star anise, cloves, and coriander over medium-low heat, stirring to prevent burning.  When the spices are aromatic, add the water or broth, carrots, celery, fish sauce, and rock sugar.

When the onion and ginger are cool enough to handle, peel both, slice in half, and add to the broth.  Bring the broth to a boil, reduce the heat, and simmer for 30 minutes.  Strain and keep hot until ready to serve, reserving the carrot slices for topping the noodles, if you like.

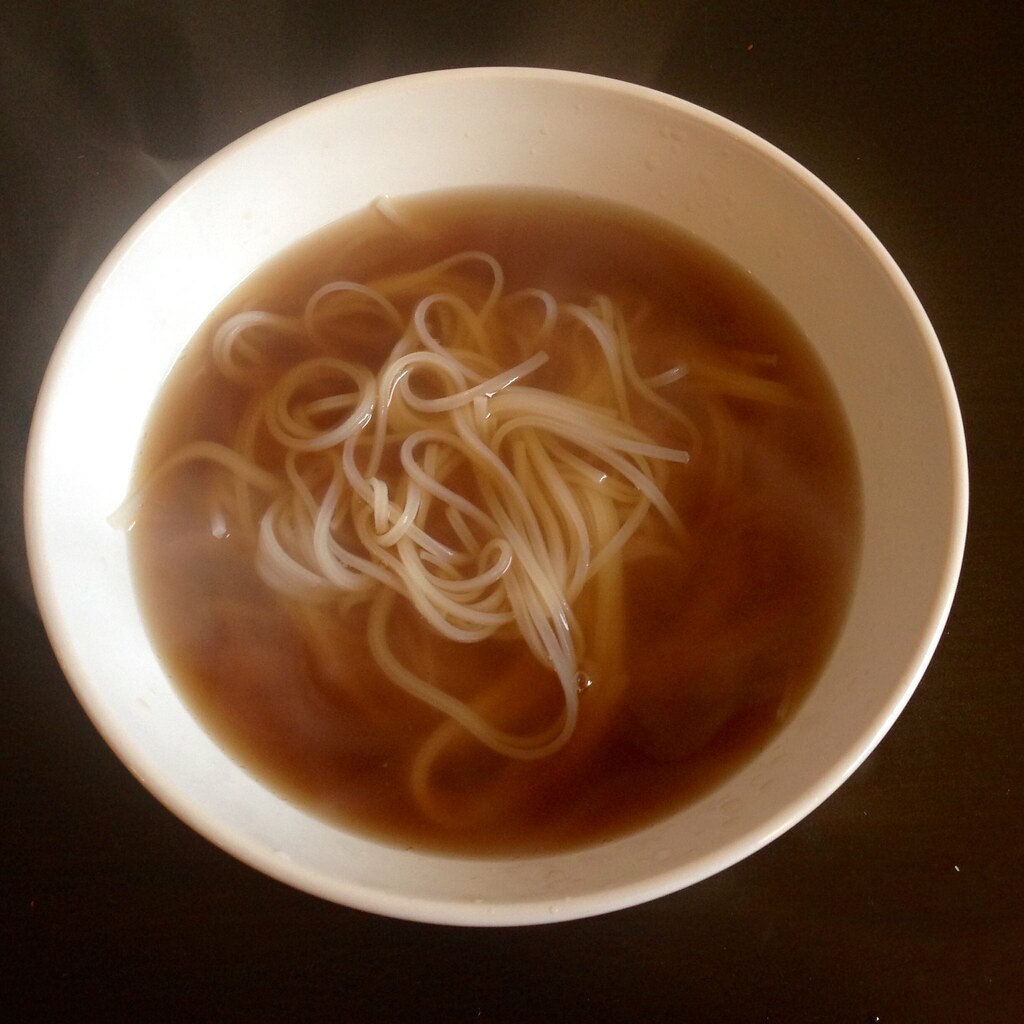
While the broth is simmering, place the noodles in a large bowl and cover with very hot water.  Let stand for 20-30 minutes or until tender but still chewy.  Drain.  (If soaking does not soften the noodles enough, blanch them in a pot of boiling water for a few seconds).

Divide noodles among the serving bowls.  Taste the broth and add salt, if necessary.  You want the broth to be almost too salty, since the noodles and toppings haven't been cooked with any salt.  Pour the broth into each bowl.  Add the toppings and serve with the garnishes on the side.

https://www.flickr.com/photos/joyosity/14996676183/

Next:  Mochi Donuts and Pon de Rings
Previously:  Nigel Slater's Chocolate Beet Cake

Two Years Ago:  Miso Marinated Black Cod

Friday, July 2, 2010

Slow Cooker Bolognese Sauce

P6123021

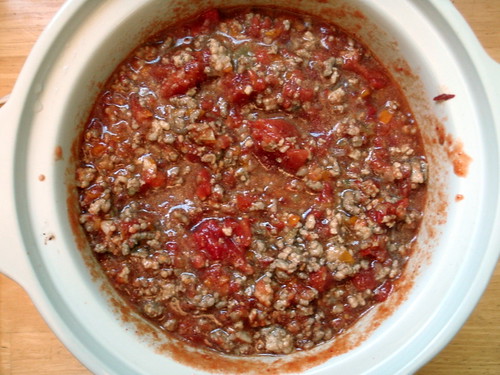
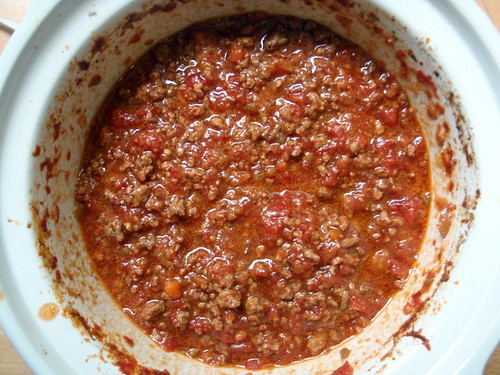
A few weeks ago I had eaten some pasta with bolognese sauce at Basta Pasta in Cambridge, and afterwards, I was totally craving more of the savory meat sauce. I remembered that The Kitchen had posted a recipe for making it using a slow cooker which sounded perfect, since I didn't really want to have to deal with hours in front of a hot stove during the summertime. Even so, you do need to spend some time sweating the vegetables, browning the meat, and reducing the liquids, but the end result is so totally worth it. The only changes I made to the original recipe is that instead of adding 1 cup of the reserved tomato juices, I reduced all the tomato juice from the 2 cans until there was only about 1 cup of liquid left and added that to the slow cooker. Also, I used a pound of ground beef and a pound of ground pork instead just ground beef.
Slow-Cooked Bolognese Sauce (from The Kitchn)
makes 6 cups
1 tablespoon olive oil
1 medium onion, finely chopped
2 celery stalks, finely chopped
1 medium carrot, finely chopped
3 cloves of garlic, minced
1 pound ground beef
1 pound ground pork
1/8 teaspoon nutmeg
1 teaspoon salt
1/2 teaspoon pepper
1 cup milk (whole or 2-percent)
1 cup white wine
2 28-ounce cans of whole peeled tomatoes, drained and finely chopped (juices reserved)
1 cup reserved tomato juices
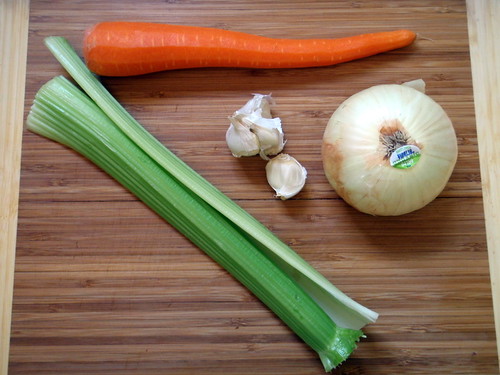
Mirepoix ingredients plus garlic
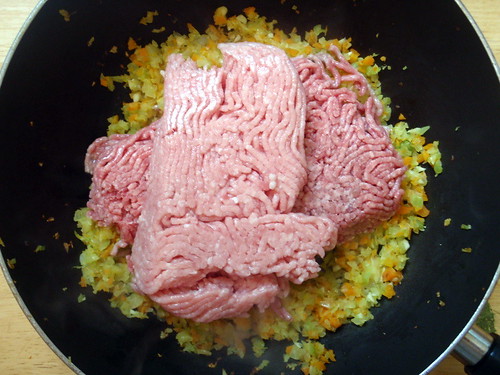
Heat the olive oil in a large saucepan over medium heat. Add the onion, celery, and carrot and cook until the onion is translucent and all the vegetables have softened. Add the garlic and cook until fragrant, about 30 seconds. Add the pork and beef, breaking it apart with your spoon and cooking until it is just browned. Season with nutmeg, salt, and pepper.
Add ground pork and beef
Stir in the milk and bring it to a rapid simmer. Continue simmering until the milk has reduced completely and very little liquid remains, about 10 minutes. Stir in the wine and simmer again until reduced completely, about 10 minutes. Transfer the beef mixture to the slow cooker.
In the same, now-empty pot, reduce the reserved tomato juices until you have about 1 cup left.
0 hours in slow cooker
Add the chopped tomatoes and reduced tomato juices to the slow cooker. Stir to combine. Cover and cook on HIGH for 6 hours or LOW for 8 hours.
In the last half hour of cooking, remove the lid to allow any excess liquid to evaporate and reduce the sauce. The finished sauce should be chunky and creamy without being soupy.
P6123040
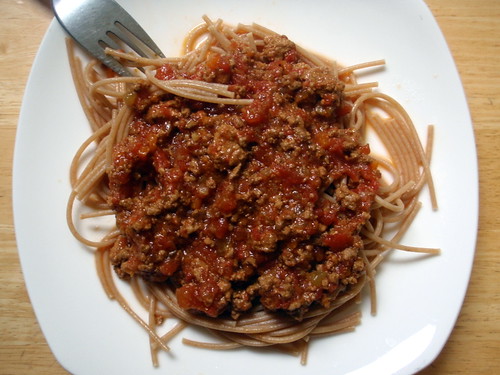
Serve over spaghetti with a hunk of crusty bread for mopping up the sauce!
P6123017

Tuesday, May 26, 2009

Kalbi (Korean Barbecue Short Ribs)

Kalbi marinade ingredients still life
Still Life of Marinade Ingredients

My friend Vince* is known for his kalbi recipe, so when I asked him for it, this is what he gave me:

-1 cup ajimirin sauce
-1/2 can of 7-Up
-1 kiwi
-1 yellow onion
-1 red apple
-1 pear...preferably Asian pear
-1/2 cup garlic

-Blend all these ingredients together and take 3 cups of the blend and mix it with the 1 cup of sugar and 1 cup of soy sauce.

I laughed when I first read this because of the lack of instructions on how to prepare the fruits. Was I supposed to peel and core the apple and pear? I wasn't supposed to throw the whole kiwi into the blender, right? When I asked him for clarification, he said that what he sent me was what he got verbatim from his Korean friend. There was also something in the recipe about "tenderizing" the short ribs, but there were no details as to how to do that. Seeing as how kalbi meat is so tender already, I figured I could just skip that part.

Perhaps the hardest part about making kalbi is finding the right cut of meat. You want to get beef short ribs that are cut across the bones, not with, which is how they're usually sold in American grocery stores. I just found out via the recent post on thekitchn.com that this is called a "flanken" count (not the same as flank steak). The only place I've found this cut is at a local Korean grocery store. Sara Kate, who wrote the post, suggests "slicing the traditional three-rib short ribs down to the bones length-wise and splaying them on the grill" if you can't find the flanken cut.

Kalbi (Korean Barbecue Short Ribs)
serves 8-12 people

6 lbs. flanken cut beef short ribs
1 kiwi
1 yellow onion, roughly chopped
1 red apple, peeled, cored, and roughly chopped
1 pear (preferably Asian pear, but I had a Bosc so I used that), peeled, cored, and roughly chopped
1/2 cup peeled garlic gloves
1 cup ajimirin sauce (I didn't have any so I substituted rice wine)
1/2 can of 7-Up
1 cup soy sauce
1 cup sugar

Cut the kiwi in half and remove the meat using a spoon. Add the kiwi meat to a blender along with the onion, apple, pear, garlic, mirin (or rice wine) and 7-Up. Puree using the blender. Measure out 3 cups of this mixture into a medium mixing bowl and add the soy sauce and sugar.

Kalbi marinade

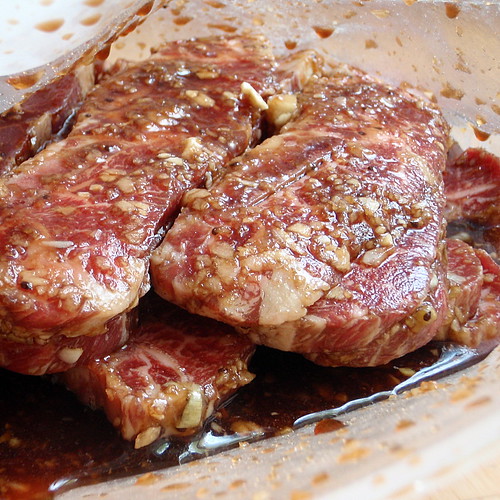
Arrange the ribs in a baking dish (you may have to use two depending on the size of your dish) and pour the marinade over them, making sure that all surfaces are exposed to the marinade. Alternatively, you can use two gallon-sized freezer bags.

Marinating the kalbi

Marinate in the refrigerator for at least 24 hours, turning the ribs around a few times so they marinate evenly.

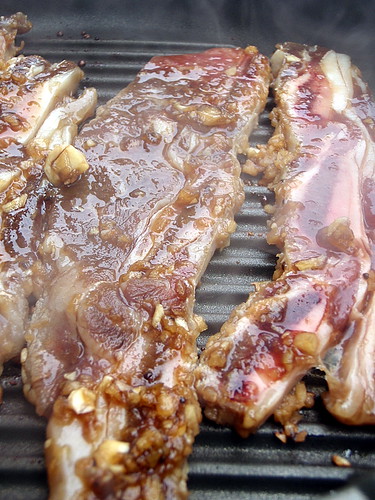
Grill the ribs over high heat. I do about 3 minutes on each side because my ribs are cut pretty thin, but you may have to grill yours longer if yours are thicker. If you don't have a grill, you can also pan-fry or use the broiler to cook the ribs. I used my electric grill and cooked it outside because the smell is heavenly, but not something you want to stick around for days.

Grilling kalbi

Serve with washed Romaine lettuce leaves, cooked rice, and ssamjang (Korean spicy bean paste). Each person should remove the meat from the bones and wrap the meat in the the lettuce along with the rice and bean paste. Don't forget to gnaw on the meat in between the bones; it's hard to get to, but oh so worth it!

Kalbi

If you're not planning on cooking the ribs right away, you can freeze them in the freezer bags after adding the marinade. When you're ready to cook them, defrost defrost overnight in the refrigerator.

I <3 Kalbi
I <3 Kalbi!

*Breaking news! I just found out that Vince liked the kalbi recipe so much, he ended up dating the girl that gave it to him! Perhaps I should rename this post: A Kalbi Worth Dating For....

Thursday, March 26, 2009

Cincinnati Chili

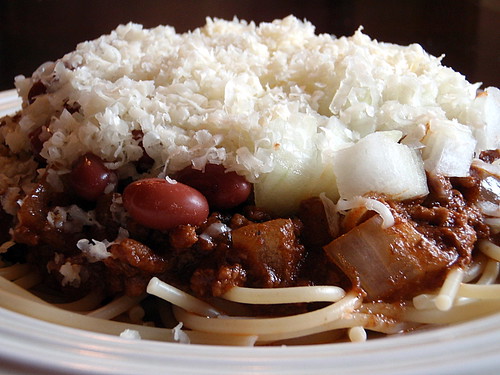
Cincinnati chili

I've been wanting to make Cincinnati chili for quite a while but never found the opportunity. It's definitely one of those dishes you want to make for a large group, and what's more perfect after a day of skiing than some chili?

Cincinnati chili differs from what most people would consider traditional chili in that it's a bit more mild and watery and served on a bed of spaghetti and topped with mounds and mounds of fluffy, shredded cheddar cheese. In fact, it's probably more akin to spaghetti sauce than chili. The beef is boiled instead of browned to achieve a fine texture, and the secret ingredient is a bit of chocolate. Yes, chocolate.

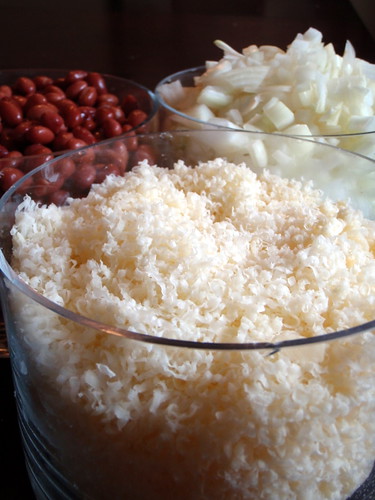
Toppings for Cincinnati chili

Cincinnati Chili
(based on this recipe)
Serves 14

4 lbs. 80% lean ground beef
4 cups water
4 (6 oz.) cans tomato paste
2 large onions, finely chopped
2 cloves garlic, minced
4 large bay leaves
4 tablespoons chili powder
2 tablespoons unsweetened ground chocolate
2 tablespoons ground cumin
4 teaspoons ground allspice
1 tablespoon cinnamon
2 teaspoons salt
2 teaspoons pepper
1/2 teaspoon red pepper
2 teaspoons white wine vinegar
2 teaspoons Worcestershire sauce
Hot cooked spaghetti (3 boxes worth)
Finely shredded cheddar cheese
Chopped onions
Small red beans

Combine ground beef and water in a large stew pot. Cook until beef is done, crumbling as it cooks. You want very fine particles of beef. Stir in everything but the last 4 ingredients.

Cover and cook, at a simmer for about one hour.

Remove cover and, if necessary, cook down to a good thick consistency. Remove and discard bay leaves.

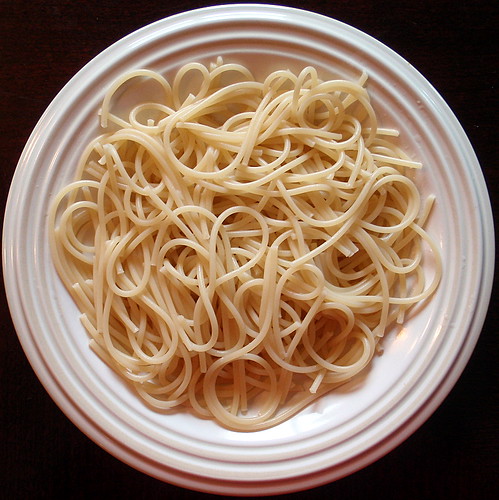
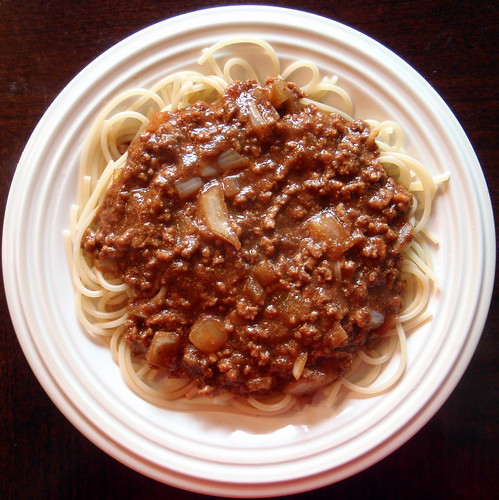
To serve, mound a bed of spaghetti on your plate.

P3210413

Add the chili.

P3210415

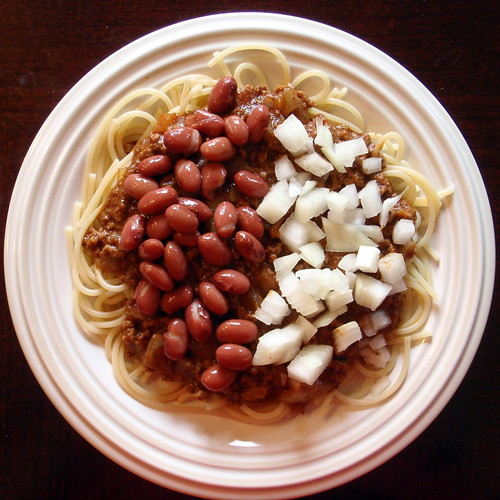
To make 3-way Cincinnati chili, you'd add just the cheese at this point. For 4-way, you'd add either the onions or beans, and for 5-way, add both onions and beans.

P3210417

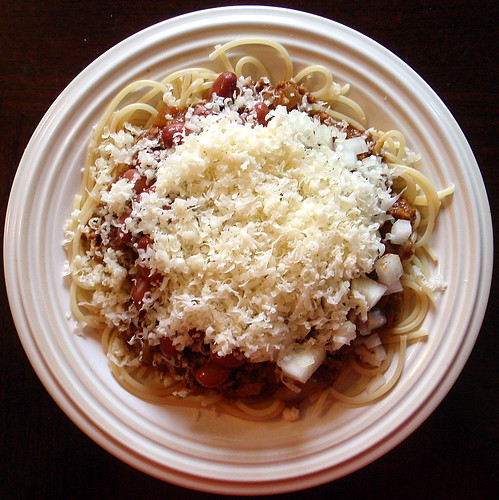
Top with a mound of freshly shredded cheddar cheese.

P3210419

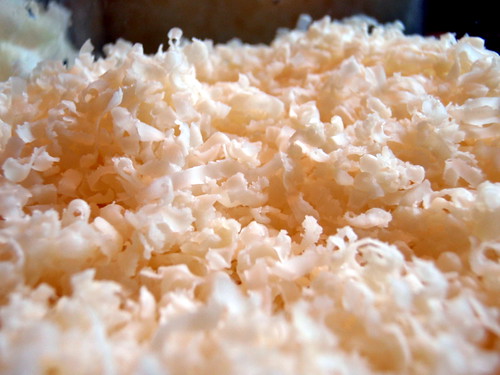
The key to the dish is the shredded cheese. You want to grate it as fine as possible so that it will be incredibly fluffy and melt just from the residual heat from the spaghetti and chili, even though a layer of onions and beans. To do this, I used my new Microplane grater. Just look at that cheese; it's like sawdust! (But in a good, appetizing way).

Finely shredded cheddar cheese

Monday, December 22, 2008

Curry Turnovers(?)

Rows and rows of homemade beef curry pies

Okay, so I have no idea what to call these things. Even in Chinese I've heard them called both jia li jiao and ga li jiao. I asked my mom if one was Mandarin and the other Taiwanese or Cantonese, but even she admits she doesn't know. My guess is that the former is Taiwanese Mandarin and the latter possibly Beijing Mandarin or Cantonese. Anyone know? Anyways, whatever these things are, they're delicious. The first time I ever had them my mom made the pastry from scratch, and it was this incredibly complicated process of making two types of dough and then combining them so that you got this extremely flaky crust, kind of like this. But then one day I was flipping through some old copies of Better Homes and Gardens and noticed that there was this reader submitted recipe for something very similar that just used refrigerated pie crust, and I was sold. They also used mashed potatoes instead of pieces of cooked potato, but I decided to use mashed potato flakes instead to make it even simpler.

The most impressive part of these turnovers is the crimped crust, which of course, my mom taught me how to do. Here's a quick video to show you how to do it:


Curry Turnovers (or whatever they're called)
makes about 56

2 packages of refrigerated pie crusts (4 pie crusts total)
1 tablespoons vegetable oil
1 cup chopped onions
4 tablespoons curry powder
1 lb. ground beef, 80% lean is good (you don't want to get too lean)
4 tablespoons soy sauce
1 cup instant mashed potato flakes
1 egg yolk, beaten

Pre-heat the oven to 450° F.

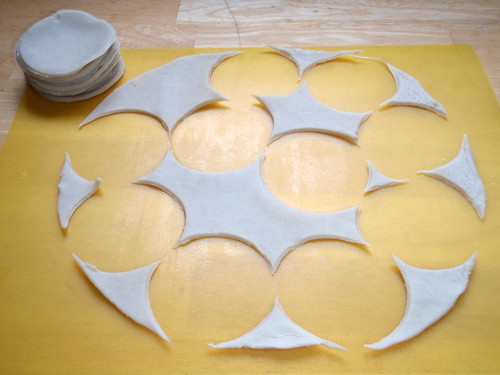
Thaw and unwrap the pie crusts. Unfold and use a cup or cookie cutter to cut out 3" circles. Re-roll the excess pie crust and cut more. You should be able to get around 56 circles.

Cutting circles out of the pie crust

Saute the onions and 1 tablespoon curry powder in the oil until the onions are sweating. Add the ground beef and continue cooking until beef is brown. Add soy sauce and more curry powder to taste.

Add 1/4 cup potato flakes to bind the mixture. Continue adding flakes until all the liquid is soaked up and the mixture is no longer crumbly.

Place a little less than 1 tablespoon of filling in the middle of each pie crust circle. Fold in half and pinch the edges to seal.

Filled curry turnovers

Place the turnovers on a cookie sheet and brush the top of each with the beaten egg yolk.

Bake at 450° F for 9 to 15 minutes or until golden brown.

Curry turnovers

The reason for the color difference in the turnovers above is that I used two different brands of pie crust dough: Pillsbury and Shaws. Believe it or not, the darker turnovers were made using the Pillsbury brand. I'm not sure if there is a difference in the thickness of the doughs or more likely the ingredients in the dough, but the Pillsbury brand was a lot easier to shape. Taste-wise, I think I like the Pillsbury ones better, too; it's just too bad they don't look as nice as the Shaws' ones. Oh yeah, and personally, I think these taste better once they've cooled down and aren't piping hot anymore. =)

Monday, December 8, 2008

Beef Noodle (Soup) and Lu Dan

My mom is the best cook I know, and I'm not just saying that because she's my mom. Not only doe she make some awesomely impressive dishes for potlucks and the like, she also makes awesome everyday dishes just for us, and the best thing is, she's self-taught. One of the dishes that my brother and I always demand she makes when we're home is niu rou mian, or Taiwanese beef noodle soup. Actually, the translation is a little misleading because it's not exactly niu rou tang mian (tang means soup in Mandarin). The dish my mom makes doesn't have a whole lot of soup (although you could just add beef broth if you wanted, I suppose), it's more like a healthy amount of sauce.

One change I made to her recipe is that I used chuck beef instead of beef shank because I'm not a big fan of all the jing, which is the chewy gross stuff that is probably tendons and junk that other people seem to really like. So yeah, if you like that junk, use beef shank, which comes out much more tender, or maybe that's just because my mom made it.

Niu Ro Mien

My Mom's Taiwanese Beef Noodle (Soup)

makes 6 servings

2 scallions, chopped
4 garlic cloves, chopped
1 teaspoon ginger, minced
1 star anise
2 tablespoons vegetable oil
1 1/2 lbs. chuck beef (or beef shank) cut into 3/4" pieces
1/2 cup rice wine
1/2 cups soy sauce
1 1/4 cup water
3 tablespoons rock sugar or brown sugar
1 tomato, skinned and roughly chopped (optional)
1 lb. angel hair pasta
1 small head napa cabbage, washed and cut into 3" pieces

In large saucepan, saute the first four ingredients the oil for 2 minutes. Add the beef and cook until just browned.

Add the wine, soy sauce, water, and sugar, and tomato (if using) and heat to boiling. Reduce to a simmer and cook with the lid on for 1-2 hours (1 hour is enough for chuck beef, may need 2 hours for beef shank).

Fifteen minutes before beef is done, boil water in a large pot. Add pasta and cook while stirring occasionally for 3 minutes. Add napa cabbage and cook for 2 more minutes. Drain off most of the water.

Divide the noodles and cabbage among 6 large bowls, adding a little of the excess hot water. Add the beef on top and ladle in some of the sauce (making sure to remove the star anise).

Another Taiwanese food I really like is lu dan, or soy sauce braised eggs. In Taiwan, these are so common you can get them at the ubiquitous 7-Elevens, but it's darn near impossible to find them here unless you make them yourself. Since I had a large amount of soy sauce mixture left from making the beef noodles, I decided to make some. (Note: these are different form cha dan, or tea eggs, in that 1) there is tea in the braising sauce for tea eggs, and 2) the egg shells are not completely removed for making tea eggs.)

Lu Dan

Soy Sauce Braised Eggs

1) Add eggs to a pot of cold water. Bring the water to a boil and reduce to a simmer. Cook for 12-15 minutes. Transfer eggs to a bowl full of cold water to cool.

2) Once eggs are not hot to the touch, peel them.

3) Heat the soy sauce mixture leftover from beef to boiling. Reduce to a simmer and add the peeled eggs. If the level of the liquid does not cover the eggs, make sure to rotate the eggs throughout the braising process. Braise for 30 minutes.

That's it! You can probably braise the eggs in a straight mixture of soy sauce, water, and sugar (i.e. without braising beef or some other kind of meat in the liquids first), but for some reason, I've only had them cooked in a mixture that had first been used to cook something else. Hmmm, maybe it's because it's a Taiwanese thing, and we're kinda cheap and efficient like that. =P