Showing posts with label vegetarian. Show all posts
Wednesday, May 20, 2015
Drunken Noodles (Pad Kee Mao) with Tofu
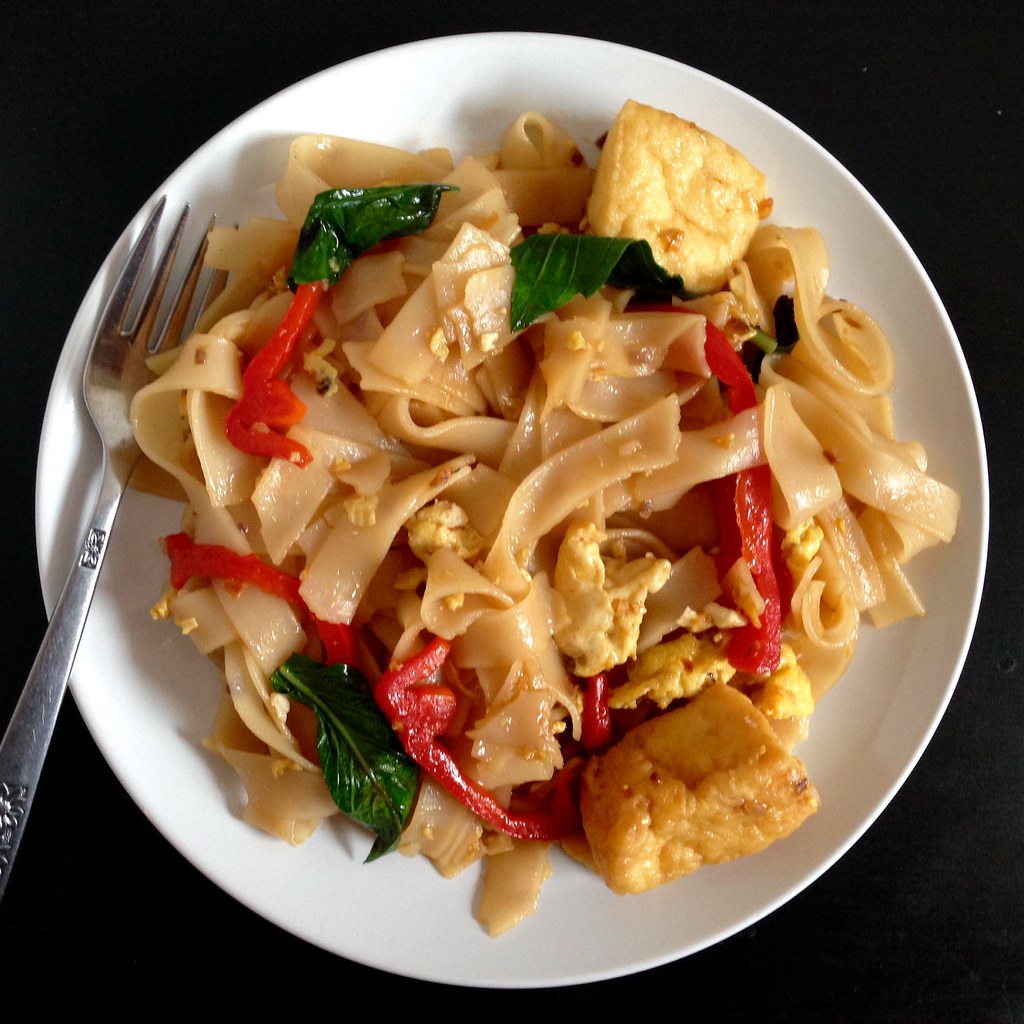
When I go to a Thai restaurant I usually order pad see ew or pad woon sen, but every once in a while I'm in the mood for something a little spicier, and for that I turn to drunken noodles, or pad kee mao. According to the menu at my favorite Thai restaurant, Pepper Sky's, drunken noodles were "originally stir-fried by a singing drunkard to starve [sic] off midnight hunger. Ingredients previously thought to be incompatible were tossed into the wok, and voila[!] Drunken noodle."
Sadly, Pepper Sky's is currently closed for renovations, so I decided to try making the dish myself. I pretty much followed this recipe from Food52 except I added some sugar to the sauce since I prefer my drunken noodles slightly sweet. I also increased the amount of egg since I wasn't adding any shrimp. I wasn't able to find rice flake noodles, so I used the widest rice noodles I could find. If you can find fresh wide rice noodles, I would suggest using those and skipping the soaking step.
This is one of those recipes where you want to make sure you have all the vegetables minced and chopped before you start cooking since it comes together pretty quickly. Feel free to add other vegetables; I'm used to seeing tomato slices, baby corn, bamboo shoots, carrots, string beans, and zucchini in the drunken noodles I get at Thai restaurants.
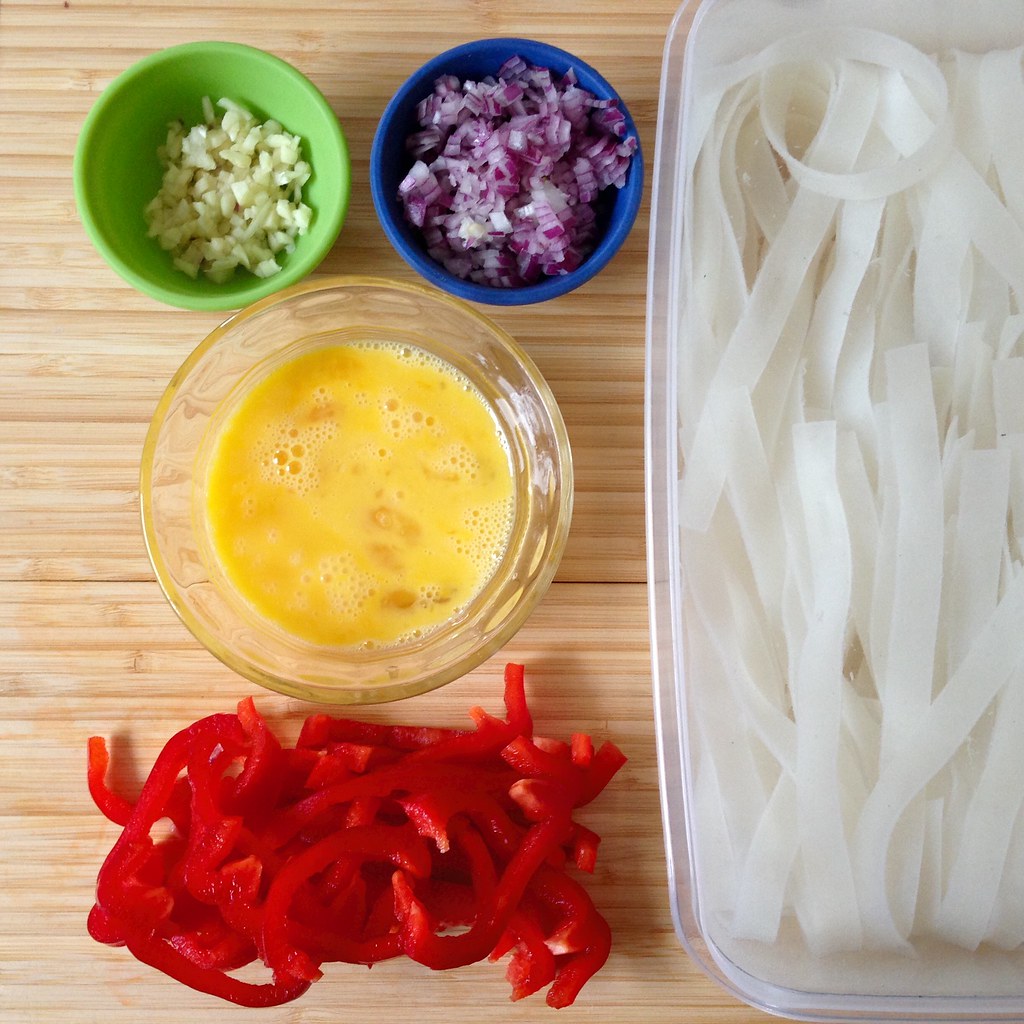
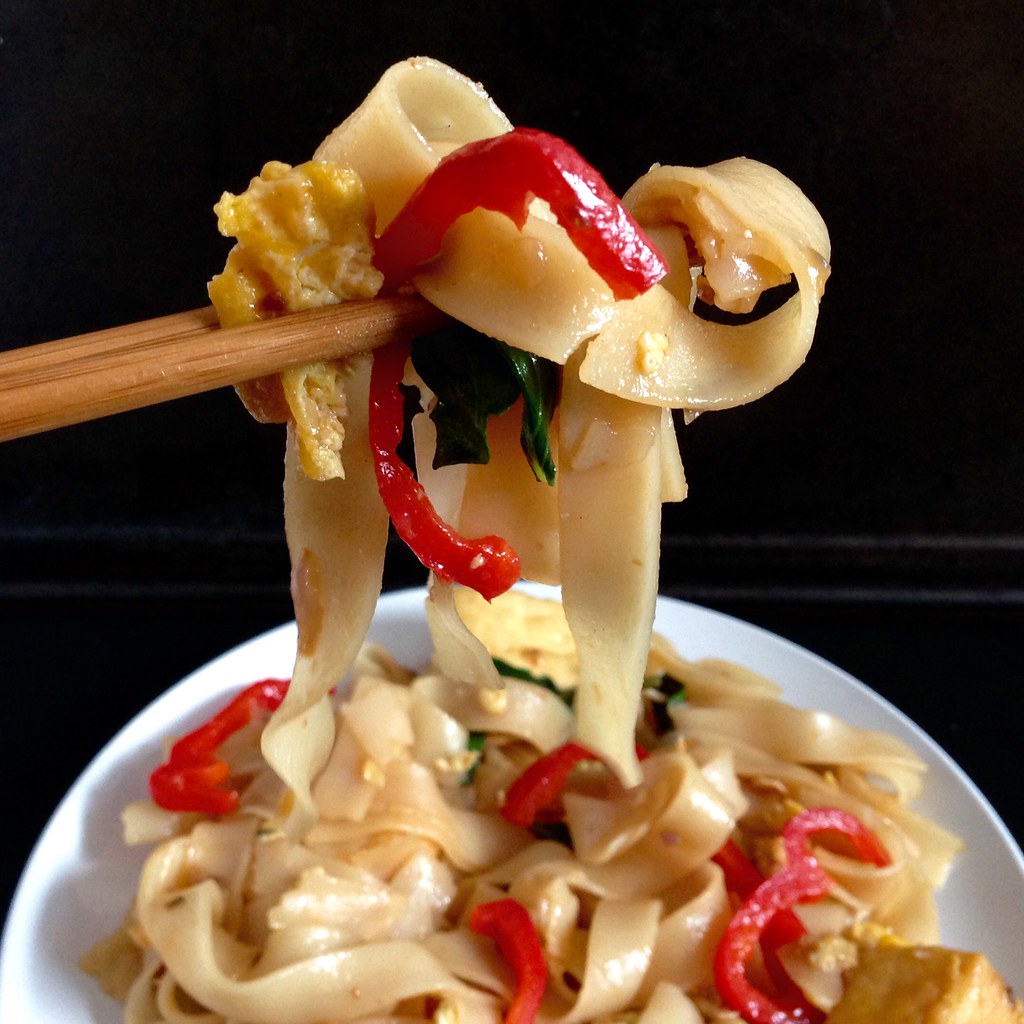
Drunken Noodles (Pad Kee Mao) with Tofu (adapted from Lollipopsicle by way of Food52)
serves 3
7 oz. wide rice stick noodles
2 tablespoons hoisin or soy paste (if using soy paste, add a teaspoon of sugar)
2 tablespoons soy sauce
1 tablespoon oyster sauce
1-3 teaspoons sriracha, depending on how hot you want it
2 tablespoons fish sauce
3 tablespoons vegetable oil
3 garlic cloves, minced
1 shallot or 1/2 red onion, minced
3 eggs, lightly beaten
5 oz. fried tofu
1 red bell pepper, diced
A large handful of Thai basil leaves
Place the rice stick noodles in a wide container and pour enough boiling water over the noodles to cover them by an inch. Stir the noodles periodically so that they don't stick together. Check them after 10 minutes to see if they are pliable and continue to soak until they are. You may have to add additional hot water. When the rice noodles are pliable but not mushy, drain. Try to time this so that the noodles are ready just in time to be added to the skillet.
Mix together the hoisin (or soy paste and sugar), soy sauce, oyster sauce, sriracha, and fish sauce in a small bowl.
Heat a large skillet over medium high heat and add the vegetable oil. Add the minced garlic and shallot and stir fry until golden brown. Move the garlic and shallots to the sides of the pan and add the eggs to the middle. Scramble the eggs until just set and add the fried tofu, sliced bell pepper, and any other vegetables you might be using. Stir fry for a couple of minutes, then add the drained noodles and the sauce. Stir fry for 5 minutes, then add the basil and cook for another couple of minutes until some of the noodles are starting to get brown and crispy. Serve hot.
Next: Tofu Tikka Masala
Previously: Taiwanese Oyster Omelet (Without the Oysters)
Six Years Ago: Zuni Cafe Ricotta Gnocchi with Browned Butter and Sage
Tuesday, February 3, 2015
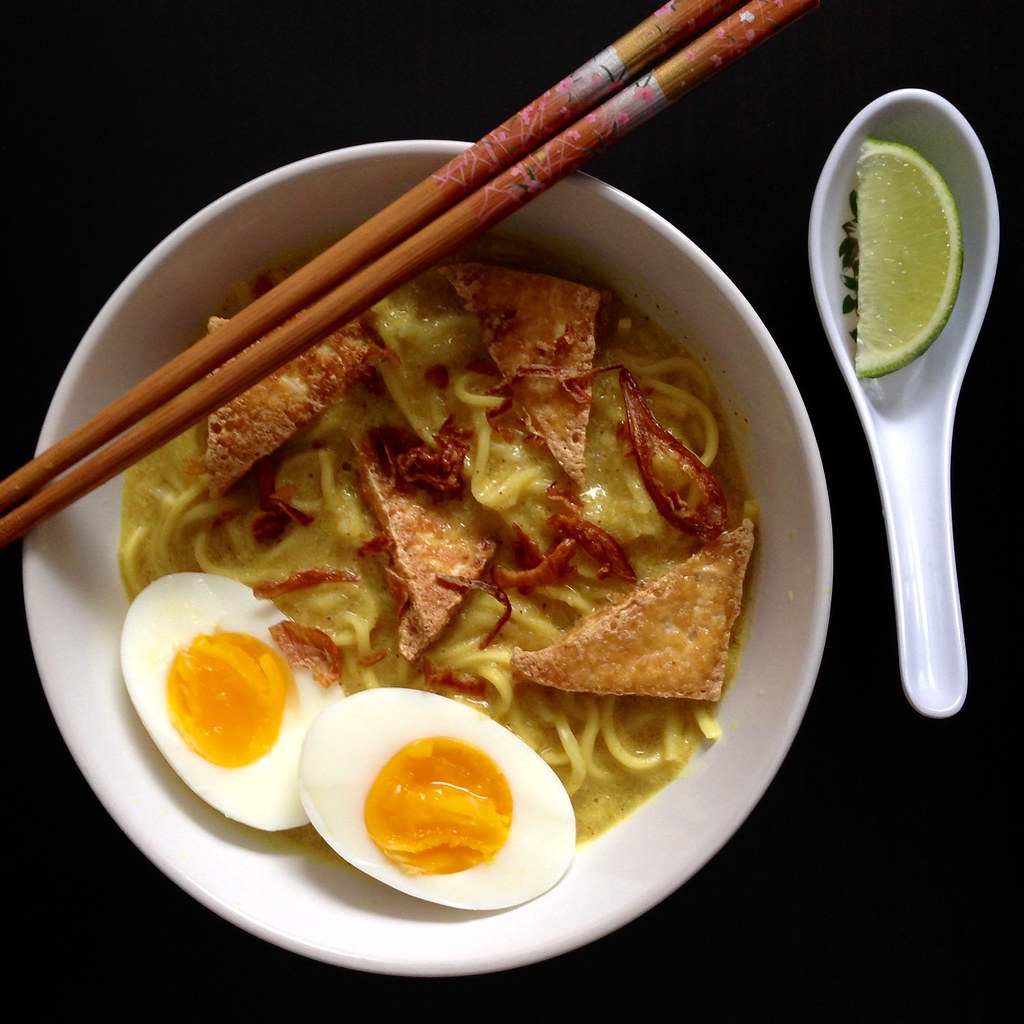
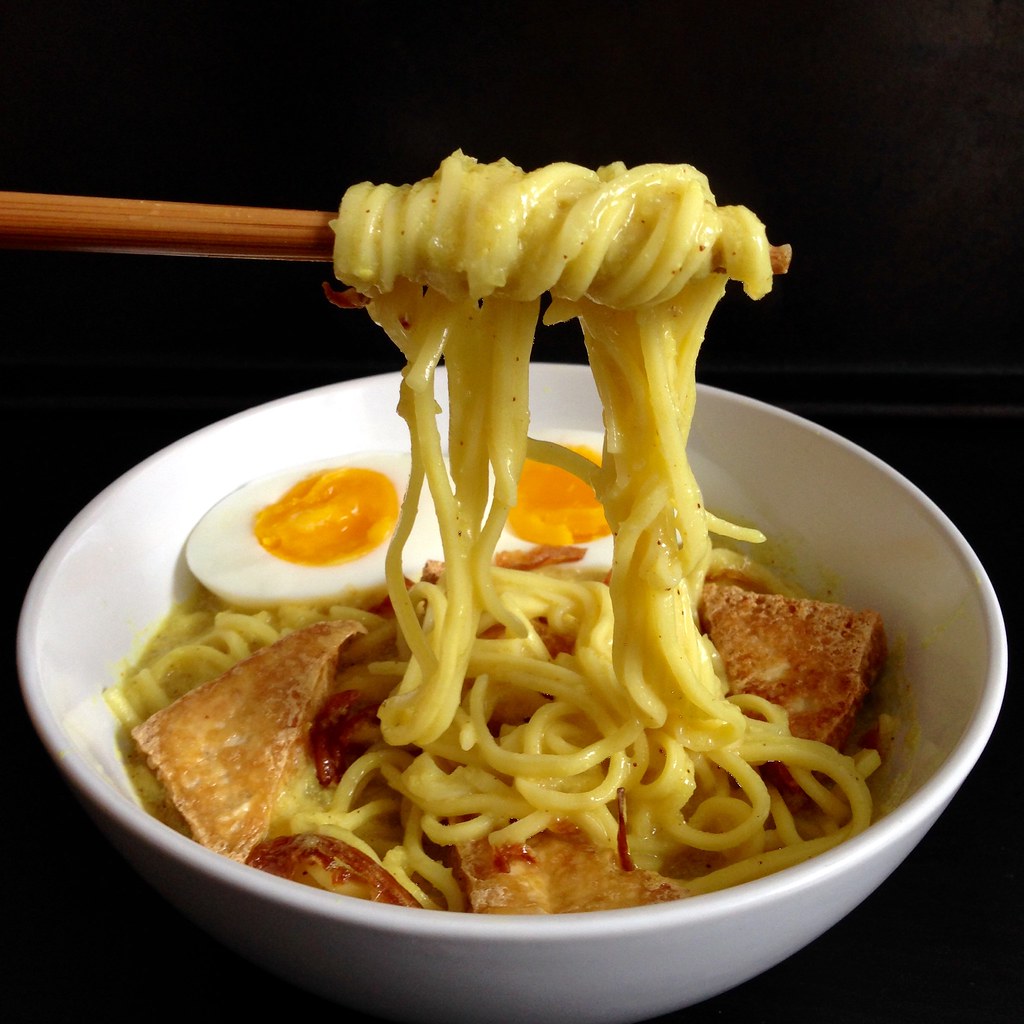
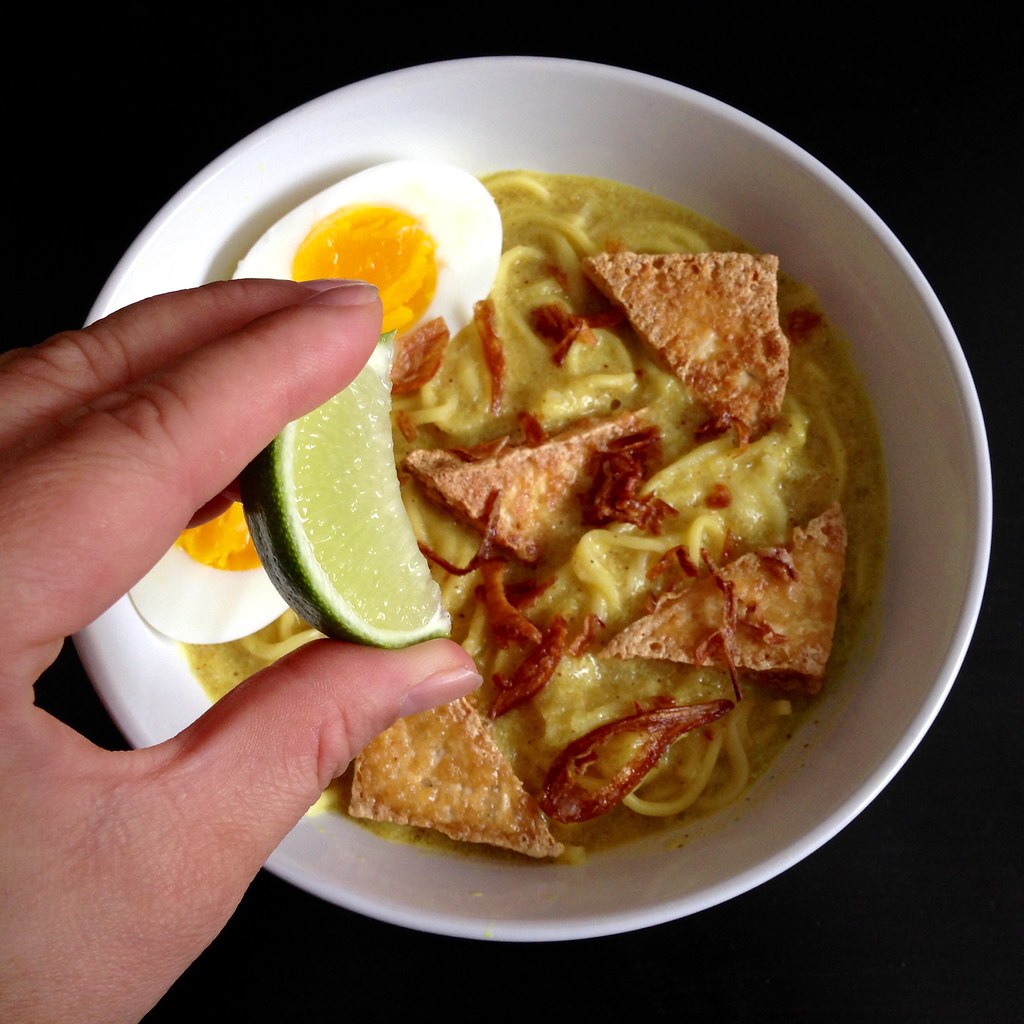
Burmese Coconut Noodles with Tofu
I'm going to admit right off that I've never been to Burma, and I don't think I've even had these noodles at a restaurant before so I'm not entirely sure what it's supposed to taste like, but when I saw this recipe for Burmese Noodle Bowl on Food52, I knew I had to try it. From my one experience with Burmese noodles (made by my friend Alvin), the flavor profile seems pretty authentic: lots of aromatics like onions and a mineral earthiness from turmeric.
The first step to making the curry sauce is to make a paste with onions, garlic, and ginger. I used my food processor to do this since I didn't want my precious Vitamix smelling like onions. The food processor worked pretty well, but every time I opened the lid to scrape down the sides, a pungent flume of onion vapors would be released. So if you're the type of person that cries easily when cutting onions, you're probably going to have a bad time with this.
Since I try not to cook too much meat anymore, I decided to use tofu as the protein and add some of the chicken flavor back in with chicken broth. You can buy fried tofu from a Asian grocery store or just slice and pan fry firm tofu yourself. You can also buy fried shallots (red onions) from an Asian grocery story or slice and fry them up yourself. Since I didn't have any shrimp paste, I substituted a tablespoon of fish sauce and some chickpea flour to thicken the sauce. I decided to use yellow Chinese noodles instead of rice noodles, but I think you could also use ramen noodles or even udon noodles if you wanted. Lastly, I omitted the cilantro topping since I consider it the devil's weed, but if you like that sort of thing, you should definitely add it.
Burmese Coconut Noodles with Tofu (adapted from Food52)
serves 3-4
2 medium onions
4 garlic cloves
1 teaspoon ginger, grated
2 tablespoons fish sauce
2 tablespoons canola oil
1 teaspoon sesame oil
1/2 teaspoon turmeric powder
1 teaspoon chili powder
14 oz. chicken broth, vegetable broth, or water
1 tablespoon chickpea flour (optional)
14 oz. can coconut milk
12 oz. noodles
Fried tofu
Fried shallots
3 eggs, boiled and chopped
Kosher salt and chili powder, to taste
1 lime, quartered
Peel and roughly chop the onions and garlic. Add the onions, garlic, ginger, and fish sauce to a food processor and process into a paste.
Add the canola and sesame oil to a large pot and heat over medium heat. Add the paste and cook for several minutes until it starts to get dry and the rawness of the onion is gone. Add the turmeric and chili powder and mix.
Whisk the chickpea flour, if using, into the chicken broth. Add the broth and coconut milk to the pot and mix. Bring the mixture to a boil and then reduce the heat and simmer for 20 minutes.
In the meantime, prepare the noodles according to the manufacturer's instructions, and prepare the rest of the toppings. Taste the curry sauce and add salt and/or chili powder, to taste.
Divide the noodles into 3 bowls, ladle the curry sauce over the noodles, and top with tofu, fried shallots, and the egg. Serve with the lime slices, cilantro, and additional fish sauce and chili powder, if you like.
Next: Matcha White Hot Chocolate
Previously: San Bei (Taiwanese Three Cup) Tofu and Ramen
Last Year: Homemade Tagliatelle with Shaved Truffles
Two Years Ago: Vanilla and Cinnamon Marshmallows
Five Years Ago: Lemon Pudding Cake
Six Years Ago: Toasted Coconut Ice Cream with Sesame Brittle and Crystallized Ginger
Labels:
coconut,
curry,
eggs,
noodle soup,
noodles,
tofu,
vegetarian
Friday, June 20, 2014
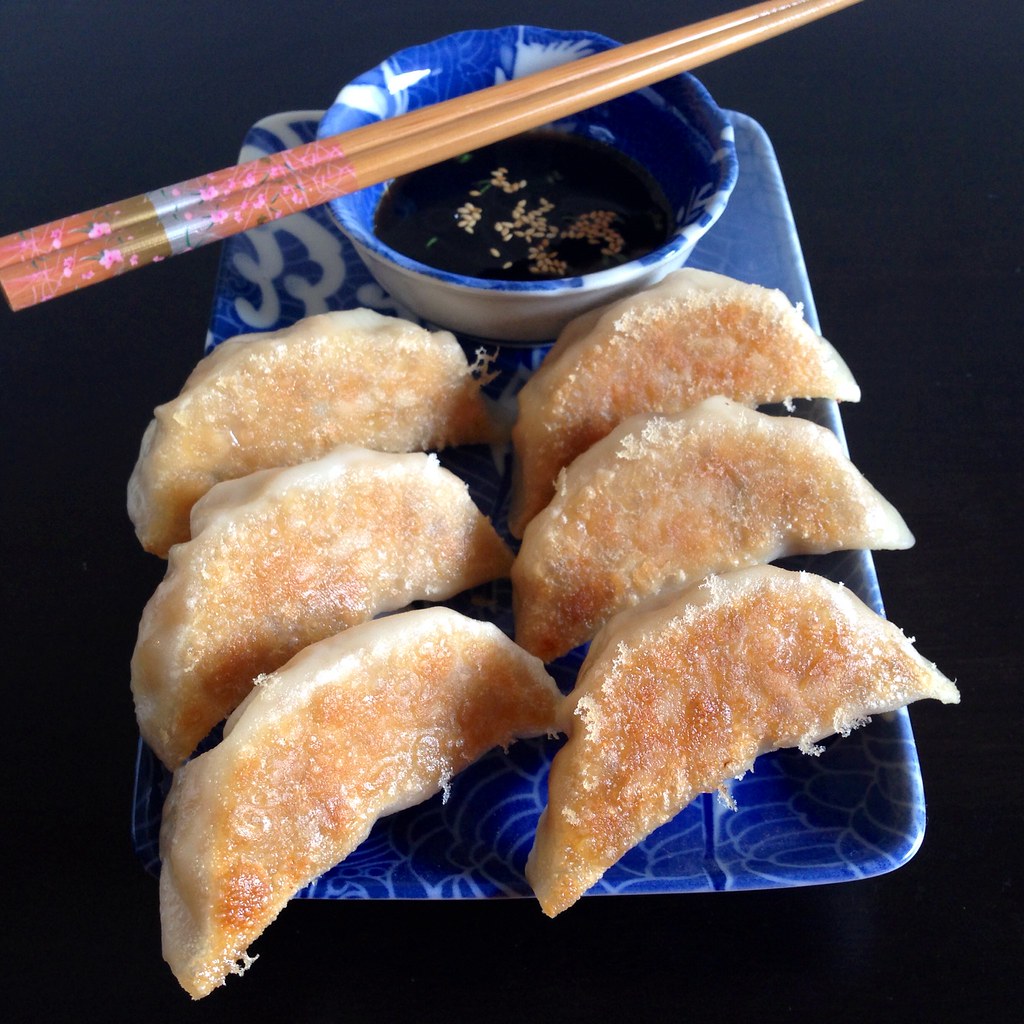
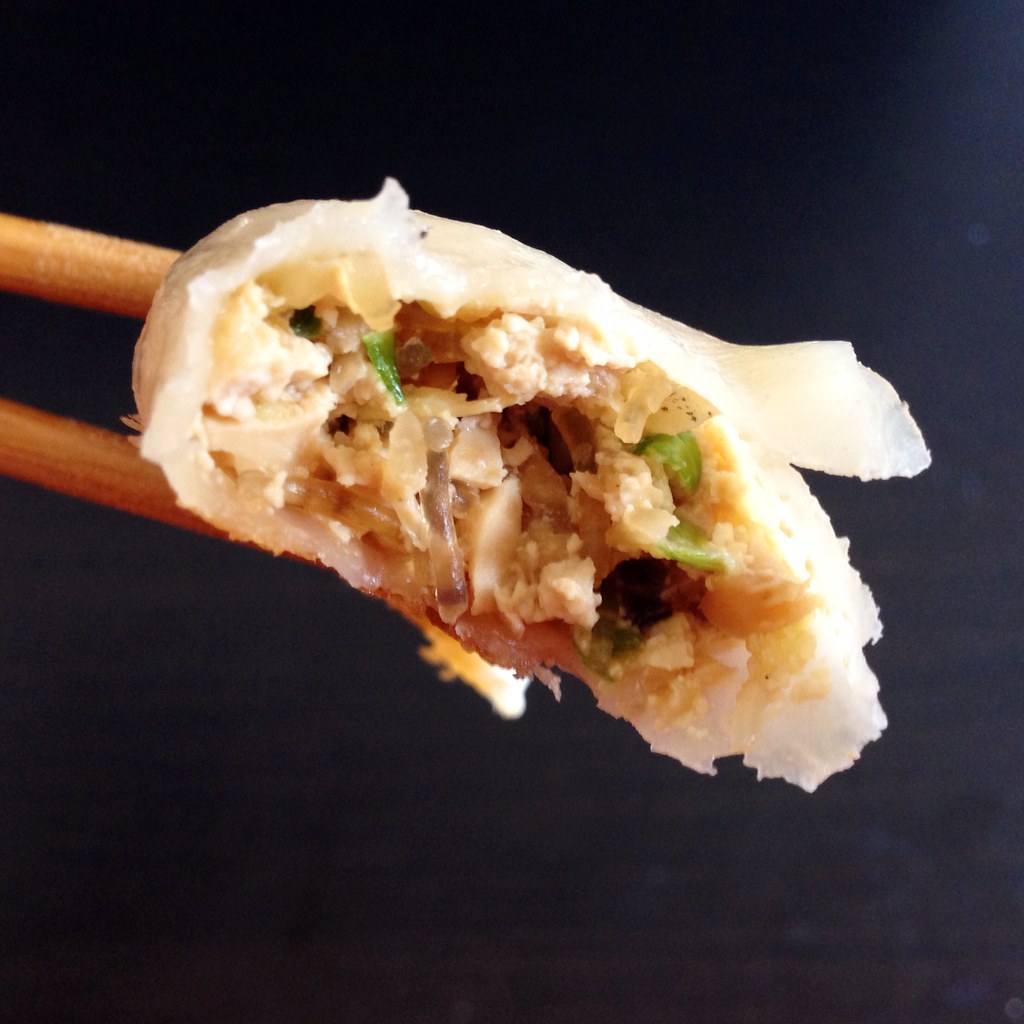
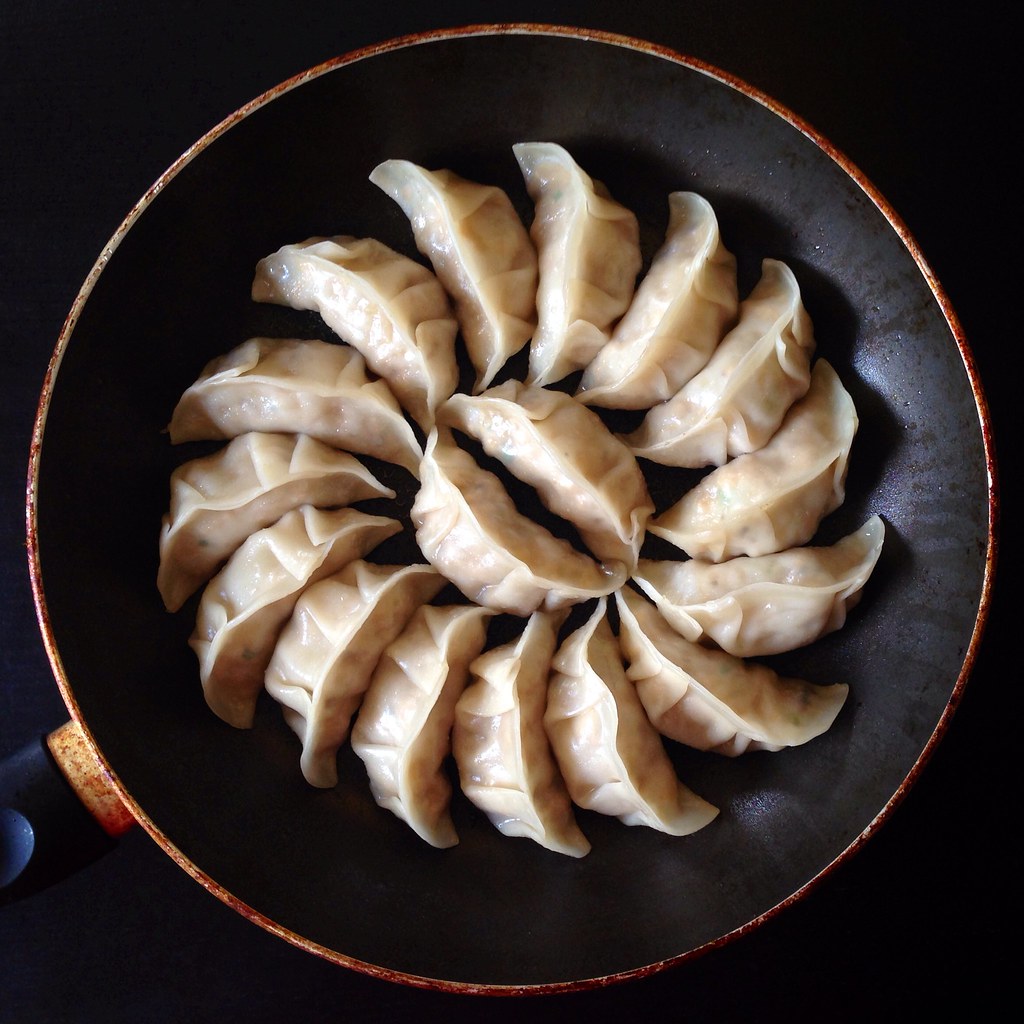
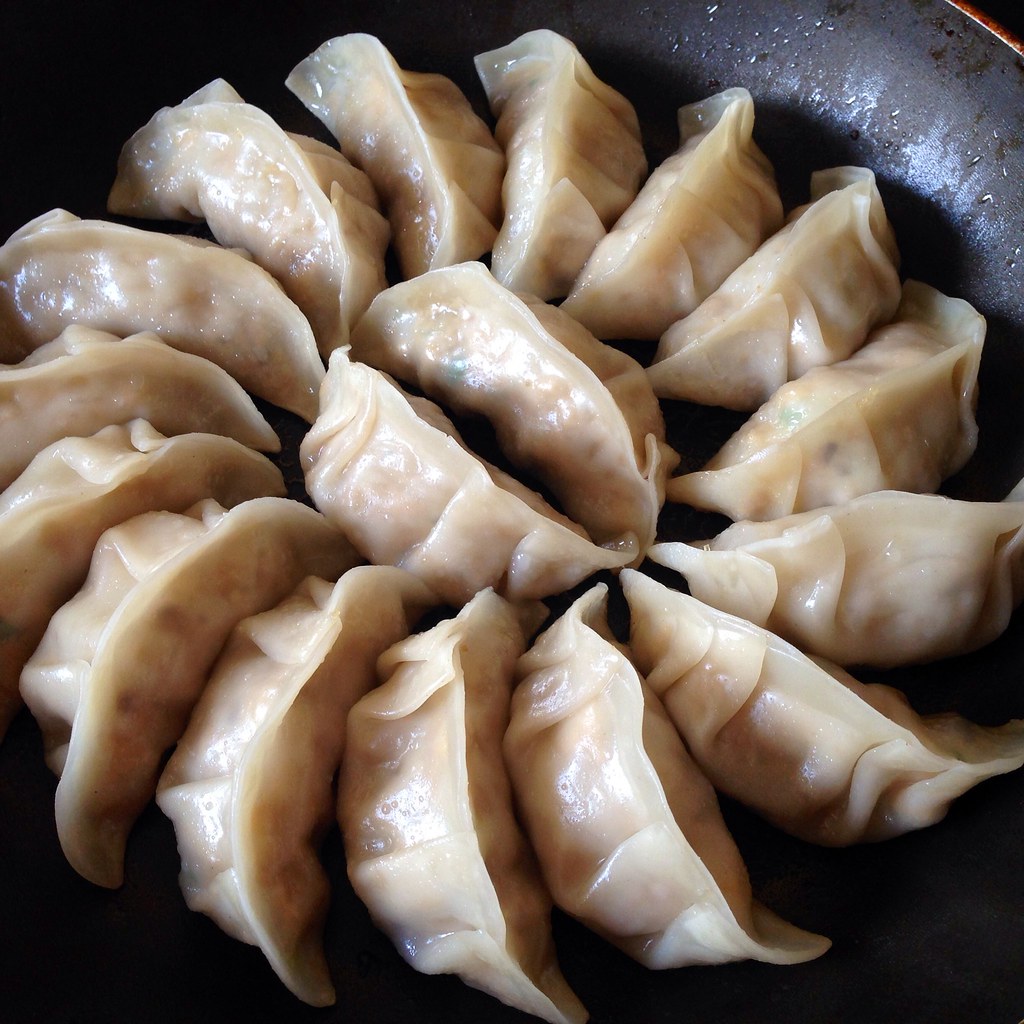
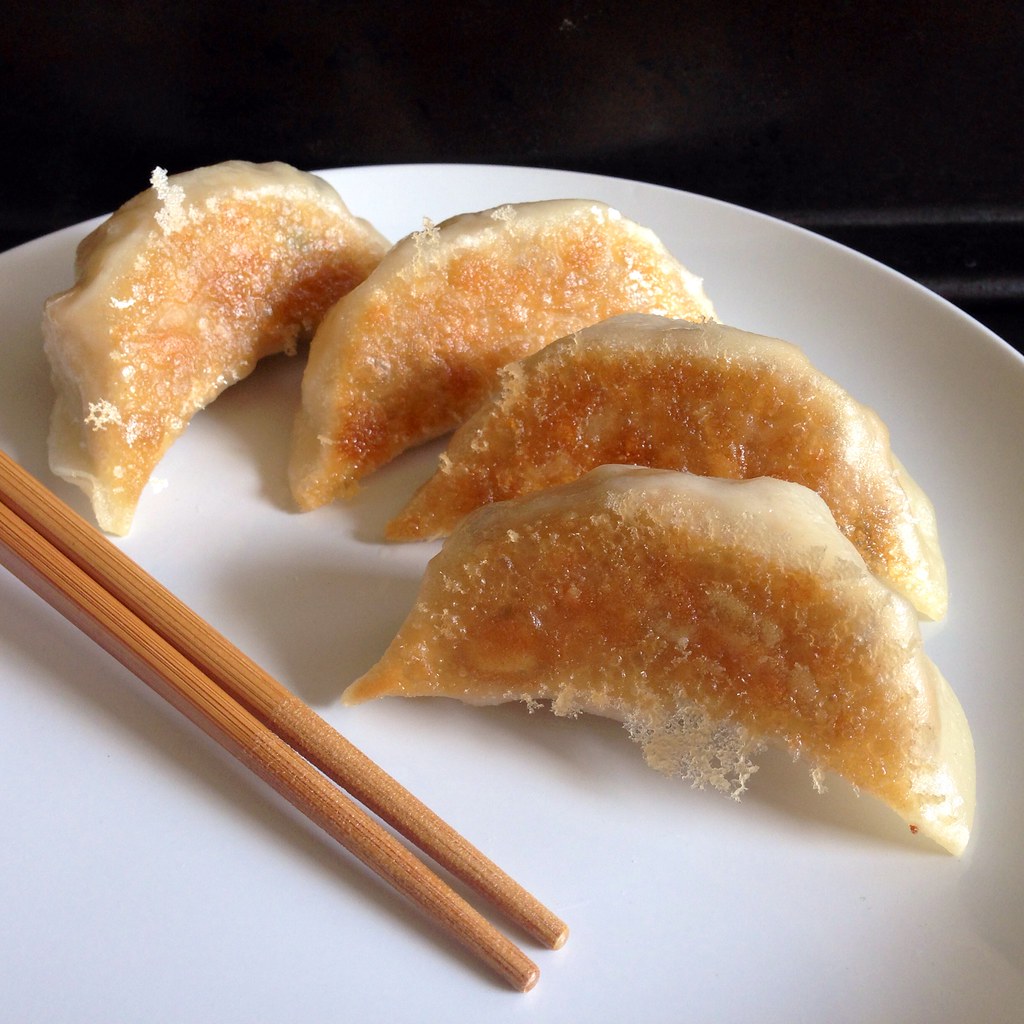
Tofu and Shiitake Potstickers
When I cut out most meats from my diet a few years ago, the one thing I missed the most wasn't steaks or burgers. It was my mom's pork and cabbage dumplings. To be honest, I still make and eat them once in a while because they're so good, but my tummy always feels funny after.
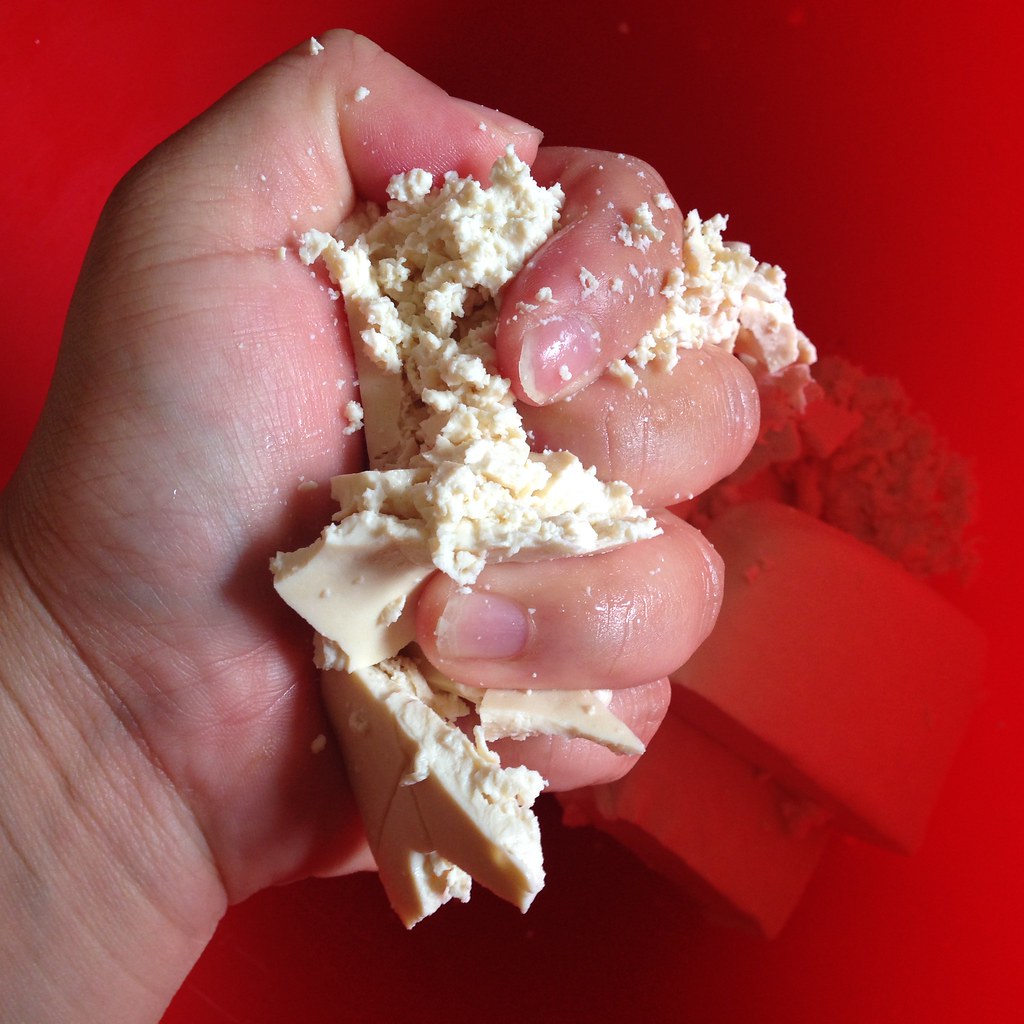
Enter this lovely vegetarian recipe from The Kitchn that gave me the courage to try using pressed tofu as a substitute for the pork. Their recipe actually uses baked tofu, which may be easier to find in an American supermarket; either way, you want to use a very firm, dense tofu. If you can only find plain firm tofu, you can press and bake it yourself to get it to the consistency you need for this recipe.
Because tofu can be pretty bland on its own, I like the addition of the shiitake mushrooms to add more umami to the filling. I also added bean thread vermicelli because I really like the texture they add to the dumplings. A big difference between this recipe and the one I usually make is that the cabbage is cooked first before being used in the filling. This allows you to squeeze a lot more water out of the cabbage so the filling isn't as watery.
Tofu and Shiitake Potstickers (adapted from The Kitchn)
makes about 60 dumplings
6-8 dried shiitake mushrooms
1 bundle bean thread vermicelli
1 small napa cabbage, roughly chopped
Vegetable oil
Kosher salt
24 oz. pressed tofu
2 scallions, thinly sliced
6 tablespoons soy sauce
2 tablespoons sesame oil
2 tablespoon sugar
1 egg, beaten
60 dumpling wrappers
Soak the shiitake mushrooms and bean thread vermicelli in cold water. Remove the bean thread vermicelli after about 15 minutes. Continue to soak the mushrooms until they are easy to slice,.
Use a food processor to finely chop the vermicelli, napa cabbage, and reconstituted mushrooms separately.
Heat 2 teaspoons of oil in a large skillet over medium-high heat. Add the mushrooms and saute for a few minutes until softened. Add the cabbage and a few pinches of salt. Stir fry until the cabbage is completely wilted, about 3-4 minutes. Set aside and allow to cool.
Meanwhile, crumble the tofu into a large mixing bowl. Add the vermicelli, scallions, soy sauce, sesame oil, sugar, and egg. Stir to combine.
Squeeze handfuls of the cooled mushroom-cabbage mixture in your fist to squeeze out as much moisture as possible and add to the tofu mixture.
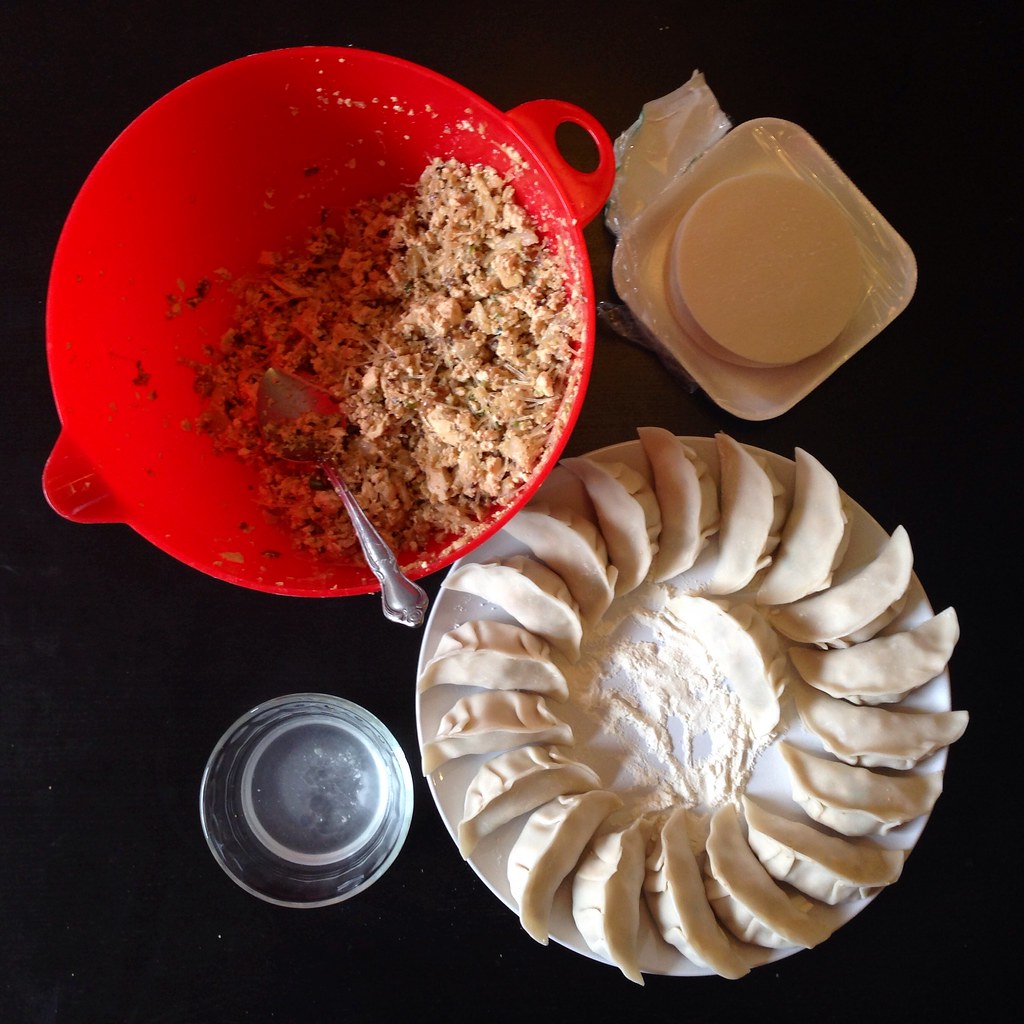
Prepare plates or trays with flour for dipping and have a small bowl of warm water ready. Hold the wrapper in one hand and use the other to dip a finger in the water and wet the edges of the wrapper.
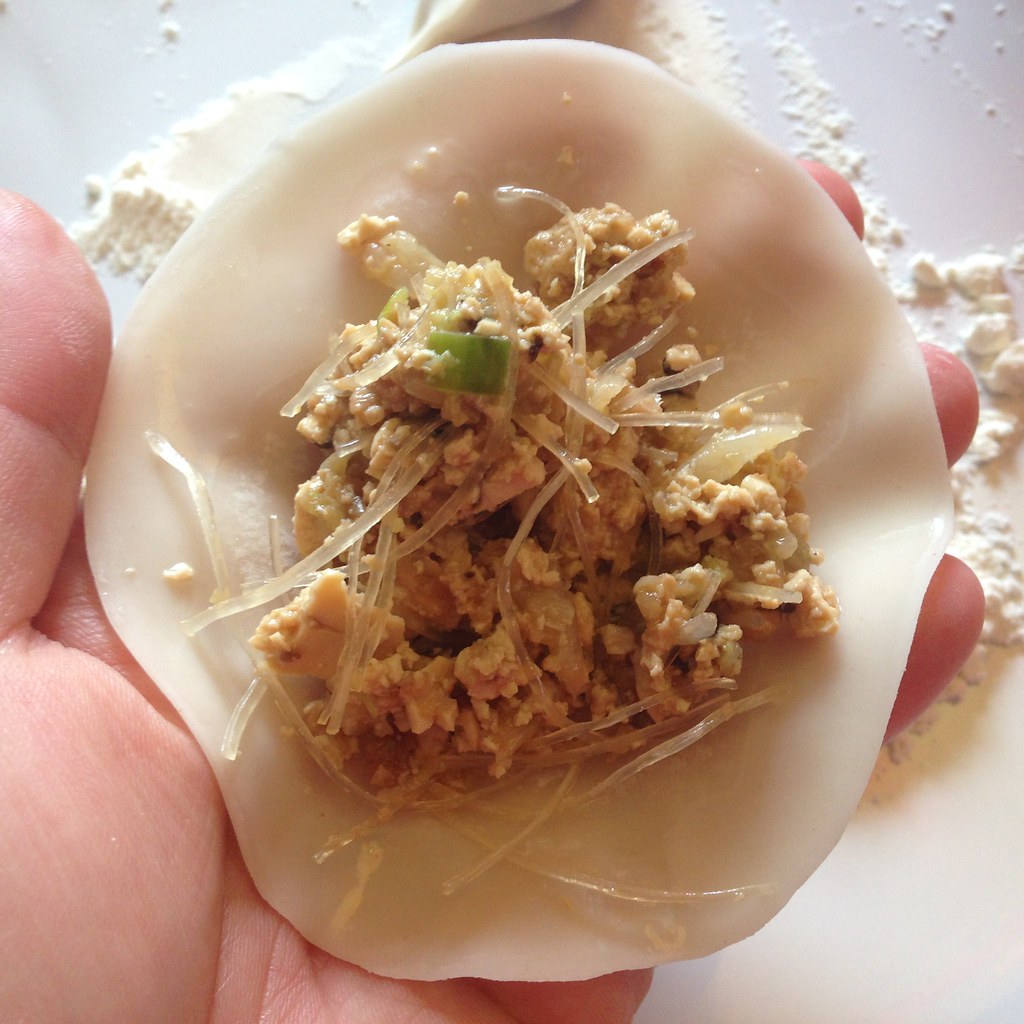
Put a spoonful of the filling in the middle of the wrapper and fold in half. Seal center portion of the joined edges. Make two pleats on both the left and right side of the dumpling. Make sure that the whole thing is totally sealed and then dip the bottom in the flour and place on the tray. Repeat 59 times. (You can find a small video of how to fold the dumplings here.)
Once a tray is filled, if you are planning on freezing the dumplings, place it in your freezer and work on the next tray. By the time the second tray is ready, the dumplings on the first tray should be solid enough to place in a freezer bag.
When you are ready to cook the dumplings, heat a tablespoon of oil in a frying pan on medium-high. Add the dumplings one at a time so that they are sitting upright. Once the bottoms are browned, add about a 1/4 cup of water (about 1/2 cup if cooking frozen dumplings). If you like your potstickers extra crispy, add some flour or cornstarch to the water and mix to get rid of the lumps before you add it to the pan. Cover and let cook for a few minutes until the water is almost all gone and the dumpling skins are translucent. Remove the lid and let the rest of the water cook off.
Serve with a dipping sauce made with soy sauce, rice wine vinegar, sesame oil, and a pinch of sugar.
I was quite impressed with how good of a ground meat substitute the crumbled, pressed tofu was. Seriously, if I wasn't paying attention, I might not have noticed that I was eating a vegetarian dumpling at all!
Next: Orange Mocha Frappuccino!
Previously: Speculoos (Cookie Butter) Ice Cream and Mini Stroopwafel Ice Cream Sandwiches
Four Years Ago: World Peace Cookies
Friday, March 7, 2014
Miso-Glazed Eggplant
It seems like a running theme in the last couple of posts has been how I've used up vegetables from my Boston Organics deliveries, so here's another one.
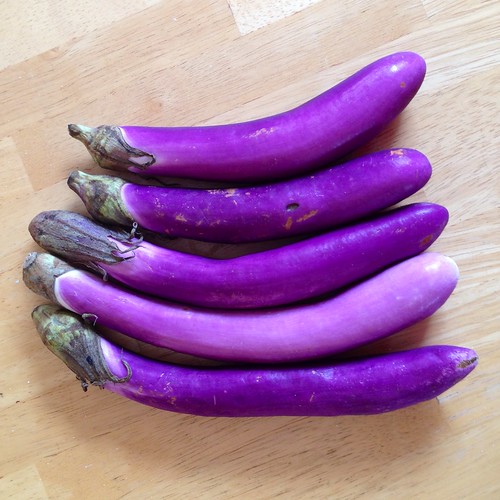
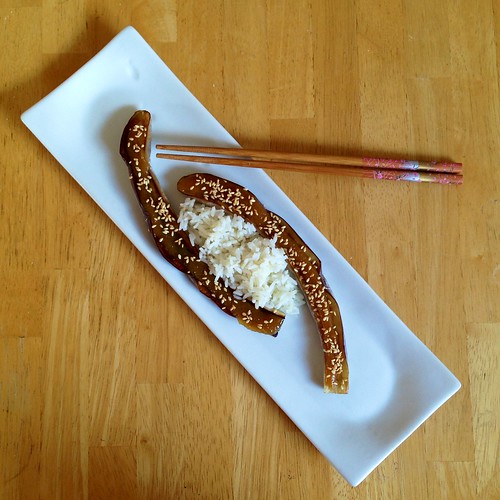
I made this back in August, when eggplants were still in season, and I got these lovelies in my delivery. I was inspired by Nobu's eggplant with miso, but instead of frying the eggplants first, I roasted them in the oven. The ingredients for the glaze are the same as for the marinade used for Nobu's miso-marinated black cod, just different proportions since you want more of a paste for this recipe.
Miso-Glazed Eggplant
serves 2
5 small Japanese eggplants
Canola oil
1/4 cup white miso
2 tablespoons sugar
2 tablespoons mirin
2 tablespoon rice wine
Toasted sesame seeds
Preheat the oven to 350°F.
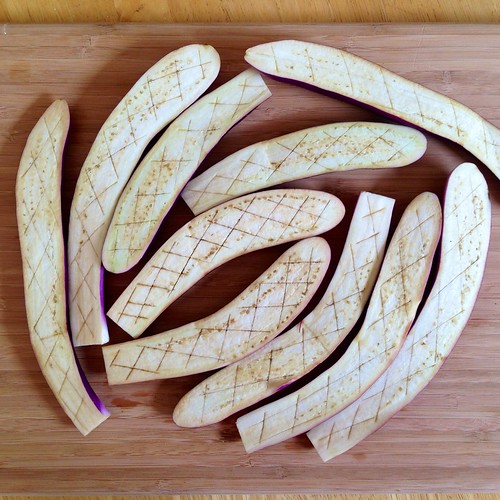
Cut off the top of each eggplant and slice in half, lengthwise. Carefully cut crosshatches into the flesh of the eggplants, but do not cut all the way through. Place the eggplants skin side down on a baking sheet and brush the tops with some oil. Bake for about 8 minutes, until the flesh starts to become tender. Remove the eggplant from the oven and set your oven to broil.
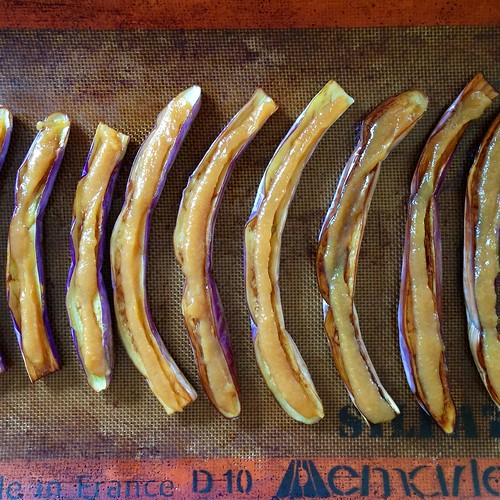
In a small saucepan, over low heat, combine the miso, sugar, mirin, and rice wine. Whisk until the sugar dissolves and the sauce begins to thicken. Remove from heat and allow to cool slightly.
Top each eggplant liberally with the miso glaze. Place under the broiler until browned and bubbly, just a few minutes.
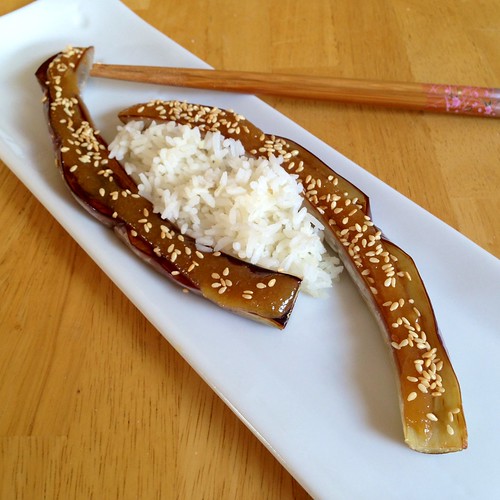
Sprinkle with toasted sesame seeds and serve with rice.
Next: Dan Bing (Taiwanese Egg Crepe)
Previously: Mushroom Marsala Pizza
Last Year: Happiness Cake
Four Years Ago: Momofuku Milk Bar's Crack Pie
Five Years Ago: French Red Onion Soup
I made this back in August, when eggplants were still in season, and I got these lovelies in my delivery. I was inspired by Nobu's eggplant with miso, but instead of frying the eggplants first, I roasted them in the oven. The ingredients for the glaze are the same as for the marinade used for Nobu's miso-marinated black cod, just different proportions since you want more of a paste for this recipe.
Miso-Glazed Eggplant
serves 2
5 small Japanese eggplants
Canola oil
1/4 cup white miso
2 tablespoons sugar
2 tablespoons mirin
2 tablespoon rice wine
Toasted sesame seeds
Preheat the oven to 350°F.
Cut off the top of each eggplant and slice in half, lengthwise. Carefully cut crosshatches into the flesh of the eggplants, but do not cut all the way through. Place the eggplants skin side down on a baking sheet and brush the tops with some oil. Bake for about 8 minutes, until the flesh starts to become tender. Remove the eggplant from the oven and set your oven to broil.
In a small saucepan, over low heat, combine the miso, sugar, mirin, and rice wine. Whisk until the sugar dissolves and the sauce begins to thicken. Remove from heat and allow to cool slightly.
Top each eggplant liberally with the miso glaze. Place under the broiler until browned and bubbly, just a few minutes.
Sprinkle with toasted sesame seeds and serve with rice.
Next: Dan Bing (Taiwanese Egg Crepe)
Previously: Mushroom Marsala Pizza
Last Year: Happiness Cake
Four Years Ago: Momofuku Milk Bar's Crack Pie
Five Years Ago: French Red Onion Soup
Labels:
boston organics,
eggplant,
Japanese,
miso,
vegan,
vegetarian
Monday, March 3, 2014
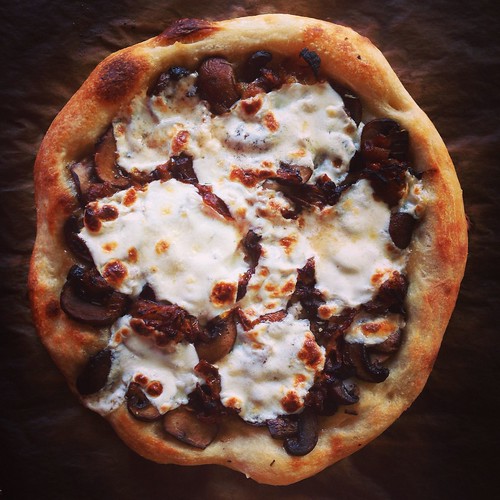
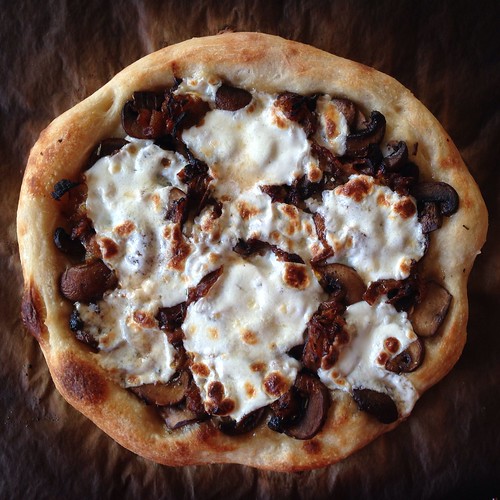
Mushroom Marsala Pizza
Every time I get crimini mushrooms in my Boston Organics delivery now I've been making this pizza. I've made several variations--with fresh mozzarella, with shredded mozzarella, with rosemary, with thyme instead--and this is my favorite iteration so far.
Mushroom Marsala Pizza
makes two 10" pizzas
2 8 oz. balls of pizza dough
Olive oil
1 onion, sliced thinly
1 lb. crimini mushrooms, washed and sliced
2 small or 1 large garlic clove, minced
1/2 cup Marsala wine
1 teaspoon fresh thyme, chopped
Kosher salt and freshly ground black pepper
6 oz. fresh mozzarella cheese, sliced
Preheat the oven to 550°F or as hot as it will go.
Heat a non-stick pan on medium-high and add the sliced onions. Cook until browned, but not burnt. Add a glug of olive oil and continue to stir while cooking. Add another glug of olive oil when the onions become dry and start sticking to the pan, about another 5 minutes.
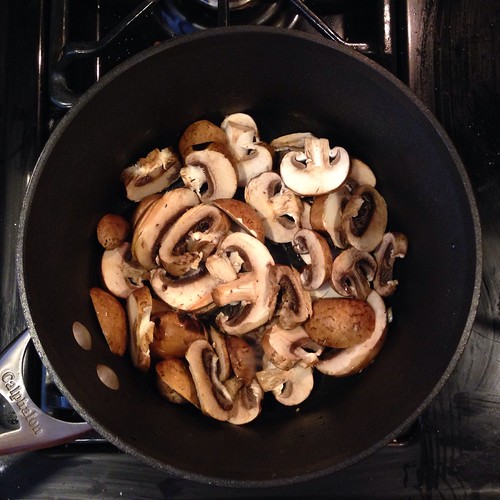
Once the onions are evenly caramelized, add the mushrooms and garlic. Sauté for 4 minutes. Add wine and simmer until almost all liquid is absorbed, stirring frequently. Add the thyme and season with salt and pepper. Set aside while you prepare the pizza dough.
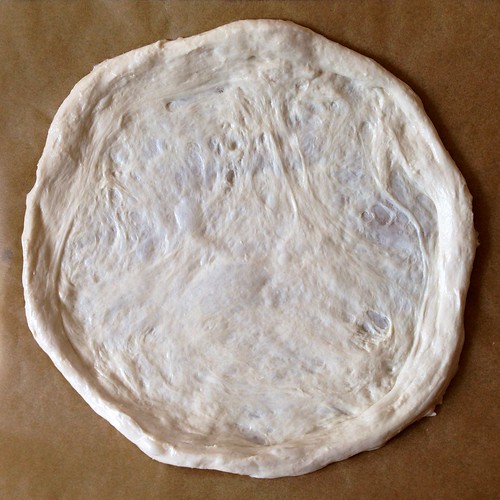
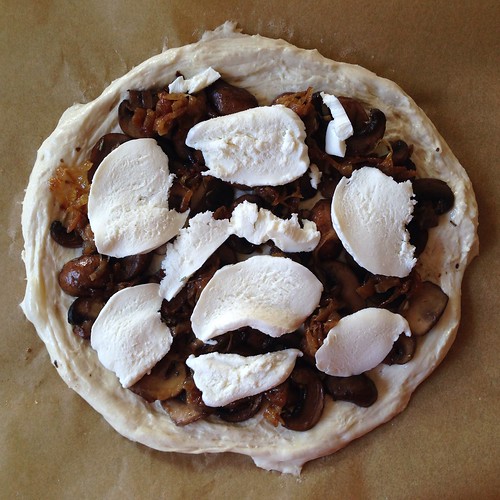
Stretch the dough onto a parchment paper-lined flexible cutting board. Lightly brush with olive oil. Top each pizza with half the mushroom and onion mixture. Top each with half the cheese.
Slide one of the pizzas and parchment paper onto the pizza stone and bake for 5 minutes. After 5 minutes, turn the oven to broil and broil for 1-2 minutes.
Use tongs to slide the pizza with the parchment paper from the pizza stone onto a cutting board. Slice and serve.
Next: Miso-Glazed Eggplant
Previously: Hotter Crash Potatoes
Last Year: Peking Duck Pizza
Four Years Ago: Bacon Fat Caramels
Five Years Ago: Potato Leek Soup with Bacon
Mushroom Marsala Pizza
makes two 10" pizzas
2 8 oz. balls of pizza dough
Olive oil
1 onion, sliced thinly
1 lb. crimini mushrooms, washed and sliced
2 small or 1 large garlic clove, minced
1/2 cup Marsala wine
1 teaspoon fresh thyme, chopped
Kosher salt and freshly ground black pepper
6 oz. fresh mozzarella cheese, sliced
Preheat the oven to 550°F or as hot as it will go.
Heat a non-stick pan on medium-high and add the sliced onions. Cook until browned, but not burnt. Add a glug of olive oil and continue to stir while cooking. Add another glug of olive oil when the onions become dry and start sticking to the pan, about another 5 minutes.
Once the onions are evenly caramelized, add the mushrooms and garlic. Sauté for 4 minutes. Add wine and simmer until almost all liquid is absorbed, stirring frequently. Add the thyme and season with salt and pepper. Set aside while you prepare the pizza dough.
Stretch the dough onto a parchment paper-lined flexible cutting board. Lightly brush with olive oil. Top each pizza with half the mushroom and onion mixture. Top each with half the cheese.
Slide one of the pizzas and parchment paper onto the pizza stone and bake for 5 minutes. After 5 minutes, turn the oven to broil and broil for 1-2 minutes.
Use tongs to slide the pizza with the parchment paper from the pizza stone onto a cutting board. Slice and serve.
Next: Miso-Glazed Eggplant
Previously: Hotter Crash Potatoes
Last Year: Peking Duck Pizza
Four Years Ago: Bacon Fat Caramels
Five Years Ago: Potato Leek Soup with Bacon
Friday, February 21, 2014
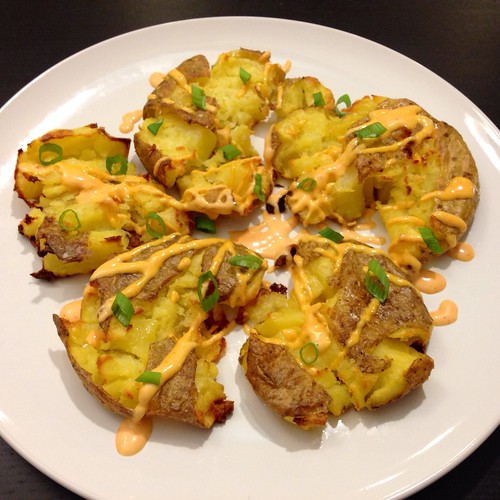
Hotter Crash Potatoes
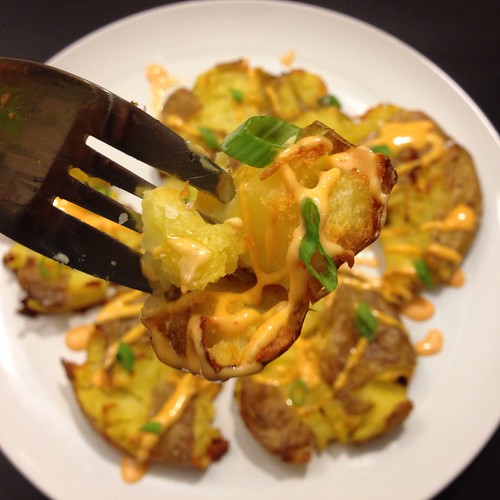
I still make hot crash potatoes almost every time I get small, waxy potatoes from Boston Organics, but this time, I wanted something with a little more kick. So I made a quick sriracha mayonnaise and drizzled it on the finished potatoes along with a sprinkle of chopped scallions, and tada! Hotter crash potatoes!
I also took a suggestion from one of the comments in my original post to microwave the potatoes instead of boiling them first. The result is basically the same but in a quarter of the time!
Hotter Crash Potatoes
serves 2 as an appetizer
6 waxy potatoes
Vegetable oil
Kosher salt
2 tablespoons kewpie or regular mayonnaise
1/2 teaspoon sriracha sauce
1 tablespoon scallions, chopped
Preheat the oven to 450°F.
Place the potatoes in a microwave-safe bowl and cook for 5 minutes. Check for doneness; if a knife pierces through the potatoes easily, it's done. If not quite done, cook for another minute or two until done.
Line a sheet pan with aluminum foil or a Silpat. Drizzle generously with oil. Transfer the potatoes onto the oiled pan and smoosh with a potato masher or slotted spoon or large fork. Crowd the potatoes close to each other and carefully drizzle more oil on top, making sure that almost all the surfaces are covered with oil. Sprinkle with a few generous pinches of kosher salt.
Bake for 20-25 minutes until golden brown. In the meantime, mix the mayonnaise and sriracha sauce together to make sriracha mayonnaise.
When the potatoes are done, plate and drizzle with the sriracha mayonnaise. Garnish with a healthy sprinkle of chopped scallions. Serve warm.
Next: Mushroom Marsala Pizza
Previously: Okonomiyaki
Four Years Ago: Faux Momofuku Brussels Sprouts
Five Years Ago: Boston Cream Cupcakes
Labels:
boston organics,
mayonnaise,
potatoes,
scallions,
sriracha,
vegetarian
Friday, February 7, 2014
Homemade Tagliatelle with Shaved Truffles
I just got back from another trip to Italy! A couple of weeks ago, my cousin Leslie asked me if I'd like to join her on a business trip to Rome and after a quick check to see if I could fly there using my miles, I happily accepted.
Rome in winter is quite different from Rome in the summer. For one thing, there's a lot less people, meaning less or no lines for attractions. Piazza Navona was basically deserted, and I had a hard time explaining to Leslie what was so magical about that square in the summertime. The weather was in the 50s and rainy, but it didn't stop us from eating as much gelato as we could. I was able to revisit Grom, Il Gelato di San Crispino, and my favorite, Gelateria del Teatro (where I had to have the rosemary honey & lemon flavor again). We also tried the gelato at Fatamorgana, which is supposedly the gelateria that started the whole natural ingredients trend.
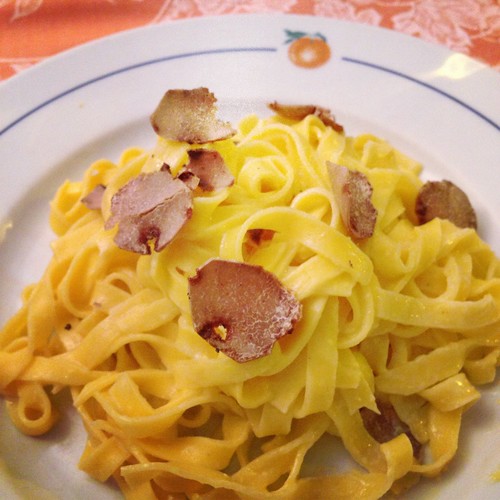
I ate a lot of pizza and pasta, some better than others (the pizza at the cafeteria in the Vatican Museum was surprisingly good, but that might be because I was hungry), but the best dish I had all vacation was the tagliatelle al tartufo bianco from Piccolo Arancio, near the Trevi Fountain. It was the most expensive pasta on the menu, almost double the price of all the other pastas, but it was so worth it.
The tagliatelle must have been freshly made, and you could taste the eggs in the dough. They were cooked to a perfect al dente and simply dressed with some salt and butter so that the white truffle flavor could shine through. It was definitely one of those dishes that make you stop and say grace again because it's just that good. Naturally, I had to try to replicate it at home.
Homemade Tagliatelle with Shaved Truffles
serves 2
1 1/2 cup all-purpose flour
2 large eggs
3-4 tablespoons unsalted butter
Sea salt and freshly ground pepper
White truffle (if you can find it; otherwise a black truffle will work, too)
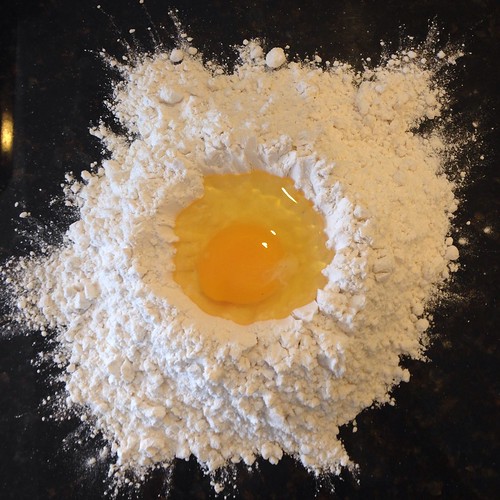
Crack the eggs into a well made in the middle of the flour. Using a fork, gently beat the eggs and gradually draw more and more of the flour into the mixture until it forms a dough. Knead the dough for several minutes until it is smooth and elastic. Cover and let rest while you go find your pasta maker and set it up.
Cut the dough in half, covering the half that you are not working with. Roll the dough through the largest opening of your pasta maker, fold in half and repeat at the largest setting several times until the dough is nice and uniform. At that point, start decreasing the size of the opening each time after you roll the dough through (without folding the dough in half in between). Stop when you reach the second smallest opening.
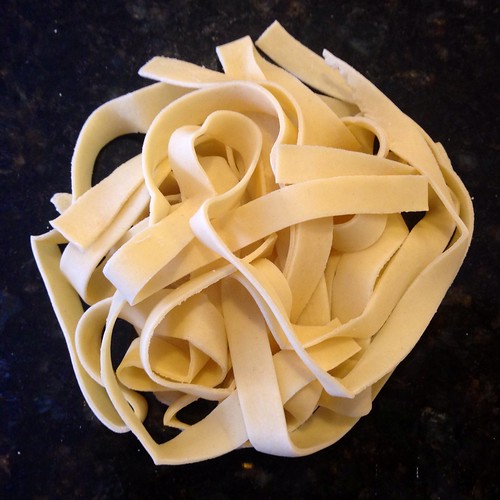
Fold the long strip of rolled dough into thirds and then one or two more times on the same axis so that you you have a manageable length to cut. Cut the dough into quarter-inch strips and unroll the noodles. Repeat the rolling and cutting process with the other half of the dough. Let the noodles rest and dry a bit while you boil a pot of salted water.
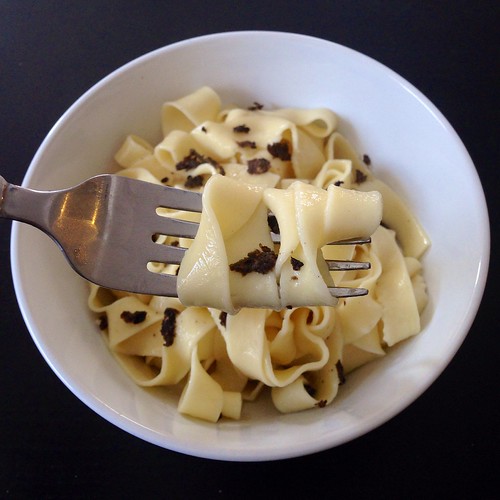
Cook the noodles in boiling, salted water for 3-5 minutes until al dente. Drain the water, leaving the pasta in the pot. Add the butter and salt and pepper to taste. Toss the pasta in the pot until the butter melts and coats all the strands. Plate the pasta and shave some truffle on top. Serve immediately.
Sadly, mine doesn't look nearly as good as the dish I had a Piccolo Arancio, but I think it tastes almost as good!
Crack the eggs into a well made in the middle of the flour. Using a fork, gently beat the eggs and gradually draw more and more of the flour into the mixture until it forms a dough. Knead the dough for several minutes until it is smooth and elastic. Cover and let rest while you go find your pasta maker and set it up.
Cut the dough in half, covering the half that you are not working with. Roll the dough through the largest opening of your pasta maker, fold in half and repeat at the largest setting several times until the dough is nice and uniform. At that point, start decreasing the size of the opening each time after you roll the dough through (without folding the dough in half in between). Stop when you reach the second smallest opening.
Fold the long strip of rolled dough into thirds and then one or two more times on the same axis so that you you have a manageable length to cut. Cut the dough into quarter-inch strips and unroll the noodles. Repeat the rolling and cutting process with the other half of the dough. Let the noodles rest and dry a bit while you boil a pot of salted water.
Cook the noodles in boiling, salted water for 3-5 minutes until al dente. Drain the water, leaving the pasta in the pot. Add the butter and salt and pepper to taste. Toss the pasta in the pot until the butter melts and coats all the strands. Plate the pasta and shave some truffle on top. Serve immediately.
Sadly, mine doesn't look nearly as good as the dish I had a Piccolo Arancio, but I think it tastes almost as good!
Next: Squid Ink Spaghetti Aglio e Olio
Previously: Grilled Cheese Egg in a Hole
Last Year: Passion Fruit Marshmallows
Four Years Ago: Lemon Pudding Cake
Five Years Ago: Toasted Coconut Ice Cream with Sesame Brittle and Crystallized Ginger
Previously: Grilled Cheese Egg in a Hole
Last Year: Passion Fruit Marshmallows
Four Years Ago: Lemon Pudding Cake
Five Years Ago: Toasted Coconut Ice Cream with Sesame Brittle and Crystallized Ginger
Friday, January 24, 2014
Grilled Cheese Egg in a Hole
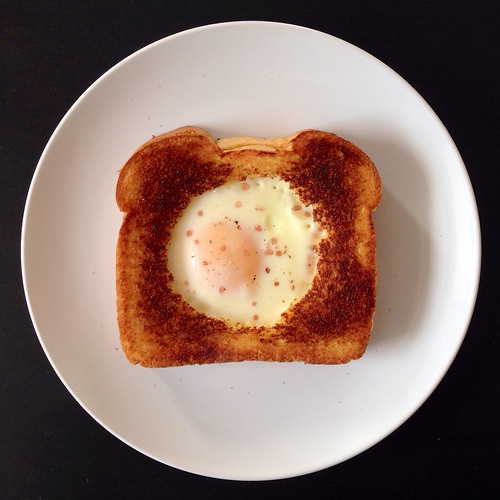
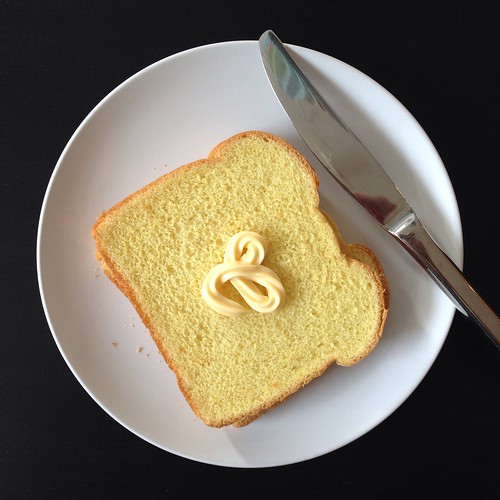
You'd think grilled cheese would be an incredibly easy thing to make, but I still remember the first time I ever tried to make one (I think I was 12 or 13) I thought I could just put a piece of American cheese between two slices of bread and toast that in the toaster oven (at least it wasn't a toaster!). Imagine my surprise when I bit into that combination and tasted dry, flavorless disappointment instead of crispy, cheesy glory.
Since then, I've learned to butter the outside of the bread before grilling it on a skillet. It makes a vast improvement, but trying to spread cold butter on a soft slice of bread can often be another source of frustration. Then I learned a pro-tip from Five Guys: use mayonnaise instead of butter on the outside of a grilled cheese. It's way more spreadable and adds just a little oomph of flavor to the sandwich.
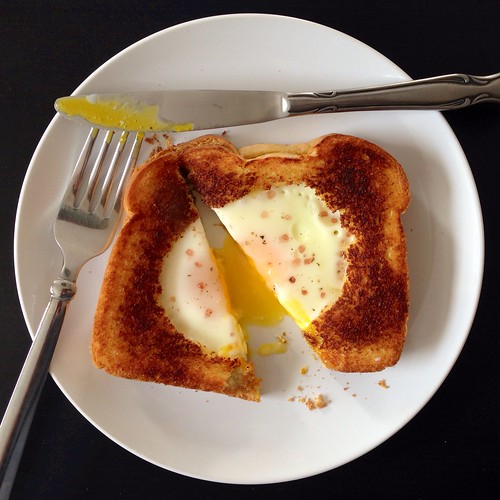
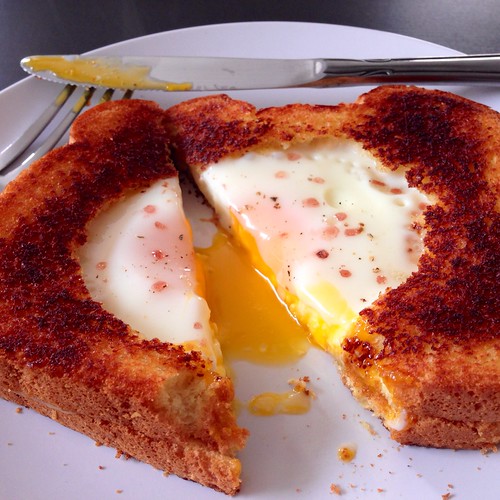
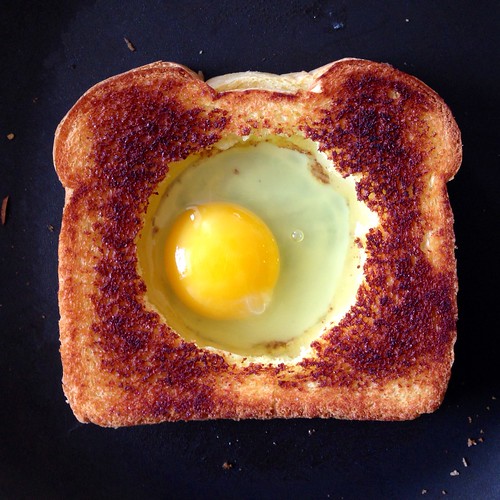
I decided to take it up another notch by making an egg in a hole with the grilled cheese. The hardest part of the whole endeavor was finding the right sized instrument to make the hole. I didn't want the diameter of the hole to be too small or else it would take too long for the egg whites to cook through, but I didn't want it too wide either or else the height of the egg in the grilled cheese would be too low and the egg to grilled cheese surface area ratio would be too high. I settled on using my rice maker's measuring cup, which had a diameter of 2 ¾". I think a tiny bit smaller would've been perfect, but as you can see, it turned out okay. =)
Grilled Cheese Egg in a Hole
makes 1 sandwich
2 slices soft bread, like white or potato
1-2 teaspoons mayonnaise
1-2 slices of sharp white cheddar or your favorite melty cheese
1 large egg
Fresh ground pepper and sea salt
Start heating a non-stick pan on medium-low.
Spread a thin layer of mayonnaise on one slice of bread and place mayonnaise-side down in the pan.
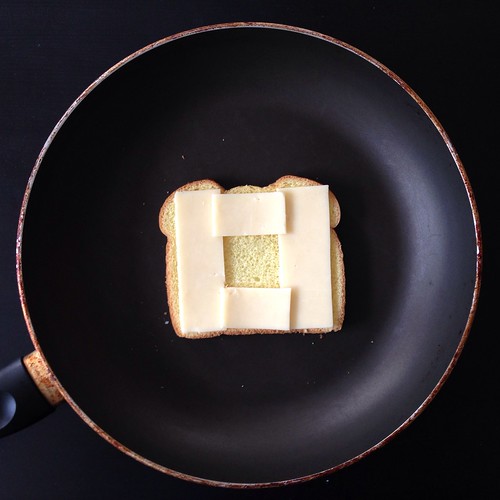
Cut the cheese into thirds. Place one-third on each side of the bread in the pan. Cut the remaining third in half and fill in the top and bottom of the gap between the other slices of cheese, leaving a cheese-less square in the middle.
Spread a thin layer of mayonnaise on the other slice of bread and place on top of the cheese, mayonnaise-side up. Cook for a few minutes until the bottom is golden brown.
Flip the sandwich over. Using a cookie cutter or drinking glass, cut out a hole in the middle of the sandwich about 2 ½" to 2 ¾" wide. Remove the circle of bread (you can continue grilling this on the side of the pan) and crack the egg into the hole. Cover and cook until the egg is set to your liking.
Slide the sandwich onto a plate. Season the egg with fresh ground pepper and sea salt (I used a red Alaea salt, which is why the egg looks like it has measles). Serve with tomato soup if you like.
Next: Homemade Tagliatelle with Shaved Truffles
Previously: Sarah Ruth's Saucepan Brownies
Last Year: Rainbow Cookie Sandwiches
Four Years Ago: Pear Bread
Five Years Ago: Luo Buo Gao (Chinese Turnip Cake)
Monday, November 25, 2013
Cheese Fondue Stuffed Roasted Pumpkin
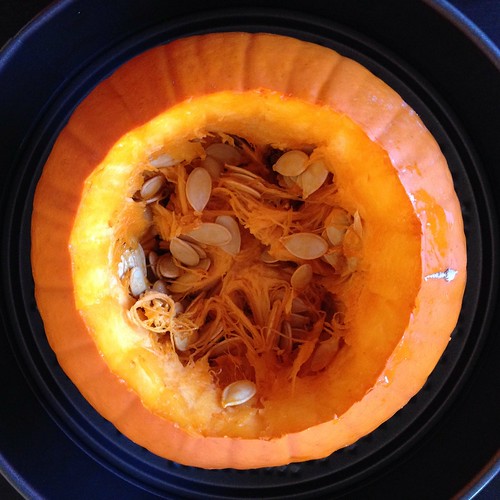
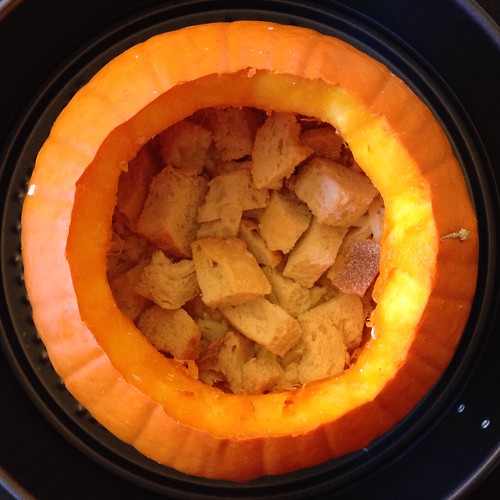
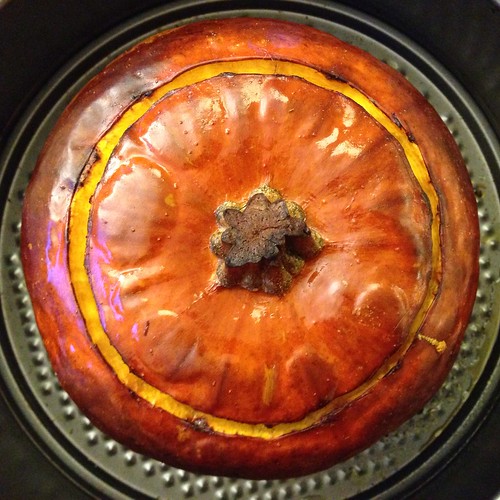
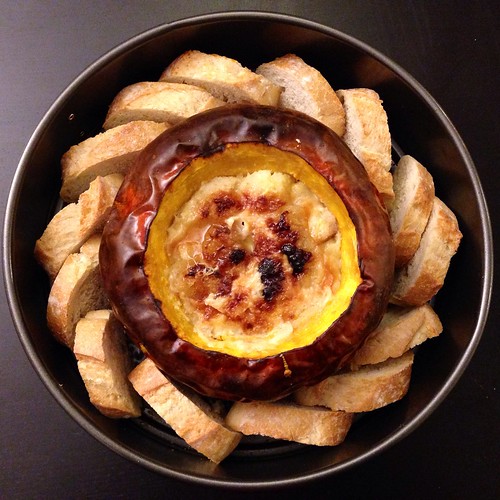
I was going to a vegetarian Thanksgivingukkah potluck, and I knew exactly what I wanted to bring. I've been wanting to make this dish ever since I read the HuffPost Taste's article raving about it last year. It's basically a pumpkin hollowed out and stuffed with breadcrumbs, cheese, and heavy cream, then roasted until the pumpkin is soft and scoopable and the filling is hot and bubbly.
The original recipe from Gourmet calls for a 7 lb. pumpkin, but the only pumpkin I was able to buy so late in the season was as an add-on order from Boston Organics, and it was only 3.5 lbs. So I adapted the recipe a bit with the help of Dorie Greenspan's version and one of the reviews from the Gourmet recipe which suggested drizzling honey throughout the layers. I stuck with the Gruyère and Emmental cheeses from the original recipe this time, but in the future, I think it'd be fine to use some cheeses that you don't need to go to Whole Foods to find, like regular Swiss or Brie.
To serve, I just used a large spoon to scoop out some of the filling and then scrape some of the pumpkin meat onto my plate. You can also scrape all the pumpkin into the filling and mix it all up before serving or just cut the pumpkin into wedges and plate it that way. Either way, serve the pumpkin with some extra baguette slices and maybe extra honey. And make sure you save the pumpkin seeds to roast with olive oil and Old Bay seasoning!
Cheese Fondue Stuffed Roasted Pumpkin
serves 6-8 as an appetizer
1 sugar pumpkin, about 3 1/2 pounds
1 baguette
3 ounces Emmental cheese, coarsely grated
3 ounces Gruyère cheese, coarsely grated
1 cup heavy cream
Freshly grated nutmeg
Salt and freshly ground black pepper
Honey
Preheat oven to 450°F with rack in lower third.
Slice the baguette into 1/2 inch slices. Cut half of them into 1/2 inch cubes.
Toast the baguette slices and cubes in a single layer on a baking sheet in oven until tops are crisp (bread will still be pale), about 7 minutes. Transfer to a rack to cool.
Remove top of pumpkin by cutting a circle around the stem with a small sharp knife. Scrape out seeds and any loose fibers from inside pumpkin with a spoon (including top of pumpkin; reserve seeds for another use if desired). Season the inside with 1/4 teaspoon salt and a drizzle of honey.
Whisk together cream, nutmeg, 1/2 teaspoon salt, and 1/4 teaspoon pepper in a bowl. Mix together cheeses in another bowl.
Put a layer of toasted bread cubes in bottom of pumpkin, then cover with about 1/2 cup cheese and about 1/3 cup cream mixture. Drizzle some more honey on top of the cheese and cream. Continue layering bread, cheese, cream mixture, and honey until pumpkin is filled to about 1/2 inch from top. (You may have some leftover bread, cheese, and cream left over.)
Cover pumpkin with top and put in an oiled small roasting pan. Brush outside of pumpkin all over with olive oil. Bake 1 hour and then remove the top.
Return the rest of the pumpkin to the oven and bake until the top of the cheese is browned and bubbly, about 10 - 15 minutes. Serve with the rest of the baguette slices.
Next: Thai Coconut Sticky Rice with Mango
Previously: My Mom's Pi Jiu Ya (Beer-Braised Duck)
Last year: Pretzel Ice Cream Pie with Homemade Magic Shell
Four years ago: Apple-Pear-Cranberry Crisp
The original recipe from Gourmet calls for a 7 lb. pumpkin, but the only pumpkin I was able to buy so late in the season was as an add-on order from Boston Organics, and it was only 3.5 lbs. So I adapted the recipe a bit with the help of Dorie Greenspan's version and one of the reviews from the Gourmet recipe which suggested drizzling honey throughout the layers. I stuck with the Gruyère and Emmental cheeses from the original recipe this time, but in the future, I think it'd be fine to use some cheeses that you don't need to go to Whole Foods to find, like regular Swiss or Brie.
To serve, I just used a large spoon to scoop out some of the filling and then scrape some of the pumpkin meat onto my plate. You can also scrape all the pumpkin into the filling and mix it all up before serving or just cut the pumpkin into wedges and plate it that way. Either way, serve the pumpkin with some extra baguette slices and maybe extra honey. And make sure you save the pumpkin seeds to roast with olive oil and Old Bay seasoning!
Cheese Fondue Stuffed Roasted Pumpkin
serves 6-8 as an appetizer
1 sugar pumpkin, about 3 1/2 pounds
1 baguette
3 ounces Emmental cheese, coarsely grated
3 ounces Gruyère cheese, coarsely grated
1 cup heavy cream
Freshly grated nutmeg
Salt and freshly ground black pepper
Honey
Preheat oven to 450°F with rack in lower third.
Slice the baguette into 1/2 inch slices. Cut half of them into 1/2 inch cubes.
Toast the baguette slices and cubes in a single layer on a baking sheet in oven until tops are crisp (bread will still be pale), about 7 minutes. Transfer to a rack to cool.
Remove top of pumpkin by cutting a circle around the stem with a small sharp knife. Scrape out seeds and any loose fibers from inside pumpkin with a spoon (including top of pumpkin; reserve seeds for another use if desired). Season the inside with 1/4 teaspoon salt and a drizzle of honey.
Whisk together cream, nutmeg, 1/2 teaspoon salt, and 1/4 teaspoon pepper in a bowl. Mix together cheeses in another bowl.
Put a layer of toasted bread cubes in bottom of pumpkin, then cover with about 1/2 cup cheese and about 1/3 cup cream mixture. Drizzle some more honey on top of the cheese and cream. Continue layering bread, cheese, cream mixture, and honey until pumpkin is filled to about 1/2 inch from top. (You may have some leftover bread, cheese, and cream left over.)
Cover pumpkin with top and put in an oiled small roasting pan. Brush outside of pumpkin all over with olive oil. Bake 1 hour and then remove the top.
Return the rest of the pumpkin to the oven and bake until the top of the cheese is browned and bubbly, about 10 - 15 minutes. Serve with the rest of the baguette slices.
Next: Thai Coconut Sticky Rice with Mango
Previously: My Mom's Pi Jiu Ya (Beer-Braised Duck)
Last year: Pretzel Ice Cream Pie with Homemade Magic Shell
Four years ago: Apple-Pear-Cranberry Crisp
Tuesday, October 29, 2013
Kaddo (Afghan Pumpkin with Yogurt and Tomato Sauces)
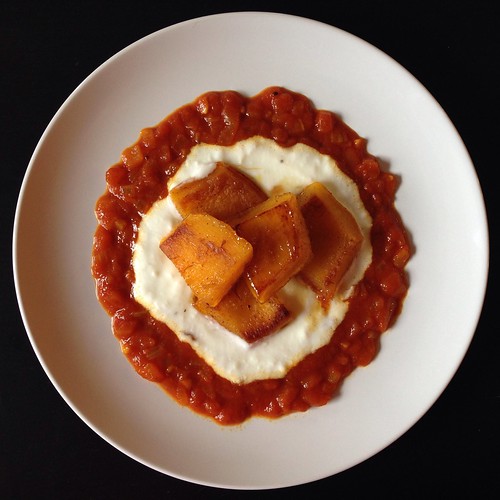
One of my favorite places to bring visitors to Boston is this Afghan restaurant in Cambridge called The Helmand. Usually, it's the first time any of them have had Afghan food, and I love introducing them to the signature appetizer there, the kaddo. It's a "pan-fried then baked baby pumpkin seasoned with sugar and served on yogurt garlic sauce, topped with ground beef sauce." It sounds like a pretty strange flavor combination and is unlike anything else I've ever tasted, but it's absolutely delicious.
I've had kaddo at another Afghan restaurant before, and it was definitely less sweet, so my guess is that the version served at The Helmand has been "Americanized". I found this recipe on Chowhound that gives a range for the amount of sugar to add and also suggests a vegetarian version. I didn't add the dried mint to the yogurt sauce because I didn't have any, and I reduced the amount of onions for the tomato sauce. Despite the changes, I was really impressed with how close this recipe is to what they serve at The Helmand.
Kaddo (Afghan Pumpkin with Yogurt and Tomato Sauces)
serves 4 as an appetizer
2 - 2 1/2 pound sugar pumpkin
2 tablespoons oil
1/2 -1 1/2 cups sugar (I used about 2/3 cup)
1/2 teaspoon ground cinnamon
1 cup plain yogurt
1 clove garlic, crushed
1/2 teaspoon dried mint (optional)
Salt and pepper to taste
2 tablespoons oil
1 medium onion, chopped
1 clove garlic, crushed
1 1/4 teaspoons ground coriander seed
1/2 teaspoon ground turmeric
1 teaspoon ground black pepper
Salt to taste
1 cup tomato sauce
1/4 cup water
Preheat the oven at 350°F.
Cut the pumpkin into quarters. Remove seeds and strings, peel the skin with a vegetable peeler, and cut down into about 2-inch chunks.
Heat 2 tablespoons oil in a dutch oven. Brown the pumpkin pieces, turning frequently, until golden brown.
Mix sugar and cinnamon and sprinkle over pumpkin. Cover and bake for 30 minutes, or until tender.
Mix together yogurt with the mint (if using) and crushed garlic in a bowl; season to taste with salt and pepper.
In a medium saucepan, heat 2 tablespoons of oil and cook the onions until lightly browned. Add the garlic, coriander, turmeric, salt, and pepper. Mix well and cook until the spices are toasted and fragrant. Add tomato sauce and water, mix thoroughly and bring to a simmer. Lower heat and cook about 20 minutes until it cooks down to a thick sauce.
Serve the pumpkin with the yogurt and tomato sauces.
Next: My Mom's Taiwanese Sticky Rice
Previously: Pão de Queijo (Brazilian Cheese Bread)
Last year: Miso Marinated Black Cod
I've had kaddo at another Afghan restaurant before, and it was definitely less sweet, so my guess is that the version served at The Helmand has been "Americanized". I found this recipe on Chowhound that gives a range for the amount of sugar to add and also suggests a vegetarian version. I didn't add the dried mint to the yogurt sauce because I didn't have any, and I reduced the amount of onions for the tomato sauce. Despite the changes, I was really impressed with how close this recipe is to what they serve at The Helmand.
Kaddo (Afghan Pumpkin with Yogurt and Tomato Sauces)
serves 4 as an appetizer
2 - 2 1/2 pound sugar pumpkin
2 tablespoons oil
1/2 -1 1/2 cups sugar (I used about 2/3 cup)
1/2 teaspoon ground cinnamon
1 cup plain yogurt
1 clove garlic, crushed
1/2 teaspoon dried mint (optional)
Salt and pepper to taste
2 tablespoons oil
1 medium onion, chopped
1 clove garlic, crushed
1 1/4 teaspoons ground coriander seed
1/2 teaspoon ground turmeric
1 teaspoon ground black pepper
Salt to taste
1 cup tomato sauce
1/4 cup water
Preheat the oven at 350°F.
Cut the pumpkin into quarters. Remove seeds and strings, peel the skin with a vegetable peeler, and cut down into about 2-inch chunks.
Heat 2 tablespoons oil in a dutch oven. Brown the pumpkin pieces, turning frequently, until golden brown.
Mix sugar and cinnamon and sprinkle over pumpkin. Cover and bake for 30 minutes, or until tender.
Mix together yogurt with the mint (if using) and crushed garlic in a bowl; season to taste with salt and pepper.
In a medium saucepan, heat 2 tablespoons of oil and cook the onions until lightly browned. Add the garlic, coriander, turmeric, salt, and pepper. Mix well and cook until the spices are toasted and fragrant. Add tomato sauce and water, mix thoroughly and bring to a simmer. Lower heat and cook about 20 minutes until it cooks down to a thick sauce.
Serve the pumpkin with the yogurt and tomato sauces.
Next: My Mom's Taiwanese Sticky Rice
Previously: Pão de Queijo (Brazilian Cheese Bread)
Last year: Miso Marinated Black Cod
Subscribe to:
Posts (Atom)