Showing posts with label squash. Show all posts
Monday, August 15, 2016
Zucchini Pizza
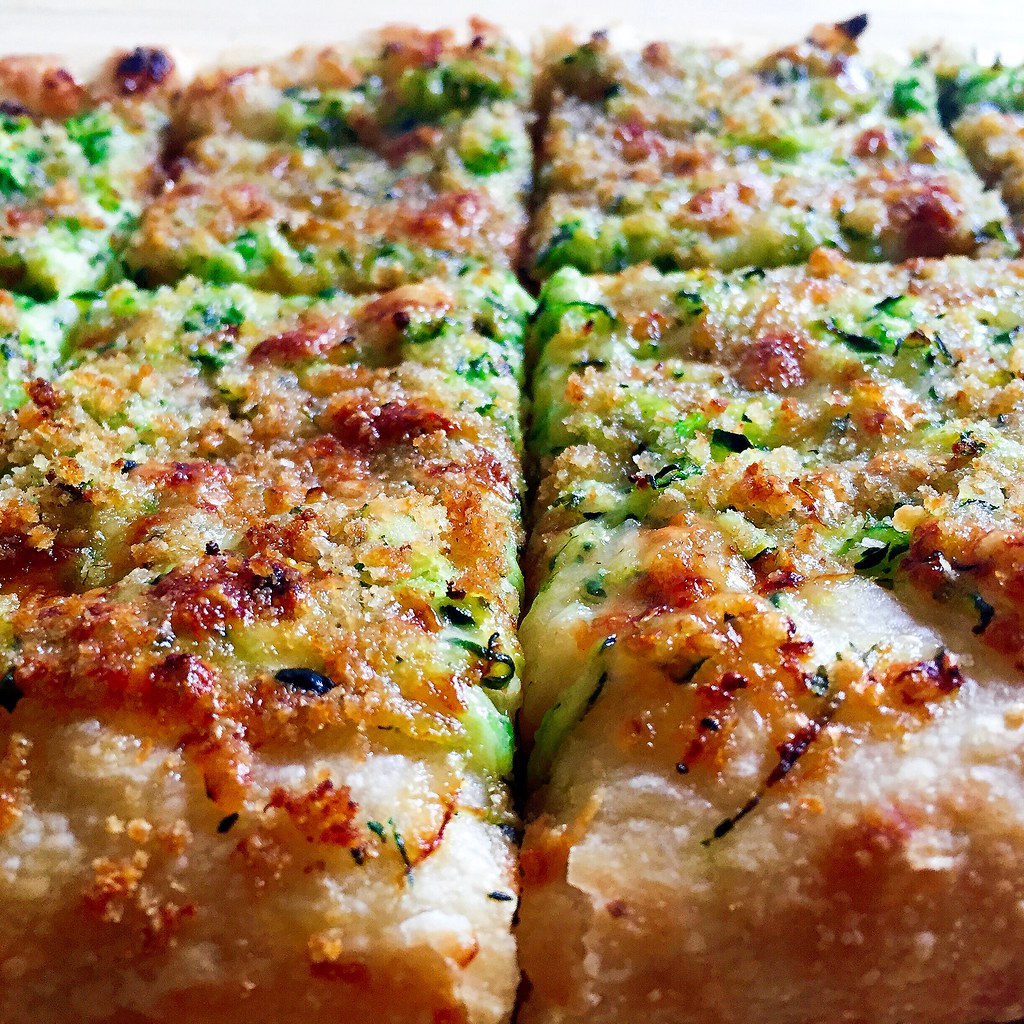
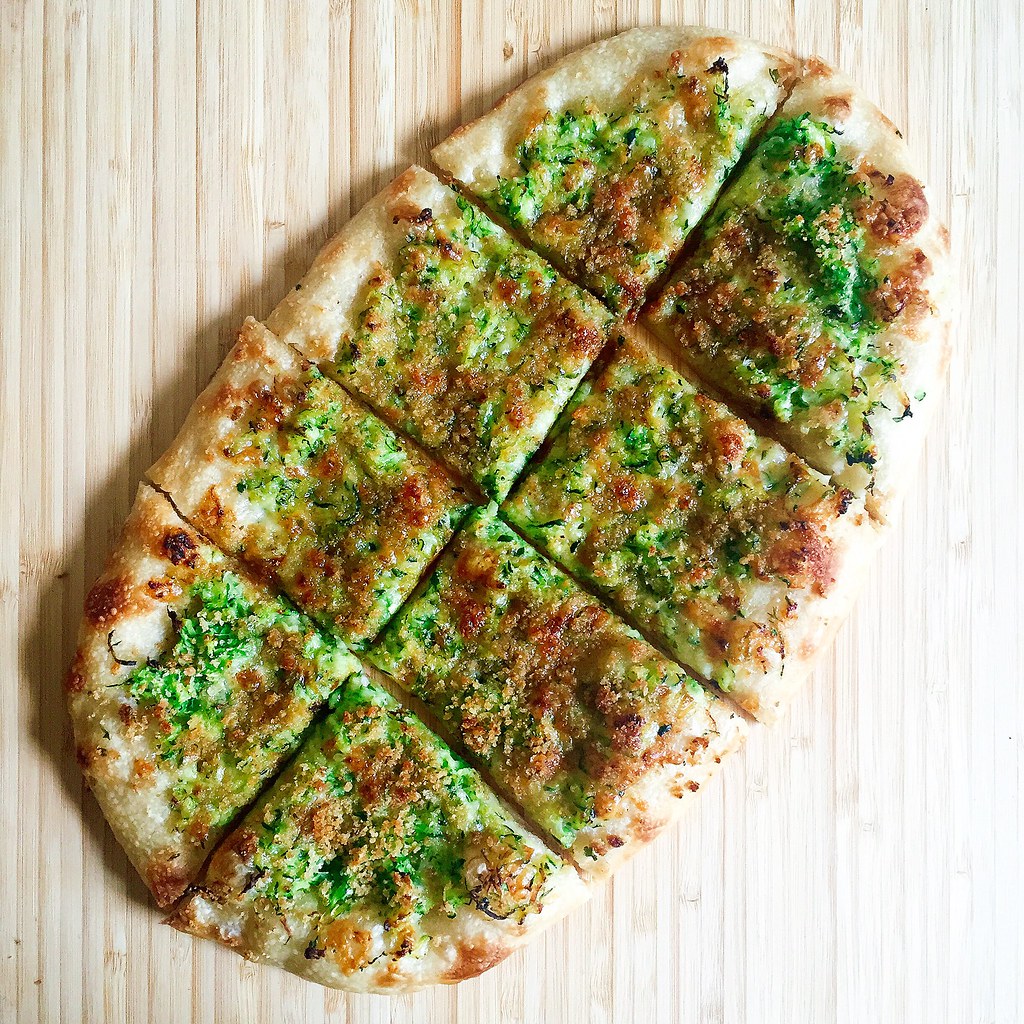
I used to cringe a little whenever I got zucchini or summer squash in my Boston Organics delivery because while I liked the vegetable enough not to add it to my "No List", I didn't like it enough to know what to do with it other than to stir fry it with garlic or grate it into an amnesty bread. But that all changed when I saw Smitten Kitchen's post about summer squash pizza.
I tweaked the recipe (which is originally from Jim Lahey of no-knead bread fame) a little by using my favorite pizza crust instead of the one in her post because I already had some on hand. I also tossed the breadcrumbs in a little olive oil for a little extra crunch and to protect it from burning too fast.
I wasn't really sure about having to buy the Gruyere cheese and even made it for the first time without the cheese and substituting with some minced garlic and olive oil (which, by the way, ended up being pretty darn good and worth trying if you don't eat cheese). But then I caved in and got a small block of Gruyere. And boy oh boy was it amazing. Divine. Glorious! In the oven, the cheese melts and binds the shredded zucchini together in a holy matrimony of texture and flavor. It's simply perfect.

Zucchini Pizza (adapted from Jim Lahey by way of Smitten Kitchen)
makes 1 pizza
8 oz. ball of pizza dough
1 medium zucchini or summer squash, about 1/2 lb.
1/2 teaspoon kosher salt
3 oz. Gruyere cheese, coarsely grated
1 generous tablespoon breadcrumbs
Drizzle of olive oil
Place a pizza stone on an oven rack set at the top 1/3 of the oven. Preheat the oven to 500°F.
Trim off the round end of the zucchini and using the other end as a handle, shred the zucchini on the coarse holes of a box grater. Squeeze the shredded zucchini in your hands to remove the water and transfer a fistful at a time to a small mixing bowl. Add the salt and mix well. Let sit for 20-30 minutes so that more water is released. Squeeze the zucchini again until you get out as much water as possible. Mix with the Gruyere cheese.
Mix the breadcrumbs with a little olive oil, just enough to moisten and clump them together a little.
Stretch the dough onto a parchment paper-lined flexible cutting board. Top with the zucchini-cheese mixture then sprinkle on the breadcrumbs. Slide the pizza (still on the parchment paper) onto the pizza stone and bake for 10 minutes, until the cheese has melted and the breadcrumbs are golden. Use tongs to slide the pizza with the parchment paper from the pizza stone onto a cutting board. Slice and eat!
Next: Extra-Crispy Tortilla Pizza
Previously: My Mom's Beef and Broccoli Stir Fry
Two Years Ago: Grace's Ginger Scallion Fish
Three Years Ago: S'mores Brownie Ice Cream Sandwiches
Friday, December 13, 2013
Miso Pumpkin Soup
I've made this soup 3 times already, so I'm not really sure why it's taken so long for me to post about it. I first bookmarked this recipe from The Kitchn when I was trying to find ways to use up a sugar pumpkin and sweet potatoes. Every time I've made it since I've done something a little different--used acorn squash instead of pumpkin, substituted ground ginger for fresh ginger or fried shallots instead of fresh shallots--and it still comes out great. There's just something so warm and cozy about this combination of flavors and colors.
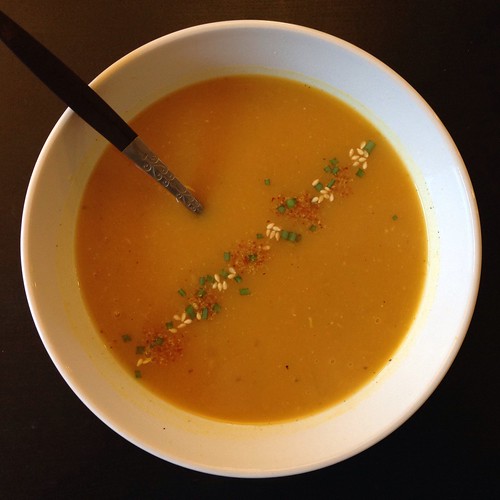
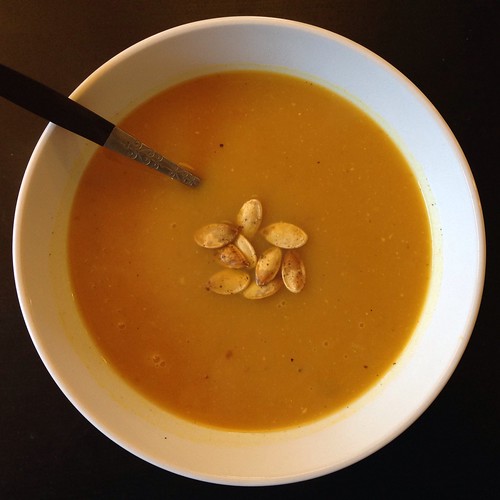
I like to save the pumpkin seeds and roast them with some olive oil and Old Bay seasoning. They add a nice crunch if you add them as a topping to the soup but are perfect for just snacking on, too. I also like the suggestion from The Kitchn of garnishing with chopped scallions, ichimi togarashi, and toasted sesame seeds. The red pepper flakes kick up the warming factor of the soup without being obnoxiously spicy.
Miso Pumpkin Soup (adapted from The Kitchn)
serves 4
2 lbs. sugar pumpkin or acorn squash
1 lb. sweet potatoes
4 garlic cloves, peeled
2 tablespoons olive oil
Salt and freshly ground black pepper, to taste
1 tablespoon fried shallots
1 teaspoon powdered ginger
3 tablespoons white miso
6 cups vegetable or chicken stock
Preheat oven to 450°F.
Cut the pumpkin or squash in half and remove the seeds and pulp with a metal spoon. Peel the pumpkin and cut into 2-inch pieces.
Peel and cut the sweet potatoes into 2-inch pieces.
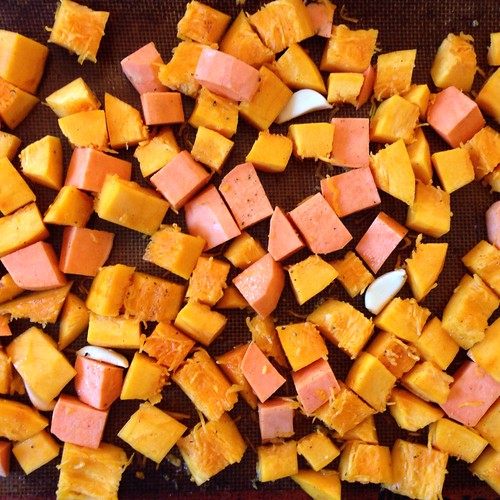
Combine the pumpkin, sweet potatoes, and garlic on a baking sheet, toss with 2 tablespoons of olive oil, and sprinkle with salt and pepper. Roast in the oven until the pumpkin and sweet potatoes are tender when pierced, about 30 minutes, tossing halfway through.
Add the fried shallots, ground ginger, miso, and vegetable stock to a large pot and stir until dissolved. Add the roasted vegetables and simmer for 15 minutes. Turn down the heat if necessary to avoid boiling, as this can impair the flavor of the miso.
Puree the soup using an immersion blender. To serve, garnish with roasted pumpkin seeds or with chopped scallions, ichimi togarashi, and toasted sesame seeds.
Next: Sticky Toffee Pudding Ice Cream
Previously: Thai Coconut Sticky Rice with Mango
One Year Ago: Momofuku Ramen Broth
Four Years Ago: Wah Guay (Taiwanese Rice Cake with Meat Sauce)
Five Years Ago: Pork and Cabbage Dumplings
I like to save the pumpkin seeds and roast them with some olive oil and Old Bay seasoning. They add a nice crunch if you add them as a topping to the soup but are perfect for just snacking on, too. I also like the suggestion from The Kitchn of garnishing with chopped scallions, ichimi togarashi, and toasted sesame seeds. The red pepper flakes kick up the warming factor of the soup without being obnoxiously spicy.
Miso Pumpkin Soup (adapted from The Kitchn)
serves 4
2 lbs. sugar pumpkin or acorn squash
1 lb. sweet potatoes
4 garlic cloves, peeled
2 tablespoons olive oil
Salt and freshly ground black pepper, to taste
1 tablespoon fried shallots
1 teaspoon powdered ginger
3 tablespoons white miso
6 cups vegetable or chicken stock
Preheat oven to 450°F.
Cut the pumpkin or squash in half and remove the seeds and pulp with a metal spoon. Peel the pumpkin and cut into 2-inch pieces.
Peel and cut the sweet potatoes into 2-inch pieces.
Combine the pumpkin, sweet potatoes, and garlic on a baking sheet, toss with 2 tablespoons of olive oil, and sprinkle with salt and pepper. Roast in the oven until the pumpkin and sweet potatoes are tender when pierced, about 30 minutes, tossing halfway through.
Add the fried shallots, ground ginger, miso, and vegetable stock to a large pot and stir until dissolved. Add the roasted vegetables and simmer for 15 minutes. Turn down the heat if necessary to avoid boiling, as this can impair the flavor of the miso.
Puree the soup using an immersion blender. To serve, garnish with roasted pumpkin seeds or with chopped scallions, ichimi togarashi, and toasted sesame seeds.
Next: Sticky Toffee Pudding Ice Cream
Previously: Thai Coconut Sticky Rice with Mango
One Year Ago: Momofuku Ramen Broth
Four Years Ago: Wah Guay (Taiwanese Rice Cake with Meat Sauce)
Five Years Ago: Pork and Cabbage Dumplings
Wednesday, December 30, 2009
Creamy Delicata Squash Soup
And now with this entry I think my blog is officially almost monochrome. I shall have to try to make more colorful recipes again soon.
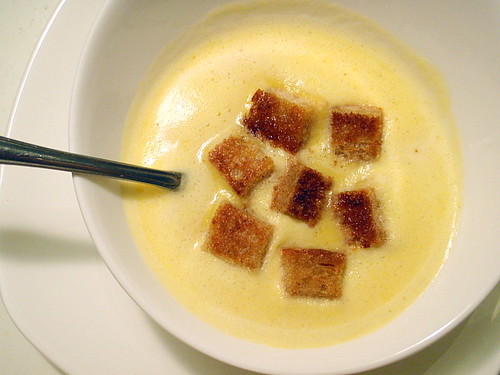
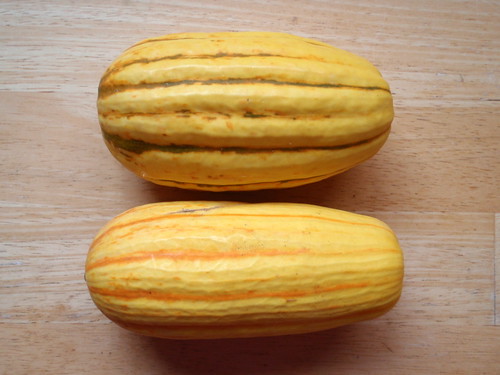
I needed to use up two more delicata squash that I received from Boston Organics and since it's been super cold lately, I googled for a soup recipe. I came across this one on allrecipes.com, and while I usually only try the recipes on there that have several hundred reviews, it seemed straightforward enough to try. I did make a couple of adjustments, however, since I didn't want to wait for the squash to fully cook via roasting. In the comments someone said they had microwaved the squash instead, which shaved off at least a good half an hour. The squash cooked unevenly so I ended up scooping out the done parts and re-microwaving the rest until it was done.And I substituted chicken broth for the vegetable broth and milk and half & half for the heavy cream (but only because I didn't have any).
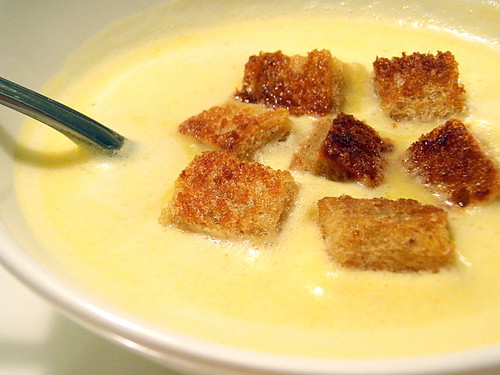
p.s. I made the croutons in the pictures by simply sauteeing some cubed wheat bread in butter. If I had really been clever, I would've cut the croutons in the shape of the squash seeds. =)
ETA: I recently made this and added curry powder instead of nutmeg. It was delicious!
One year ago: Hua Juan (Steamed Scallion Buns)
I needed to use up two more delicata squash that I received from Boston Organics and since it's been super cold lately, I googled for a soup recipe. I came across this one on allrecipes.com, and while I usually only try the recipes on there that have several hundred reviews, it seemed straightforward enough to try. I did make a couple of adjustments, however, since I didn't want to wait for the squash to fully cook via roasting. In the comments someone said they had microwaved the squash instead, which shaved off at least a good half an hour. The squash cooked unevenly so I ended up scooping out the done parts and re-microwaving the rest until it was done.And I substituted chicken broth for the vegetable broth and milk and half & half for the heavy cream (but only because I didn't have any).
Creamy Delicata Squash Soup (adapted from here)
makes 3-4 servings
2 delicata squash, halved lengthwise and seeded
1 small onion, chopped
2 cups chicken broth
1/3 cup half & half
2/3 cup milk
1 tablespoon olive oil
Salt and pepper to taste
1 dash nutmeg (optional)
Place the squash cut side down in a microwave-safe baking dish. Add 1/8" water to the dish and microwave on high for 7 minutes or until squash is soft.
In a large saucepan, heat the olive oil. Add onion and cook over medium-low heat, stirring occasionally until onion is softened but not brown.
Scrape the squash out of the flesh and add to onions. Add the broth, half & half, and milk. Bring to a boil and then simmer, stirring occasionally, about 25 minutes.
Puree the soup using an immersion blender. Season with salt and pepper and a dash of nutmeg, if you like.
Pureeing the soup made it really light and frothy. The consistency was slightly grainy like a potato soup, but it really wasn't very thick at all. I found that I barely had to add any salt to it, but then maybe that's because the chicken broth I used was already pretty salty. I think the nutmeg really brought out the sweetness of the squash. In fact, I can see this being a really versatile template for a squash soup. You could go the sweeter path and really roast the squash with some butter and maybe a little brown sugar. Or you could go the more savory route and use shallots instead of the onion and maybe throw in a little garlic or other fresh herbs. All in all, it was the perfect thing to have on a frigid day.makes 3-4 servings
2 delicata squash, halved lengthwise and seeded
1 small onion, chopped
2 cups chicken broth
1/3 cup half & half
2/3 cup milk
1 tablespoon olive oil
Salt and pepper to taste
1 dash nutmeg (optional)
Place the squash cut side down in a microwave-safe baking dish. Add 1/8" water to the dish and microwave on high for 7 minutes or until squash is soft.
In a large saucepan, heat the olive oil. Add onion and cook over medium-low heat, stirring occasionally until onion is softened but not brown.
Scrape the squash out of the flesh and add to onions. Add the broth, half & half, and milk. Bring to a boil and then simmer, stirring occasionally, about 25 minutes.
Puree the soup using an immersion blender. Season with salt and pepper and a dash of nutmeg, if you like.
p.s. I made the croutons in the pictures by simply sauteeing some cubed wheat bread in butter. If I had really been clever, I would've cut the croutons in the shape of the squash seeds. =)
ETA: I recently made this and added curry powder instead of nutmeg. It was delicious!
One year ago: Hua Juan (Steamed Scallion Buns)
Friday, December 4, 2009
Stuffed Delicata Squash
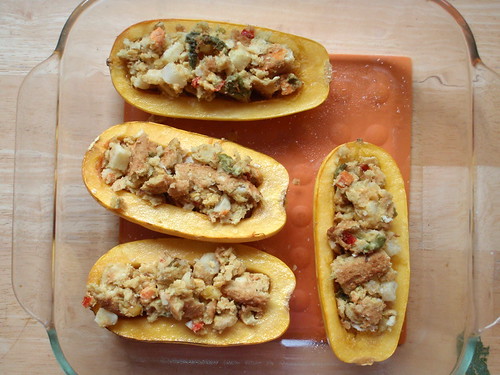
I recently received two delicata squashes in my Boston Organics delivery. Now I know what to do with yellow/zucchini squash, and I have a favorite recipe for butternut squash, but this was the first time I had work with this particular kind of squash. Luckily, The Kitchn had a post recently about making stuffed squash, which I thought would be the perfect thing to do with these two lovelies.
The only thing is, their recipe called for some type of protein (chopped ham, bacon, sausage, etc.) to be added, and I just didn't have anything like that, nor did I really think ham belonged in a stuffed squash. Bacon or sausage, I can see, but I didn't want to go out and buy some just for this recipe. They suggested using tofu for a vegetarian version, but that sounded just as weird, if not weirder than using ham. And then I realized, I had the perfect ingredient sitting in my freezer. Can you guess what it is?
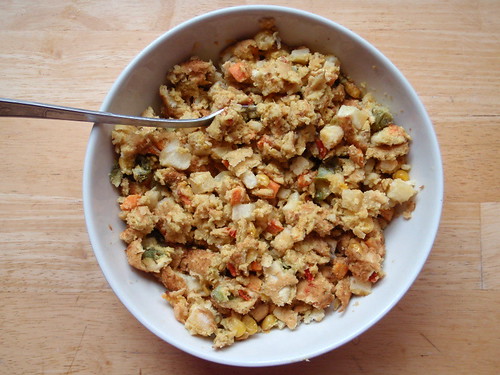
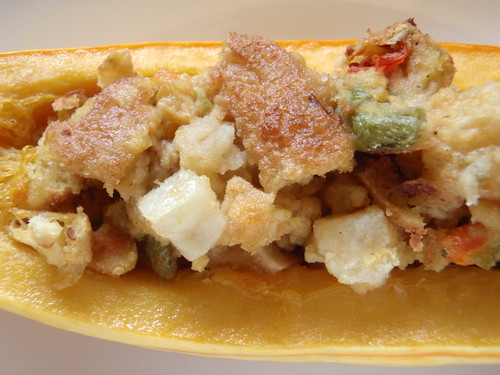
One of my vegetarian friends had brought over Vegetable Masala Burgers from Trader Joe's for a barbecue we had over the summer. There had been no time or room on the grill to cook them, so they've been sitting in my freezer until now. I figured the burgers would already be seasoned, and after microwaving them and mashing them up with a fork, they would be just about the right consistency to stuff a squash with!
I really did like the taste of the masala burgers with the squash. If you wanted to add more texture to the stuffing, you could add toasted nuts or roasted sunflower seeds. If I were using a more traditional flavor of veggie burger, I might also sprinkle some cheese on top, but I think it would have been weird to mix cheese and masala.
One year ago: Salted Butter Caramel Ice Cream
The only thing is, their recipe called for some type of protein (chopped ham, bacon, sausage, etc.) to be added, and I just didn't have anything like that, nor did I really think ham belonged in a stuffed squash. Bacon or sausage, I can see, but I didn't want to go out and buy some just for this recipe. They suggested using tofu for a vegetarian version, but that sounded just as weird, if not weirder than using ham. And then I realized, I had the perfect ingredient sitting in my freezer. Can you guess what it is?
One of my vegetarian friends had brought over Vegetable Masala Burgers from Trader Joe's for a barbecue we had over the summer. There had been no time or room on the grill to cook them, so they've been sitting in my freezer until now. I figured the burgers would already be seasoned, and after microwaving them and mashing them up with a fork, they would be just about the right consistency to stuff a squash with!
Veggie Burger Stuffed Delicata Squash
makes 2 servings
2 delicata squash
Olive oil
Salt and pepper to taste
2 veggie burger patties
Butter (optional)
Preheat oven to 350°F.
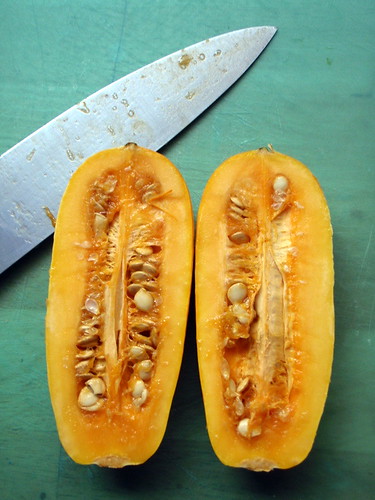
Halve the squash lengthwise and scoop out the seeds and pulp with a spoon. Brush the cut side with olive oil and salt and pepper. Roast squash cut side up for 30 minutes or until soft when forked.
In the meantime, microwave the veggie burger patties for a minute or two until thawed. They don't need to be hot. Break up the patties with a fork.
Once the squash is done, remove from oven. Mound veggie burger stuffing in the squash cavities. Top with a pat of butter, if desired.
Return stuffed squash to oven and bake for another 10 minutes.
I really did like the taste of the masala burgers with the squash. If you wanted to add more texture to the stuffing, you could add toasted nuts or roasted sunflower seeds. If I were using a more traditional flavor of veggie burger, I might also sprinkle some cheese on top, but I think it would have been weird to mix cheese and masala.
One year ago: Salted Butter Caramel Ice Cream
Wednesday, December 10, 2008
Pan-Fried Pasta with Butternut Squash, Fried Sage, and Pine Nuts
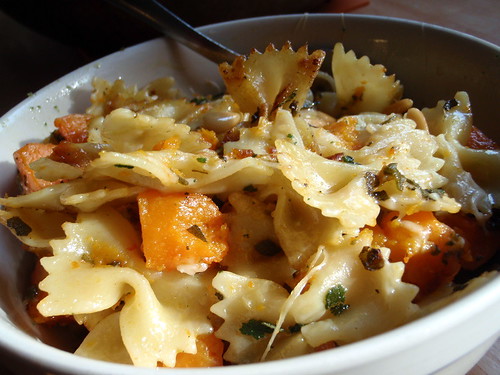
One of my favorite cooking sites is The Kitchn because not only are they generally socially conscious (advocating fresh, in-season, locally grown products, farmer's markets, CSAs, etc.) but because they also update several times a day so almost every time I check back, they have something new to read. I often find the inspiration to try a new dish there, and so far this one has been my favorite. I brought it to small group once, and someone who didn't think she liked squash said that she loved the dish. I gave them the recipe, and I know it's been made multiple times since.
It's a little too late to find butternut squash at the farmer's market now, but I know they're still being sold in the supermarkets. If you really want to save time (although probably not money), you can buy the squash all peeled and cut up already. But if you want to peel and cut it up yourself, this is what I usually do:

Pan-Fried Pasta with Butternut Squash, Fried Sage, and Pine Nuts (adapted from The Kitchn)
Makes 4-6 servings
1 medium butternut squash, peeled and cut into 1" pieces
1 small sweet onion, peeled and diced
3 cloves garlic, minced
Olive oil
Salt and pepper
1/2 cup fresh sage leaves
1 pound farfalle pasta
3/4 cup pine nuts
4 ounces high quality Parmesan, shredded or shaved (I actually like less)
Heat the oven to 375°.
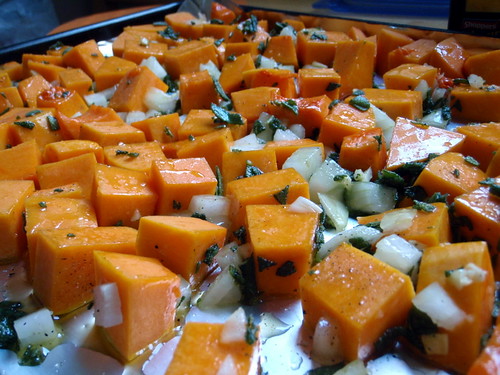
Mince about half of the fresh sage leaves and toss with the butternut squash, onion, garlic, a drizzle of olive oil, salt and pepper. Spread the squash mixture in a thin layer on a large baking sheet and roast for about 40 minutes or until the squash is soft.
In the meantime, heat up a large, high-sided, un-oiled sauté pan until hot and toss in the nuts. Try to spread them out in a single layer and stir every 30 seconds or so until browned and you can smell the nutty aroma. These burn rather quickly so make sure you are paying attention! When toasted, set aside.
Heat salted pasta water to boiling and cook the farfalle until al dente. Drain and set aside.
As the squash finishes roasting, heat about two tablespoons of olive oil in the sauté pan. The oil is ready when it pops and sputters. (Don't let it start smoking.) Drop in the rest of the sage leaves and fry for about a minute, or until they begin to just shrivel up. Remove with a slotted spoon (leaving the sage-seasoned olive oil in the pan) and salt lightly. Crush with the back of a spoon.
Add half the pasta to the pan, along with half the roasted squash mixture. Crumble in half the sage. Cook, stirring frequently, for five minutes or until the pasta is heated through and getting crispy on some of the edges. Add the pine nuts and cook for another minute. Stir in half the cheese, salt to taste, and serve.
Repeat the last step with the rest of the ingredients. It's very important that you not crowd the pan too much - you want the pasta to really pan-fry, not just steam up.
It's a little too late to find butternut squash at the farmer's market now, but I know they're still being sold in the supermarkets. If you really want to save time (although probably not money), you can buy the squash all peeled and cut up already. But if you want to peel and cut it up yourself, this is what I usually do:
- Cut off the top (so that you have an edge to start peeling from) and bottom (so that you have a level surface to stand the squash upright).
- Use a vegetable peeler (I use a Palm Peeler which was given to me by jalzee--one of the most useful gifts ever!) and peel the skin from top to bottom, going around the whole squash. You may find that you will need to do several layers before you get past the pale skin and to the brighter colored and softer flesh. Alternatively, you can just peel using a knife, but I find using a peeler is safer and less wasteful.
- Cut the squash in half horizontally (along the equator), then cut each half in half vertically. Scoop out the seeds and icky stuff from the cavity of the bottom part.
- Slice the squash into 1" wide sticks and then turn the stick 90 degrees and cut into 1" chunks.

Pan-Fried Pasta with Butternut Squash, Fried Sage, and Pine Nuts (adapted from The Kitchn)
Makes 4-6 servings
1 medium butternut squash, peeled and cut into 1" pieces
1 small sweet onion, peeled and diced
3 cloves garlic, minced
Olive oil
Salt and pepper
1/2 cup fresh sage leaves
1 pound farfalle pasta
3/4 cup pine nuts
4 ounces high quality Parmesan, shredded or shaved (I actually like less)
Heat the oven to 375°.
Mince about half of the fresh sage leaves and toss with the butternut squash, onion, garlic, a drizzle of olive oil, salt and pepper. Spread the squash mixture in a thin layer on a large baking sheet and roast for about 40 minutes or until the squash is soft.
In the meantime, heat up a large, high-sided, un-oiled sauté pan until hot and toss in the nuts. Try to spread them out in a single layer and stir every 30 seconds or so until browned and you can smell the nutty aroma. These burn rather quickly so make sure you are paying attention! When toasted, set aside.
Heat salted pasta water to boiling and cook the farfalle until al dente. Drain and set aside.
As the squash finishes roasting, heat about two tablespoons of olive oil in the sauté pan. The oil is ready when it pops and sputters. (Don't let it start smoking.) Drop in the rest of the sage leaves and fry for about a minute, or until they begin to just shrivel up. Remove with a slotted spoon (leaving the sage-seasoned olive oil in the pan) and salt lightly. Crush with the back of a spoon.
Add half the pasta to the pan, along with half the roasted squash mixture. Crumble in half the sage. Cook, stirring frequently, for five minutes or until the pasta is heated through and getting crispy on some of the edges. Add the pine nuts and cook for another minute. Stir in half the cheese, salt to taste, and serve.
Repeat the last step with the rest of the ingredients. It's very important that you not crowd the pan too much - you want the pasta to really pan-fry, not just steam up.
Subscribe to:
Posts (Atom)