Thursday, January 31, 2013

Homemade Bagels

P1033215

So remember that time I decided to make croissants from scratch using what was probably the most complicated recipe ever?  And remember how it took almost three days to make?  Well this is pretty much the exact opposite of that.

One morning I was craving a bagel with cream cheese, but it was too cold, and I was too lazy to go out to the store to buy some.  So I decided to look up some bagel recipes to see how easy it would be to make them at home.  Really easy, it turns out.  (Yes, you read that right:  I was too lazy to go to the store but not lazy enough to make my own bagels.  Go figure.)  In fact, you can almost whip these up in about 2 hours if you really wanted.  I'd suggest letting them rise slowly (overnight) in the refrigerator, though, for better flavor and texture (see note at the bottom of this post).

I used this recipe from CHOW as a template and altered it based on some of the comments on the post and by the ingredients I had on hand.  First, I noticed a lot of the comments mentioning that 2 tablespoons of salt was way too much, so I used 2 teaspoons instead.  I also added some baking soda to the boiling water because someone mentioned it would give it a more authentic NYC taste, whatever that means.  And because I only had diastatic malt powder, I substituted the malt syrup with 1 teaspoon of the malt powder.

P1033200
 
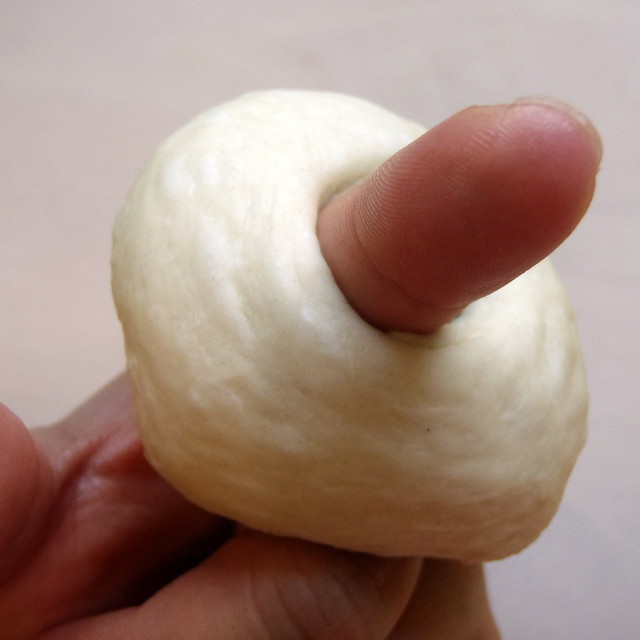
I also decided to shape the bagels using the "finger hula hooping" method rather than the "snake biting its tail" method.  Yeah, I just made the name of those two methods up, but I'm sure you can see where I'm going with them.  The finger hula hooping method is just too fun not to do!

Bagels
 
Homemade Bagels (adapted from CHOW)
makes 12 bagels

1 1/2 cups tepid water (105-110°F), plus 1 tablespoon for the egg wash
1 packet active dry yeast
4 cups bread flour
1 teaspoon diastatic malt powder
2 teaspoons kosher salt
4 teaspoons sugar
Vegetable Oil
1 teaspoon baking soda
1 large egg white
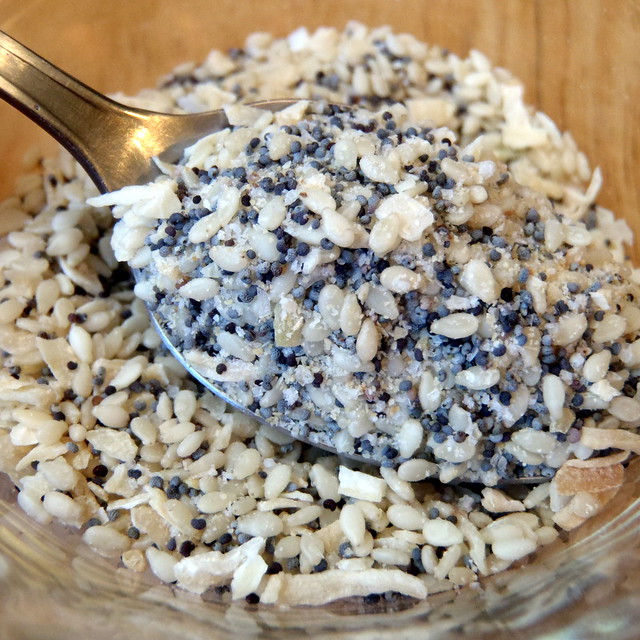
Sesame seeds, poppy seeds, or coarse salt for topping

P1033191
 
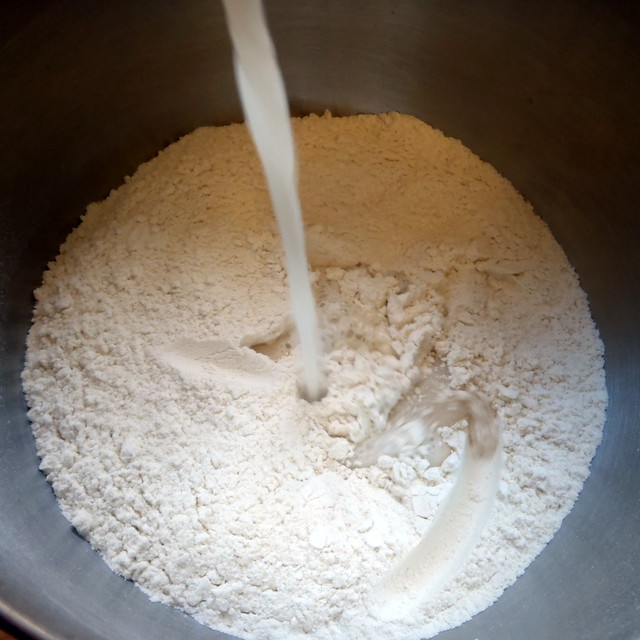
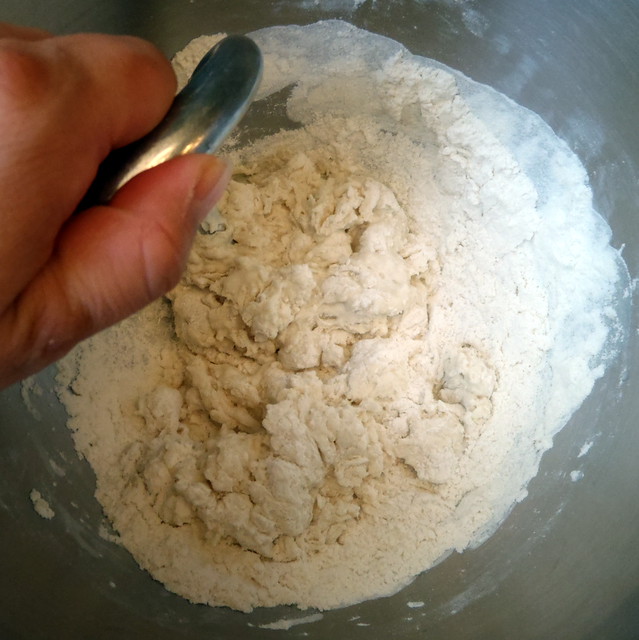
Place the tepid water in a small bowl and dissolve the yeast completely; set aside. Combine flour, malt powder, salt, and sugar in the bowl of a stand mixer fitted with a dough hook attachment. Add yeast mixture, scraping any undissolved yeast out of the bowl with a spatula.

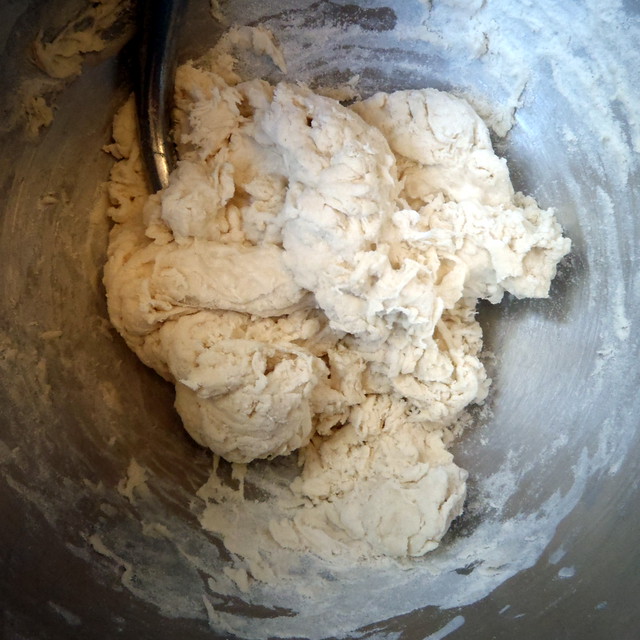
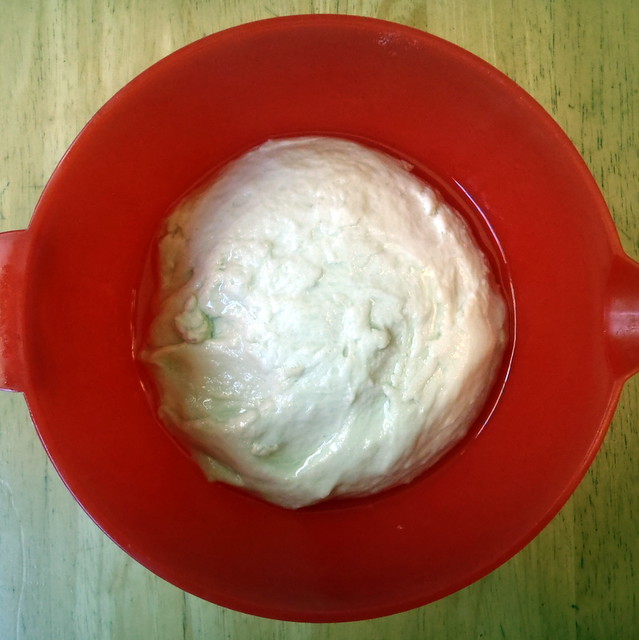
Mix on low until most of the loose flour has been worked into the dough and the dough looks shredded, about 2 minutes. Increase the speed to medium low and continue mixing until the dough is stiff, smooth, and elastic, about 8 to 9 minutes more. (If the dough gets stuck on the hook or splits into 2 pieces, stop the machine, scrape off the hook, and mash the dough back into the bottom of the bowl.) The dough should be dry, not tacky or sticky, and somewhat stiff.

P1033194
 
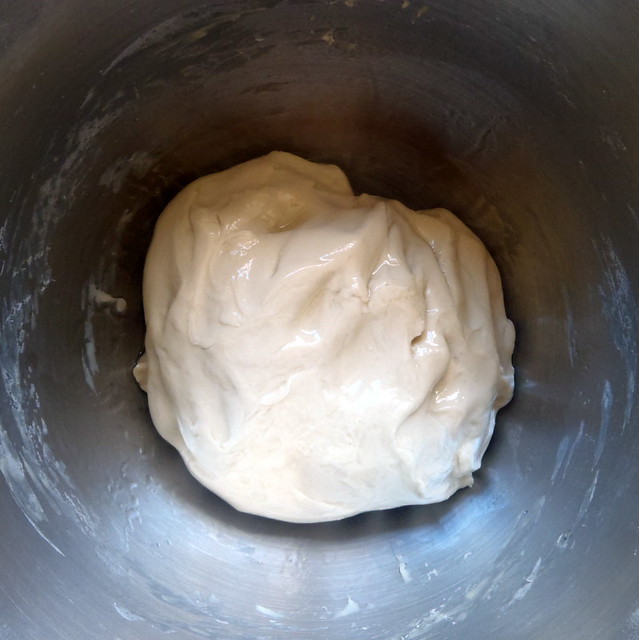
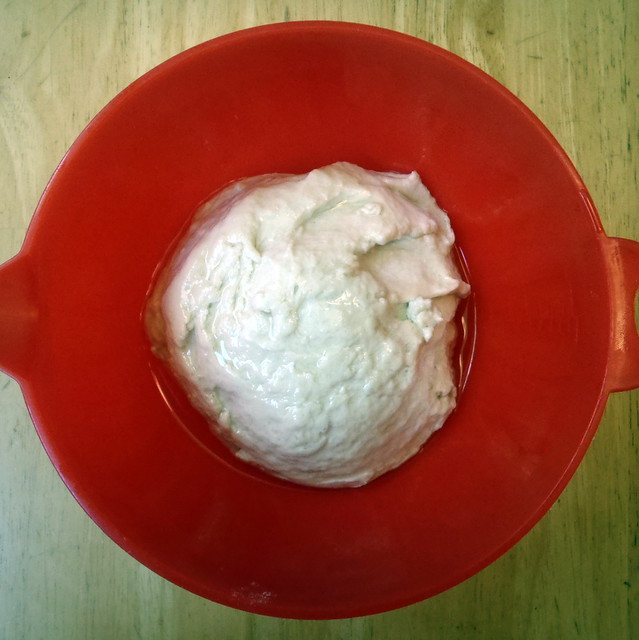
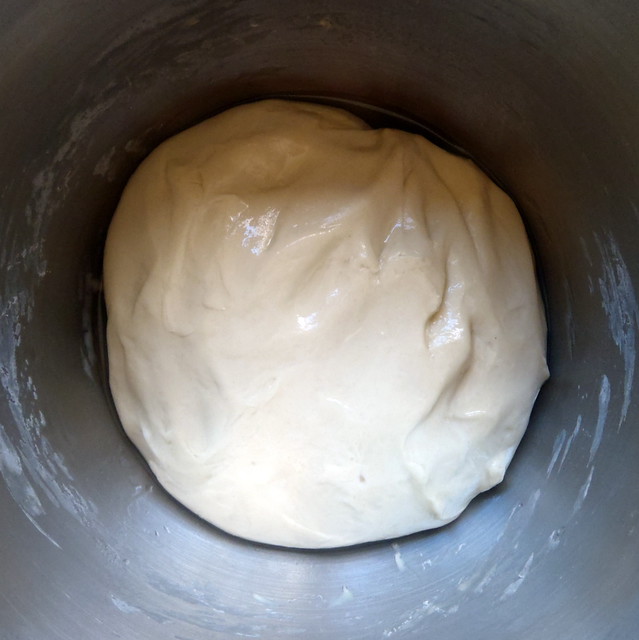
Shape the dough into a ball, pour a glug of oil over it, and turn it to coat in oil. Cover the bowl with a damp towel and let the dough rise in a warm place, until it is noticeably puffy and springs back when you poke it, about 20 minutes. (The dough will not double in size.)

P1033195
 
Meanwhile, heat the oven to 425°F and arrange the rack in the middle. Fill a large, wide, shallow pan (about 3 to 6 quarts) with water and baking soda, bring to a boil over high heat, then reduce heat to medium low and let simmer. Cover until you’re ready to boil the bagels. Line a baking sheet with a Silpat or parchment paper greased with oil or cooking spray. Place a metal rack inside of a second baking sheet and set aside.

P1033196
 
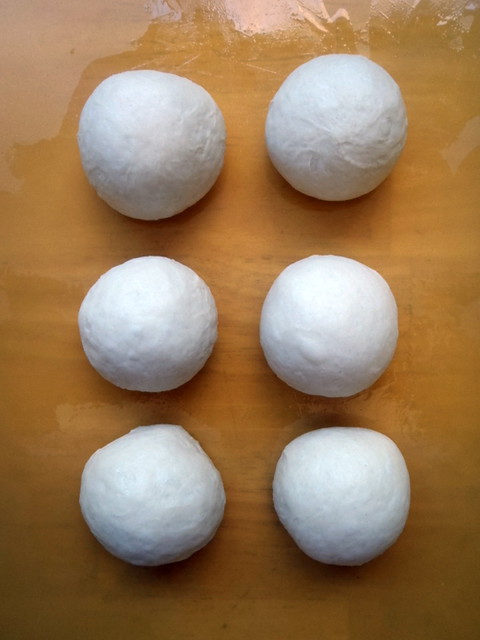
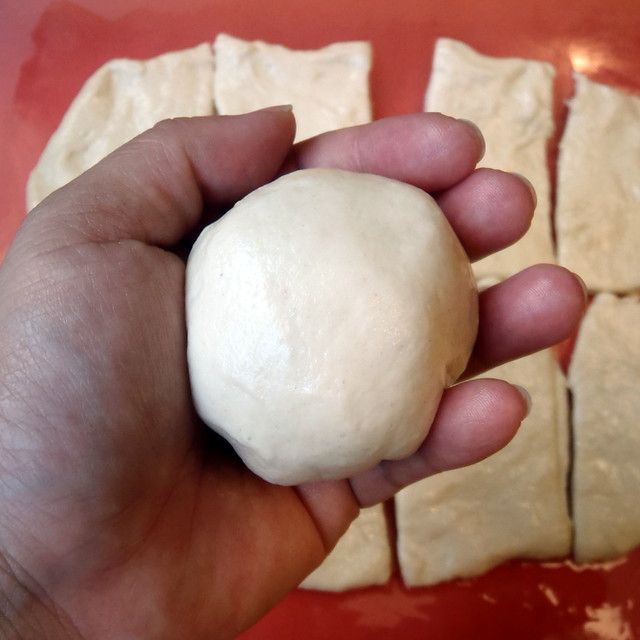
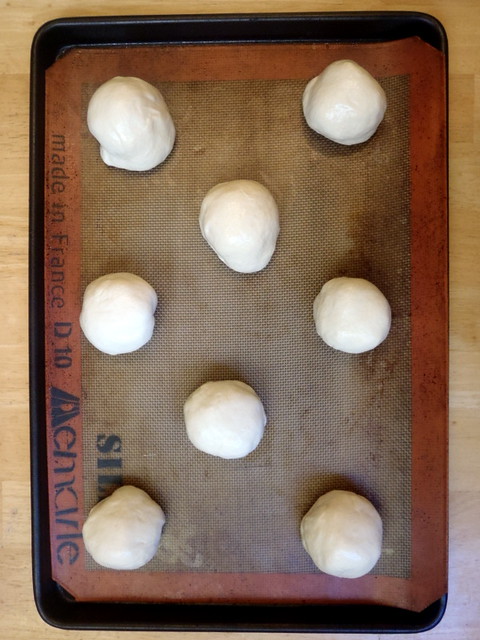
Turn the risen dough out onto a dry surface. Divide the dough into 12 equal pieces, about 3 ounces each.  (While you work, keep the dough you’re not handling covered with a damp towel to prevent drying.)

P1033197
 
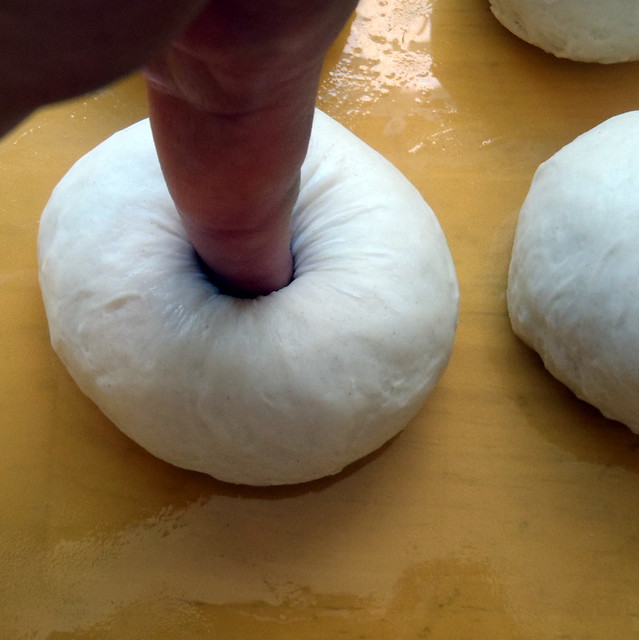
Roll each piece into a ball, then poke a hole through the middle with your index finger.  With the dough still wrapped around your finger like a ring, rotate your hand upright and start twirling it around to enlarge the hole (you can also do this with your finger touching the work surface, but it's not as fun because there's no risk of the dough accidentally flying off your finger!).

P1033202
 
Widen the hole in the middle so it is approximately the size of a quarter. Cover the shaped bagels with a damp towel and let rest 10 minutes.*

P1033203
 
After resting, stretch the dough to retain the quarter-size hole (the dough will have risen a bit) and boil the bagels, making sure they have room to bob around.

P1033205
 
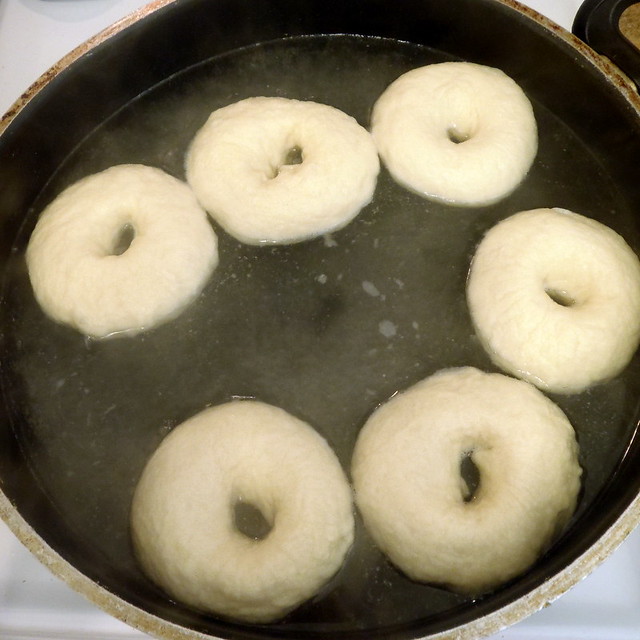
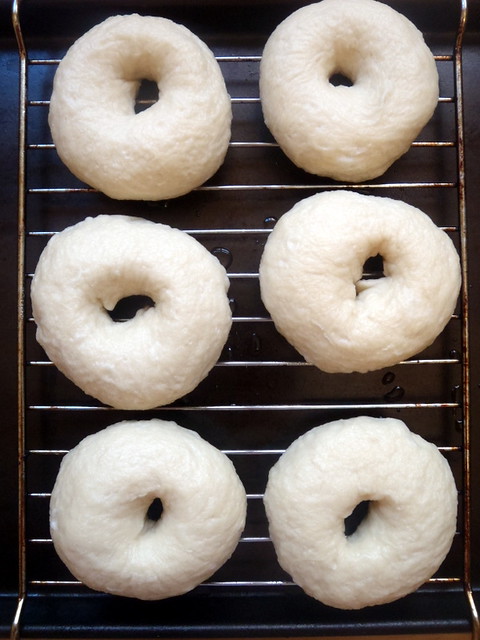
Cook for about 60 seconds on each side until the bagels have a shriveled look, then remove to the baking sheet with the rack in it. Adjust heat as necessary so the water stays at a simmer.

P1033206
 
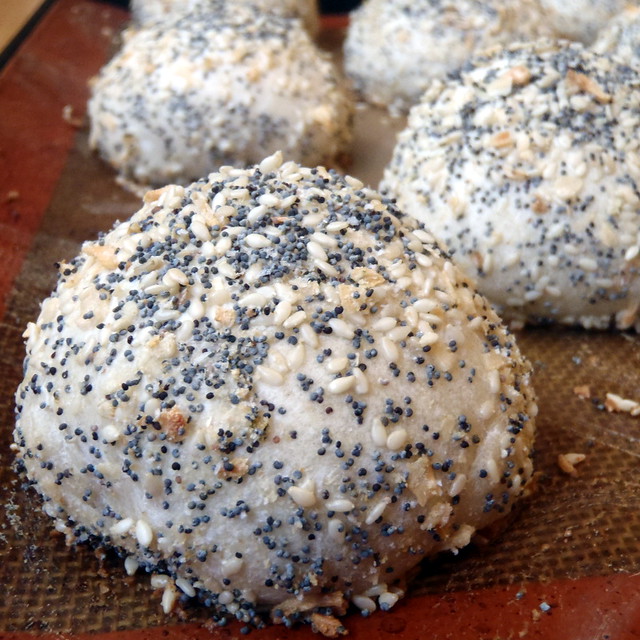
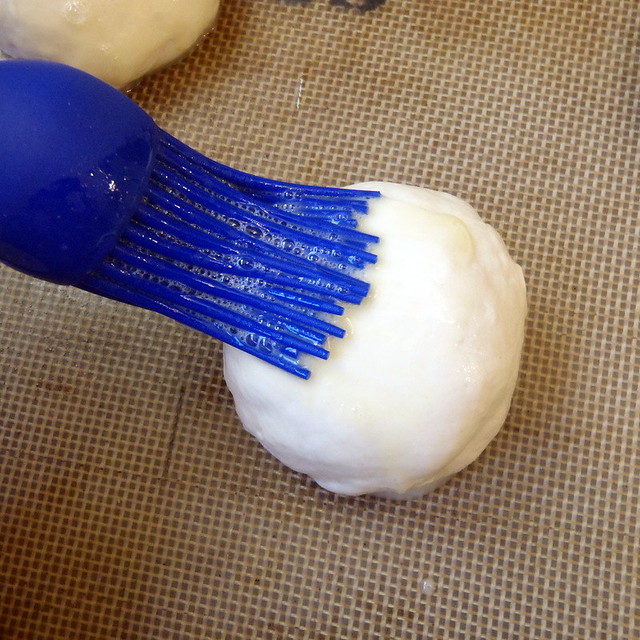
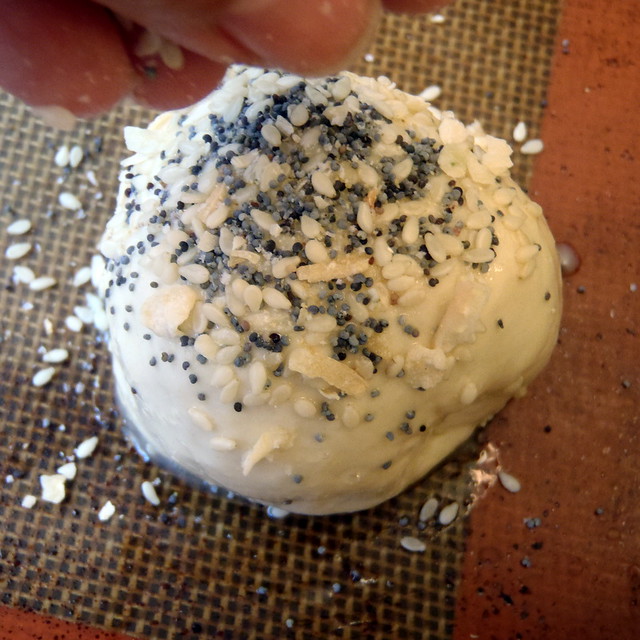
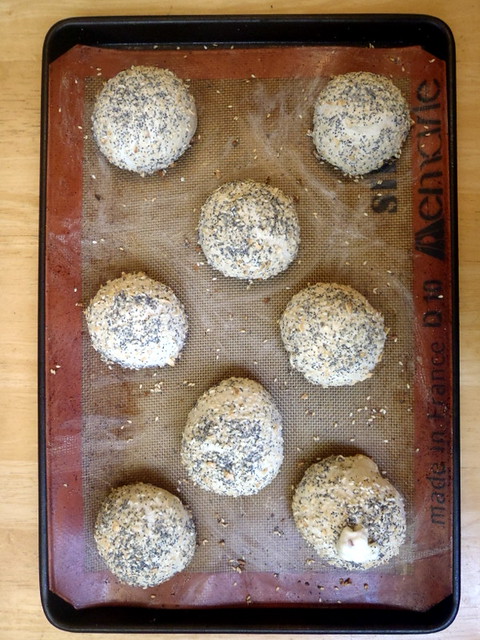
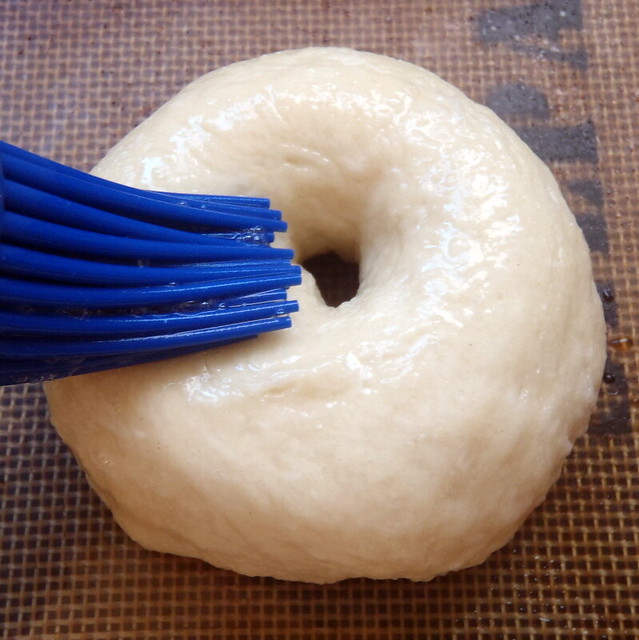
Whisk together the remaining 1 tablespoon of water and the egg white until evenly combined. Brush the egg wash all over the bagels, then sprinkle as desired with poppy seeds, sesame seeds, or coarse salt.

P1033207
 
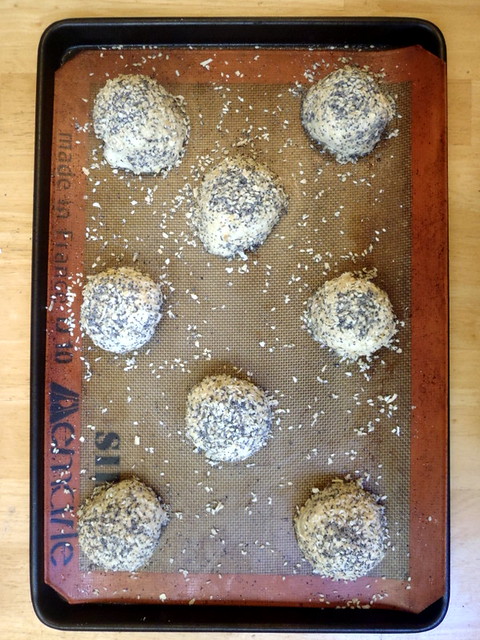
Arrange the bagels on the lined baking sheet about 1 inch apart and bake.

P1033208
 
Rotate the pan after 15 minutes and bake until the bagels are a deep caramel color and have formed a crust on the bottom and top, about 10 minutes more. Remove from the oven and let cool on a rack for at least 30 minutes so the interiors finish cooking and the crusts form a chewy exterior.

P1033209
 
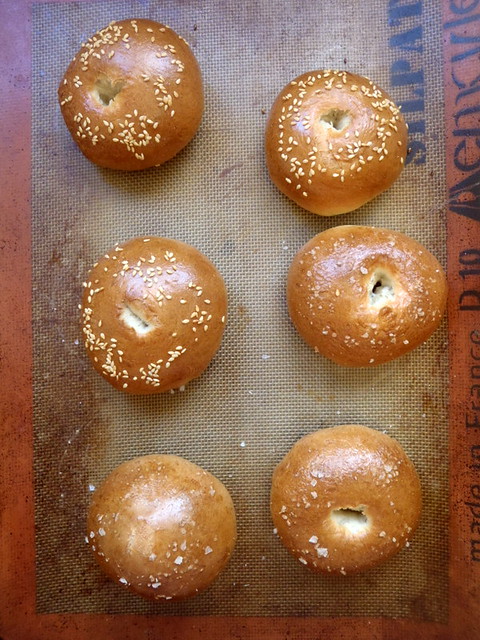
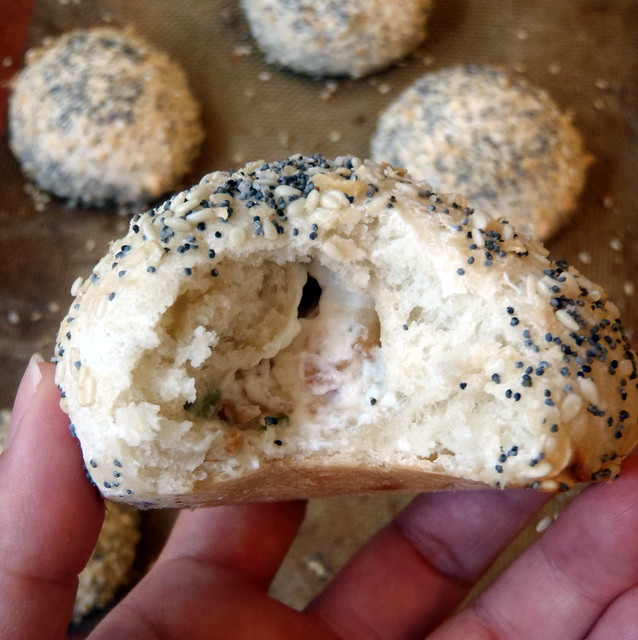
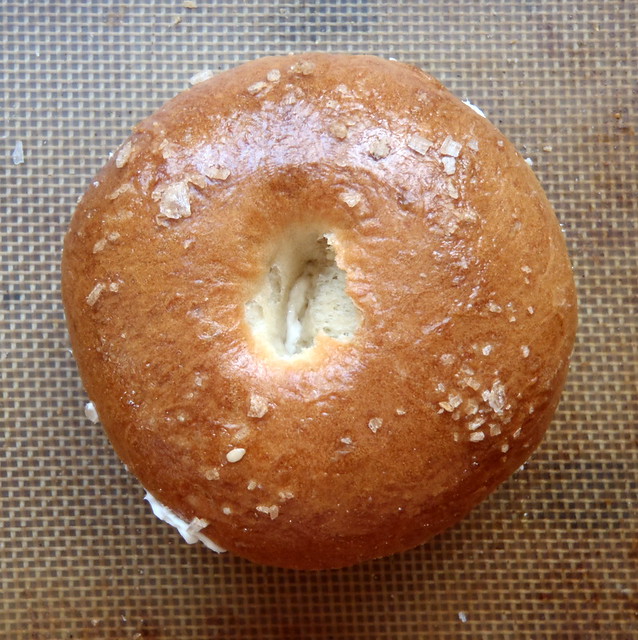
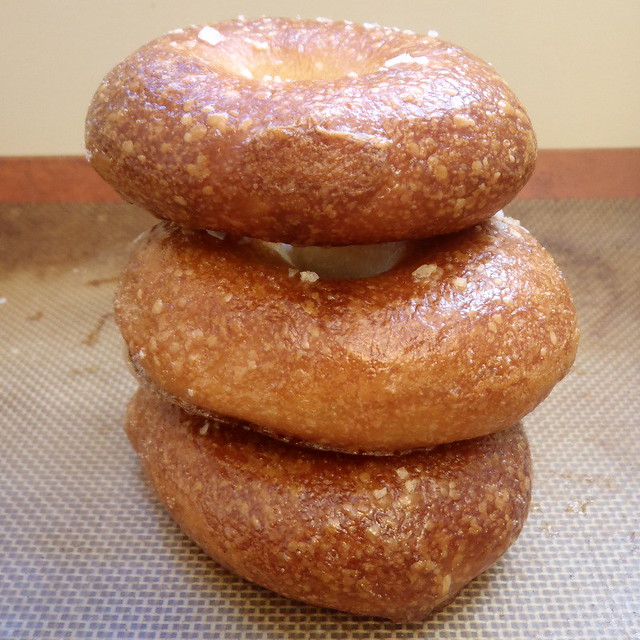
These bagels were exactly what I think of when I think bagel:  dense and chewy with a thick crust that has a "snap" to it.  As you can see in the pictures, they weren't kidding about making sure the hole in the middle was the size of a quarter before boiling and baking.

P1033213

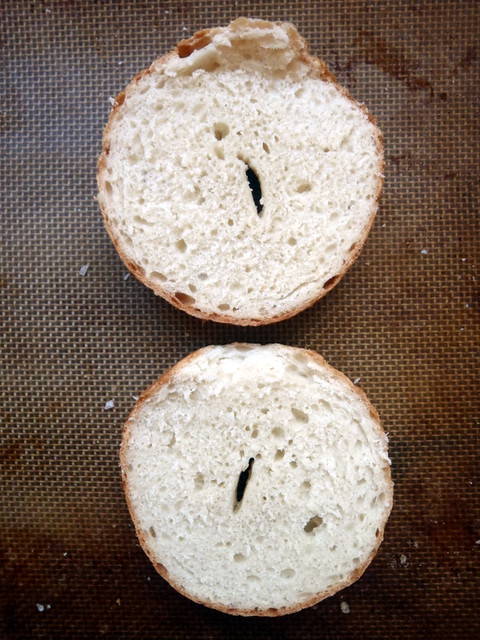
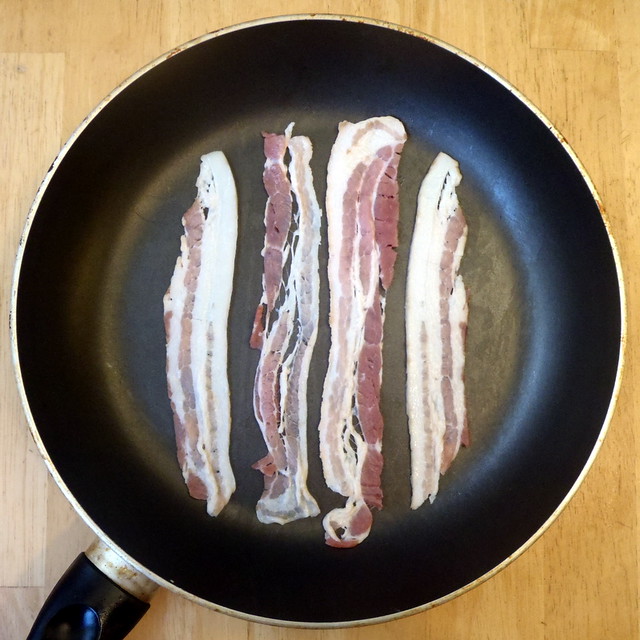
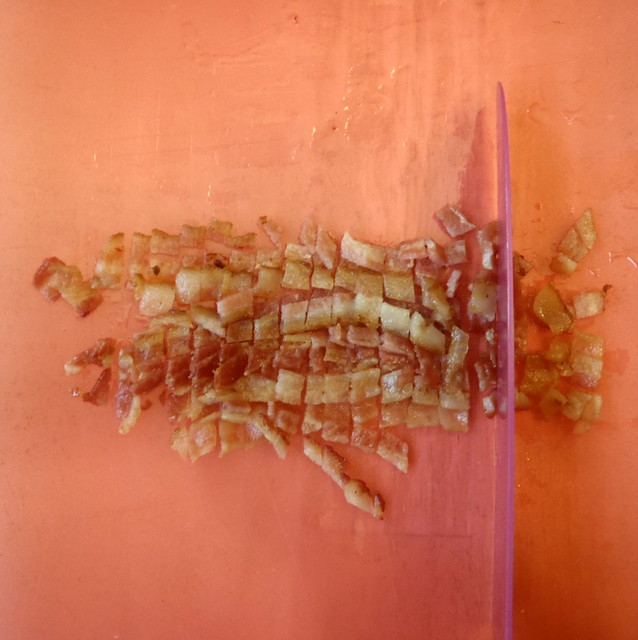
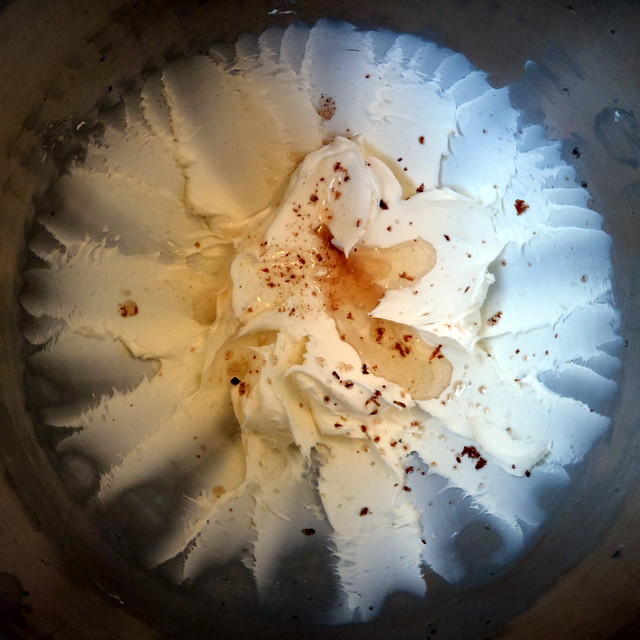
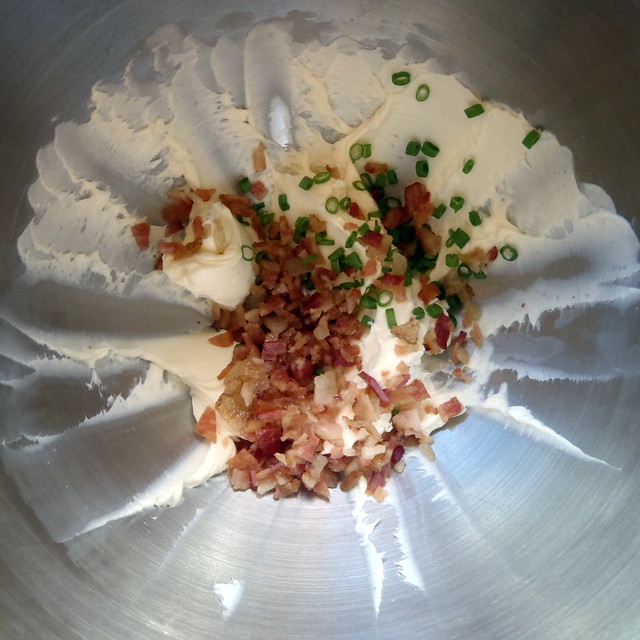
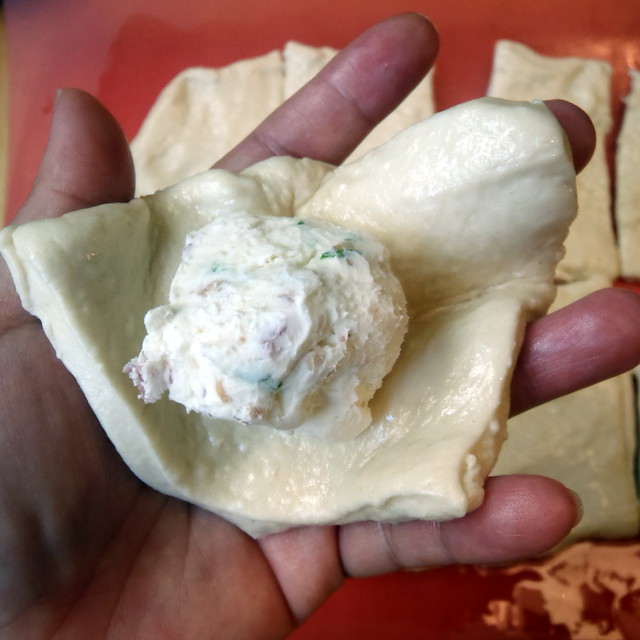
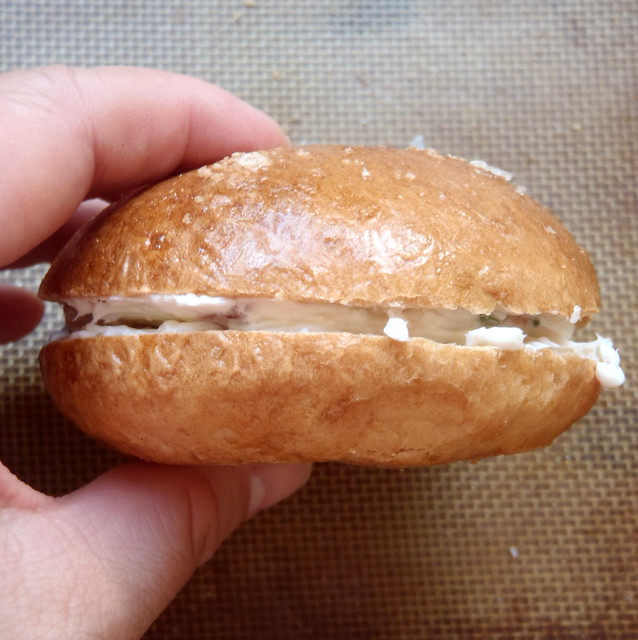
These aren't delicate, little pastries.  They'll stand up to a good schmear and go great with the bacon scallion cream cheese from the Momofuku Milk Bar Bagel Bombs, but even with plain cream cheese they're wonderful.   

P1033216

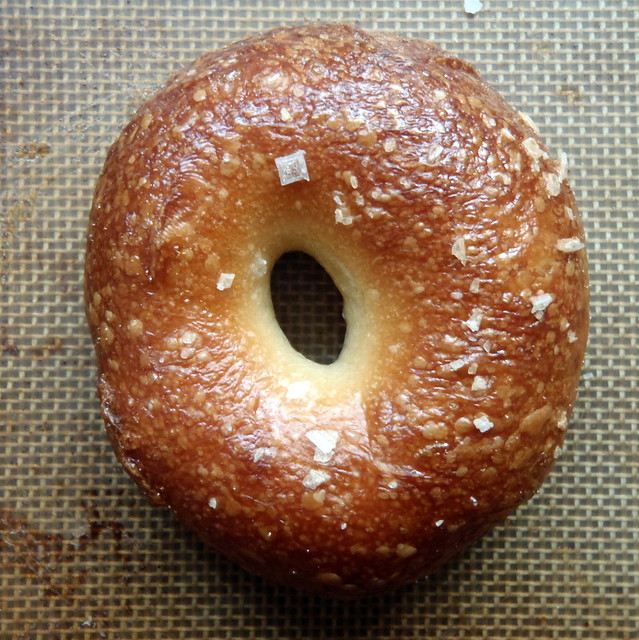
*At this point I decided to freeze some of the bagels.  The night before I wanted to eat them, I would remove however many I wanted from the freezer and put them in the refrigerator to thaw overnight.  Then the next morning I would let them come to room temperature, widen the hole if needed, and proceed with the boiling step.  I found that the bagels I made this way had a deeper flavor and more textured crust (compare the bagel below with the bagel at the top of the post).

Second bagel attempt

Next:  Vanilla Cinnamon Marshmallows
Previously:  Bagel Bombs
Four years ago:  Clementine Cupcakes

Tuesday, January 29, 2013

Bagel Bombs

So far I've made the crack pie, compost cookies, cereal milk, cereal milk panna cotta with cornflake crunch, cereal milk ice cream pie, grapefruit pie, and pretzel milk ice cream pie from the Momofuku Milk Bar cookbook.  Can you tell I really like this cookbook?

For something a little different, i.e. savory, I tried making the Bagel Bombs.  Think freshly baked bread stuffed with bacon and scallion cream cheese and topped with an "everything bagel" mix of sesame seeds, poppy seeds, onion powder, garlic powder, and flaky salt.  Yum, right?

PB013140
 
Bagel Bombs (adapted from Momofuku Milk Bar)
makes 8 buns

For the cream cheese stuffing
2 strips bacon
8 oz. cream cheese
1/2 bunch scallions, chopped
1 teaspoon sugar
1/2 teaspoon kosher salt

For the buns
1 3/4 cups flour
1/2 tablespoon kosher salt
1/2 teaspoon active dry yeast
7/8 cups water, at room temperature
1 tablespoon vegetable oil

For the everything bagel topping
1 egg
1/2 teaspoon water
1 tablespoon white sesame seeds
2 teaspoons black sesame seeds (I couldn't find any so I just added more white sesame seeds)
2 teaspoons poppy seeds
1 tablespoon dried onions
3/4 teaspoons kosher salt
1/2 teaspoon onion powder
1/4 teaspoon garlic powder

PB013109
 
Place the bacon strips on a cold pan and place on low heat.  (Mine were really long so I had to halve them to fit in the pan.)  Cook until nice and crispy, flipping over once the bottom is cooked.

PB013110
 
Transfer the bacon to a cutting board and finely chop.  Reserve the bacon fat left in the pan.

PB013111
 
Put the cream cheese in the bowl of a stand up mixer with the paddle attachment and cream on medium speed until fluffy.

PB013114
 
Pour in the reserved bacon fat and continue creaming on a lower speed.  Add the chopped bacon, scallions, sugar, and salt and mix at low speed to combine.

P1033211
 
Scoop the cream cheese mixture onto a parchment-lined sheet pan in 8 even lumps and freeze until rock hard, 1 to 3 hours.

PB013118
 
To make the dough, stir together the flour, salt, and yeast in the bowl of your stand mixer using the dough hook like a spoon.  Continue stirring as you add the water, mixing for 1 minute, until the mixture has come together into a shaggy mess.

PB013119
 
Engage the bowl and hook and have the machine mix the dough on the lowest speed for 3 minutes, or until the ball of dough is smoother and more cohesive. (If it just looks like a big wet mess, add some more flour until it begins to look more like a ball.)  Then knead for 4 more minutes on the lowest speed.  The dough should look like a wet ball and should bounce back softly when prodded.

PB013122
 
Brush a large bowl with oil and transfer the dough ball into it (um, yeah, I might have accidentally poured a little too much oil into the bowl as evidenced in the pictures). Cover with plastic wrap and let the dough proof at room temperature for 45 minutes.

PB013123
 
Make the everything bagel mix by mixing together the salt, sesame seeds, poppy seeds, dried onions, onion powder, and garlic powder.

PB013128
 
Preheat the oven to 325°F.

Punch down and flatten the dough on a smooth, dry counter top.  Divide the dough into 8 equal pieces.

PB013125
 
Put a cream cheese plug in the center of each piece of dough. 

PB013126
 
Bring up the edges of each round and pinch to seal so that the cream cheese plug is completely contained, then gently roll the ball between the palms of your hands to ensure the bomb has a nice, round, dinner roll-y shape.

PB013131
 
Arrange the bombs 4 inches apart on a parchment- or Silpat-lined cookie sheet.

PB013133
 
Whisk the egg and 1/2 teaspoon water together and brush a generous coat of egg wash on the buns.

PB013135
 
Sprinkle a heavy, even coating of the bagel mix all over the bagel bombs–every possible inch, except for the bottoms, should be coated.

PB013136
 
Bake the bagel bombs for 20 to 30 minutes.  While in the oven, the bombs will become a deep golden brown and a few may have cream cheese explosions.  Continue baking until you see this happen.

PB013139
 
As you can see in the picture above, the bottom right bun burst, so I pulled the baking sheet out, but I probably could have left the buns in there a little longer to get a little brown.

I found that while the buns were really delicious, the dough didn't really remind me of a nice, chewy bagel.  If anything, it kind of reminded me of my mom's hua juan buns.  I went back to the Milk Bar recently and tried the Bagel Bomb there to compare it with the ones I made.  The one I had had probably sat in their display counter for a few hours so it wasn't really a fair comparison, but I really think my homemade ones were better!

PB013144
 
Next:  Homemade Bagels
Previously:  Rainbow Sandwich Cookies
Four years ago:  Dutch Babies

Friday, January 25, 2013

Rainbow Cookie Sandwiches

It all started with unicorn poop.  I saw this post and wanted to make my own, but I didn't want to go out and buy all the glittery stuff.  And I didn't want to use the sugar cookie recipe that she used because I didn't have any shortening.  So I did a quick search for sugar cookie recipes and decided to use Martha Stewart's Ideal Sugar Cookie recipe.

But then I found out why unicorns are now extinct.  Their poop is really hard to work with, so I think they must have been constipated all the time.  This was as close as I could get my cookies to looking like unicorn poop:

Unicorn poop
 
Sure it's kind of pretty, but then I ran into a second problem.  It didn't taste very good.  Or rather, they didn't taste as good as they looked.  Now I know you're probably thinking, well, what did you expect from unicorn poop?

Then a friend made the suggestion of adding icing and making them into cookie sandwiches.  Brilliant!  I decided to go with the filling for the homemade Oreos from the Flour Bakery cookbook.  And since it was so hard to twist the different colors together, I chose to just press the seven different colored doughs together into kind of a flower/pentagonal shape.  I kind of like how the white colored filling looks like clouds, expanding on the whole rainbow theme.

To get the super vivid, technicolored dough, you'll need to use gel food coloring, and not the watery kind you usually find at the grocery store.  If you can't find any though, you could always just make pretty daisy cookie sandwiches by coloring one rope of dough yellow (the regular food coloring should be fine for this purpose) and putting it in the middle of the other white colored ropes.

Rainbow Cookie Sandwiches
makes 4 dozen

1 batch of your favorite sugar cookie dough
Red, orange, yellow, green, blue, and purple gel food coloring

1/2 cup unsalted butter, softened
1 2/3 cup confectioner's sugar
1 teaspoon vanilla extract
1 tablespoon milk
Pinch of kosher salt

P1043178
 
Divide the dough into six equal parts and put each in a separate sandwich bag. (A food scale is helpful for this.)

P1043179
 
Add a few drops of red food coloring into one bag and squish around with your hands until the dough is evenly colored.  Add more food coloring to get it as bright as you like.  Repeat for the 5 other colors.  (I don't have any kids, but speaking as a kid at heart, this part was really fun.  So if you trust your kid, you might ask them to help you out with this part.  But I'd keep them away from any white carpeting, just in case.)

P1043180
 
Roll each colored dough into a long rope, about a centimeter wide.  The ropes will be very long, so it's easier to divide the dough into half first.  Make sure your hands are clean in between each color so that you don't muddy the colors.

P1063188
 
Stack the six different colored ropes together to form a pentagon with one of the ropes in the middle.  Lightly roll this tube around so that the ropes stick to each other.  Cover with plastic wrap and chill in the refrigerator for at least 1 hour.

Preheat the oven to 350°F.  Line two baking sheets with a Silpat or parchment paper and set aside.  If you only have one baking sheet, just bake the cookies in two batches.

P1063189
 
Slice the chilled cookie dough into about 1/8 inch thickness.  Space evenly on the baking sheet.  These cookies will spread a little, so give them at bit of space in between each one.

Rainbow cookies
 
Bake for about 10 minutes; do not allow to brown.  Allow to cool completely.

Rainbow cookies
 
To make the filling, beat the butter until smooth and creamy.  Add the sugar and vanilla extract and beat until smooth.  Add the milk and salt and beat until smooth again.

Flour's Oreo filling
 
Scoop into a pastry bag if you have one.  (I forgot to put the tip in before I filled my pastry bag so I didn't end up using one and just cut a small hole at the corner.)

Rainbow cookies
 
Match similarly shaped cookies together.  If you are using a pastry bag, pipe a layer of filling onto one cookie and top with its matching half, pressing down slightly to make it stick.

Piping the filling
 
If you have the time and inclination, move the pastry bag in and out of the center while moving around the cookie (like you're drawing flower) so that the outside edge of the filling makes a scalloped shape.  Otherwise, just pipe a spiral or if you're not using a pastry bag, use a spatula or butter knife to spread some of the filling onto the cookie.

Rainbow cooking sandwiches
 
If I were to make these again, I think I'd actually use a lemon flavored icing instead of a vanilla flavored one to make them even more delicious!

Next:  Bagel Bombs
Previously:  Pains au Chocolat (Chocolate Croissants)
Three years ago:  Pear Bread
Four years ago:  Luo Buo Gao (Chinese Turnip Cake)

Wednesday, January 23, 2013

Pains au Chocolat (Chocolate Croissants)

When I went to France last summer, I vowed to eat a pain au chocolat every morning.  Think buttery, rich croissant dough wrapped around smooth, dark chocolate.  It's sweet, but not too sweet, so it's possible to eat one a day with an espresso.  And if it's made right, it's flaky and shatters when you bite into it, unlike the sad, soft versions I usually find here in the States.  Sure, you'll probably make a mess eating it, but it's sooo worth it.

While I did not succeed in my goal, I can at least say that now I've made my own, and nothing beats a freshly baked pain au chocolat.  For this recipe you'll need croissant dough and chocolate baking sticks.  I sourced mine from King Arthur Flour, but if you wanted, I bet you could just carefully line up some semi-sweet chocolate chips instead.

Pains au Chocolat
 
Pains au Chocolat (adapted from Bouchon Bakery)
makes 10

1/2 recipe croissant dough, thawed but still cold
20 chocolate baking sticks
1 egg, beaten and strained (I like to thin this out a little with 1 teaspoon of water)

Spray a baking sheet with nonstick cooking spray and line with parchment paper.

Lightly flour the work surface.  Roll the dough out to a rectangle about 19 x 9 inches.  Trim to a 17 ½ x 8 inch rectangle.  Cut the dough in half lengthwise, then cut each half into five 4 x 3 ½ inch rectangles.

PC283176
 
Set a chocolate baking stick ½ inch up from the bottom of each rectangle.  Turn the bottom edge up and over to cover the baking stick.  Set a second baking stick close to the folded dough.

PC283178
 
Brush the top of the dough with the egg wash, roll the dough over the second stick, and continue to roll, finishing with the seam on the bottom.  Set on the baking sheet.  Repeat with the remaining 9 pieces of dough, spacing them evenly on the baking sheet.*

PC283179
 
Brush the pains au chocolat with egg wash.  Cover the pans with plastic tubs or cardboard boxes and let proof for about 2 hours.

PC283185
 
Preheat the oven to 350°F.

Pains au Chocolat
 
Brush the pains au chocolat again with egg wash.  Bake for 35 to 40 minutes, rotating the baking sheet once halfway through baking and separating the pains if they are touching, until the tops are a rich golden brown and no portions, particularly between the layers, look undercooked.  Set the baking sheet on a rack and cool completely.

Pains au Chocolat
 
*At this point I froze some of the shaped pains.  The night before I wanted to eat them, I took them out of the freezer and let them thaw and proof at room temperature overnight.  In the morning I brushed them with egg wash before baking as instructed above. 

Next:  Rainbow Sandwich Cookies
Previously:  Almond Croissants
Three years ago:  Sweet Potatoe Gnocchi with Maple Cinnamon Sage Brown Butter
Four years ago:  Scallion Pancakes