Showing posts with label original. Show all posts

Monday, October 16, 2017

Crane Rangoons


I've been toying with the idea to make these ever since I saw an article on Food52 about someone who folded wonton skins into origami cranes and deep fried them.  Naturally the only logical progression would be to stuff them with cream cheese and make crane rangoons, right?

My mom taught me how to fold paper cranes when I was a kid, and it's basically muscle memory for me, but if you're not familiar with how to fold a crane you'll definitely want to practice with paper first.  One thing I realized as I was doing research for this post is that the way my mom taught me how to fold a paper crane is different than the most popular way on the internet.  In fact, I can't seem to find a single tutorial showing the method my mom taught me!  It's a very disorienting feeling to realize that something that you thought everyone else knew is actually just something only your family knows.

Anyways, for science, I tried both ways with a wonton skin, and there doesn't seem to be too much of a difference.  I think the hollow space in the crane's body may be a tad larger using my mom's method, and the tail and head are a bit fatter so it's a little easier to have a defined head.  Both honestly, I'm not sure those differences are a big enough of a deal to learn a new way to fold a crane, especially since it's hard enough folding one with a wonton skin.


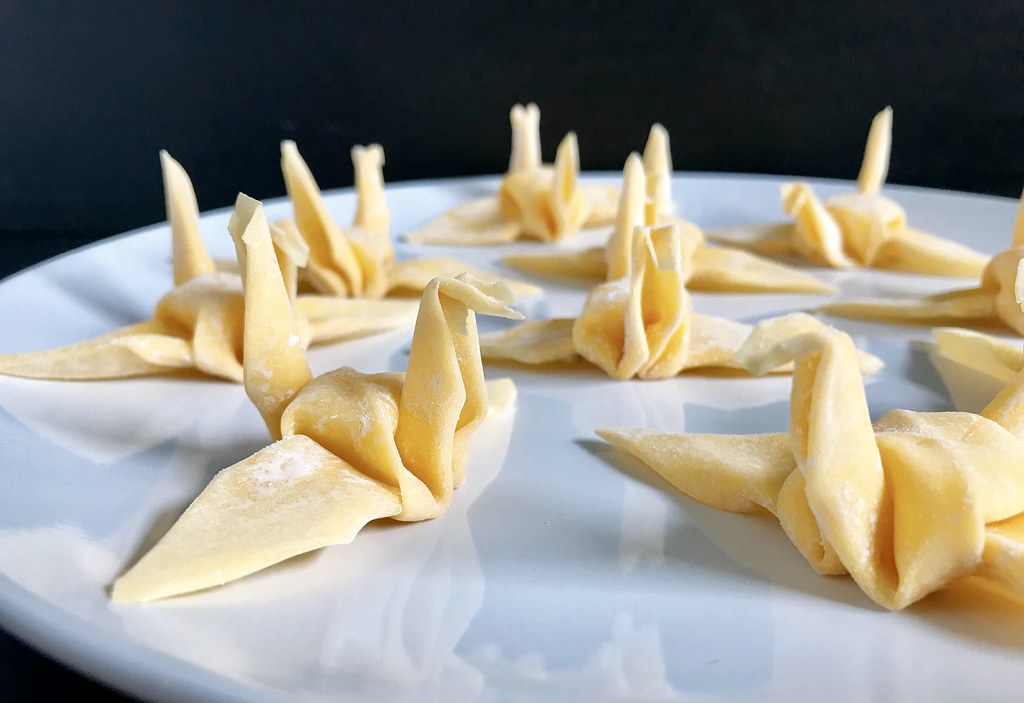
You will want to get the freshest, most pliable wonton skins you can find, and the thinner the better.  The ones I used weren't a perfect square, but you can still get a pretty decent looking crane.  Also, instead of making perfect creases like you'd usually do with paper, you want to try not to press down too hard on any folds so that the wonton skin doesn't break.

After I finished folding the cranes, I microwaved them for 8-10 seconds, just enough to make them a little stiffer, but not totally cooked.  Basically I watched them as they microwaved and pulled them out as soon as they started to distort.  At that point, I was still able to manipulate them back into the desired shape.

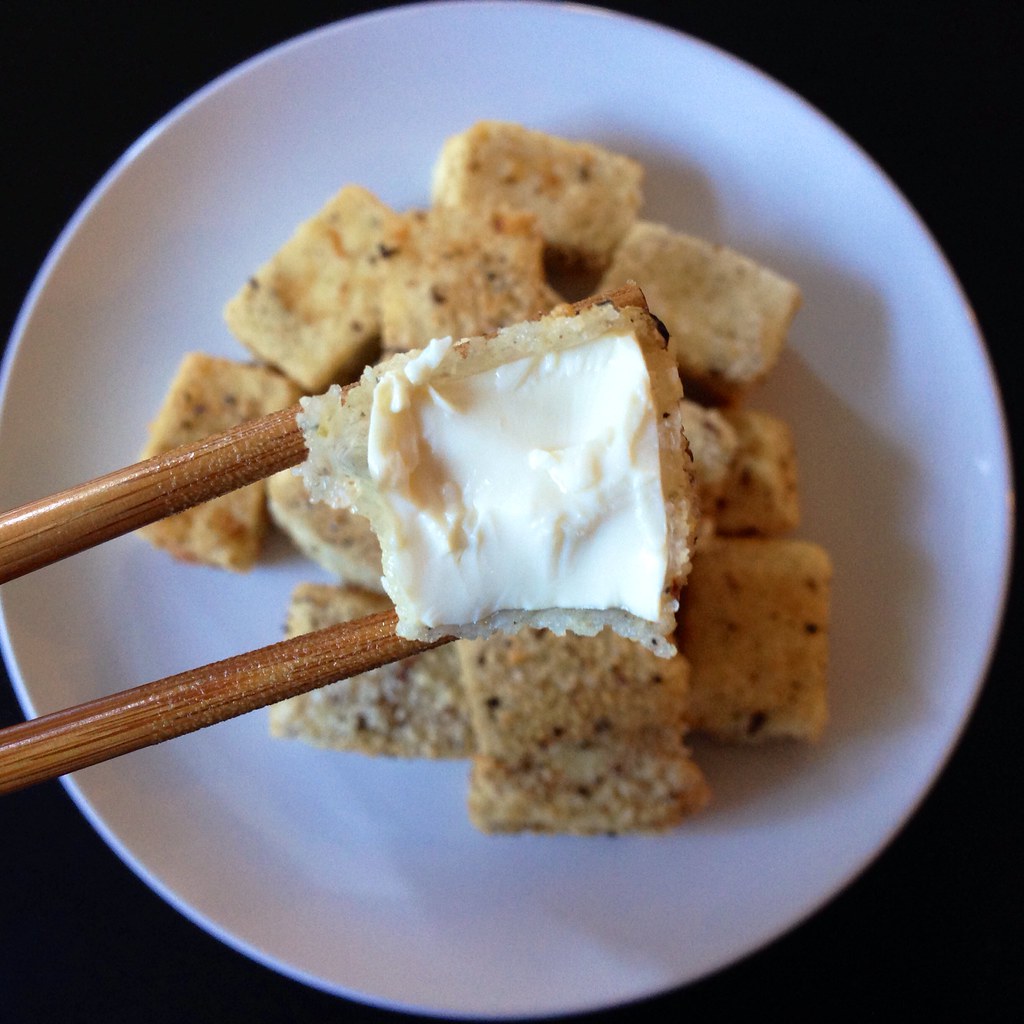
Then I whipped up some softened cream cheese with some chopped scallions and a pinch or two of salt.  To fill the cranes, I used a piping bag with a no. 12 round tip.  A slightly smaller tip would probably have been a little better, but you don't want to use a tiny one or else the scallions might get stuck in the tip.

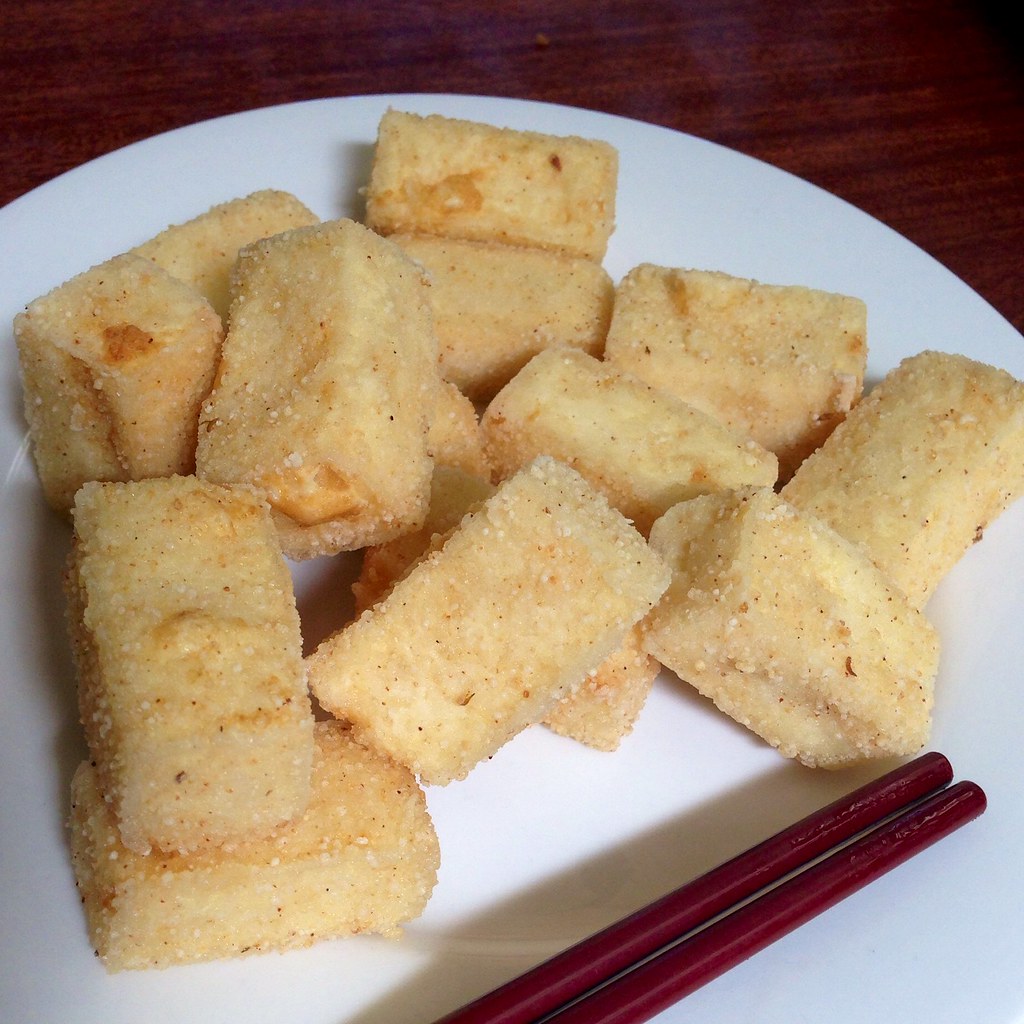
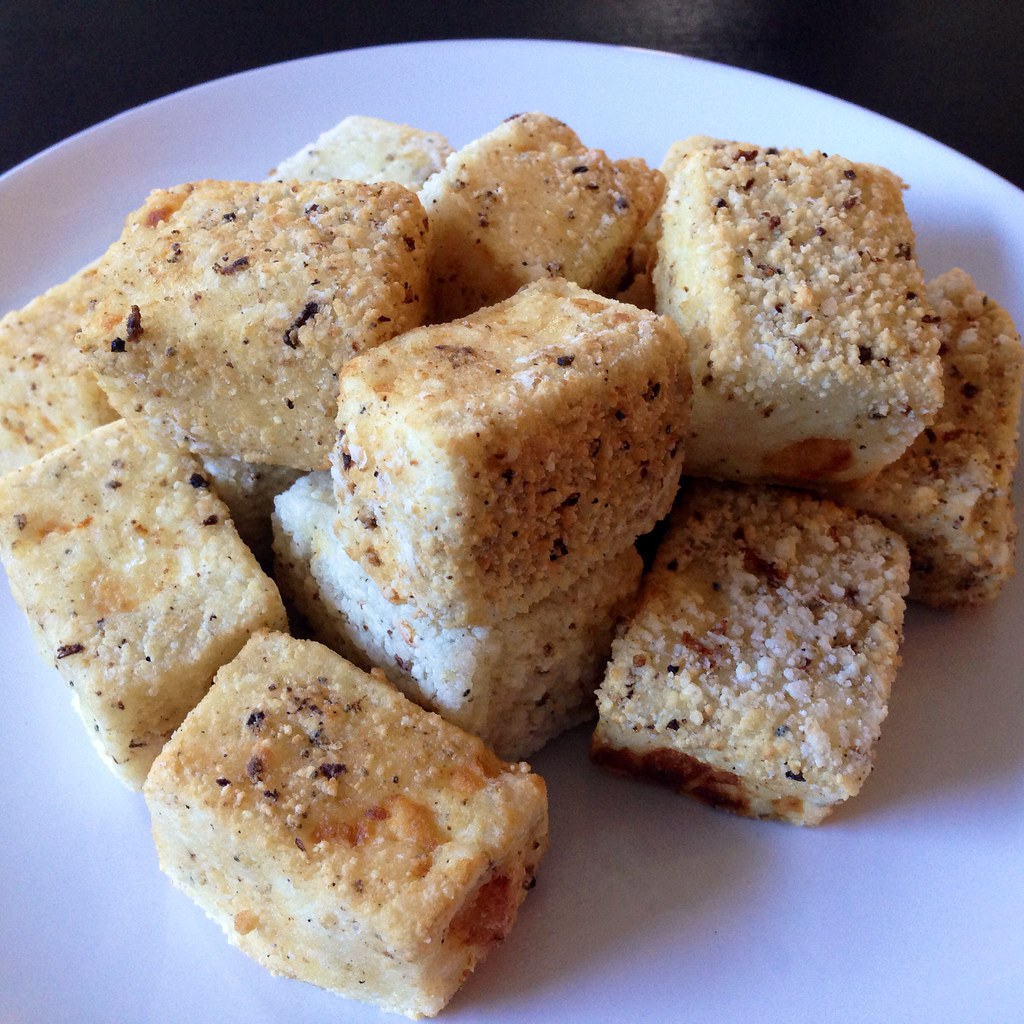
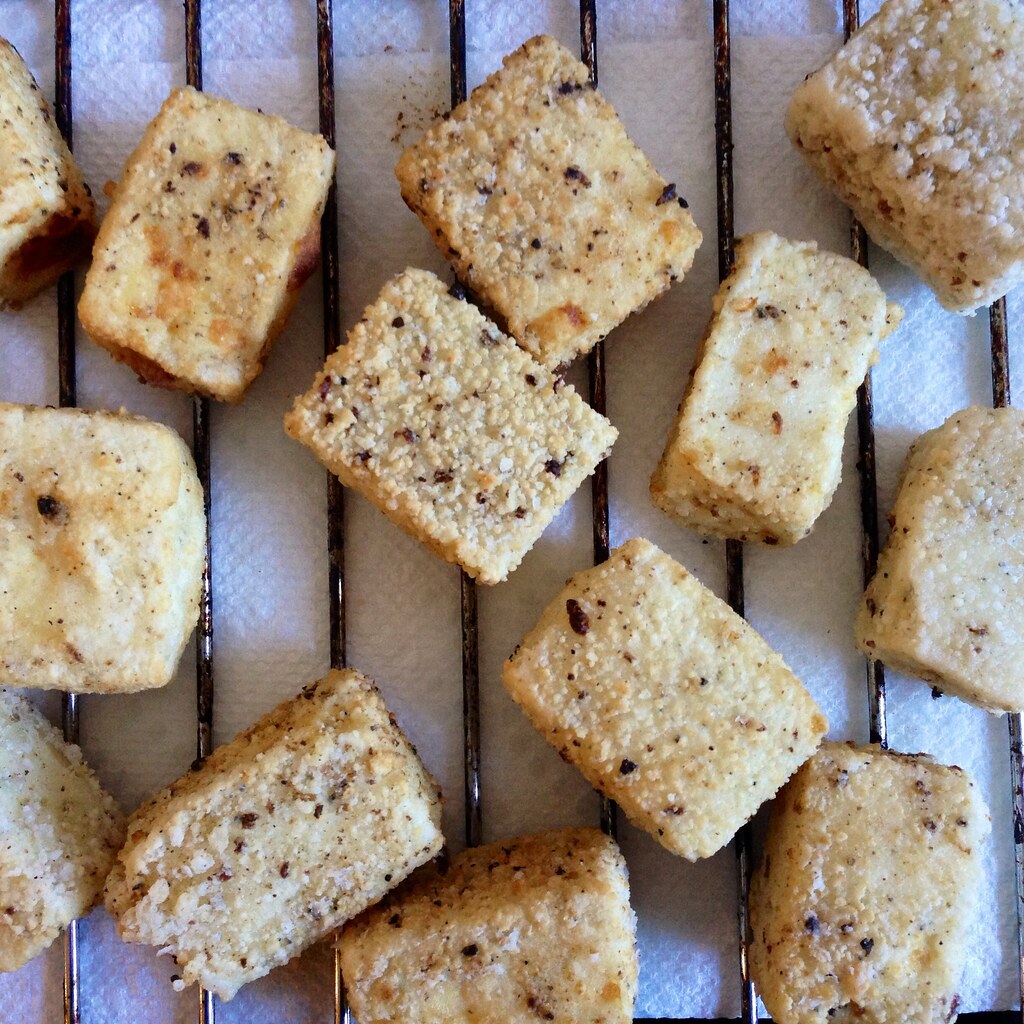
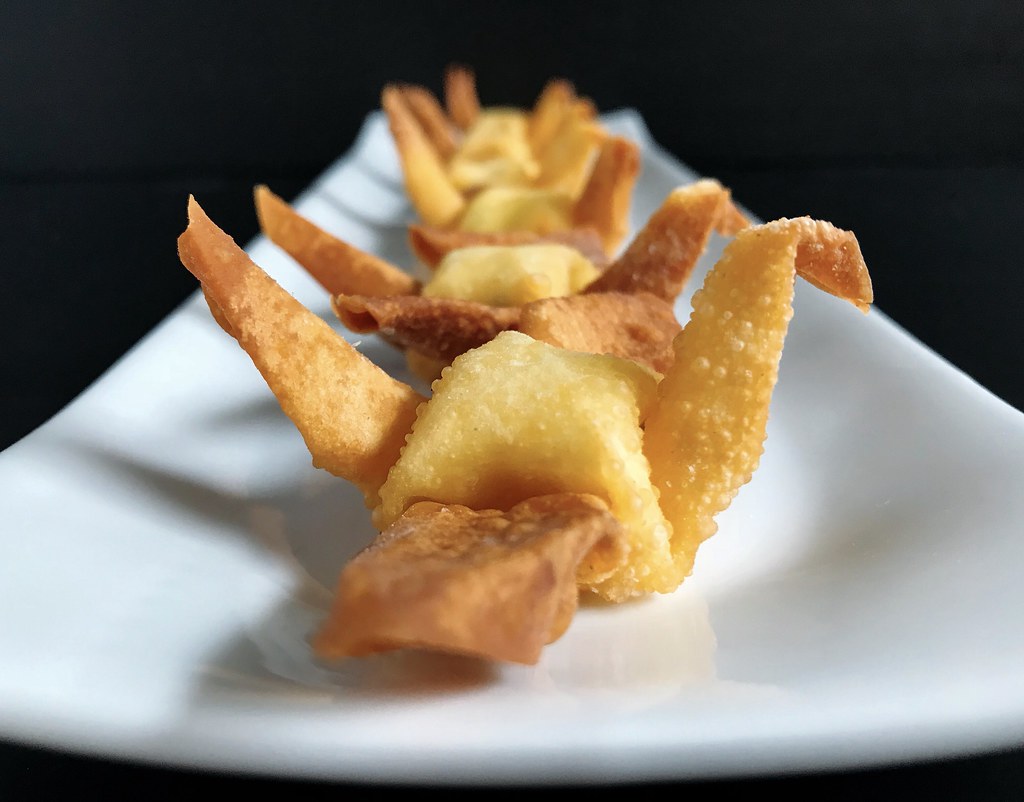
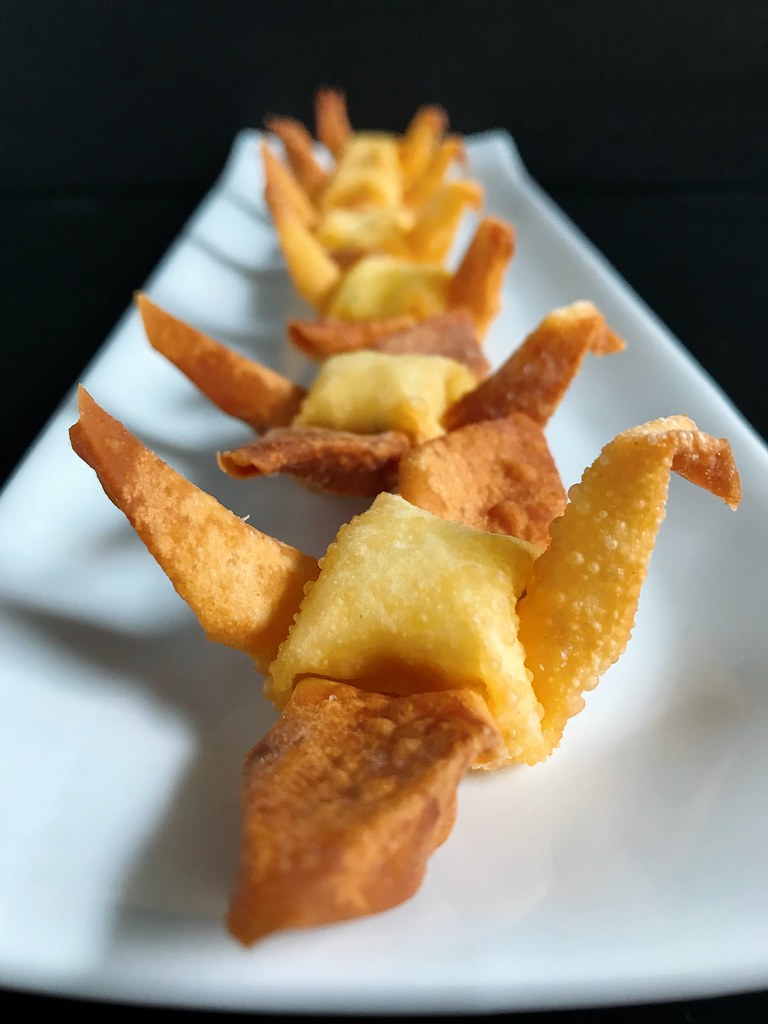
I deep fried the crane rangoons in 375°F oil until they were golden brown.  After some trial and error, it seemed like frying them upside down was the best way to get them to cook as evenly as possible.  When they were done, I let them drain on a paper towel-lined plate.


Tuesday, July 26, 2016

My Mom's Beef and Broccoli Stir Fry

https://www.flickr.com/photos/joyosity/27932366904/in/dateposted-public/

This is one of the original recipes in the cookbook that I made for my mom's Christmas gift 8 years ago.  I would've shared it earlier, except I thought I'd shared it already!  It's a classic dish to order from a Chinese restaurant--velvety strips of marinated beef stir fried with tender crisp broccoli in a flavorful brown sauce--and perfect served over steamed white rice.

To keep the beef tender and not chewy, it's important to slice the strips against the grain.  The addition of cornstarch in the marinade further helps improve the texture of the beef.  Since the broccoli takes a lot longer to cook than the beef, it is cooked separately while the beef is marinating and then added back in at the end.  You'll want to use a large pan with a lid so that you can steam the broccoli after a quick stir fry.

https://www.flickr.com/photos/joyosity/28421948532/in/dateposted-public/

My favorite part about this recipe is the marinade which ends up becoming the sauce upon stir frying with the beef.  It is already quite fragrant due to the soy sauce, garlic, and sesame oil, but my mom adds a secret ingredient that really brings it over the top:  cinnamon!  Only a tiny amount is added that you can't really taste it, but the aromatic spice somehow boosts all the other flavors in the sauce in a way you wouldn't expect.

https://www.flickr.com/photos/joyosity/28549364325/in/dateposted-public/

My Mom's Beef and Broccoli Stir Fry
serves 4

1 lb. flank or sirloin steak, sliced thinly against the grain
1/4 cup soy sauce
2 tablespoons cornstarch
1/4 cup rice wine
1 teaspoon sesame oil
1 1/2 tablespoons sugar
2 garlic cloves, minced
1/4 teaspoon ground cinnamon
3 tablespoons vegetable oil, divided
6 cups broccoli florets
Salt, to taste
1 cup water, divided

Whisk together the soy sauce, cornstarch, rice wine, sesame oil, sugar, minced garlic, and cinnamon.  Toss with the sliced steak and marinate for at least 30 minutes.

In a large wok, heat 1 tablespoon of oil on high and add the broccoli florets.  Season with salt and stir fry until bright green.  Add 1/2 cup water and cover.  Steam until the broccoli is done.  Transfer the broccoli to a bowl, and wipe down the wok.

Add another 2 tablespoons of oil and heat on high again.  Add the steak and marinade to the wok.  Rinse out the container you used to hold the beef with 1/2 cup of water and add to the wok.  Stir fry until the beef is just done and no longer red.  Add the broccoli back into the wok and continue to stir fry for another minute or two to combine.  Serve hot.

https://www.flickr.com/photos/joyosity/28265304420/in/dateposted-public/

Next:  Zucchini Pizza
Previously:  How to Make an American Flag Cake
Two Years Ago:  Cleveland Cassata Cake (Bonus:  In a Jar!)
Three Years Ago:  Backyard Mint Ice Cream with Dark Chocolate Freckles
Six Years Ago:  Slow Cooker Bolognese Sauce
Seven Years Ago:  Curried Carrot Soup

Wednesday, April 27, 2016

Sesame Soba Noodles with Avocado Rose


Usually when I get an avocado in my Boston Organics delivery, I just hope that I'll be able to figure out how to use it before it gets overripe.  But this time I knew exactly what to do with it; I was going to attempt an avocado rose!  I had first discovered these a few weeks ago thanks to a post on Food52 on the trend taking over Instagram.

To make one, slice an avocado in half.  You want a ripe avocado, but not one that is so soft it'll be hard to manipulate without smushing.


Remove the pit, then carefully peel away the skin.  See that little bit of flesh left on the skin below?  It ended up being the only blemish on my rose.  =(


Place on half cut side down on a cutting board and slice the avocado thinly.  It helps to use a paring knife since it has less surface area to stick to the avocado than a chef's knife (which I found out the hard way).


Start shifting the slices diagonally.


Try to make as long of a chain as you can make without breaking it.


Start curling in one end of the chain and continue rolling it in until you've made a rose!


To have something to eat with the avocado, I tried making some sesame soba noodles based on my go to peanut butter noodle recipe but using tahini instead of peanut butter.  I really liked how the buttery avocado added a cool creaminess to the sesame noodles, so much so that I'd pair the two again even if I didn't have enough time to make an avocado rose!


Sesame Soba Noodles with Avocado
makes 2 servings

2 handfuls of soba noodles
3 tablespoons tahini
3 tablespoons soy sauce
1 tablespoon toasted sesame oil
1 tablespoon rice wine vinegar
A pinch of sugar
1 avocado
Sesame seeds and chopped scallions, for garnish (optional)

Bring a pot of salted water to boil and add the soba noodles.  Cook until done.  Drain in a colander and run under cold water so that the noodles don't stick to each other.

Mix the tahini, soy sauce, sesame oil, rice wine vinegar, and sugar until it forms a smooth paste.  Toss with the noodles, adding water to thin, if desired.

Serve with sliced avocado and garnish with sesame seeds and chopped scallions, if desired.


Next:  Tortilla Española (Spanish Potato Omelet)
Previously:  Will It Puffle?
Last Year:  Scoglio all'Andiamo (Saffron Fettuccine with Seafood in a Lemon Garlic White Wine Sauce)
Two Years Ago:  Easy Chilquiles with Fried Egg and Avocado
Six Years Ago:  Lilikoi Malasadas (Portuguese Donuts filled with Passion Fruit Curd)
Seven Years Ago:  Moffles!

Monday, April 18, 2016

Will It Puffle?


I was so excited when I received an electric bubble waffle maker from my brother and sister-in-law for my birthday last year.  I had visions of making the eggettes I used to get from NYC's Chinatown and SF's Genki and maybe even making a puffle cone a la Cauldron Ice Cream or Monkey King Tea (below).  But after trying the recipes I found on-line for eggettes and puffle cones (basically the same recipe) I'm still not satisfied with the results.  I even played around a little with the ingredients but nothing I made recreated the aroma, texture, or taste I was looking for.


Not to be deterred, I decided to experiment with some other batter-based foods I had made before.  First up was pão de queijo (Brazilian cheese bread).  Since some of the eggette recipes used a little tapioca flour, I figured it would be fun to try an entirely tapioca flour based batter in the bubble waffle maker.  The results were incredible!

https://www.flickr.com/photos/joyosity/24500005166/in/dateposted-public/

The bubble waffle maker was able to encapsulate the chewy, airy bread in a crispy crust in a fraction of the time it takes to bake the pão in the oven.  And it's sooooo cute!

https://www.flickr.com/photos/joyosity/26219396352/in/dateposted-public/

I also tried Korean pajeon (above) and Japanese okonomiyaki (below), and the results were decent, but not really worth writing about.

https://www.flickr.com/photos/joyosity/26307581532/in/dateposted-public/

Probably my favorite use of the bubble waffle maker has to be the Taiwanese oyster omelette.  Since I remember the sweet potato starch batter to be super sticky, I added a half tablespoon of oil to the batter itself and made sure to oil the waffle iron well before adding the batter.  And even though I took those precautions, I was still surprised when the omelette came out rather easily from the iron.  

https://www.flickr.com/photos/joyosity/26169045712/in/dateposted-public/

As with the pão de queijo, I loved how the outside of the batter got super crispy but still stayed moist inside.  And the shape of the bubble waffle maker gave it a lot more nooks and crannies for an even higher crispy to chewy ratio!


So does anyone else have a good eggette recipe or recommendation for what to try next in the bubble waffle maker?

Next:  Sesame Soba Noodles with Avocado Rose
Previously:   The 4-Hour Baguette
Last Year:  Gordan Ramsay's Sublime Scrambled Eggs - 2 Ways
Two Years Ago:  Nutella Mini Crepe Cakes
Six Years Ago:  The Best Scones in the World
Seven Years Ago:  Samoa Cupcakes and the Cupcake Exchange

Wednesday, March 16, 2016

Tropical Pulled Pork on Griddled Banana Bread Sandwiches

https://www.flickr.com/photos/joyosity/25635814581/in/dateposted-public/

Back in January I found an incredible deal for airfare to St. Thomas so I went ahead and booked it along with four nights at the Marriott Frenchman's Reef using my points.  Even though the weather forecast the weeks up to the trip showed a lot of possible rain, it turned out to be beautiful and sunny every day we were there!

https://www.flickr.com/photos/joyosity/25180348454/in/dateposted-public/
Sunrise at the Frenchman's Reef

On our third day, my friend Sooyun and I took the passenger ferry from Red Hook to Cruz Bay in St. John and hiked the Lind Point Trail to Honeymoon Beach.  After some relaxing time on the beach, we continued over to the Caneel Bay Resort for lunch.  Little did I know I was about to have one of the best sandwiches I had ever eaten.  We almost didn't order it (I was craving a turkey sandwich, and Sooyun almost ordered something else before I reminded her about the rum pork on crispy banana bread sandwich she had pointed out earlier), but after tasting it, I'm so grateful we did.  I think it was that perfect balance of salty pulled pork and sweet banana bread plus the crunch from a red cabbage slaw.  The memory of this sandwich haunted me for over a month before I finally decided to try and recreate it.

https://www.flickr.com/photos/joyosity/25810827555/in/dateposted-public/
Floating at Honeymoon Beach, St. John

For the pulled pork I pretty much followed my slow cooker kalua pork recipe except I added a quartered orange and garlic plus a splash of passion fruit rum.  For the banana bread I followed this basic recipe but you can just use your favorite recipe as long as the bread can be sliced and griddled without falling apart.  Then I made a quick cabbage slaw using coconut white balsamic vinegar, lemon sugar, and shredded red cabbage.  If you don't have smoked sea salt, passion fruit rum, coconut white balsamic vinegar, and lemon sugar, you should be fine using regular sea salt, another rum (or skipping the rum altogether), a light vinegar (like cider or rice wine), and regular white sugar.  But then where would be the fun in that? 

https://www.flickr.com/photos/joyosity/25104257803/in/dateposted-public/

Tropical Pulled Pork on Griddled Banana Bread Sandwiches
makes about 8 sandwiches

For the pulled pork:
3 lbs. boneless pork butt/shoulder
2 tablespoons smoked sea salt
1 orange, quartered
6 garlic cloves, peeled
1/4 cup rum (tropical flavor like passion fruit or mango preferred)

Using a steak knife, poke the pork all over and rub with smoked salt.  Place in the slow cooker along with the orange quarters and garlic cloves.  Turn on low and cook for 12 hours. 

Halfway through, flip the pork and add the rum.

When done, remove the excess fat and shred the pork with a fork.

For the red cabbage slaw:
3 cups shredded red cabbage
1 teaspoon kosher salt
1 tablespoon coconut white balsamic vinegar (or other light vinegar)
1 teaspoon lemon or white sugar

Place the shredded cabbage in a salad spinner or a colander over a bowl.  Sprinkle the salt over the cabbage and mix.  Let sit for an hour, then rinse and squeeze/spin out the excess water.

Transfer the cabbage to a sealable container.  Add the vinegar and sugar and mix.  Cover and store in the refrigerator for at least 30 minutes, until ready to use.

For the sandwiches:
2 loaves of your favorite banana bread (or just one loaf if you want to make open faced sandwiches)
Butter

Slice the banana bread to the thickness you prefer and butter both sides.  Heat a pan over medium-high heat and cook the banana bread slices, turning once, until both sides are browned.

Top one slice with the pulled pork and slaw and add the other slice.  Serve with plantain or yucca chips and die of happiness.

https://www.flickr.com/photos/joyosity/25180343634/in/dateposted-public/
Sunset at Frenchman's Reef

Next:  The 4-Hour Baguette
Previously:  Pad Thai
Last Year:  Homemade Squid Ink Pasta
Two Years Ago:  Miso-Glazed Eggplant
Three Years Ago:  Peking Duck Pizza
Six Years Ago:  Bacon Fat Caramels
Seven Years Ago:  St. Patrick's Day Maki

Monday, May 11, 2015

Scoglio all'Andiamo (Saffron Fettuccine with Seafood in a Lemon Garlic White Wine Sauce)

https://www.flickr.com/photos/joyosity/17320160279/in/dateposted-public/

Last year I was lucky enough to win two nights at a Marriott resort of my choosing in the Caribbean through an Instagram contest.  At first I considered going to St. Kitts & Nevis since I had never been before, but the airfare was outrageous, so I ended up choosing to go back to Grand Cayman.  I used my points to stay an extra two nights at the Ritz Carlton and brought along two girlfriends. 

https://www.flickr.com/photos/joyosity/17475397226/in/dateposted-public/

I was sad to find out that the Periwinkle restaurant at the Ritz was gone because I had the best truffle fries of my life there a few years ago, but when I found out that the Italian restaurant that had replaced it, Andiamo, had the truffle parmesan fries on their menu, I insisted that we go there for our last dinner on the island.

https://www.flickr.com/photos/joyosity/17501766415/in/dateposted-public/

The fries were as good--if not better--than I remember them being, but I was also really impressed with their version of pasta allo scoglio, also known as pasta ai frutti di mare.  Scoglio means "rocky seashore" in Italian, and all types of seafood can be used in this dish.  Shrimp and mussels were on sale, so that's what I used, but clams, scallops, and calamari would also work.

Unlike most recipes for pasta allo scoglio, there were no tomatoes in Andiamo's version; all I tasted was a clean white wine sauce with garlic and lemons spiked with the delicious juices from the clams and mussels.  The sauce was so good we asked for another basket of bread just so we could soak it all up.  The pasta they used was a saffron fettuccine, which I attempted to make from scratch.  Since I didn't have any saffron on hand, I added some saffron salt to the fresh pasta dough and finished the dish with more saffron salt.  If I were to make this again, I'd probably add a pinch of turmeric to the pasta dough to bring out the bright yellow coloring more.

https://www.flickr.com/photos/joyosity/16881598383/in/dateposted-public/

Scoglio all'Andiamo (Saffron Fettuccine with Seafood in a Lemon Garlic White Wine Sauce)
serves 2-3

1/4 cup butter
2 garlic cloves, minced
2/3 cup dry white wine
1 lb. mussels and/or clams
1 lb. peeled raw shrimp and/or scallops
1/2 lb. dried fettuccine or 3/4 lb. fresh fettuccine
Juice from 1/2 a lemon
1 tablespoon chopped parsley (optional)
Saffron salt (if you have it, if not, regular sea salt is fine)
Freshly ground pepper
Lemon slices

Bring a pot of salted water to boil.  Cook the fettuccine to al dente (if using fresh pasta, wait until the after adding the shrimp to the pan to start cooking the pasta).

In the meantime, melt the butter over medium-low heat in a large skillet.  Add the garlic cloves and saute for a minute.  Add the white wine and the mussels and/or clams.  Cover and let steam until the shellfish have opened.  Use a slotted spoon to remove the shellfish from the skillet and set aside in a bowl.

Add the shrimp and/or scallops and cook until just opaque.  Add the cooked pasta, lemon juice, parsley, and shellfish back to the skillet and toss well.  Season with salt and pepper to taste.  Serve immediately with lemon slices and crusty bread to soak up any leftover sauce.

https://www.flickr.com/photos/joyosity/16881596943/in/dateposted-public/

Next:  Taiwanese Oyster Omelet (Without the Oysters)
Previously:  Gordon Ramsay's Sublime Scrambled Eggs - Two Ways
Last Year:  Candied Bacon Chocolate Chip Pancakes
Five Years Ago:  Passion Fruit Ice Cream
Six Years Ago:  Carrot Cake Ice Cream

Monday, December 1, 2014

Pull-Apart Thanksgiving Leftover Stuffed Bread

https://www.flickr.com/photos/joyosity/15917680195/

I hosted Thanksgiving for my friends this year and ended up with a ton of leftovers:  turkey meat, mashed potatoes, candied sweet potatoes, stuffing, and cranberry sauce.  The one dish that was all gone (or claimed by guests) was my corn souffle!  I didn't mind having all the leftovers, though, because I've been wanting to make pull-apart stuffed bread after seeing this post a few weeks ago.  I decided to make the bread dough using Two Red Bowl's simplified recipe for Hokkaido milk bread, which turned out wonderfully soft and fluffy, just like the ones I made before.  This time I used the tangzhong method, which means first making a cooked flour paste (the tangzhong).  This paste is incorporated into the rest of the dough and is what makes it so soft and fluffy.

https://www.flickr.com/photos/joyosity/15917680455/

In terms of the types of filling, I'd go with softer, mushier textures like mashed potatoes, stuffing, or sweet potatoes and stay away from anything that could possibly poke through the dough like fresh green beans (canned green beans might be okay).  I ended up stuffing each roll with a bit of all the different leftovers since that's how I roll, but you can stuff them however you like.

https://www.flickr.com/photos/joyosity/15298028243/

Pull-Apart Thanksgiving Leftover Stuffed Bread (adapted from Two Red Bowls)
makes 24 small rolls

6 tablespoons water
2 tablespoons plus 2 3/4 cup bread flour, divided
1/2 cup milk
1 1/2 teaspoon active dry yeast
1 teaspoon salt
1/4 cup sugar
1 egg, beaten
2 tablespoons butter
About 2 cups Thanksgiving leftovers (cubed turkey, mashed potatoes, candied sweet potatoes, stuffing, etc.)

To make the tangzhong, whisk the water and 2 tablespoons of flour together in a small saucepan until there are no lumps left.  Heat over medium-low heat, whisking all the while, until the mixture just starts to gel.  As soon as lines start to appear in the mixture when stirred, remove from heat and allow to cool to room temperature.

Heat the milk to about 110°F by heating in the microwave for 15-30 seconds.  Sprinkle the yeast over the milk and set aside to allow the yeast to activate, about 5-10 minutes.

Sift or whisk together the rest of the flour (2 3/4 cups), salt, and sugar in the bowl of a stand mixer.  When the yeast is ready, add the tangzhong and egg and whisk to combine.  Make a well in the flour mixture and pour in the wet ingredients. Stir until the mixture forms a loose, shaggy dough, then use the dough hook of the stand mixer to knead until the dough forms a semi-smooth ball.

Add the butter to the dough, one tablespoon at a time, kneading after each addition.  Knead until the butter is fully incorporated and the dough becomes smooth and elastic.

Place the dough in a large bowl with plenty of room and cover loosely with plastic wrap or a damp towel. Let rise for 1-2 hours in a warm, draft-free area, or until well-doubled. Alternatively, let the dough rise overnight in the refrigerator; the dough should be fine for up to 24 hours.  Line a round cake pan or square brownie pan with parchment paper.

Once the dough has doubled, punch it down and divide into 24 even pieces.  You can either use a food scale or divide the dough in half three times and then into thirds (2 * 2 * 2 * 3 = 24).  Working one a a time, roll out the dough into a flat circle about 3" in diameter.  If you can, try to make the edges thinner than the middle, but it's not super critical.

https://www.flickr.com/photos/joyosity/15730376620/

Drop a heaping tablespoon of Thanksgiving leftovers onto the middle of the dough.  Bring the edges of the dough together and seal.  I like to do this using the method I learned to wrap xiao long bao, but since the seal will be concealed on the bottom, it's fine to just bring four opposite parts of the dough together and then pinch together the edges in between together.  You just want to make sure that the filling is sealed inside.  Roll the ball a bit in your hands to reform a sphere.

https://www.flickr.com/photos/joyosity/15917035852/

Arrange the stuffed dough balls seam side down in the prepared pan just so they touch each other.  You may run out of room in the pan (I could only fit 19 balls, so I set the remaining in a smaller baking dish).  Brush the top of the rolls with olive oil and let the dough proof again until they are almost doubled, about another hour or so.  Preheat the oven to 350°F.

Bake the rolls for about 25-35 minutes, until golden brown.  Serve warm with butter and any leftover cranberry sauce and/or gravy.

https://www.flickr.com/photos/joyosity/15730378250/

Next:  Puppy Chow Pie
Previously:  Jeni's Crème Sans Lait (Dairy Free Ice Cream)
Last Year:  Thai Coconute Sticky Rice with Mango
Two Years Ago:  Three Bean Chili
Five Years Ago:  Kettle Corn
Six Years Ago:  Salted Butter Caramel Ice Cream

Tuesday, September 9, 2014

Ginger Scallion Lobster Buns

https://www.flickr.com/photos/joyosity/15138821161/

This past Labor Day I went on a road trip to Portland, ME with two of my favorite people in the world.  I insisted that we go to Eventide Oyster Co. since I was still dreaming about their lobster rolls from my trip 2 years ago.  This time the Hollandaise lobster roll had been replaced on their menu by a ginger scallion version, which I just had to try, along with my favorite from last time, the brown butter lobster roll.

https://www.flickr.com/photos/joyosity/14955116369/

I took a bite of the ginger scallion lobster roll first and decided right then and there that it was my favorite lobster roll ever, until I took a bite of the brown butter one.  Both were just so good in their own special way!  I knew I had to try to recreate the ginger scallion lobster roll at home, and this time, I was going to make my own steamed buns.  I used my mom's recipe for making hua juan except I omitted the sesame scallion glaze and just shaped the rolls by rolling the dough into a long snake and cutting them into about 5" logs.  I also made some hua juan to use for buns since I figured it was in the same flavor profile.

After trying both, I really preferred the sandwiches made with the hua juan.  They're just so pretty, and the added flavor and texture really complements the ginger scallion lobster well.  You can also just use store bought steamed buns, but I guarantee that the fresh made ones will be better than anything you can get from a store.

https://www.flickr.com/photos/joyosity/14955254728/

Ginger Scallion Lobster Buns
serves 4-6

3 1.5 lb lobsters, steamed
3/4 cup chopped scallions
1 tablespoon grated ginger
1 tablespoon minced garlic
1 tablespoon sesame oil
1 teaspoon soy sauce
1/2 teaspoon rice wine vinegar
1/2 teaspoon salt
12 hua juan or steamed buns

Remove the meat from from the claws, knuckles, and tail of the lobsters.  Chop or tear into small pieces and mix with the scallions, ginger, garlic, sesame oil, soy sauce, rice wine vinegar, and salt.

Slice the hua juan or steamed buns in half, leaving one side attached.  Fill the buns with the ginger scallion lobster salad and enjoy!

https://www.flickr.com/photos/joyosity/14955253608/

Next:  Hokkaido Milk Bread Three Ways (Traditional, Braided, and Taro Swirl)
Previously:  Taiwanese Taro Swirl Mooncakes
Last Year:  Lobster Bisque

Thursday, August 28, 2014

Salt and Pepper Tofu

https://www.flickr.com/photos/joyosity/14838698529/

The picture above probably doesn't look that impressive, but that there was the best tofu I've ever had in the Western Hemisphere.  It's the salt and pepper tofu from Northwest Tofu, which my friend Mitchell recommended to me the last time I was in Seattle.  It's a simple enough dish--tofu dusted with starch, salt, and pepper and then deep fried--but that description barely does it justice.  The crust is super thin and light, but full of crispy texture and perfectly seasoned.  The tofu itself is so soft and custardy it pretty much melts in your mouth.

https://www.flickr.com/photos/joyosity/14838888117/

I tried to recreate the dish at home using firm silken tofu, cornstarch, and finely ground Sichuan peppercorns and sea salt.  I think it turned out pretty well for my first attempt, but the coating got a little thicker than I wanted, and the tofu was firmer than I remember the original being.  I can't imagine trying to keep a cube of soft silken tofu intact through the coating and frying phases though; the firm tofu was already breaking up a bit even though I was trying to be very careful.  That said, I think my version was still really tasty.  =)  Next time I might try using tapioca flour or potato starch instead of cornstarch just to see if that ends up being closer to what I remember.

https://www.flickr.com/photos/joyosity/14838680909/

Salt and Pepper Tofu
serves 1-2

12 oz. package of firm silken tofu
5 tablespoons cornstarch
2 teaspoons sea salt, finely ground
1 teaspoon Sichuan or black peppercorns, finely ground
Vegetable oil, for frying

Pat the tofu dry with paper towels.  Cut into 1" cubes.

Mix together the cornstarch, salt, and ground pepper.  Pour enough oil into a saucepan to reach 1" depth and heat over medium high.  The oil is ready for frying when it reaches 350°F or bubbles start to form when you dip a wooden utensil in the oil. 

Working in small batches, carefully coat the tofu cubes in a thin layer of the cornstarch mixture, the thinner the better.  Fry the tofu, turning after a minute or so, until all sides are a pale, golden brown.  Remove with a slotted spoon and let drain on paper towels.  Serve immediately.

https://www.flickr.com/photos/joyosity/15025416745/

Next:  Melanzane alla Parmigiana (Eggplant Parmesan)
Previously:  Crispy Skinned Salmon Teriyaki
Last Year:  Jim Lahey's No-Knead Bread

Wednesday, July 30, 2014

Strawberry Pop Tart Slab Pie

 https://www.flickr.com/photos/joyosity/14584412708/

Ever since I saw this post for a S'mores Pop Tart slab pie, I just knew I had to make my own version of a frosted strawberry Pop Tart!  Can you think of anything more fun and delightful than a huge slab pie filled with jammy fresh strawberries, glazed, and topped with rainbow sprinkles?  I didn't think so. 

https://www.flickr.com/photos/joyosity/14769971405/

One pro-tip for making this pie is to use parchment paper.  You can use it to figure out how large to roll the dough out to just by creasing the paper inside the baking pan first.  You can also use it to easily transport the rolled out dough to the refrigerator and into the baking pan.  Lastly, it makes it super easy to remove the pie from the pan and totally saves time on clean up!

I didn't use all the glaze because I didn't want the pie to be too sickeningly sweet, but it also meant I didn't get a nice opaque frosting on top, which would have looked more authentic.  To make it super authentic, I'd also glaze one of the shorter sides of the pie all the way to the edge since my Pop Tarts always seem to be unevenly frosted like that.

https://www.flickr.com/photos/joyosity/14746960266/

Strawberry Pop Tart Slab Pie
serves 10-12 (although I served it to a small group of 5, and we pretty much demolished it)

For the crust:
2 1/2 cups flour
3 tablespoons sugar
1 teaspoon kosher salt
1 cup cold unsalted butter (2 sticks), cubed
1/4 cup ice water, more as needed

For the filling:
1 lb. fresh strawberries
1/2 cup vanilla or granulated sugar
2 tablespoons cornstarch
Pinch of kosher salt
Juice from 1/2 lemon

For the glaze:
1 cup confectioner's sugar
2 tablespoons milk
Rainbow sprinkles!

Mix the flour, sugar, and salt together in a food processor.  Add the butter and pulse until the butter has been cut into pea-sized pieces.  Add the water and pulse to combine.  Add more water if needed, a tablespoon at a time, just until the dough comes together.  Divide the dough in two, wrap with plastic wrap, and refrigerate for at least 30 minutes or overnight.

Preheat the oven to 400°F.

https://www.flickr.com/photos/joyosity/14583488247/

Tear off two large pieces of parchment paper and tuck each into a 9" x 13" baking pan, creasing along the sides and corners so you know how large to roll the dough.  One at a time, roll out the two pieces of dough to about 10" x 14" on the parchment paper.  It's okay if it's not perfect since you'll be tucking the sides over and under.  You can cut off any excess pieces and patch up other corners or cracks if needed, too.  Transfer the rolled out dough on the parchment paper back to the refrigerator while you prepare the filling.

Wash, hull, and thinly slice the strawberries.  Toss with the sugar, cornstarch, salt, and lemon juice.

https://www.flickr.com/photos/joyosity/14767597874/

Tuck one of the rolled out crusts with the parchment paper into the baking pan, making sure there is enough dough on all sides to form a rim.  Spread the strawberry filling evenly over the crust.  Top with the other rolled out pie crust.  Carefully crimp together the edges and fold the excess dough over and under the edge, lifting up the parchment paper underneath to help with this process.  If there was a lot of extra dough, you can trim it off, but you want to make sure the filling is sealed inside.

https://www.flickr.com/photos/joyosity/14767599664/

Use a fork to prick the top crust evenly all around.  Bake for 20 minutes.

Check to make sure that the holes you made are still open (sometimes they shrink and seal up), and if not, prick again with a fork.  Rotate and return to the oven for another 20 minutes or until golden brown.

https://www.flickr.com/photos/joyosity/14766793491/

Make the glaze in the meantime by mixing together the confectioner's sugar and milk.

https://www.flickr.com/photos/joyosity/14769966325/

Allow the pie to cool before using the parchment paper as a sling to remove it from the pan and onto a large cutting board.  Spread the glaze over the pie, leaving a 1/2" border.  Immediately top with the rainbow sprinkles.

https://www.flickr.com/photos/joyosity/14770616552/

The pie actually reminded me a little more of a Toaster Strudel than a Pop Tart, which isn't a bad thing.  Oooh, now to make a gigantic Toaster Strudel with puff pastry and cream cheese frosting....

Next:  Grace's Ginger Scallion Fish
Previously:  Ginger Beer Sherbet
Last Year:  Oven Fried Mac 'n' Cheese Pizza