Showing posts with label Thanksgiving. Show all posts

Wednesday, November 23, 2016

Pear Apple Cranberry Slab Pie


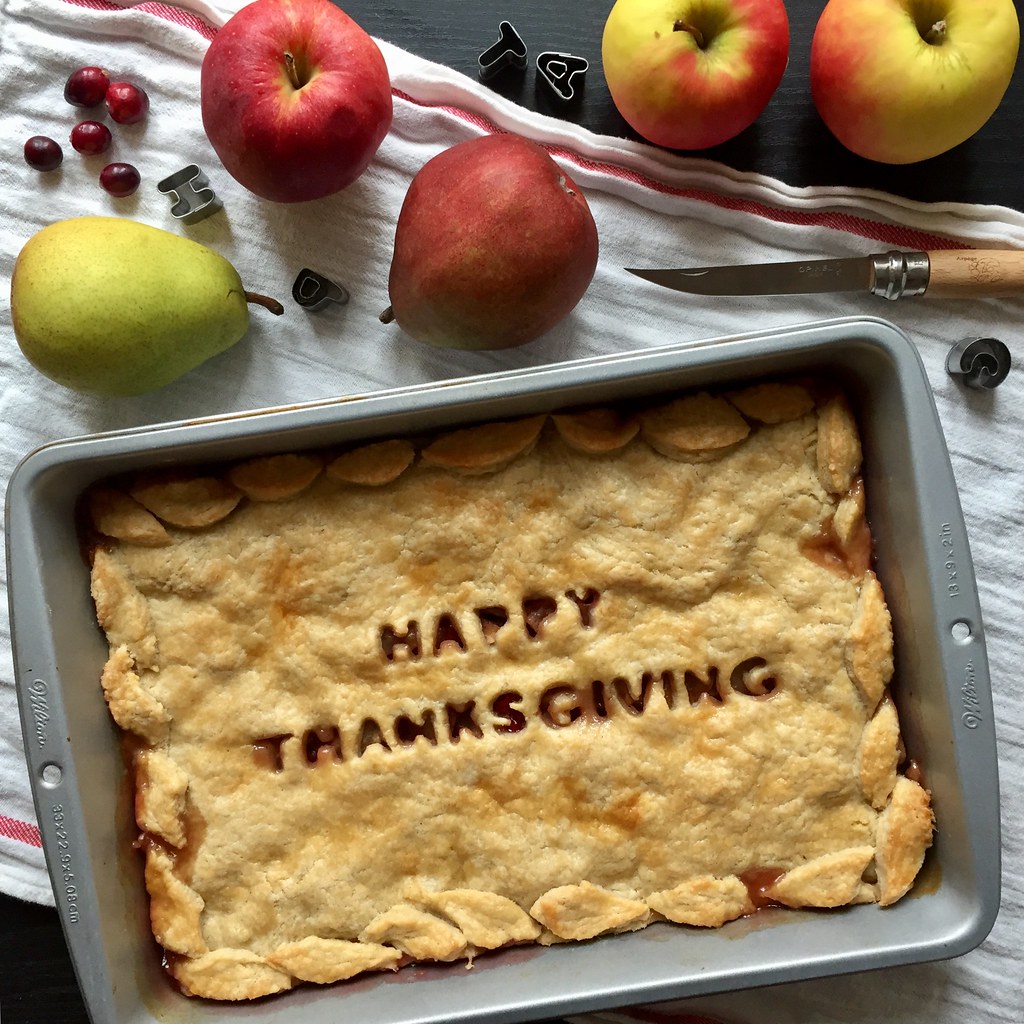
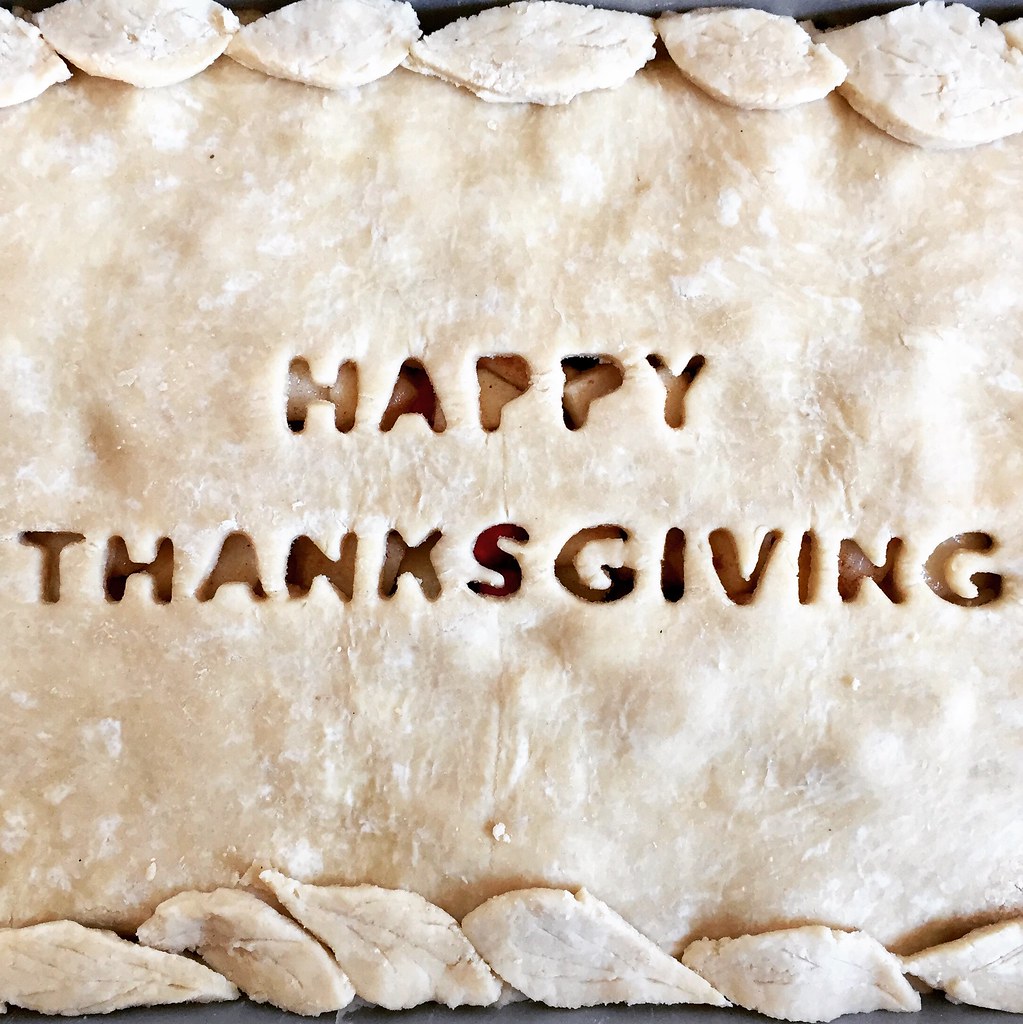
Sometimes you get an idea in your head that you just need to make a reality.  This was one of those times.  I already had alphabet cookie cutters from another project and a good slab pie recipe.  I didn't have any leaf cookie cutters, but those were easy enough to freehand cut out of the dough.


For the filling I used up fruits that had been accumulating from my Boston Organics deliveries and ended up using 3 pears, 2 apples, and 4 oz. of cranberries, which I think ended up being about 5-6 cups of chopped fruit.  I liked how the cranberries added a little tartness and color to the otherwise simply sweet filling.  (If you want to add more than 4 oz. of cranberries, I would also up the amount of sugar to account for the additional tartness.)

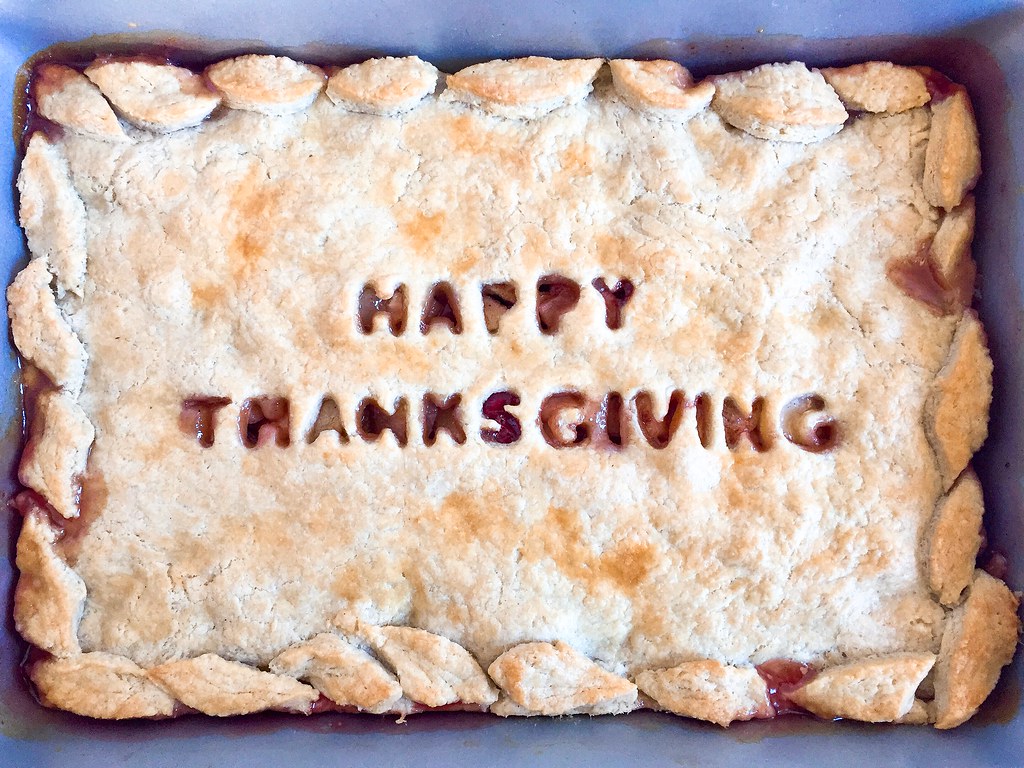
I cheated a little and didn't make a bottom crust, but in the end I think that was a good call because it saved a lot of time and aggravation and really, no one likes the soggy bottom crust right?  That meant I could make the top crust a little thicker and have plenty of dough left for the cut outs.  If I had had the time, I would've added more leaves, but for my first attempt at pie dough decorations, I think it went pretty well.  =)


Pear Apple Cranberry Slab Pie
makes a 9" x 13" slab pie

2 cups all-purpose flour, divided
2 tablespoons sugar
3/4 teaspoon kosher salt
12 tablespoons cold, unsalted butter, cubed
3 tablespoons ice water, more as needed
3 pears, peeled and chopped
2 apples, peeled and chopped
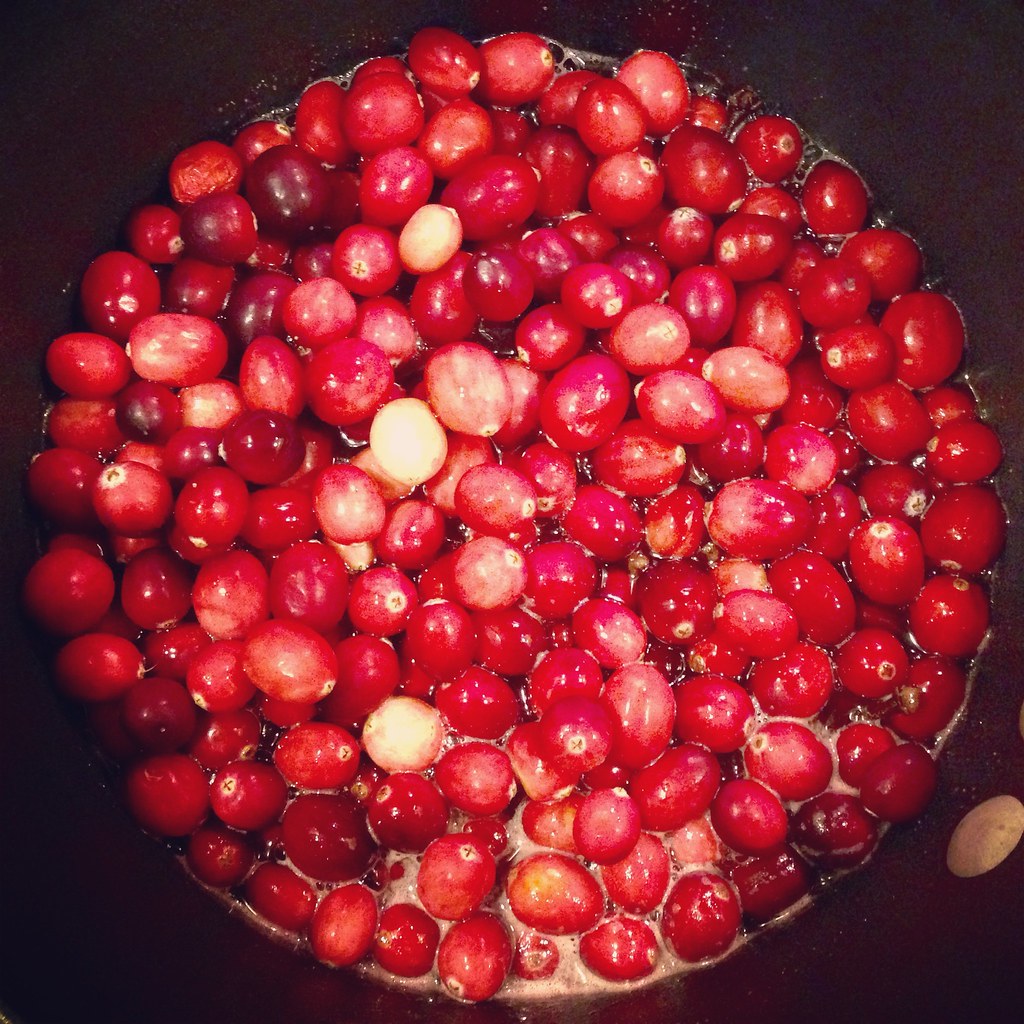
4 oz. fresh cranberries
3/4 cup sugar
1 teaspoon cinnamon
1 egg, beaten

Remove a heaping tablespoon of flour from the 2 cups and reserve for the filling.  Mix the remaining flour, sugar, and salt together in a food processor.  Add the butter and pulse until the butter has been cut into pea-sized pieces.  Add the water and pulse to combine.  Add more water if needed, a teaspoon at a time, just until the dough comes together.  Form the dough into a disc, wrap with plastic wrap, and refrigerate for at least 30 minutes or overnight.

Preheat the oven to 400°F.

Place the chilled dough on a large piece of floured parchment paper or Silpat and roll the dough out to a 9" x 13" rectangle about 1/6" thick.  You should have enough leftover dough to make cut outs from.  Cover and return to the refrigerator while you prepare the filling.

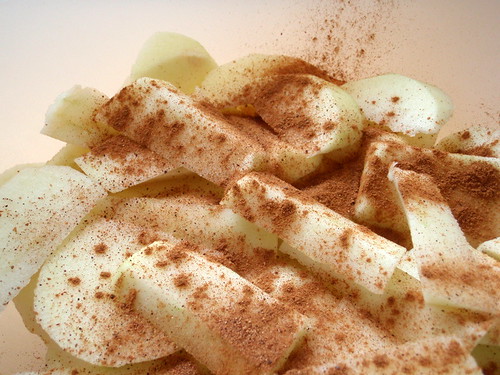
Mix the sugar with the reserved flour and cinnamon,  Toss with the chopped pears, apples, and cranberries.  Pour into a 9" x 13" baking pan.

Decorate the pie dough as you like and place it over the fruit.  Make an egg wash by mixing the beaten egg with 1 tablespoon of water.  Brush the entire crust with the egg wash.  Bake for 20 minutes, then rotate and bake for another 20 minutes or until golden brown.


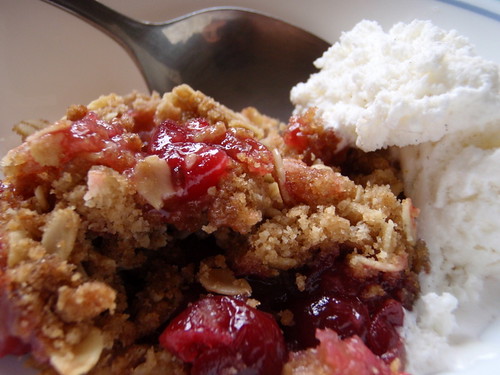
Next:  Cranberry Curd Tart
Previously:  Soy Garlic Glazed Korean Fried Cauliflower
Last Year:  Pad Thai
Two Years Ago:  Raindrop Cake
Three Years Ago:  My Mom's Taiwanese Sticky Rice
Four Years Ago:  Duchikey (Simplified Turkducken)
Seven Years Ago:  Nanaimo Bars
Eight Years Ago:  Homemade Crystallized Ginger

Monday, December 1, 2014

Pull-Apart Thanksgiving Leftover Stuffed Bread

https://www.flickr.com/photos/joyosity/15917680195/

I hosted Thanksgiving for my friends this year and ended up with a ton of leftovers:  turkey meat, mashed potatoes, candied sweet potatoes, stuffing, and cranberry sauce.  The one dish that was all gone (or claimed by guests) was my corn souffle!  I didn't mind having all the leftovers, though, because I've been wanting to make pull-apart stuffed bread after seeing this post a few weeks ago.  I decided to make the bread dough using Two Red Bowl's simplified recipe for Hokkaido milk bread, which turned out wonderfully soft and fluffy, just like the ones I made before.  This time I used the tangzhong method, which means first making a cooked flour paste (the tangzhong).  This paste is incorporated into the rest of the dough and is what makes it so soft and fluffy.

https://www.flickr.com/photos/joyosity/15917680455/

In terms of the types of filling, I'd go with softer, mushier textures like mashed potatoes, stuffing, or sweet potatoes and stay away from anything that could possibly poke through the dough like fresh green beans (canned green beans might be okay).  I ended up stuffing each roll with a bit of all the different leftovers since that's how I roll, but you can stuff them however you like.

https://www.flickr.com/photos/joyosity/15298028243/

Pull-Apart Thanksgiving Leftover Stuffed Bread (adapted from Two Red Bowls)
makes 24 small rolls

6 tablespoons water
2 tablespoons plus 2 3/4 cup bread flour, divided
1/2 cup milk
1 1/2 teaspoon active dry yeast
1 teaspoon salt
1/4 cup sugar
1 egg, beaten
2 tablespoons butter
About 2 cups Thanksgiving leftovers (cubed turkey, mashed potatoes, candied sweet potatoes, stuffing, etc.)

To make the tangzhong, whisk the water and 2 tablespoons of flour together in a small saucepan until there are no lumps left.  Heat over medium-low heat, whisking all the while, until the mixture just starts to gel.  As soon as lines start to appear in the mixture when stirred, remove from heat and allow to cool to room temperature.

Heat the milk to about 110°F by heating in the microwave for 15-30 seconds.  Sprinkle the yeast over the milk and set aside to allow the yeast to activate, about 5-10 minutes.

Sift or whisk together the rest of the flour (2 3/4 cups), salt, and sugar in the bowl of a stand mixer.  When the yeast is ready, add the tangzhong and egg and whisk to combine.  Make a well in the flour mixture and pour in the wet ingredients. Stir until the mixture forms a loose, shaggy dough, then use the dough hook of the stand mixer to knead until the dough forms a semi-smooth ball.

Add the butter to the dough, one tablespoon at a time, kneading after each addition.  Knead until the butter is fully incorporated and the dough becomes smooth and elastic.

Place the dough in a large bowl with plenty of room and cover loosely with plastic wrap or a damp towel. Let rise for 1-2 hours in a warm, draft-free area, or until well-doubled. Alternatively, let the dough rise overnight in the refrigerator; the dough should be fine for up to 24 hours.  Line a round cake pan or square brownie pan with parchment paper.

Once the dough has doubled, punch it down and divide into 24 even pieces.  You can either use a food scale or divide the dough in half three times and then into thirds (2 * 2 * 2 * 3 = 24).  Working one a a time, roll out the dough into a flat circle about 3" in diameter.  If you can, try to make the edges thinner than the middle, but it's not super critical.

https://www.flickr.com/photos/joyosity/15730376620/

Drop a heaping tablespoon of Thanksgiving leftovers onto the middle of the dough.  Bring the edges of the dough together and seal.  I like to do this using the method I learned to wrap xiao long bao, but since the seal will be concealed on the bottom, it's fine to just bring four opposite parts of the dough together and then pinch together the edges in between together.  You just want to make sure that the filling is sealed inside.  Roll the ball a bit in your hands to reform a sphere.

https://www.flickr.com/photos/joyosity/15917035852/

Arrange the stuffed dough balls seam side down in the prepared pan just so they touch each other.  You may run out of room in the pan (I could only fit 19 balls, so I set the remaining in a smaller baking dish).  Brush the top of the rolls with olive oil and let the dough proof again until they are almost doubled, about another hour or so.  Preheat the oven to 350°F.

Bake the rolls for about 25-35 minutes, until golden brown.  Serve warm with butter and any leftover cranberry sauce and/or gravy.

https://www.flickr.com/photos/joyosity/15730378250/

Next:  Puppy Chow Pie
Previously:  Jeni's Crème Sans Lait (Dairy Free Ice Cream)
Last Year:  Thai Coconute Sticky Rice with Mango
Two Years Ago:  Three Bean Chili
Five Years Ago:  Kettle Corn
Six Years Ago:  Salted Butter Caramel Ice Cream

Monday, November 24, 2014

Cranberry-Port Gelée

https://www.flickr.com/photos/joyosity/15677571349/

It's probably been a good 10 years since I went home to my parents' place for Thanksgiving.  I usually spend the holiday with friends instead and love having them over for a potluck style meal.  One of our friends, let's call him Jerry, is not the most kitchen savvy, so a few years ago I assigned him the task of bringing the cranberry sauce.  Specifically, one can of cranberry sauce.  Instead of obeying my instructions, he brought two cans and promised to finish it all because he loves cranberry sauce.  Guess what:  he didn't finish it all.  In fact, he didn't even finish the first can.  But since he loves cranberry sauce, he took home the opened can to finish on his own.

Fast forward one year to when it was his turn to host Thanksgiving.  This is when we found out, to our horror, that he still had the opened can of cranberry sauce sitting in his fridge.  From a year ago.  And he thought it would be okay to serve it to us.  *shivers*

Sadly, Jerry can't join us this year for Thanksgiving, so I figured it was high time to try making cranberry sauce from scratch.  I wanted something similar to the familiar canned version but a little classier and distinctly homemade.  Enter Food52's Genius Recipe for Canal House's Cranberry-Port Gelée.  I adapted the original recipe by adding a bit of orange juice and substituting cloves for the juniper berries.  You could also use rosemary if you want the juniper berry woodsiness or a cinnamon stick and star anise for more warmth.

https://www.flickr.com/photos/joyosity/15676062218/

Cranberry-Port Gelée (adapted from Food52)
makes about 2 cups

3/4 cup port (or red wine or Madeira)
1/4 cup fresh orange juice
1 cup sugar
1 teaspoon cloves
10 black peppercorns
12-oz bag fresh cranberries

Put the port, sugar, cloves, and peppercorns into a heavy saucepan and bring to a boil over medium-high heat.
  
Add the cranberries and return to a boil. Reduce the heat to low and simmer until the cranberries burst and are very soft, about 10 minutes more.  Using a large spoon to mash the cranberries a bit so it is easier to strain in the next step.
   
Strain the sauce into a bowl through a fine-mesh sieve, pushing the solids against the screen with the spoon. Stir the thin and thick portions of the strained gelée together.
   
Transfer to a pretty serving bowl or jar.  Cover and refrigerate. It will firm up within a few hours, or can be made several days ahead.

https://www.flickr.com/photos/joyosity/15676338640/

Since I'm hosting Thanksgiving this year, I'll be serving this along with a spatchcocked turkey and also making my corn souffle and a sweet potato casserole.  Others are bringing the salad, mashed potatoes, green beans, and pie.  What will you be having for Thanksgiving?

p.s.  The reason for the sub-par pictures above is because instead of making the cranberry sauce and taking pictures of it when the sun was still out, I made a last minute decision to go hiking with some friends in the Middlesex Fells since it was probably going to be one of the last nice days of 2014.  While the pics above rather flat and uninteresting, it was worth it to spend time with good friends and to get this shot:

https://www.flickr.com/photos/joyosity/15680639090/

Next:  Jeni's Crème Sans Lait (Dairy-Free Ice Cream)
Previously:  Sriracha Popcorn
Last Year:  My Mom's Pi Jiu Ya (Beer Braised Duck)
Two Years Ago:  Pretzel Ice Cream Pie with Homemade Magic Shell
Fives Years Ago:  Nanaimo Bars

Monday, November 25, 2013

Cheese Fondue Stuffed Roasted Pumpkin

I was going to a vegetarian Thanksgivingukkah potluck, and I knew exactly what I wanted to bring.  I've been wanting to make this dish ever since I read the HuffPost Taste's article raving about it last year.  It's basically a pumpkin hollowed out and stuffed with breadcrumbs, cheese, and heavy cream, then roasted until the pumpkin is soft and scoopable and the filling is hot and bubbly.

The original recipe from Gourmet calls for a 7 lb. pumpkin, but the only pumpkin I was able to buy so late in the season was as an add-on order from Boston Organics, and it was only 3.5 lbs.  So I adapted the recipe a bit with the help of Dorie Greenspan's version and one of the reviews from the Gourmet recipe which suggested drizzling honey throughout the layers.  I stuck with the Gruyère and Emmental cheeses from the original recipe this time, but in the future, I think it'd be fine to use some cheeses that you don't need to go to Whole Foods to find, like regular Swiss or Brie.

To serve, I just used a large spoon to scoop out some of the filling and then scrape some of the pumpkin meat onto my plate.  You can also scrape all the pumpkin into the filling and mix it all up before serving or just cut the pumpkin into wedges and plate it that way.  Either way, serve the pumpkin with some extra baguette slices and maybe extra honey.  And make sure you save the pumpkin seeds to roast with olive oil and Old Bay seasoning!

http://www.flickr.com/photos/joyosity/11037518086/

Cheese Fondue Stuffed Roasted Pumpkin
serves 6-8 as an appetizer

1 sugar pumpkin, about 3 1/2 pounds
1 baguette
3 ounces Emmental cheese, coarsely grated
3 ounces Gruyère cheese, coarsely grated
1 cup heavy cream
Freshly grated nutmeg
Salt and freshly ground black pepper
Honey

Preheat oven to 450°F with rack in lower third.

http://www.flickr.com/photos/joyosity/11037566353/

Slice the baguette into 1/2 inch slices.  Cut half of them into 1/2 inch cubes.

Toast the baguette slices and cubes in a single layer on a baking sheet in oven until tops are crisp (bread will still be pale), about 7 minutes. Transfer to a rack to cool.

http://www.flickr.com/photos/joyosity/11037521854/

Remove top of pumpkin by cutting a circle around the stem with a small sharp knife. Scrape out seeds and any loose fibers from inside pumpkin with a spoon (including top of pumpkin; reserve seeds for another use if desired).  Season the inside with 1/4 teaspoon salt and a drizzle of honey.

Whisk together cream, nutmeg, 1/2 teaspoon salt, and 1/4 teaspoon pepper in a bowl. Mix together cheeses in another bowl.

http://farm8.staticflickr.com/7399/11037585703_eedf5123e3.jpg

Put a layer of toasted bread cubes in bottom of pumpkin, then cover with about 1/2 cup cheese and about 1/3 cup cream mixture. Drizzle some more honey on top of the cheese and cream.  Continue layering bread, cheese, cream mixture, and honey until pumpkin is filled to about 1/2 inch from top. (You may have some leftover bread, cheese, and cream left over.)

http://www.flickr.com/photos/joyosity/11037403005/

Cover pumpkin with top and put in an oiled small roasting pan. Brush outside of pumpkin all over with olive oil. Bake 1 hour and then remove the top.

http://www.flickr.com/photos/joyosity/11037612743/

Return the rest of the pumpkin to the oven and bake until the top of the cheese is browned and bubbly, about 10 - 15 minutes.  Serve with the rest of the baguette slices.

http://www.flickr.com/photos/joyosity/11037653336/

Next:  Thai Coconut Sticky Rice with Mango
Previously:  My Mom's Pi Jiu Ya (Beer-Braised Duck)
Last year:  Pretzel Ice Cream Pie with Homemade Magic Shell
Four years ago:  Apple-Pear-Cranberry Crisp

Monday, November 19, 2012

Corn Souffle

This is one of my favorite dishes to bring to a potluck, especially around this time of year, because it's dead easy to make, but everyone always raves about how delicious it is.  And the weirdest part is, almost all the ingredients come out of a box or a can.

PB173158
 
I wouldn't technically consider it a souffle, but if you bake it in a souffle dish, it will rise and fall like one.  If you don't have a souffle dish (like me), you can also just bake it in a regular 9"x13" baking dish, and it'll be just as delicious.  It's like a super moist corn bread, but to describe it like that is to do it a grave injustice.  It's just that little bit sweet enough where you'll keep taking another bite to try to taste it some more, and it's light enough that you won't regret it.

So make this dish, sit back, and wait for the compliments to roll in.

Corn Souffle
 
Corn Souffle
serves 15-20

2 large eggs
1/2 cup oil or 1 stick of butter, melted
8 oz. sour cream
16 oz. can whole corn kernels, drained
16 oz. can creamed corn
8 1/2 oz. Jiffy corn muffin mix

Preheat oven to 350°F.

PB173160
 
In a large bowl, beat the 2 eggs.  Add oil or melted butter and sour cream and combine (the sour cream will help emulsify the oil and eggs).

PB173162
 
Add the drained corn and creamed corn and mix.  Finally, add the corn muffin mix and stir until combined.

PB173163
 
Bake in a 2 quart souffle dish for 55 minutes or a 9"x13" baking dish for 45 minutes until golden brown.  Serve warm, if possible, but it's okay at room temperature, too.

Corn Souffle
 
If you like, you can also sprinkle on some shredded cheddar cheese when there are 10 minutes left to bake.  Other ideas for add-ins would be chopped peppers, scallions, and crumbled, cooked bacon.  Personally, I like it just as it is.  ^_^

Next:  Ramen Cabbage Salad
Previously:  Pretzel Ice Cream Pie with Homemade Magic Shell

Monday, November 12, 2012

Duchikey (or Simplified Turducken)

The idea of making a turducken is kind of frightening:  deboning three different birds and then stuffing one inside the other inside the other and then roasting it all low and long enough so that it's cooked all the way through but not dry or burnt on the outside.  Crazy.

But when Serious Eats posted a way to make a simplified turducken a couple of years ago by using cuts from all three birds instead of the whole birds, I knew I had to try it.  It's a pounded duck breast covered with a layer of stuffing covered with chicken thighs, another layer of stuffing, and then turkey cutlets.  Thus, a duchikey.  The Serious Eats post included a recipe for stuffing, but I decided to further simplify it by just using Stove Top stuffing, a personal guilty pleasure.

Duchikey ingredients
 
Duchikey (based on the recipe from Serious Eats)
makes 4 servings

1 box Stove Top stuffing, prepared
1 large duck breast (about 8 oz.)
1/2 lb. boneless, skinless chicken thighs (2-3)
1 turkey cutlet (about 1/4 lb.)
1 tablespoon oil

Adjust oven rack to middle position and preheat oven to 350°F.

Lay duck breast skin-side down on cutting board with long edge perpendicular to edge of table. Using sharp chef's knife or boning knife, make one thin horizontal slit from left side of breast to right side, about 1/4 inch from the top, leaving 1/8th-inch connected on right side. Open like book. Repeat, making another cut from right to left and open duck breast like business letter. Place duck breast between two pieces of wax paper or plastic wrap and pound gently until roughly 1/3 of an inch thick. Refrigerate until needed.
 
Pound chicken thighs between two sheets of wax paper with meat pounder or rolling pin until each one is even 1/3-inch thickness. Refrigerate until needed. Repeat with turkey cutlet.

Duck breast layer

Lay opened duck breast skin side down on cutting board. Season with salt and pepper. Spread 3-4 tablespoons stuffing onto duck meat. Use back of spoon or offset spatula to smooth stuffing entirely over top of breast.

Chicken thighs layer
 
Lay flattened chicken thighs on top of duck. Season with salt and pepper. Chicken layer should be the same size or slightly smaller than the duck layer. Trim chicken if necessary. Spread 3-4 tablespoons stuffing over chicken, smoothing with spatula or back of spoon.

Turkey cutlets layer
 
Lay turkey cutlet on chicken layer, trimming if necessary to fit over chicken. Season with salt and pepper. Spread 1 tablespoon stuffing over turkey. Place remaining stuffing in 13 x 9-inch baking pan.

Roll duchikey jelly-roll style from left to right. Cut five 12-inch pieces of butcher's twine and lay parallel to each other in 1-inch intervals. Place duchikey on top and twine working from outside towards center to secure. Trim off excess twine.

Wrapped duchikey
 
Season duchikey with salt and pepper.  Heat oil over medium-high heat in heavy 12-inch oven-proof cast iron or stainless steel skillet until shimmering. Add duchikey, duck skin side down, and brown on all sides, approximately 8 minutes total. Transfer duchikey and stuffing to oven and roast until instant read thermometer inserted into center of duchikey registers 150°F, about 30 minutes. Remove duchikey to cutting board, tent lightly with aluminum foil and let rest at least 10 minutes before slicing.

Duchikey
 
I found that the original recipe called for too much turkey, so I halved the amount.  I liked that it was so much easier to make than a turducken, and it's perfect if you're just feeding a small crowd for Thanksgiving.  Moving the duck to the outside and browning it first gives you a really nice, crispy skin, too, without making the rest of the meat dry.

Next:  Grapefruit Pie
Previously:  Cereal Milk Ice Cream and Pie
Four years ago:  Homemade Crystallized Ginger

Thursday, November 26, 2009

Apple-Pear-Cranberry Crisp

Happy Thanksgiving, everyone! What are you thankful for this year? Me, I'm thankful that I got to travel to a lot of different countries (Czech Republic, Bolivia, Aruba, Italy, Greece, Turkey, and Egypt!), for new friends that I've made, and that my brother got married to a wonderful girl!

I almost always staying in Boston for Thanksgiving since my home in Ohio is really too far away to drive to and too expensive to fly to for such a short break. But it's become tradition to celebrate with other Thanksgiving "orphans", and this year I went over to Oeimae, Yumi (thanks for the invite!), and Judy's apartment in Brookline for yet another potluck. This time, I wanted to use up the two pears and two apples I had gotten in my Boston Organics delivery, so I decided to make a apple-pear crisp. But just those 4 fruits didn't seem to be enough for the 9"x13" pan, so I bought a bag of fresh cranberries to add to the mix for some color and tartness.

PB262293

Apple-Pear-Cranberry Crisp
makes 24 servings

2 apples, peeled, cored, and sliced (I used Fuji apples)
2 pears, peeled, cored, and sliced (I used one Bosc and one Concord pear)
1 bag fresh cranberries
1 teaspoon cinnamon
1 dash nutmeg
1 1/2 cups flour and 1 tablespoon flour, divided
1 teaspoon vanilla extract
1 cup sugar
1 1/2 cups oats
1 1/2 cups brown sugar
1/2 teaspoon baking powder
1/2 teaspoon baking soda
3/4 cups butter, cut into pieces

Preheat oven to 350°F.

PB262282

Toss the apple and pear slices with the cinnamon, nutmeg, and 1 tablespoon flour. Add the cranberries and sugar. Toss to mix. Place in a 9"x13" baking dish.

PB262288

In a large bowl, add the remaining ingredients and cut the butter into the dry ingredients until it resembles a coarse meal. You can also use a food processor to do this, but I enjoy doing it with my hands.

Spread the topping evenly over the fruit. Bake for 45 minutes. Serve with vanilla ice cream!

PB262297

That last part of the recipe is key. Even though there's a whole cup of sugar in the fruit filling, the fresh cranberries are really quite tart. Eating this crisp with ice cream mellows out the fruit so that the sum is much greater than its parts.

This recipe can be adapted to other fruits as well. You can omit the cranberries and use more of the apples or pears. A peach or cherry crisp is another possibility, but you'd have to adjust the amount of sugar since those fruits are already quite sweet.