Showing posts with label easy. Show all posts
Monday, March 16, 2015
Cacio e Pepe for One
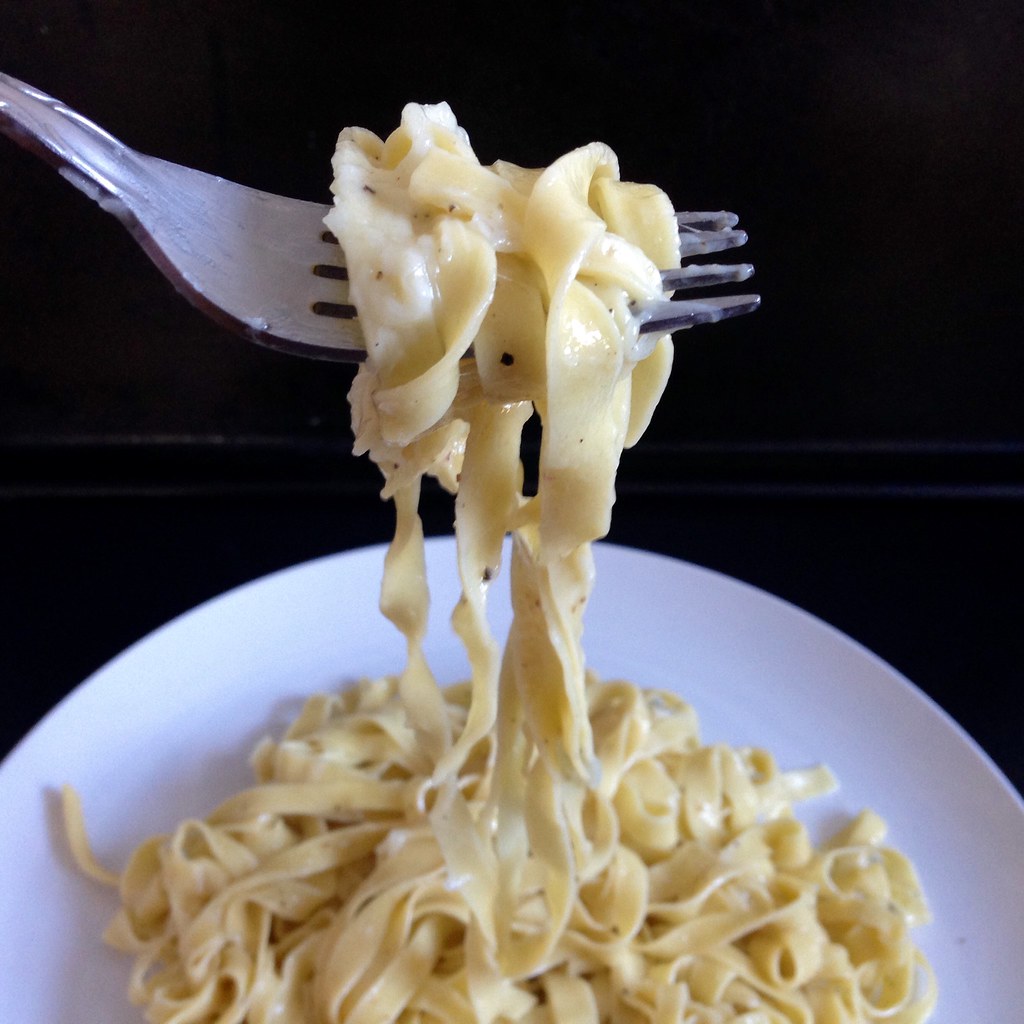
I love macaroni and cheese, but sometimes I just want to make enough for one serving. Or I don't have any milk in the refrigerator. Or I'm starving and and need something that only takes a few minutes to make. Luckily, this recipe for cacio e pepe meets all those requirements!
Italian for "cheese and pepper", this dish comes together in a flash and uses ingredients you probably already have in your pantry and refrigerator. Pecorino Romano is the traditional cheese used for cacio e pepe, but in a pinch, you could also use parmesan or another hard, grated cheese.
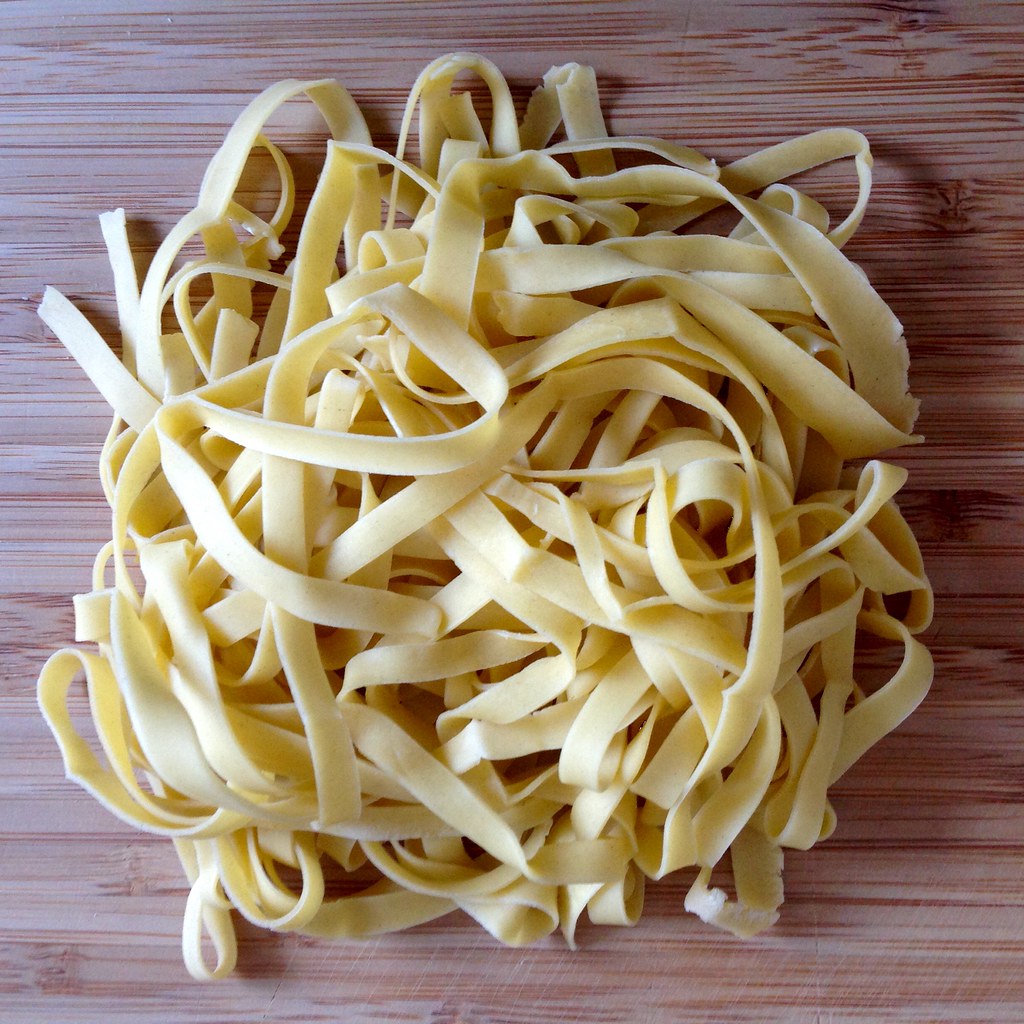
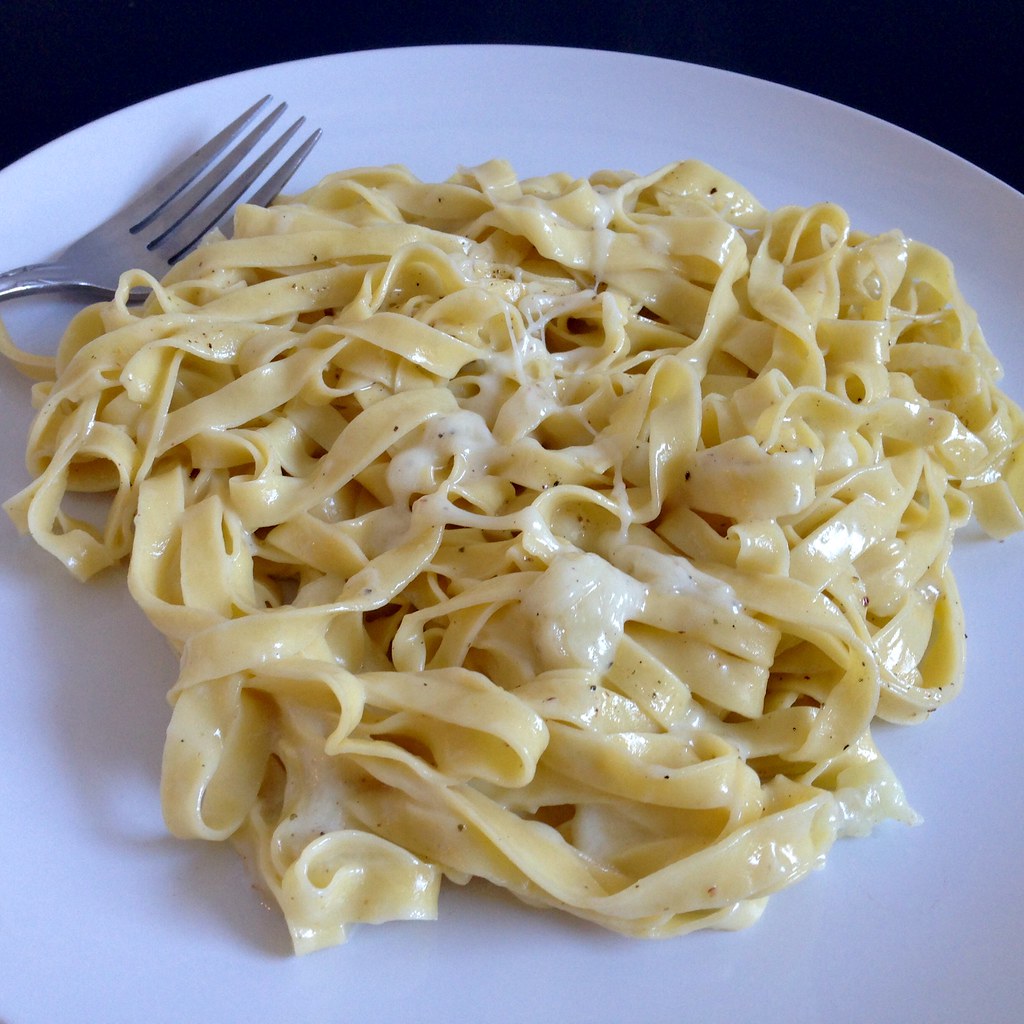
The first time I made this, I used the fresh pasta I had made in the previous post, but I've also since made this with regular dried spaghetti. Obviously, the fresh pasta was better, but the version made with the dried pasta was still pretty decent, and much better than anything that comes out of a blue and orange box. I like mine slightly gooey and with less pepper, but if you like it creamier, you can add more pasta water, and feel free to use as much pepper as you like!
Cacio e Pepe for One
serves one (duh) but can be easily doubled
Kosher salt
1 serving of uncooked pasta, dried or fresh
1 tablespoon unsalted butter or olive oil
Freshly ground black pepper, to taste
50 g (about 3/4 cup) freshly grated Pecorino Romano
Bring a pot of salted water to boil.
Add the butter and pepper to a skillet large enough to hold all the pasta. If using fresh pasta, turn the heat on once you add the pasta to the boiling water. If using dried pasta, wait until there is 1 minute left before the pasta is done to turn on the heat. Toast the pepper over medium-low heat.
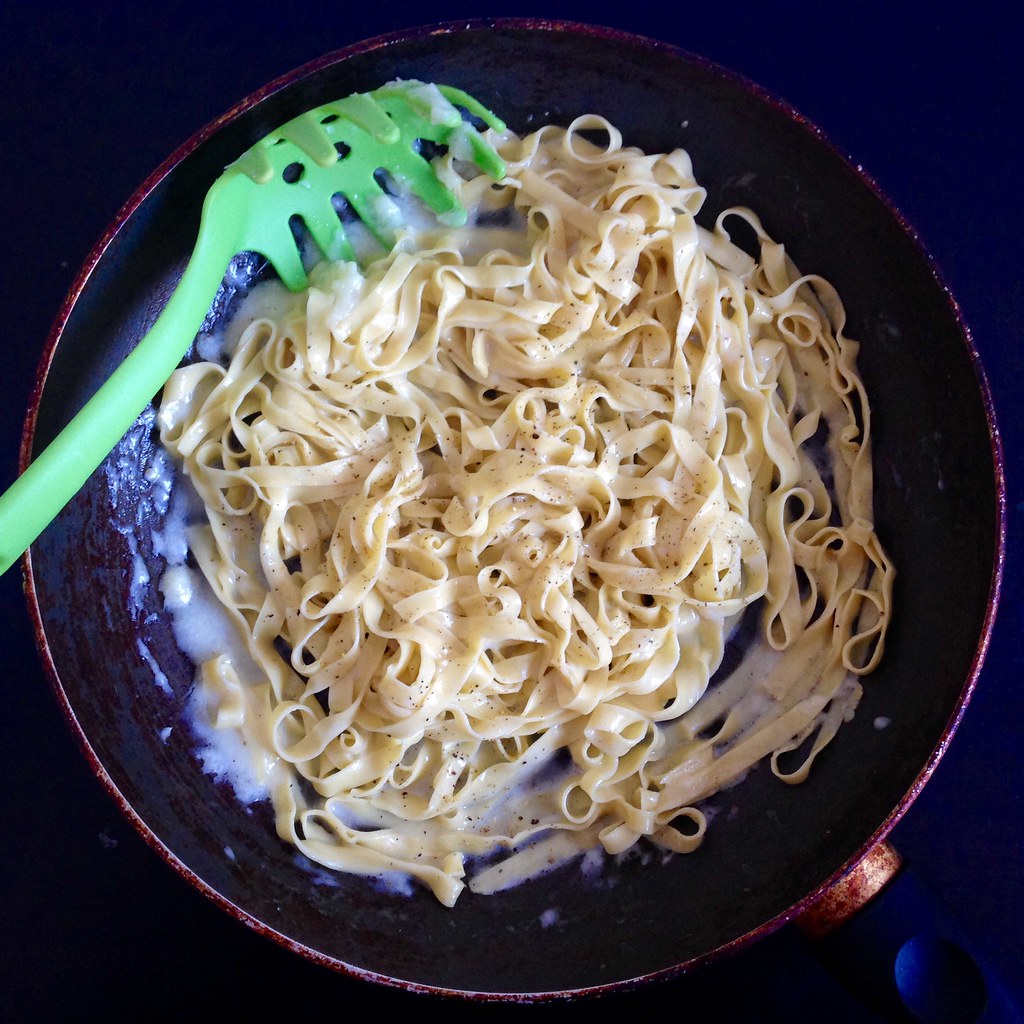
When the pasta is done, transfer it to the skillet using tongs or a pasta scooper. Toss with the butter and pepper, then start adding the grated cheese, alternating with some of the pasta water. Continue tossing until the cheese has melted and coated all the pasta. Season to taste with additional pepper and salt.
Next: Homemade Squid Ink Pasta
Previously: A Better Homemade Pasta
Last Year: Miso-Glazed Eggplant
Two Years Ago: Happiness Cake
Five Years Ago: Momofuku's Crack Pie
Six Years Ago: Korean Pancake Face Off
Tuesday, February 17, 2015
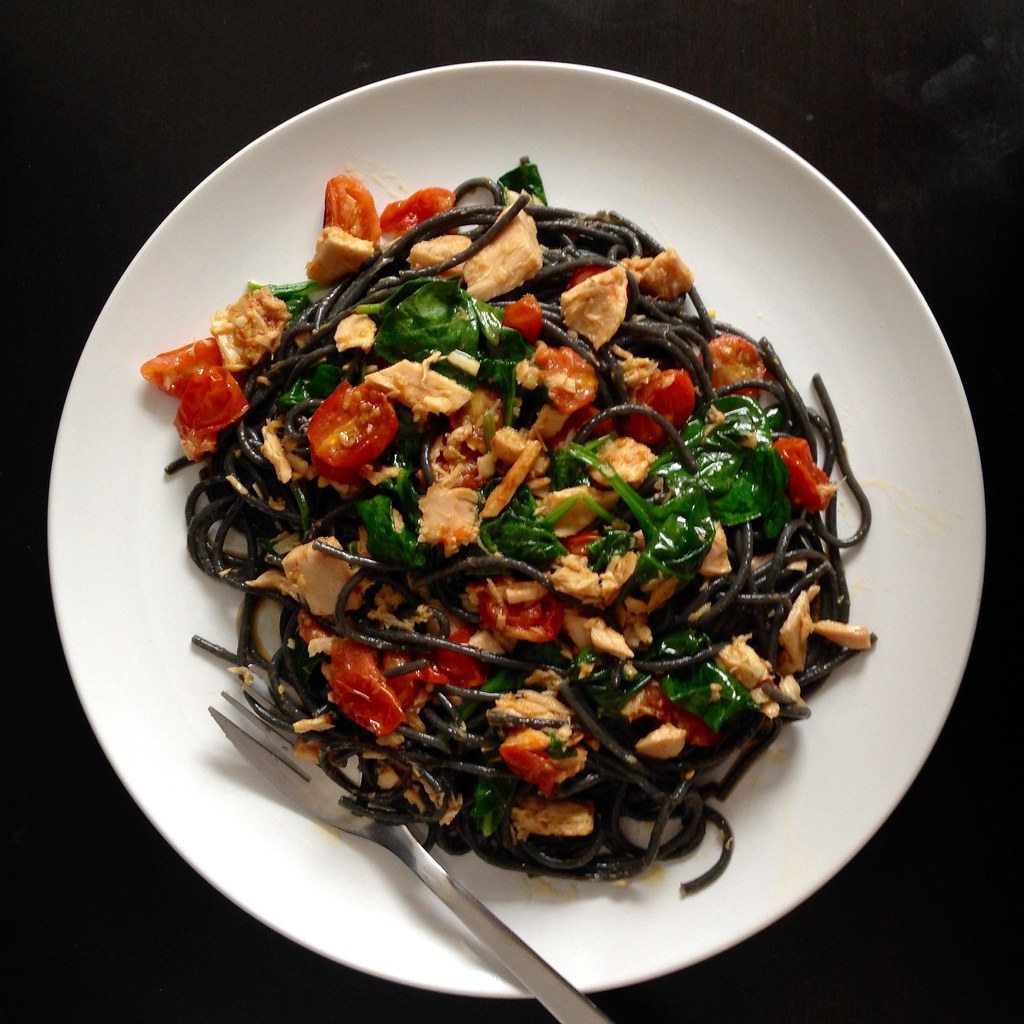
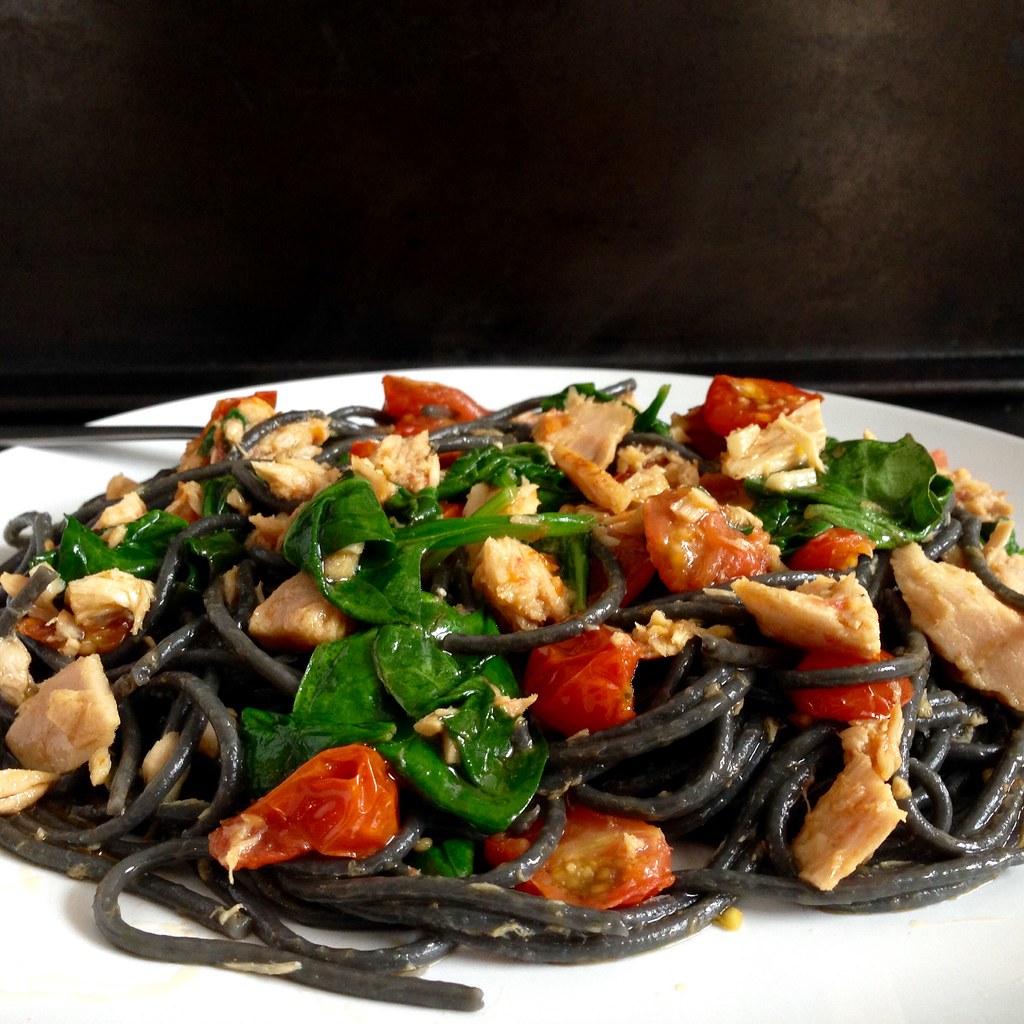
First Night in Florence Spaghetti
I have made this dish four times in as many days since I first discovered it. Maybe it's because I'm feeling nostalgic for Italy and wanting to get out of this crazy New England snow. Maybe it's the way the olive oil, tomatoes, and lemon juice come together like magic to make this unbelievably fresh tasting sauce. Or maybe it's the way the tuna and garlic linger on the tongue and then in my dreams. Whatever it is, you need to make this pasta stat.
This dish comes together quickly; while the pasta is cooking, you'll be starting the sauce so that by the time the pasta is almost al dente, you toss it into the pan that the sauce is in to finish cooking it. So I usually start cutting up the tomatoes and mincing the garlic while I wait for the water to boil.
For this recipe, make sure you use the tuna that's packed in olive oil, not water. And don't pour out the oil; add it to the sauce. Speaking of olive oil, you'll want to use a good one, and lots of it. I used the last of the olive oil I got from Tuscany for this, and it was worth it. I also used the last of the squid ink pasta I got from Venice since I figured the brininess would go well with the tuna (and because it's photogenic). All this just means I'll have to go back to Italy soon to stock up again!
First Night in Florence Spaghetti (adapted from The Solitary Cook by way of Food52)
serves 2
1/2 package of spaghetti
Kosher salt and freshly ground pepper, to taste
Good olive oil, and lots of it
1 pint grape tomatoes, quartered
3 cloves garlic, minced
1 tin of tuna packed in olive oil
A few handfuls of spinach or Swiss chard leaves
Juice of 1/2 a lemon
Get a large pot of salted water boiling. Add the pasta and start a timer to cook for 3 minutes less than what the package calls for (i.e. if the package says to cook the spaghetti for 10 minutes, cook it for 7).
In a pan large enough to hold all the pasta, add 5-6 generous glugs of olive oil heat on medium-high (it should be at least twice what you think you'll need). Once the oil starts to shimmer, add the tomatoes and a generous pinch of salt. While the tomatoes soften, you may want to (carefully!) smoosh them to help release their juices. When there are 2 minutes left on the pasta, add the minced garlic. When there is 1 minute left on the pasta, add the tuna plus the oil it's packed in, breaking up any large chunks of fish.
When the timer is up on the pasta, use tongs or a pasta spoon to add the spaghetti to the pan. Add some of the pasta cooking water to the pan too (the original recipe calls for a few ladlefuls, but I like a little less than that). Add the greens and lemon juice and toss everything around, cooking until the leaves is just wilted. Taste the sauce and season with salt and pepper as needed.
Next: Hugo & Victor's Pink Grapefruit Tart
Previously: Odile's Fresh Orange Cake
Last Year: Okonomiyaki
Six Years Ago: New England Clam Chowda with Homemade Oyster Crackers
Wednesday, January 21, 2015
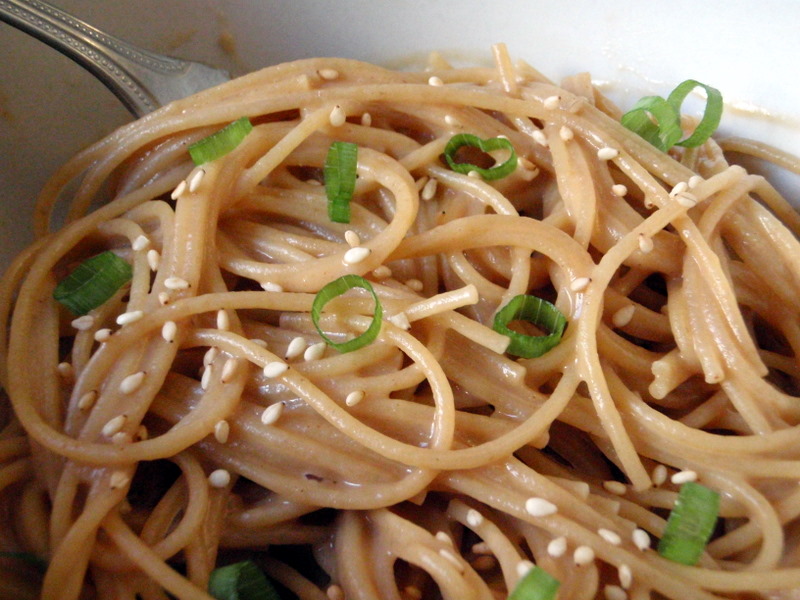
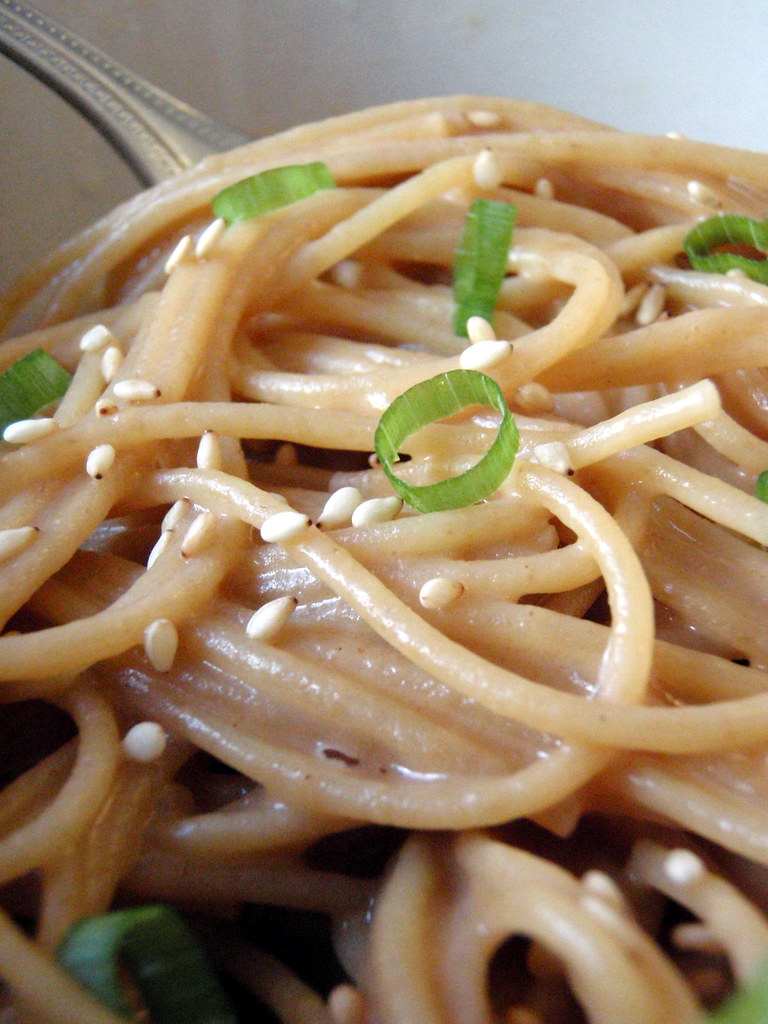
Peanut Butter Noodles
Recently my friends (and even my mom!) have been telling me that the recipes I've been posting have become too complicated. So here's one of the simplest recipes I know; it was actually one of the first things I learned how to make when I started cooking in college.
The recipe comes from my friend, Jaleen, who, if I recall correctly, got it from her family. You probably have all the main ingredients in your pantry already: peanut butter, pasta, soy sauce, vinegar, sesame oil, and sugar. You literally don't even need measuring spoons for this; the sauce is made up of 3 parts peanut butter, 3 parts soy sauce, 1 part vinegar, 1 part sesame oil, and a pinch of sugar. If I'm just making enough for myself, I use a small spoon, and if I want to make more than one serving, I'll grab a large spoon to measure. I prefer to use smooth peanut butter, but this works just as well with chunky. For the vinegar, rice wine vinegar is suggested, but regular white vinegar or cider vinegar would do in a pinch.
Depending on what else you have on hand, you can add a plethora of toppings: toasted sesame seeds, sliced almonds, chopped scallions, shredded chicken, baked tofu, and shredded cucumbers are just a few ideas. You can serve this dish cold or at room temperature so it's easily packable for lunch, picnic, or potluck. See, I told you it was easy! The hardest part about this recipe might be trying to mix the peanut butter into the other liquids without splashing, but if you stir carefully and long enough, you'll end up with a smooth, homogenous peanut sauce.
Peanut Butter Noodles
serves as many as you want
3 parts peanut butter
3 parts soy sauce
1 part sesame oil
1 part vinegar (rice wine vinegar preferred)
A pinch of sugar
Cooked noodles
Mix the peanut butter, soy sauce, sesame oil, vinegar, and sugar together until the sauce becomes smooth and creamy.
Toss with the cooked noodles, adding some of the pasta water if you want to thin out the sauce. Serve with toasted sesame seeds, sliced almonds, chopped scallions, shredded chicken, baked tofu, and/or shredded cucumbers if you like.
Next: San Bei (Taiwanese Three Cup) Tofu and Ramen
Previously: Zuppa Toscana
Last Year: Flower Pavlovas, Banoffee Pie
Two Years Ago: Spicy Tuna with Crispy Sushi Rice, Traditional Croissants
Five Years Ago: Banana Bread Yeasted Waffles
Six Years Ago: Nian Gao (Mochi Cake), Mayonnaise Shrimp with Candied Walnuts
Thursday, November 13, 2014
Sriracha Popcorn
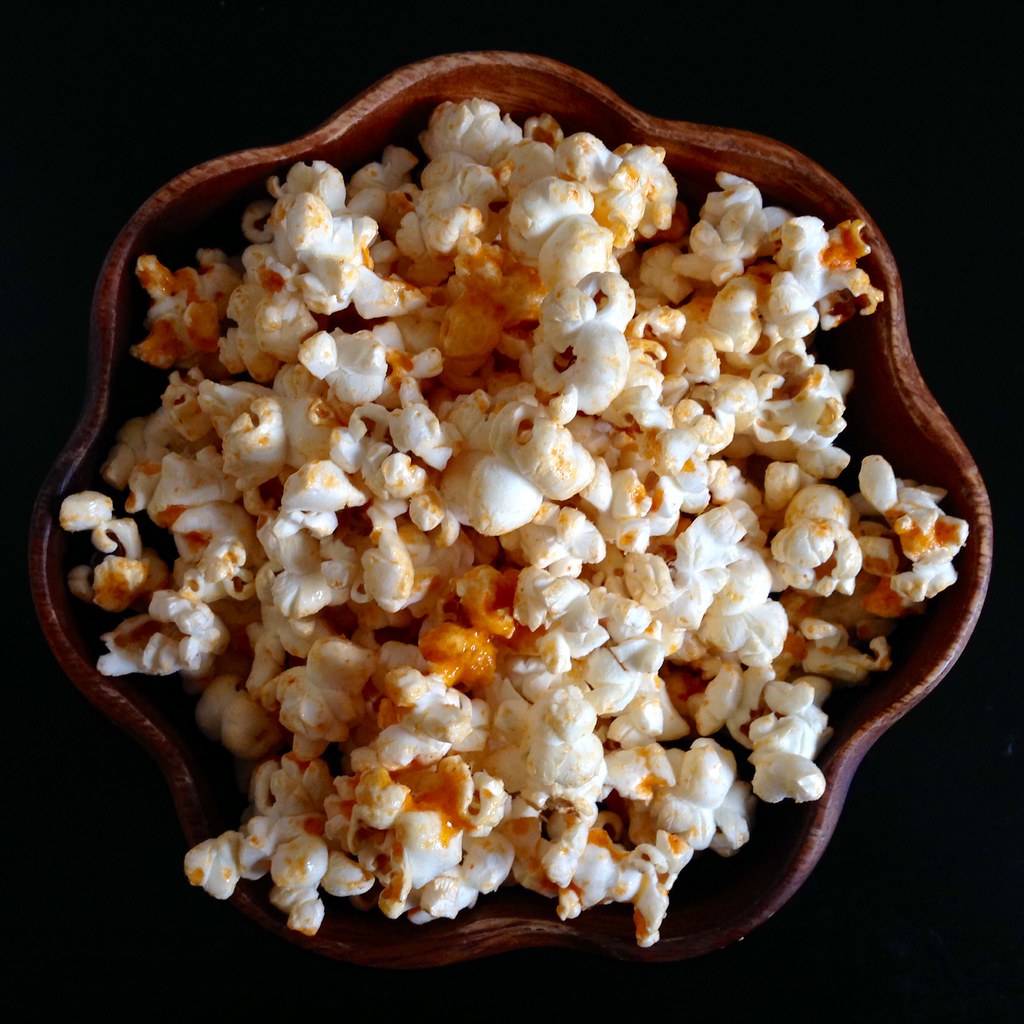
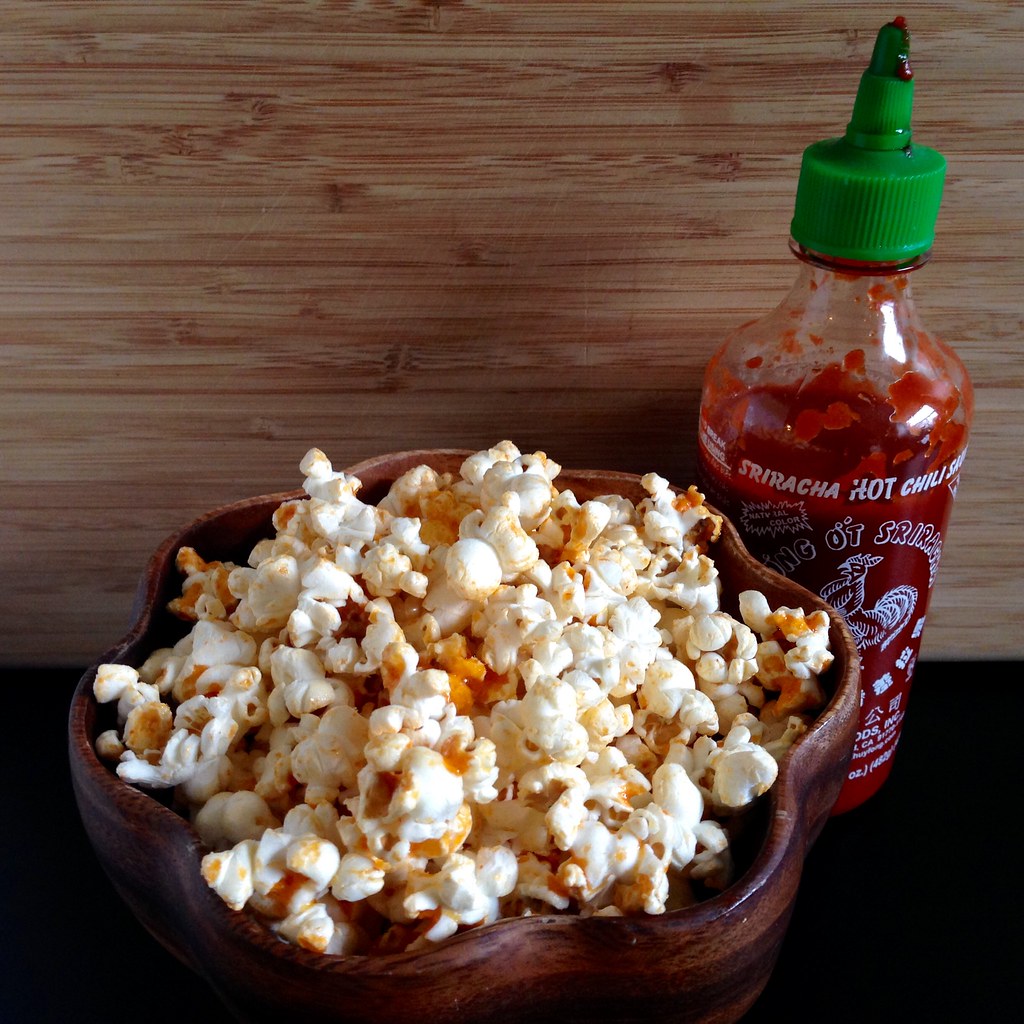
I was first introduced to Pop! Sriracha Popcorn when I was in the midst of a cold and could barely taste a thing. The intense taste of sriracha cut through everything though, and the crunchiness of the popcorn only added to it being the best thing I had eaten since I started getting sick.
Even after I had regained all my taste buds and sense of smell, I couldn't stop eating the snack even though I'm usually not a big fan of spicy stuff. I checked the list of ingredients and noticed that sugar was included. Of course! I don't know how it works, but I know you can add sugar to a dish if it's too spicy to make it more palatable. I bet the sugar was doing the same thing here while also making it super addictive, like a buttery, spicy, garlicky kettle corn.
Since I'm kind of a wimp in terms of spiciness, I only used 2 teaspoons of sriracha in this recipe, but if really like things spicy, I imagine that doubling that amount or more might work better for you. At a certain point, though, you might have too much liquid, which would make the popcorn soggy, so you'd be better off making some sriracha salt and sprinkling that on.
Sriracha Popcorn
makes 6 cups
6 cups freshly popped popcorn
2 tablespoons butter
1/2 teaspoon kosher salt (plus more, to taste)
1/2 teaspoon sugar
2-4 teaspoons sriracha
Place the butter, 1/2 teaspoon of salt, and sugar in a microwaveable measuring cup with a spout and microwave for 45-60 seconds, until the butter is melted. Add the sriracha and stir.
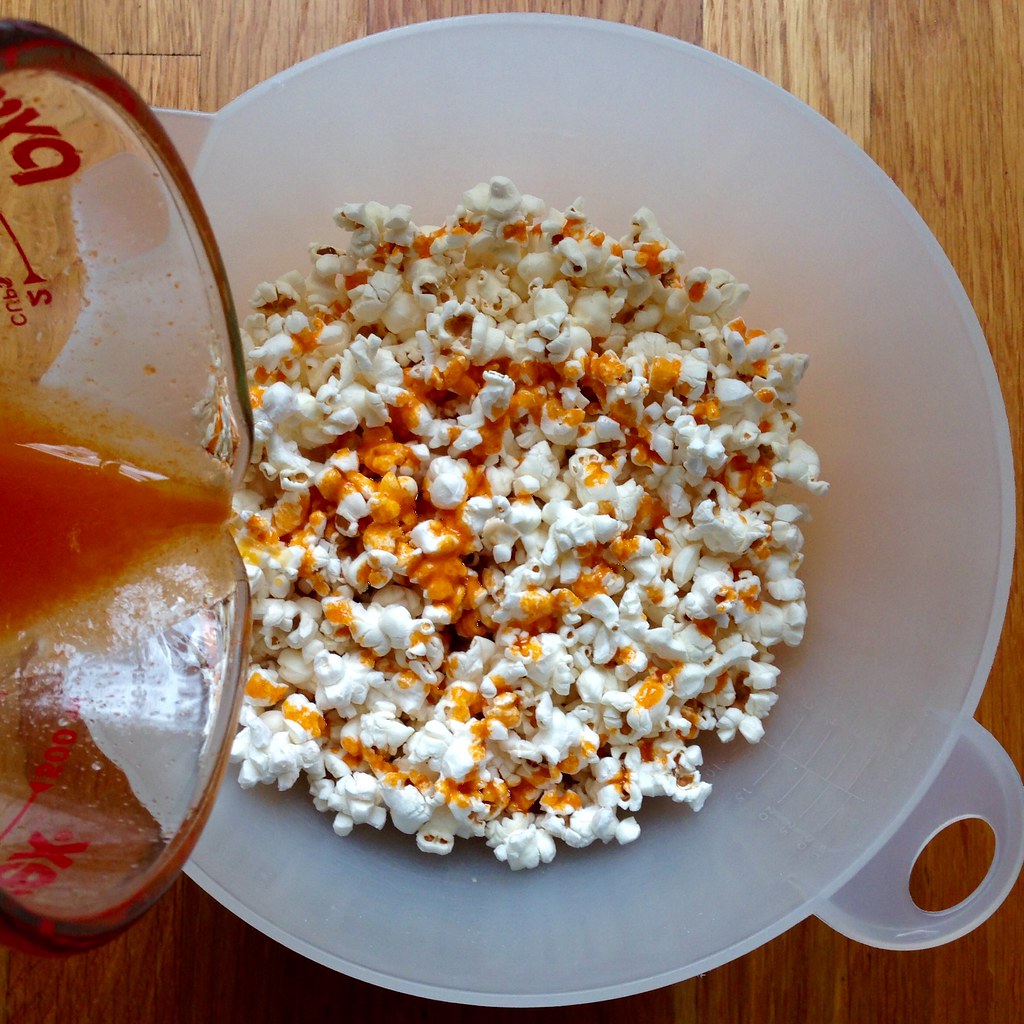
Drizzle half of the sauce over the popcorn in a large bowl. Shake to distribute and then drizzle the other half. Shake again to combine. Add more salt, to taste, if desired.
Next: Cranberry-Port Gelée
Previously: Spatchcock Chicken and Roasted Root Vegetables
Last Year: My Mom's Taiwanese Sticky Rice
Two Years Ago: Grapefruit Pie
Six Years Ago: Homemade Crystallized Ginger
Friday, August 1, 2014
Grace's Ginger Scallion Fish
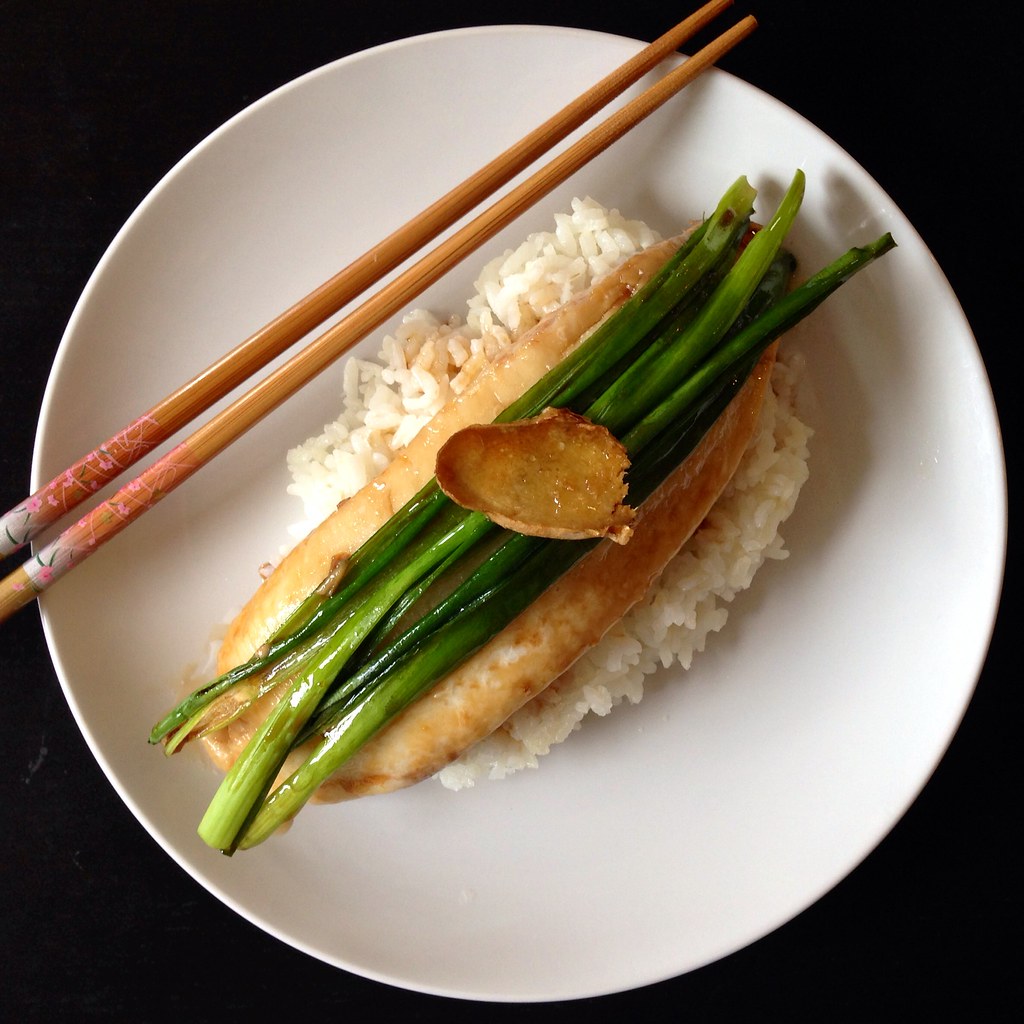
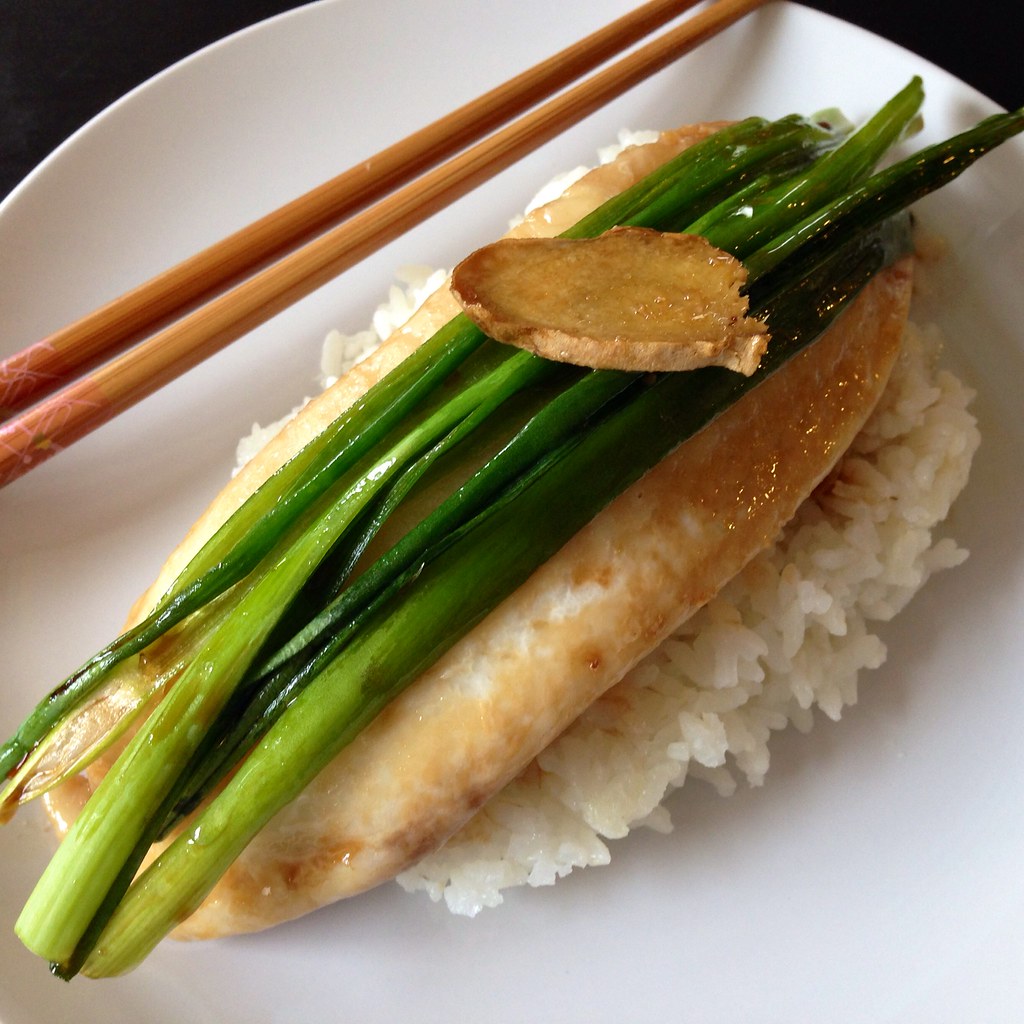
One of my friends posted a picture of some steamed fish she made on Facebook, and it looked so good I had to ask for the recipe. Turns out the fish isn't so much steamed as baked in the oven, but it's so moist and tender, it might as well have been steamed!
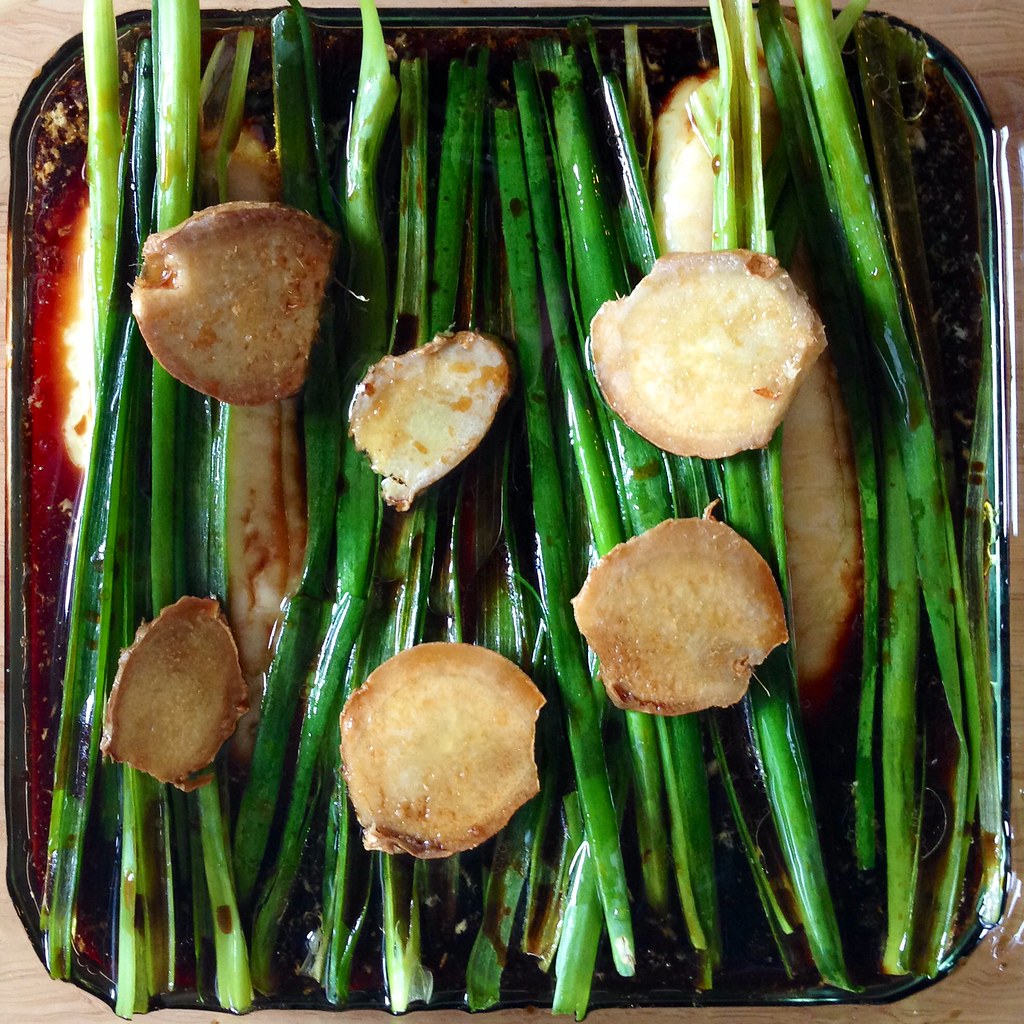
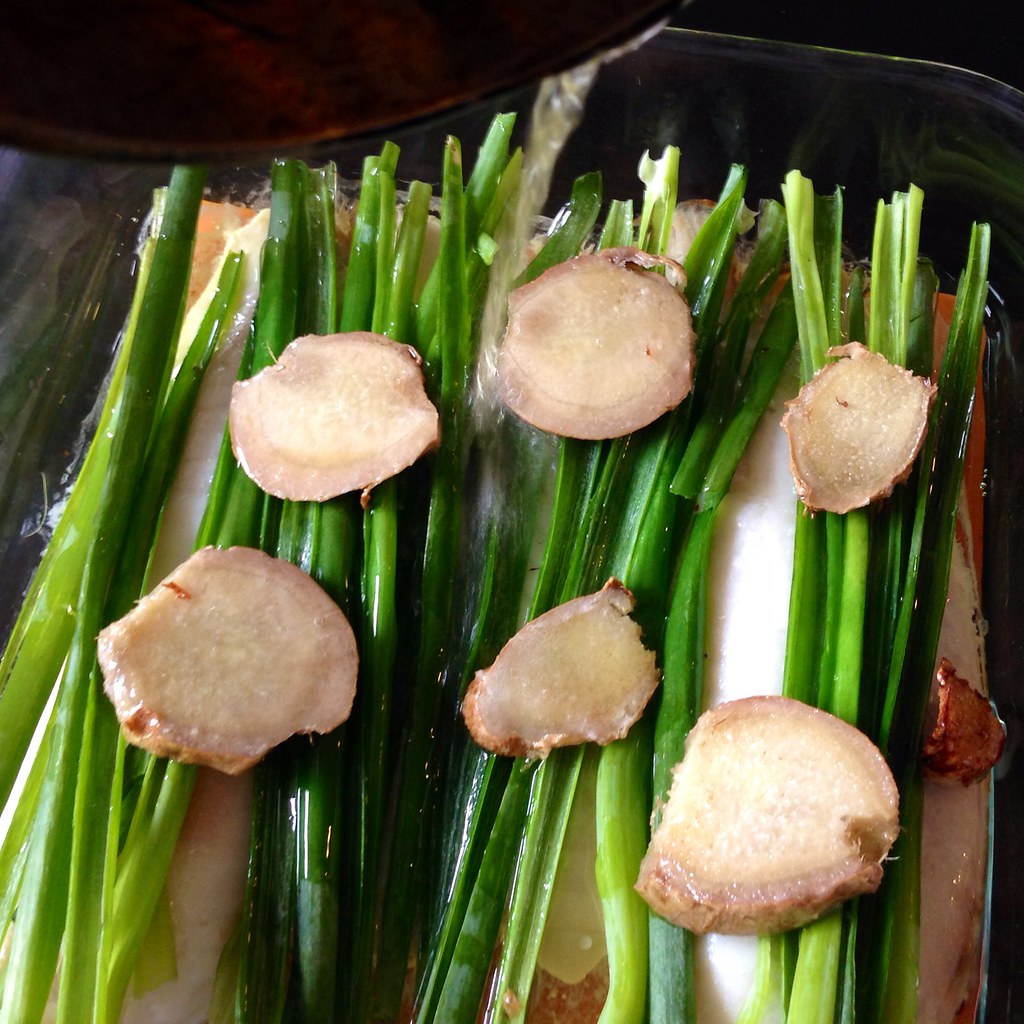
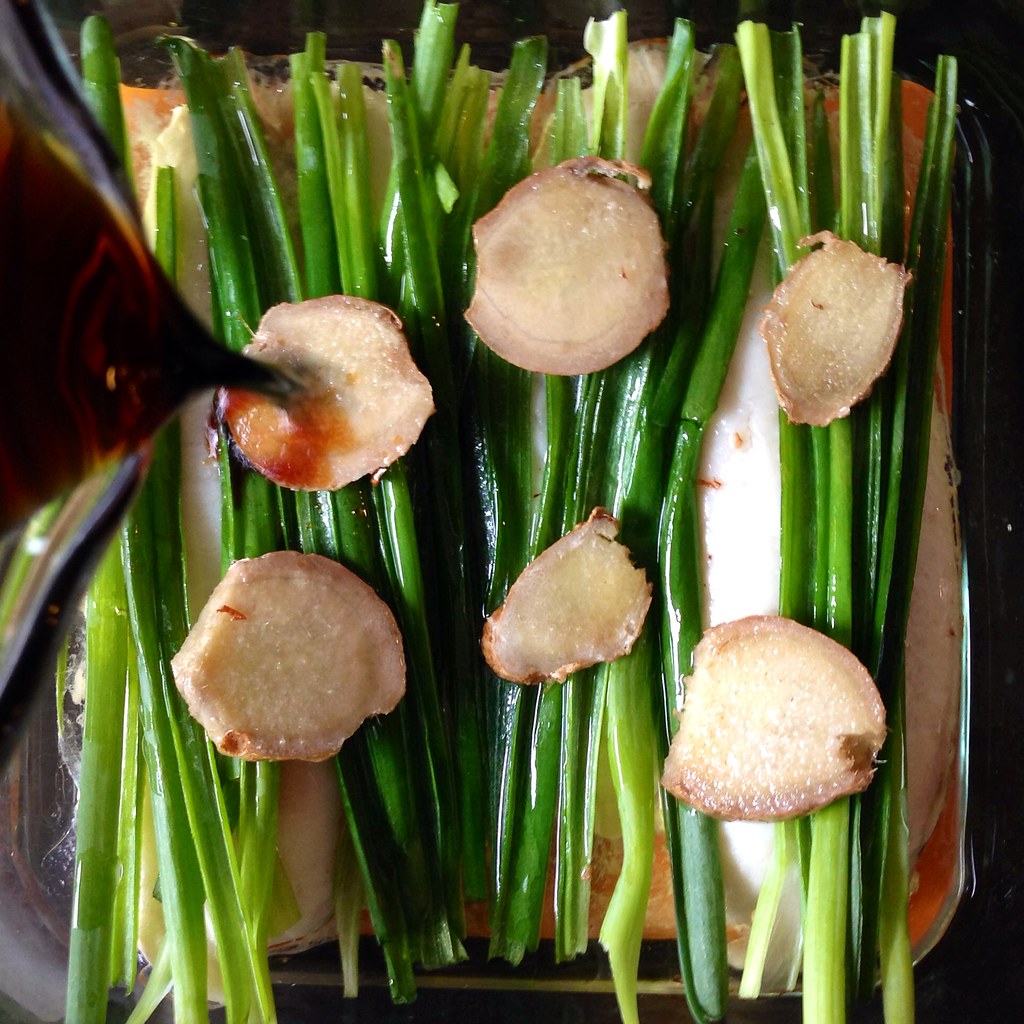
First you bake the fish with some rice wine and ginger slices just until the fish is barely done. The ginger slices are then added to some oil being heated on the stove, and the fish is topped with scallions. Then comes my favorite part: you pour the ginger-infused hot oil over the scallions and fish to seal in moisture and flavor. Finally a sweet soy based sauce is poured over everything. This is great served over steamed rice, and in my opinion, is even better the next day when the fish has absorbed some of the sauce!
Grace's Ginger Scallion Fish
serves 2-4
1-2 lbs. white fish filets (I've used cod and tilapia, but I bet sole, flounder, and orange roughy would work well, too)
5 tablespoons rice wine, divided
2 inch ginger root, thinly sliced
1/4 cup vegetable oil
1 bunch scallions, green parts only
6 tablespoons soy sauce
4 tablespoons sugar
5 tablespoons water
Preheat the oven to 400°F.
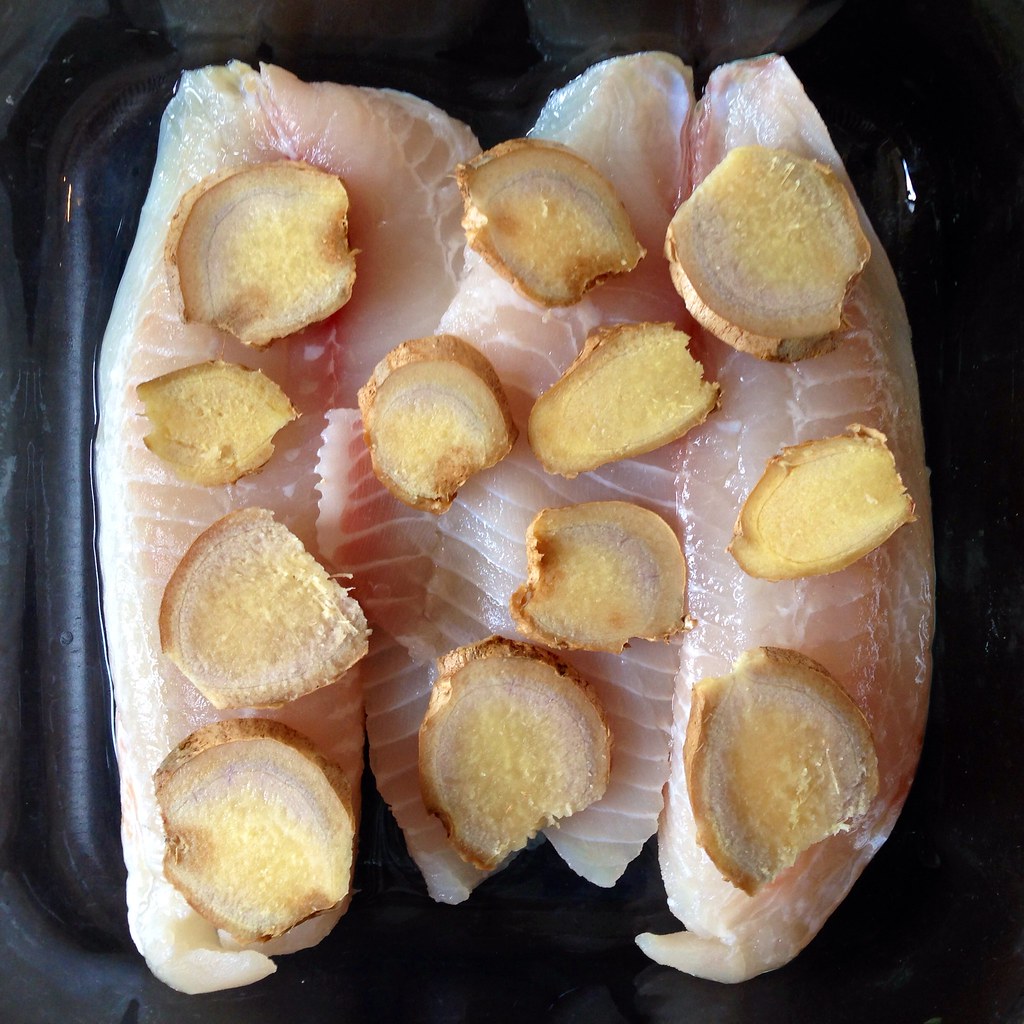
Place the fish filets in a small baking pan. Sprinkle 2 tablespoons of rice wine over the fish and then arrange the ginger slices on top. Bake for 12 minutes or until the fish is just cooked through (do not overcook).
Meanwhile, heat up the oil in a small saucepan over medium low. Mix the remaining 3 tablespoons of rice wine with the soy sauce, sugar, and water and heat for 1 minute in the microwave. Stir to dissolve the sugar.
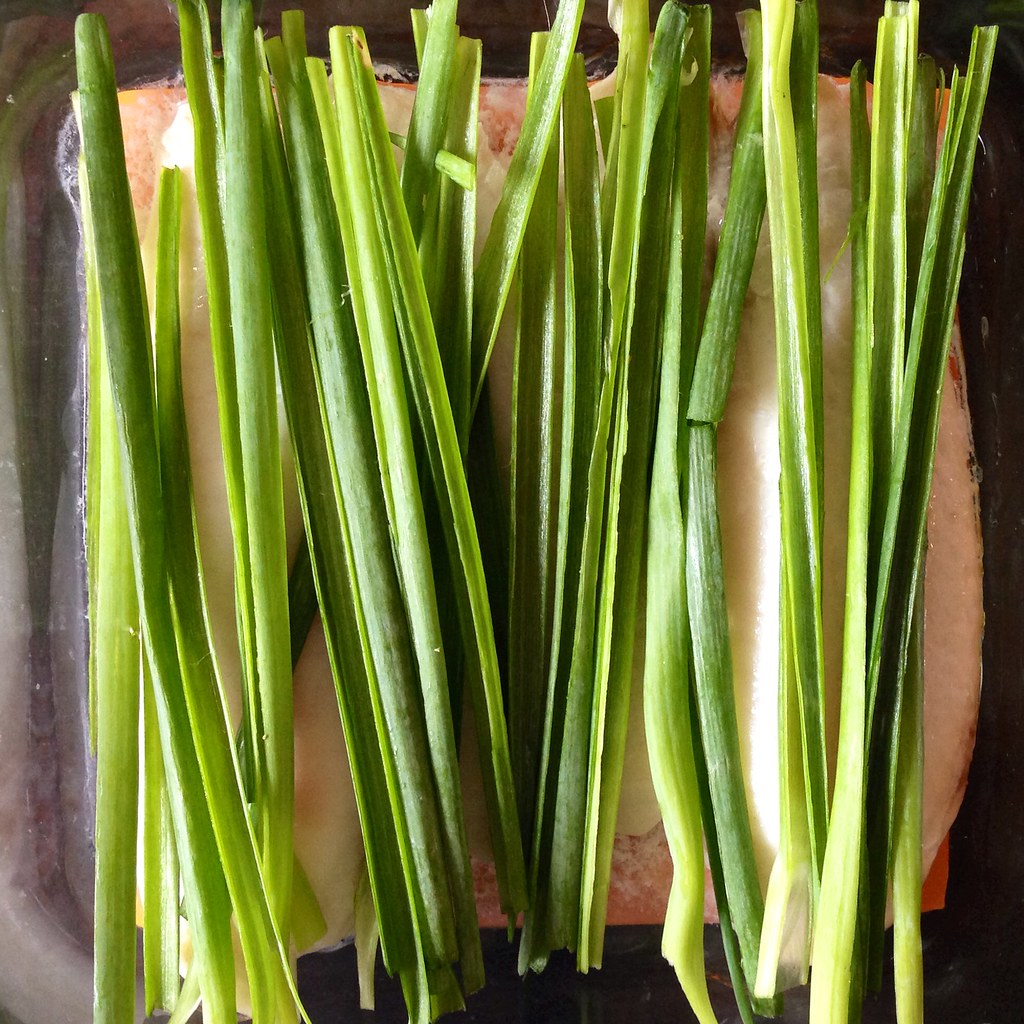
Slice the scallions in half lengthwise or julienne, if you can be bothered.
When the fish is done, remove the ginger slices and transfer to the hot oil. Arrange the scallion on top of the fish.
Bring the heat up on the oil to medium high and cook until the ginger just starts to brown. Immediately pour the hot oil onto the fish. (It's okay with the ginger falls out.)
Pour the soy sauce mixture over the fish and serve warm with rice.
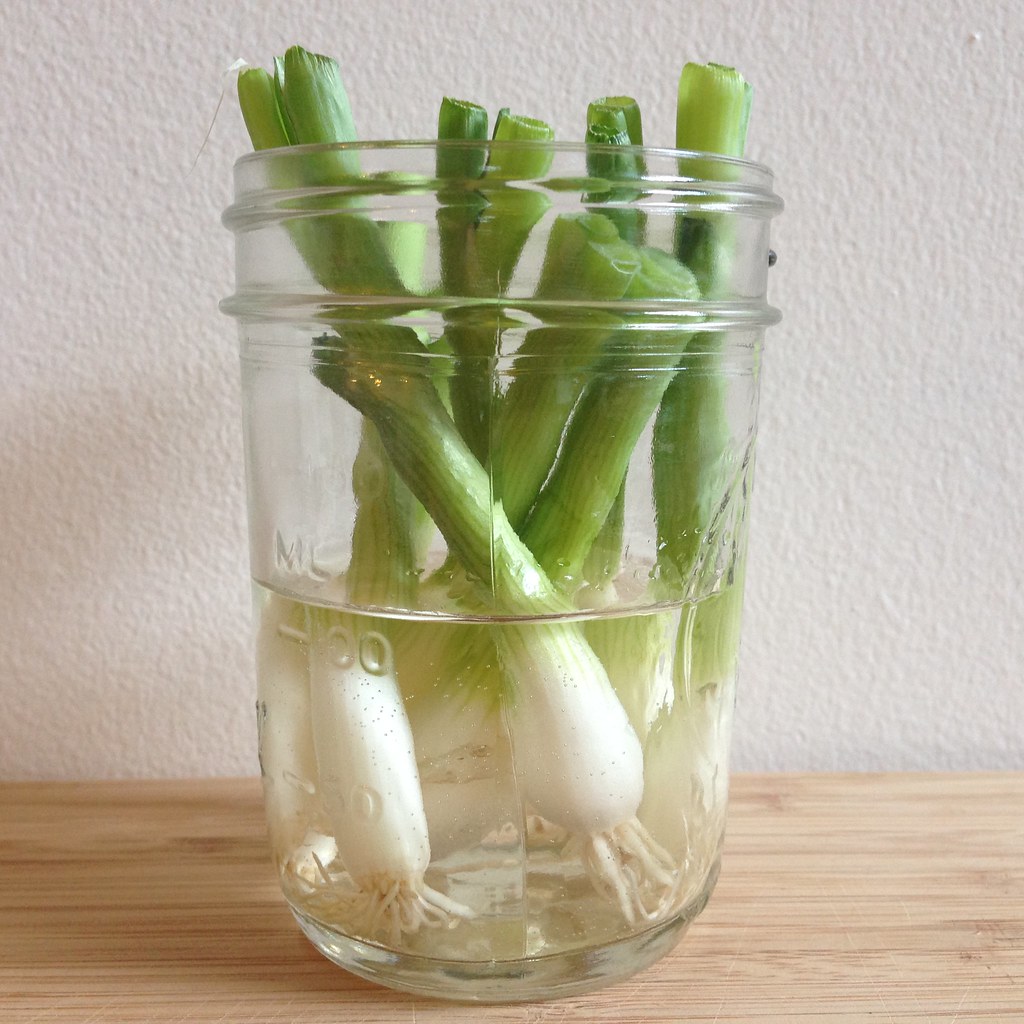
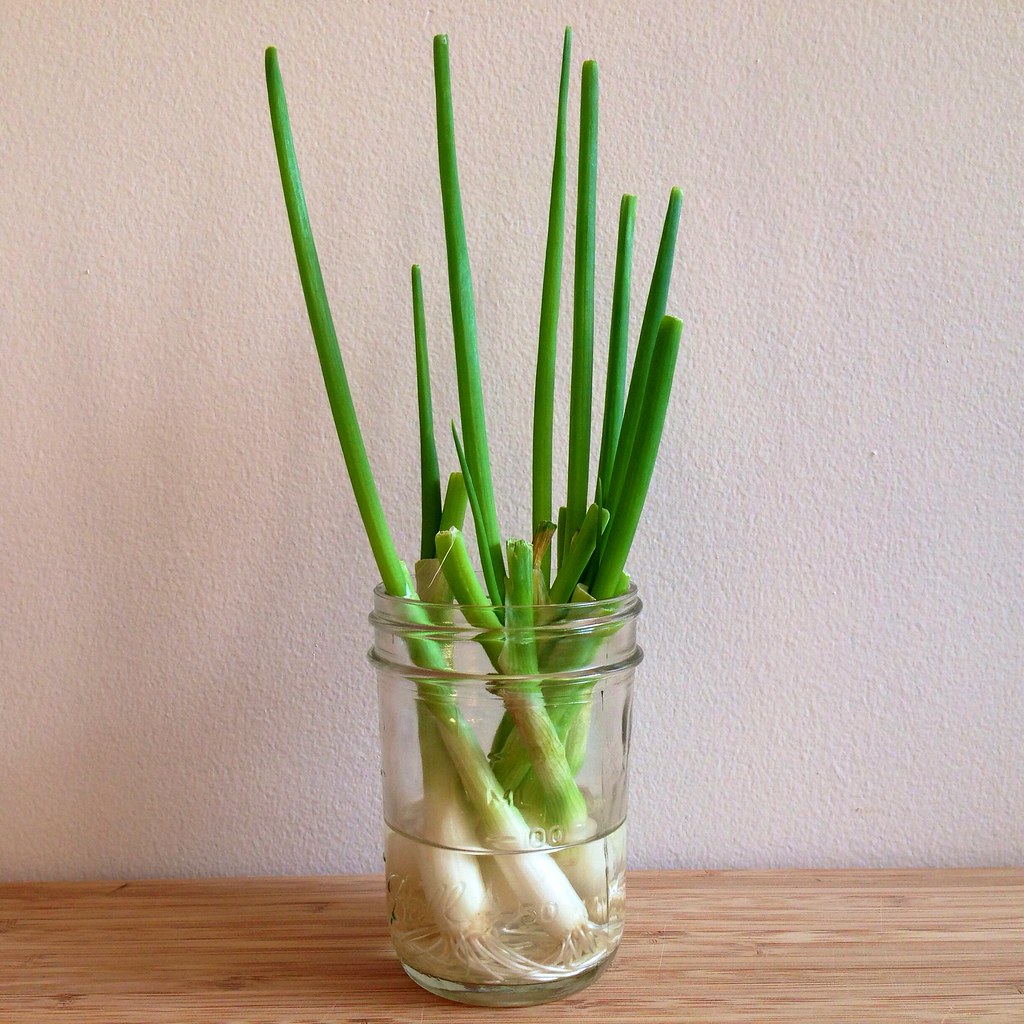
Pro-tip: Don't throw out the scallion roots after you've chopped off the green part! Put them in some water and leave them in a sunny place.
They'll start regrowing, and you can get a lot more mileage out of them. The picture below shows how much they grew in only 5 days! That's enough to make some tomato and eggs over rice. =)
Next: Jacques Genin's Mango Passion Caramels
Previously: Strawberry Pop Tart Slab Pie
Last Year: Cold Soba Noodle Salad with Bake Tofu and Edamame, S'mores Brownie Ice Cream Sandwiches
Friday, November 22, 2013
My Mom's Pi Jiu Ya (Beer-Braised Duck)
I honestly thought I had already shared this recipe with you all, but when I looked it up recently I realized I had just posted a teaser post. How naughty of me!
This is one of those recipes that is way more simple to make than you would think considering how delicious the end result it. And since it's made on the stovetop, it would make a great turkey substitute if you're thinking of going for an Asian-inspired Thanksgiving meal. I would serve it with sticky rice (instead of stuffing), Taiwanese rice cake with meat sauce (instead of mashed potatoes and gravy), steamed scallion buns or scallion pancakes (instead of dinner rolls), and some stir-fried fresh green beans (instead of a green bean casserole). Is anyone else hungry yet?
My Mom's Pi Jiu Ya (Beer-Braised Duck)
serves 6
4-5 lb. duck (thawed, if previously frozen)
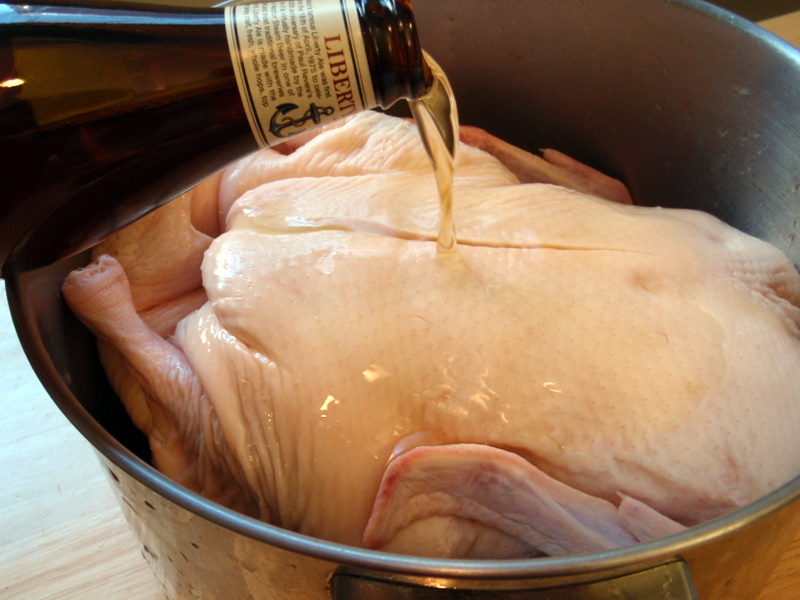
1 can of beer (I've made it with cheap and less cheap beer, and I couldn't taste a difference, although I'm not the most discerning of beer drinkers)
1/3 cup soy sauce
3 tablespoons sugar
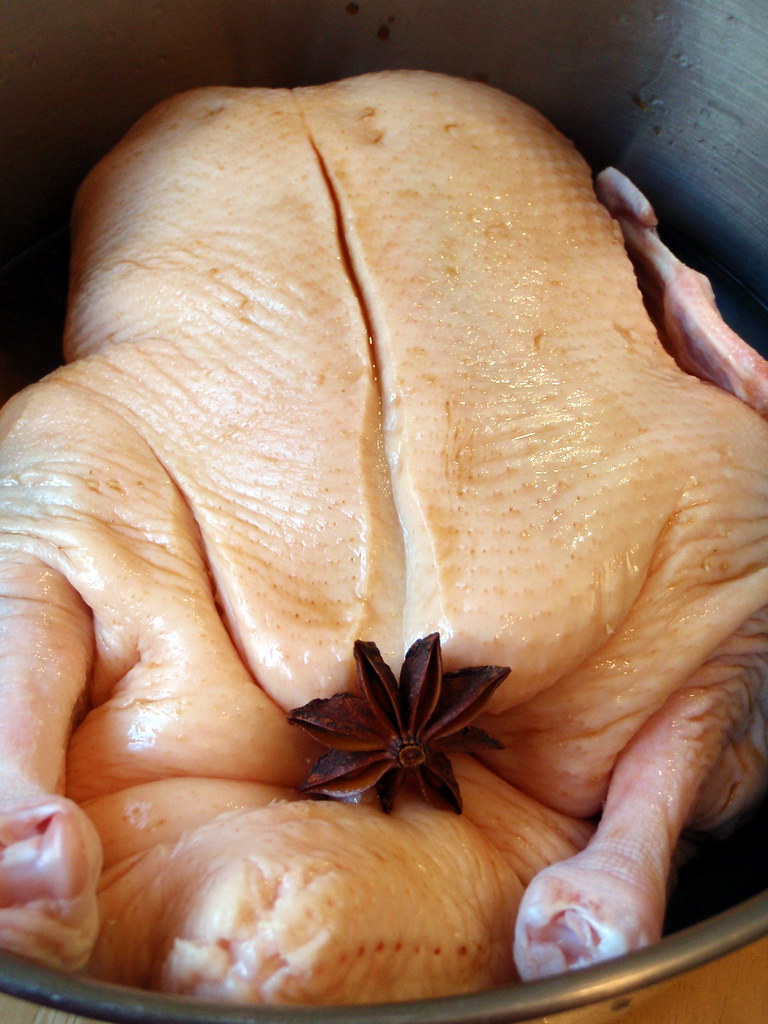
1 star anise
Add all the ingredients to a pot large enough to hold the duck. Fill the empty beer can with water and add to the pot.
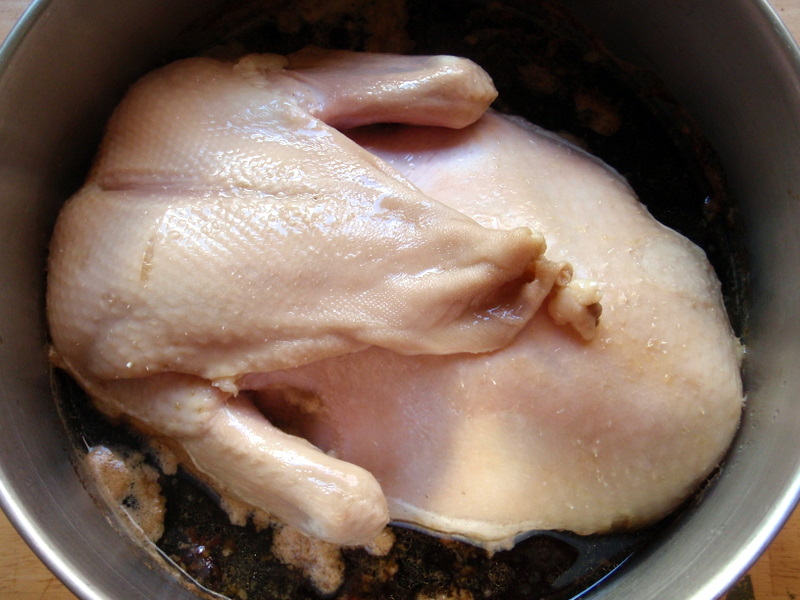
Heat on high until boiling, then reduce heat to medium-low and cover.
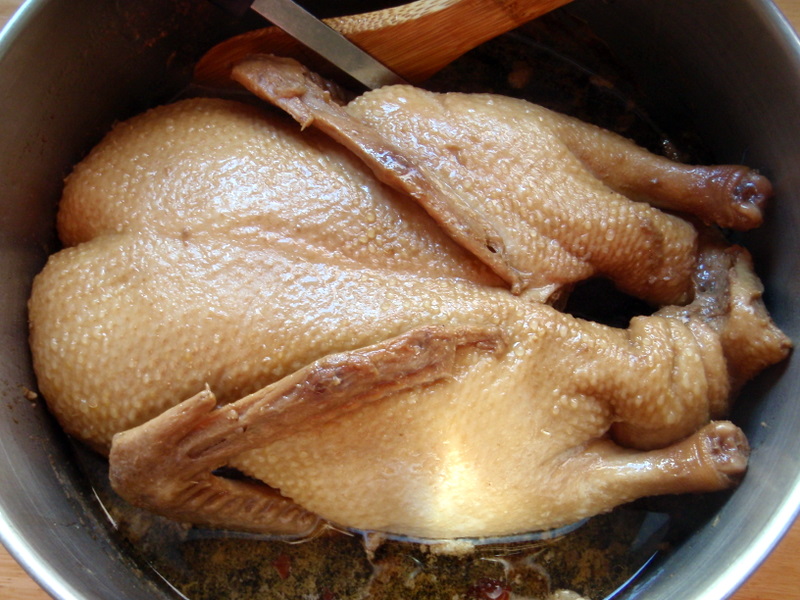
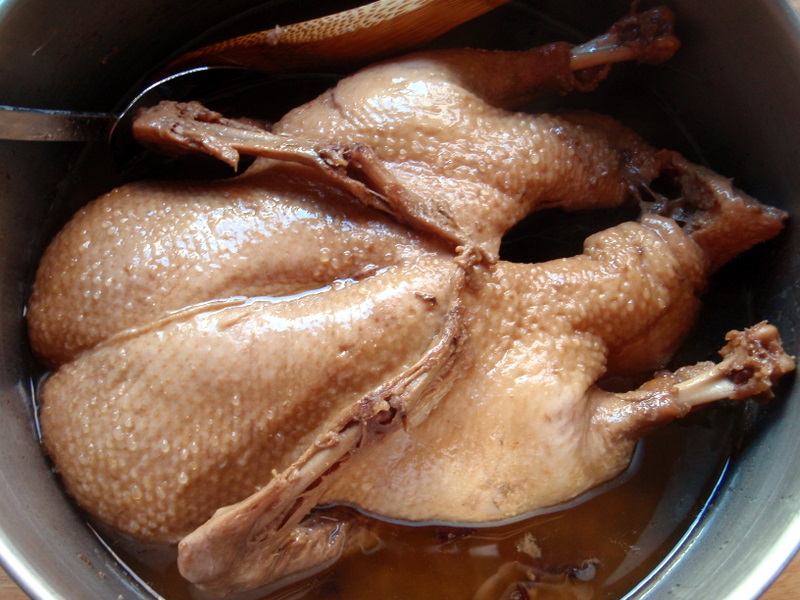
Turn the duck over every half hour until done (2 to 2 1/2 hours). Cook uncovered the last half hour so the duck get s a nice brown, shiny coat.
Serve with the braising sauce over steamed rice. Save the duck fat for duck fat potatoes!
Next: Cheese Fondue Stuffed Roasted Pumpkin
Previously: My Mom's Taiwanese Sticky Rice
Last year: Grapefruit Pie
Four years ago: Nanaimo Bars
This is one of those recipes that is way more simple to make than you would think considering how delicious the end result it. And since it's made on the stovetop, it would make a great turkey substitute if you're thinking of going for an Asian-inspired Thanksgiving meal. I would serve it with sticky rice (instead of stuffing), Taiwanese rice cake with meat sauce (instead of mashed potatoes and gravy), steamed scallion buns or scallion pancakes (instead of dinner rolls), and some stir-fried fresh green beans (instead of a green bean casserole). Is anyone else hungry yet?
My Mom's Pi Jiu Ya (Beer-Braised Duck)
serves 6
4-5 lb. duck (thawed, if previously frozen)
1 can of beer (I've made it with cheap and less cheap beer, and I couldn't taste a difference, although I'm not the most discerning of beer drinkers)
1/3 cup soy sauce
3 tablespoons sugar
1 star anise
Add all the ingredients to a pot large enough to hold the duck. Fill the empty beer can with water and add to the pot.
Heat on high until boiling, then reduce heat to medium-low and cover.
Turn the duck over every half hour until done (2 to 2 1/2 hours). Cook uncovered the last half hour so the duck get s a nice brown, shiny coat.
Serve with the braising sauce over steamed rice. Save the duck fat for duck fat potatoes!
Next: Cheese Fondue Stuffed Roasted Pumpkin
Previously: My Mom's Taiwanese Sticky Rice
Last year: Grapefruit Pie
Four years ago: Nanaimo Bars
Tuesday, July 9, 2013
Zuni Cafe's Fried Eggs in Bread Crumbs
Last week as a thank you gift, I received a four foot baguette from Iggy's. Four feet. Of bread. FYI, I'm only five feet tall. It was a lot of bread, especially for someone who doesn't usually eat that much bread. But I decided I was going to challenge myself to use it all.
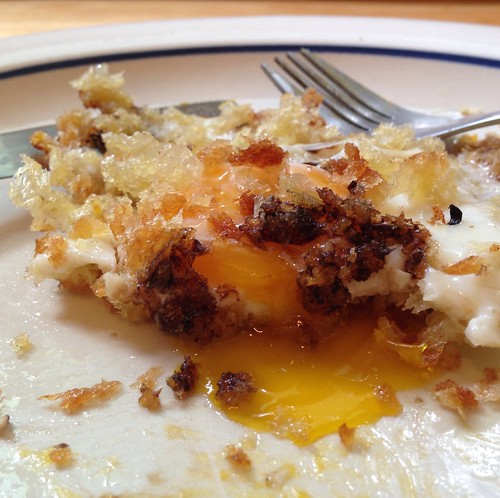
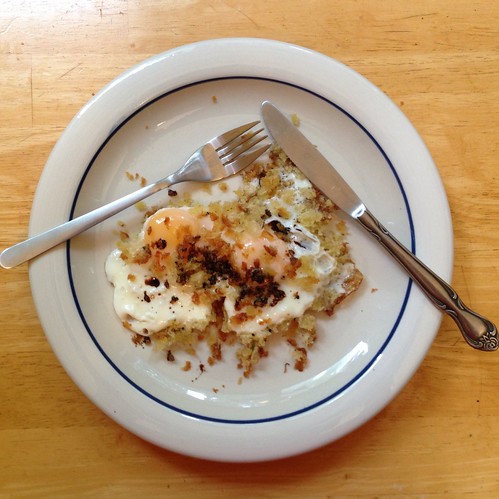
The first thing I knew I wanted to make was Zuni Cafe's eggs fried in bread crumbs. I found this recipe years ago, and every time I end up with some leftover bread I find myself making this. It's the ultimate comfort food: crispy, crunchy bread crumbs topped with a fried egg that oozes golden yellow yolk, cut with a drizzle of warmed balsamic vinegar dressing.
I used to always flip the eggs over at the end so that the top wouldn't be raw but I never liked how they looked when I did that. Then one day I saw my friend Kay making perfect sunny side up eggs that were set on top without having to flip them over. I asked her how she did that, and she told me she just put the lid on when she fried her eggs so that the steam would cook the tops of the eggs. The solution was so simple and brilliant!
Zuni Cafe's Fried Eggs in Bread Crumbs (adapted from The Zuni Cafe Cookbook)
serves 1
6-8 inches French baguette, or another chewy, white peasant-style bread (enough to make 3 packed tablespoons of crustless breadcrumbs)
Kosher salt
2 tablespoons extra-virgin olive oil
Thyme leaves or coarsely chopped rosemary (optional)
2 large eggs
1 teaspoon balsamic vinegar
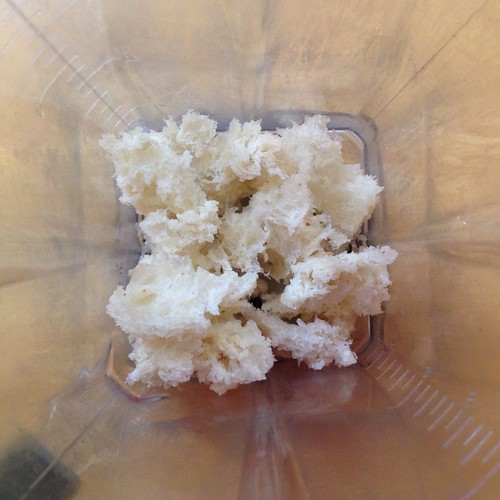
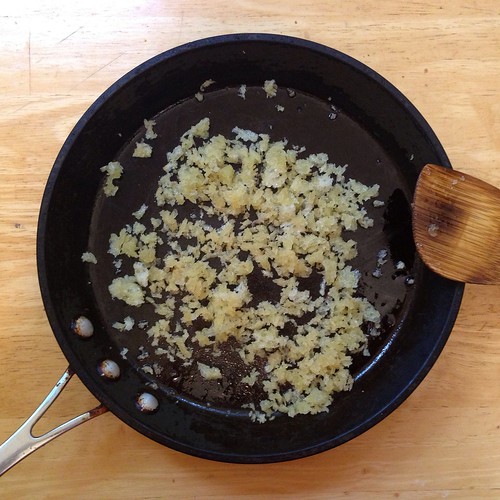
Tear off the bread from the crusts and add to a food processor or blender.
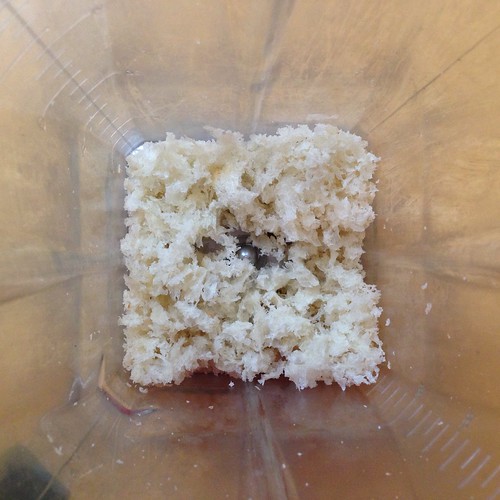
Grind into rough, uneven bread crumbs.
Place the crumbs in a 6- to 8-inch nonstick pan, sprinkle with salt to taste, and then drizzle with the olive oil. Set the pan over medium heat.
Let the crumbs warm through, then swirl the pan as they begin drying out -- which will make a quiet static-like sound. Stir once or twice.
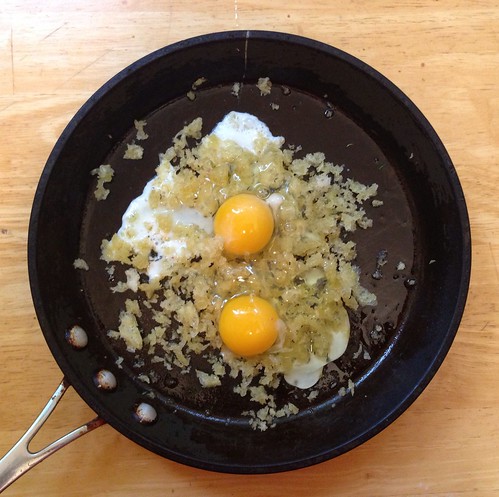
The moment you see the crumbs begin to color, quickly add the herbs if using, then crack the eggs directly onto the crumbs. Cover the pan with a lid and cook the egg until the top is just set.
Slide onto a warm plate, then add the vinegar to the hot pan. Swirl the pan once, then pour the drops of sizzling vinegar over the eggs.
Next: BLT with Avocado and Basil Mayonnaise
Previously: Potatoes Boulangère
Four years ago: Curried Carrot Soup
Wednesday, November 28, 2012
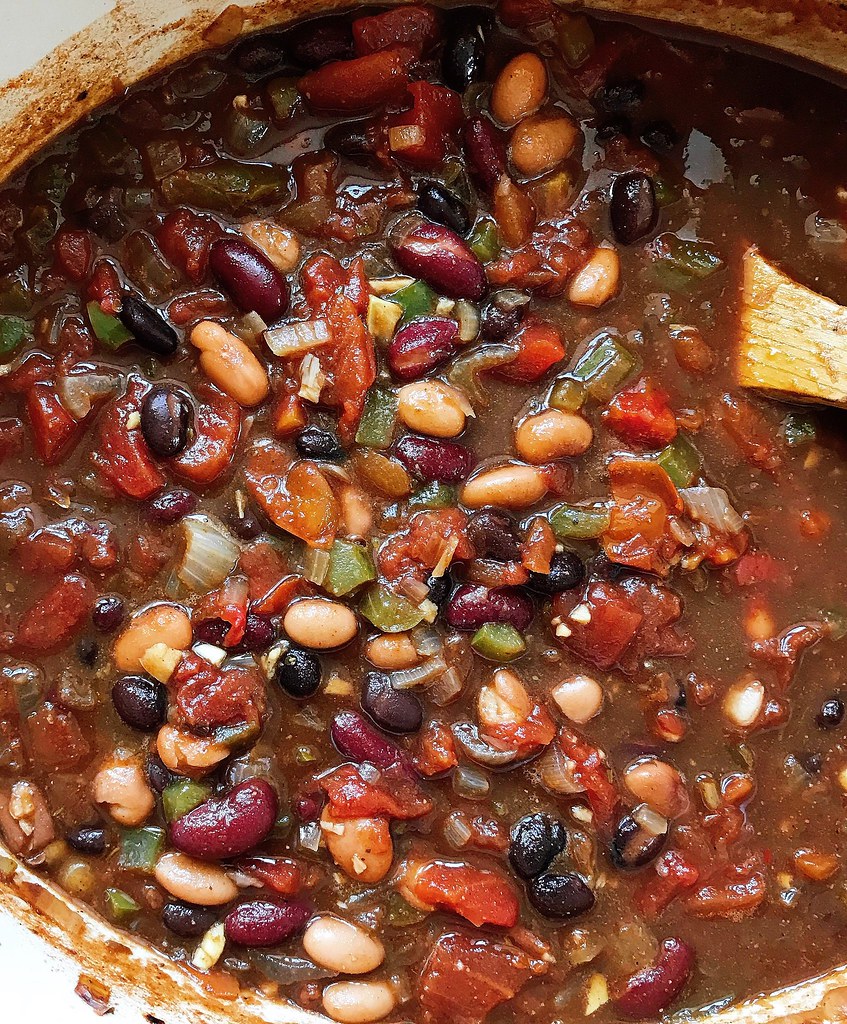
Three Bean Chili
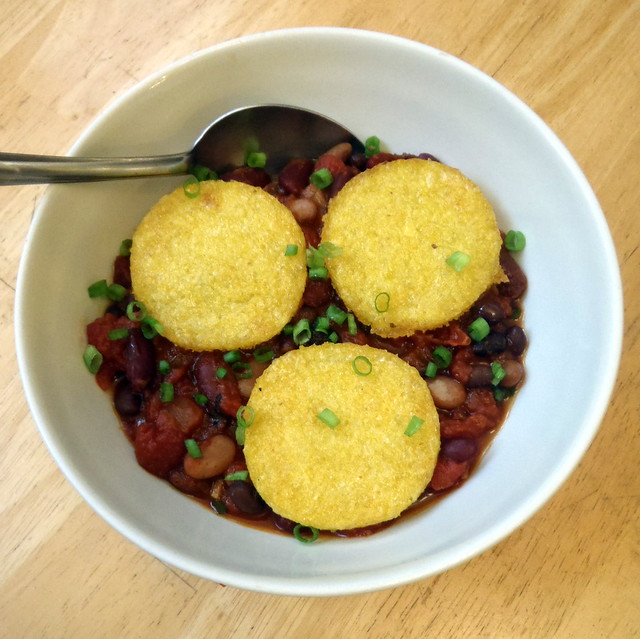
Here's another healthy recipe full of fiber that will make you feel better after eating it. It's even vegan (if you don't add cheese or sour cream), but I always feel full after eating it. I used to make this at church along with polenta for hundreds of people, and no one ever complained for the lack of meat (although more than a few didn't eat the polenta because they didn't know what it was).
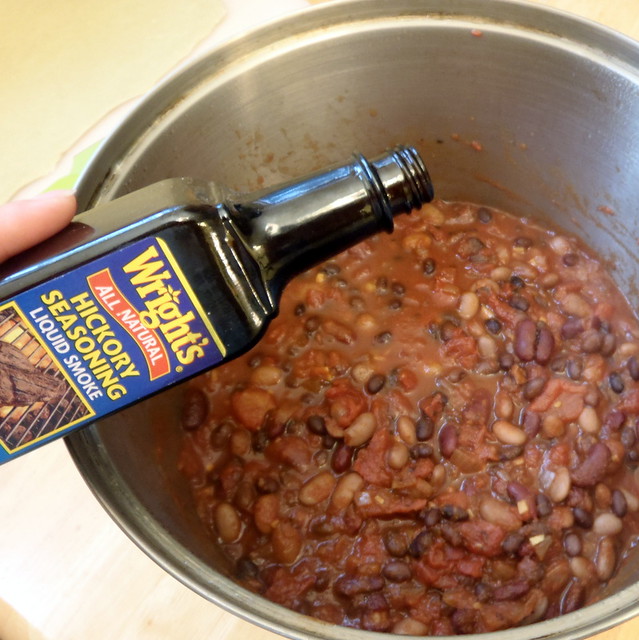
I've taken the recipe from PETA and added three secret ingredients, adobo seasoning, liquid smoke, and chipotle peppers in adobo, to give it some real depth of flavor. Well, I guess the ingredients aren't that secret anymore. =) Start with just a little bit of peppers, taste, and then add more because a little goes a long way.
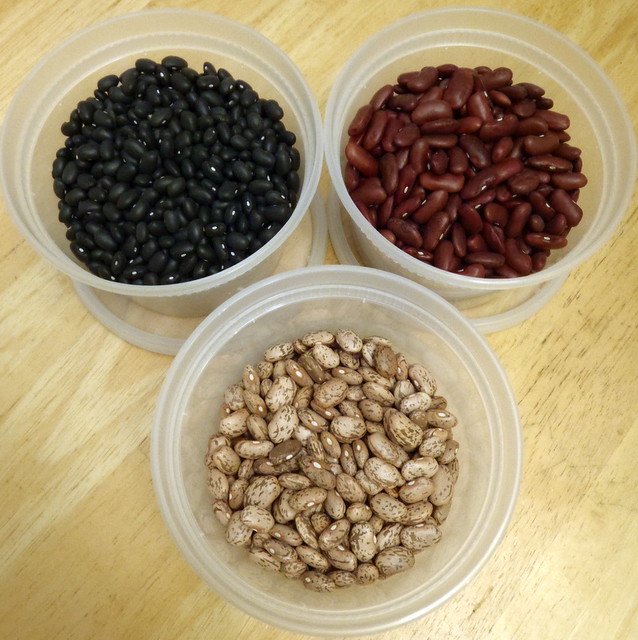
The recipe is pretty forgiving. I've had to substitute crushed tomatoes and whole tomatoes for the diced tomatoes before. Once I even used salsa instead of some of the tomatoes, and it still turned out okay. I've made this with dried beans before, but it's a lot easier to make it with canned beans. The original recipe calls for 2 parts kidney beans to 1 part pinto beans, but I substitute a can of black beans in for half the kidney beans to give it more color.
Three Bean Chili (adapted from PETA)
serves 6
2 tablespoons canola oil
6 garlic cloves, minced
1 cup chopped white onion
Red pepper flakes, to taste
1 tablespoon chili powder
2 1/2 teaspoon ground cumin
1 tablespoon adobo seasoning
1 teaspoon oregano
1 bay leaf
28-oz. can diced fire-roasted tomatoes
1 tablespoon soy sauce
1 1/2 cups vegetable stock
6 oz. tomato paste
1 tablespoon red wine vinegar
16 oz. can pinto beans, drained
16 oz. can kidney beans, drained
16 oz. can black beans, drained
1 teaspoon liquid smoke
Chipotle peppers in adobo, chopped, to taste
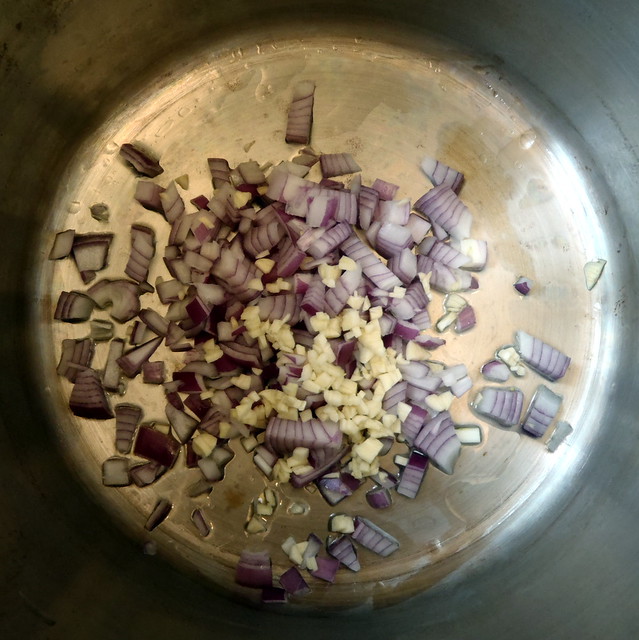
Heat the oil in a large pot over medium heat. Add the garlic and onion and sauté until softened, about 5 minutes.
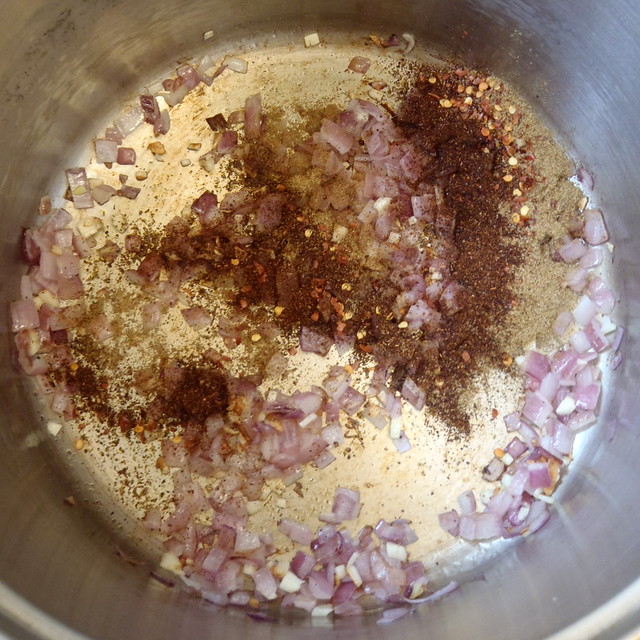
Add the red pepper flakes, chili powder, and cumin and cook for an additional 2 minutes, or until fragrant.
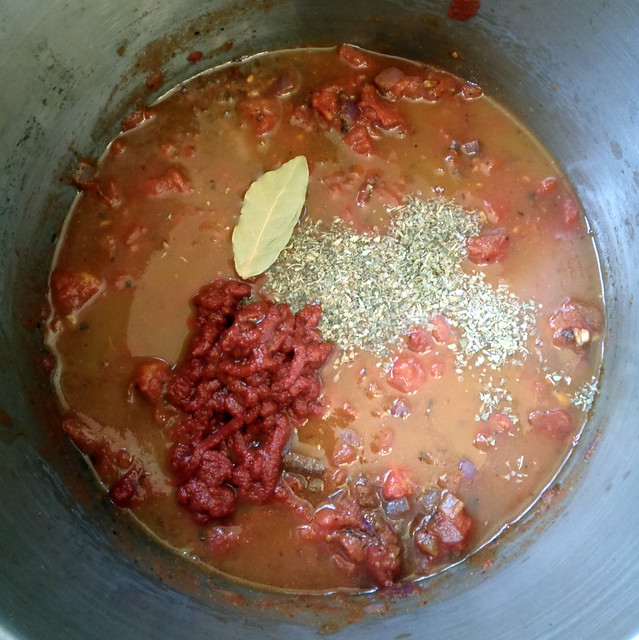
Add the adobo seasoning, oregano, bay leaf, tomatoes, soy sauce, stock, tomato paste, and vinegar, then bring to a boil, lower the heat, and simmer 30 minutes, stirring occasionally.
Add the beans and simmer 15 minutes longer to heat through and blend flavors. Add more water, if necessary, or cook longer to reach desired consistency. Add the liquid smoke and chopped chipotle peppers and stir to combine.
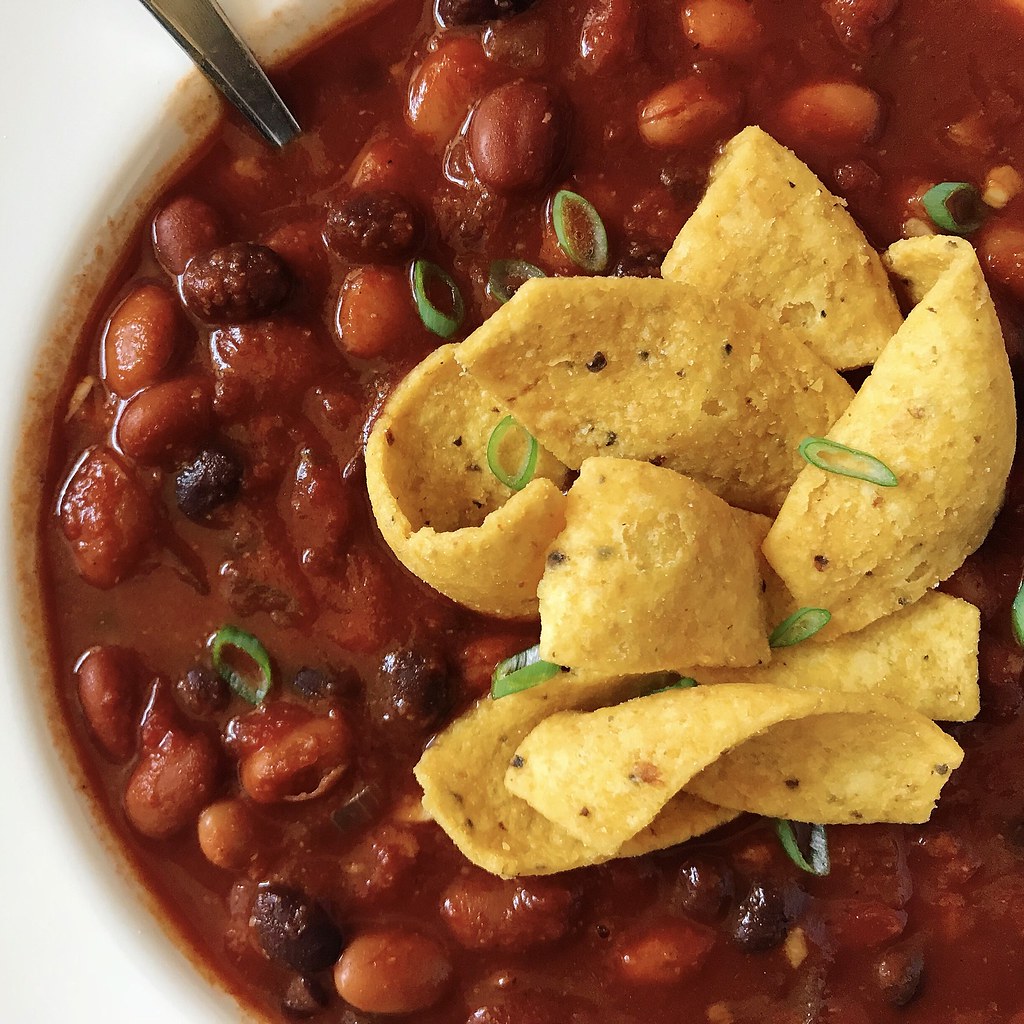
You can serve this with shredded cheese, sour cream, avocado slices, and chopped green onions. I like to eat this with Fritos, brown rice and lime-flavored tortilla chips, or fried polenta. You can find tubes of pre-cooked polenta at Trader Joe's and just slice and pan fry it. The chili freezes well, so go ahead and make a big pot!
Three years ago: Kettle Corn
Wednesday, October 31, 2012
The Famous Butter Tomato Sauce
Here's another one of those super simple, only-three-ingredient recipes that I love. I think I first discovered this recipe from Orangette, but it's also been posted by so many other people. Gilt Taste speculates that it might be the "most-blogged about pasta sauce on earth". I've even read about this sauce in a Nicholas Sparks book!
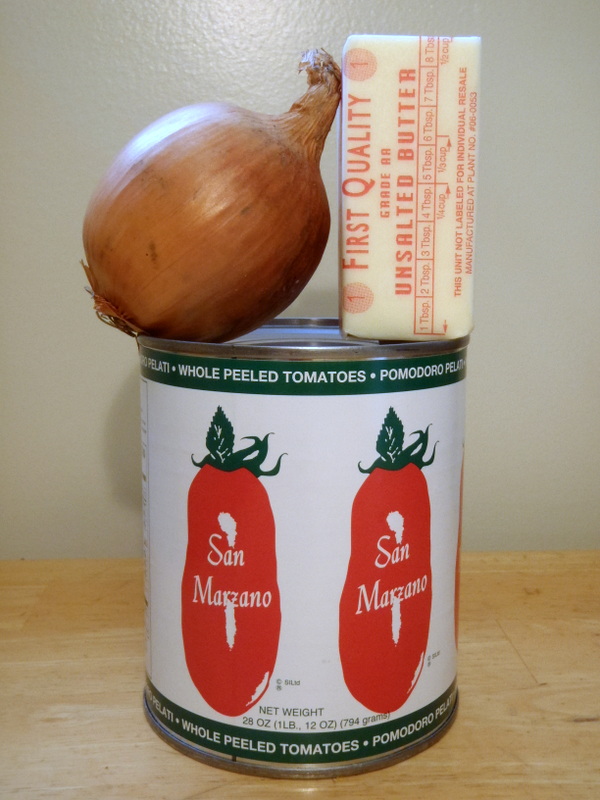
So when I saw that San Marzano tomatoes were on sale at Whole Foods (3 cans for $7!), I knew I had to get some cans and make this sauce again.
Marcella Hazan's Tomato Sauce with Onion and Butter (adapted from Marcella Hazan's Essentials of Classic Italian Cooking)
makes enough sauce to toss with 1 pound of dried pasta
1 28-oz. can of San Marzano whole, peeled tomatoes
1 small onion, peeled and halved
5 tablespoons butter
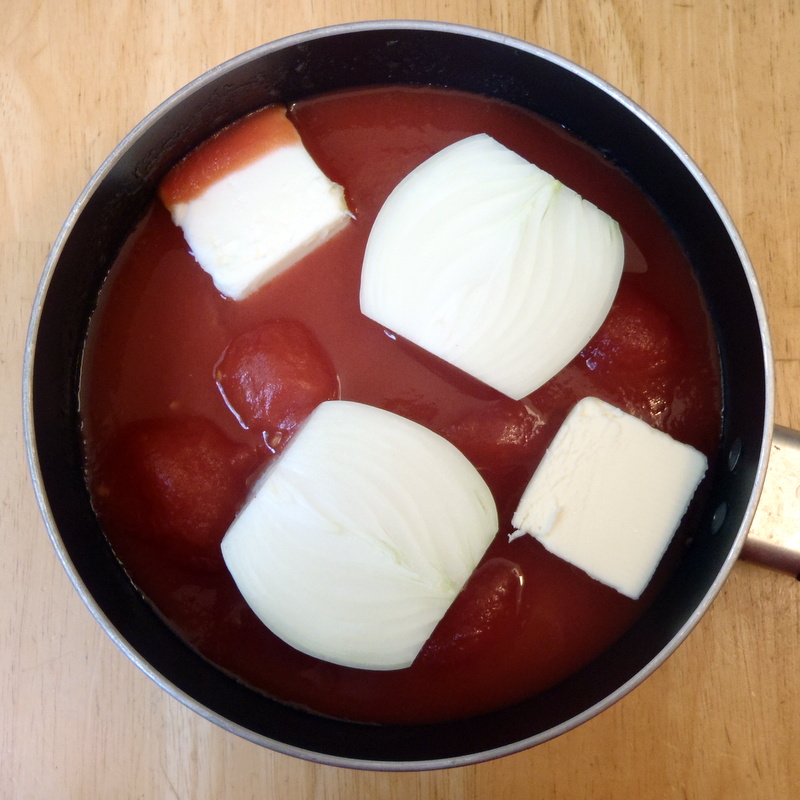
Combine the tomatoes, their juices, the butter, and the onion halves in a medium saucepan. Add a pinch or two of salt. Place over medium heat and bring to a simmer. Cook, uncovered, at a very slow but steady simmer, adjusting the heat as necessary, for about 45 minutes, or until droplets of fat float free from the tomato (this took me longer than 45 minutes).
Stir occasionally, mashing any large pieces of tomato with the back of a wooden spoon (be careful; I ended up squirting myself a few times with hot tomato innards!).
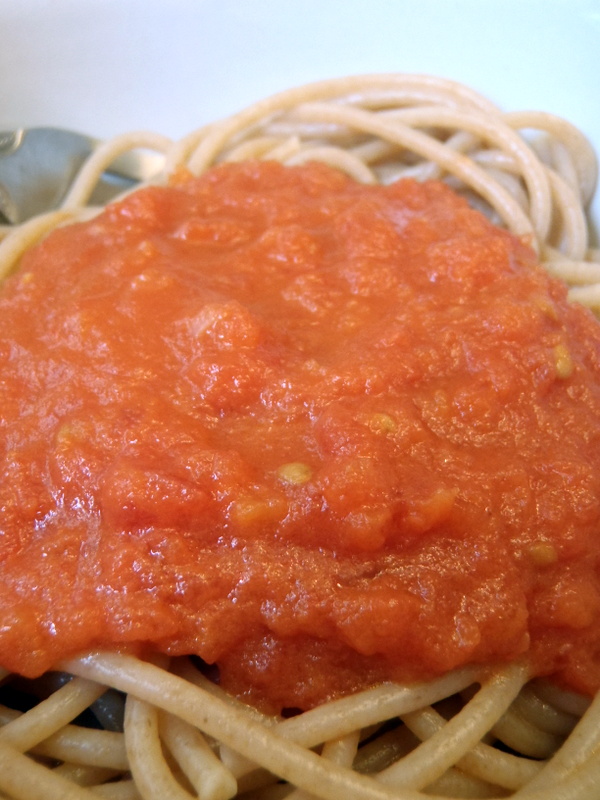
Taste and salt as needed. Discard the onion before tossing the sauce with cooked pasta.
I actually washed the sauce off the onion and saved it in the fridge for the next time I needed to add softened onions to a dish. If you want, you could just chop up the onions and throw them in the sauce, or blend them into the sauce, but I think the sauce is already perfectly balanced as is. The only thing I would maybe add to the pasta is some shaved parmesan cheese.
So when I saw that San Marzano tomatoes were on sale at Whole Foods (3 cans for $7!), I knew I had to get some cans and make this sauce again.
Marcella Hazan's Tomato Sauce with Onion and Butter (adapted from Marcella Hazan's Essentials of Classic Italian Cooking)
makes enough sauce to toss with 1 pound of dried pasta
1 28-oz. can of San Marzano whole, peeled tomatoes
1 small onion, peeled and halved
5 tablespoons butter
Combine the tomatoes, their juices, the butter, and the onion halves in a medium saucepan. Add a pinch or two of salt. Place over medium heat and bring to a simmer. Cook, uncovered, at a very slow but steady simmer, adjusting the heat as necessary, for about 45 minutes, or until droplets of fat float free from the tomato (this took me longer than 45 minutes).
Stir occasionally, mashing any large pieces of tomato with the back of a wooden spoon (be careful; I ended up squirting myself a few times with hot tomato innards!).
Taste and salt as needed. Discard the onion before tossing the sauce with cooked pasta.
I actually washed the sauce off the onion and saved it in the fridge for the next time I needed to add softened onions to a dish. If you want, you could just chop up the onions and throw them in the sauce, or blend them into the sauce, but I think the sauce is already perfectly balanced as is. The only thing I would maybe add to the pasta is some shaved parmesan cheese.
Monday, October 8, 2012
Hot Crash Potatoes
I got this recipe from The Pioneer Woman, who calls these Crash Hot Potatoes, but for whatever reason, I keep calling them Hot Crash Potatoes in my head. Maybe because it sounds more like hot cross buns or hot mashed potatoes. Regardless, whenever I get small potatoes in my Boston Organics delivery, I get really excited because it means I can make these.
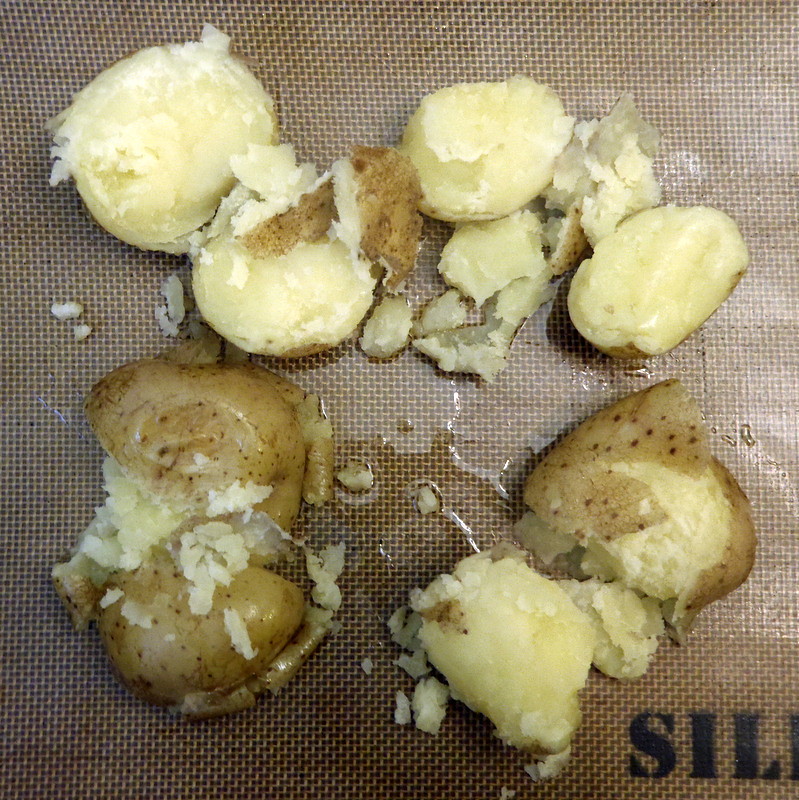
It's not the fastest recipe, and you end up having to use multiple pieces of cookware (since you have to first boil and then bake the potatoes), but in my opinion, it's worth it. These potatoes end up exponentially crispier than regular roasted potatoes without all the mess and greasiness involved with frying. The only thing is, my potatoes have never been as photogenic as the ones on The Pioneer Woman's site. Hers remain in one piece, and she writes that, "you almost want it to resemble a cookie." Mine split in half and look more like Humpty Dumpty after he fell off the wall.
But since I'm usually just making these for myself to eat, I don't really care. I just continue to smoosh them until there's plenty of surface area for the olive oil to catch onto and make crispy.
Hot Crash Potatoes (from The Pioneer Woman)
New Potatoes (or other small, round potatoes)
Olive Oil
Kosher Salt to taste
Black Pepper to taste
Rosemary (or other herbs, I used Thyme) to taste
It's not the fastest recipe, and you end up having to use multiple pieces of cookware (since you have to first boil and then bake the potatoes), but in my opinion, it's worth it. These potatoes end up exponentially crispier than regular roasted potatoes without all the mess and greasiness involved with frying. The only thing is, my potatoes have never been as photogenic as the ones on The Pioneer Woman's site. Hers remain in one piece, and she writes that, "you almost want it to resemble a cookie." Mine split in half and look more like Humpty Dumpty after he fell off the wall.
But since I'm usually just making these for myself to eat, I don't really care. I just continue to smoosh them until there's plenty of surface area for the olive oil to catch onto and make crispy.
Hot Crash Potatoes (from The Pioneer Woman)
New Potatoes (or other small, round potatoes)
Olive Oil
Kosher Salt to taste
Black Pepper to taste
Rosemary (or other herbs, I used Thyme) to taste
Bring a pot of salted water to a boil. Add in as many potatoes as you wish to make and cook them until they are fork-tender, about 20-30 minutes depending on the size of the potatoes. Drain well.
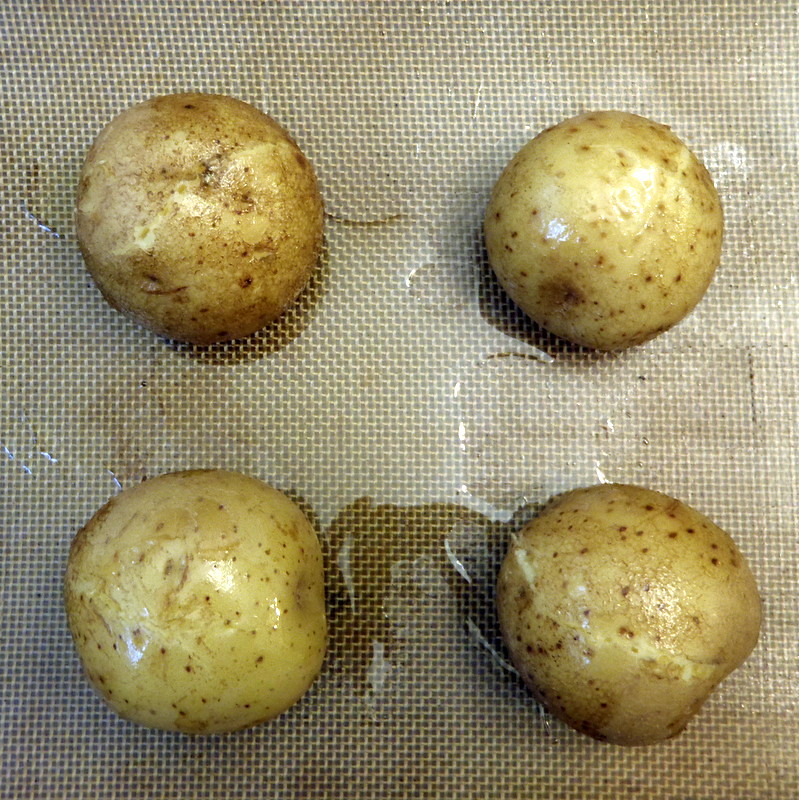
Preheat oven to 450°F. On a sheet pan (I line mine with a Silpat), generously drizzle olive oil. Place tender potatoes on the cookie sheet and with a potato masher (I use a slotted spoon), gently press down each potato until it slightly mashes, rotate the potato masher 90 degrees and mash again.
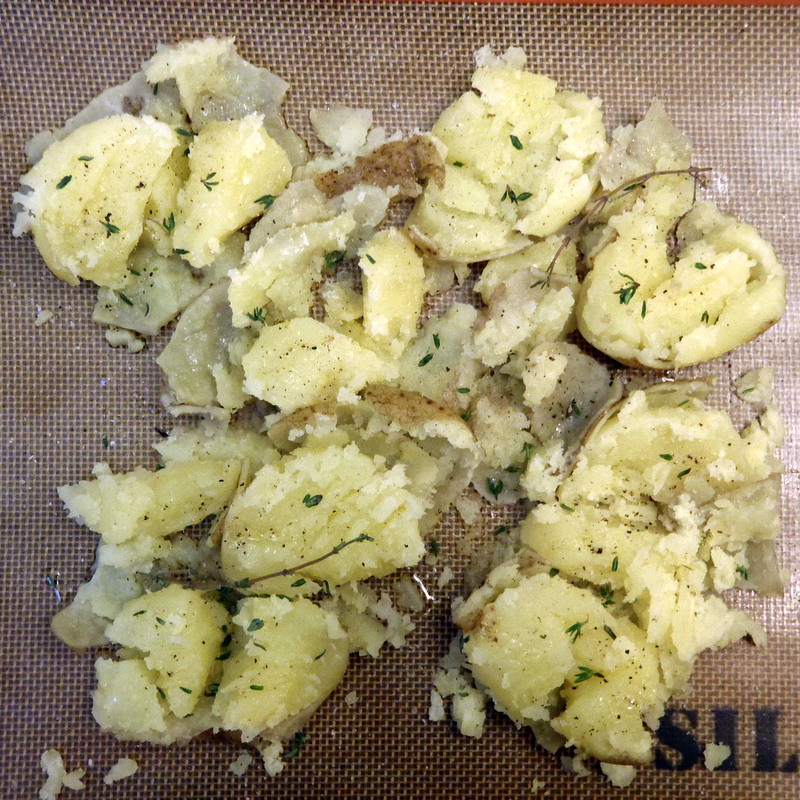
Crowd the potatoes close to each other and carefully drizzle olive oil on top, making sure that almost all the surfaces are covered with oil.
Sprinkle potatoes with kosher salt, fresh ground black pepper and fresh chopped rosemary (or chives or thyme or whatever herb you have available). Now spread the potatoes further apart on the sheet.
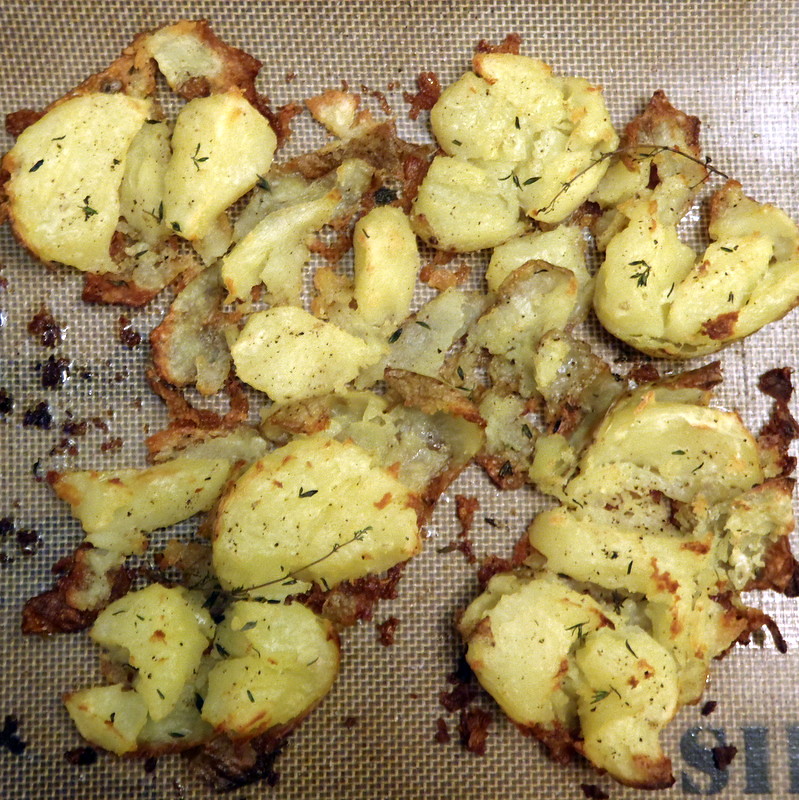
Bake for 20-25 minutes until golden brown.
Edited to add: I wanted to make these today but the only potatoes I had were a little too large so I just cut them in half before adding them to the boiling water. Then I put them skin side down on the sheet before smooshing them. They looked a lot more like the Pioneer Woman's potatoes this way but turned out less crispy because the cut side was exposed to the boiling water. They were still really delicious, though, and it took less time to boil them so this was definitely a "why didn't I think of that before?" moment.
Preheat oven to 450°F. On a sheet pan (I line mine with a Silpat), generously drizzle olive oil. Place tender potatoes on the cookie sheet and with a potato masher (I use a slotted spoon), gently press down each potato until it slightly mashes, rotate the potato masher 90 degrees and mash again.
Crowd the potatoes close to each other and carefully drizzle olive oil on top, making sure that almost all the surfaces are covered with oil.
Sprinkle potatoes with kosher salt, fresh ground black pepper and fresh chopped rosemary (or chives or thyme or whatever herb you have available). Now spread the potatoes further apart on the sheet.
Bake for 20-25 minutes until golden brown.
Edited to add: I wanted to make these today but the only potatoes I had were a little too large so I just cut them in half before adding them to the boiling water. Then I put them skin side down on the sheet before smooshing them. They looked a lot more like the Pioneer Woman's potatoes this way but turned out less crispy because the cut side was exposed to the boiling water. They were still really delicious, though, and it took less time to boil them so this was definitely a "why didn't I think of that before?" moment.
Subscribe to:
Posts (Atom)