Friday, February 26, 2010

Bacon Caramel Corn

https://www.flickr.com/photos/joyosity/4377062813/

It started with the best and healthiest of intentions. When I saw that Boston Organics was offering organic popcorn as an add-on, I thought, "Ooh! I love popcorn; I should order some!" And then once I received it, I thought, I could use my air popper (thanks, Susan, I'm still using it after all these years!) to pop this. But then the evil food fairy that sits on my left shoulder said, "Yes, you could, but what's the unhealthiest thing you could do with this?"

Ladies and gentlemen, I present to you bacon caramel corn.

With all the hoopla over bacon the past couple of years, I figured (correctly) that I couldn't have been the first person to come up with the idea and googled for a recipe. I used the one I found on bunrab.com, and the only changes I made were omitting the almonds, using a cup of light brown sugar and a cup of dark brown sugar instead of 2 cups of golden brown sugar, and popping the popcorn in bacon fat, just because I had some and wanted to see what popcorn popped in bacon fat tasted like.

Bacon Caramel Corn (based on bunrab's recipe)
makes 3 pints

1/2 pound bacon
1/3 cup organic popcorn kernels*
1 cup butter
2 cups brown sugar (I used 1 cup light and 1 cup dark just because)
1/2 cup light corn syrup
2 teaspoons kosher salt
1 teaspoon baking soda

Cut bacon into a fine dice and fry until crisp. Reserve 2 tablespoons of the bacon fat.

Heat the bacon fat in a large pot with a cover. Add 3 popcorn kernels and cover. Listen for all three kernels to pop, and add the rest of the popcorn kernels. Cover and shake until popping stops. Put popped corn in a non-stick roasting pan, making sure to remove the unpopped kernels.

Preheat oven to 200°F.

Heat butter, brown sugar, corn syrup and salt in a saucepan over medium high heat until it reaches 300°F on your candy thermometer.

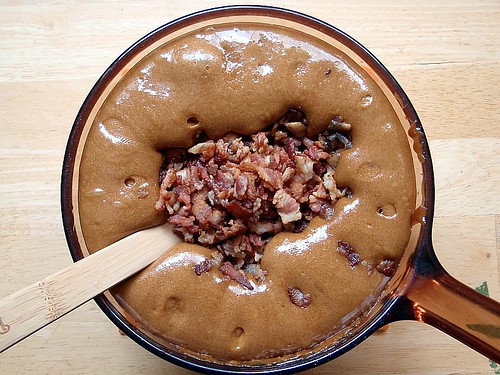
Adding the bacon to caramel

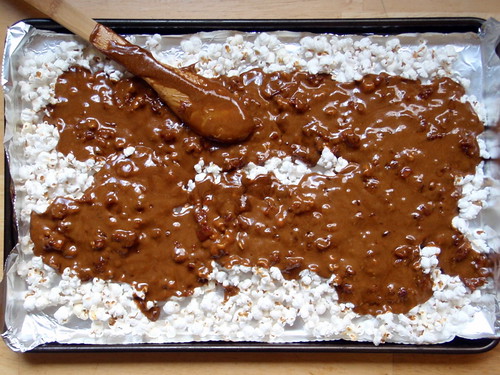
Remove from heat, stir in baking soda and bacon (the caramel will explode in volume at this point so make sure you use a large enough saucepan) and pour this caramel mixture over the popcorn (do this quickly so that the caramel doesn’t cool and stiffen).

Adding the caramel to the popcorn

Stir the mixture with a couple wooden spoons and place in the oven for a total of an hour rearranging the popcorn to evenly distribute the caramel and bacon every 15 minutes. Add more salt (if necessary) during this process. Cool and break into bite-sized pieces.

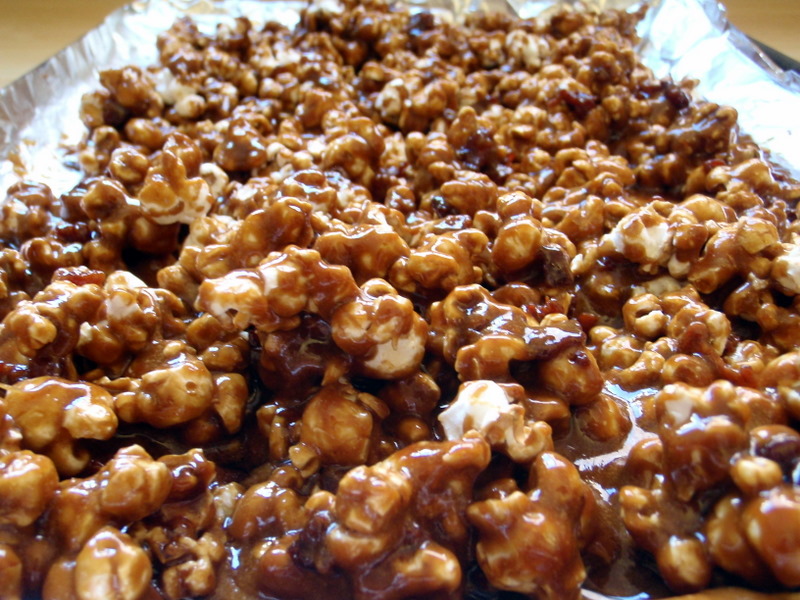
Bacon Caramel Popcorn

*Popping 1/3 cup of organic popcorn kernels gave me ~6 cups popped corn plus quite a few unpopped kernels. I'd guess if you are using a gourmet popping corn you may need to use less than 1/3 cup of kernels to get 6 cups of popped corn, which is the amount you need for this recipe.

Popped corn and unpopped kernels

So I tried some of the bacon fat-popped corn before dousing it with the caramel, and while I could taste a whiff of bacon, I personally think butter pairs better with popcorn. Bacon and caramel, however, pair together wonderfully (a fact which I will devote the next post to). Do I really need to describe how awesome bacon, caramel, and popcorn taste together? It's so good I had to hide this from some of my vegetarian friends for fear they'd give up their convictions just to try some. See what a good friend I am?

Monday, February 22, 2010

Faux Momofuku Brussels Sprouts

Momofuku Brussel Sprouts

I remember when I was growing up in elementary school, one of the two vegetables most hated by my peers (the other being lima beans) were brussels sprouts. Because of that, I never even tried a brussels sprout (or a lima bean for that matter) until much later in life, probably college. I do remember after trying my first brussels sprout thinking that they were absolutely delicious and so extremely cute, like a baby cabbage.

<Aside> The vegetable I truly detested in elementary school were green beans. I couldn't stand the smell of them when they were being served in the school cafeteria. I still don't really like them this day, but I can handle them when they're cooked fresh Asian style (stir-fried with garlic) or smothered with the sodium-bearing medium that is cream of mushroom. </Aside>

I'm lucky enough to get to go to Manhattan for work every month or two but I'm too chicken to go downtown by myself since I usually stay uptown. So when a co-worker and fellow foodie joined me on my last trip, I told her in no uncertain terms that we were going to go to a Momofuku for dinner. I've been wanting to try the steamed pork buns forever! After a bit of research, I decided to go to the Momofuku Ssam Bar because the Momofuku Bakery and Milk Bar was just next door, and I also wanted to try the chess pie and cereal milk.

After all the hype about the steamed pork buns, it's probably not that surprising that I wasn't totally blown away by them, but I most certainly was a huge fan of the fried brussels sprouts. They were served with a mint and fish sauce dressing and topped with these crunchy, seasoned pieces of puffed rice, like Rice Krisipies. As soon as I got home, I had to google for the recipe to see if I could try to recreate the dish. Luckily, there was a version on Epicurious that roasted the sprouts instead of deep frying them, since I dislike deep frying at home. (And I totally missed the fact that those brussels sprouts had been deep fried!)

I decided to skip the whole puffed rice bit so simplicity's sake. And while the mint in the original version added a very interesting note to the sauce, but I didn't really feel like buying some just for this recipe, and the same goes for the cilantro stems and Thai chiles. Plus, I still very much dislike cilantro. So I simplified the recipe even more by making the dressing with just the fish sauce, sugar, water, and garlic. Oh, and instead of roasting the sprouts in oil and then tossing them with butter, I just roasted them in duck fat because I had some on hand. And it's okay if the leaves start coming off of the sprouts when you're halving them. Throw them in along with everything else because they'll get really nice and crispy and totally be first thing you'll want to pop in your mouth when these come out of the oven.

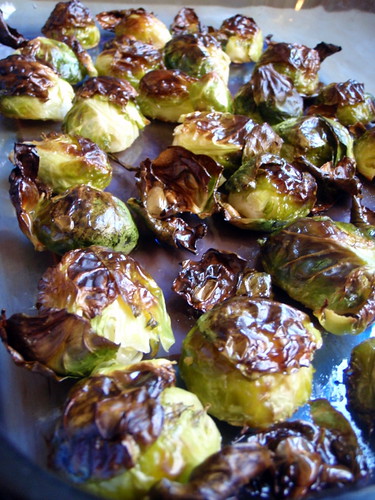
Roasted Brussel Sprouts

Faux Momofuku Brussels Sprouts (very much inspired by David Chang's recipe on Epicurious)
makes enough for two as a side, or one hungry girl

1 pound Brussels sprouts, trimmed and halved lengthwise
2 tablespoons duck fat, melted (or regular canola oil)
1 tablespoon Asian fish sauce
1 tablespoon water
1 tablespoon sugar
1/4 tablespoon minced garlic

Preheat oven to 450°F with a rack in the upper third of the oven. Trim and halve the Brussels sprouts, toss with oil, and roast, cut side down on baking sheet, for 20-35 minutes, depending on size and desired taste. They should brown but remain somewhat firm.
Meanwhile, stir together the rest of the ingredients in a small bowl. Heat in the microwave for a minute to dissolve the sugar.
When sprouts are done, transfer to a serving bowl and add just enough dressing to coat.

Momofuku Brussel Sprouts

That's it! You won't believe the depth of flavor you'll get from so few ingredients. They were so good I just kept eating them with my hands instead of taking the time to get a fork. The only downside to this is that the fish sauce can be quite stinky, especially if you're just smelling it and not eating any so you don't get the oral context for what your nose is telling you (kind of like how dumplings can be smelly if you're not the one eating them; a fact which I was unaware of for most of my life because I was usually the one eating them!).

Honestly, I think I might have liked these better than the Momofuku version because the mint in the original kept jumping out and saying, "Here I am! I am mint!" And nobody likes to be interrupted when eating something this yummy.

Friday, February 19, 2010

Nutella Ice Cream

It was World Nutella Day a couple of weeks ago; a day I'd love to celebrate but always seem to forget about until I start reading about it in everyone else's food blog. I first heard about Nutella in high school when one of my friends came back from a trip to Europe and told me about this amazing chocolately spread that they had on bread almost every day. But I don't think it was until college that I finally got to try it when I saw it for the first time at Wegmans. Ah, Wegmans. Where every good thing comes from. Kinda like God. ^_^

This Nutella ice cream was one of the first ice creams I made when I got my ice cream maker. In fact, it may be the reason I got an ice cream maker in the first place. It has two ingredients. Two! Can you tell I like the simple recipes? Or rather, I like recipes with high yumminess to number of ingredients ratios. On a scale of one to ten, this one scores about a thousand in my book.

Nutella Ice Cream*

Nutella Ice Cream (from Chocolate and Zucchini)
makes about 3/4 quart

350 grams (1 1/2 cups) Nutella
410 grams (1 1/2 cups + 1 tablespoon) evaporated milk

Pre-freeze the bowl of your ice cream maker according to the manufacturer's instructions.

Combine the Nutella and evaporated milk in a medium mixing bowl, and stir with a whisk until they become one, voluptuous and smooth. Cover and refrigerate until well chilled. Whisk again and churn in your ice cream maker.

Transfer to a container, cover, and freeze overnight or for several hours to harden.

Nutella Ice Cream*

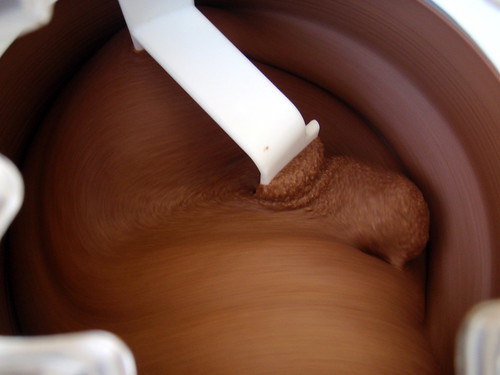
I made a batch for a small party I hosted, thinking I'd have leftovers that I could use to take pictures of the next morning when I had sunlight. Yeah, that didn't happen. This stuff was gone before I could save any. So all I have are the pictures of when it was churning. But if you look at the blurry part of the ice cream (and not the lumpy, grainy part), you'll get an idea of how it tastes. It is smooth and voluptuous, just like Clotilde described. Other words I'd use to describe it are luscious and velvety. In fact, it's almost chewy, like Turkish ice cream. And since the only two ingredients are Nutella and evaporated milk, it tastes just like Nutella: rich cocoa and fragrant hazelnuts. The only thing is, it's so sweet, I might add even a little more evaporated milk next time. Clotilde's solution was to use an all-natural, organic hazelnut-cocoa spread. Anyone know where I can get some in Boston? Unfortunately, it may take a couple of more years before a Wegmans comes to Massachusetts....

p.s. For those who don't have an ice cream maker, Clotilde does explain how you can make this without one, although it's pretty labor intensive.

Monday, February 8, 2010

Lemon Pudding Cake

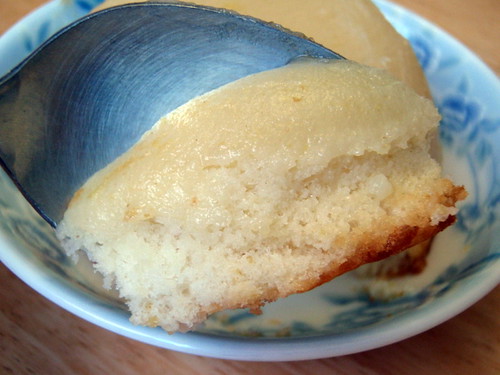
The concept of a pudding cake--a dessert made from a single homogeneous batter that separates into two layers, one cake-like and one pudding-like, while baking--has intrigued me for a while, so when I found myself with a lemon in my Boston Organics delivery, I figured it was time to try Baking Bite's Lemon Pudding Cake.

Lemon Pudding Cake

It was easy to halve her recipe (which calls for 2 lemons), and instead of making one big cake, I was able to three individual size servings in little Pyrex cups. I filled them up about three-quarters of the way, and they didn't rise too much after baking.

Like magic, the batter separated into a dense lemony custard at the bottom of the dish and a light, fluffy sponge cake at the top. You can serve them either in the cups or unmold them so that the custard is on top.

Lemon Pudding Cake

Lemon Pudding Cakes (from Baking Bites)
makes 3 individual servings

1 egg, separated
2 tablespoons fresh lemon juice
1 teaspoon lemon zest
1/3 cup milk
1/2 teaspoon vanilla extract
1/2 cup sugar
1/4 cup all-purpose flour
Pinch of salt

Preheat oven to 350°F. Place a 9-inch cake pan, filled with about 3/4 inch of water, into the oven. Grease 3 small souffle cups.

In a large bowl, whisk together sugar, flour, and salt. Add in egg yolks, lemon juice, lemon zest, milk and vanilla and whisk thoroughly. In a medium bowl, beat egg whites to soft peaks. Stir egg whites gently into lemon mixture, until well combined.

Pour mixture into prepared souffle dish and gently place in water bath.

Bake for 30-40 minutes, until the cake has risen and begun to pull away from the sides of the dish.

Lemon Pudding Cake

This was so good, I ended up making another batch the next time I got a lemon from Boston Organics! I couldn't believe how good this tasted considering no oil is added, and the only fat comes from the egg. I did end up saving one overnight in the fridge, and it tasted just as good the next day, even when I ate it cold. I have a feeling I'll be making orange pudding cakes the next time I end up with an orange that I don't know what to do with.