Monday, June 28, 2010

Bruschetta

I went to Trader Joe's Friday night intending to just pick up some sugar and something for dinner when I got stopped by the gorgeous display of basil plants outside on sale. I'd had a couple of basil plants before, but because I travel so much and they need regular watering, I'd never managed to keep them alive for long. But these were so cheap, I justified getting another one by reasoning that it would have cost just as much to get a package of fresh basil leaves, and these could have the chance of being sustainable.

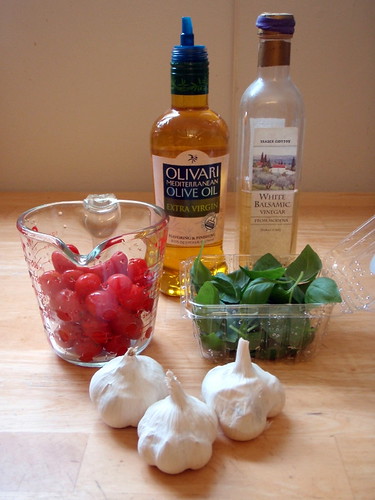
Having your own basil plant not only means needing to water it regularly (by the way, how often is "regularly" anways?) but also needing to cook a lot more with basil since the plant is so prolific! I was going to the beach on Saturday, so I decided I'd make a bruschetta topping and pack some marinated mozzarella balls and bagel chips (both also from TJ's) for lunch. I used the grape tomatoes and garlic I got in my Boston Organics delivery and just added 4 other ingredients: olive oil, balsamic vinegar, salt, and pepper. I liked using the grape tomatoes because they have a lot of flavor, are a little sweeter, and are almost never mealy like salad tomatoes can get.

P6263117

Bruschetta
makes about 4 servings

1 pint grape tomatoes
Handful of fresh basil leaves
1 large garlic clove
3 tablespoons olive oil
1 1/2 tablespoons balsamic vinegar (I used white)
Salt and pepper

P6263120

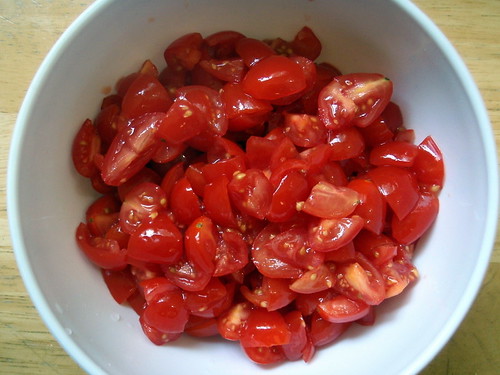
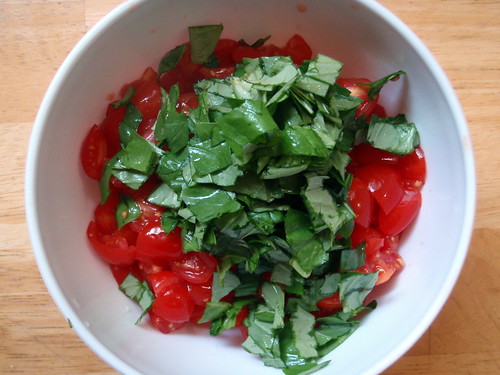
Chop up the grape tomatoes using a serrated knife. Depending on the size of the tomato, I cut them into 4, 6, or 8 pieces each. Chop up the basil and throw it in with the tomatoes.

P6263121

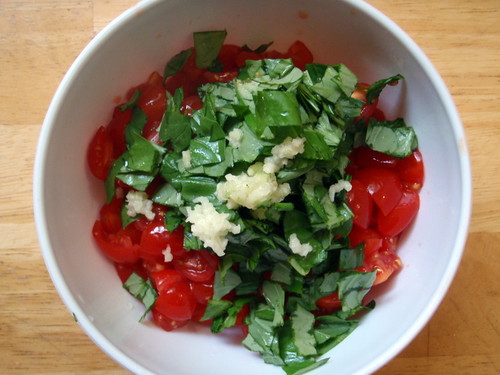
Crush the garlic clove using a garlic press (or mince it by hand) and add to the tomatoes as well.

P6263122

Drizzle with the olive oil and vinegar. Mix well and salt and pepper to taste. Let sit for a bit to macerate. Serve with slices of toasted French bread or bagel chips.

P6263124

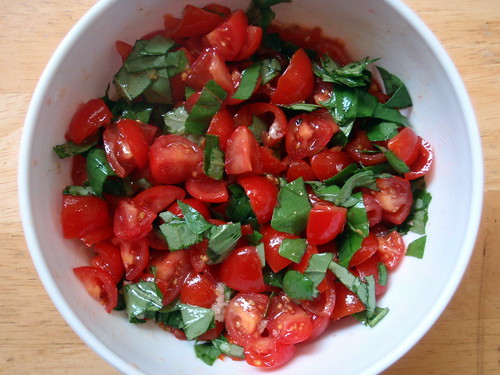
These pictures are of the bruschetta right after it's been mixed together. It gets a lot more liquidy and wilted but starts to taste better and better as the flavors mix. Unfortunately, I didn't get any pictures of the bruschetta once it got to that point because I had gone to get a popsicle, and when I came back, the bruschetta was all gone. I think Jenny was even trying to lick the plastic container clean.

P6263131

Wednesday, June 23, 2010

Bacon Caramel Maple Ice Cream

Bacon Caramels

I wasn't planning on doing another post on bacon and caramel after posting about bacon fat caramels and bacon caramel corn. But then I met the girl behind 3am Confections, Erika, and she started telling me about the bacon caramels that she makes, and I just knew I had to have some. These actually aren't on her website, but she made me a batch anyways and even hand-delivered them to me! Like the caramels I made, they're topped with Maldon salt and diced bacon. Unlike mine, they're butter based instead of made with bacon fat, which means they're not as soft at room temperature. Another huge difference is that she fries the bacon with a secret ingredient that gives the bacon a subtle kick.

Bacon Caramels

After eating four of these in a row (because I couldn't stop myself), I decided to assert some self control because I wanted to immortalize these in an ice cream. At first I was thinking of just dicing them up and adding them to a sweet cream base so as to really highlight the caramels themselves. But then I came up with the idea of adding them to a maple ice cream since I do so love dipping my bacon slices in maple syrup. I based the maple ice cream on the maple walnut ice cream recipe from Ben & Jerry's Homemade Ice Cream & Dessert Book.

Bacon Caramel Maple Ice Cream

Bacon Caramel Maple Ice Cream
makes about 1 pint

1 large egg
4 tablespoons sugar
1/2 cup milk
1 cup heavy cream
4 tablespoons maple syrup, grade B
1/2 cup 3am Confections bacon caramels, diced (about 8 caramels)

Whisk egg until light and frothy. Add sugar, a little at a time and whisk to dissolve. Add heavy cream, milk, and maple syrup. Cover and chill.

Freeze mixture in ice cream maker until almost firm, then fold in caramels. Transfer ice cream to an airtight container and put in freezer to harden.

Bacon Caramel Maple Ice Cream

I found the maple flavoring to be really subtle; if I had some, I probably would add some maple extract to the ice cream base to bring out the maple flavor even more. The recipe in the Ben & Jerry's book suggests using a grade C maple syrup which would probably help as well.

The caramels get pretty hard, but not to the point where it will crack your teeth or anything. If it's something you're wary of, though, I'd suggest dicing the caramels finely so that you don't get a big hard gob in your mouth.

Bacon Caramel Maple Ice Cream

Amnesty Bread

P6153051

After a post about World Peace Cookies, it only seems appropriate to follow up with a post on Amnesty Bread. The idea for the name came from David Lebovitz's Amnesty Cookies, which are really Compost Cookies. But the theory is that you declare a day of amnesty for your fridge and pantry and just throw everything you want to get rid of into this bread. I had a zucchini, a pear, and two bananas from my Boston Organics delivery that needed to be used up plus some leftover dried cranberries and walnuts. If I had had carrots I would've grated those up and thrown them in here, too. Raisins, chocolate chips, white chocolate chips, and other types of nuts would certainly have worked just as well in here. If you make any substitutions, I'd recommend trying to keep it a total of 2 cups of grated veggies or fruits and 1 cup total of dried fruits, nuts, or chocolate.

P6143044

Amnesty Bread
makes 2 loaves or 24 muffins

3 eggs
3/4 cup vegetable oil
2/3 cup packed brown sugar
1/2 cup white sugar
1 zucchini, grated
1 pear, peeled, cored, and grated
2 bananas, mashed
2 teaspoons vanilla extract
3 cups all-purpose flour, divided
1 tablespoon ground cinnamon
1 1/2 teaspoons baking powder
1 teaspoon baking soda
1 teaspoon salt
1/2 cup dried cranberries
1/2 cup chopped walnuts

Preheat oven to 325°F. Grease and flour two 8"x4" bread loaf pans, a 10" tube pan, or line 24 muffin tins.

In a large bowl, beat eggs until light yellow and frothy. Add oil, brown sugar, white sugar, grated zucchini, pear, bananas, and vanilla; blend together until well combined. Stir in 2 3/4 cups of the flour, cinnamon, baking powder, baking soda, and salt.

Toss the remaining 1/4 cup flour with the cranberries and nuts and mix in with the rest of the batter. Divide the batter evenly between the two prepared loaf pans or muffin tins.

Bake in the preheated oven until a toothpick inserted in the center comes out clean, about 50 minutes for the loaf pans and tube pan and 35 minutes for the muffins.
P6153063-1

It's not the prettiest of breads or muffins, but it certainly does its job, which is to use up all those ingredients in a yummy way. It's quite moist, thanks to all the zucchini and fruits, but also a sturdy enough bread that you could slice and toast it and serve it with some butter.

Monday, June 21, 2010

World Peace Cookies

P6123034

The story behind these cookies is that Dorie Greenspan's neighbor had told her that the cookies were so good that, "in our house, we call them World Peace Cookies, because we're convinced that a daily dose of the cookies is all that's needed to ensure planetary peace and happiness." I've been meaning to make these cookies for quite a while, but it wasn't until the Boston Dragon Boat Festival dock staff kept bugging me for some homemade cookies that I finally decided to make them to appease the two Petes.

These are basically chocolate shortbreads, or sables, with chocolate chunks and a dash of salt. I made a whole batch, meaning to bring them to a party, but they were so good I decided to keep most of them for myself. They're perfect eating with a glass of cold milk, and if I had had any vanilla ice cream on hand, I would have totally made ice cream sandwiches with them.

World Peace Cookies (from Dorie Greenspan's Baking: From My Home to Yours)
makes about 36 cookies

1 1/4 cups all-purpose flour
1/3 cup unsweetened cocoa powder
1/2 teaspoon baking soda
1 stick plus 3 tablespoons (11 tablespoons) unsalted butter, at room temperature
2/3 cup (packed) light brown sugar
1/4 cup sugar
1/2 teaspoon fleur de sel or 1/4 teaspoon fine sea salt
1 teaspoon pure vanilla extract
5 ounces bittersweet chocolate, chopped into chips, or a generous 3/4 cup store-bought mini chocolate chips

Sifting flour, cocoa, and baking soda
Sift the flour, cocoa and baking soda together.
Cocoa turds
Working with a stand mixer, preferably fitted with a paddle attachment, or with a hand mixer in a large bowl, beat the butter on medium speed until soft and creamy. Add both sugars, the salt and vanilla extract and beat for 2 minutes more.
Chopping up the chocolate
Turn off the mixer. Pour in the dry ingredients, drape a kitchen towel over the stand mixer to protect yourself and your kitchen from flying flour and pulse the mixer at low speed about 5 times, a second or two each time. Take a peek — if there is still a lot of flour on the surface of the dough, pulse a couple of times more; if not, remove the towel. Continuing at low speed, mix for about 30 seconds more, just until the flour disappears into the dough — for the best texture, work the dough as little as possible once the flour is added, and don't be concerned if the dough looks a little crumbly. Toss in the chocolate pieces and mix only to incorporate.
Cooking dough log
Turn the dough out onto a work surface, gather it together and divide it in half. Working with one half at a time, shape the dough into logs that are 1 1/2 inches in diameter. Wrap the logs in plastic wrap and refrigerate them for at least 3 hours. (The dough can be refrigerated for up to 3 days or frozen for up to 2 months. If you've frozen the dough, you needn't defrost it before baking — just slice the logs into cookies and bake the cookies 1 minute longer.)
Center a rack in the oven and preheat the oven to 325°F. Line two baking sheets with parchment or silicone mats.
Using a sharp thin knife, slice the logs into rounds that are 1/2 inch thick. (The rounds are likely to crack as you're cutting them — don't be concerned, just squeeze the bits back onto each cookie.) Arrange the rounds on the baking sheets, leaving about 1 inch between them.
Bake the cookies one sheet at a time for 12 minutes — they won't look done, nor will they be firm, but that's just the way they should be. Transfer the baking sheet to a cooling rack and let the cookies rest until they are only just warm, at which point you can serve them or let them reach room temperature.
P6123029

Tuesday, June 15, 2010

Elote (Mexican Grilled Corn)

P5312955

I tried elote for the first time a while ago at La Verdad, but I wasn't totally blown away. Then I tried it at Toro a couple of weeks ago, and wow, I couldn't get enough of it! (As an aside, I had always assumed that Toro was a Japanese sushi place because to me, toro = fatty bluefin tuna belly. So I was a little surprised to find out it was actually a tapas restaurant, where toro = Spanish for bull.)

P5312960

A couple days later I was going to a bbq, so I decided to look up how to make it myself. What I came up with is an amalgam of what I found and a few adjustments to make the corn more similar to how I remember they made it at Toro. I chose to pre-cook the corn before grilling it so that I could ensure that the corn was cooked all the way through and also so that I wouldn't be hogging up time and space on the grill. I also added some raw garlic and the spices to the mayonnaise since I remember there was a garlicky taste in their sauce, which was pink. I found the cotija cheese, a mild, aged cheese, at Whole Foods, but if you can't find it, you can substitute either grated Parmesan or crumbled feta cheese.

Elote (Mexican Grilled Corn)
makes 12 servings

12 ears of corn
1 cup mayonnaise
2 garlic cloves
4 limes
Cayenne pepper
Chili powder
Paprika
1 cup crumbled cotija cheese

Preheat oven to 350 °F. Place corn in husks directly on the middle rack of the oven for 30 minutes, or until corn is soft to the touch. After it has cooled, remove the silk and husks. If you like, you can break the ears in half.

P5312947

Run the garlic cloves through a garlic press (or mince well) and add to the mayonnaise. Add the juice from half of a lime and quarter the rest of the limes. Mix in cayenne pepper, chili powder, and paprika to taste.

P5312952

Grill the corn on a hot grill until lightly charred. Top with the mayonnaise sauce and crumbled cotija cheese. Sprinkle on more cayenne pepper and/or chili powder as desired, and serve with lime wedges.

P5312957

Monday, June 14, 2010

Homemade Dulce de Leche and Dulce de Leche Ice Cream

Hola! Did you miss me? Sorry for the unexpected break, but the last month has been full of exciting happenings including bumping into the cast of Glee on a flight from Chicago to New York, racing in the Boston Dragon Boat Festival with The Boat for Kids Who Don't Paddle Good, and a vacation to Argentina and Brazil.

P5302932

It was down in Buenos Aires that I fell in love with dulce de leche. I used my Marriott points to stay at the Marriott Plaza Hotel, and because I'm a Gold Elite member, we got to eat breakfast in the Concierge Lounge each morning. And each morning they put out little jars of dulce de leche to spread on the pastries. It was so good, I ended up putting some in my coffee, too! I just knew I had to try to make some at home, and luckily, there is a rather easy (and safe*) method. Basically all you do is put a can (or two or three) of sweetened condensed milk in a crock pot, fill it with water, turn it on low, and let it cook for 8 hours. That's it! Obviously, you'll want to wait for the cans to come back down to room temperature before attempting to open them, or else you'll risk having hot dulce de leche squirting out of the can.

P5302931

I'll admit that it doesn't taste quite as good as the real thing, but for how easy it was to make, it's pretty darn close. Now my only problem was what to do with the dulce de leche. See, while it was great spreading it all over pastries and stirring into my coffee, I don't really have pastries just sitting around at home, nor do I usually make coffee at home. So I figured I'd look for a recipe to make dulce de leche ice cream. I came across this one on Epicurious with the following description: "This is not just the best dulce de leche ice cream we've ever had, it's one of the best ice creams we've ever had, period." With a testimonial like that, how could I not try to make it?

Dulce de Leche Ice Cream with Toasted Pecans (from Epicurious)
makes about 1.5 quarts

2 cups whole milk
1 cup heavy cream
1 pound dulce de leche (this ended up being a little more than 1 can of homemade dulce de leche)
1/8 teaspoon pure vanilla extract
3/4 cup chopped pecans (2 1/2 to 3 oz), toasted

Bring milk and cream just to a boil in a 3-quart heavy saucepan over moderate heat, then remove from heat and whisk in dulce de leche until dissolved. Whisk in vanilla and transfer to a metal bowl. Quick-chill by putting bowl in a larger bowl of ice and cold water and stirring occasionally until cold, 15 to 20 minutes.

P5312934

Freeze mixture in ice cream maker until almost firm, then fold in pecans.

P5312939

Transfer ice cream to an airtight container and put in freezer to harden, at least 1 hour.

P5312946

To be honest, I still think the passion fruit ice cream was the best ice cream I ever made. But this one is definitely high up on the list. The addition of the toasted pecans almost made it taste like butter pecan ice cream, but with a richer, caramelized flavor. Probably the hardest part of making this was making sure the pecans didn't burn when toasting them. I almost always end up throwing out the first batch because I forget about them and soon I'm left with blackened, useless pecans. So make sure you keep a careful eye on the pecans! The added flavor from toasting them is so worth the extra effort.

*Safe because the alternative way to make this is to add a can of sweetened condensed milk to boiling water and boiling it for several hours, which could possibly lead to exploding cans. One of my friends from Taiwan used to call this, "Danger Pudding" for that reason.