Monday, December 31, 2012

Thomas Keller's Lemon Tart

Thomas Keller's lemon tart
 
After years and years of not owning a tart pan, I finally bought one, and the first thing I wanted to do was make Thomas Keller's lemon tart. My friend, Ellen, had made one with her family and they had raved about how good the pine nut crust was, so I knew I needed to try it.

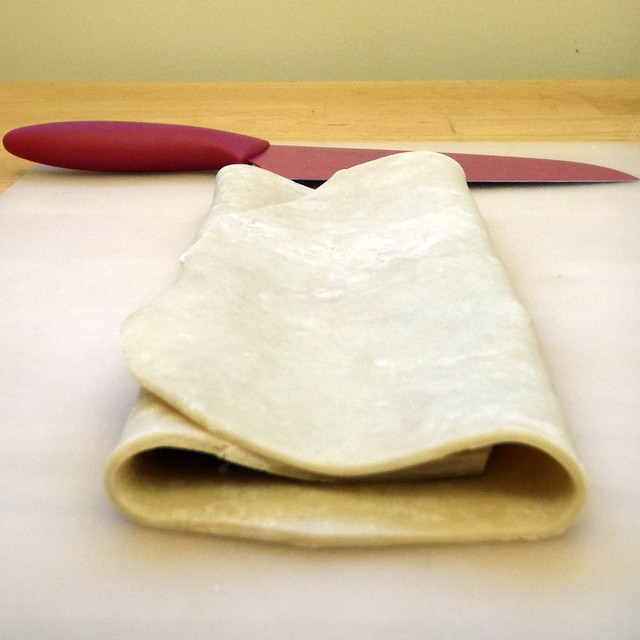
The pine nut crust recipe makes enough for 3 tarts but is hard to divide since it only uses one egg. Go ahead and make the full recipe and keep the leftover dough in the fridge where it will keep for a couple of days or the freezer, where it will keep for a month, because after you taste it, you'll just want to make more.

Pine Nut Crust (from Bouchon)
makes enough for 3 tart crusts

2 cups pine nuts
1/3 cup sugar
3 cups all-purpose flour
8 ounces unsalted butter, at room temperature
1 large egg
1 teaspoon pure vanilla extract

Pine nuts
 
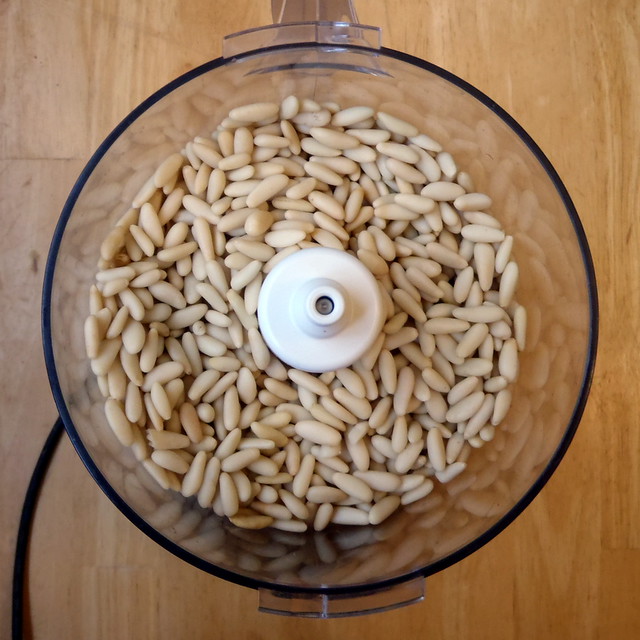
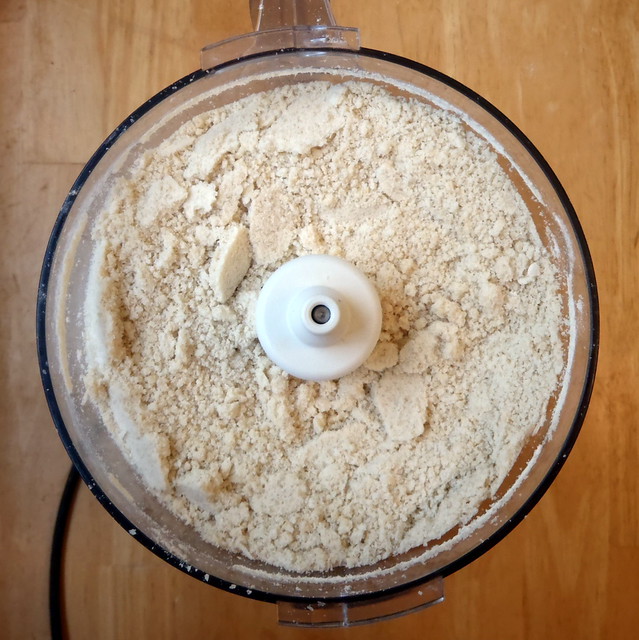
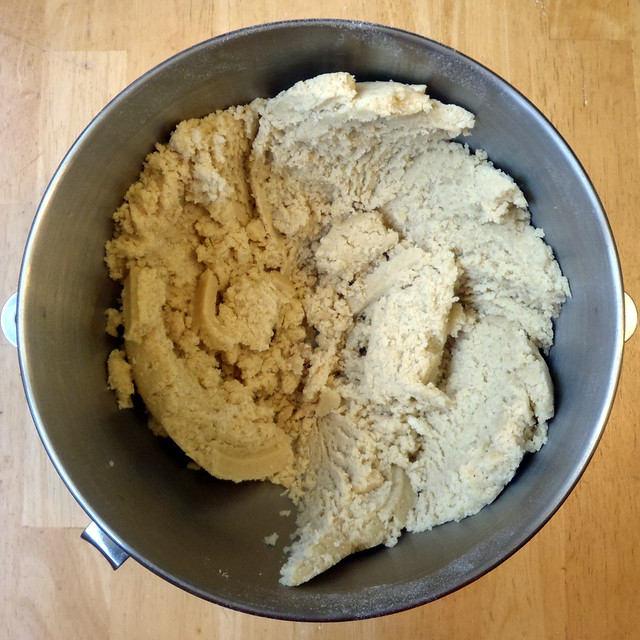
Place the pine nuts in a food processor and pulse a few times.  Add the sugar and flour and continue to pulse until the nuts are finely ground.  Transfer the mixture to a large bowl.

PC043179
 
Add the butter, egg, and vanilla extract and mix to incorporate all the ingredients (the dough can be mixed by hand or in a mixer fitted with the paddle attachment).  Divide the dough into three equal parts.  Wrap each piece in plastic wrap and refrigerate for at least 10 minutes before using.

PC043181
 
Preheat the oven to 350°F.  Generously butter and flour a 9-inch fluted tart pan with a removable bottom and refrigerate it while the oven preheats.

PC053213
 
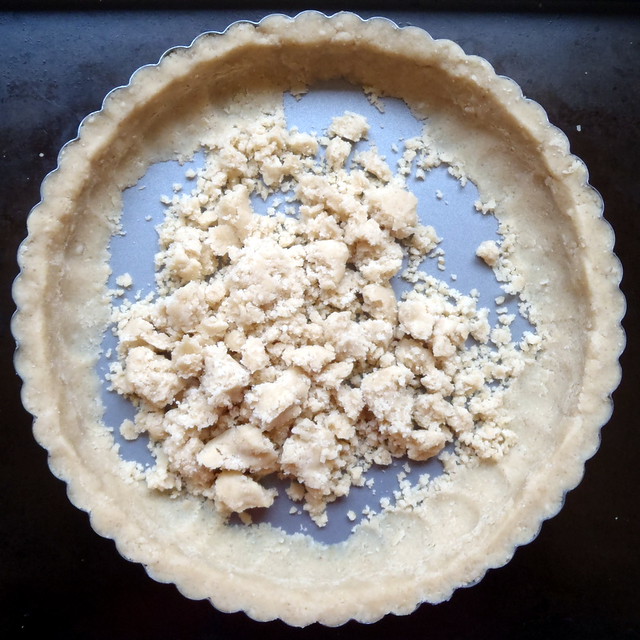
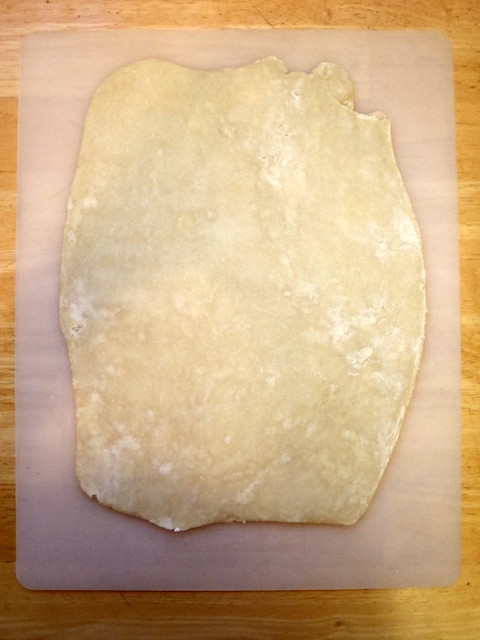
Remove the tart pan from the refrigerator.  Use your fingertips to press the chilled pine nut dough evenly over the bottom and up the sides of the pan.  I found that the easiest way to do this was to fill in the sides of the pan first, and then press down whatever dough is left into the bottom. That way you don't have to worry about making sure there is enough dough to evenly press into the sides if you started in the middle.

Pine Nut Tart Crust
 
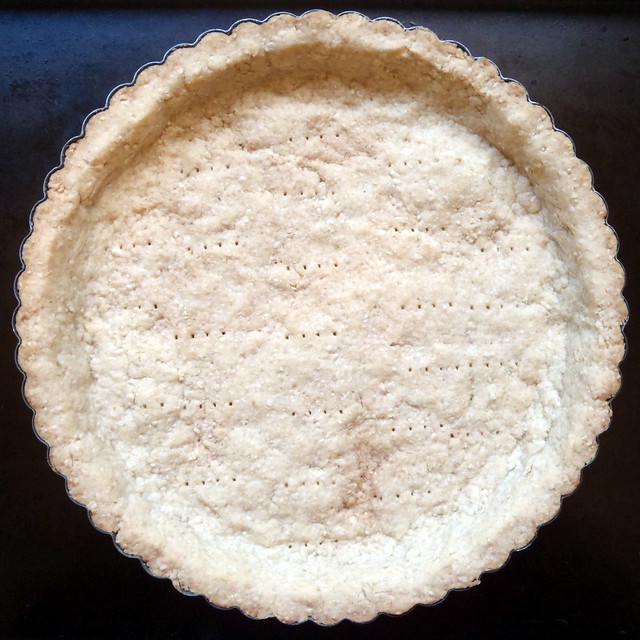
Prick the tart crust with a fork to prevent it from puffing up unevenly.  Bake the crust for 10 to 15 minutes, then rotate it and bake for another 10 to 15 minutes, or until it is golden brown.  Remove the crust from the oven and let it cool while you make the filling.

Pine Nut Tart Crust - baked

The filling for this lemon tart is made using the sabayon method, which means the eggs, lemon juice, and sugar are first cooked over boiling water and then incorporated with the butter.

Lemon Tart (from Bouchon)
makes 1 tart

1 pre-baked Pine Nut Crust
2 large eggs, cold
2 large egg yolks, cold
3/4 cup sugar
1/2 cup fresh lemon juice
6 tablespoons cold unsalted butter, cut into 6 pieces

Bring about 1 1/2 inches of water to a boil in a medium pot.  Meanwhile, in a large metal bowl, whisk the eggs, yolks, and sugar for about 1 minute, or until the mixture is smooth.

Whisking the eggs and sugar
 
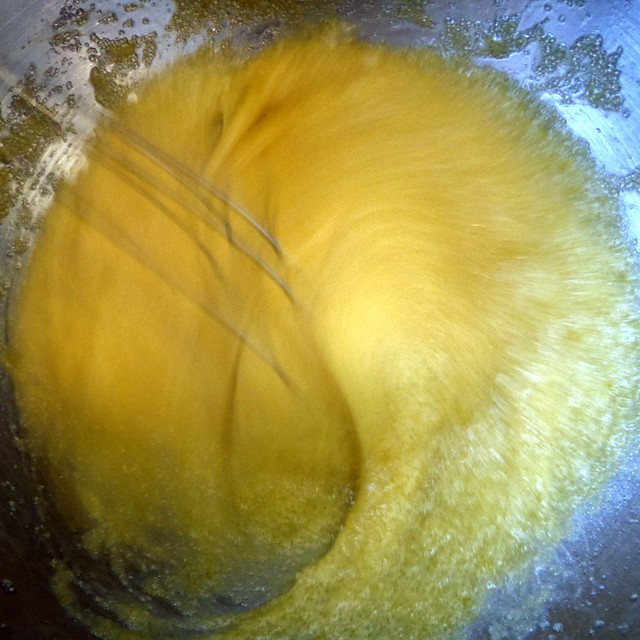
Set the bowl over the pot and, using a large whisk, whip the mixture while you turn the bowl (for even heating).  After about 2 minutes, when the eggs are foamy and have thickened, add one-third of the lemon juice.  Continue to whisk vigorously and, when the mixture thickens again, add another one-third of the lemon juice.  Whisk until the mixture thickens again, then add the remaining lemon juice.  Continue whisking vigorously, still turning the bowl, until the mixture is thickened and light in color and the whisk leaves a trail in the bottom of the bowl.  The total cooking time should be 8 to 10 minutes.

Whisking in the butter
 
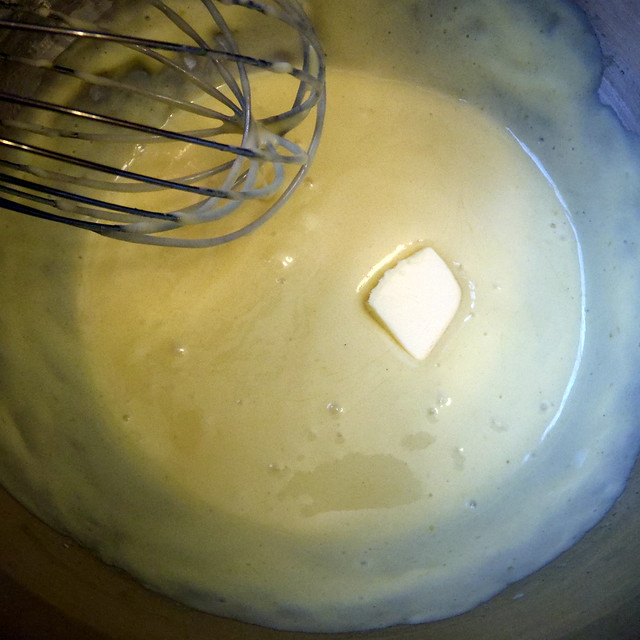
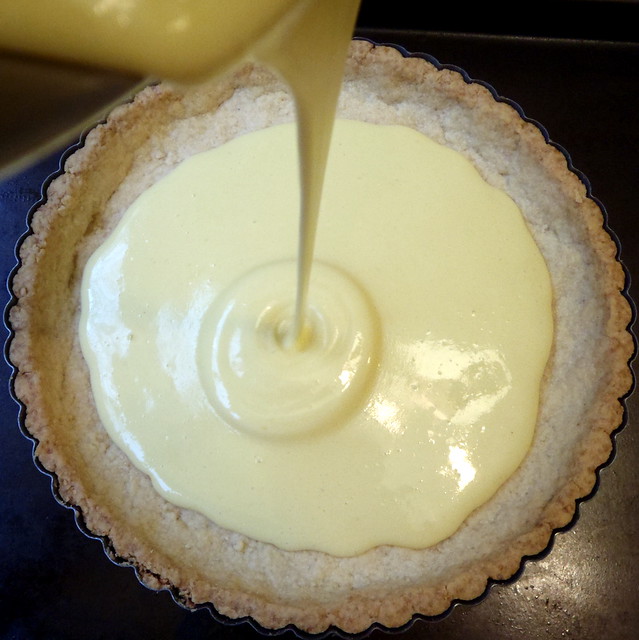
Turn off the heat and leave the bowl over the water.  Whisk in the butter a piece at a time.  The sabayon may loosen slightly, but it will thicken and set as it cools.  Pour the warm sabayon into the tart crust and place the pan on a baking sheet.

PC043199
 
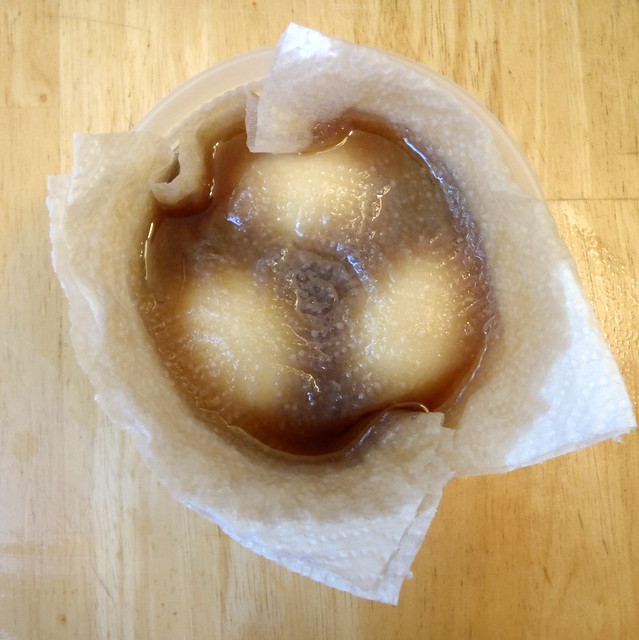
Preheat the broiler.  While the sabayon is still warm, place the tart under the broiler.  Leaving the door open, brown the top of the sabayon, rotating the tart if necessary for even color; this will take only a few seconds, so do not leave the oven.  Remove the tart from the broiler and let it sit for at least 1 hour before serving. Serve at room temperature or cold.

Thomas Keller's lemon tart
 
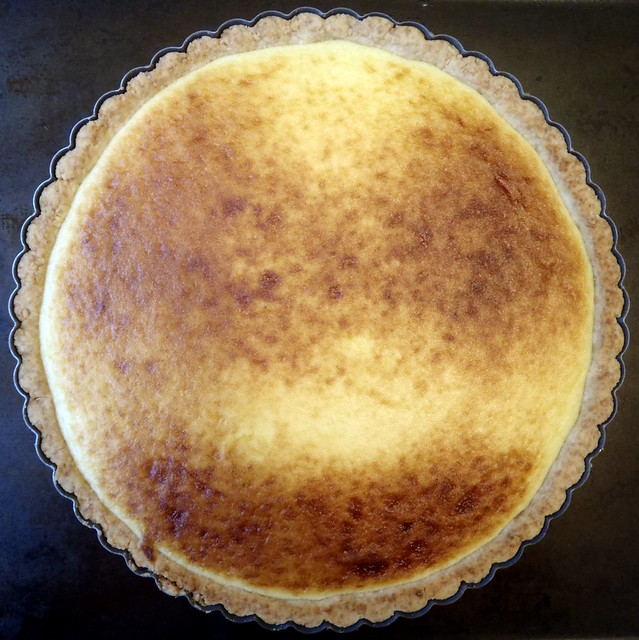
As you can see from the picture above, I didn't do a great job with broiling the top evenly.  It would've been a lot easier with one of those mini blowtorches that you use for creme brulee, I think.

Thomas Keller's lemon tart
 
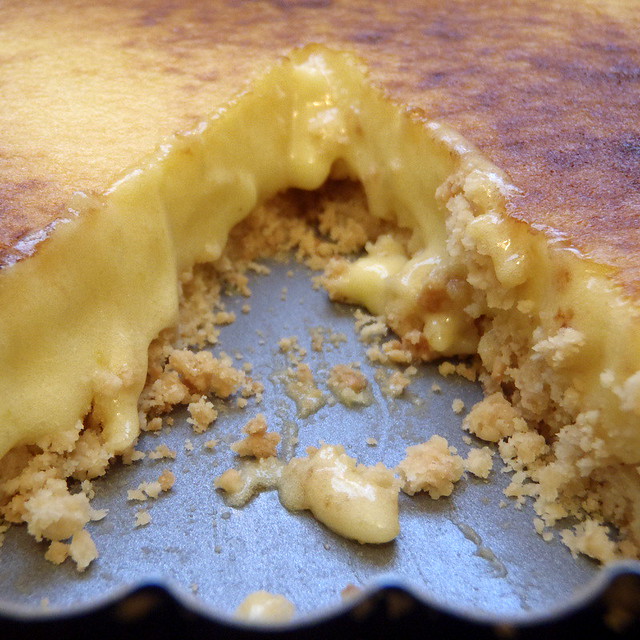
As with all Thomas Keller recipes, this is not simple to make, but delicious to eat.  Since I still had enough crust for 2 more tarts, I decided to try a super easy lemon tart recipe next.

Next:  Lazy Mary's Lemon Tart
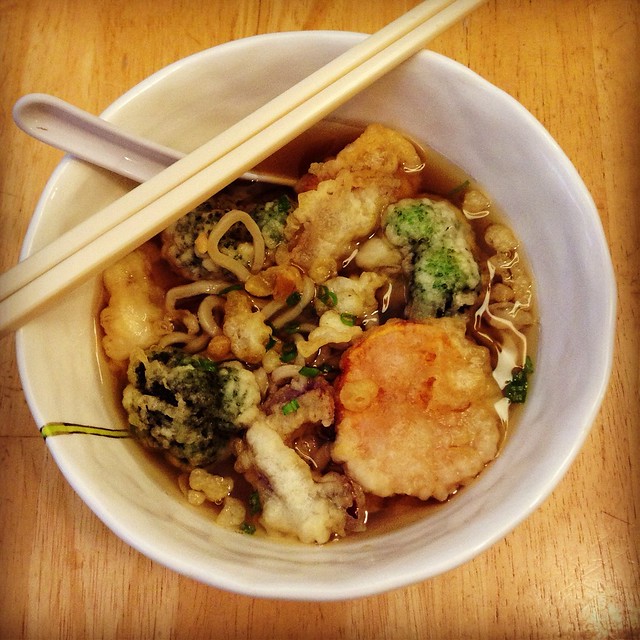
Previously:  Vegetable Tempura and Tempura Udon
Three years ago:  Homemade Waffle Face Off
Four years ago:  Hot Pot, Tang Yuan

Thursday, December 27, 2012

Vegetable Tempura and Tempura Udon Noodle Soup

Tempura udon noodle soup is pretty much my go to order at Japanese restaurants if they don't serve ramen.  I love the contrast of the crunchy tempura vegetables with the thick, chewy noodles and the delicate broth that brings it all together. 

Tempura isn't something I'd normally make at home since deep frying can be such a pain, but being able to eat freshly fried tempura is so good that it's worth it.  You can also refrigerate any leftovers and heat them up in the oven or toaster oven, but it won't be as good.

Vegetable Tempura
serves 3-4

Assorted vegetables (I used a large sweet potato, half a bunch of broccoli, and half a red onion)
Neutral oil for frying (I used canola)
1 egg yolk
1 cup ice water
1 cup sifted all-purpose flour

Peel and slice the sweet potato into think rounds.  Cut the broccoli into florets and discard the stalk.  Cut the onion into thin slices.  Spread the cut vegetables out and allow to air dry for at least half an hour, flipping the pieces halfway through.

PA293154
 
Pour enough oil into a heavy pot so that the oil is at least 2" deep.  Heat on high until the oil reaches 350°F.

PA293156
 
In the meantime, mix the egg yolk, ice water, and flour to make the tempura batter.  Prepare a draining rack by lining a baking tray with two layers of paper towels and then laying cooling racks on top of the towels. 

Once the oil has reached 350°F, drop a few pieces of vegetable in the batter to coat and carefully lower into the oil (I used chopsticks to do this).  Make sure you do not overcrowd the pot; you don't want the vegetables to touch each other while they're cooking, and you don't want the temperature of the oil to drop too much.

PA293162
 
When the vegetables have lightly browned, remove with a slotted spoon and place on the draining rack.  Make sure the oil has heated back up to 350°F and repeat with the rest of the vegetables in small batches.  Serve immediately.

PA293164
 
You can make a dipping sauce by mixing one cup of dashi with 1/4 cup mirin and 2 tablespoons of soy sauce.

To make tempura udon noodle soup, heat two cups of dashi and add 2 tablespoons of mirin and soy sauce each.  Pour into a large soup bowl, add cooked udon noodles, and top with vegetable tempura.

Untitled
 
If you end up with leftover batter after frying all the vegetables, drip it into the hot oil to make tenkasu (tempura flakes).  I like to add these to the udon noodle soup for added texture.  You can also use them in okonomiyaki.

Next:  Thomas Keller's Lemon Tart
Previously:  Homemade Udon Noodles
Four years ago:  Curry Turnovers

Wednesday, December 19, 2012

Homemade Udon Noodles

Compared to making ramen noodles, making udon noodles seems a lot less fussy.  There's no obscure ingredient to find (unless you live somewhere where you can't find tapioca flour) and you literally use your feet to knead the dough.  I know!  Since the noodles are a thicker cut, there's even less of a need to have a pasta machine as well, although I found the dough to be stiffer so a pasta machine can really help with the rolling part.

Udon Noodles (adapted from She Simmers)
makes 1 1/2 lbs. fresh noodles

5 1/2 cups bread flour plus more for dusting
1/2 cup tapioca flour
3 teaspoons kosher salt
1 1/4 cups warm water

Mix together the bread flour and tapioca flour in a large mixing bowl.

PB033111
 
Dissolve the salt in the warm water.  Pour about half of the salt water into the flour and mix with your hands.  Add the remaining water, a teaspoon at a time, just until you can form a ball with the dough.

Kneading the dough with my feet
 
Place the dough in a gallon size Ziploc bag, squeeze out the air, and seal.  Place the bag on the ground and knead with your feet for a minute.  (I may or may not have put on my cutest socks for that shot.)

Remove the dough from the bag, fold it in thirds like a letter, place it back in the bag, and knead with your feet again for another minute.  Repeat this process two more times.

PB033119
 
Let the dough rest in a warm place for 3-6 hours.

Divide the dough in 4 quarters.  Work on a quarter at a time, leaving the rest of the dough covered.

Rolled out
 
Use a pasta machine or roll out the dough on a floured surface to 1/8" thickness. 

Dust the surface of the dough with a little more flour and then fold it into thirds like a letter.  Cut the dough into 1/8" thick strips. 

Cut
 
Keep the noodles covered while you work on rolling out and cutting the rest of the dough.  At this point you can store the fresh, uncooked noodles in an airtight container (I used a Ziploc bag) in the refrigerator for a few days before cooking.  Just make sure to toss them in enough flour to keep them from sticking to one another.  As you can kind of see from my pictures, my dough was so dry already that I didn't need to add much more flour. 

Bring a large pot of water to boil and add the fresh noodles.  After about 3 minutes, the noodles will start to float.  Cook for another 2-3 minutes until the noodles look swollen.  Drain and rinse with cold water.

Handmade vs. Machine rolled
 
Above is a comparison of hand-rolled and hand-cut noodles vs. machine rolled and cut noodles.  Can you tell which is which?

In broth
 
I like to eat my udon noodles in a dashi broth seasoned with a little soy sauce and mirin (about 2 teaspoons of soy sauce and 1 teaspoon of mirin per cup of dashi).  Add whatever toppings you want:  tofu, mushrooms, snow peas, carrots, etc.  My favorite is vegetable tempura, which I'll cover in the next post!

Next:  Vegetable Tempura and Tempura Udon
Previously:  Momofuku Ramen Broth
Three years ago:  Apple and Pear Cake Fail
Four years ago:  Macarons - A Lesson in Humility

Friday, December 14, 2012

Momofuku Ramen Broth

After I made the miso ramen, I decided to try to make a bacon version.  I fried up some bacon, added bacon grease to the broth, and even added some smoked salt, but I just couldn't get the depth of flavor that I was looking for.  So I decided to try making Momofuku's ramen broth.  After all, it used bacon as one of the ingredients so it must be on the right track.

Bacon Ramen
 
What I love about this recipe is that it builds layers and layers of umami using multiple ingredients:  kombu, shiitake mushrooms, chicken bones, roast pork bones, and finally tare, a soy based barbecue sauce made with roast chicken bones.  By the end, you get a super rich and flavorful broth that surprisingly isn't very heavy at all.

The first step is to make the tare.  This recipe will make more than you need, but you can also use it to season just about anything you'd normally use soy sauce for.  I've added it to the filling for dumplings, and it would be excellent as a basting sauce for grilled meats.

Tare (adapted from Momofuku)
makes 1 cup

2 chicken legs
1 cup soy sauce
1/2 cup rice wine
1/2 cup mirin

Butchered
 
Preheat the oven to 450°F.  Using a butcher knife, butcher the chicken legs into the thigh piece and drumstick.

Roasted

Place the thighs and drumsticks onto an oven-proof pan and roast for about 45 minutes, or until nicely browned, but not burnt.

Poaching
 
Remove the pan from the oven and place on medium high on the stove.  Add a splash of the soy sauce, and once it starts boiling, scrape up all the caramelized fond from the bottom of the pan with a spatula.

Done!
 
Add the rest of the ingredients and once it starts boiling, reduce the heat, and let it simmer for about an hour.

Tare
 
Strain out the chicken and store the tare in a jar.  It'll keep for a few days in the fridge or longer in the freezer. I like to keep a little of the fat on top to help seal off the top and preserve the sauce better.

Now it's time to make the broth.  I halved the recipe from the book because I was short on some of the ingredients, but I would suggest making the full amount since it's the same amount of work, and the broth freezes well.  I've also found that when refrigerated, the broth will form an aspic, so you can also use it to make xiao long bao.

Momofuku Ramen Broth (from Momofuku)
makes 5 pints, about 5 servings

3 three-inch pieces of kombu
1 cup dried shiitake mushrooms
2.5 lbs. pork neck bones
2 chicken legs
1/2 lb. bacon
6 scallions
1/2 onion
1 large carrot, chopped into large pieces
Tare (see recipe above)

Preheat the oven to 400°F.

Konbu
 
Add the kombu to 3 quarts of water in a large pot.  Turn the heat on high, and just before it boils, turn off the heat and let sit for 10 minutes.

Shiitake
 
Remove the kombu with a slotted spoon and add the dried shiitake mushrooms.  Bring the water to a boil and then reduce the heat and let simmer for 30 minutes.

Roasted pork neck bones
 
Meanwhile, place the pork neck bones on a baking tray and roast in the oven for 60 minutes, flipping half way through.

Chicken legs
 
Remove the mushrooms from the broth with a slotted spoon and add the chicken legs.  Continue to simmer for an hour, skimming off any of the crud that floats to the top.

Bacon
 
After an hour, check the chicken to make sure that it is cooked through and the meat is falling off the bones.  At that point, remove from the broth and add the bacon and pork bones.  Continue to simmer, adding more water if necessary.

Making Momofuku ramen broth
 
After 45 minutes, remove the bacon.  Continue to simmer for 5-8 hours.  About 45 minutes before you are done, add the scallions, onion, and carrot pieces.  After simmering for 45 minutes, strain everything out.

If you are using your broth right away, add 1/4 cup of the tare and taste your broth.  David Chang recommends seasoning it until it is almost at but just under "too salty".

PB063211
 
If not using your broth immediately, you can turn the heat on high and reduce the volume in half.  Store in the refrigerator (if using within a few days) or the freezer.  When ready to use, heat it up again and add an equal volume of water.  Season with the tare to taste.

Bacon Ramen
 
For my bacon ramen, I topped the Momofuku ramen broth and homemade ramen noodles with some fried bacon, blanched spinach, corn kernels, chopped scallion, a soft-boiled egg, and nori.  I still felt like it was missing a little something, so I added some fried shallots, which turned out to be the perfect touch.

Next:  Homemade Udon Noodles
Previously:  Miso Ramen with Marinated Soft-Boiled Egg
Four years ago:  Pork and Cabbage Dumplings

Tuesday, December 11, 2012

Miso Ramen with Marinated Soft-Boiled Egg

PA263188

Now that we've made the ramen noodles, it's time to make some ramen broth!  Some broths take hours if not days to make, but fortunately, it only takes a few minutes to make the broth for miso ramen.  There's two ways you can make this broth:  either add instant dashi and miso paste to chicken broth, or add chicken bouillon and miso paste to dashi stock.  I chose to do the latter because dashi is a lot easier to make than chicken broth, and the two ingredients (kombu and bonito flakes) are shelf stable.

PA243126
 
Kombu is a type of seaweed, and bonito flakes are made from smoked, shaved fish.  You should be able to find both in an Asian grocery store, but I've also found them in the ethnic section of grocery stores. They both are very high in umami, which is why such a simple preparation can produce so much flavor.

Dashi Stock
makes 1 quart, enough for 2 bowls of miso ramen

4 cups water
2-3 strips of kombu
1/2 cup loosely packed bonito flakes

PA243121
 
Place the water and kombu in a medium pot and let soak for 15 minutes.

PA243124
 
After 15 minutes, place the pot on medium heat.  Just before it boils, remove from heat and sprinkle the bonito flakes over the surface of the water.

PA243129
 
After 3-4 minutes, strain through a fine mesh strainer.

PA243132
 
Now let's talk toppings:  my absolute favorite is a marinated soft-boiled egg.  It's similar to lu dan, except the yolk is barely set, and the marinade only penetrates the outer surface of the egg.  It took me a few tries to get it right because the recipe I was using called for the egg to be boiled for only 6 minutes, but my eggs were still too soft at that point.  You want to cook it just long enough so that the egg white is set.  If it's too soft, it's almost impossible to peel, which I found out the hard way.  Eventually, through trial and error, I found that 7 and a half minutes was the ideal amount of time that I needed to cook my eggs to that point.

PB063215
 
Marinated Soft-Boiled Eggs (adapted from Serious Eats)
makes 3 eggs (you only need 2 for 2 bowls of ramen, but you might as well make the third since there's enough marinade for 3 eggs)

1/2 cup water
1/2 cup rice wine
1/4 cup soy sauce
1/4 cup mirin
1/4 cup sugar
3 eggs

Combine water, rice wine, soy, mirin, and sugar in a medium bowl and whisk until sugar is dissolved. Set aside.

Bring 1 quart of water to a boil in a medium saucepan over high heat.  Carefully lower eggs into water with a slotted spoon. Reduce heat to maintain a bare simmer. Cook for exactly 7 minutes and 30 seconds. Drain hot water and transfer eggs to a bowl filled with ice water.  Cool for 3 minutes and then carefully peel eggs (the whites will be quite delicate).

PA243116
 
Transfer eggs to a bowl that just barely fits them all. Pour marinade on top until eggs are covered or just floating.

PA243118
 
Place a double-layer of paper towels on top and press down until completely saturated in liquid to help keep eggs submerged and marinating evenly.

PA243119

Cover and refrigerate at least four hours and up to 12. Discard marinade after 12 hours. Store eggs in a sealed container in the fridge for up to 3 days.

PA263138

As for the rest of the toppings, I didn't have any roast pork on hand, or else I would have used that, but I did have some fried tofu, which worked well with the miso broth.  Other possible toppings include corn, bean sprouts, chopped scallions, nori, cooked spinach, bamboo shoots, etc.  You don't want anything too strong to mask the flavor of the broth, but it's nice to have a few different textures in each bite.

Miso Ramen
makes 2 bowls

4 cups dashi stock
1 chicken bouillon cube
3 tablespoons frozen corn kernels
1/4 cup fresh bean sprouts
8 pieces fried tofu
2 tablespoons white miso paste
1/2 recipe ramen noodles, cooked
2 marinated soft-boiled eggs, sliced in half lengthwise
4 four inch-square sheets nori
2 teaspoons scallions, chopped

Add the dashi stock, bouillon cube, corn, bean sprouts, and fried tofu in a medium pot and bring to a boil over high heat.  Remove the corn, bean sprouts, and tofu with a slotted spoon and set aside.

PA263180
 
Remove the pot from heat and add the miso paste to the stock.  Stir to dissolve.

PA263181
 
Split the cooked ramen noodles between two large bowls.  Pour in the miso broth.

PA263177
 
Top each bowl with half the corn, bean sprouts, fried tofu, and marinated soft-boiled eggs.

PA263178

Place two sheets of nori in each bowl and sprinkle half the scallions over each bowl.

PA263183

Next post:  Momofuku Ramen Broth!
Previously:  Homemade Ramen Noodles