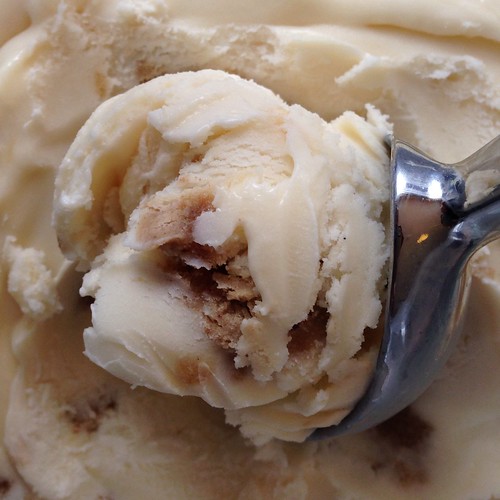
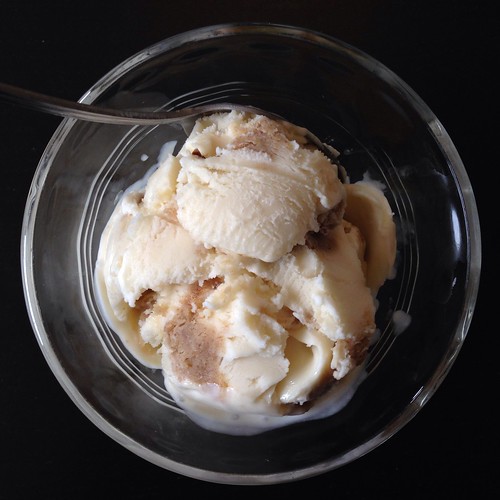
Häagen-Dazs had a contest years ago for fans to create a new flavor, and the winner was sticky toffee pudding. I was ecstatic because I absolutely loved sticky toffee pudding! I first had the dessert when I was in London. I don't even remember the name of the restaurant, but I remember totally falling in love with the warm, moist cake topped with a toffee caramel sauce and vanilla ice cream.
Alas, the ice cream flavor was a limited edition, and even though I stocked up on it every chance I had, there came a long, dry spell during which I had no sticky toffee pudding ice cream. =( I sometimes thought about making it myself but never went through with it until recently when The Kitchn posted a recipe for making sticky toffee pudding sundaes. I just made a half recipe of the cake and sauce and combined it with a simple base ice cream from Jeni's Splendid Ice Creams enriched with a little vanilla extract. There was no point in making a gourmet vanilla ice cream with vanilla beans since all the nuances would have been lost under the stronger flavors from the sticky toffee pudding.
Warning: this is not a quick and easy recipe. It involves reconstituting dried dates, baking a steamed cake, making a caramel sauce, and churning your own ice cream. Read through all the steps and make sure you have the time and equipment. I will say, however, that the results are oh so worth it! This tastes pretty much exactly like what I remember the Häagen-Dazs version tasted like!
Sticky Toffee Pudding Ice Cream
makes about 1 quart
For the toffee cake:
4 ounces pitted dates, coarsely chopped
1/2 cup water
1/2 teaspoon baking soda
4 tablespoons unsalted butter, room temperature
1/2 cup packed dark brown sugar
1 large egg, room temperature
5 ounces all-purpose flour
1/4 teaspoon baking powder
1/8 teaspoon kosher salt
1/4 teaspoon vanilla extract
Combing the chopped dates and water in a small saucepan and bring to a boil. Remove from heat. Stir in the baking soda and let stand for 20 minutes to 2 hours. Transfer to a food processor or blender and process until mostly pureed.
Preheat oven to 375°F. Generously grease the bottom and sides of a loaf pan with butter or baking spray.
In the bowl of a stand mixer fitted with a paddle attachment (or with an electric mixer), cream together the butter and sugar on medium speed until light and fluffy, 3-5 minutes. Reduce speed to low and add the eggs one at a time, fully incorporating after each addition. Stop the mixer and scrape down the sides of the bowl.
Whisk the dry ingredients together in a separate mixing bowl. On low speed, alternate adding the dry ingredients with the date mixture, beginning and ending with the dry ingredients. Stir in the vanilla extract. Pour the batter into the prepared pan.
Place the pan inside a larger casserole dish or roasting pan and transfer to the oven. Pour enough hot water to reach halfway up the side of the loaf pan. Bake until a toothpick pricked into the middle comes out slightly moist, 30-35 minutes.
For the caramel sauce:
4 tablespoons unsalted butter, room temperature
1/2 cup packed dark brown sugar
1/2 cup heavy cream
1/2 tablespoon rum (optional)
1 teaspoon vanilla extract
When the cake has about 10 minutes left of cooking time, make the caramel sauce. Combine butter, sugar, and cream in a heavy saucepan. Whisking constantly, bring the mixture to a boil and cook for 3 minutes. Remove from the heat and whisk in rum (if using) and vanilla extract.
Remove the cake from the oven and allow to cool for 5 minutes. Prick the cake all over with a skewer or toothpick. Pour half the sauce over the warm cake and let sit until it reaches room temperature. Cover and transfer to the refrigerator so that it can chill while you make the ice cream.
For the vanilla ice cream:
2 cups whole milk
4 teaspoons cornstarch
3 tablespoons cream cheese, softened
1/8 teaspoon kosher salt
1 1/4 cups heavy cream
2/3 cups sugar
2 tablespoons light corn syrup
2 teaspoons vanilla extract
Mix about 2 tablespoons of the milk with the cornstarch in a small bowl to make a smooth slurry. Whisk the cream cheese and salt in a medium bowl until smooth.
Combine the remaining milk, cream, sugar, and corn syrup in a 4-quart saucepan, bring to a rolling boil over medium-high heat, and boil for 4 minutes. Remove from heat and gradually whisk in the cornstarch slurry.
Return the mixture to a boil over medium-high heat and cook, stirring until the mixture is slightly thickened, about 1 minute. Remove from heat.
Gradually whisk the hot milk mixture into the cream cheese until smooth. Stir in the vanilla extract and chill the mixture in the refrigerator.
Pour the ice cream base into an ice cream maker and spin until thick and creamy.
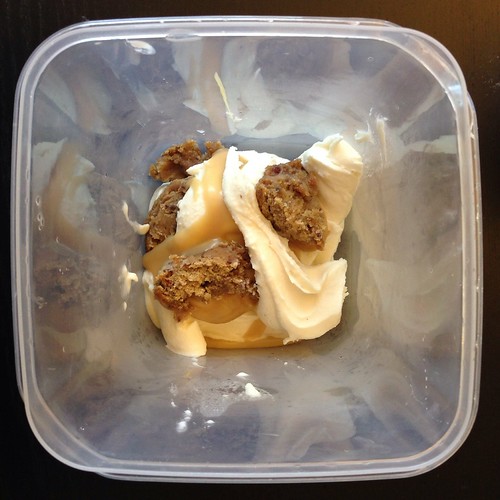
Pack the ice cream into a storage container, alternating it with layers of the cake and caramel sauce; do not mix. Seal with an airtight lid and freeze until firm, at least 4 hours.
Next: Salade Indochinoise
Previously: Miso Pumpkin Soup
Last Year: Thomas Keller's Lemon Tart
Four Years Ago: Homemade Waffle Face Off
Five Years Ago: Curry Turnovers(?)
Tuesday, December 31, 2013
Friday, December 13, 2013
Miso Pumpkin Soup
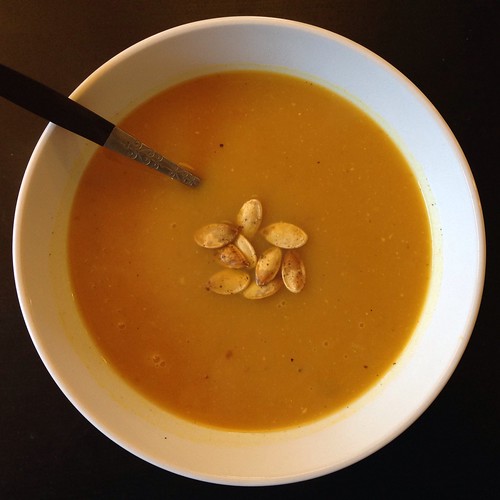
I've made this soup 3 times already, so I'm not really sure why it's taken so long for me to post about it. I first bookmarked this recipe from The Kitchn when I was trying to find ways to use up a sugar pumpkin and sweet potatoes. Every time I've made it since I've done something a little different--used acorn squash instead of pumpkin, substituted ground ginger for fresh ginger or fried shallots instead of fresh shallots--and it still comes out great. There's just something so warm and cozy about this combination of flavors and colors.
I like to save the pumpkin seeds and roast them with some olive oil and Old Bay seasoning. They add a nice crunch if you add them as a topping to the soup but are perfect for just snacking on, too. I also like the suggestion from The Kitchn of garnishing with chopped scallions, ichimi togarashi, and toasted sesame seeds. The red pepper flakes kick up the warming factor of the soup without being obnoxiously spicy.
Miso Pumpkin Soup (adapted from The Kitchn)
serves 4
2 lbs. sugar pumpkin or acorn squash
1 lb. sweet potatoes
4 garlic cloves, peeled
2 tablespoons olive oil
Salt and freshly ground black pepper, to taste
1 tablespoon fried shallots
1 teaspoon powdered ginger
3 tablespoons white miso
6 cups vegetable or chicken stock
Preheat oven to 450°F.
Cut the pumpkin or squash in half and remove the seeds and pulp with a metal spoon. Peel the pumpkin and cut into 2-inch pieces.
Peel and cut the sweet potatoes into 2-inch pieces.
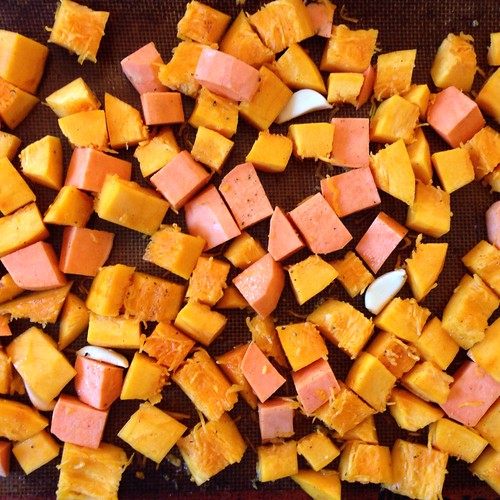
Combine the pumpkin, sweet potatoes, and garlic on a baking sheet, toss with 2 tablespoons of olive oil, and sprinkle with salt and pepper. Roast in the oven until the pumpkin and sweet potatoes are tender when pierced, about 30 minutes, tossing halfway through.
Add the fried shallots, ground ginger, miso, and vegetable stock to a large pot and stir until dissolved. Add the roasted vegetables and simmer for 15 minutes. Turn down the heat if necessary to avoid boiling, as this can impair the flavor of the miso.
Puree the soup using an immersion blender. To serve, garnish with roasted pumpkin seeds or with chopped scallions, ichimi togarashi, and toasted sesame seeds.
Next: Sticky Toffee Pudding Ice Cream
Previously: Thai Coconut Sticky Rice with Mango
One Year Ago: Momofuku Ramen Broth
Four Years Ago: Wah Guay (Taiwanese Rice Cake with Meat Sauce)
Five Years Ago: Pork and Cabbage Dumplings
Monday, December 2, 2013
Thai Coconut Sticky Rice with Mango
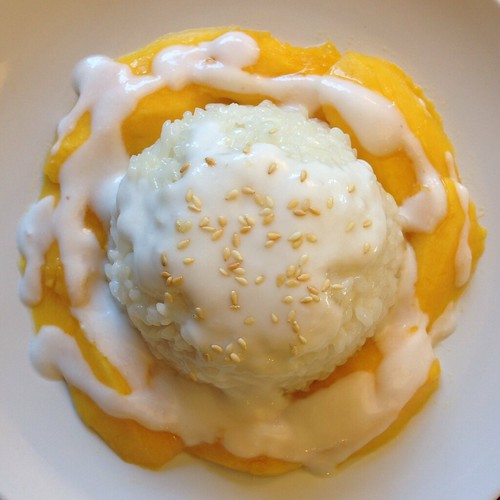
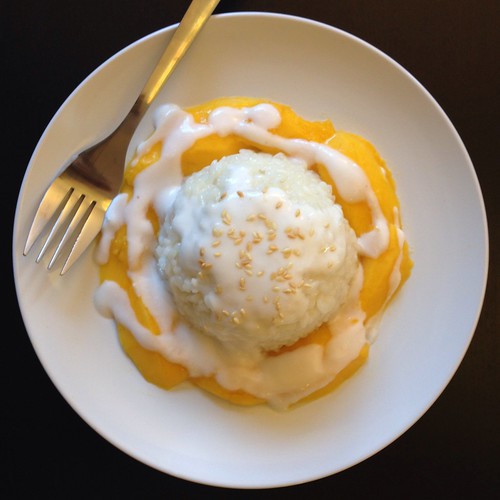
Trader Joe's used to carry this dessert, and I loved it: chewy sticky rice infused with coconut milk and topped with mangoes and even more coconut goodness. It had the sweet and salty flavor profile that makes you keep coming back for bite after bite. I've been missing this dessert ever since it was discontinued, but when I saw that mangoes were on sale at my local grocery store, I decided to learn how to make it myself.
I followed this recipe from The Kitchn, but since I didn't have a steamer basket, I improvised with some parchment paper and the pasta strainer insert for my stock pot. You could also maybe try using cheesecloth with a metal colander or strainer in a large enough pot with a lid--anything with holes in which you could steam the rice in. I also suggest chilling the can of coconut milk in the fridge before opening because I find that it makes it easier to scoop the coconut cream from the top off if it's more solid.
Thai Coconut Sticky Rice with Mango
serves 2-4
1 cup sweet rice
1 can coconut milk, unshaken and chilled in the refrigerator
3 tablespoons sugar, divided
1 teaspoon salt, divided
1/2 teaspoon cornstarch
2 ripe mangos
Toasted sesame seeds, to garnish
Soak the sweet rice in room temperature water for 1-2 hours. Cut a piece of parchment paper out about 3 inches wider in diameter than the bottom of the pasta strainer insert for a stockpot. Tuck the paper into the insert so it fits in the bottom like a bowl.
Drain the rice and rinse thoroughly. Pour about 1 cup of water into the stockpot and place the rice in the parchment paper "bowl" and place the pasta strainer insert in the pot. Cover tightly and steam over low to medium heat for 20 minutes.
While the rice is steaming, open the can of coconut milk and spoon out the thick cream on top into a small bowl.
Pour the thinner, lighter coconut milk left in the can into a small saucepan. Stir in 2 tablespoons of sugar and 3/4 teaspoon salt. Warm over medium heat, stirring frequently, for 5 minutes. Do not let the sauce boil.
When the rice is done, transfer it to a mixing bowl (it will be clumpy). Slowly pour the warm coconut milk over the rice in the bowl, stirring frequently. You want the milk to coat the rice but not leave puddles. Keep stirring, and stop pouring in coconut milk when it looks like the rice is saturated. You may not use all of the milk. Set the rice aside to finish absorbing the coconut milk; after 15 minutes or so it should have soaked up any milk that is still liquid.
While the rice is standing, make the coconut topping sauce. Rinse out the coconut milk saucepan and pour in the coconut cream that you took off the top of the can. Stir in 1 tablespoon of sugar and 1/4 teaspoon salt. In a separate bowl, whisk together a few teaspoons of water and the cornstarch.
Whisk this cornstarch slurry into the coconut cream and cook over low heat for about 3 minutes, or until the mixture thickens considerably. Set aside.
Peel the mangoes and then slice the flesh into 1 inch wide strips.
To serve, place about 1/3 cup cooked sticky rice on each plate, and arrange mango slices around it. Drizzle with the coconut topping sauce and sprinkle with a few toasted sesame seeds.
Next: Miso Pumpkin Soup
Previously: Cheese Fondue Stuffed Roasted Pumpkin
Last Year: Mashed Potato Pizza with Roasted Garlic and Bacon
Four Years Ago: Kettle Corn
Five Years Ago: Salted Butter Caramel Ice Cream
Subscribe to:
Comments (Atom)
