Wednesday, May 28, 2014

Blueberry Buttermilk Mini Pies

https://www.flickr.com/photos/joyosity/14100187299/

Last year I ate the best pie I've ever had at this popular, local restaurant.  Luckily, I was friends with someone who worked there, so I begged her for the recipe.  She was able to get it from the pastry chef, but I don't want anyone to get in trouble (myself included!) so I'm going to refrain from saying which restaurant it is.

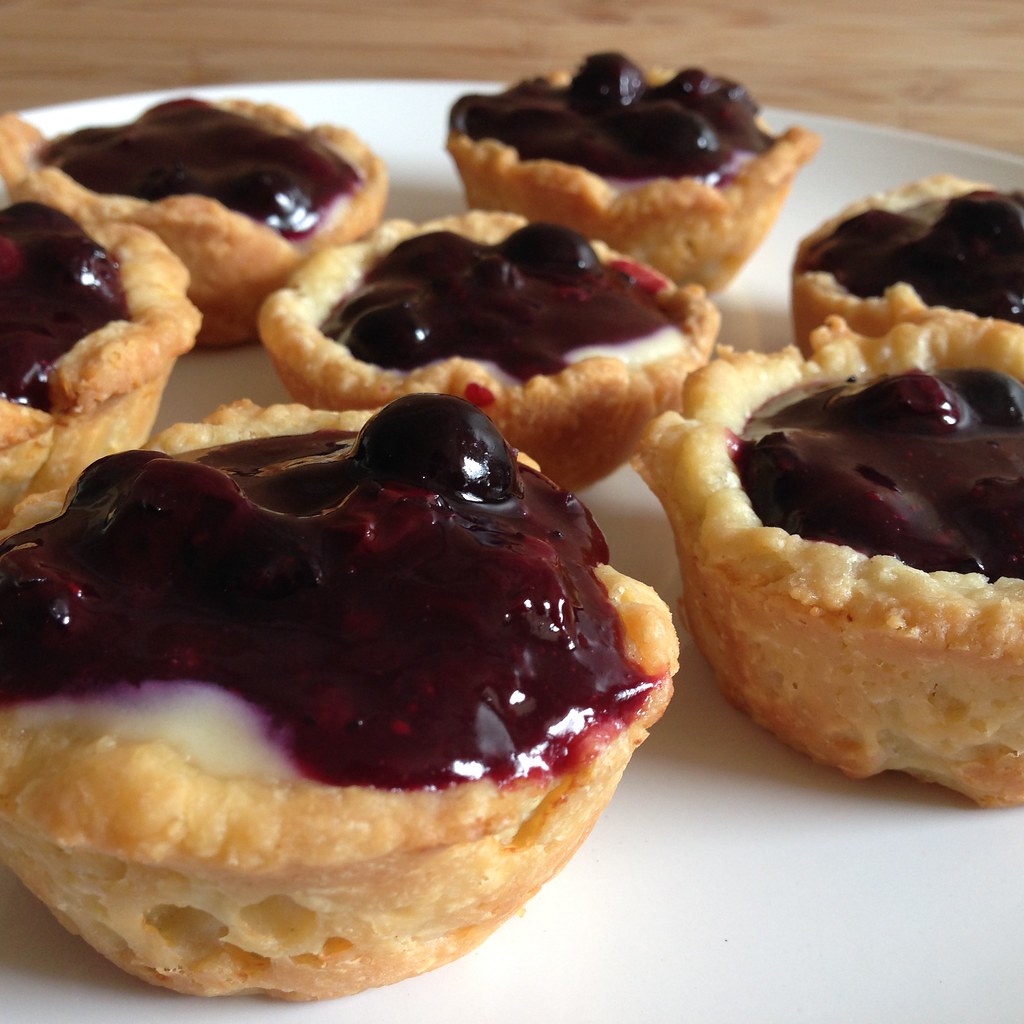
I will say, however, that this is a damn fine pie.  The sweet blueberry filling pairs nicely with the tart buttermilk pastry cream.  And the crust.  OMG, the crust....  I mean, I really like the vodka pie crust recipe from America's Test Kitchen, but this all-butter crust is simply amazing.  The texture is unlike any other pie crust I've ever tasted; it's practically crispy!  I'm guessing one of the main reasons it doesn't get all soggy like a lot of other pie crusts is because you blind bake the pie crust before filling it.

https://www.flickr.com/photos/joyosity/14283533291/

I decided to make these into mini pies so that I could more easily share them with friends, and also so I wouldn't be getting into as much trouble for sharing a secret recipe word for word.  I hope.  O_o  I did have to adapt the recipe a bit since the one I got was for 10 pies, if that helps. 

To blind bake the mini pie crusts in a muffin tin, I used aluminum cupcake liners to line the top of the pie crusts before weighing it down with pearl barley.  You can also use dried beans, rice, or of course, pie weights.  If you don't want to go through the trouble, you can try docking the pie crusts by poking the bottom several times with a fork, but I haven't tested that method, so I can't guarantee it'll work.

https://www.flickr.com/photos/joyosity/14100267238/

Blueberry Buttermilk Mini Pies
makes 12 mini pies

For the pie crust
160 g all-purpose flour
25 g sugar
1/4 teaspoon salt
120 g cold butter, cubed
Ice water
Cooking spray

https://www.flickr.com/photos/joyosity/14100230430/

Mix the flour, sugar, and salt together in a food processor.  Add the butter and pulse until the butter has been cut into pea-sized pieces.  Transfer to a small bowl.

Add ice water (just the water, not the ice) to the butter flour mixture by hand; only add enough water for the dough to come together but not be sticky.  Cover and allow dough to relax in refrigerator overnight.

https://www.flickr.com/photos/joyosity/14263734316/

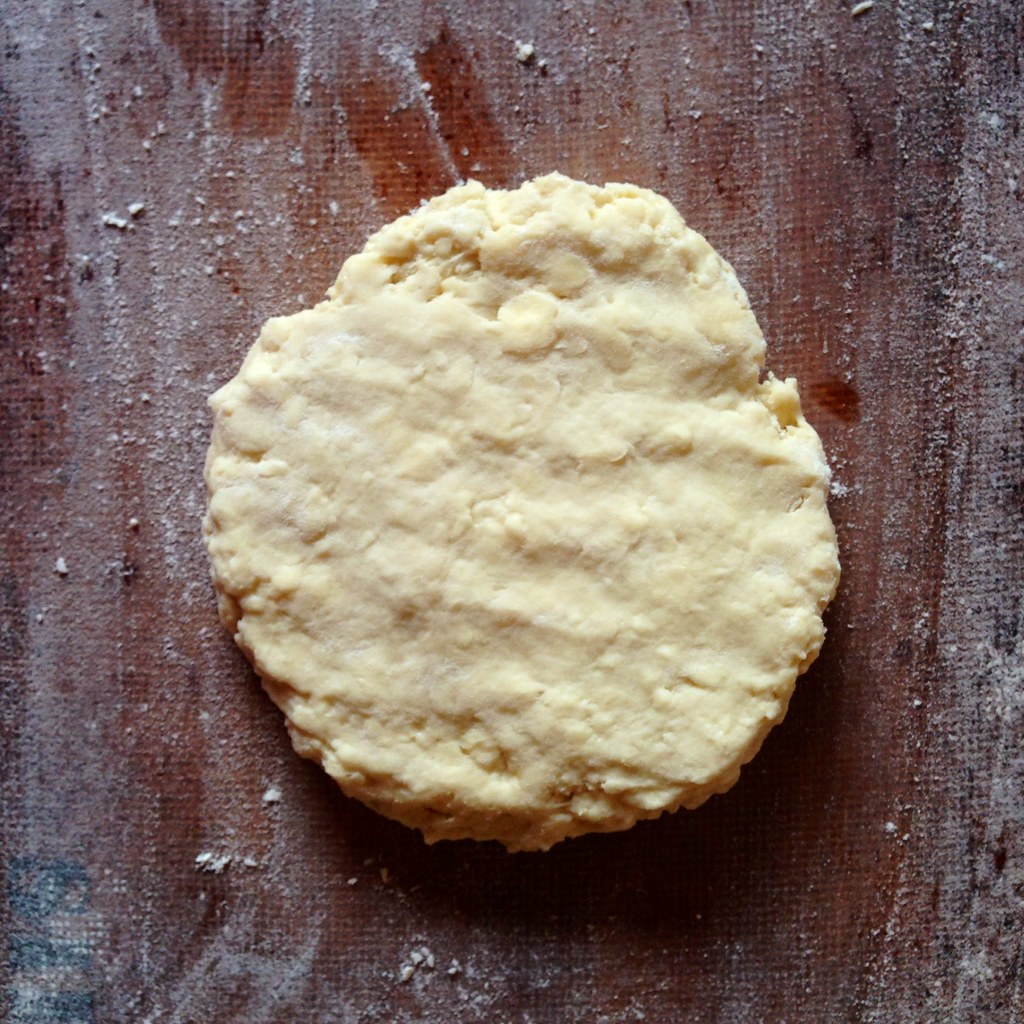
The next day, roll out the dough to about 1/8".  (If you added a little too much water, like I did, make sure to flour the surface and top of the dough well before rolling.)  Use a flattened cupcake liner as a stencil, cut out 12 circles (you will probably need to re-roll out leftover scraps to get the last 2 circles).  Set aside any leftover scraps in the fridge for now.

https://www.flickr.com/photos/joyosity/14286855975/

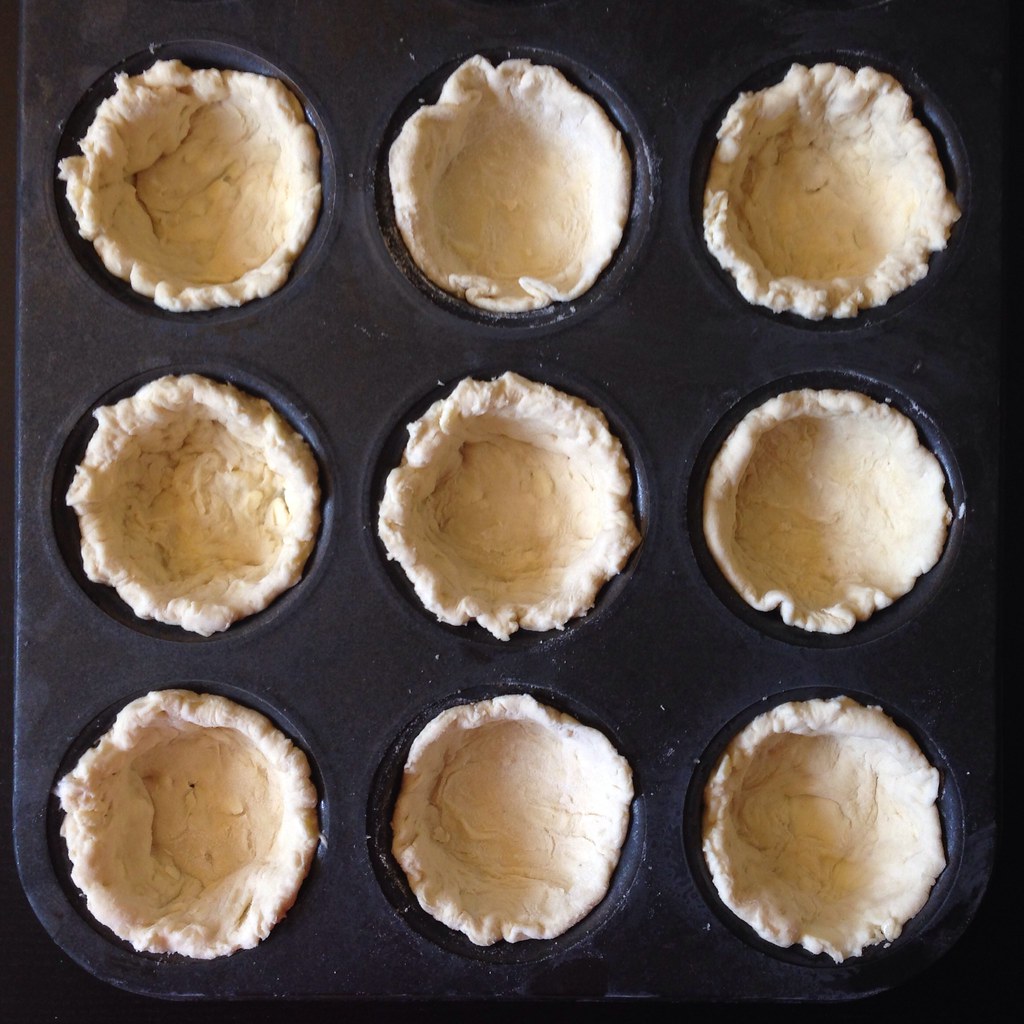
Generously grease the wells of a muffin tin with cooking spray.  Press the pie crust circles into each well.  Place a cupcake liner on top of each pie crust.  Transfer the pie crusts to the freezer for at least 30 minutes.

Preheat the oven to 350°F. 

https://www.flickr.com/photos/joyosity/14307040343/

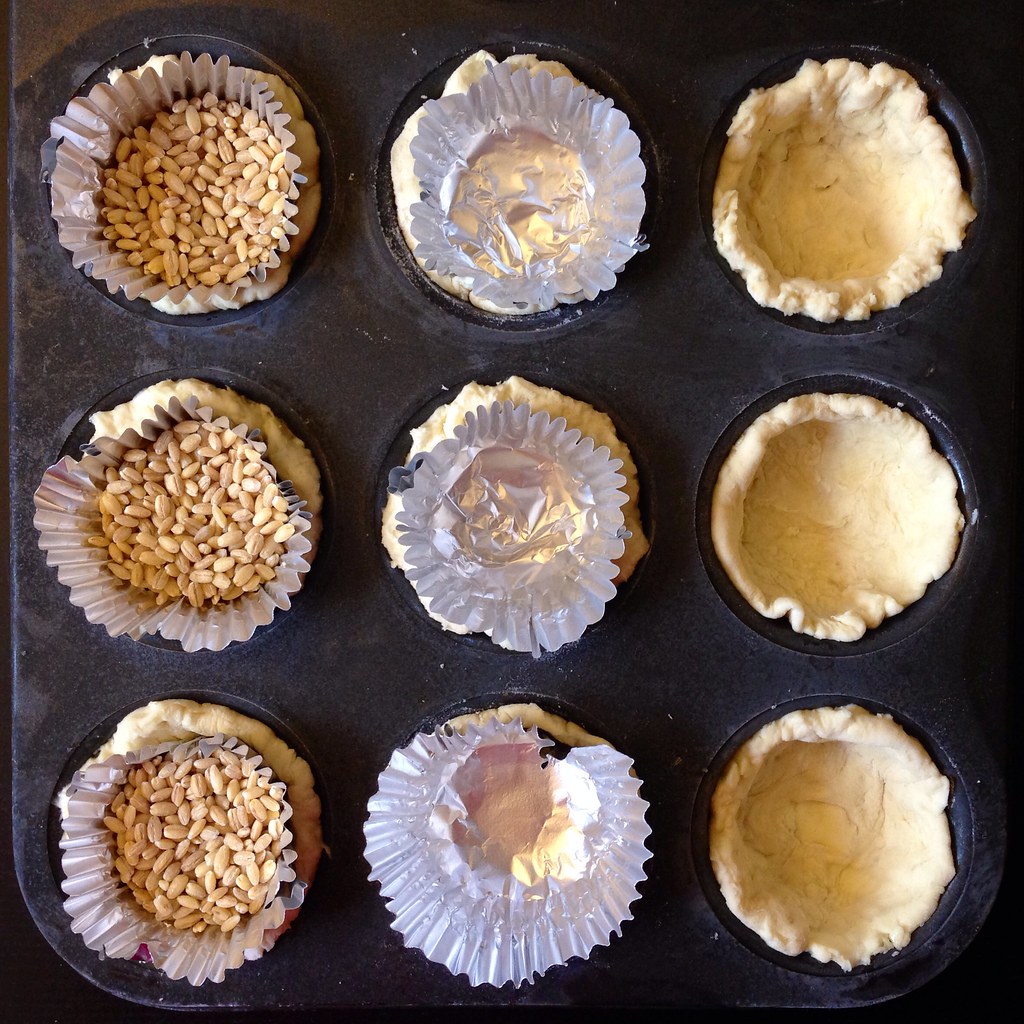
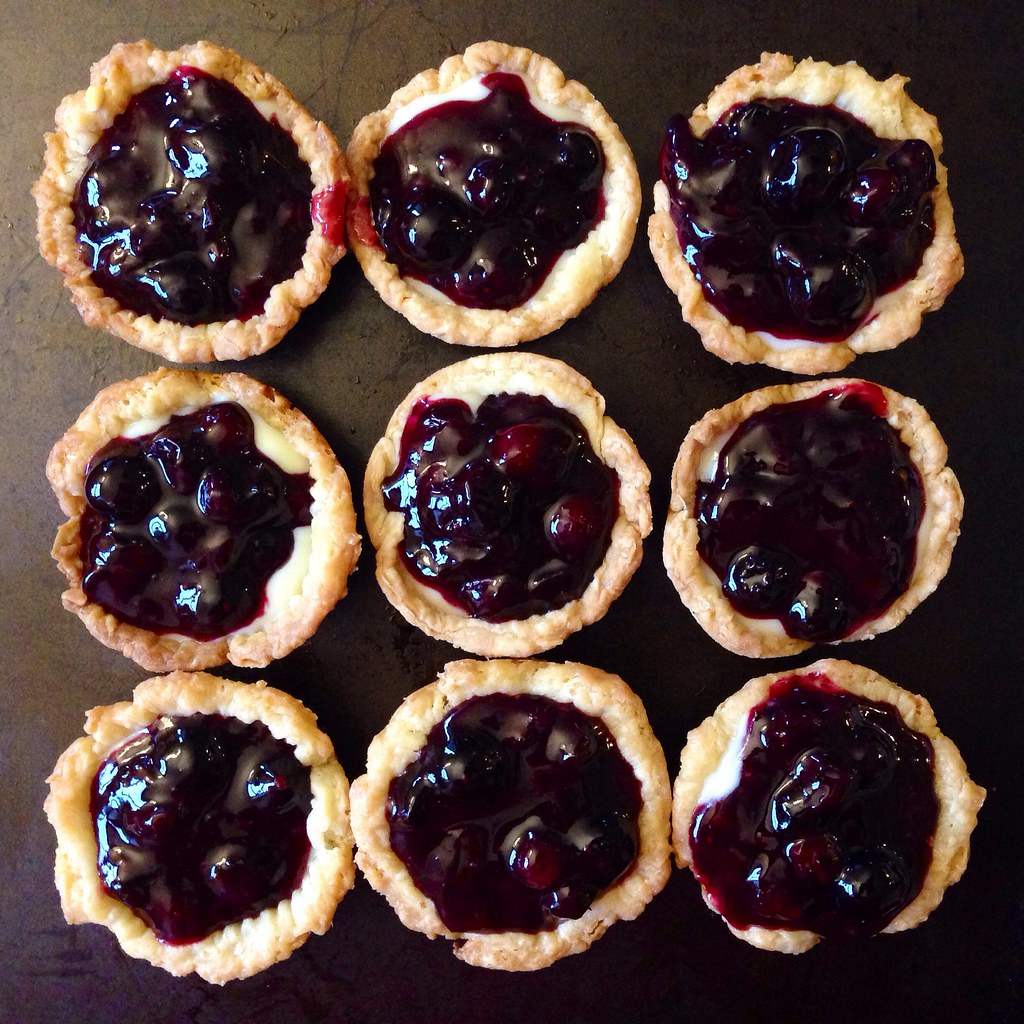
Once the pie crusts have frozen, fill the cupcake liners with you pie weight of choice (see above).  Bake for 20 minutes, or until the edges of the pie crusts just start to brown.  Remove the cupcake liners and pie weights.  If there are any holes in the crusts, use the leftover scraps to carefully patch them (which, as you can see below, I failed to do). Return the crusts to the oven and bake for another 5-10 minutes until the bottom of the pie crust is cooked through.  Allow to cool completely.  Carefully twist the pie crusts in the muffin tins to release.

https://www.flickr.com/photos/joyosity/14307076573/

For the buttermilk pastry cream
100 g buttermilk
32 g sugar, divided
8 g cornstarch
1 egg
10 g butter, melted and cooled
1 g salt

Whisk together 12 g (about 1 tablespoon) of sugar and the cornstarch.  Add the egg and whisk until mixed.

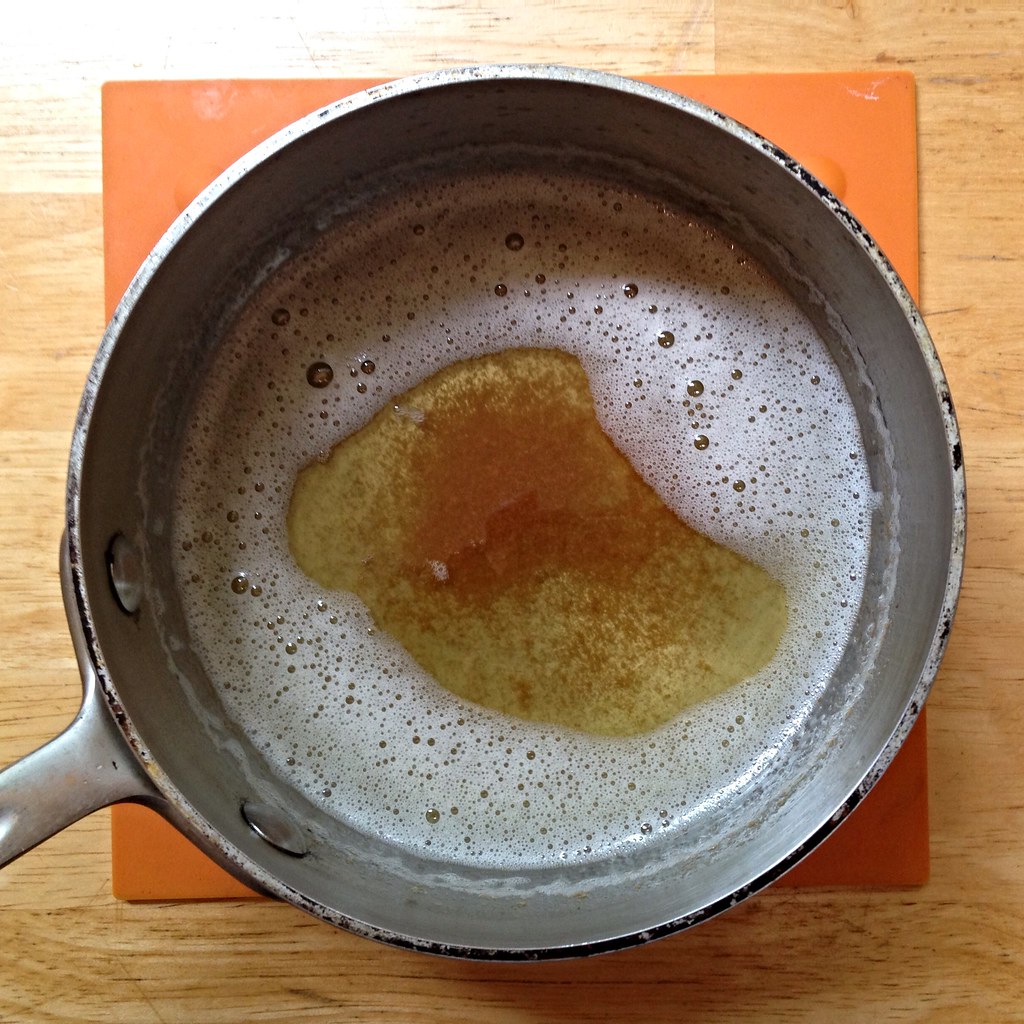
In a small saucepan, bring the buttermilk and remaining sugar to a simmer.  Temper the hot buttermilk mixture into the egg mixture and return to the saucepan.  Cook over medium-low heat, scraping constantly, until it boils and thickens and no starch is detected on tongue.

https://www.flickr.com/photos/joyosity/14284886282/

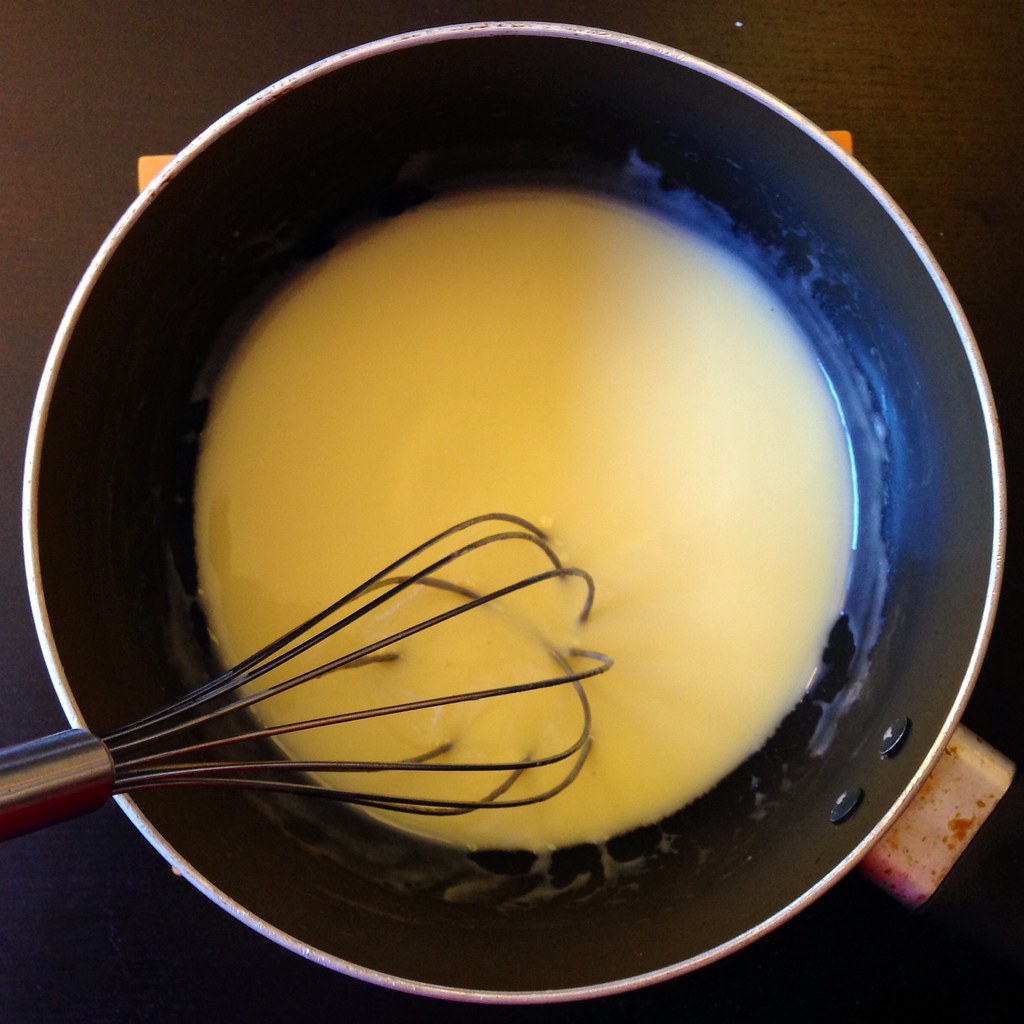
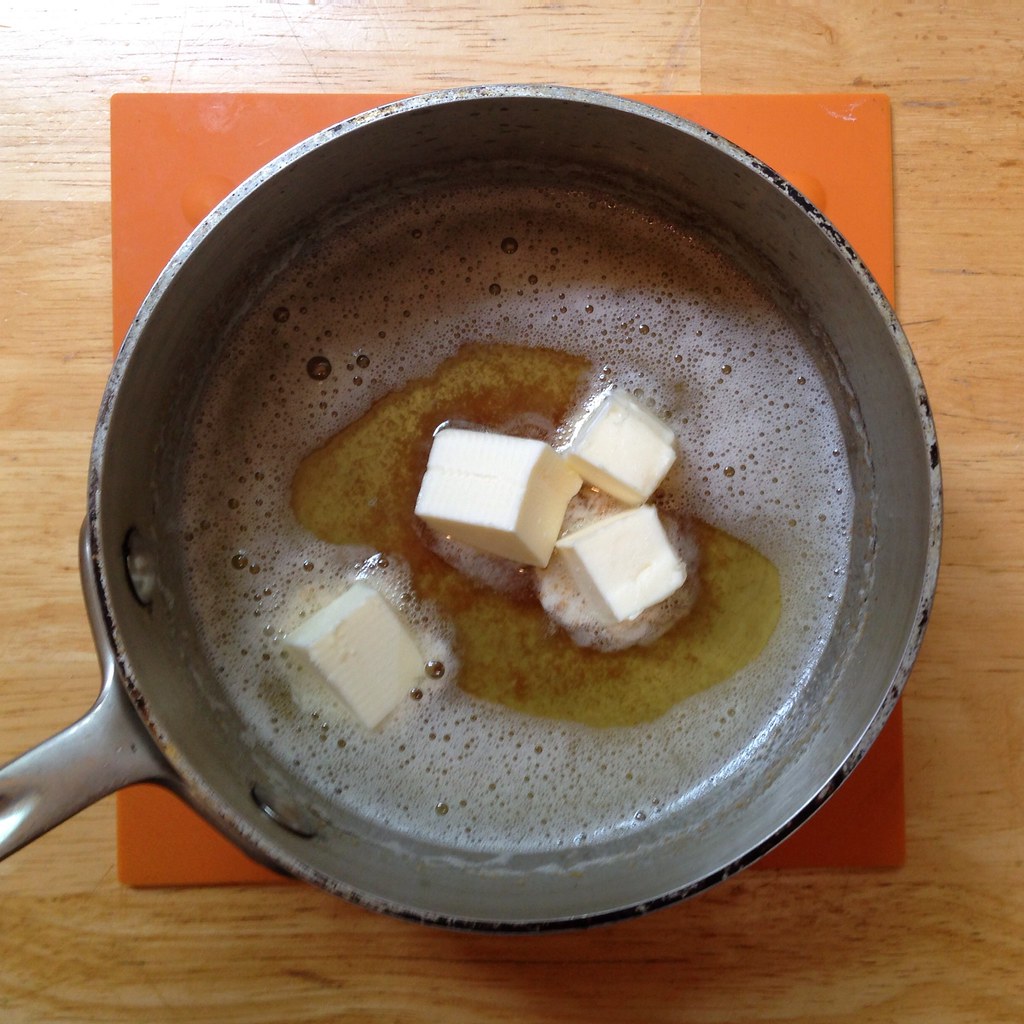
Pour into a small bowl, cover with plastic wrap directly on the custard, and place in the refrigerator until the surface is at room temperature.  Mix in the soft butter and salt, and return to the refrigerator to chill again.

For the blueberry filling
500 g blueberries, divided
100 g sugar
1 teaspoon salt
20 g cornstarch
15 g fresh lemon juice

https://www.flickr.com/photos/joyosity/14100255268/

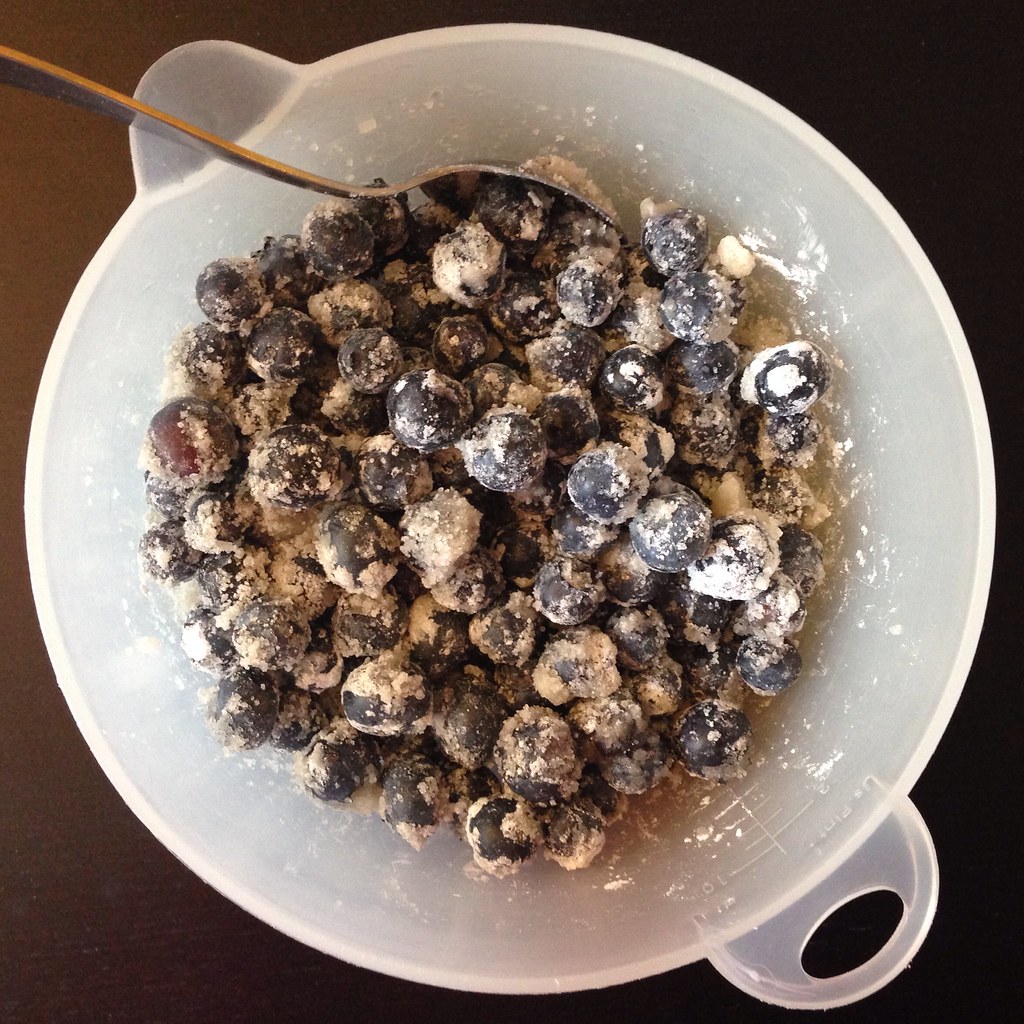
Toss 350 g of the blueberries with the sugar, salt, and cornstarch and transfer to a small saucepan.

Cook on medium heat, scraping throughout until blueberries break down, thicken, and no starch is detectable on tongue (should be a chunky jam consistency).

https://www.flickr.com/photos/joyosity/14286896605/

Turn off the heat and add the remaining fresh blueberries and lemon juice.  Allow to cool to room temperature, stirring occasionally to release the heat.

https://www.flickr.com/photos/joyosity/14284890432/

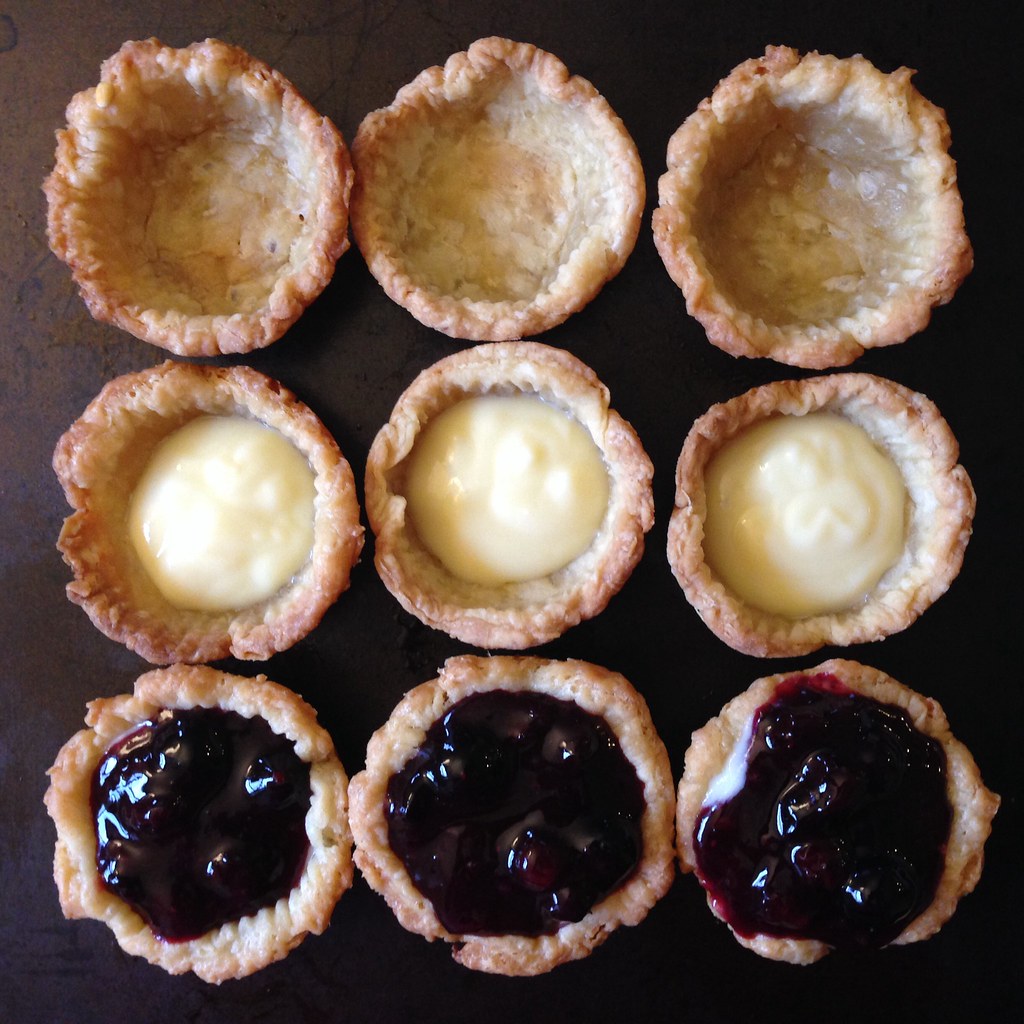
Divide the buttermilk pastry cream among the 12 pie crusts.  Top with the blueberry filling.  Keep mini pies chilled until serving. 

https://www.flickr.com/photos/joyosity/14100216588/
Five Years Ago:  Butter Mochi Cupcakes

Monday, May 26, 2014

Corn and Black Bean Tortilla Soup


https://www.flickr.com/photos/joyosity/14238218406/

I think I first discovered tortilla soup at the Wolfgang Puck Café in Chicago O'Hare, and it soon became my go-to during layovers in Terminal 3.  It's relatively light and refreshing after a long flight but still filling enough to be a full meal for me.  Of course, I always ask for extra tortilla strips because I like to add them a little bit at a time as I eat the soup so that there are always be some crunchy ones even towards the end. 

The only reason I haven't made this soup before is that I never had any corn tortillas on hand.  But after making the chilaquiles, I had some left over, so it was time to finally try it out.  I did some research on-line and cobbled together my own recipe with a lot of influence from The Pioneer Woman and Simply Recipes.

https://www.flickr.com/photos/joyosity/14261340875/

Corn and Black Bean Tortilla Soup
makes 4 servings

3-4 corn tortillas, preferably slightly stale and dry
1/4 cup vegetable oil
1 onion
1 green bell pepper
2 garlic cloves
1 teaspoon cumin
1 teaspoon adobo seasoning
4 cups vegetable or chicken broth
1 can (14.5 oz.) of diced tomatoes with jalepenos
1 cup corn kernels, fresh or frozen
1 can (15.5 oz.) can black beans, drained
1 tablespoon cornmeal
1 avocado
1/2 cup shredded Monterey Jack cheese
1 lime, quartered

https://www.flickr.com/photos/joyosity/14260946314/

Cut the tortillas in half and then into thin strips.  Heat oil in a large pot and fry the tortilla strips in batches until golden brown.  Transfer to a paper towel-lined plate and lightly salt.

https://www.flickr.com/photos/joyosity/14281503403/

Dice the onion and add to the same pot, on medium-low heat, stirring occasionally.  Dice the green pepper and add to the pot.  Mince the garlic and add to the pot along with the cumin and adobo seasoning.  Mix well and cook for another minute.

https://www.flickr.com/photos/joyosity/14259189732/

Add the tomatoes and broth.  Bring to a boil and then reduce the heat.  Simmer for 15 minutes.  Use an immersion blender to puree the soup, leaving a few chunks if you like.  Taste the soup at this point and season accordingly.

Add the corn and black beans.  Mix the cornmeal with some water and add to the soup.  Stir and simmer for another 15 minutes.

https://www.flickr.com/photos/joyosity/14074695278/

Dice the avocado and distribute half among four soup bowls.  Add half the tortilla strips equally between the bowls.  Ladle in the soup and top with the rest of the avocado, tortilla strips, and shredded cheese.  Serve with a slice of lime.

https://www.flickr.com/photos/joyosity/14074720570/

You can also top the soup with sour cream, queso fresco, and cilantro.

Next:  Blueberry Buttermilk Mini Pies
Previously:  Serendipitous Chocolate Chip Cookies
Five Years Ago:  Kalbi (Korean Barbecue Short Ribs)

Tuesday, May 13, 2014

Serendipitous Chocolate Chip Cookies

https://www.flickr.com/photos/joyosity/9185424347/in/photostream/

Everyone has their own favorite chocolate chip cookie recipe, and this is mine.  A couple of years ago, I attended a Sister's Appreciation Night at my church, and one of the party favors were these "chocolate chip cookie mixes in a jar" jars.  To be honest, I don't think I touched that jar until almost a year later, when I really wanted to try making America's Test Kitchen's Perfect Chocolate Chip Cookies but didn't have all the ingredients.  Undaunted, I dumped out the contents of the jar, literally separated all the chocolate chips from the rest of the dry ingredients, and proceeded as directed.  What came out of that oven were the best chocolate chip cookies I've ever had.  There was a perfect chocolate chip to cookie dough ratio, and the cookies were just slightly crisp at the edges and soft but not too gooey in the middle.

The next time I wanted to make chocolate chip cookies, I decided to try repeating my success by using the same ingredients from the "cookie in a jar" recipe and the same process as the ATK recipe.  And it worked perfectly, again.  One thing I really like about the ATK method is that you don't have to cream the butter and sugar together, meaning you can make this recipe even without an electric mixer.  The "cookie in a jar" recipe simplifies the ATK ingredients a bit by only using 1 egg instead of an egg plus an egg yolk.  I also roll out slightly smaller balls of dough than what the ATK recipe calls for due to personal preferences.

I call these my Serendipitous Chocolate Chip Cookies because I don't think I would've ever otherwise have come up with this perfect union of two different recipes by myself.

https://www.flickr.com/photos/joyosity/9188223892/in/photostream/

Serendipitous Chocolate Chip Cookies
makes 24 cookies

1 3/4 cup all-purpose flour
1 teaspoon baking powder
1 teaspoon baking soda
3/4 cup unsalted butter, divided
3/4 cup brown sugar
1/2 cup white sugar
1/4 teaspoon salt
1 teaspoon vanilla extract
1 large egg
1 cup semi-sweet chocolate chips

Preheat oven to 375°F.  Whisk together the flour, baking powder, and baking soda in a medium bowl.

https://www.flickr.com/photos/joyosity/9188207566

Melt 1/2 cup butter in a small saucepan over medium heat.  Continue to cook the butter until the milk solids have browned, and it has a nutty aroma. 

https://www.flickr.com/photos/joyosity/9185411417

Remove from heat and add the remaining 1/4 cup of butter, stirring to melt.  Add the sugars, salt, and vanilla extract to the melted butter and whisk to combine. 

https://www.flickr.com/photos/joyosity/9188210760

Add the egg and whisk until smooth, about 30 seconds.  Let stand 3 minutes and then whisk again for 30 seconds.  Repeat the 3 minute resting and 30 second whisking two more times.

https://www.flickr.com/photos/joyosity/9185415071

Fold in the flour mixture until just combined.  Add the chocolate chips and stir once more to make sure no pockets of flour remain.

https://www.flickr.com/photos/joyosity/9188214272

Scoop out 24 balls of dough, about 2 tablespoons each.  Give each ball of dough a quick roll with your hands to make them spherical.  Place the balls of dough onto two parchment- or Silpat-covered baking sheets, about 2 inches apart from each other.

https://www.flickr.com/photos/joyosity/9185422627

Bake 9-11 minutes, until golden brown and puffy.  Cool before serving.

https://www.flickr.com/photos/joyosity/9188224786/in/photolist-5JqqoG-eZW3zJ-eZFGmV-eZW2es-eZFFh8-eZW1C5-eZW4hs-eZW47J-eZFG8D-eZVZZs-eZVYJs-eZW3Rj-eZVXZQ-eZFDTn-eZFGDi-eZVZGY-eZVYWU-eZFDD4-eZFEEz-eZFCNn-eZW2uG/

If you wanted, you could even throw in some of the tips from the tried and true New York Times chocolate chip cookie recipe by letting the dough sit in the fridge overnight to hydrate more fully and sprinkling some flaky sea salt on top of the dough just before baking.

Next:  Corn and Black Bean Tortilla Soup
Previously:  Candied Bacon Chocolate Chip Pancakes
Five Years Ago:  Red Bean and Black Sesame Ice Cream

Wednesday, May 7, 2014

Candied Bacon Chocolate Chip Pancakes


https://www.flickr.com/photos/joyosity/14096160712/

Last month for Easter my church decided to throw its first Pancake Breakfast!  I've always had a secret desire to be a line cook and man a griddle, churning out pancake after pancake.  I guess I wanted to see if I could handle the pressure, a la MasterChef or Top Chef.  Well let's just say that it was fun and I can't wait do it again next year, but only if I had a second person to help me pour out the batter.  I was too busy to get a picture of the pancakes, but here's a shot of just some of the bacon we made to go with the pancakes.

https://www.flickr.com/photos/joyosity/14076149326/

The recipe we used was based on Alton Brown's "Instant" Pancake Mix, and it produced the lightest, fluffiest pancakes I've ever had.  Even after making several hundred of those puppies, I couldn't believe how good they were when I finally got to eat one.

I was going to just post about the recipe we used, but then I started thinking about all the variations I could make:  blueberry pancakes, banana brulee pancakes, and then it hit me.  I needed to make bacon chocolate chip pancakes.  Better yet, candied bacon chocolate chip pancakes.  Boom!  I think I just won at life.

https://www.flickr.com/photos/joyosity/14096055651/

Candied Bacon Chocolate Chip Pancakes
makes six 5" pancakes

2 strips of bacon
1/2 tablespoon brown sugar
1 cup all-purpose flour
1/4 teaspoon baking soda
1/2 teaspoon baking powder
1 teaspoon sugar
1 egg
1 cup buttermilk
2 tablespoons melted butter (or 1 tablespoon melted butter and 1 tablespoon melted bacon fat)
3 tablespoons chocolate chips
Butter or bacon fat for greasing
Real maple syrup

https://www.flickr.com/photos/joyosity/13912642970/

Preheat oven to 325°F.  Evenly sprinkle the brown sugar onto the bacon and bake for 20 minutes or until just crisp.  Allow bacon to cool and then chop.  Save the bacon fat if you like (I was able to pour off about 1 tablespoon of bacon fat which I used in the pancake mix along with the melted butter).

https://www.flickr.com/photos/joyosity/14076145206/

Mix the flour, baking soda, baking powder, and sugar in a medium bowl.  Separate the egg white and egg yolk into two small bowls.  Mix the buttermilk with the egg whites and the melted butter (and bacon fat, if using) with the egg yolks.  Make sure the melted butter/fat isn't too hot or else you'll end up cooking the egg yolks.  Mix the buttermilk and egg yolk mixtures together.  Pour the liquids onto the dry ingredients and mix with a whisk until just combined; there will be some small lumps.  If the batter if too thick, you can thin it out with a few tablespoons of milk if you like.

Heat up your pan or griddle.  Lightly grease with butter or bacon fat and wipe off with a paper towel.  Because of the high content of fat in the batter, you will probably only need to grease the pan this one time.

https://www.flickr.com/photos/joyosity/14099683874/

Pour 1/3 cup of batter onto the pan.  Scatter about some chocolate chips and chopped candied bacon on top.  Cook until the edges are dry and the bottom is golden brown.  Flip the pancake and cook the other side until dry.  It's better not to overcook the second side since the chocolate might burn.  In between each pancake, wipe off any melted chocolate with a paper towel.

https://www.flickr.com/photos/joyosity/14099257165/

Serve warm with real maple syrup.

https://www.flickr.com/photos/joyosity/14076157116/

Lots of real maple syrup.

https://www.flickr.com/photos/joyosity/14099693354/

Oh, yeah....

https://www.flickr.com/photos/joyosity/13912631999/

Next:  Serendipitous Chocolate Chip Cookies
Previously:  Easy Chilaquiles with Fried Egg and Avocado
Five years ago:  Coconut Curry Noodles with Collard Greens and Broccoli

Monday, May 5, 2014

Easy Chilaquiles with Fried Egg and Avocado

https://www.flickr.com/photos/joyosity/13912165339/

Happy Cinco de Mayo!  Confession:  I don't really know anything about Cinco de Mayo except that it's the day after Star Wars Day and is Mexican in origin.  But that's enough for me to know that I can post about chilaquiles, the best thing I ate in Mexico.  I didn't really expect the breakfast buffet at the CasaMagna Marriott Cancun to have good local food, but this dish was so yummy I went back for thirds!

It doesn't look like much, which is maybe why I was so pleasantly surprised, but it's ridiculously loaded with flavor and texture.  Basically, it's just stale corn tortillas which are cut and fried, then cooked in salsa and topped with whatever you want.  Traditional toppings may include cilantro, cotija cheese, queso fresco, crema, and onions.  Since I think cilantro is the devil's weed and didn't have any of those cheeses, I used shredded Monterey Jack, chopped green onions, avocado, and a fried egg.  I chose to use jarred salsa instead of making my own sauce, which is why this is an "easy" recipe.  You can use pretty much use whatever salsa you want--spicy, mild, green, red--just choose your favorite one!

https://www.flickr.com/photos/joyosity/14075693576/

Easy Chilaquiles with Fried Egg and Avocado
makes 1 serving

6 small corn tortillas, stale or left out overnight
2 tablespoons corn or vegetable oil
Kosher salt
1/2 cup of your favorite salsa
1 egg
A handful of shredded Monterey Jack
Chopped green onion and/or cilantro
Chopped avocado

https://www.flickr.com/photos/joyosity/13912152957/

Stack the tortillas and cut into wedges.  Heat the oil in a pan on medium-high.  Cook the tortilla wedges in batches, flipping them over until both sides are golden brown.  Transfer to a plate lined with paper towels and lightly salt.  Once all the tortillas are fried, transfer most of the oil to another pan (in which you will fry the egg).

https://www.flickr.com/photos/joyosity/13912197968/

Add the salsa to first pan and heat on medium low.  Toss in the fried tortilla wedges until they are well coated.

https://www.flickr.com/photos/joyosity/13912149887/

While the chilaquiles is cooking, fry an egg in the other pan.  Once the egg is almost done, top the chilaquiles with the shredded cheese and chopped onions and/or cilantro.  Slide the fried egg on top and serve with chopped avocado.

https://www.flickr.com/photos/joyosity/14075690456/

If you're not a fan of runny egg yolks and prefer scrambled eggs, you can also beat the egg first and mix it in with the fried tortilla wedges when they are cooking in the salsa.  In fact, I think that's how they made them at the resort, but it's not nearly as photogenic.  =)

https://www.flickr.com/photos/joyosity/14098801965/

Next:  Candied Bacon Chocolate Chip Pancakes
Previously:  Nutella Mini Crepe Cakes
Four Years Ago:  Passion Fruit Ice Cream
Five Years Ago:  Carrot Cake Ice Cream