Thursday, February 26, 2015
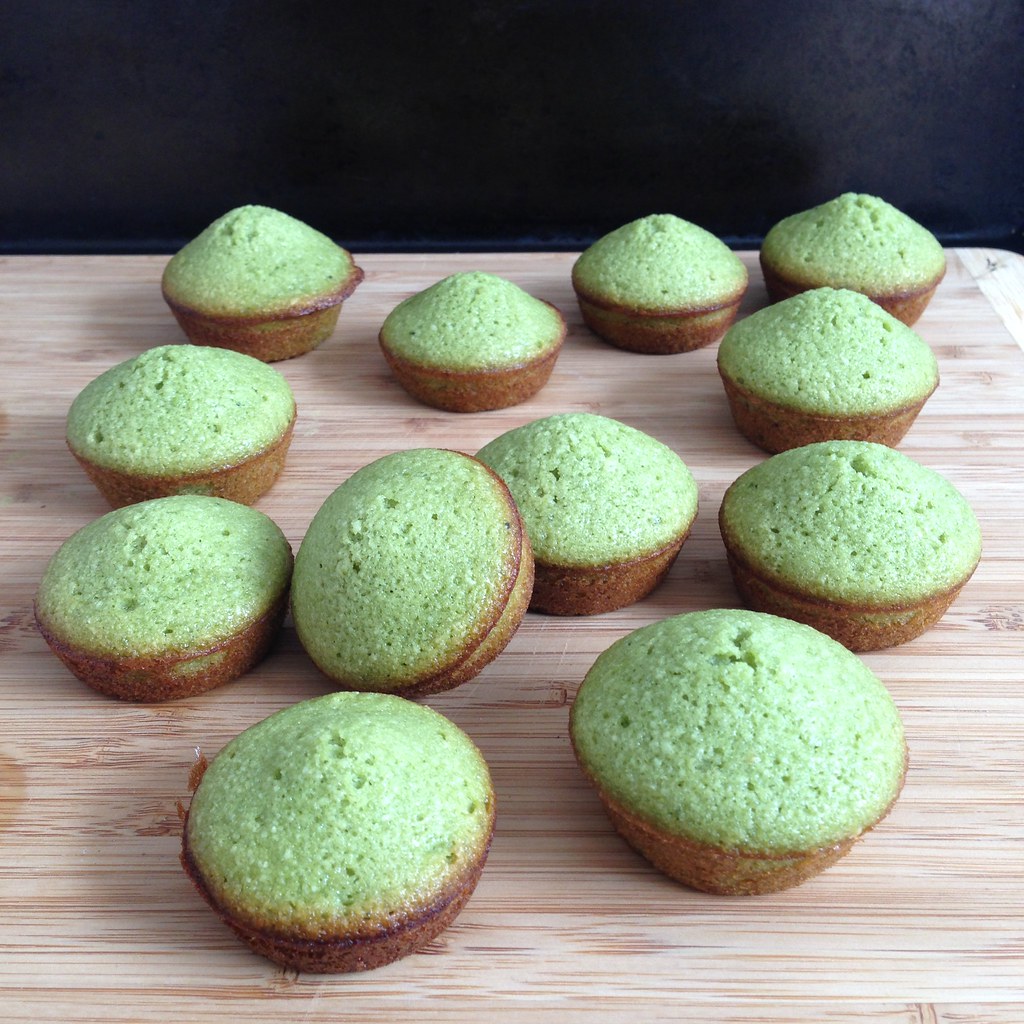
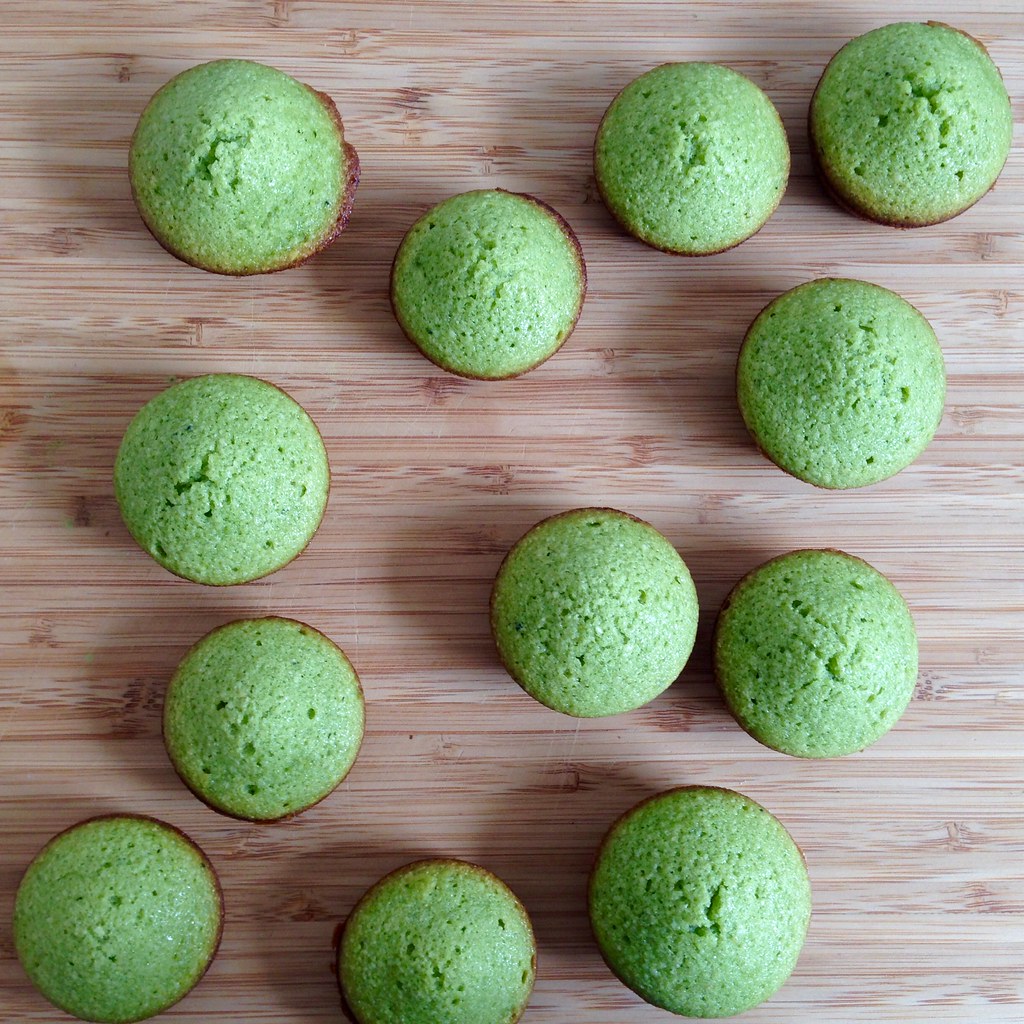
Matcha Financiers with White Chocolate Centers
Here is yet another recipe from Dorie Greenspan's Baking Chez Moi (and probably not the last)! I first discovered financiers at Eric Kayser's bakery near my hotel in Paris. They looked like perfect little miniature cakes that were basically unadorned--a distinct change from all the super-frosted and decorated cupcakes that were all the rage in America at the time. They're just one or two bites each and less sweet than a cupcake, more substantial than a muffin. Perfect for packing and eating on the go without having to worry about getting a crazy sugar rush.
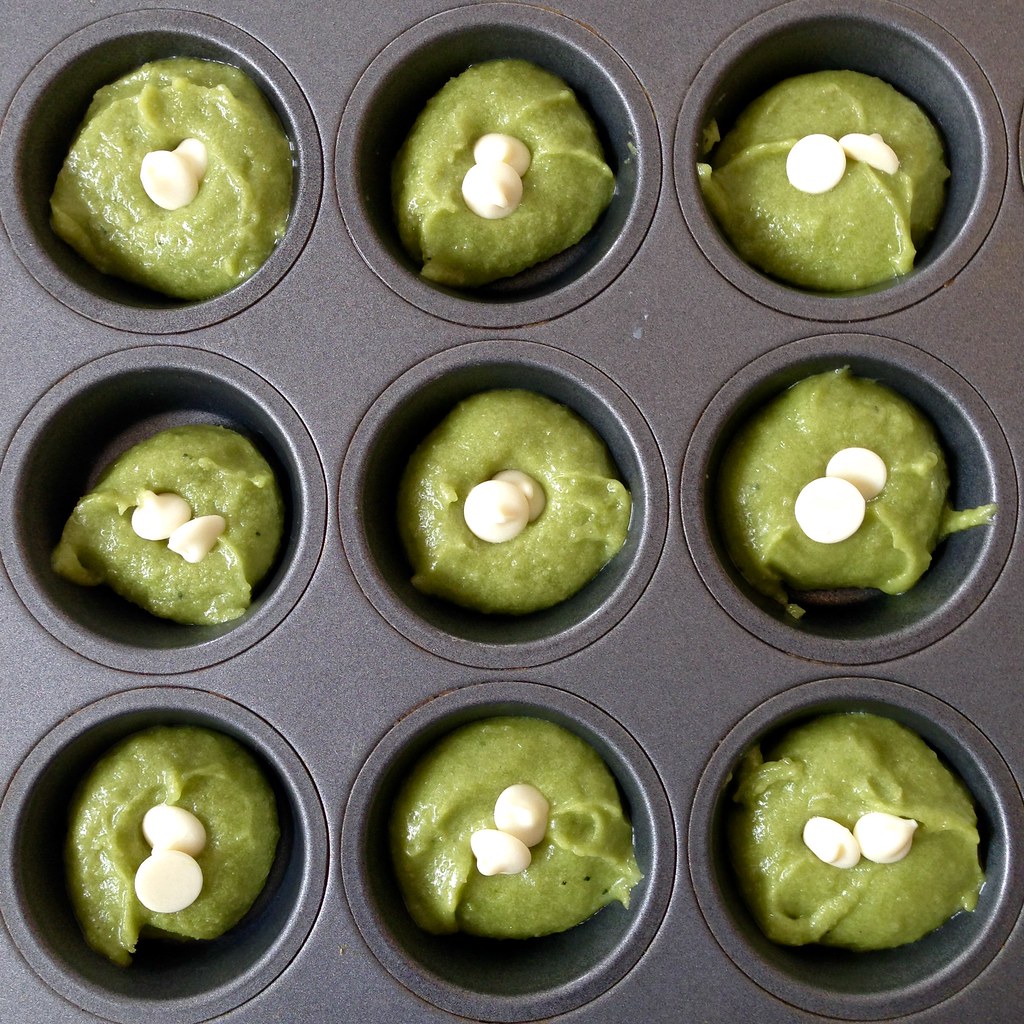
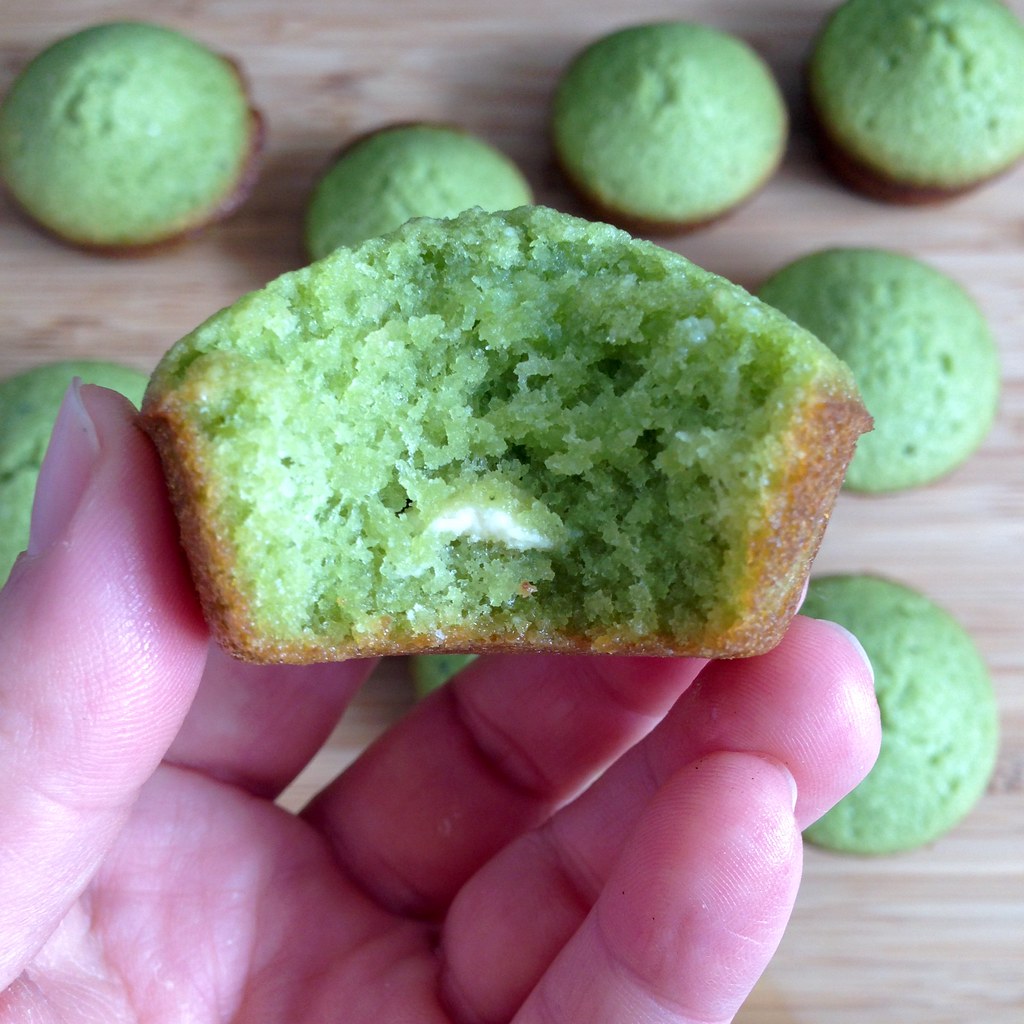
Since I'm currently in love with the matcha/white chocolate flavor combination, I was excited when I saw Dorie's "bonne idée" for her matcha financier recipe: baking chunks of white chocolate in the center of each financier. I used 2 white chocolate chips per financier, but I think I would at least add a third if not more next time since it just wasn't enough (for me, anyway). I also increased the amount of matcha slightly since I could barely taste the matcha in the first batch I made.
Matcha Financiers with White Chocolate Centers (slightly adapted from Dorie Greenspan's Baking Chez Moi)
makes 12 small cakes
6 tablespoons unsalted butter, cut into chunks
1/3 cup all-purpose flour
1 teaspoon matcha green tea
Pinch of fine sea salt
1/2 cup sugar
1/2 cup almond flour
3 large egg whites, at room temperature, lightly beaten
White chocolate chips
Heat the butter in a small saucepan over medium heat until it starts to boil, then boil for 1 minute; it may color ever so slightly, but you don’t want it to brown. Remove the pan from the heat and set it aside (you want the butter to be warm when you add it).
Whisk the all-purpose flour, matcha, and salt together in a small bowl.
Using a flexible spatula, stir the sugar and almond flour together in a large bowl. Gradually add the egg whites, stirring to moisten the dry ingredients.
When all the whites are in, give the mix a few vigorous stirs. Stir in the all-purpose flour mixture, mixing only until it’s evenly blended, then start adding the melted butter, a little at a time, folding and stirring the batter until all the butter is in.
Press a piece of plastic film against the surface of the batter and refrigerate for at least 1 hour. (The batter can be refrigerated for up to 3 days.)
Preheat the oven to 400°F. Butter the wells of a mini muffin tin, dust with flour and tap out the excess.
Spoon the batter into the muffin cups, filling them about halfway. Drop 2-4 white chocolate chips into each, then spoon on additional batter, almost to the top of the well.
Bake the financiers for 12 to 14 minutes, or until they have crowned and feel springy to the touch. Remove from the oven, wait 1 minute, then tap them against the counter to encourage the financiers to tumble out. Pry any stragglers from their molds with a table knife. Transfer the financiers to a rack and let cool until they are just warm or at room temperature.
By the way, don't throw out the 3 egg yolks after separating them from the 3 egg whites needed for this recipe! You can use them to make really good pasta dough!
Next: A Better Homemade Pasta
Previously: Hugo & Victor's Pink Grapefruit Tart
Last Year: Hotter Crash Potatoes
Five Years Ago: Faux Momofuku Brussels Sprouts
Six Years Ago: Wok-Fried Edamame with Garlic
Labels:
cake,
cupcakes,
desserts,
egg whites,
matcha,
snack,
white chocolate
Tuesday, February 24, 2015
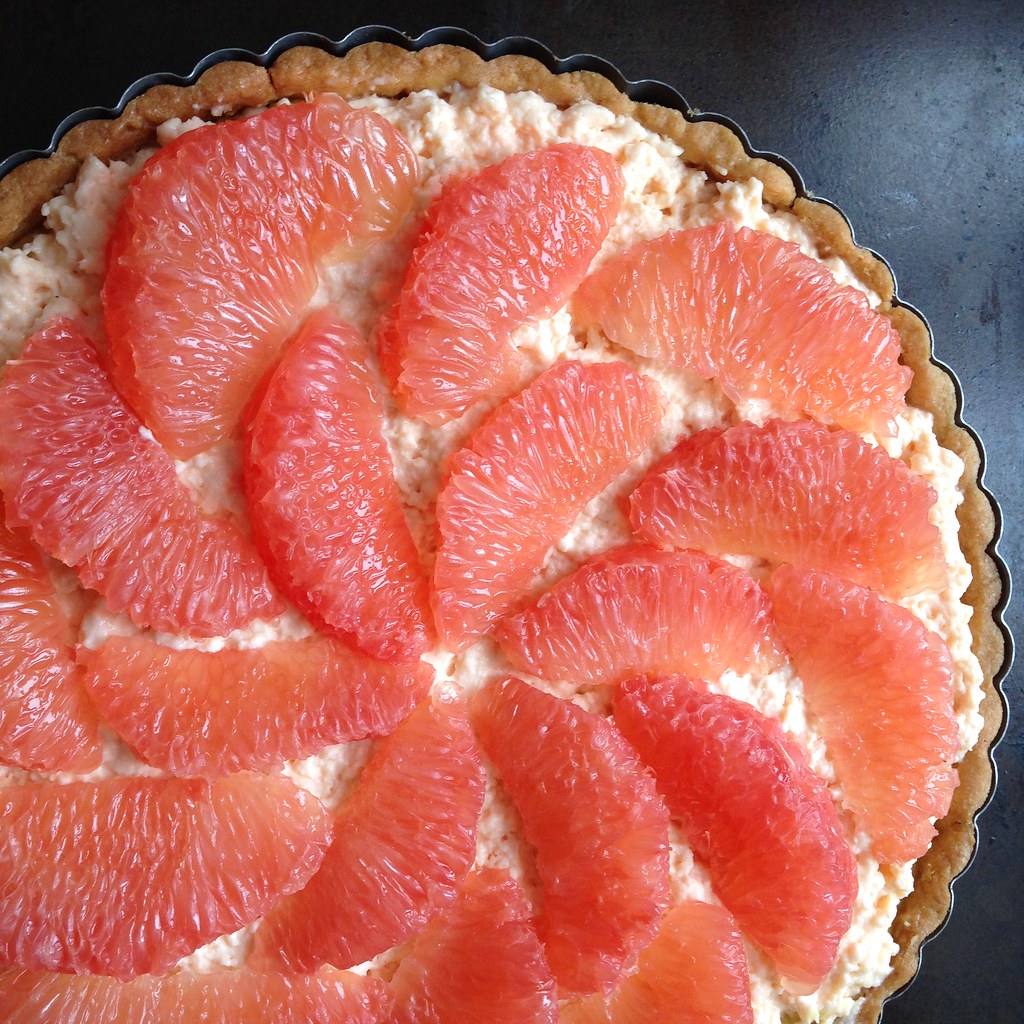
Hugo & Victor's Pink Grapefruit Tart
There are two things I tell my friends to get when they go to Paris: the mango passion caramels from Jacques Genin and this pink grapefruit tart from Hugo & Victor. So when I saw a recipe for the tart in Dorie Greenspan's Baking Chez Moi, I was ecstatic! I even bought a $25 bottle of Campari just so I could have the 2 1/2 tablespoons needed to make the grapefruit crémeux because I wanted to follow the recipe as close as possible.
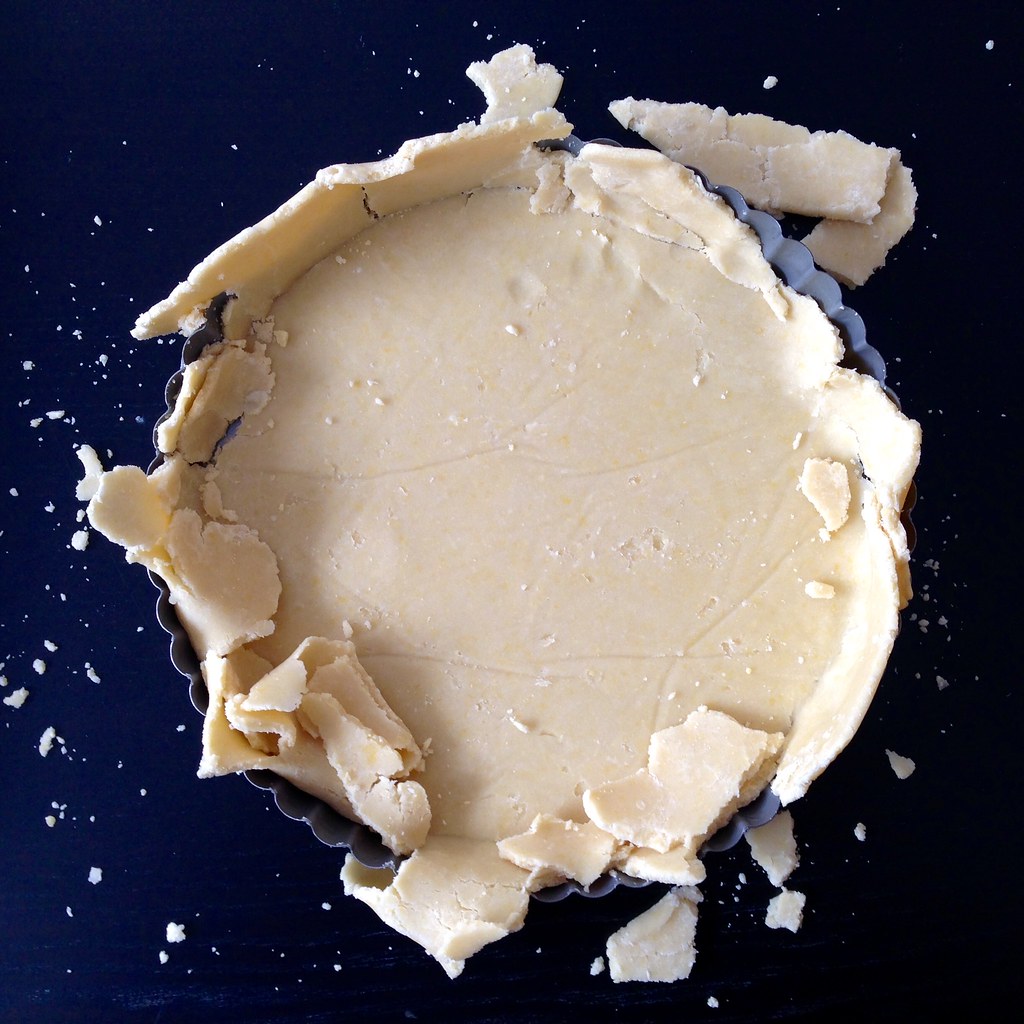
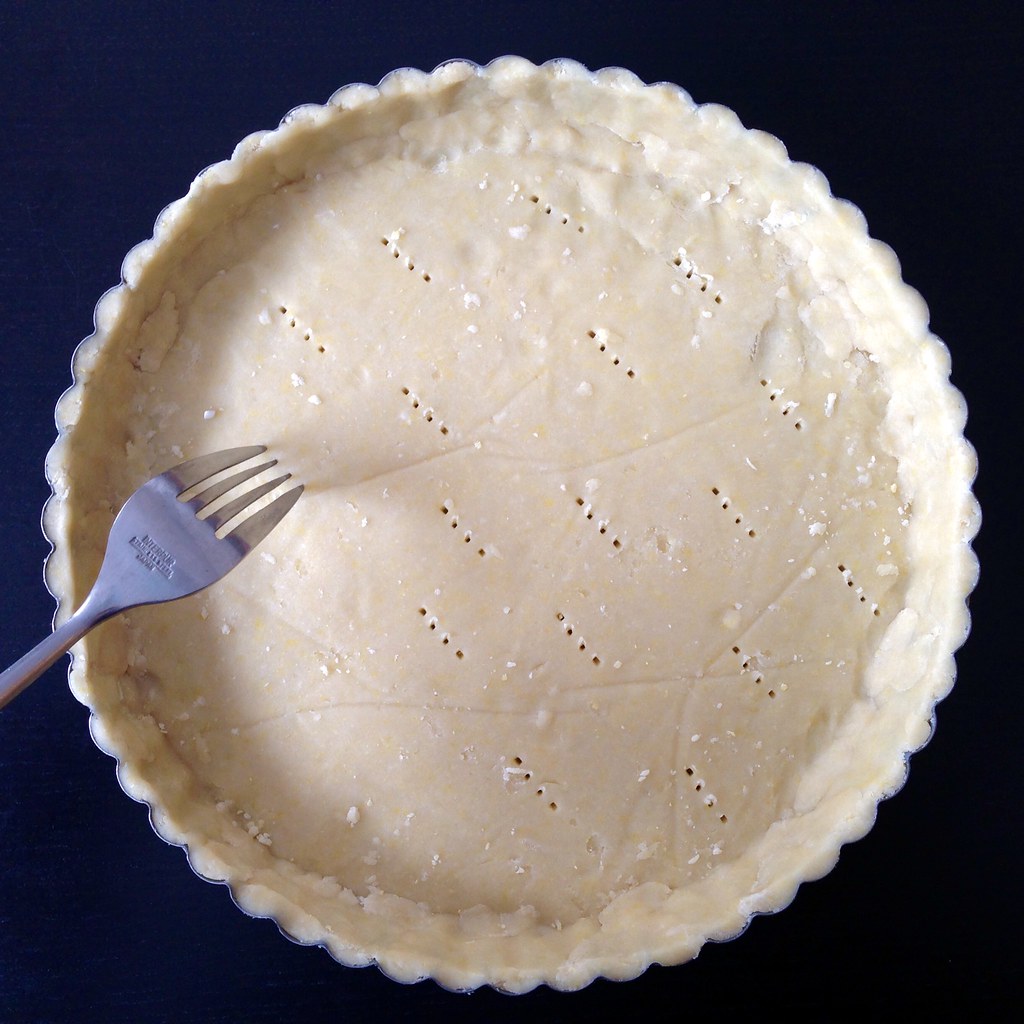
And yet so many things went wrong, mostly because I was impatient. First the sweet tart dough shattered when I tried to fit it into the tart pan because I hadn't waited long enough for it to warm up a bit after letting it chill in the freezer. Luckily, this was pretty easy to fix because you could just patch up the cracks but pressing the extra dough in. (next time I'll just fit the crust into the tart pan after rolling it out and then chill it, which is how I wrote the recipe below.)
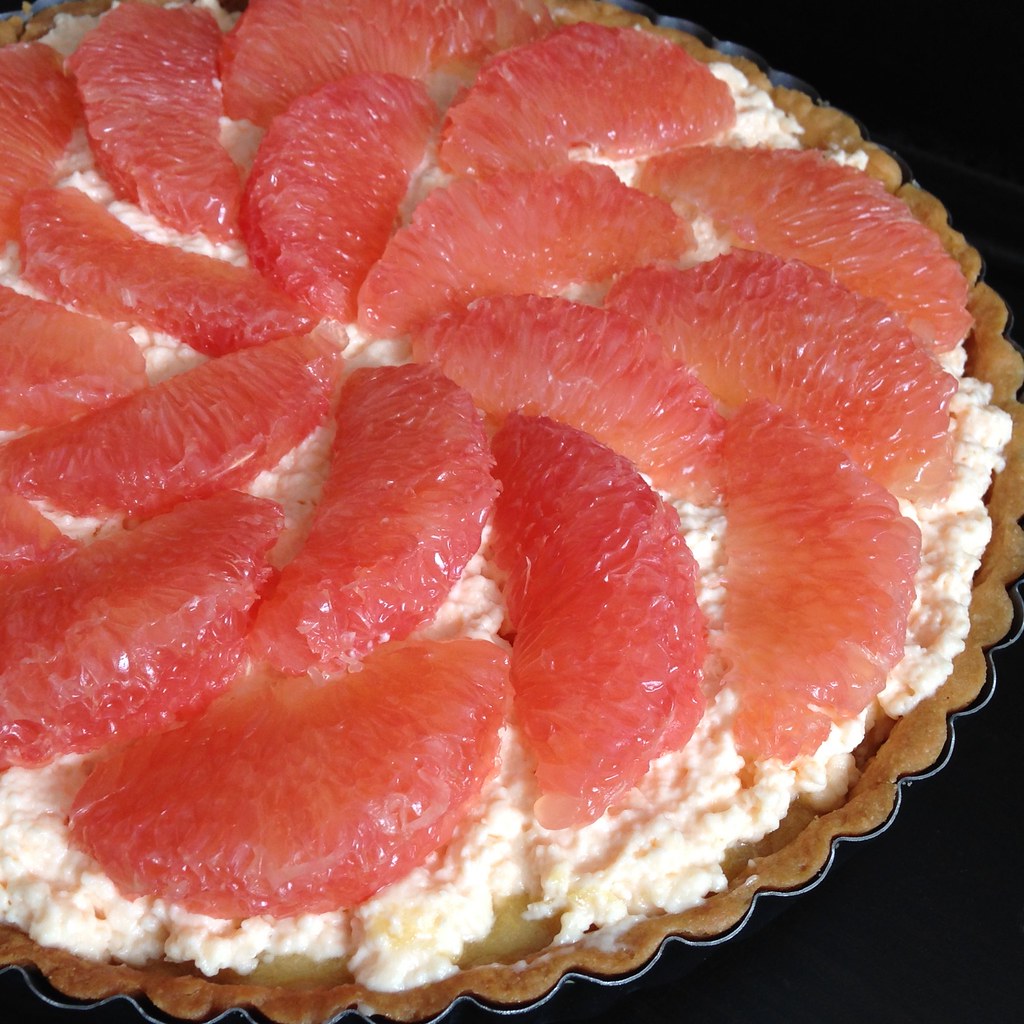
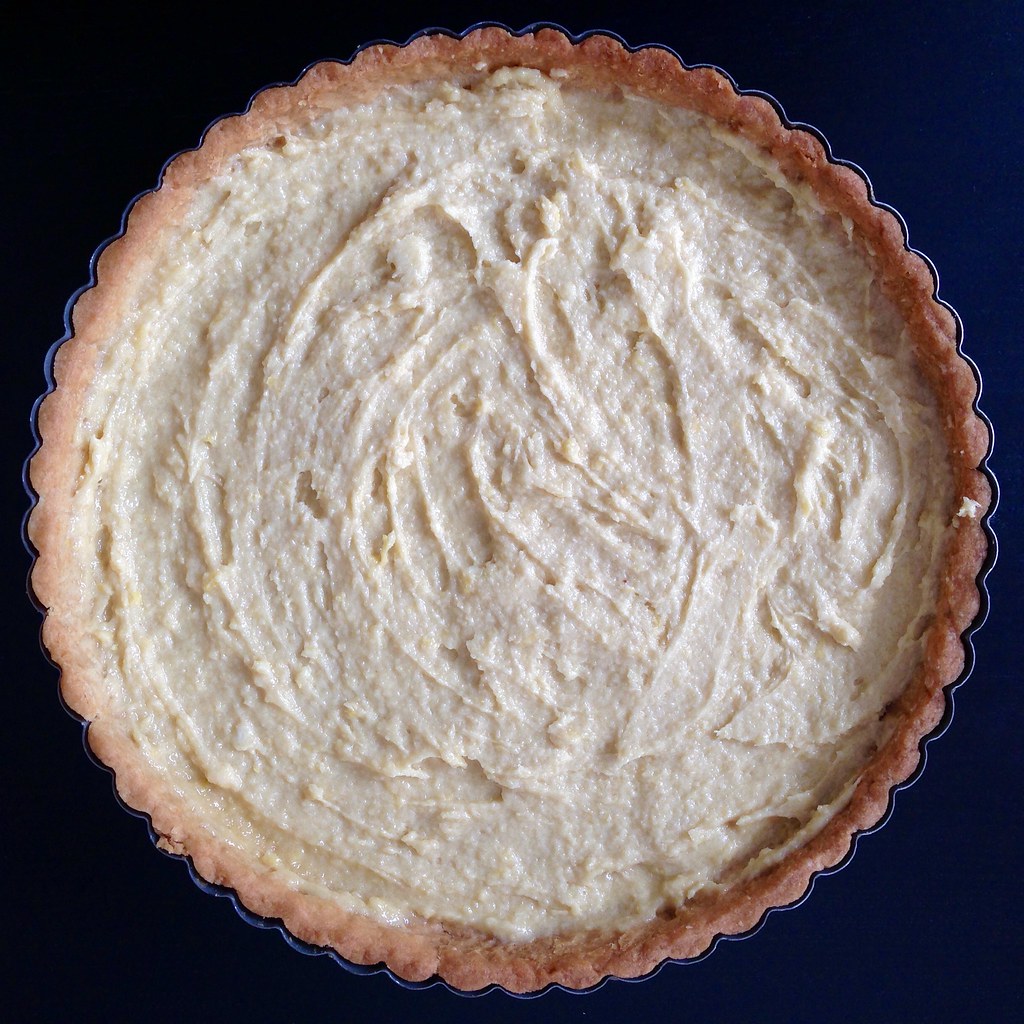
Then, when it was time to add the grapefruit crémeux (which I think is just a fancy French word for gelatinous cream), I didn't whisk it long enough so it was still kind of curdy when I spread it on. Again, I was kind of fortunate because the grapefruit topping hides most of it, and the texture doesn't affect the taste at all.
That said, please learn from my mistakes and take plenty of time to make this tart. I'd definitely start the sweet tart dough and maybe the grapefruit crémeux the day before. There's lot of chilling the dough, then blind baking it, then cooling it, then baking it again (with the lemon-almond cream), and cooling it again before topping it with the crémeux and grapefruit topping and then chilling it one last time to set before serving.
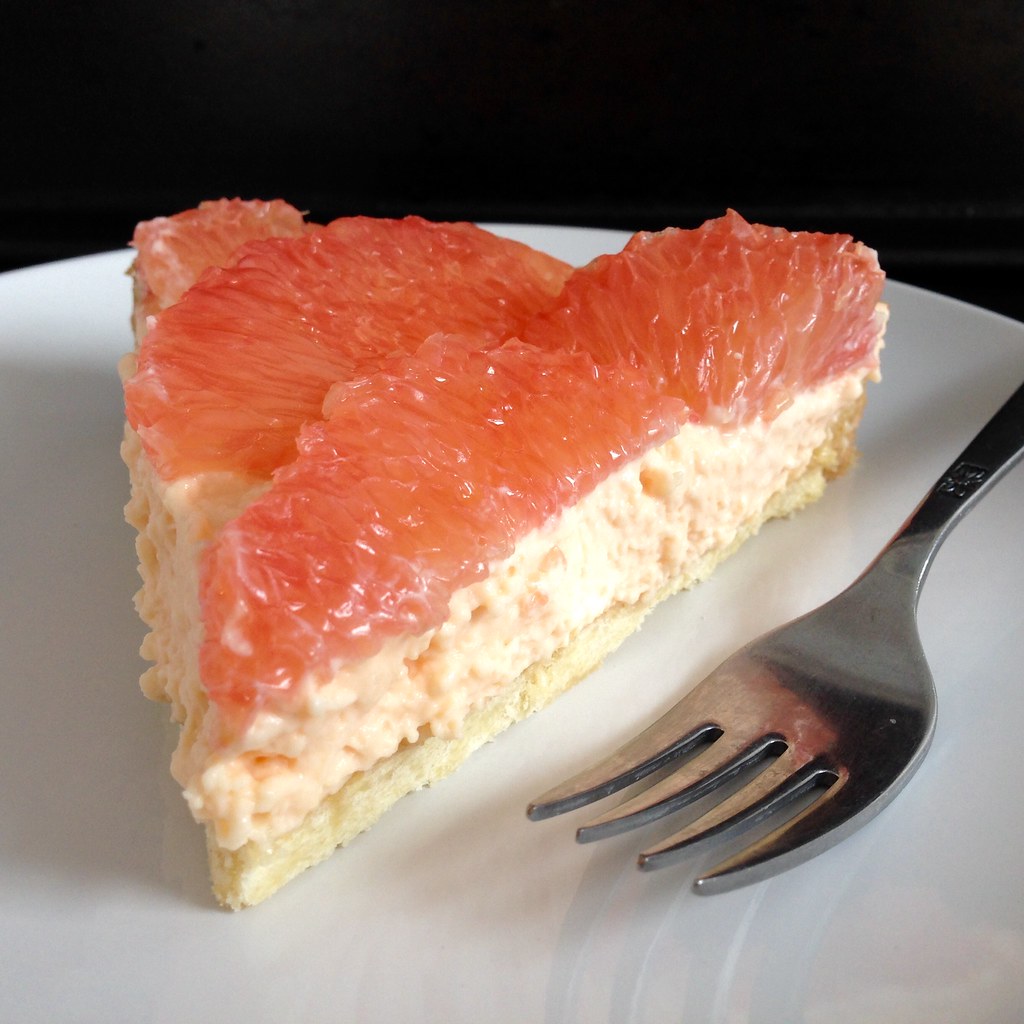
But it's worth it! Not only is it totally beautiful to look at, it tastes incredible. Even people who don't like grapefruit love this tart! I think it helps that you've done some of the hard work by removing all the membrane from the grapefruit segments already so that all you have to do is take a bite, and you get the tartness of the fruit, a hint of bitterness from the Campari, sweetness from the fillings, and lots of buttery richness from the snappy crust.
Hugo & Victor's Pink Grapefruit Tart (adapted from Dorie Greenspan's Baking Chez Moi)
makes 1 tart
For the sweet tart dough:
1 1/2 cups (204 g) all-purpose flour
1/2 cup (60 g) confectioners' sugar
1/4 teaspoon kosher salt
9 tablespoons very cold unsalted butter
1 large egg yolk
Put the flour, confectioners' sugar, and salt in a food processor and pulse a few times to blend. Cut the butter into small pieces and scatter over the dry ingredients. Pulse until the butter is cut in coarsely.
Stir the yolk just to break it up and drizzle over the rest of the ingredients. Pulse until the egg is incorporated, then process in longer pulses, about 10 seconds each, until the dough forms clumps and curds. Finish blending the dough by turning it out onto a work surface and smearing small amounts across the surface with the heel of your hand.
Shape the dough into a disk and place between two sheets of parchment or wax paper. Roll the dough out evenly until it is about 12" in diameter. Carefully fit into a buttered tart pan and trim the excess dough. Chill in the refrigerator for at least 2 hours, or if you're short on time, for 1 hour in the freezer.
Preheat the oven to 400°F. Prick the crust all over with a fork. Butter the shiny side of a piece of aluminum foil and fit snugly on top of the crust. Fill with pie weights (you can use dried beans, rice, etc.). Bake the crust for 25 minutes, then carefully remove the foil and weights. Bake for another 7-10 minutes, until firm and golden brown. Cool the crust completely.
For the grapefruit crémeux:
2 teaspoons powdered gelatin, bloomed in 1 1/2 tablespoons cold water
3/4 cup (150) g sugar
2 large pink grapefruits
3 large eggs
14 tablespoons unsalted butter, at room temperature
2 1/2 tablespoons Campari
Put the sugar in a 2- to 3-quart heavy-bottomed saucepan and grate the grapefruits over it. Rub the sugar and zest together with your fingertips until the sugar is moist. Squeeze the juice from the grapefruits into a measuring up until you have 3/4 cup of juice. Add the eggs to the sugar and start whisking immediately. Continue to whisk as you add the juice.
Place the saucepan over medium heat and continue whisking. Eventually, after 7-9 minutes, the custard will start to thicken. When it reaches 180°F (or when the first bubble pops at the surface), remove from the heat and strain into a blender.
Allow the custard to sit in the blender for about 5 minutes, pulsing a few times to help the cooling process. Heat the bloomed gelatin in the microwave for 15 seconds to liquefy, then add to the blender. Blend on high, and start adding the butter, two tablespoons at a time. After all the butter has been incorporated, add the Campari and blend until homogenous in color. Scrape the crémeux into a bowl, press a piece of plastic wrap to the surface, and refrigerate for at least 6 hours.
For the topping:
2 large pink grapefruits
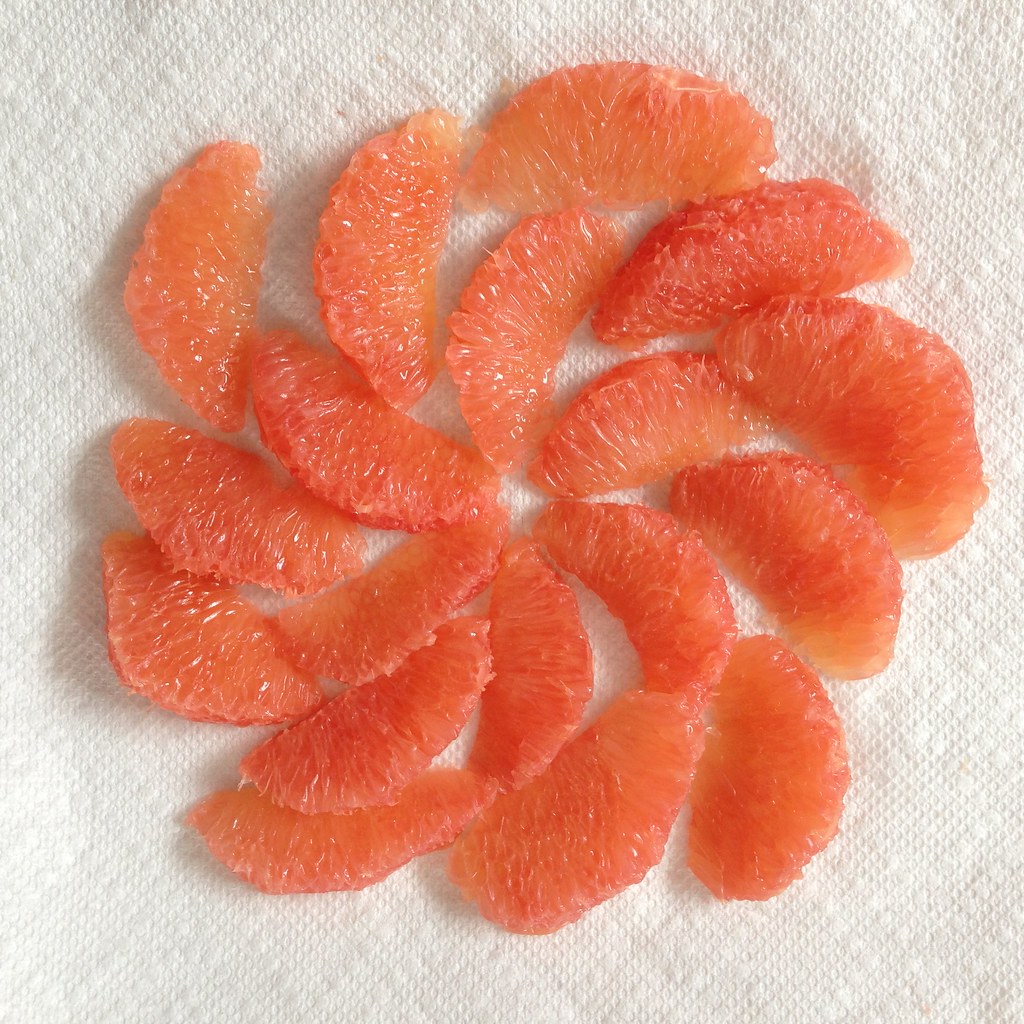
About 3 hours (or up to 8 hours) before you want to serve the tart, cut off all the peel and pith away from the tart. You want to carefully cut through the outer membrane of the grapefruit, too. Then, using a small paring knife, cut on either sides of the membranes in between each section to release each section. There should be no membrane left on the sections. Place the segments on several layers of paper towels, cover with more paper towels, and allow to dry at room temperature. At this point, you can try arranging the segments to see if you'll have enough to cover the surface of the tart.
For the lemon-almond cream:
3 1/2 tablespoons unsalted butter, at room temperature
2 tablespoons packed light brown sugar
1/2 cup (50 g) almond flour
Finely grated zest of 1 lemon
1 large egg, at room temperature
Beat butter until smooth and creamy, about 3 minutes. Beat in the brown sugar for a minute, and then beat in the almond flour and grated zest until smooth again. Add the egg and beat until fully incorporated. Refrigerate for at least an hour.
Assembling the tart:
Preheat the oven to 375°F. Whisk the chilled lemon-almond cream until it is spreadable. Spread the cream over the bottom of the tart crust and bake for 6-7 minutes, until the cream is set. Cool the tart completely before the next step.
About 2 hours before you want to serve the tart, whisk the grapefruit crémeux until it's smooth (unlike the picture above). Spread over the lemon-almond cream. Arrange the grapefruit segments on top of the crémeux. Chill the tart for another 2-8 hours before serving.
Next: Matcha Financiers with White Chocolate Centers
Previously: First Night in Florence Spaghetti
Two Years Ago: Cauliflower Steak with Cauliflower Purée
Six Years Ago: Boston Cream Cupcakes
Tuesday, February 17, 2015
First Night in Florence Spaghetti
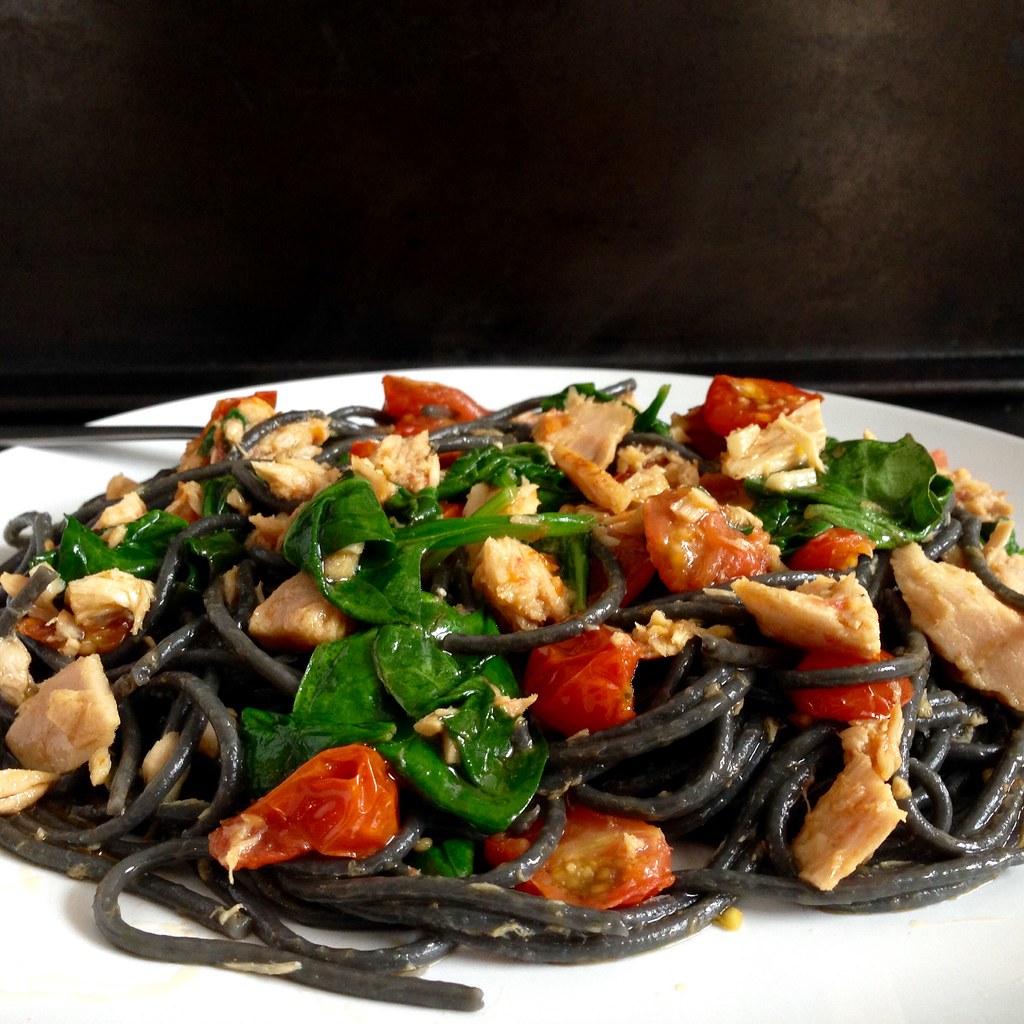
I have made this dish four times in as many days since I first discovered it. Maybe it's because I'm feeling nostalgic for Italy and wanting to get out of this crazy New England snow. Maybe it's the way the olive oil, tomatoes, and lemon juice come together like magic to make this unbelievably fresh tasting sauce. Or maybe it's the way the tuna and garlic linger on the tongue and then in my dreams. Whatever it is, you need to make this pasta stat.
This dish comes together quickly; while the pasta is cooking, you'll be starting the sauce so that by the time the pasta is almost al dente, you toss it into the pan that the sauce is in to finish cooking it. So I usually start cutting up the tomatoes and mincing the garlic while I wait for the water to boil.
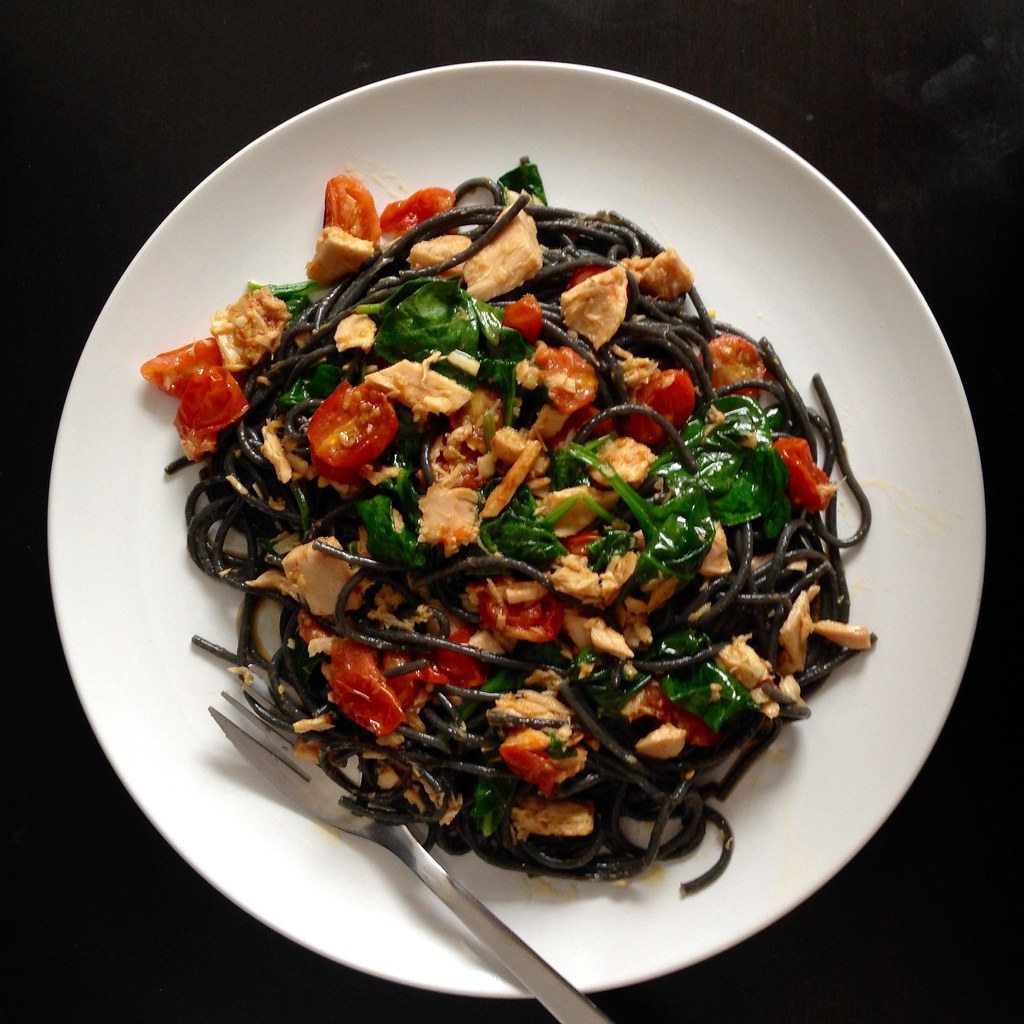
For this recipe, make sure you use the tuna that's packed in olive oil, not water. And don't pour out the oil; add it to the sauce. Speaking of olive oil, you'll want to use a good one, and lots of it. I used the last of the olive oil I got from Tuscany for this, and it was worth it. I also used the last of the squid ink pasta I got from Venice since I figured the brininess would go well with the tuna (and because it's photogenic). All this just means I'll have to go back to Italy soon to stock up again!
First Night in Florence Spaghetti (adapted from The Solitary Cook by way of Food52)
serves 2
1/2 package of spaghetti
Kosher salt and freshly ground pepper, to taste
Good olive oil, and lots of it
1 pint grape tomatoes, quartered
3 cloves garlic, minced
1 tin of tuna packed in olive oil
A few handfuls of spinach or Swiss chard leaves
Juice of 1/2 a lemon
Get a large pot of salted water boiling. Add the pasta and start a timer to cook for 3 minutes less than what the package calls for (i.e. if the package says to cook the spaghetti for 10 minutes, cook it for 7).
In a pan large enough to hold all the pasta, add 5-6 generous glugs of olive oil heat on medium-high (it should be at least twice what you think you'll need). Once the oil starts to shimmer, add the tomatoes and a generous pinch of salt. While the tomatoes soften, you may want to (carefully!) smoosh them to help release their juices. When there are 2 minutes left on the pasta, add the minced garlic. When there is 1 minute left on the pasta, add the tuna plus the oil it's packed in, breaking up any large chunks of fish.
When the timer is up on the pasta, use tongs or a pasta spoon to add the spaghetti to the pan. Add some of the pasta cooking water to the pan too (the original recipe calls for a few ladlefuls, but I like a little less than that). Add the greens and lemon juice and toss everything around, cooking until the leaves is just wilted. Taste the sauce and season with salt and pepper as needed.
Next: Hugo & Victor's Pink Grapefruit Tart
Previously: Odile's Fresh Orange Cake
Last Year: Okonomiyaki
Six Years Ago: New England Clam Chowda with Homemade Oyster Crackers
Friday, February 13, 2015
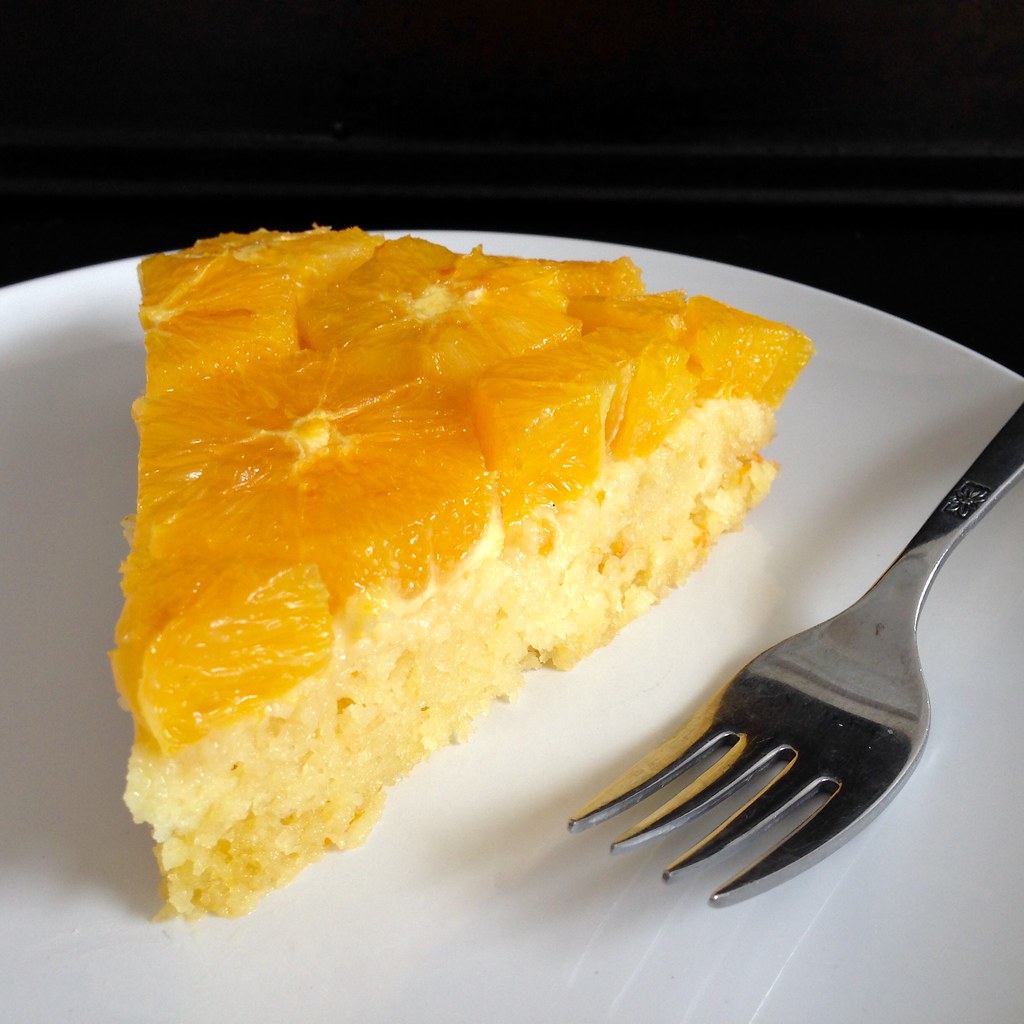
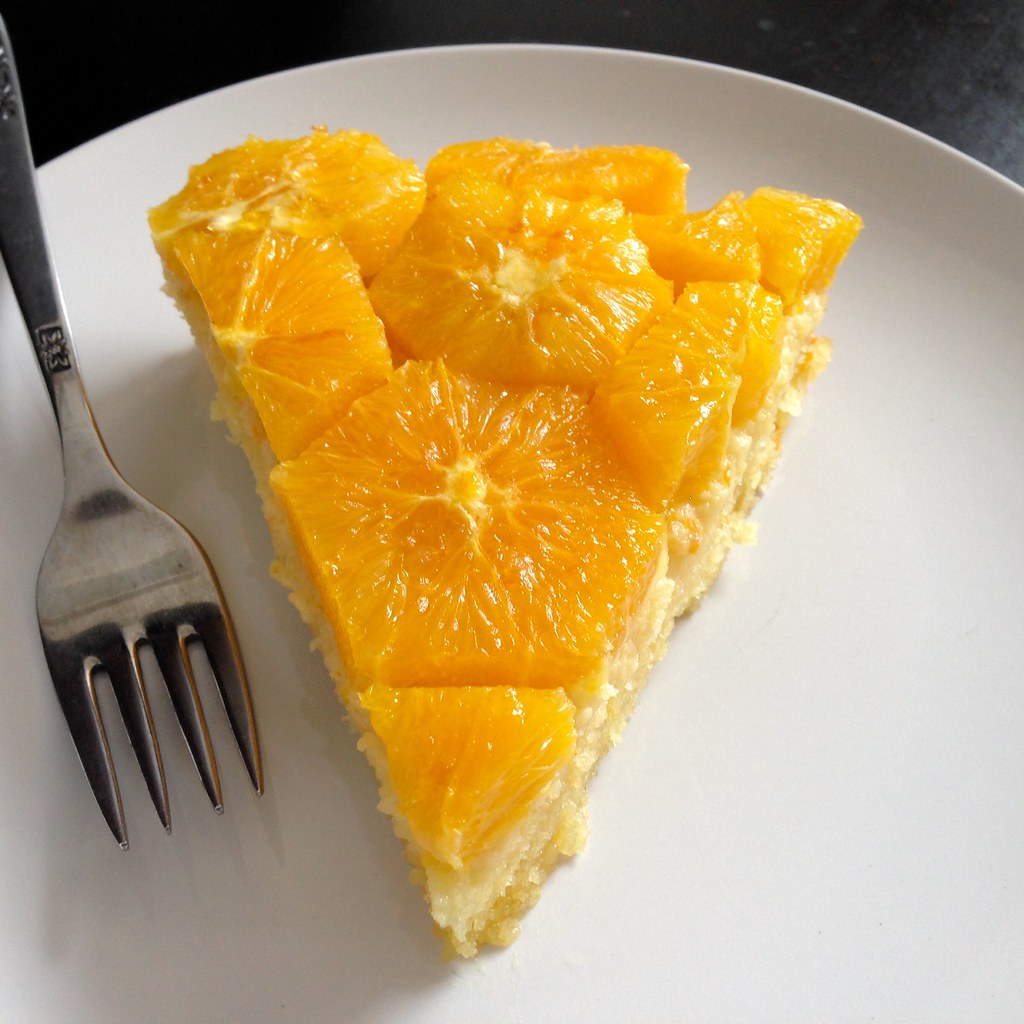
Odile's Fresh Orange Cake
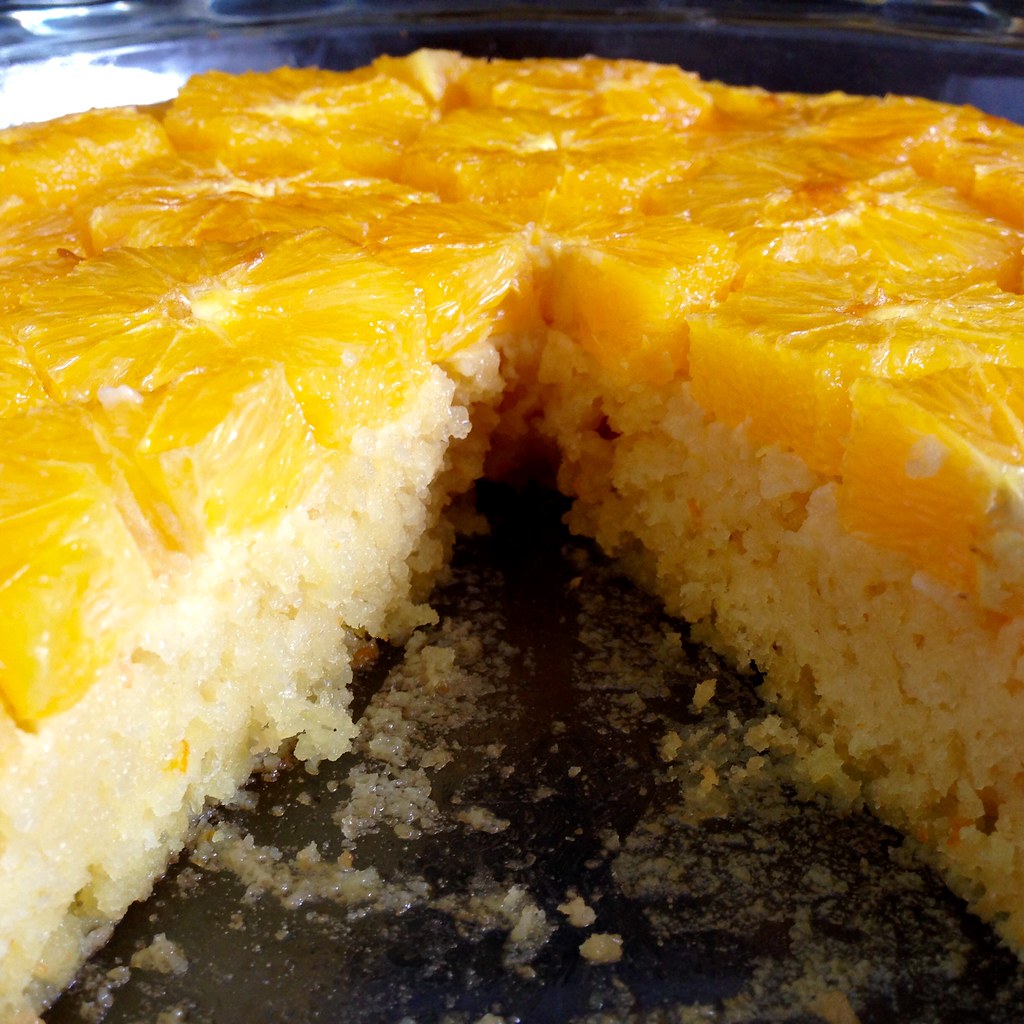
I came across Dorie Greenspan's Baking Chez Moi cookbook at my local library the other day and borrowed it without even opening it. I've made some of her recipes in the past and totally trust her authority in all things baking, just like I trust Jeni's in all things frozen. I was a little disappointed that there weren't pictures for every recipe in the book, but maybe that's a good thing because otherwise I'd want to make (and eat) every single last thing in there.
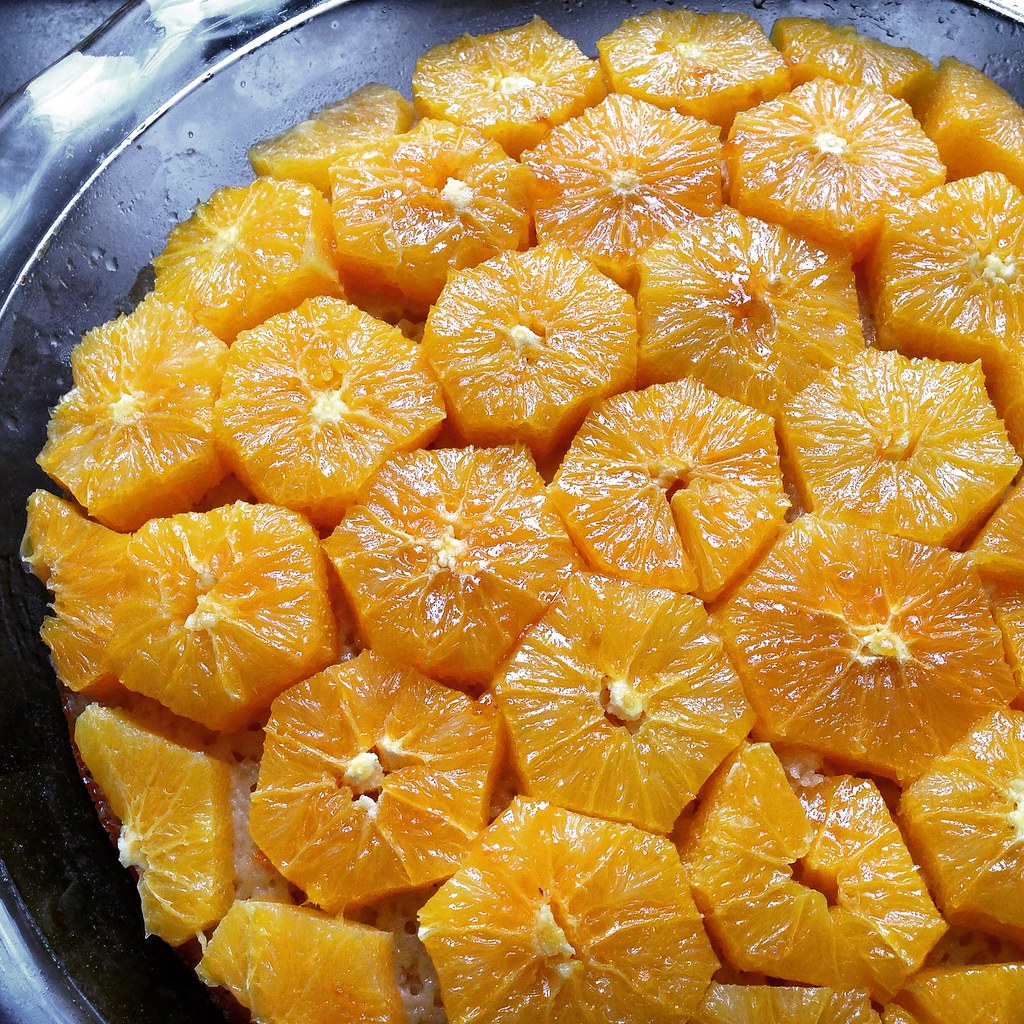
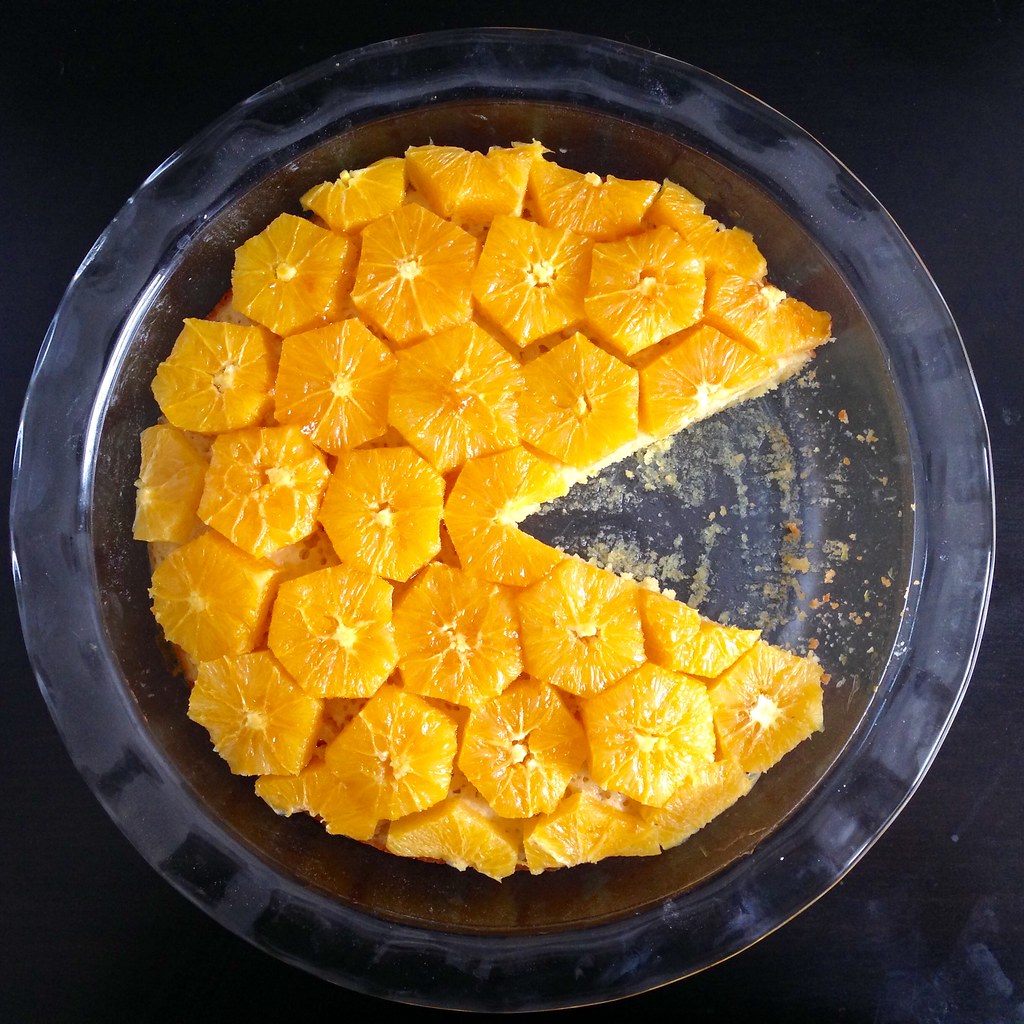
The first thing that caught my eye was this fresh orange cake that had beautiful slices of glistening oranges on top. As I was currently sitting at home in the midst of the third snowstorm to hit in as many weeks, I desperately needed a reminder of something warm and sunny.
I made just a few adjustments to her recipe; since I didn't have an 8" cake pan, I used a pie pan, which was 8" at the bottom but wider on top. This just meant more space for the showstopping orange topping. And after cutting a few of the oranges into her suggested pentagon shape, I realized I was wasting a lot less of the orange if I cut them into hexagons instead. I think hexagons are easier to arrange together than pentagons anyways (or maybe I've just been playing too much Civilization V). In her recipe, she says you only need 3 oranges to fill the top of your cake, but I found I needed a lot more, like almost the whole bag. I guess it depends on the size of your oranges, but one way you can estimate how many slices you need is to poach them in a pot the same diameter as the top of your cake. If you arrange them in a single layer in the pot, you'll see if you need to keep cutting up more oranges to cover the bottom.
Odile's Fresh Orange Cake (slightly adapted from Dorie Greenspan's Baking Chez Moi)
makes 1 cake
For the cake:
3/4 cup plus 2 tablespoons all purpose flour
1 1/2 teaspoons baking powder
1/2 teaspoon salt
1/2 cup sugar
1 large orange
1 stick unsalted butter, at room temperature
2 large eggs, at room temperature
For the topping:
At least 3 oranges, possibly a lot more
1 cup sugar
1 cup water
1 cinnamon stick (optional)
2 tablespoons orange marmalade
Center a rack in the oven and preheat the oven to 350°F. Butter an 8-inch round cake pan, dust with flour and tap out the excess. Whisk together the flour, baking powder, and salt in a small bowl. Put the sugar in the bowl of a stand mixer or in a large bowl in which you can use a hand mixer. Grate the zest of the orange over the sugar. Squeeze the juice into a measuring cup–you should have about 1/3 cup, but a little more or a tad less won’t throw things off.
Rub the sugar and zest together with your fingertips until the sugar is moist and fragrant. If you’re using a stand mixer, fit it with the paddle attachment and attach the bowl. Add the butter to the bowl and beat on medium speed for about 2 minutes, until the mixture is smooth and creamy. Add the eggs one at a time, beating for 1 minute after each one goes in, then pour in the juice and beat to blend. Reduce the mixer speed to low and add the dry ingredients, mixing only until they disappear into the batter. The batter may look a little lumpy and grainy, but that’s fine. Turn the batter out into the cake pan and smooth the top. Bake the cake for 20 to 25 minutes, or until a knife inserted into the center comes out clean.
In the meantime, make the topping. Cut the tops and bottoms off each orange, stand the orange up and remove the remaining peel by cutting straight down the sides of the orange 6 times, to shape it into a hexagon. Then turn the oranges on their sides and slice them about 3/8" thick.
Bring the sugar, water, and cinnamon stick to boil in a medium saucepan, then reduce the heat and simmer for 2 minutes. Gently drop the orange slices into the syrup and cook over low heat for 3 minutes. Carefully remove the slices with a slotted spoon; strain and reserve the syrup.
Arrange the orange slices on top of the cake and pour about a 1/2 cup of the poaching syrup over the oranges and cake. Melt the marmalade and brush it over the fruit. Cool the cake completely before slicing and serving.
Next: First Night in Florence Spaghetti
Previously: Heart-Shaped Tamagoyaki (Japanese Omelet)
Last Year: Squid Ink Spaghetti Aglio e Olio
Two Years Ago: Jjajungmyeon (Korean Black Bean Noodles)
Tuesday, February 10, 2015
Heart-Shaped Tamagoyaki (Japanese Omelet)
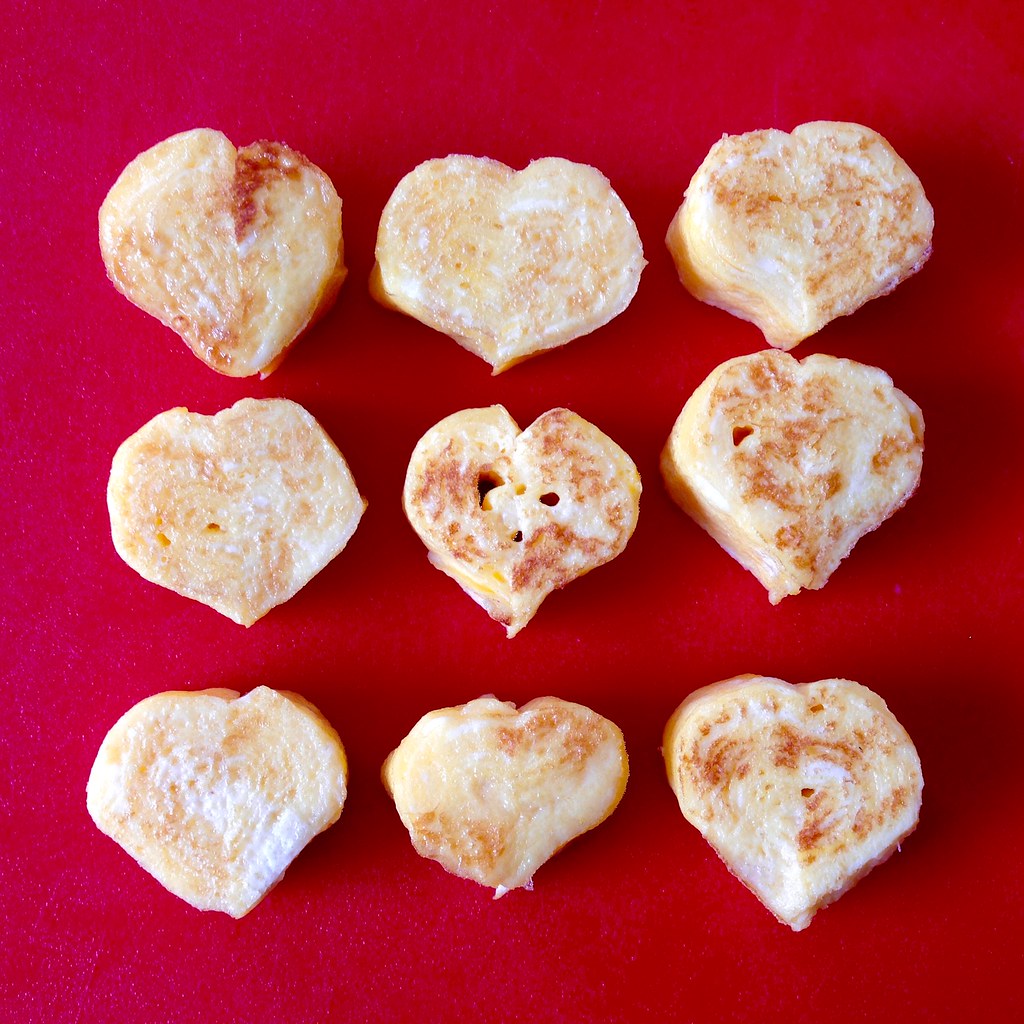
If you're looking for something special to make this Valentine's Day, here's a tutorial on how to make heart-shaped tamago without using any heart-shaped tools! Even though it might look complicated, if you can make scrambled eggs, you can make these. They would also be great for a Mother's Day breakfast in bed or just whenever you feel like surprising a loved one.
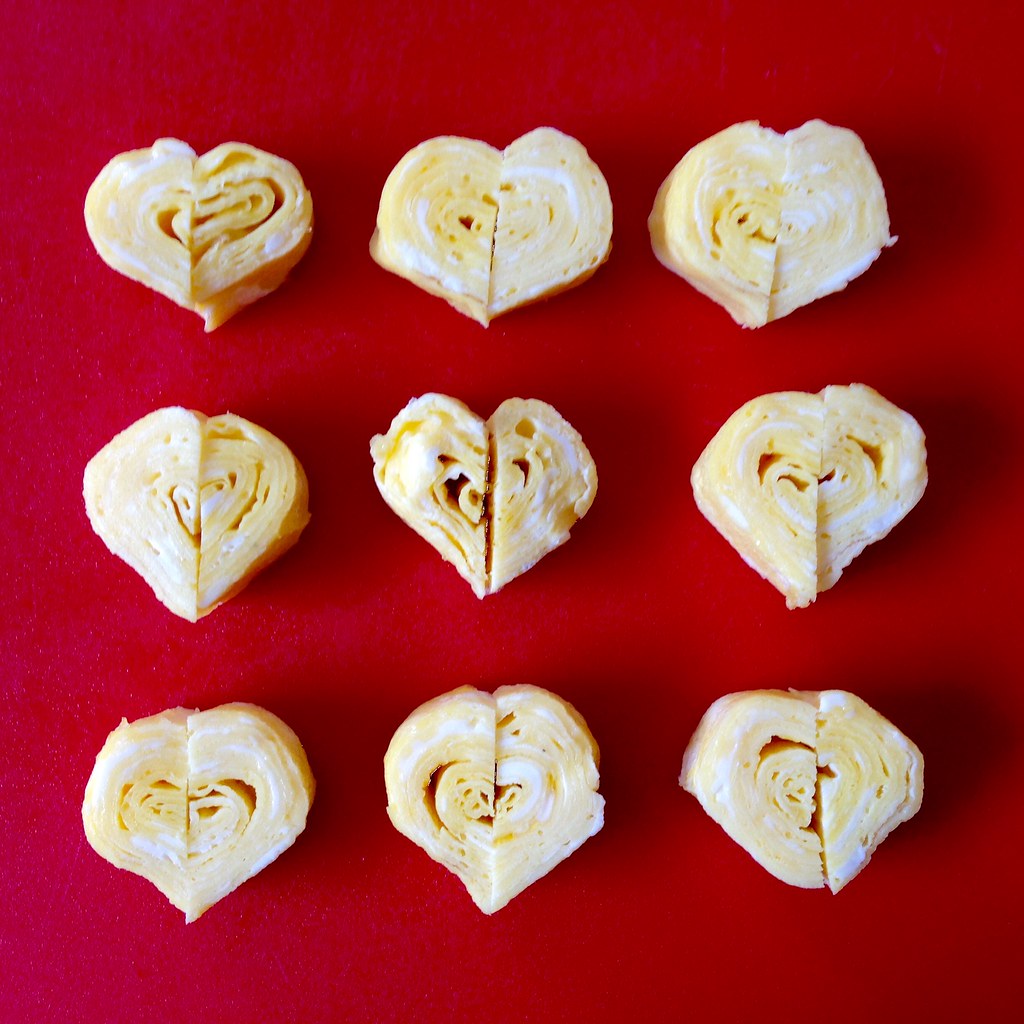
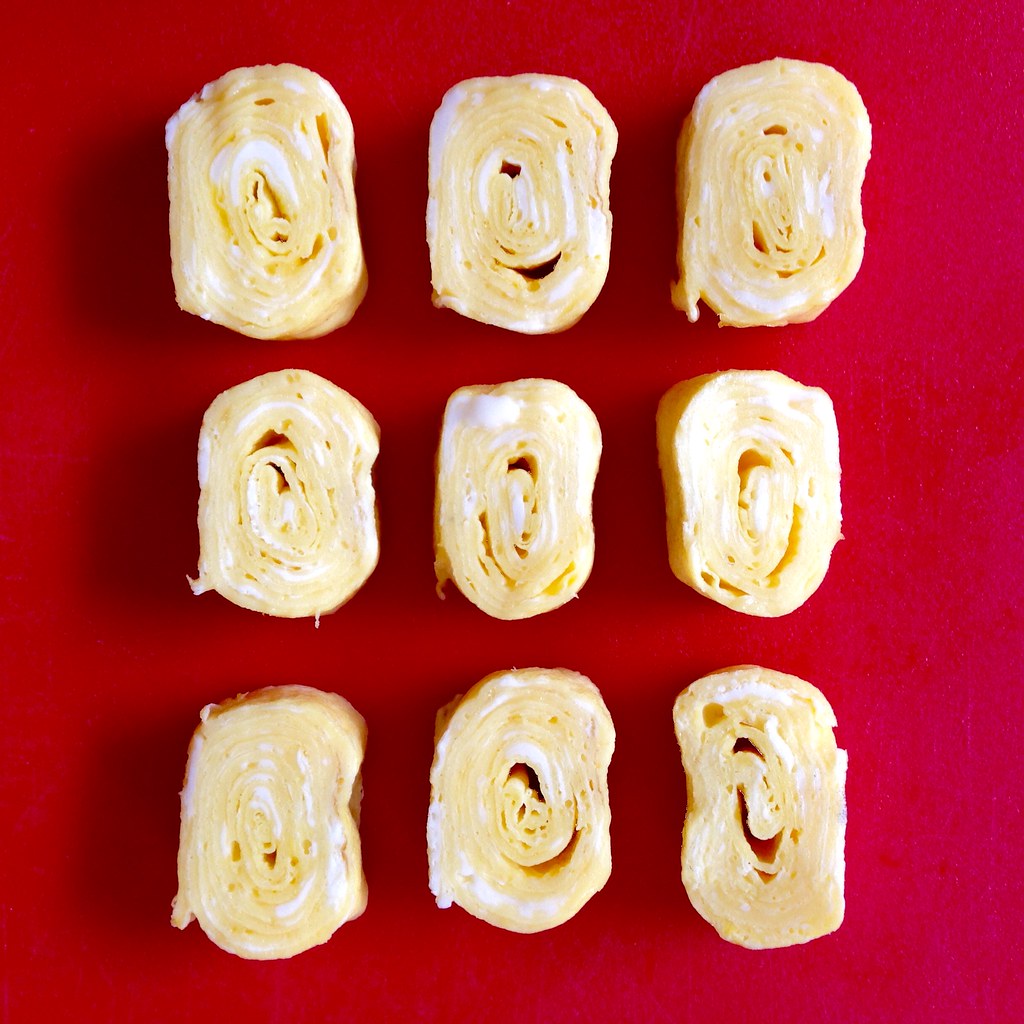
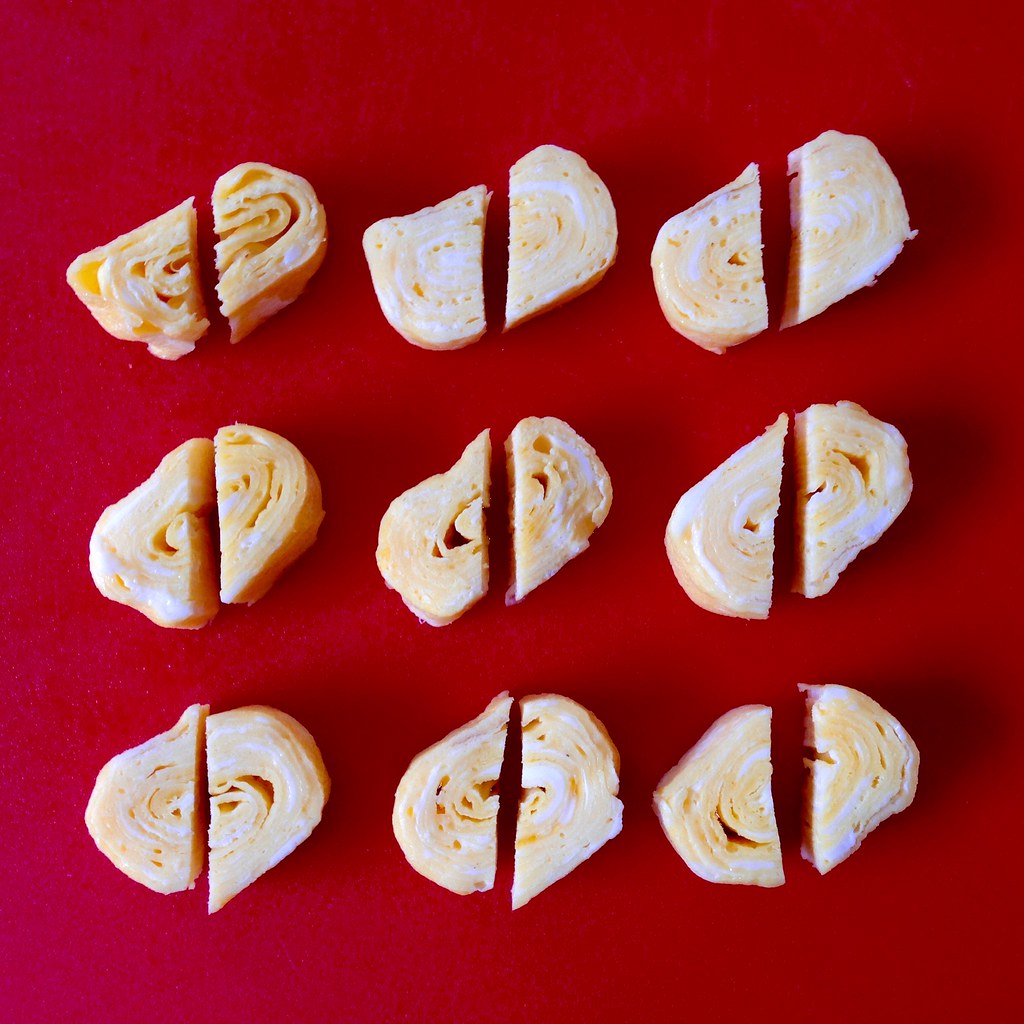
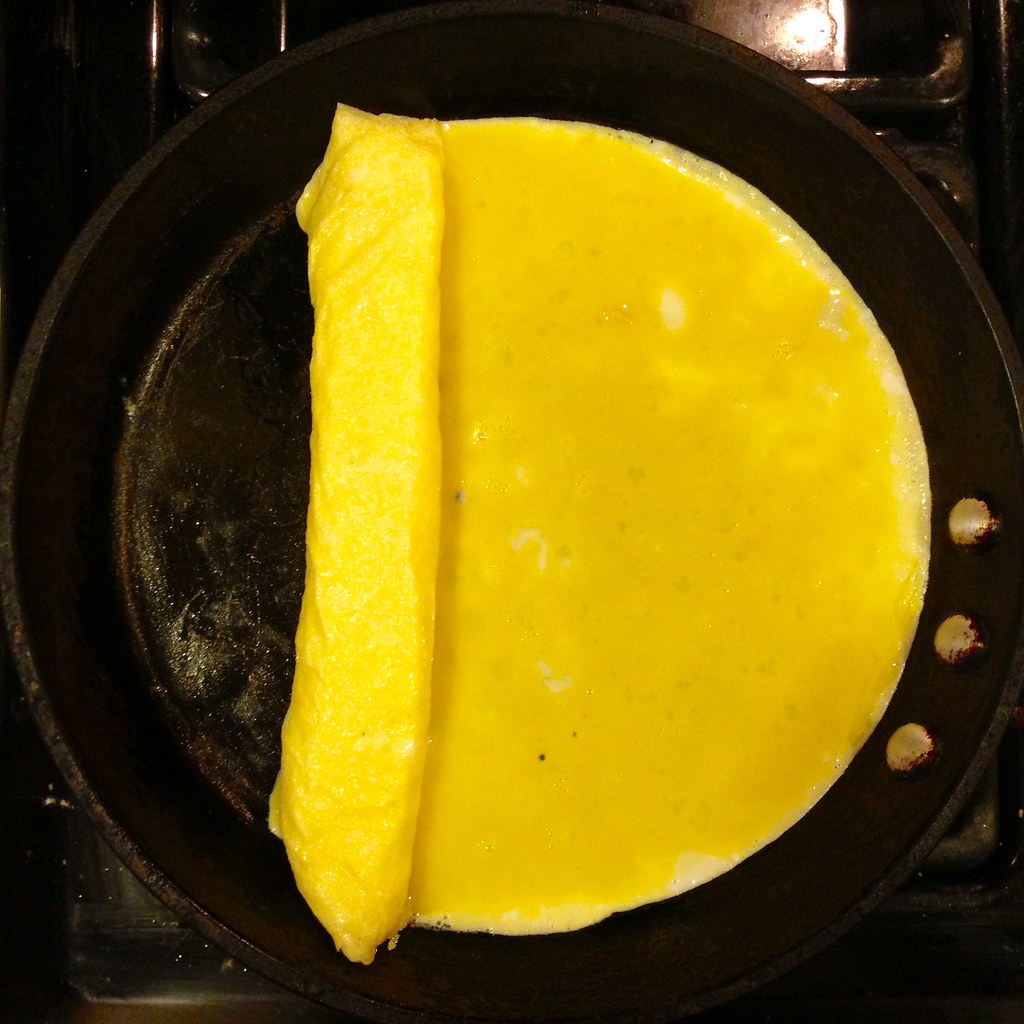
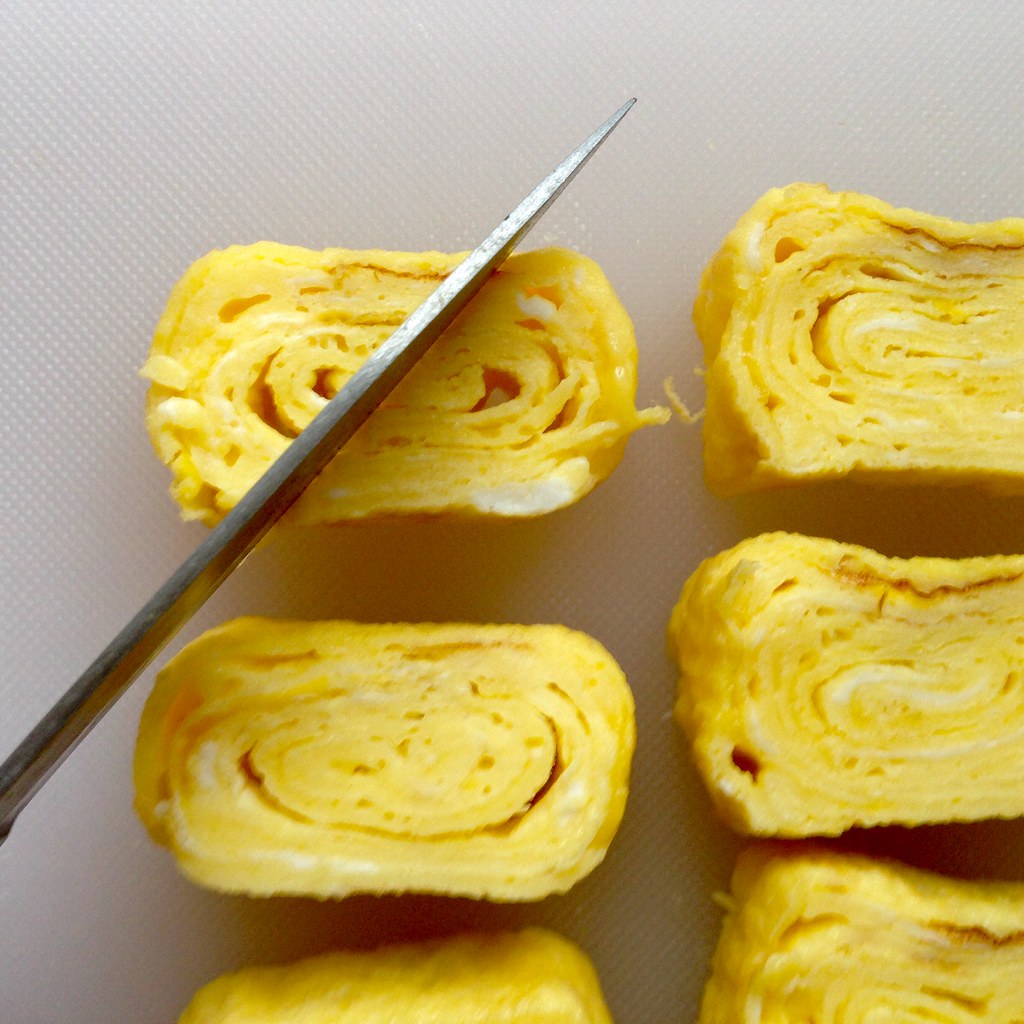
Traditional Japanese tamagoyaki is made from rolling up thinly cooked scrambled eggs. You'll usually see it in a rectangular or long oval shape. To make the heart-shaped version, you'll want to make a flattened log, cut out cross sections, and then bisect the cross sections diagonally.
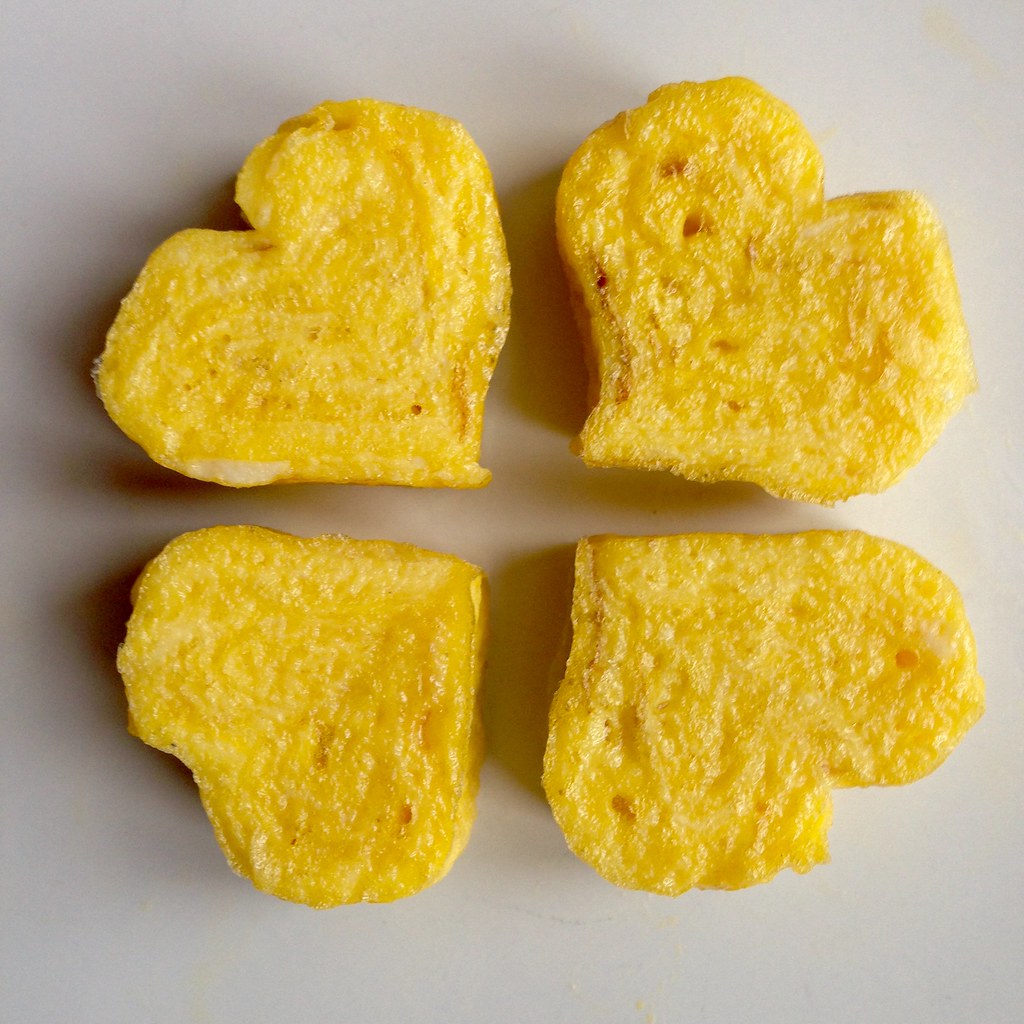
When you flip one of the halves and put it together again, you get the hearts! You could stop here, but with just a little more effort, you can re-dip the hearts in some uncooked scrambled eggs and cook it again for a few seconds to seal the halves together.
I originally got the idea for making this from my friends Xing-Yin and Esther, who pointed me to
Heart Shaped Tamagoyaki
serves 1-2
1 tablespoon vegetable oil
3 large eggs
1/4 teaspoon salt
1/2 teaspoon sesame oil
1 teaspoon mirin
Pour the oil into a small bowl. Dip a folded up piece of paper towel in the oil and use it to apply a film of oil to a nonstick skillet about 8" in diameter. Heat the pan on medium heat.
Scramble the rest of the ingredients together, but try not to introduce too many air bubbles into the mixture.
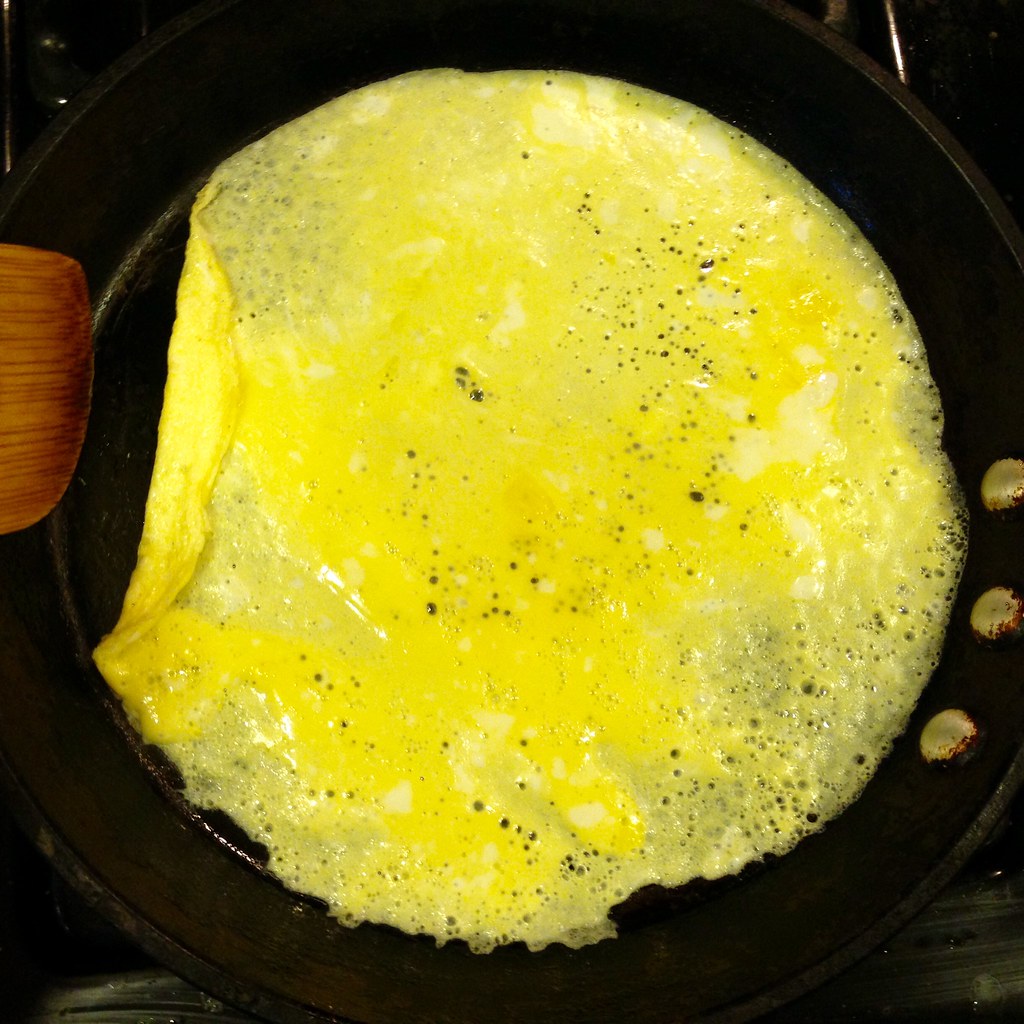
Pour a third of the egg mixture onto the hot pan and swirl it around so that the bottom is evenly covered. You may want to turn down the heat a bit here since you don't want the egg to cook completely through while you are folding it.
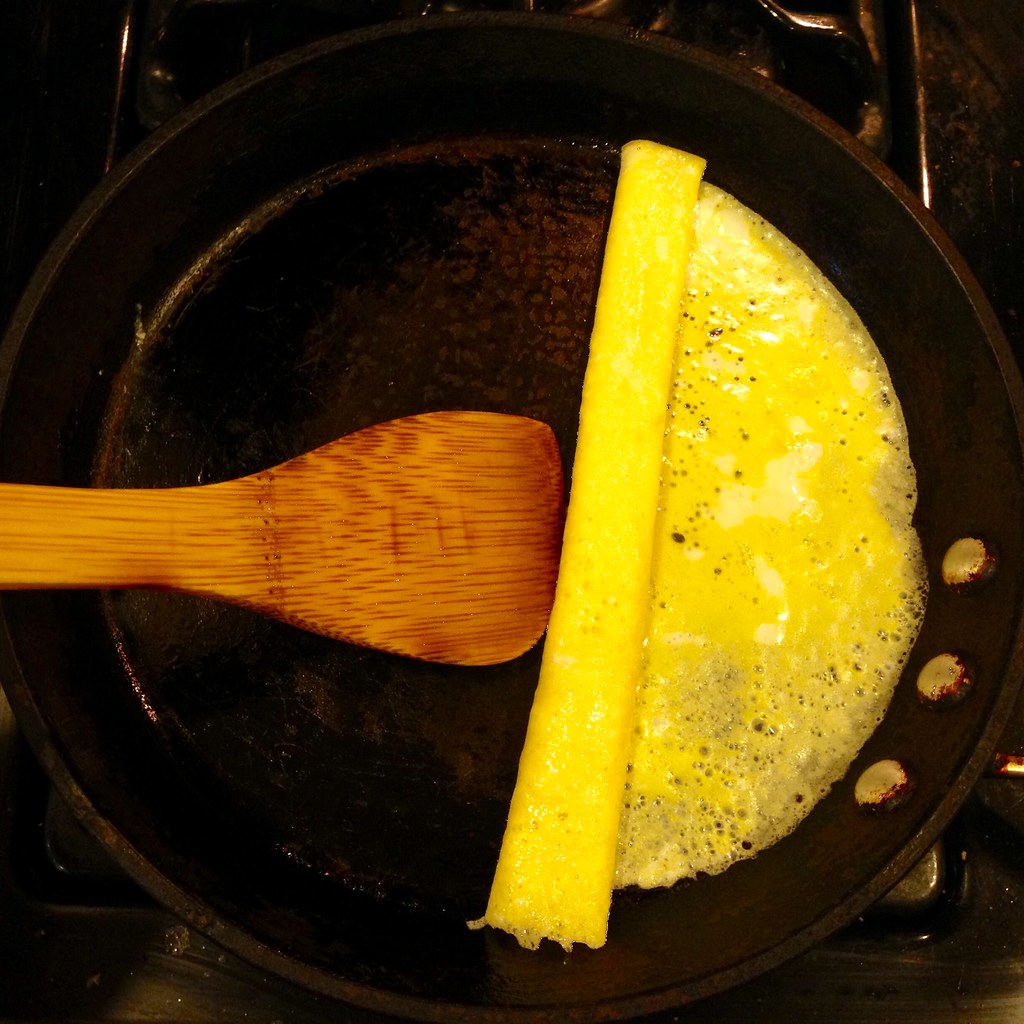
Starting from one end, fold over about 1/4" of the egg and continue to fold it over and over until all the egg has been rolled up. You want to do this carefully so that you get a tight bundle and end up with a flattened log.
Slide this log over towards the end where you started folding and re-oil the bottom of the pan. Pour in half of the remaining egg mixture and swirl the pan again to make another layer.
Start folding the egg again in the same direction until it is all folded up. Slide the log back, re-oil, and pour almost all of egg mixture in, reserving about a teaspoon. Repeat the swirling and folding. Once all the egg has been folded up into a flattened log, remove the egg from the pan and place it on a cutting board.
Slice off the uneven ends, then cut the rest of the log into 1/2"-3/4" cross sections. Lay each cross section down and make a diagonal slice. Flip one of the halves over and rejoin to make a heart shape.
Choose the nicest shaped sides of each heart, and dip that side into the leftover egg mixture. Place dipped side down onto the pan and cook for another 15 seconds. Serve dipped side up.
Next: Odile's Fresh Orange Cake
Previously: Matcha White Hot Chocolate
Last Year: Homemade Tagliatelle with Shaved Truffles
Two Years Ago: Potato Dominoes
Six Years Ago: Cassava Heavy Cake
Thursday, February 5, 2015
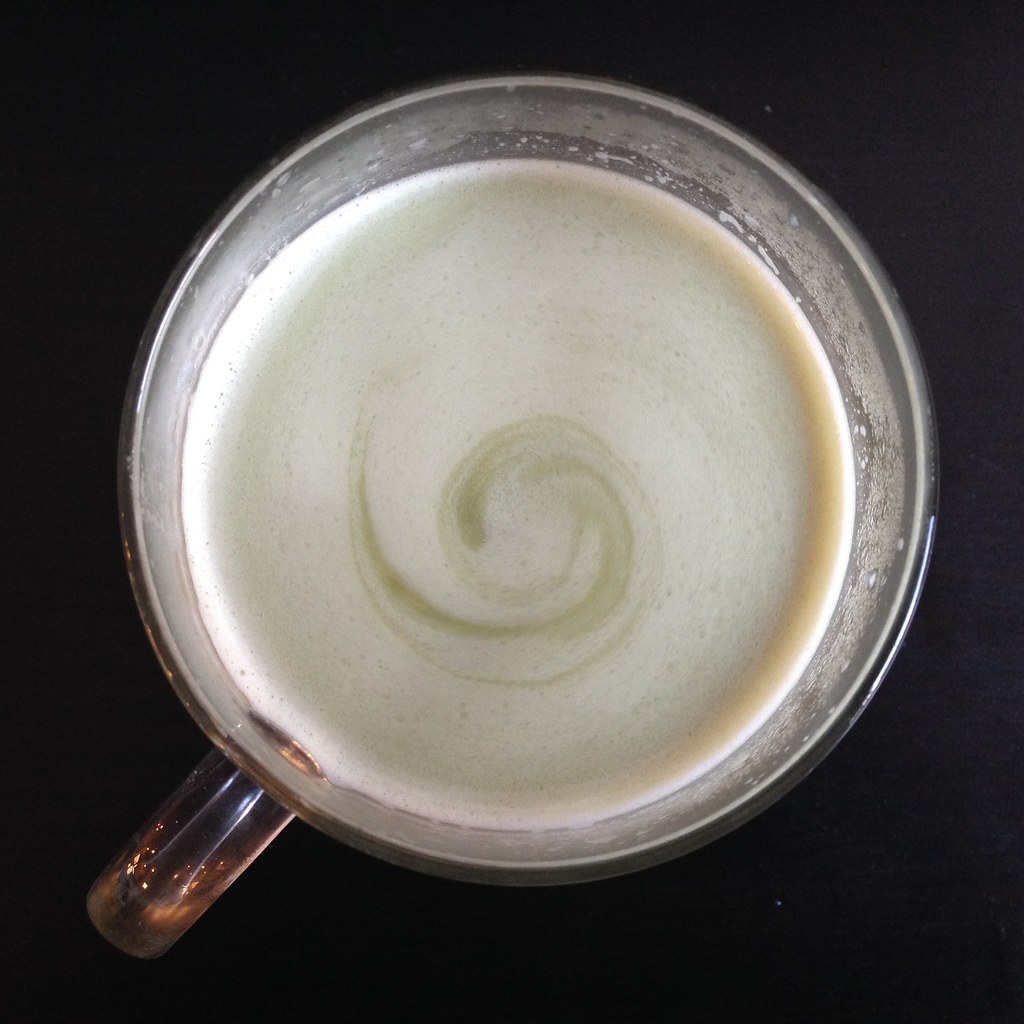
Matcha White Hot Chocolate
There are some flavors that just seem destined to be paired together. Salt and pepper. Ginger and scallion. Chocolate and peanut butter. To that exalted list of flavor pairings, I 'd like to nominate matcha green tea and white chocolate.
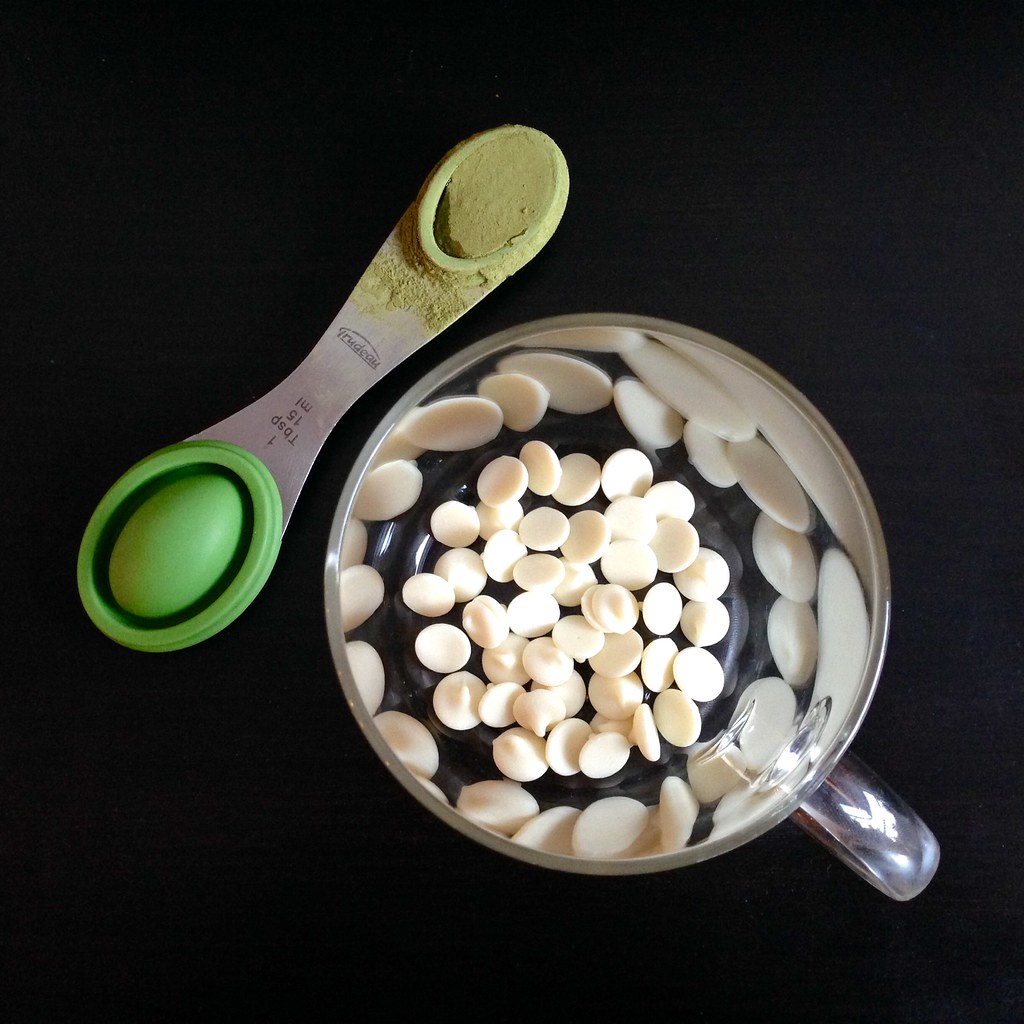
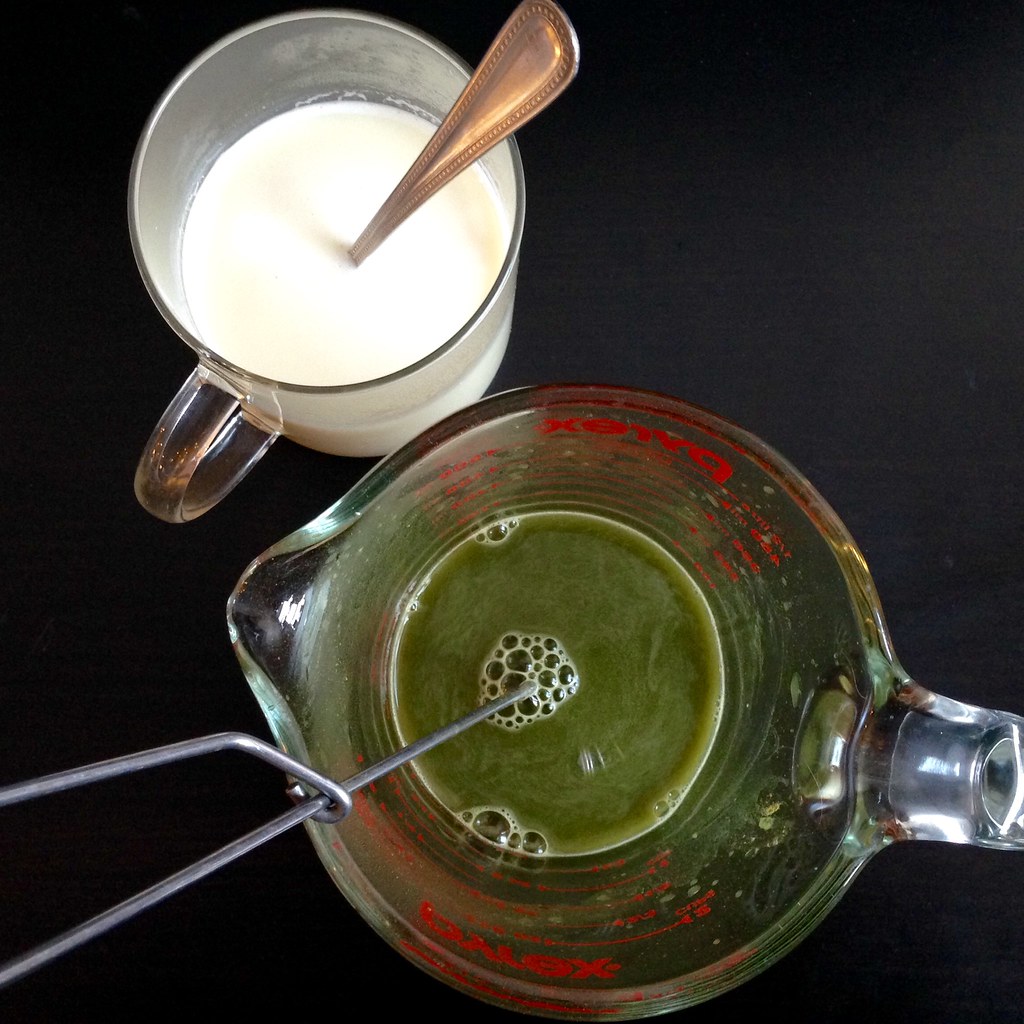
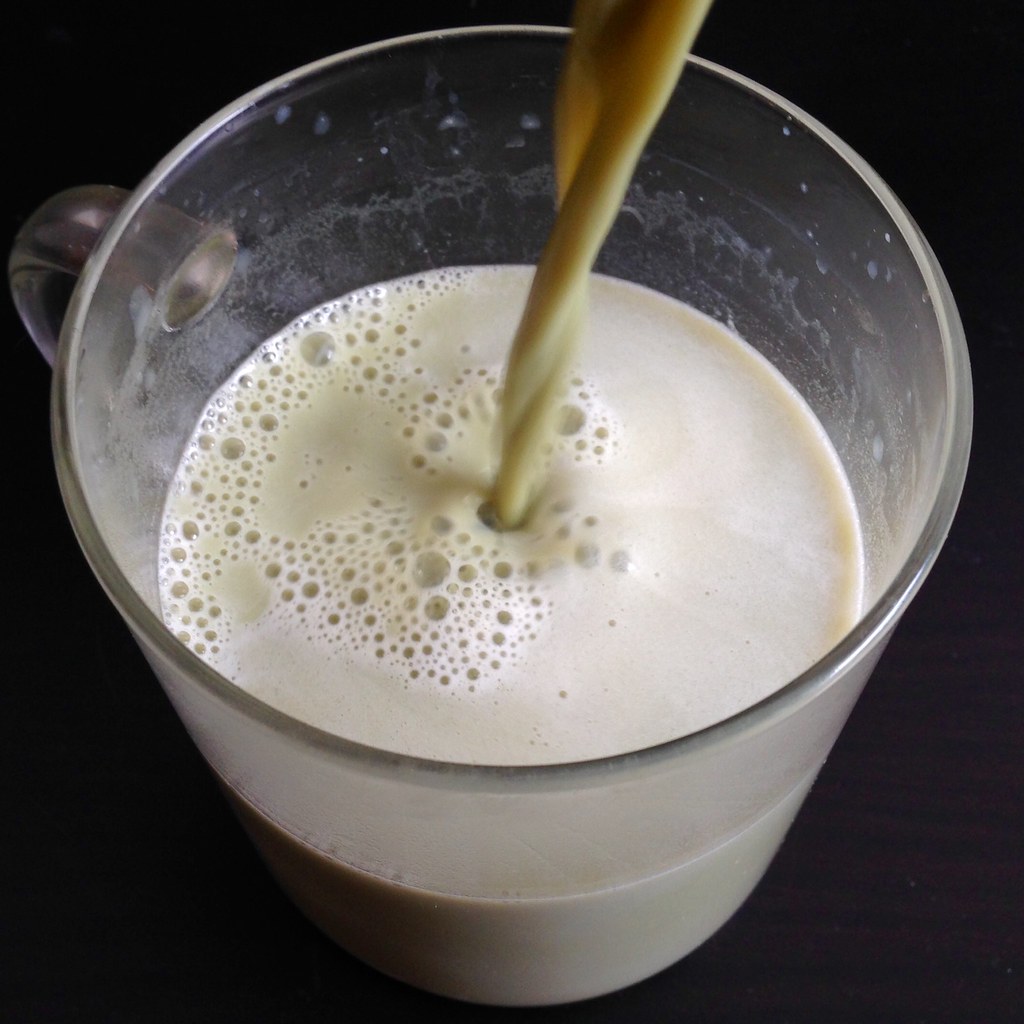
I was craving something warm, sweet, and comforting, and for some reason my mind came up with matcha and hot chocolate. But not regular hot chocolate, a white hot chocolate. A quick google showed me I wasn't the first one with this idea. I followed Love & Lemons' recipe which was super simple: melt some white chocolate chips in some milk, whisk some matcha green tea powder in some hot water, combine the two, and voila! Matcha white hot chocolate!
I love how the two flavors interact with each other. By itself, matcha can be bitter and unpleasant while white chocolate can be too sickly sweet. But paired up, they temper each other's extremes to give you a creamy, herbaceous concoction. For the milk, I used vanilla soy milk, which adds just a hint of sweetness. If you're looking for a thick, decadent hot chocolate, this is not the right recipe. But if you're looking for a perfectly balanced, subtly flavored hot chocolate that you can drink without feeling too guilty, it doesn't get any better than this.
Matcha White Hot Chocolate (adapted from Love & Lemons)
makes 1 cup
3 tablespoons white chocolate chips
3/4 cups vanilla soy milk
1 teaspoon matcha green tea powder
1/2 cup hot water
Melt the white chocolate chips in 1/4 cup of the soy milk by microwaving on high for 30 seconds. Stir until combined. Heat the rest of the soy milk and mix together.
Whisk the match into the hot water. Combine with the soy milk mixture and serve.
Next: Heart-Shaped Tamgaoyaki
Previously: Burmese Coconut Noodles with Tofu
Two Years Ago: Passion Fruit Marshmallows
Five Years Ago: Nutella Ice Cream
Six Years Ago: Tomato and Eggs over Rice
Tuesday, February 3, 2015
Burmese Coconut Noodles with Tofu
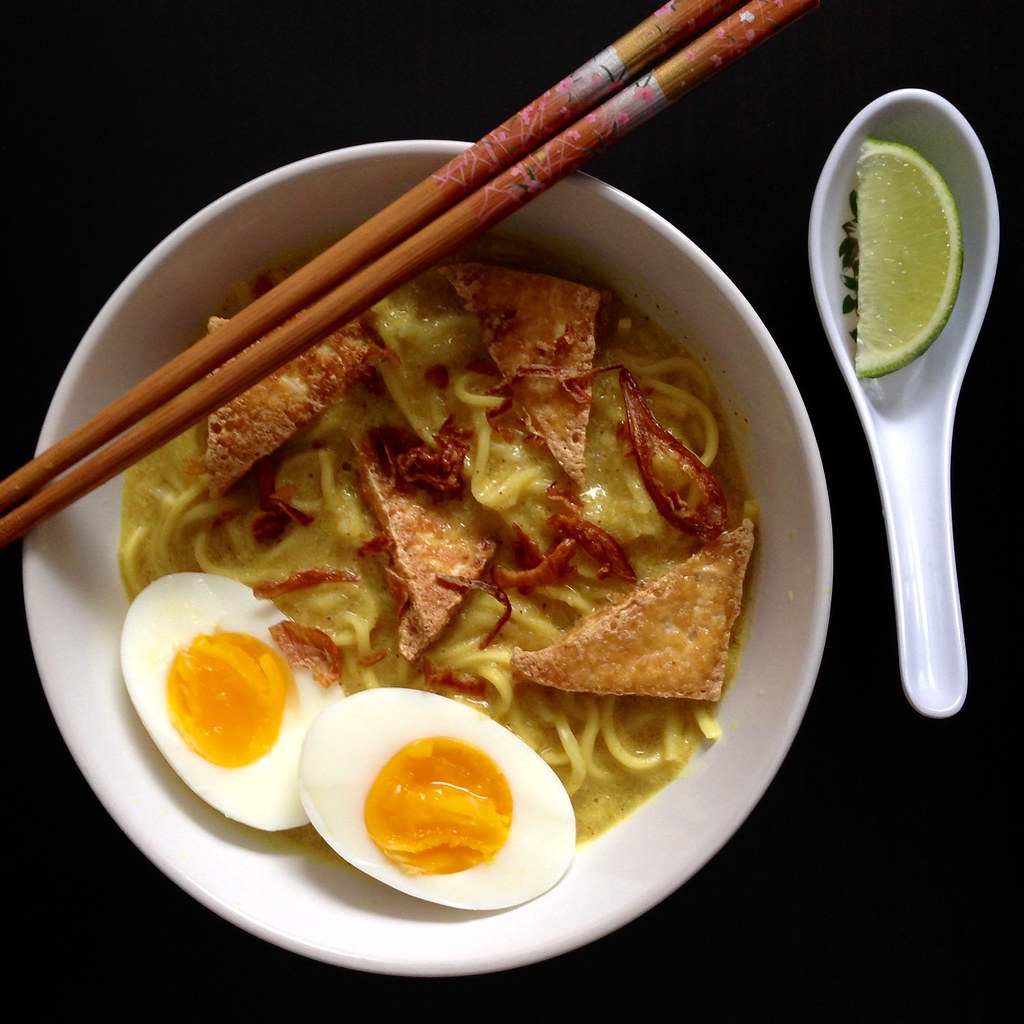
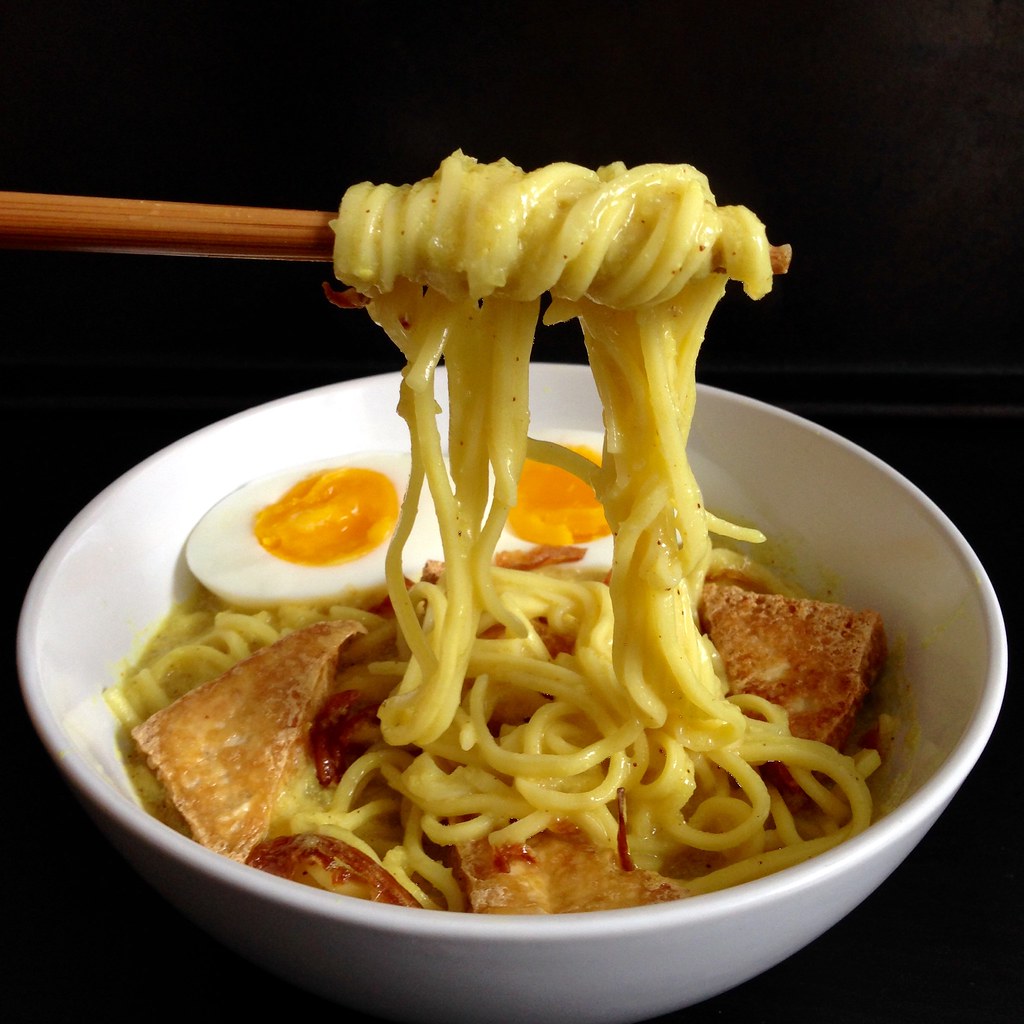
I'm going to admit right off that I've never been to Burma, and I don't think I've even had these noodles at a restaurant before so I'm not entirely sure what it's supposed to taste like, but when I saw this recipe for Burmese Noodle Bowl on Food52, I knew I had to try it. From my one experience with Burmese noodles (made by my friend Alvin), the flavor profile seems pretty authentic: lots of aromatics like onions and a mineral earthiness from turmeric.
The first step to making the curry sauce is to make a paste with onions, garlic, and ginger. I used my food processor to do this since I didn't want my precious Vitamix smelling like onions. The food processor worked pretty well, but every time I opened the lid to scrape down the sides, a pungent flume of onion vapors would be released. So if you're the type of person that cries easily when cutting onions, you're probably going to have a bad time with this.
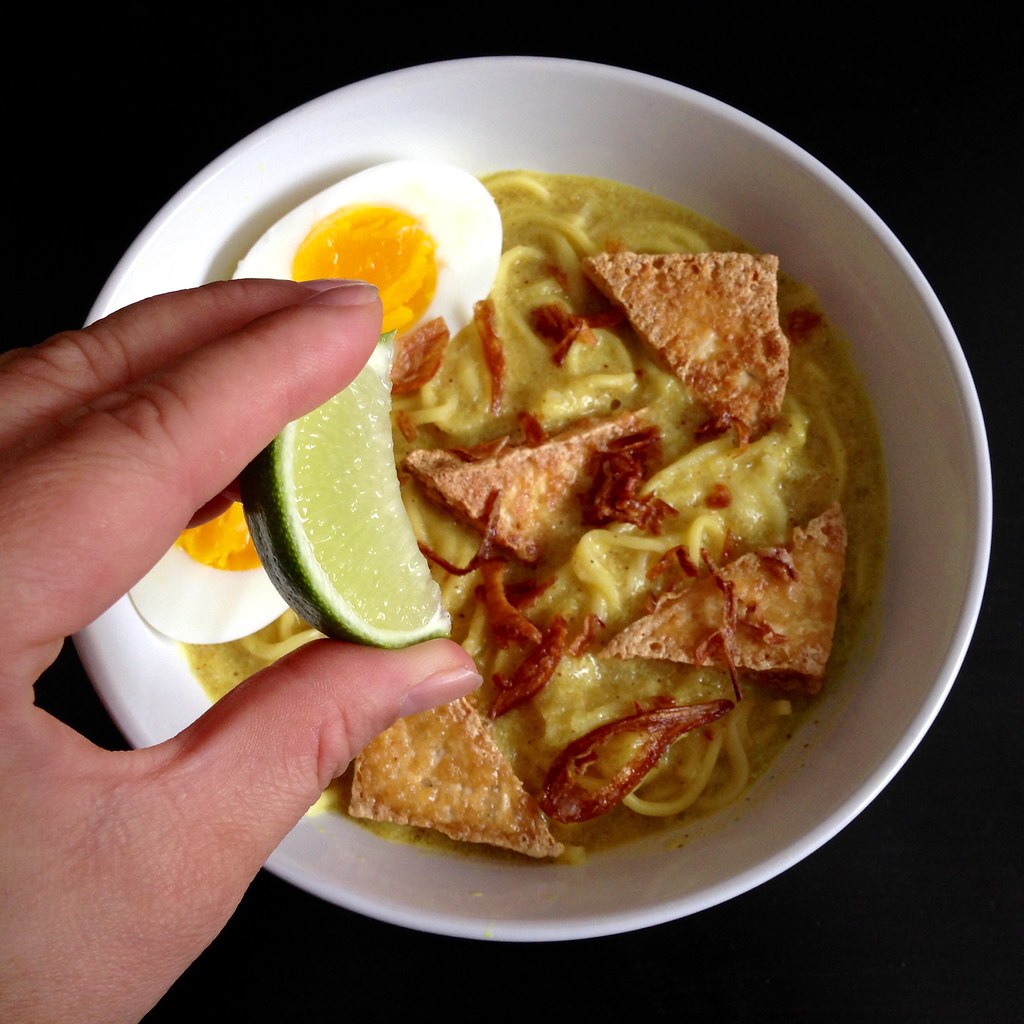
Since I try not to cook too much meat anymore, I decided to use tofu as the protein and add some of the chicken flavor back in with chicken broth. You can buy fried tofu from a Asian grocery store or just slice and pan fry firm tofu yourself. You can also buy fried shallots (red onions) from an Asian grocery story or slice and fry them up yourself. Since I didn't have any shrimp paste, I substituted a tablespoon of fish sauce and some chickpea flour to thicken the sauce. I decided to use yellow Chinese noodles instead of rice noodles, but I think you could also use ramen noodles or even udon noodles if you wanted. Lastly, I omitted the cilantro topping since I consider it the devil's weed, but if you like that sort of thing, you should definitely add it.
Burmese Coconut Noodles with Tofu (adapted from Food52)
serves 3-4
2 medium onions
4 garlic cloves
1 teaspoon ginger, grated
2 tablespoons fish sauce
2 tablespoons canola oil
1 teaspoon sesame oil
1/2 teaspoon turmeric powder
1 teaspoon chili powder
14 oz. chicken broth, vegetable broth, or water
1 tablespoon chickpea flour (optional)
14 oz. can coconut milk
12 oz. noodles
Fried tofu
Fried shallots
3 eggs, boiled and chopped
Kosher salt and chili powder, to taste
1 lime, quartered
Peel and roughly chop the onions and garlic. Add the onions, garlic, ginger, and fish sauce to a food processor and process into a paste.
Add the canola and sesame oil to a large pot and heat over medium heat. Add the paste and cook for several minutes until it starts to get dry and the rawness of the onion is gone. Add the turmeric and chili powder and mix.
Whisk the chickpea flour, if using, into the chicken broth. Add the broth and coconut milk to the pot and mix. Bring the mixture to a boil and then reduce the heat and simmer for 20 minutes.
In the meantime, prepare the noodles according to the manufacturer's instructions, and prepare the rest of the toppings. Taste the curry sauce and add salt and/or chili powder, to taste.
Divide the noodles into 3 bowls, ladle the curry sauce over the noodles, and top with tofu, fried shallots, and the egg. Serve with the lime slices, cilantro, and additional fish sauce and chili powder, if you like.
Next: Matcha White Hot Chocolate
Previously: San Bei (Taiwanese Three Cup) Tofu and Ramen
Last Year: Homemade Tagliatelle with Shaved Truffles
Two Years Ago: Vanilla and Cinnamon Marshmallows
Five Years Ago: Lemon Pudding Cake
Six Years Ago: Toasted Coconut Ice Cream with Sesame Brittle and Crystallized Ginger
Labels:
coconut,
curry,
eggs,
noodle soup,
noodles,
tofu,
vegetarian
Subscribe to:
Comments (Atom)
