Wednesday, December 30, 2009

Creamy Delicata Squash Soup

And now with this entry I think my blog is officially almost monochrome. I shall have to try to make more colorful recipes again soon.

Creamy Delicata Squash Soup

I needed to use up two more delicata squash that I received from Boston Organics and since it's been super cold lately, I googled for a soup recipe. I came across this one on allrecipes.com, and while I usually only try the recipes on there that have several hundred reviews, it seemed straightforward enough to try. I did make a couple of adjustments, however, since I didn't want to wait for the squash to fully cook via roasting. In the comments someone said they had microwaved the squash instead, which shaved off at least a good half an hour. The squash cooked unevenly so I ended up scooping out the done parts and re-microwaving the rest until it was done.And I substituted chicken broth for the vegetable broth and milk and half & half for the heavy cream (but only because I didn't have any).

Creamy Delicata Squash Soup (adapted from here)
makes 3-4 servings

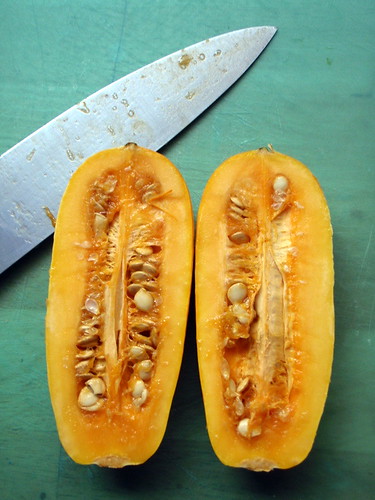
2 delicata squash, halved lengthwise and seeded
1 small onion, chopped
2 cups chicken broth
1/3 cup half & half
2/3 cup milk
1 tablespoon olive oil
Salt and pepper to taste
1 dash nutmeg (optional)

Place the squash cut side down in a microwave-safe baking dish. Add 1/8" water to the dish and microwave on high for 7 minutes or until squash is soft.

In a large saucepan, heat the olive oil. Add onion and cook over medium-low heat, stirring occasionally until onion is softened but not brown.

Scrape the squash out of the flesh and add to onions. Add the broth, half & half, and milk. Bring to a boil and then simmer, stirring occasionally, about 25 minutes.

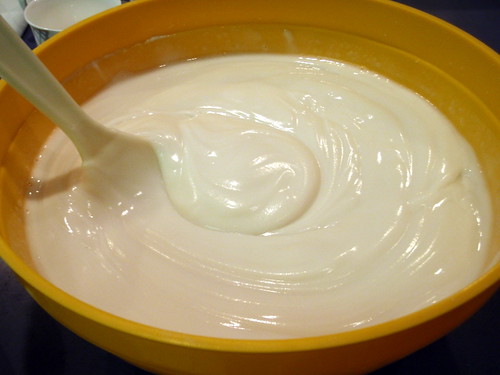
Puree the soup using an immersion blender. Season with salt and pepper and a dash of nutmeg, if you like.

Creamy Delicata Squash Soup

Pureeing the soup made it really light and frothy. The consistency was slightly grainy like a potato soup, but it really wasn't very thick at all. I found that I barely had to add any salt to it, but then maybe that's because the chicken broth I used was already pretty salty. I think the nutmeg really brought out the sweetness of the squash. In fact, I can see this being a really versatile template for a squash soup. You could go the sweeter path and really roast the squash with some butter and maybe a little brown sugar. Or you could go the more savory route and use shallots instead of the onion and maybe throw in a little garlic or other fresh herbs. All in all, it was the perfect thing to have on a frigid day.

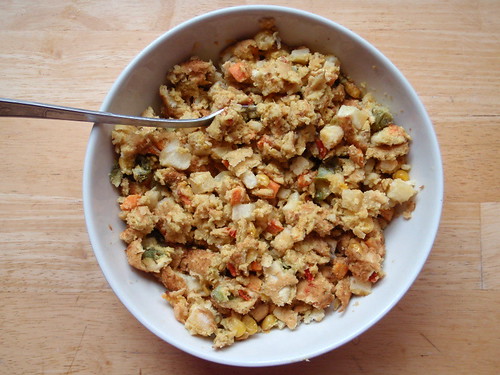
p.s. I made the croutons in the pictures by simply sauteeing some cubed wheat bread in butter. If I had really been clever, I would've cut the croutons in the shape of the squash seeds. =)

ETA:  I recently made this and added curry powder instead of nutmeg.  It was delicious!

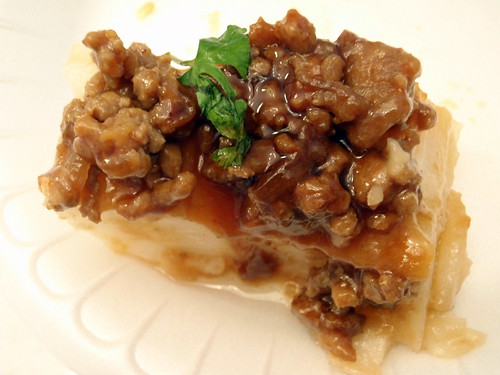
One year ago:  Hua Juan (Steamed Scallion Buns) 

Monday, December 28, 2009

Homemade Waffle Face Off

overnight vs insanity

Ever since I tried my first Belgian waffle (with real pearl sugar!) from Mr. Crepes a few weeks ago, I've been wanting to make some waffles. My friend, Nicole, had left me her waffle maker when she moved away this past summer and I had yet to break it out. I was hoping to buy some pearl sugar from Mr. Crepes, but it turns out they no longer sell it there. So I settled for making regular waffles. But oh my, the many different "regular" waffle recipes that existed! I browsed through the waffles on TasteSpotting, The Kitchn, and looked up Alton Brown's recipe. I remembered an episode from Good Eats when he explained that the batter you want for pancakes and the batter you want for waffles are two completely different things since pancakes should be soft and fluffy and waffles should be crispy on the outside. Unfortunately, his recipe for the Basic Waffle included buttermilk as an ingredient, and I didn't really feel like buying something I don't usually use just to make this. But then I found a recipe titled, "Waffle of Insane Greatness". How could you not want to make those?

And then while talking to my friend, Helena, about my plan to make waffles, she recommended Mark Bittman's recipe for Overnight Waffles from How to Cook Everything (thank you, Ellen!), saying they were the best waffles she had ever had. That's when I decided it was time for another face off: Yeasted vs. non-yeasted waffles.

Obviously, as you can tell from the title, the Overnight Waffles need to be started the night before to give the yeast time to do it's thing. There are several steps to the recipe, and I followed everything to the letter (including separating the egg and whipping up the egg whites; is there anything more satisfying than whipping egg whites up to a soft peak by hand?) except that I halved the recipe. Hopefully it didn't alter the outcome too much.

overnight

Overnight Waffles (based on Mark Bittman's recipe from How to Cook Everything)
makes 2-3 servings

1/4 teaspoon instant yeast
1 cup all purpose flour
1/2 tablespoon sugar
1/4 teaspoon salt
1 cup milk
4 tablespoons butter, melted and cooled
1/4 teaspoon vanilla
Canola oil (for brushing on waffle iron)
1 egg

The night before, combine dry ingredients and stir in the milk, then butter and vanilla. The mixture will be loose and creamy. Cover and set aside overnight at room temperature.

PC272358

The next morning, brush the waffle iron lightly with oil and preheat. Separate the egg and stir the egg yolk into the batter. Beat the egg whites until they hold soft peaks. Fold them gently into the batter.

Pour the batter onto the waffle iron just until the barely covered. Bake 3 to 5 minutes, depending on your iron. Serve immediately with maple syrup and butter.

I thought it was interesting that in the book, Mark mentions that his favorite type of maple syrup is Grade B which is also the cheapest. Maple syrup is pretty darn expensive even up here in New England, but I found that Harvest sells Grade B maple syrup in bulk!

It looks like the "Waffle of Insane Greatness" recipe is from a restaurant called Aretha Frankenstein's in Tennessee. I have a feeling I will never get to go and try the originals, but having the recipe is good enough for me.

insanity

Waffle of Insane Greatness (courtesy of the Food Network and Aretha Frankenstein's)
makes 4 servings

3/4 cup all purpose flour
1/4 cup cornstarch
1/2 teaspoon baking powder
1/4 teaspoon baking soda
1/2 teaspoon salt
1 cup milk
1/3 cup vegetable oil
1 egg
1 1/2 teaspoons sugar
3/4 teaspoon vanilla

In a medium bowl, combine the flour, cornstarch, baking powder, baking soda, and salt; mix well. Add the milk, vegetable oil, egg, sugar, and vanilla and mix well. Let the batter sit for 30 minutes.

Preheat the waffle iron. Do not use non-stick spray on the waffle iron; the oil in the batter will allow the waffle to release easily. Follow the directions on your waffle iron to cook the waffles. Serve immediately with butter and syrup.

It's true about not needing to grease the waffle iron for these. If you let the batter sit long enough, the oil will even start to separate. If that happens, just stir the batter again and the oil will re-incorporate. I chose not to halve this recipe because it would've been a lot harder to do so and also because it seemed like the main ingredients (flour, milk, oil, and egg) were almost identical in quantity.

As you can see from the pictures above, the Waffle of Insane Greatness browned more uniformly and had a more defined shape. This translated into a crisper waffle. It also had an eggier taste than the Overnight Waffles which I thought had a pretty strong yeasty taste. The texture of the Overnight Waffles was definitely fluffier but I didn't really get the crispiness.

PC272365

I decided to try to make them side by side so that they had the same amount of time on the iron. Again you can see (below) that the Waffle of Insane Greatness had a more defined shape and that the Overnight Waffles had more air bubbles, but now you can see that the Overnight Waffles actually brown quicker than the Waffle of Insane Greatness. (Please ignore the fact that there are holes in the Waffle of Insane Greatness; that's more due to user error as you can see in the picture with the waffle iron.)

PC272366

Personally, I had a slight preference for the Waffle of Insane Greatness because it was able to get the crispy texture I wanted. Too many air bubbles in the Overnight Waffles meant it absorbed the maple syrup like a sponge and got way too soggy way too fast. Also, I thought the yeasty taste was a little too strong for me. One of my roommates preferred the Overnight Waffles, though, and my other roommate's sister preferred the Waffle of Insane Greatness.

As a final experiment, I mixed the last of both batters together and made an Overnight Waffle of Insane Greatness. This turned out to be the perfect waffle for me. The yeasty flavor was neutralized and turned into a more malted flavor. The waffle was crispier and had less air bubbles than the Overnight Waffles but was fluffier than the regular Waffle of Insane Greatness. If I ever really, really wanted to make the perfect waffle, I would make these two recipes and combine them again. But being the lazy person I am, I'll probably just make the Waffles of Insane Greatness again and maybe try separating the egg and whipping up the egg whites before folding them in.

PC272372

One year ago:  Hot Pot, Tang Yuan

Friday, December 18, 2009

Apple and Pear Cake FAIL

Apple and Pear Cake

I needed to use up some more apples and pears from my Boston Organics delivery, so I decided to try Smitten Kitchen's Mom's Apple Cake. Except I didn't have a tube pan. Or a bundt pan. And I only had 2 apples and 2 pears. And I accidentally bought white whole wheat flour instead of my usual unbleached all-purpose flour. A normal person might have decided these reasons were enough to stop, but oh no, I had to go ahead and try to make the cake anyways.

Ridiculously thick batter

First conversion: I figured I could multiple all the ingredients by 3/4 to account for the fact that I only had 4 pieces of fruit instead of the 6 required for the recipe.

First fail: You know how people say baking is like chemistry and that everything needs to be measured precisely? Well, I had to adjust some of the calculated measurements just so I could measure them. And I ended up with a really, really, really thick batter. Like closer to cookie dough than cake batter. I don't think that's right.

Second conversion: Instead of using a tube pan, I used a normal square pan. In the original post, Deb says that you can probably make the cake in a 9"x13" cake pan if you don't have a tube pan. I figured since I was reducing the quantities in the recipe, I could get away with a 9" square pan.

Second fail: I think the reason this cake calls for a tube pan is because it take a long time for the middle to bake. And maybe longer because I had that ridiculously thick batter. The original recipe says to bake for 1.5 hours or until a tester comes out clean. Um, at 1.5 hours, the middle of the cake was just barely starting to set, and the edges were all getting burnt.

(By the way, The Kitchn just posted a hack on what to do if you don't have a tube pan!)

Apple and Pear Cake

Third conversion: I only had 1/4 cup all-purpose flour left, so I used that and then used whole wheat flour for the rest of the flour. I figured, it's a cake with fruit so it's already slightly healthy anyways. Can't make that much of a difference right? Um, yeah. Don't ever do what I did, okay? Unless you like eat really dense cardboard.

But, I was still able to get some decent pictures of the thing. And I still did eat it. At least, the top half of it. The bottom half was unsalvageable. Hmmm, I should've taken a picture of what was leftover in the pan.

Apple and Pear Cake

Anyways, instead of posting the fail recipe, I'm just going to link over to Smitten Kitchen again. Because she has the correct recipe AND gorgeous pictures.

ETA:  Three years later, I finally conquered this recipe by using the right ingredients and baking pan.

One year ago:  Maracons - A Lesson in Humility

Monday, December 7, 2009

Tim Tam Slam Ice Cream

A couple of years ago, I was having dinner with this other girl who kept talking about all the homemade ice cream she made. After repeated mentions, I couldn't stand it anymore and threw down the proverbial gauntlet and challenged her to an "ice cream throw down". We rounded up two other friends who also made their own ice cream and drew up a list of rules. We were all to make 3 churned, frozen desserts: one vanilla ice cream for a baseline, one sorbet, and one free-for-all. Forty people came to judge, and I'm proud to say that I won the vanilla and sorbet categories with my "Triple Vanilla Threat" (frozen custard made with vanilla bean, vanilla sugar, and vanilla bourbon) and Coconut Lime Sorbet, which is really the simplest and yummiest sorbet recipe ever.

So for the one category that I lost, I had made a Tim Tam Slam ice cream. At the time, Tim Tams had yet to be imported into the US, so I actually had saved a package that a co-worker from Australia had sent special to me after I told her how much I loved the cookies. I was introduced to Tim Tams back when I lived in Taiwan by a couple from New Zealand. Crunchy chocolate cookies sandwiching a smooth chocolate mousse all dipped in rich chocolate fudge. You can really only eat one or two at time before going into chocolate overdose.

The inside of a Tim Tam
(This is actually a picture I took of the Tim Tams I had 2 years ago; the ones from Pepperidge Farms have a different packaging.)

But the best way to enjoy a Tim Tam is to do the Tim Tam Slam! This involves biting off the ends of the rectangular cookie and using it as a straw to sip up some coffee (or milk or tea). Just as the liquid reaches your lips, you toss the whole cookie in your mouth and close your eyes in delight as you experience the Tim Tam Slam.

Luckily for us, Tim Tams are now available stateside, at least during the colder months of the year, through Pepperidge Farms. I spied some at the local Shaws the other day, and decided it was high time to try to make a better Tim Tam Slam ice cream, because the Tim Tam Slam really deserved to be enshrined in such a hallowed way.

The previous time, I had tried David Lebovitz's recipe for making the coffee ice cream and used Dunkin' Donuts' hazelnut coffee beans. For whatever reason, the ice cream didn't really turn out as I had hoped. It's been over two years now so I can't remember exactly what I didn't like about it, but it was just off, somehow. As a note, my favorite coffee ice cream is the first one I ever tried: Breyers. It's the whole reason I even like coffee.

Since I've moved away from making frozen custards, I decided it was time to try Jeni's recipe for making no-egg ice cream again since let's face it, the last time was kind of a fail. And I think I know what the issue was last time. I bet I didn't let the mixture get a chance to cook enough after adding the corn starch so that it thickened before cooling it. Because let me tell you, when it starts boiling and thickening, you better get that pot off the heat fast or else it'll boil over. And I'm sure I'd have remembered something like that happening before.

Tim Tam Slam ice cream

Tim Tam Slam Ice Cream (based on Jeni's ice cream recipe)
makes about 1 quart

3 tablespoons cream cheese, softened
1 tablespoon plus 1 teaspoon corn starch
3 1/2 cups half and half
2/3 cup sugar
1 1/2 tablespoons corn syrup
1/8 teaspoon salt
1 tablespoon instant coffee crystals (I used Nescafe)
1 package Tim Tams

In the bottom of a medium bowl, beat the cream cheese until soft and loose and set aside.

In a small bowl, whisk together the cornstarch and 2 tablespoons of the half and half, making sure the cornstarch is dissolved. Pour the rest of the half and half into a large pot and whisk in the sugar, corn syrup, and coffee crystals. Bring to a boil over medium-high heat, and then simmer, stirring frequently, for 4 minutes.

Remove from heat and whisk in the cornstarch mixture. Return the pot to medium-high heat, bring back to a boil, and cook for 1 more minute, stirring or whisking constantly, until the mixture is slightly thickened.

Pour the milk mixture into the bowl with the cream cheese and whisk until the cream cheese is combined. Add the salt. Set the bowl into a larger bowl filled with snow or an ice bath and cool, stirring every few minutes, until the liquid is at least down to room temperature. Transfer the inner bowl to the refrigerator and allow to chill thoroughly.

Chopped up Tim Tams

Roughly chop the Tim Tams into small bits.

Once the ice cream base is chilled, freeze in an ice cream maker, adding the chopped Tim Tams at the very end. Transfer the ice cream to a container and freeze for several hours until firm.

Tim Tam Slam ice cream

I liked this version of the Tim Tam Slam much better, although it still doesn't taste as good as Breyer's coffee ice cream. Maybe it's something to do with the amount of coffee flavoring or the way I introduced it. Perhaps it would've been better to add espresso powder or coffee extract. But the addition of the Tim Tam bits definitely compensates for any faults the ice cream itself may have. I actually used caramel Tim Tams, which added a nice non-chocolatey dimension to the ice cream, kind of similar to Ben & Jerry's Coffee Heath Bar Crunch ice cream. The only thing is the caramel gets pretty hard when frozen, but does eventually soften in your mouth.

One year ago:  Pan-Fried Pasta with Butternut Squash, Fried Sage, and Pine Nuts

Sunday, December 6, 2009

Wah Guay, or Taiwanese Rice Cake with Meat Sauce

Wah guay

It's been a while since I've posted any recipes from my mom, and I just received a random request for this recipe, so I'd like to introduce you to wah guay, of Taiwanese rice cake with meat sauce. The name of the dish is Taiwanese, so I don't even know how to correctly pronounce it, much less romanize the spelling. My mom makes this dish a lot for pot lucks, and it's one of her specialties; I believe she even made up the recipe herself. All the flavoring comes from the meat sauce which is really pretty salty plus a little sweetness, heat, and umami. You need all of the saltiness because the rice cake is just steam-baked rice flour and water. That's it. But if you make it right, it should come out with a thick, custardy texture that jiggles like Jell-o.

Make sure that you use a soy sauce paste for the topping and not regular soy sauce. Soy sauce paste is more viscous and also slightly sweeter than the normal stuff. We used it a lot growing up in dipping sauces for things like boiled dumplings and hot pot because the water that inherently deposits with each dip wouldn't dilute the soy sauce paste as much as it would with normal soy sauce. And if you can find the sweet chili paste, definitely try that. It's barely spicy, but does cut through the saltiness of the meat sauce just enough. In a pinch, I guess a little sriracha sauce could do.

Wah Guay
makes 24 servings

1 (16 oz.) bag of rice flour (not the glutinous kind)
1 lb. ground pork
2 tablespoons vegetable oil
1/4 cup fried shallots
1/4 cup rice wine
2 tablespoons sugar
1/2 teaspoon five spice powder
6 tablespoons soy sauce
Soy sauce paste or chili soy sauce paste
Sweet chili paste (optional)
Cilantro (optional)

Preheat the oven to 350 °F and lightly grease a 9" x 13" casserole dish.

Add 9 cups boiling water

In a large mixing bowl, mix the rice flour with 2 cups of water using a spatula. Continue stirring and add 7* cups boiling water in a continuous stream. Once fully incorporated, transfer to the casserole dish, cover loosely with aluminum foil, and bake for 45-90** minutes until fully set.

In a medium-sized pot, heat oil on high until hot. Add the shallots and fry for 20 seconds. Add the pork, rice wine, sugar, five spice powder, and soy sauce and continue to cook until meat is no longer pink, breaking the pork into smaller pieces. Cover, lower the heat, and let simmer for 2 minutes. Then turn off the heat and let sit covered.

Wah guay

Once the rice cake is done, top with the meat sauce. Drizzle with soy sauce paste and sweet chili paste and top with cilantro, if desired.

I am not a big fan of cilantro, so my mom usually just garnishes three-quarters of the dish with the cilantro, leaving an unblemished quarter for me. Isn't my mommy the best?

One note I should make, I tried making this once in grad school in a toaster oven and the rice cake never really "set". And even my mom has said that it hasn't set correctly for her on a few occasions. Neither of us could figure it out; I'm guessing it has to do with having the perfect ratio of water to rice flour and the ideal conditions for steaming and baking in the oven.

*The original recipe listed 9 cups of boiling water, but after making this recipe recently, I would suggest only using 7 cups of boiling water (in addition to the 2 cups of room temp water).  

**The original recipe listed a 45 minute bake time, but the last time I made this it wasn't set in the middle yet at 45 minutes.  Next time I'm also going to try stirring the mixture maybe every 15 minutes to ensure a more even bake.

One year ago:  Beef Noodle (Soup) and Lu Dan

Friday, December 4, 2009

Stuffed Delicata Squash

I recently received two delicata squashes in my Boston Organics delivery. Now I know what to do with yellow/zucchini squash, and I have a favorite recipe for butternut squash, but this was the first time I had work with this particular kind of squash. Luckily, The Kitchn had a post recently about making stuffed squash, which I thought would be the perfect thing to do with these two lovelies.

Delicata Squash

The only thing is, their recipe called for some type of protein (chopped ham, bacon, sausage, etc.) to be added, and I just didn't have anything like that, nor did I really think ham belonged in a stuffed squash. Bacon or sausage, I can see, but I didn't want to go out and buy some just for this recipe. They suggested using tofu for a vegetarian version, but that sounded just as weird, if not weirder than using ham. And then I realized, I had the perfect ingredient sitting in my freezer. Can you guess what it is?

PB282309

One of my vegetarian friends had brought over Vegetable Masala Burgers from Trader Joe's for a barbecue we had over the summer. There had been no time or room on the grill to cook them, so they've been sitting in my freezer until now. I figured the burgers would already be seasoned, and after microwaving them and mashing them up with a fork, they would be just about the right consistency to stuff a squash with!

Veggie Burger Stuffed Delicata Squash
makes 2 servings

2 delicata squash
Olive oil
Salt and pepper to taste
2 veggie burger patties
Butter (optional)

Preheat oven to 350°F.

PB282307
Halve the squash lengthwise and scoop out the seeds and pulp with a spoon. Brush the cut side with olive oil and salt and pepper. Roast squash cut side up for 30 minutes or until soft when forked.

In the meantime, microwave the veggie burger patties for a minute or two until thawed. They don't need to be hot. Break up the patties with a fork.
PB282312
Once the squash is done, remove from oven. Mound veggie burger stuffing in the squash cavities. Top with a pat of butter, if desired.

Return stuffed squash to oven and bake for another 10 minutes.
PB282316

I really did like the taste of the masala burgers with the squash. If you wanted to add more texture to the stuffing, you could add toasted nuts or roasted sunflower seeds. If I were using a more traditional flavor of veggie burger, I might also sprinkle some cheese on top, but I think it would have been weird to mix cheese and masala.

One year ago:  Salted Butter Caramel Ice Cream