Wednesday, August 28, 2013

Jim Lahey's No-Knead Bread

A new chapter of my life started recently when I became a homeowner for the first time.  The first picture I saw of the place was of the kitchen, and it basically had me at hello.


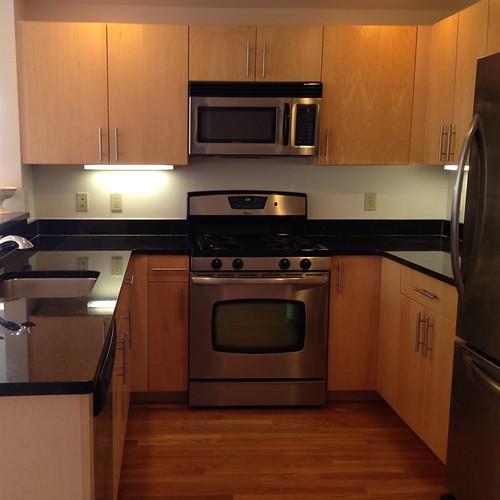
It's not the biggest, nor is it the brightest, but something about it just called out to me in a way that none of the other listings I'd been looking at for the last 2 months did.  It was the first place I physically went to look at, and I made an offer the same day!


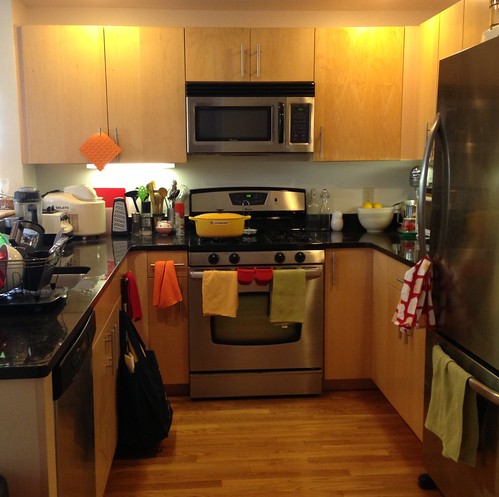
The kitchen was the very first room that I unpacked; can you spot my Vitamix blender, Kitchenaid stand mixer, and Lello gelato maker?  I also acquired my very first piece of Le Creuset!  I picked up the Dutch oven from Bed, Bath, and Beyond for half off (old, discontinued model) on tax-free weekend with a 20% off coupon.  ^_^

I decided the first thing I would make in my new home in the Le Creuset would be Jim Lahey's No-Knead Bread.  After all, what's more homey than homemade bread?

This recipe was printed in The New York Times in 2006 and pretty much revolutionized homemade bread baking.  The recipe calls for a very wet, shaggy dough which you let rise overnight and is baked in a Dutch oven with the lid on for the first half hour.  This allows steam to build up in the Dutch oven which does something to the dough so that you get the most gorgeous, crispy crust after the lid is removed.  My guess is that it has something to do with keeping the exterior of the dough from cooking too much before the inside has had a chance to bake through.  Usually it's almost impossible to get this kind of crust from a home oven, but the use of a super-wet dough and the Dutch oven changed all that.


No-Knead Bread (adapted from The New York Times)
makes 1 small loaf

1 1/2 cups bread flour, more for dusting
1/8 teaspoon instant yeast
1/2 teaspoon salt
3/4 cup water


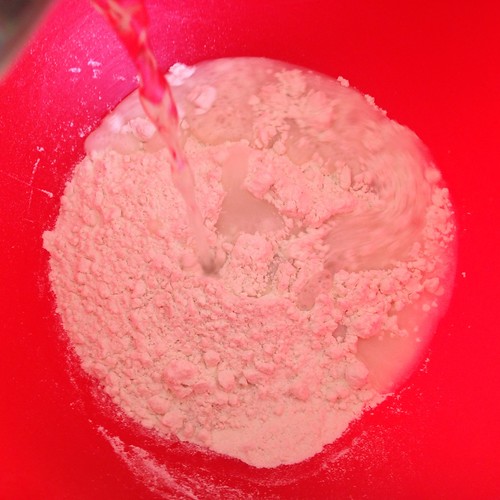
In a large bowl combine flour, yeast and salt. Add water, and stir until blended; dough will be shaggy and sticky. Cover bowl with plastic wrap. Let dough rest at least 12 hours, preferably about 18, at warm room temperature, about 70°F.


Dough is ready when its surface is dotted with bubbles. Lightly flour a work surface and place dough on it; sprinkle it with a little more flour and fold it over on itself once or twice. Cover loosely with plastic wrap and let rest about 15 minutes.


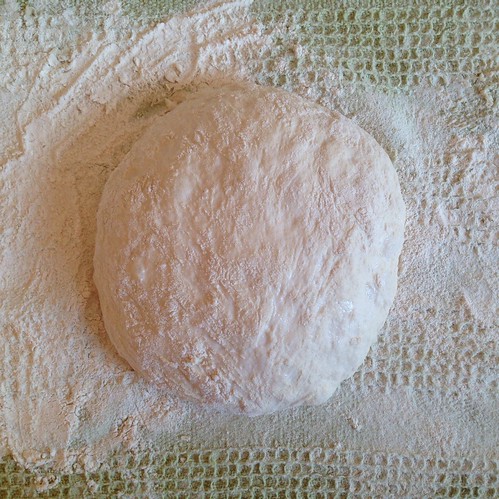
Using just enough flour to keep dough from sticking to work surface or to your fingers, gently and quickly shape dough into a ball. Generously coat a cotton towel (not terry cloth) with flour; put dough seam side down on towel and dust with more flour. Cover with another cotton towel and let rise for about 2 hours. When it is ready, dough will be more than double in size and will not readily spring back when poked with a finger.


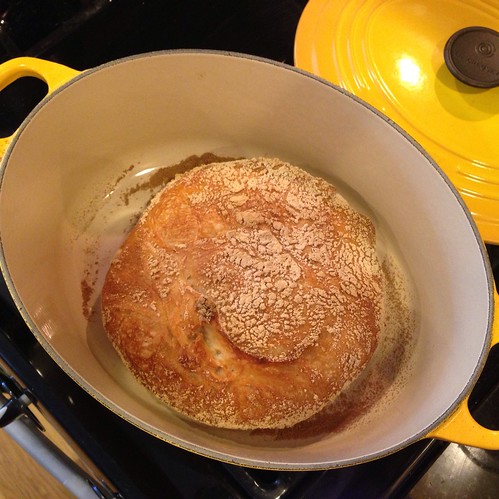
At least a half-hour before dough is ready, heat oven to 450°F. Put a 5-quart heavy covered pot (cast iron, enamel, Pyrex or ceramic) in oven as it heats. When dough is ready, carefully remove pot from oven. Slide your hand under towel and turn dough over into pot, seam side up; it may look like a mess, but that is okay. Shake pan once or twice if dough is unevenly distributed; it will straighten out as it bakes. Cover with lid and bake 30 minutes, then remove lid and bake another 15 to 30 minutes, until loaf is beautifully browned. Cool on a rack.


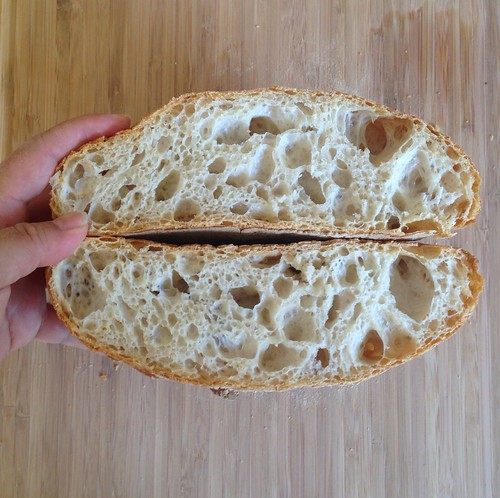
I was quite pleased with the texture of the bread and especially the crust.  I would say this is a good, dependable recipe to use for making crusty, white bread, but I think I'm going to experiment a little bit with making my own starter for some more complexity of flavor....


Next: Brown Butter Vinaigrette Lobster Buns
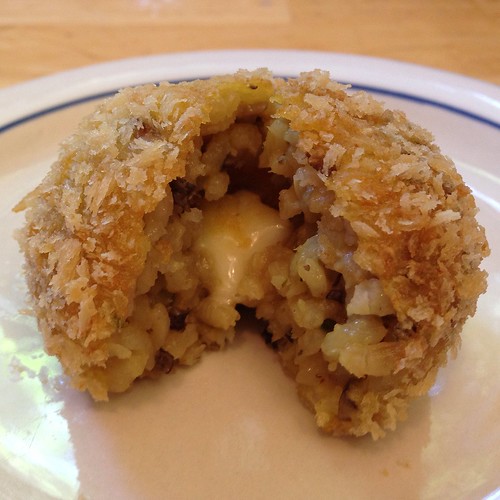
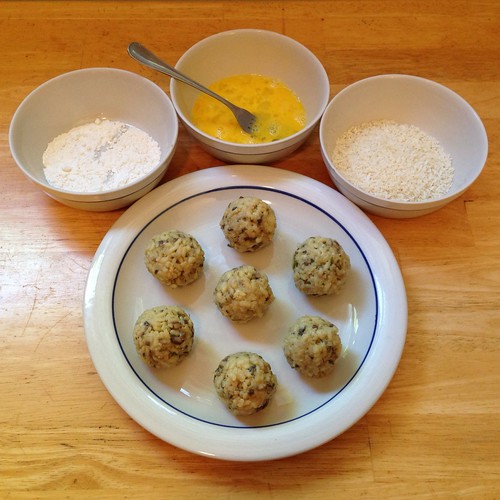
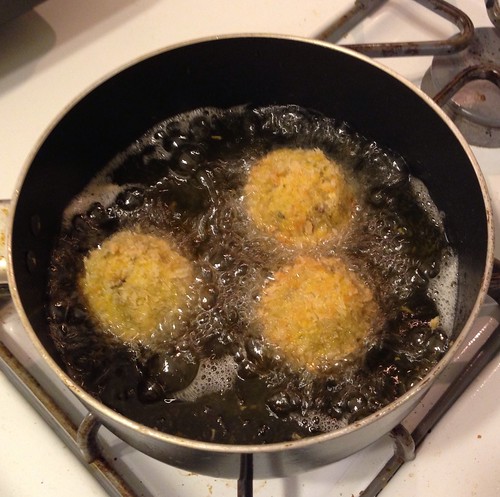
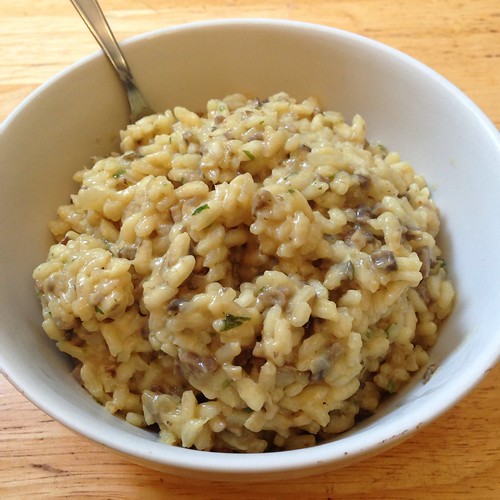
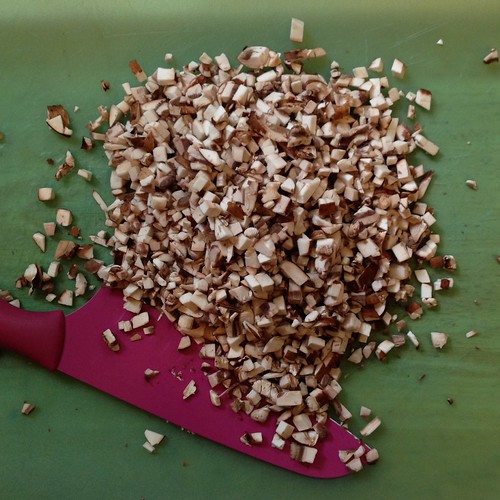
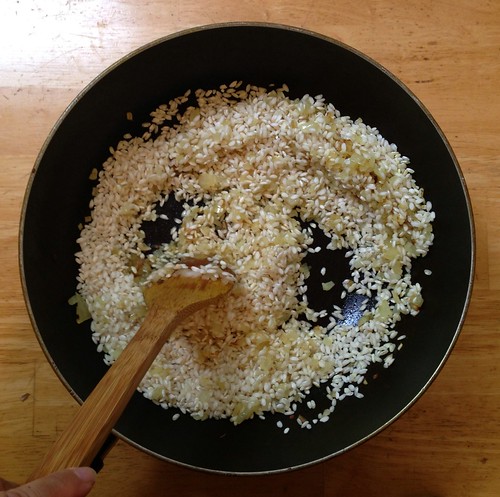
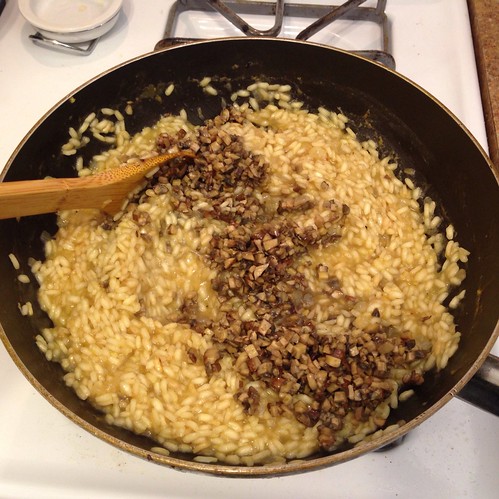
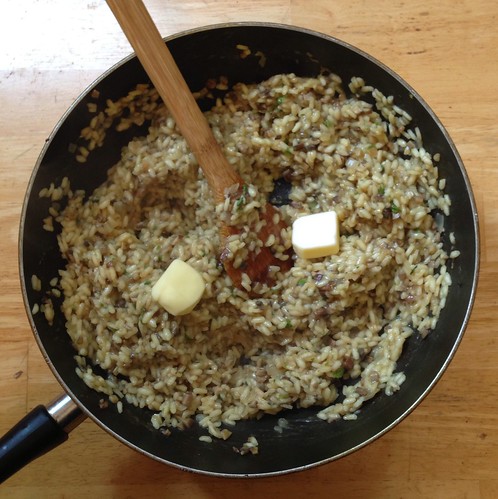
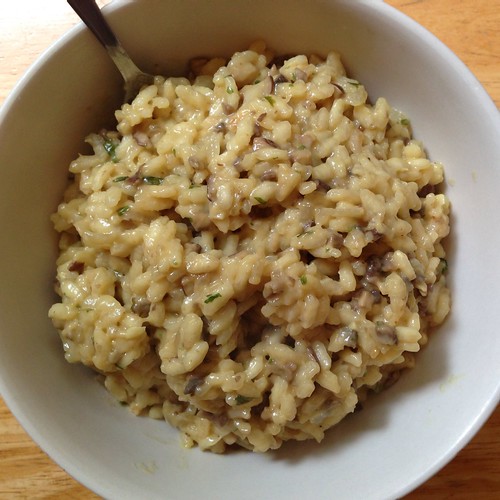
Previously:  Mozzarella Stuffed Arancini (Risotto Balls)

Friday, August 23, 2013

Mozzarella Stuffed Arancini (Risotto Balls)

While I love making risotto, I love eating arancini even more!  So every time I make risotto, I make sure I have enough leftover to make some of these fried risotto balls.  The traditional breading would be breadcrumbs with Italian seasonings, but I make mine with panko flakes for some added crunch.  And if you cut up a stick of mozzarella string cheese and stick them inside the arancini, it gets all warm and gooey after you fry it up and makes for even more of a texture contrast.


Mozzarella Stuffed Arancini
makes 6-7 balls

About 1 1/2 cups leftover risotto
1 stick mozzarella string cheese, cut into 6 pieces
Flour for coating
1 egg, beaten
Panko bread crumbs
Oil for frying

Scoop up about 1/4 cup of risotto into your hand and place a piece of the cheese in the middle.  Mold the risotto up and around the cheese to enclose it.  Pat the risotto into a ball (it will be too sticky to properly roll).  Repeat 5 more times.  Place the risotto balls on a plate a refrigerate for at least half an hour.


Prepare your breading station:  place some flour into a wide bowl, the beaten egg in another wide bowl, and some panko bread crumbs in another wide bowl.  Pour enough oil into a saucepan to reach a depth of 2 inches and start heating on high to 350°F.


Remove the balls from the fridge and one at a time, roll them in the flour to coat, the beaten egg to coat the flour, and the panko bread crumbs to coat the egg.


When the oil has reached 350°F, fry the risotto balls a few minutes on each side until golden brown.  Drain on a rack set over paper towels.  Serve warm.


These are also good at room temperature and great to pack and eat on the run.  You can also add other leftovers to the risotto balls:  cooked peas, chopped up chicken, ham, or sausages, etc. I would refrain from adding anything too wet like tomatoes for fear of making the arancini a soggy mess, though.

Next:  Jim Lahey's No-Knead Bread
Previously:  Crimini Mushroom Risotto

Wednesday, August 21, 2013

Crimini Mushroom Risotto

If I had to pinpoint the one dish that made me love cooking, it'd be risotto. It's not one of those quick, easy recipes that you can throw together in 15 minutes or less. It takes time and almost-constant attention, which you can only give something you love.

You start with arborio rice, a short grain rice, which is chewier and starchier than long grain rice. The rice is sauteed first before any liquids are added, until the edges start to get translucent and the center is still opaque. Then some white wine is added to deglaze the pan and add some depth of flavor. Once the wine has been fully absorbed, hot stock is added a ladleful at a time. In between each addition of stock, you need to stir the risotto and make sure that all the liquid has been absorbed before adding the next ladleful. This is what gives the risotto the velvety, creamy texture.  That, and love.

I love mushroom risotto because it's a great way to showcase the sometimes subtle flavor of mushrooms.  I finally got a shipment of crimini mushrooms in my Boston Organics delivery last week so I was excited to make this dish with them.  It's even better if you have wild mushrooms, though, like morels if you can get your hands on them.


Crimini Mushroom Risotto
makes 4 servings

1/2 lb. crimini mushrooms, finely chopped
1 tablespoon olive oil
6 tablespoons unsalted butter, divided
Kosher salt
1 small onion, chopped
1 garlic clove, minced
1 2/3 cup arborio rice
1/4 cup white wine
1 quart mushroom, vegetable, or chicken stock, hot
1 teaspoon parsley, chopped
1/3-1/2 cup Parmesan reggiano cheese, grated
Truffle salt (optional)


Heat the olive oil and 2 tablespoons of butter in a large saute pan on medium heat.  Add the mushrooms and saute until softened.  Season to taste with salt, transfer to a bowl (along with the juices), and set aside.


In the same pan, melt 2 more tablespoons of butter and add the chopped onions.  Once the onions start to sweat, add the garlic and cook for another minute or two until softened.


Add the arborio rice and stir so that it doesn't stick to the bottom of the pan.  After about 5 minutes, once the rice has started to turn translucent on the edges but is still opaque in the center, add the white wine and stir to deglaze the pan.


Once the wine has been absorbed, add a ladleful of hot stock and keep stirring.  Continue to add the stock a ladleful at a time once the rice has absorbed all the liquid.


When all the stock has been used up, add the mushrooms along with their juices back into the rice and stir.  Cover the rice for 2 minutes to finish cooking.


Remove from heat and stir in the chopped parsley, remaining 2 tablespoons of butter, and cheese.  Finish with truffle salt, if using.  Serve immediately.


Even though the dish gets all creamy, the rice should still have some bite to it and not be all mushy.  If you do happen to have leftovers, make sure you refrigerate them so that you can make arancini (risotto balls) out of them (recipe coming up next)!

Next:  Mozzarella Stuffed Arancini (Risotto Balls)
Previously:  Shakshuka Pizza

Thursday, August 15, 2013

Shakshuka Pizza

I had my first shakshuka when I was in Israel a few years ago at this restaurant I'll never be able to find again. I'd heard of the dish--eggs poached in a spicy tomato sauce--before and was very curious about how it'd taste. I found it to be warming and comforting without being heavy.

It's pretty easy to make at home, but the limiting factor for me is always not having any bread to eat along with it. But then one day I had an extra ball of pizza dough and thought, why don't I just cook the eggs and tomato sauce on top of it? And thus shakshuka pizza was born.


The first time I made it I wasn't sure if the 7 minutes in the oven would be enough to cook the eggs so I made sure the tomato sauce was still hot when I topped the pizza. I guessed wrong, though, and the yolks ended up setting by the time I took the pizza out of the oven. I prefer my yolks still runny while the whites are set so the next time I refrigerated the sauce first and they came out perfect. 


I like to scoop up all the runny yolk and spread it all around the top of the pizza.  It might not be pretty, but it sure is yummy!


Shakshuka Pizza 
makes two 10" pizzas

2 8 oz. balls of pizza dough
3 tablespoons olive oil, divided
1 small onion, chopped
1 garlic clove, minced
1 teaspoon cumin
1 teaspoon chili powder
1 pinch red pepper flakes
1 cup tomato sauce
Salt, to taste
4 eggs
1/2 cup crumbled feta cheese
Parsley, chopped

Place a pizza stone on an oven rack set at the top 1/3 of the oven.  Preheat the oven to 550°F.


In a small saucepan, heat 2 tablespoons of olive oil on medium.  Add the chopped onions and saute until starting to soften.  Add the garlic and continue to cook for another minute or two until the garlic has lost its bite.  Add the cumin, chili powder, and red pepper flakes and cook until the spices are toasty and fragrant.


Add the tomato sauce and simmer for 15 minutes.  Add salt to taste.  If you want your egg yolks to be set, use the sauce while it's still hot.  If you want your egg yolks to be runny, cool the sauce down and chill in the fridge before using.

Stretch the dough onto a parchment paper-lined flexible cutting board.


Spread half a tablespoon of olive oil on top of the dough.  Top with half of the tomato sauce.


Crack two eggs onto the pizza.  Top with half of the feta cheese.


Slide one of the pizzas and parchment paper onto the pizza stone and bake for 5 minutes.

After 5 minutes, turn the oven to broil and broil for 1-2 minutes.  Bake until the eggs are set to your liking and the crust is golden with spots of brown and a few small spots of char. 


Use tongs to slide the pizza with the parchment paper from the pizza stone onto a cutting board.  Top the pizza with the chopped parsley.  Slice and serve!


Next:  Crimini Mushroom Risotto
Previously:  Almond Pesto Pizza

Monday, August 12, 2013

Almond Pesto Pizza

It had been a while since I had made a margherita pizza, and my basil plant was getting a little full so I decided to make some pesto pizza.  I didn't have any pine nuts, though, so I decided to substitute in some slivered almonds which I already had instead.


Don't they kind of look like pine nuts anyways?  I also threw in some baby spinach leaves as suggested by Kenji from Serious Eats to "add some more green without overwhelming the other flavors with excess basil."  Normally I probably would've been afraid that the spinach would add its own unwanted flavor, but after my experience with adding spinach to green smoothies, I've realized how innocuous spinach leaves can be when mixed with other ingredients.


Almond Pesto Pizza
makes two 10" pizzas

2 8 oz. balls of pizza dough
1 cup loosely packed basil leaves
1 cup loosely packed spinach leaves
1 small garlic clove
1-2 tablespoon Parmesan reggiano, grated
2 tablespoons raw slivered almonds
1/3 cup olive oil
Kosher salt, to taste
6 oz. fresh mozzarella, torn into chunks

Place a pizza stone on an oven rack set at the top 1/3 of the oven.  Preheat the oven to 550°F.


Add the basil, spinach, garlic, Parmesan reggiano, and almonds to a food processor.  While processing, stream in the olive oil until a smooth puree is formed.  Season with salt to taste.  Transfer to a small container and allow to settle.


Stretch the dough onto a parchment paper-lined flexible cutting board.


Spoon out some of the olive oil that has settled to the top of the pesto and spread over the pizza dough.


Drop dollops of pesto around the dough.  Top with the torn mozzarella.  Stretch and top the second ball of pizza dough.


Slide one of the pizzas and parchment paper onto the pizza stone and bake for 5 minutes.

After 5 minutes, turn the oven to broil and broil for 1-2 minutes.  Bake until the cheese is completely melted and the crust is golden with spots of brown and a few small spots of char.  


Use tongs to slide the pizza with the parchment paper from the pizza stone onto a cutting board.  Slice and serve!

Next:  Shakshuka Pizza
Previously:  Matcha Green Tea Ice Cream with Matcha Mochi Bits

Wednesday, August 7, 2013

Matcha Green Tea Ice Cream with Matcha Mochi Bits


Since I had some extra matcha powder and glutinous rice flour from making the matcha mochi cupcakes, I decided to try making matcha green tea ice cream with matcha mochi bits.  I was still traumatized by the time I tried to make mochi wrapped ice cream so I decided to just cut up the mochi and swirl it into the ice cream this time.  Of course, I (once again) underestimated the stickiness of fresh cooked mochi and ended up stretching and hacking it into bits instead of properly cutting it.  If there's anything I learned from this process it's that you can never use enough cornstarch!

For the ice cream I adapted the ice cream base from Jeni's Splendid Ice Creams at Home by adding matcha powder.


After making a batch of the matcha green tea ice cream, I noticed that the matcha powder wasn't really dissolving into the ice cream base and was clumping up instead.  I thought it would go away in the churning process but you can still see bits of matcha powder in the picture above.  Compare that with the picture below of the second batch I made.  Can you guess what simple ingredient made the matcha powder dissolve more easily?


Alcohol!  Or in this particular case, vodka.  I think it has something to do with it being more non-polar than water (yay masters degree in chemistry from an Ivy League school!).  By mixing the matcha powder in some vodka first and then mixing it with the rest of the ice cream base you get a nice, smooth result.


Matcha Green Tea Ice Cream with Matcha Mochi Bits
makes about 1 quart

For the matcha mochi bits: (adapted from Come On, Ilene!)
1/2 cup sugar
1 cup water, divided
1/2 cup glutinous rice flour
1 teaspoon matcha powder
Cornstarch

Prepare a baking sheet by covering it with wax paper or a Silpat and coating it generously with cornstarch. 

Dissolve the sugar into 3/4 cup of water in a small saucepan over medium-low heat to make a simple syrup.


In a medium microwaveable mixing bowl, mix the remaining 1/4 cup water with the glutinous rice flour and matcha powder until smooth.

Cover the bowl and microwave on high for 5 minutes.  Remove the bowl from the microwave (be careful, it will be very hot!) and stir again.


Pour in the simple syrup and keep stirring.


At first it will look kind of gross and lumpy but eventually it was all even out and you'll get a nice, thick goo.


Pour the mochi batter onto the prepared baking sheet and sprinkle more cornstarch on top.  Let the mochi cool.  You can put the sheet in the fridge or freezer to hurry this process along.


Once the mochi is firm, distribute the top layer of cornstarch evenly with your fingers to coat any shiny areas. Flip it over on a cutting board and make sure the back side is evenly coated as well.


When the mochi is completely cool, cut into small bits and pieces and continue to coat with extra cornstarch while cutting to avoid letting the pieces stick together.

Freeze the mochi bits until the ice cream is ready to pack.

For the matcha green tea ice cream: (adapted from Jeni's Splendid Ice Creams at Home)
2 cups whole milk
1 tablespoon plus 1 teaspoon cornstarch
1 1/2 ounces (3 tablespoons) cream cheese, softened
1/8 teaspoon fine sea salt
1 tablespoon matcha green tea powder
1 tablespoon vodka
1 1/4 cup heavy cream
2/3 cup sugar
2 tablespoons light corn syrup

Mix about 2 tablespoons of the milk with the cornstarch in a small bowl to make a smooth slurry. Whisk the cream cheese and salt in a medium bowl until smooth.  Fill a large bowl with ice and water.


Mix the matcha powder with the vodka and stir until smooth.

Combine the remaining milk, the cream, sugar, and corn syrup in a 4-quart saucepan, bring to a rolling boil over medium-high heat, and boil for 4 minutes. Remove from the heat, and gradually whisk in the cornstarch slurry.

Bring the mixture back to a boil over medium-high heat and cook, stirring with a heatproof spatula, until slightly thickened, about 1 minute.


Remove from heat and add some of the hot ice cream base to the matcha vodka mixture.  Stir until smooth and then add back to the rest of the ice cream base.


Gradually whisk the hot milk mixture into the cream cheese until smooth. Pour the mixture into a 1-gallon Ziploc freezer bag and submerge the sealed bag in the ice bath. Let stand, adding more ice as necessary, until cold, about 30 minutes.

Pour the ice cream base into the frozen canister and spin until thick and creamy.


Pack the ice cream into a storage container, adding the matcha mochi bits in between layers of ice cream.  Press a sheet of parchment directly against the surface and seal with an airtight lid.  Freeze in the coldest part of your freezer until firm, at least 4 hours.


Just like with mochi-wrapped ice cream, the mochi bits stay nice and pillowy soft even after frozen.  It makes an interesting contrast to the usual hard and crunchy mix-ins for ice creams.  And the amount of vodka used to dissolve the matcha powder was so minimal I can't even taste it in the ice cream.

Next:  Almond Pesto Pizza
Previously:  Matcha Mochi Cupcakes