Thursday, October 30, 2014

Mochi Donuts and Pon de Rings

https://www.flickr.com/photos/joyosity/15644391585/

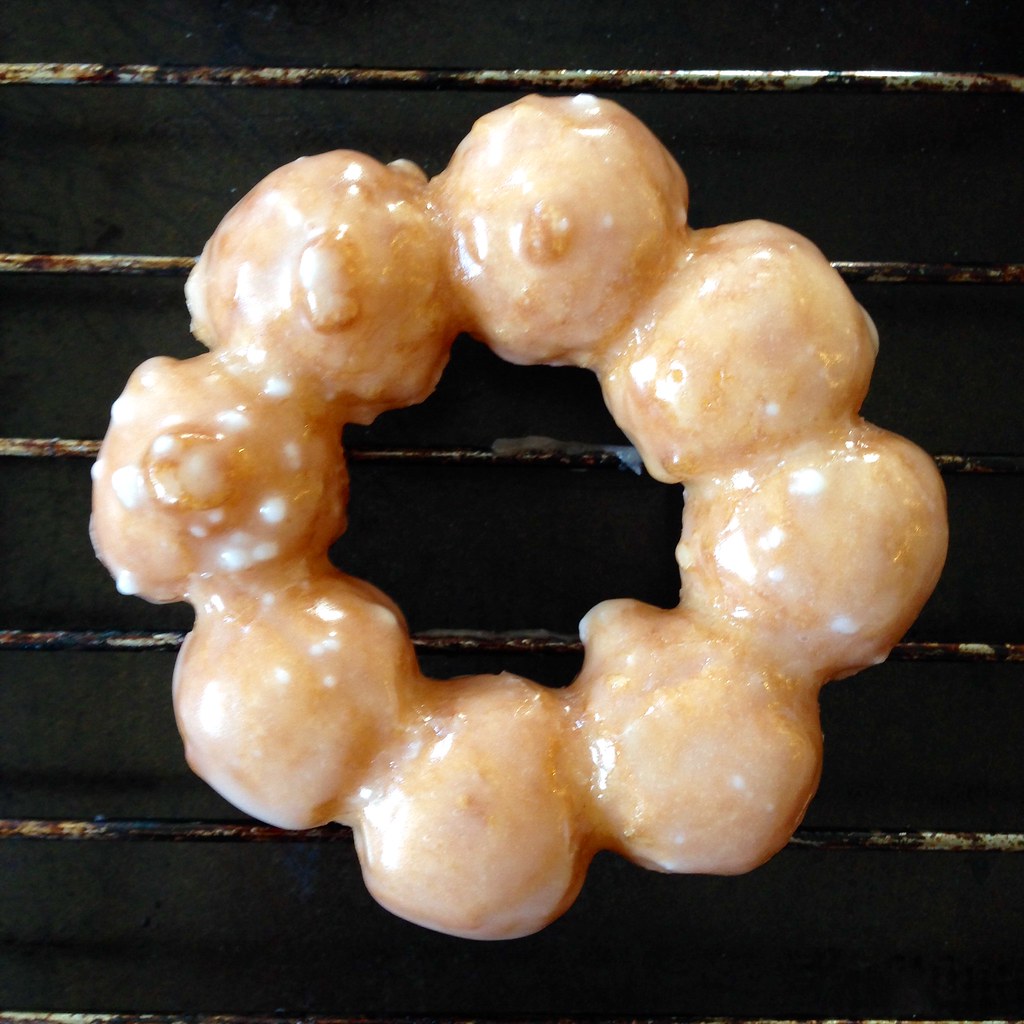
Move aside cronut, the next hybrid donut is here, and it's the mochi donut!  After I first saw Lady and Pups' post on mochi donuts, I couldn't stop dreaming about making them. What's not to love about a chewy ring of mochi deep fried and sugar glazed?  Then I read one of the comments that mentioned rolling the donut holes into balls and forming a ring out of them to make pon de rings!

https://www.flickr.com/photos/joyosity/15024217323/

If you've ever been to Taiwan (or Japan, Korea, and probably other parts of Asia) I'm sure you've seen the ubiquitous Mister Donuts and their almost-too-cute-to-eat pon de rings.  They're made out of a chewier dough than their regular donuts and shaped like their mascot Pon de Lion's mane.

https://www.flickr.com/photos/joyosity/15458253448/

Instead of rolling the donut holes into the balls, I took the scraps left over from cutting out the regular donut shapes and rolled them into a long snake.  Then I just cut off inch-long pieces and rolled them much like I do when making tang yuan.  I found that the balls stuck together pretty well, but for extra insurance, I lightly wet them at the point that they touched each other to make sure they wouldn't fall apart when frying.  I also used the pro-tip in the comments and assembled them on a square of parchment paper.  You can place the whole thing, pon de ring and paper, into the oil and remove the paper once it's loose.  So genius!

https://www.flickr.com/photos/joyosity/15023630324/

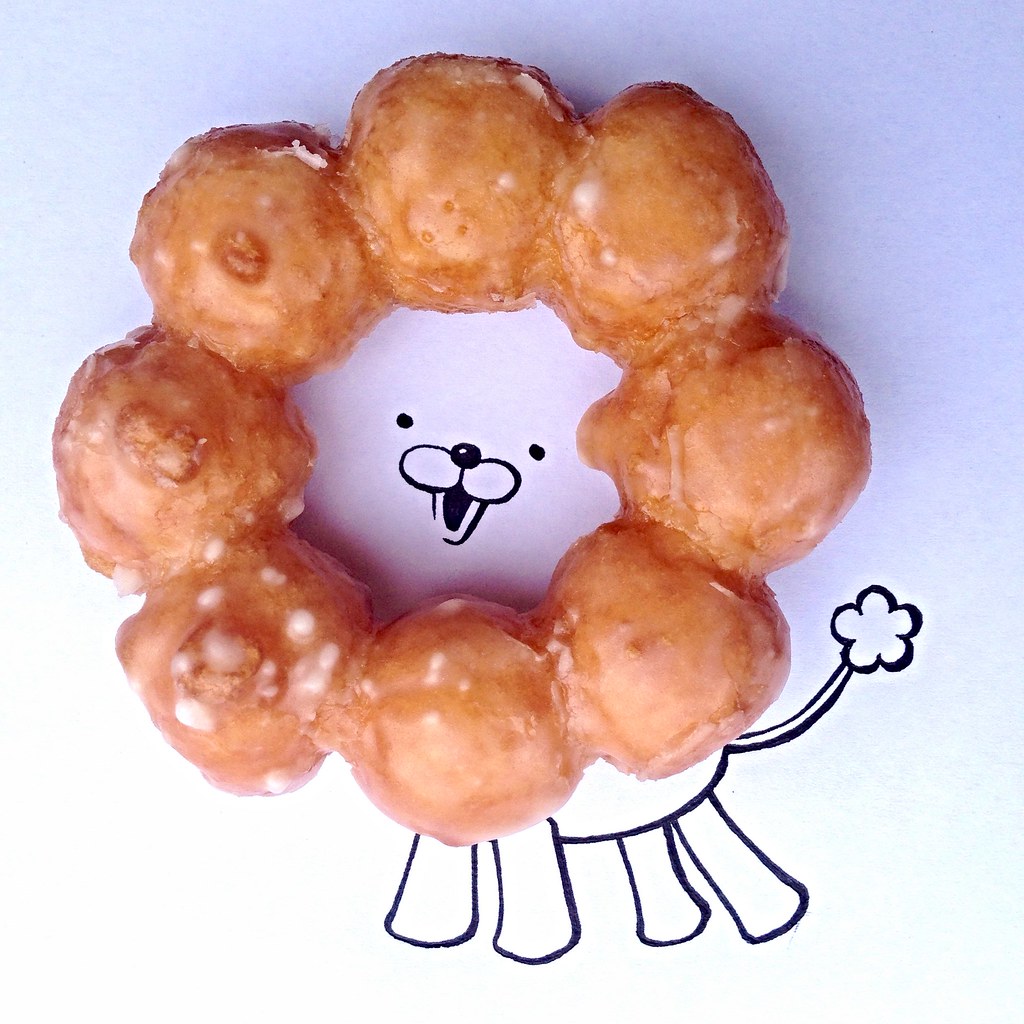
I think this may be one of the cutest things I've ever made.  It also helps to have a super talented friend named NoNo draw Pon de Lion for you so you can take a picture of the cutest donut lion ever.  ^_^  (I won't mention our other friend who couldn't be bothered to get up from the couch to see it herself and just waited for us to post the pictures to Instagram.  Although to redeem herself, she did comment that these tasted as good as they looked.)

https://www.flickr.com/photos/joyosity/15642053911/

Mochi Donuts and Pon de Rings (adapted from Lady and Pups)
makes about 10-14 donuts and/or pon de rings

For the starter dough:
1/4 cup glutinous rice flour
3 tablespoons whole milk

For the donut:
1 3/4 cup glutinous rice flour
1/2 cup whole milk
2 1/2 tablespoons unsalted butter, melted
1/4 cup granulated sugar
1 large egg
1 teaspoon baking powder
Vegetable oil

For the sugar glaze:   
2 1/2 tablespoons unsalted butter, melted
1 cup powdered sugar
1/2 teaspoon vanilla extract
2-3 tablespoons of hot water

https://www.flickr.com/photos/joyosity/15644385185/

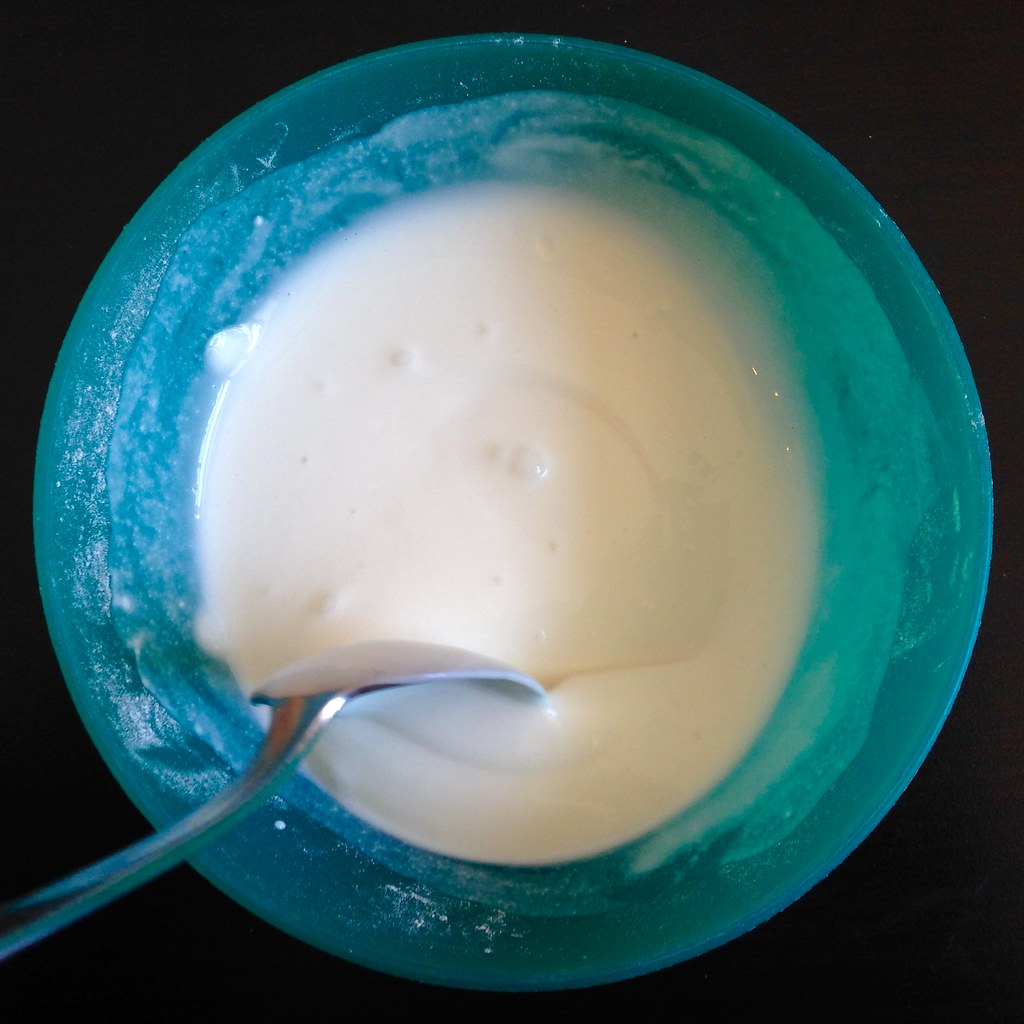
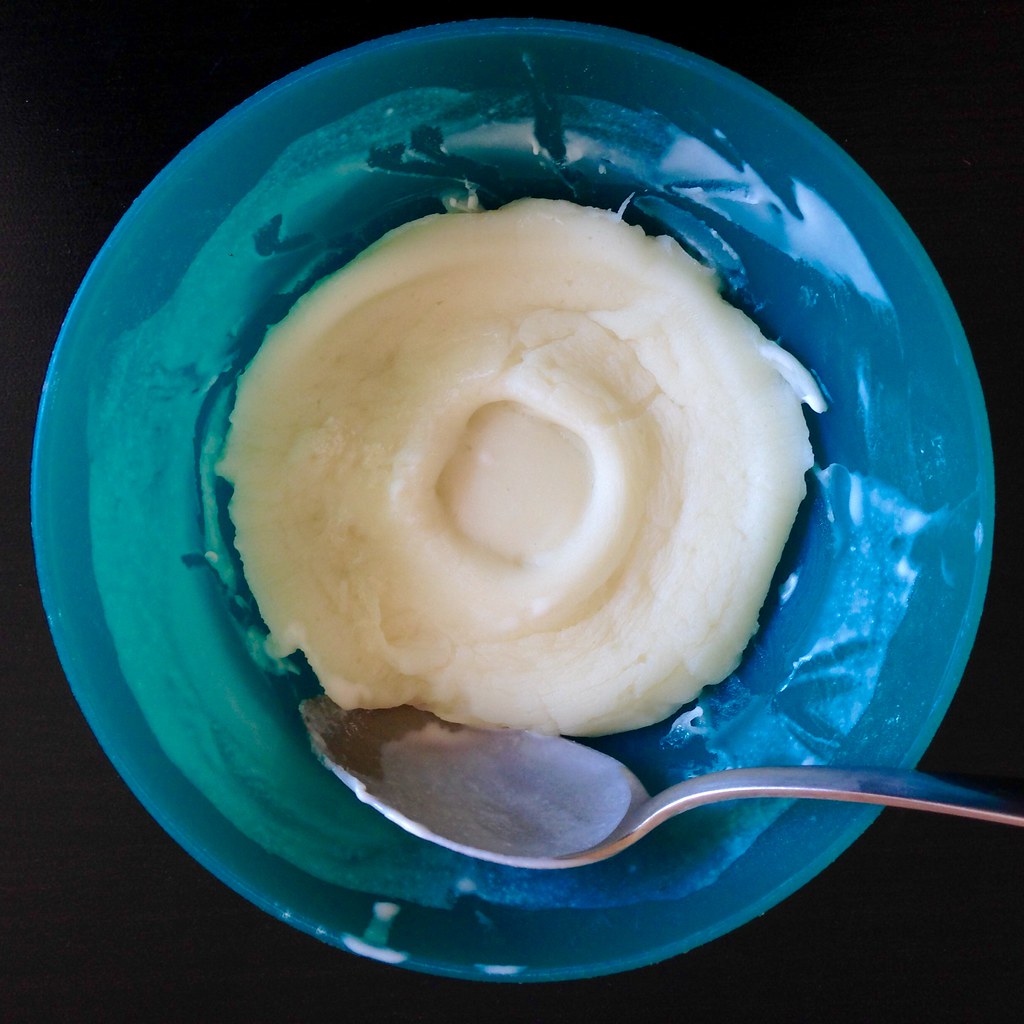
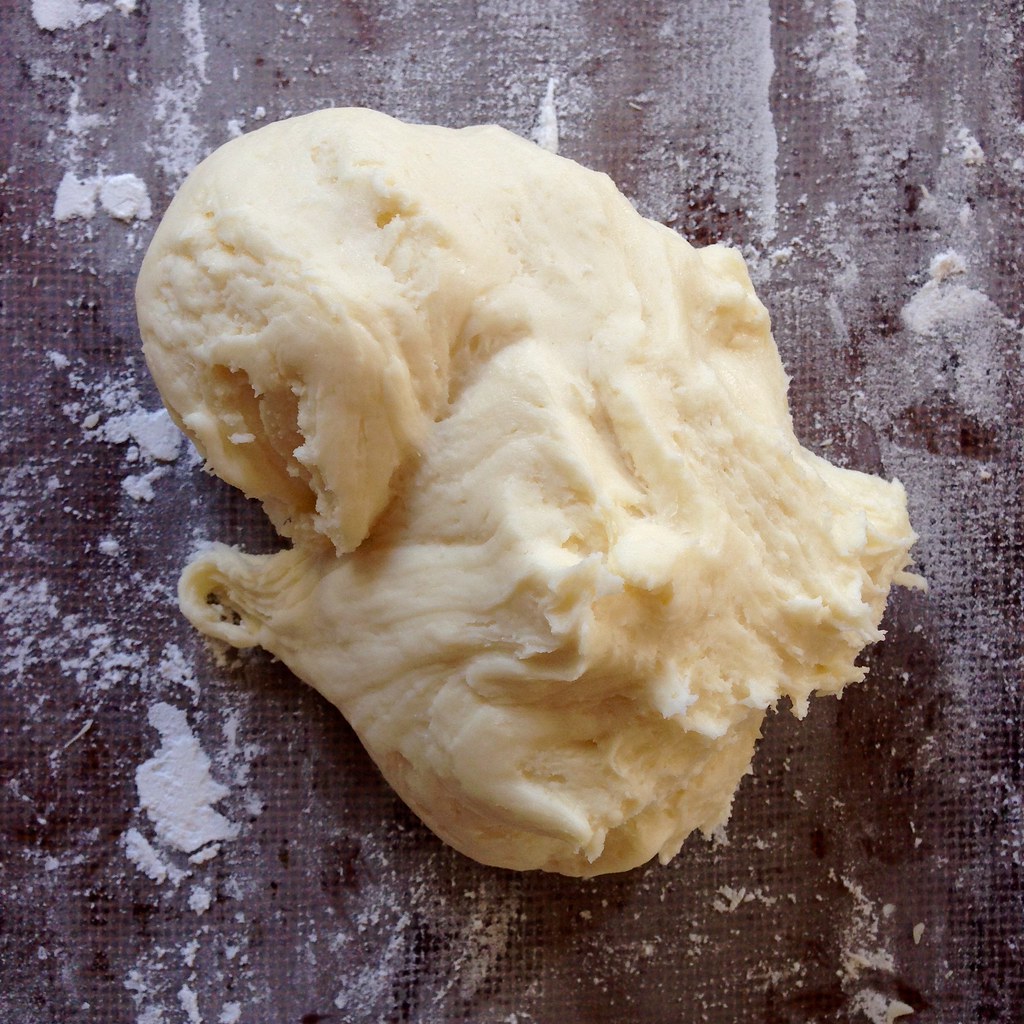
Mix 1/4 cup of the glutinous rice flour and 3 tablespoons of whole milk together in a microwave-proof bowl.  Microwave on high for 30 seconds and check to see if the dough is cooked through, which will look opaque and feel very “bouncy”.  Set aside to cool for 5 min.

https://www.flickr.com/photos/joyosity/15458391787/

Meanwhile, add 1 3/4 cup of glutinous rice flour, 1/2 cup of milk, melted butter, granulated sugar, egg, and baking powder in a stand-mixer bowl with dough-hook.  Add the cooled starter-dough and knead the mixture on low until everything comes roughly together, then increase the speed to medium and knead until the starter dough has completely blended into the mixture.

https://www.flickr.com/photos/joyosity/15645209162/

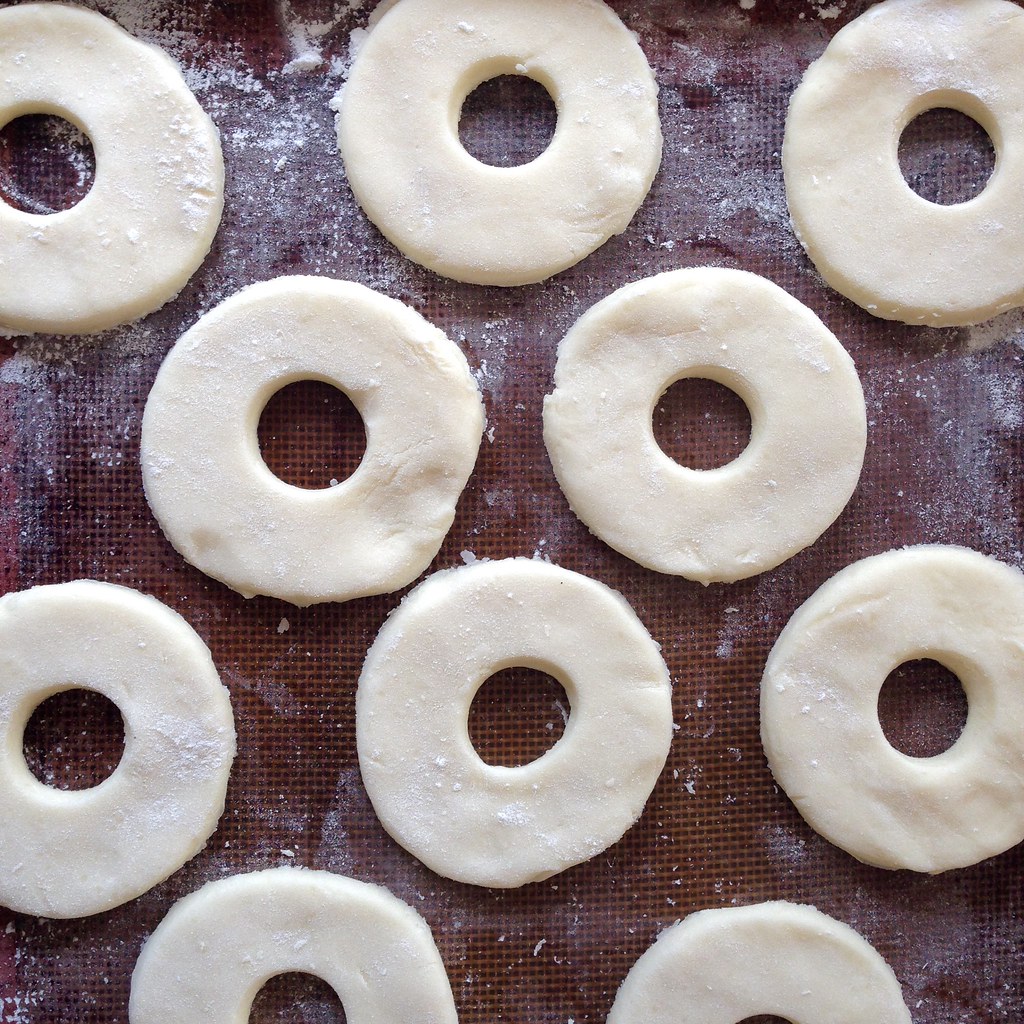
Scrape the dough onto a surface that’s dusted more glutinous rice flour.  Sprinkle just enough glutinous rice flour onto the dough to prevent sticking, then roll it to 1/2″ thick.  With a well-floured cutter, cut as many donuts out as you can (I was able to get ten 3-inch donuts using a mason jar lid ring and a water bottle cap).

https://www.flickr.com/photos/joyosity/15458391787/

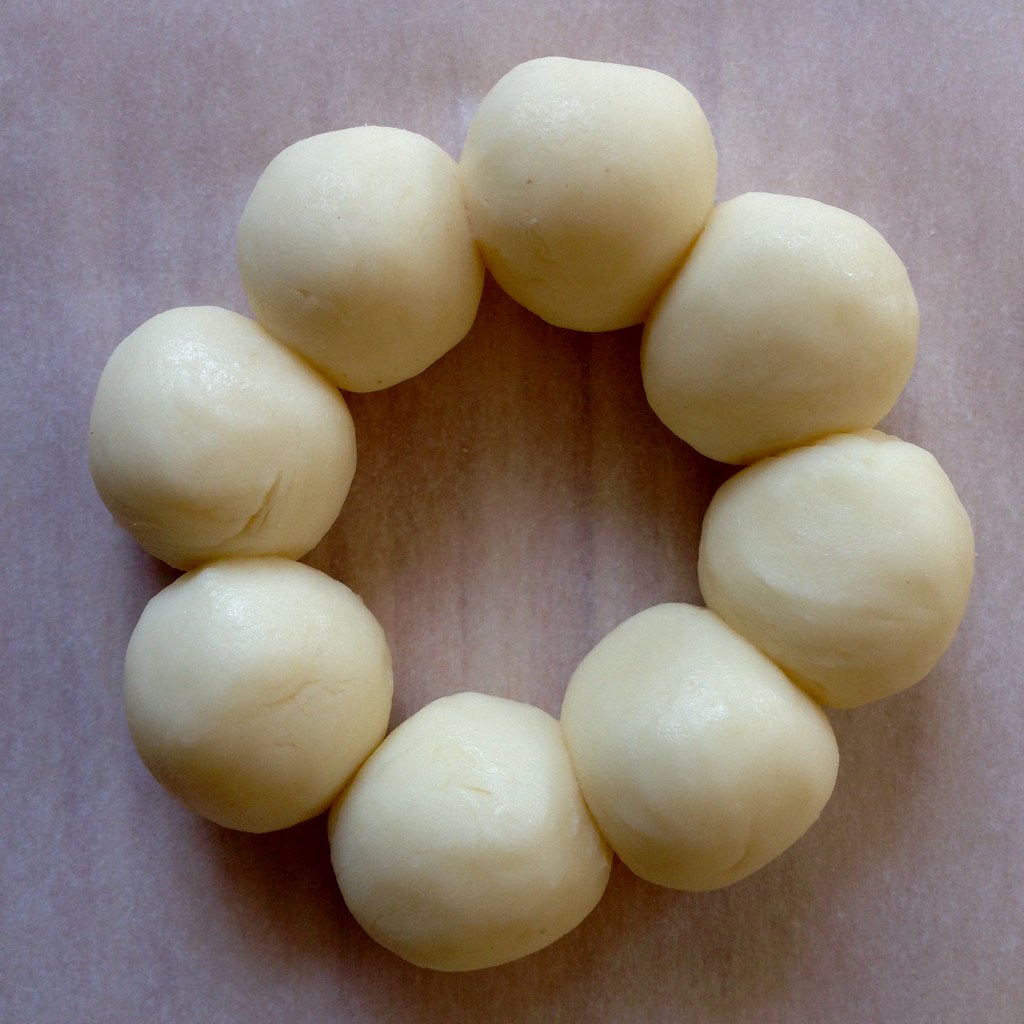
To make the pon de rings, gather the scraps, mash them together, and roll into a long snake, about 3/4" thick.  Cut the snake into 1" pieces and roll all the pieces into balls.  On pieces of square parchment paper, arrange 8 of the balls together to form a ring.  Using your finger, dab a bit of water over where each of the balls touch their neighbor.  Allow to rest while you heat up the oil.

Add enough vegetable oil to a pot to reach 1 1/2″ deep and set on medium-high heat to bring the oil to 330ºF, then turn the heat down to medium-low.  If you don’t have a thermometer, just insert a wooden chopstick into the oil; if small bubbles form around the chopstick quickly, the oil is ready.

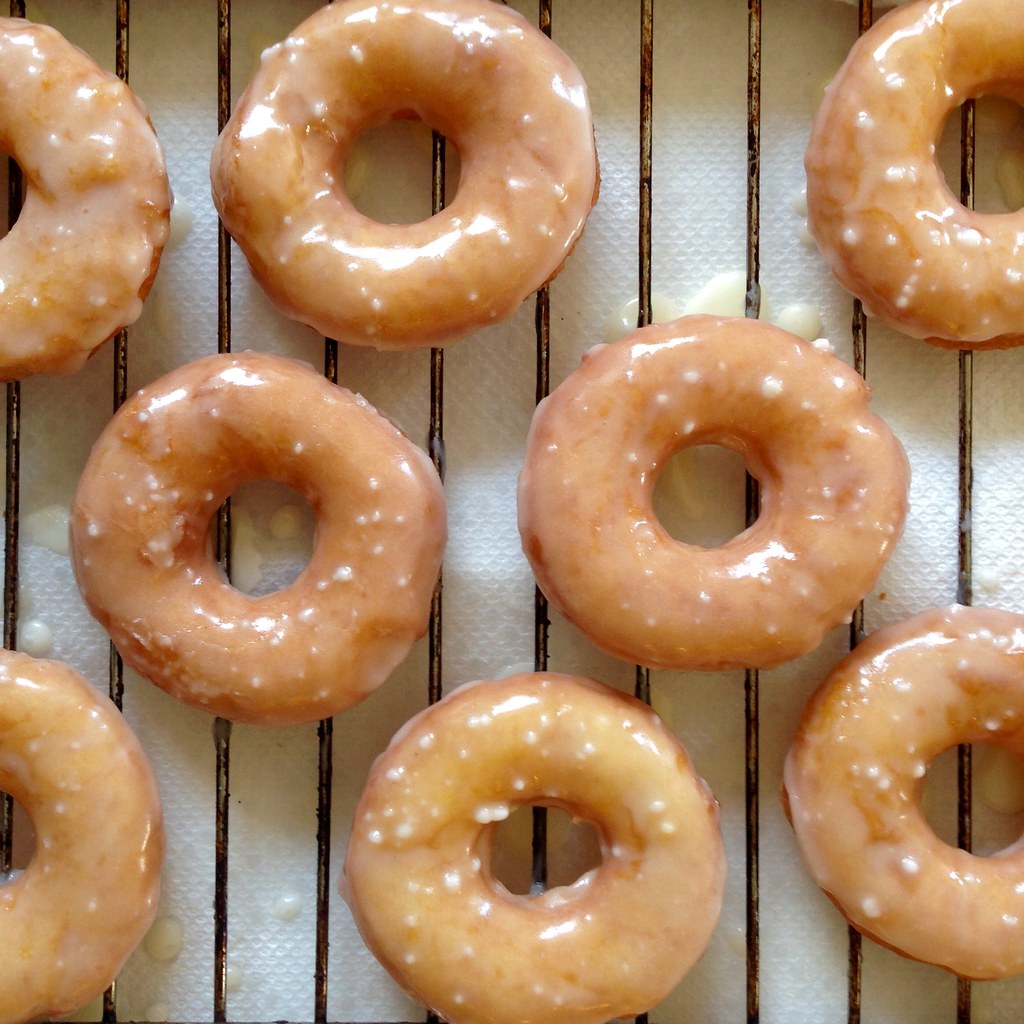
To fry the donuts, carefully lower a few donuts into the oil; they will sink to the bottom for the first 20 seconds then float back up.  Fry for a few minutes on each side until the donuts are puffed up and golden brown.  Transfer to a cooling rack set over a tray lined with paper towels to drain.

https://www.flickr.com/photos/joyosity/15620657536/

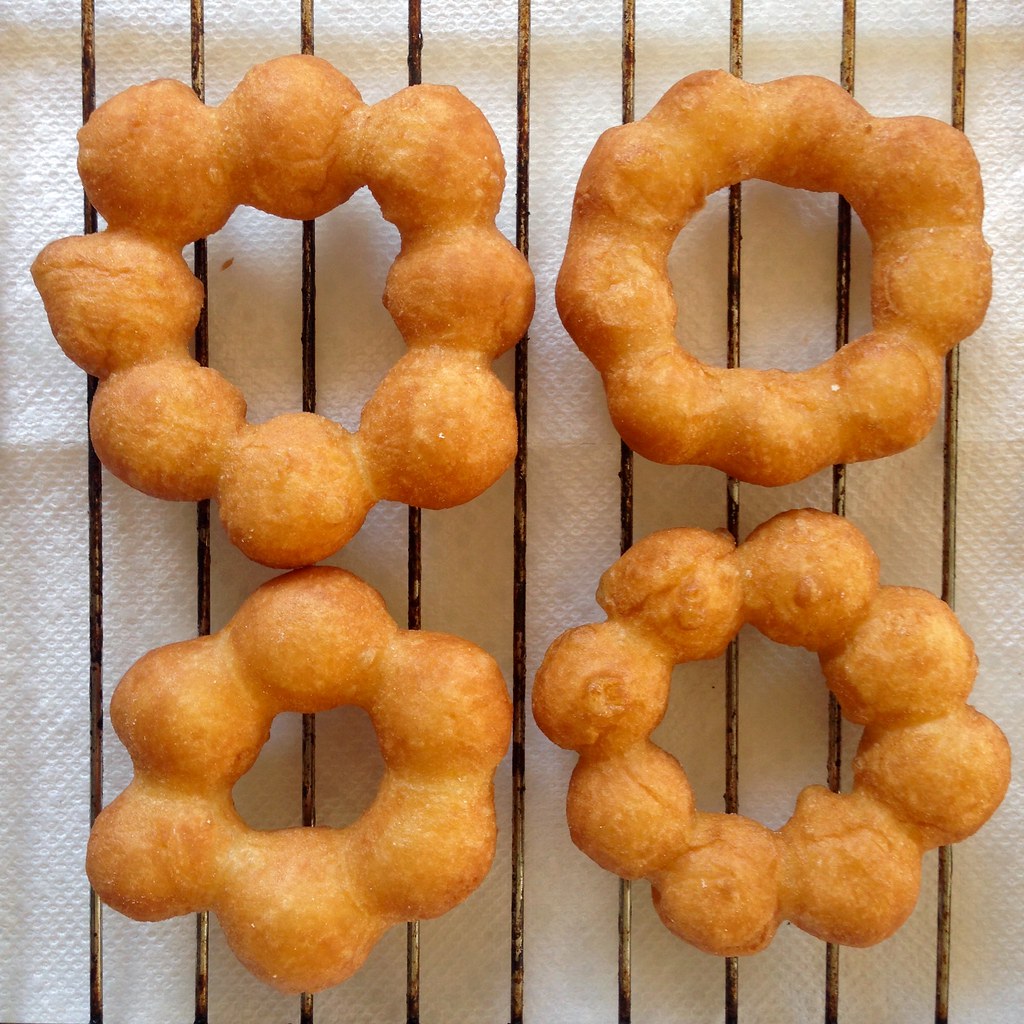
To fry the pon de rings, lower the rings along with the parchment paper into the hot oil.  After 20-30 seconds, you should be able to separate the paper from the ring.  Remove the paper with tongs and discard.  Once the rings are golden brown on both sides, transfer to the cooling rack to drain.

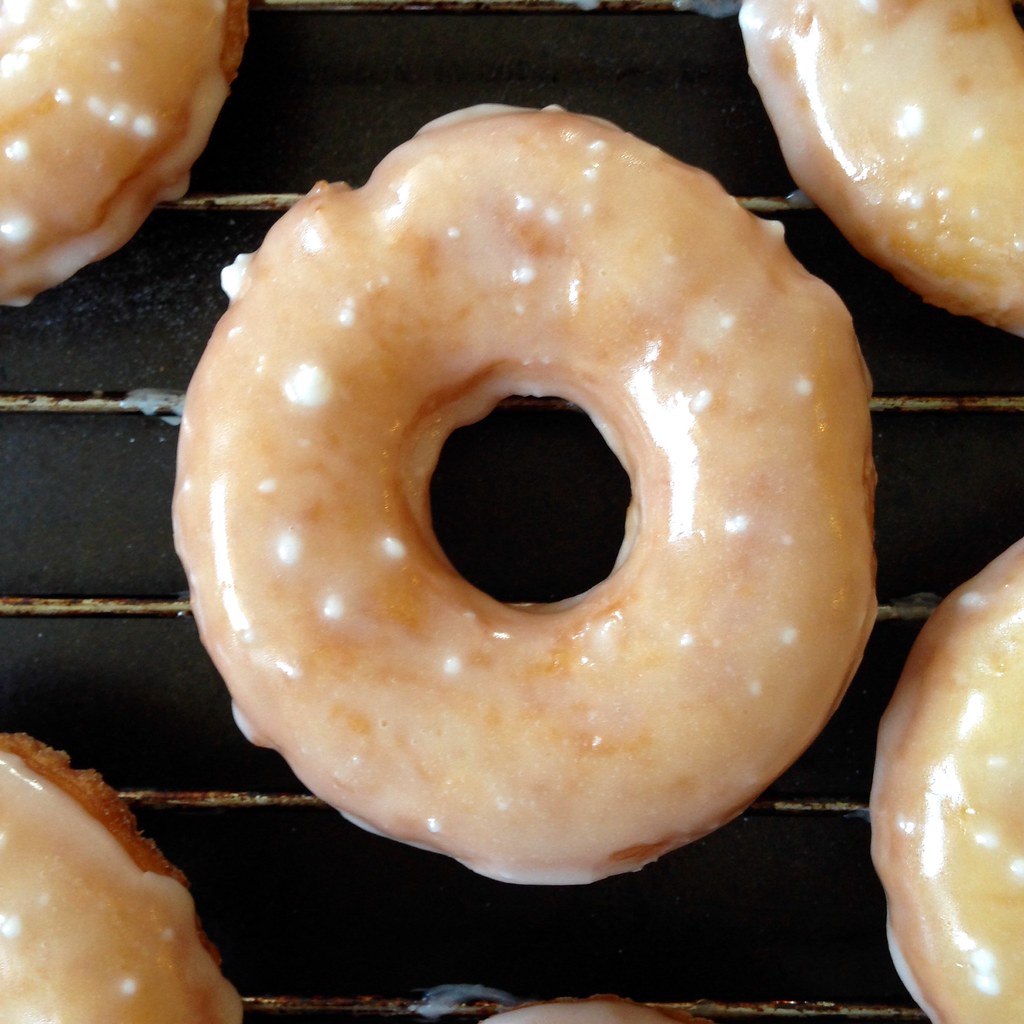
Mix 2 1/2 tablespoons of melted unsalted butter with powdered sugar and vanilla extract, then add 2-3 tablespoons of hot water to bring it to a desired glaze-consistency.  Dip one side of the donuts into the glaze and serve within a few hours.  (I didn't mix my glaze well enough so there were still quite a few sugar lumps in it when I dipped the donuts; I like to think of them as accidental pearl sugar decorations ;)

https://www.flickr.com/photos/joyosity/15645206102/

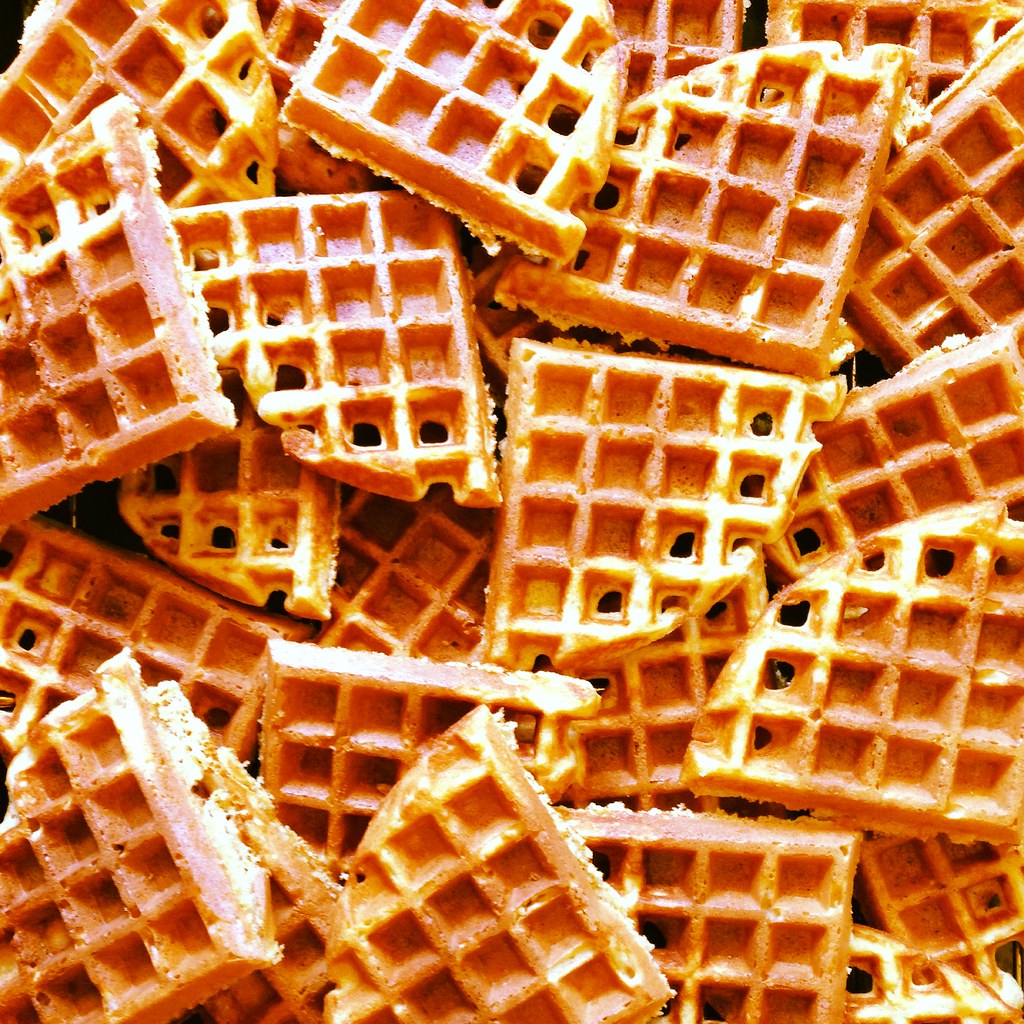
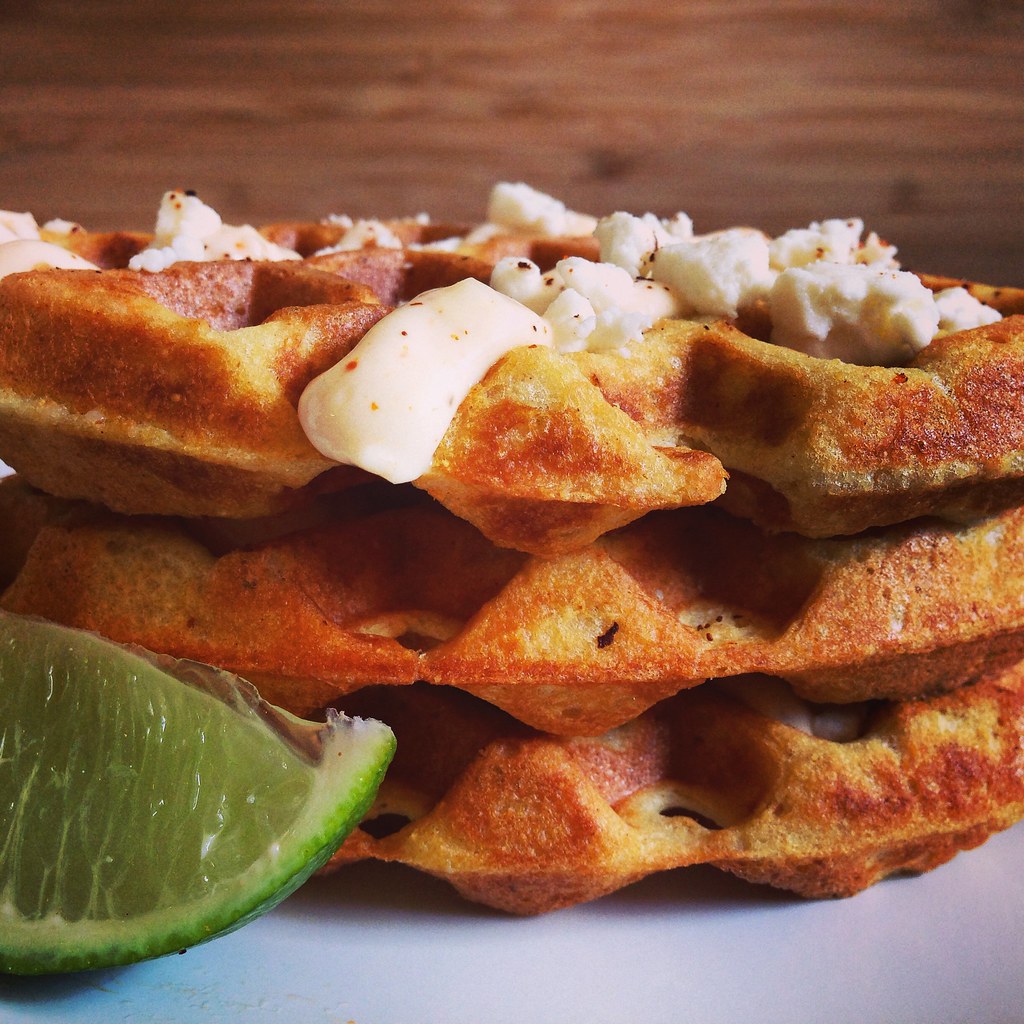
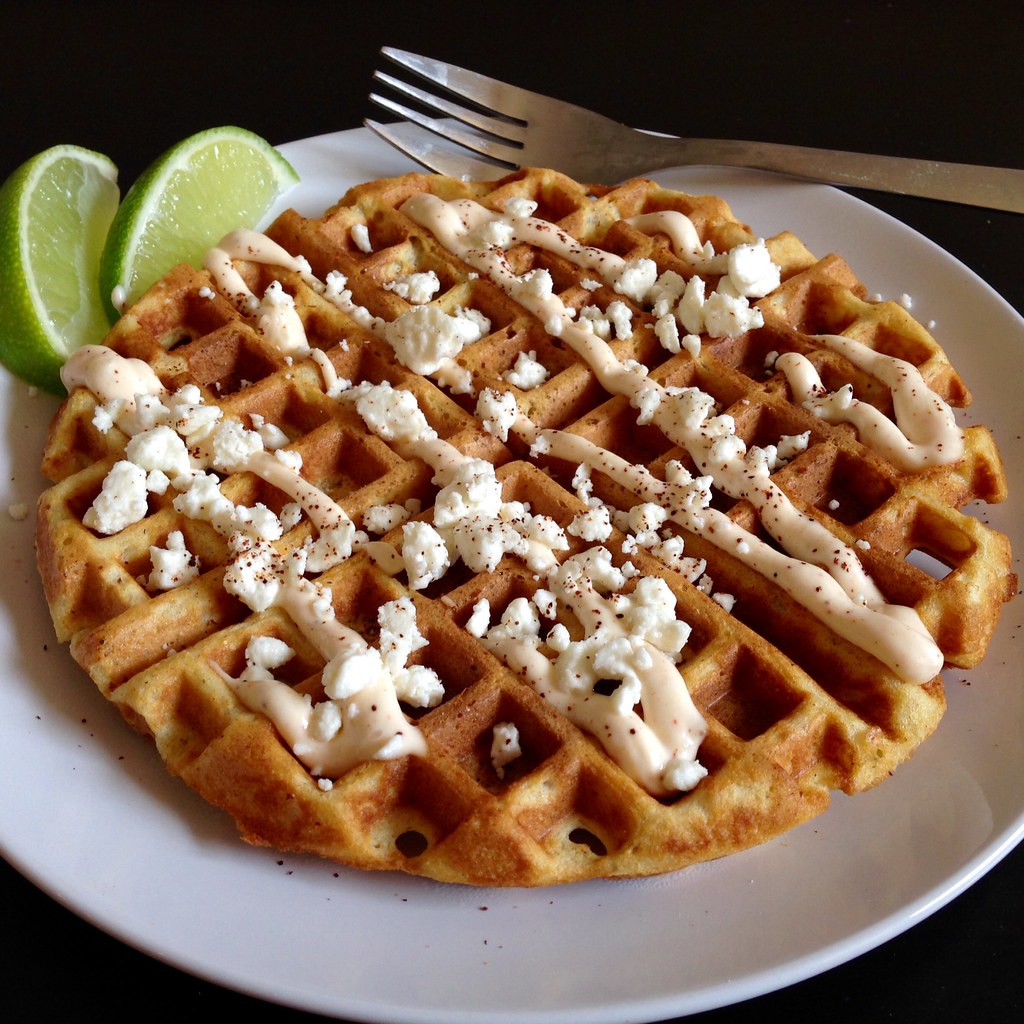
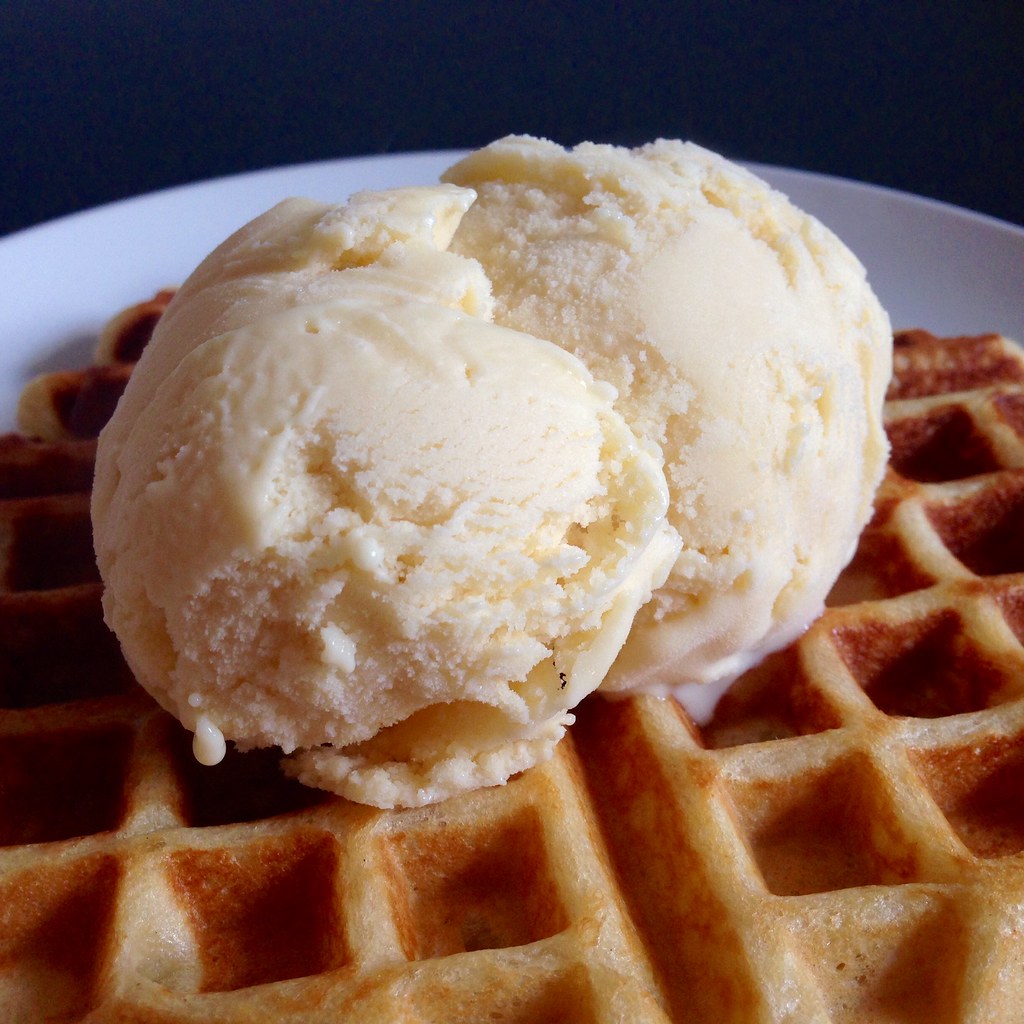
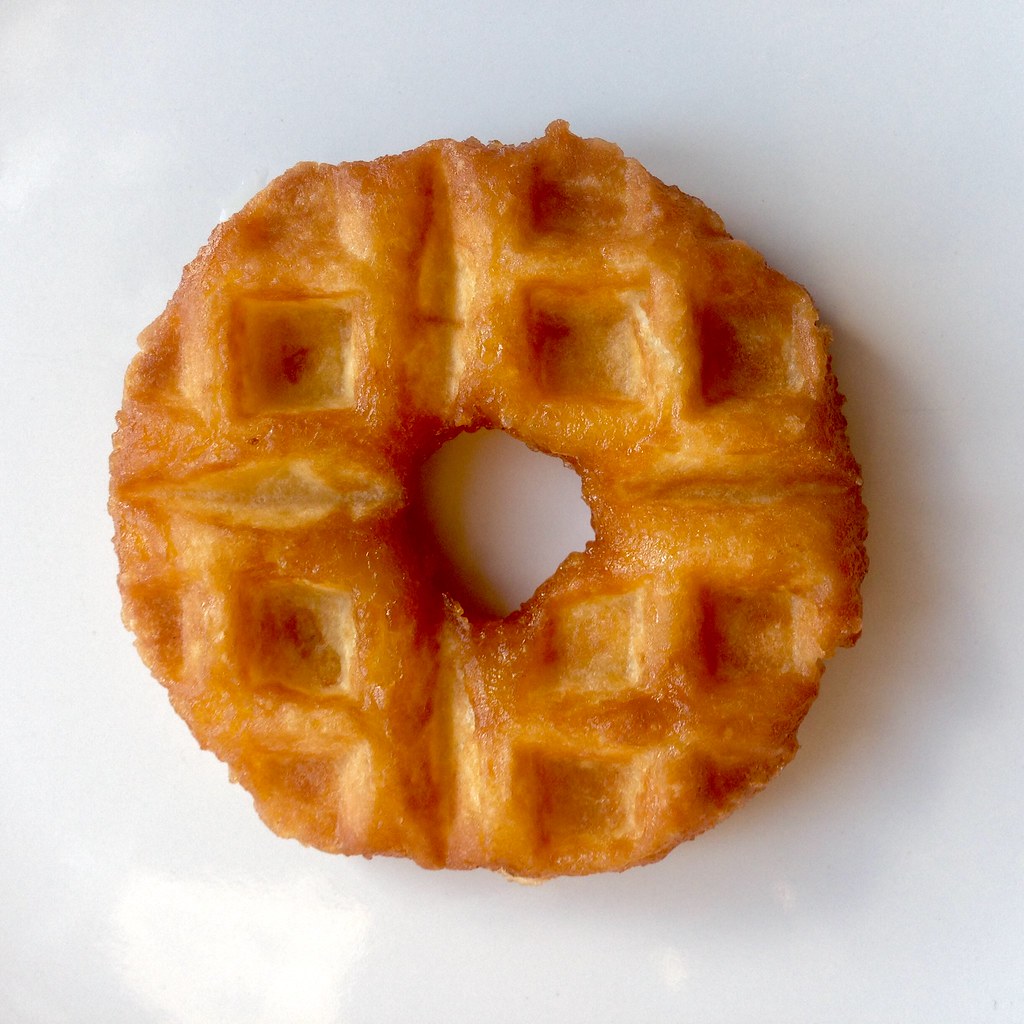
If you end up with leftovers, you should heat them up before eating so the soft, chewy texture is restored.  Ten seconds in the microwave works, but my preferred way of reheating a mochi donut is to use a waffle iron.  This way you get the chewiness but also a crispier crust.  It's like a moffle, only better!

https://www.flickr.com/photos/joyosity/15641711491/

Next:  Raindrop Cake
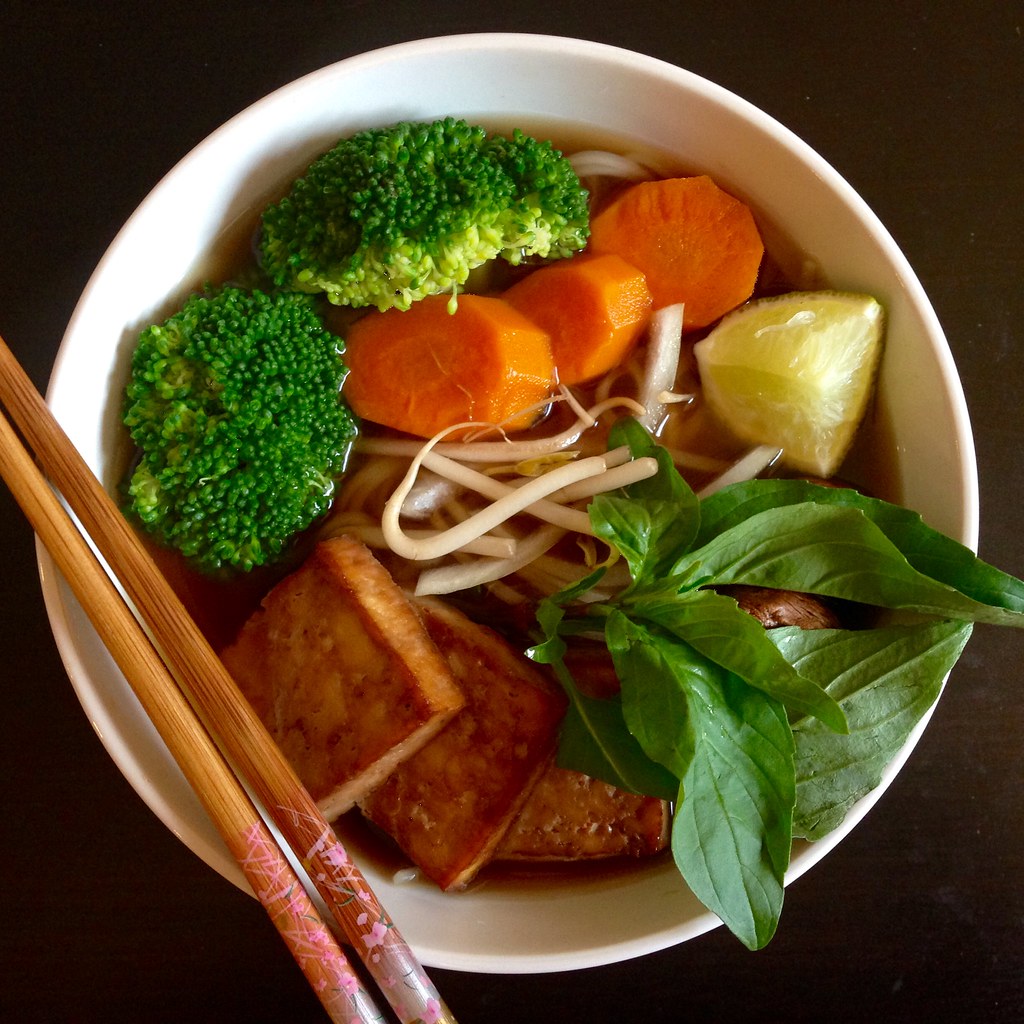
Previously:  Faux Phở
Last Year:  Kaddo (Afghan Pumpkin with Tomato and Yogurt Sauces)
Two Years Ago:  The Famouse Butter Tomato Sauce

Monday, October 27, 2014

Faux Phở

https://www.flickr.com/photos/joyosity/15619751892/

I'm ashamed to admit that I didn't have my first phở until maybe 3 or 4 years ago.  Every time I went to a Vietnamese restaurant before that fateful day, I'd always ordered the bún with fried spring rolls and roast pork because, let's face it, fried spring rolls are delicious.  But then one day I was with some friends who were determined to go to Turtle Tower for what was supposed to be the best chicken phở in San Francisco, so I figured I might as well try what they were famous for.  Suffice it to say, I realized I how much I had been missing out.

https://www.flickr.com/photos/joyosity/15430722368/

Since then, I've discovered that I prefer beef-based phở, especially with veggie and tofu toppings.  To try to recreate phở at home, I mostly followed this recipe from The Kitchn for a vegetarian phở but used beef broth and fish sauce instead of the vegetable broth and soy sauce.  I guess you could call it a faux phở (and in case you were wondering, phở is pronounced as if you were saying the first part of a very bad word).  The result is pretty close to what I'm used to, but definitely no where close to what you'd get from making your own broth from beef bones.  I also noticed the distinct lack of MSG, which I would've added if I had any.

https://www.flickr.com/photos/joyosity/14996075854/

One of the first things you do in this recipe is char an onion and ginger over an open flame.  If you don't have a gas stove, you can also get the same type of result under a broiler.  Don't be afraid of getting them a bit burnt; that's the point.  You'll end up peeling off the burnt parts, anyways, revealing the softened, aromatic insides before adding it to the broth.  For the protein, I pressed, marinated, and baked some firm tofu similar to how I made the baked tofu for the soba noodle salad, but this time, I only baked it on each side for 10 minutes so that it was a bit softer.

https://www.flickr.com/photos/joyosity/15617669402/

Faux Ph (adapted from The Kitchn)
serves 2-3

Broth:
1 large onion
2-inch piece of fresh ginger
3-inch cinnamon stick
1 star anise
2 cloves
1 teaspoon coriander seeds
6 cups beef broth (you could also use vegetable or chicken broth)
2 carrots, peeled and coarsely chopped
2 celery stalks, coarsely chopped
2 tablespoons fish sauce or soy sauce
2 tablespoons rock sugar or granulated sugar
Salt, to taste

Noodles:
1/2 lb. dried flat rice noodles

Toppings:
Fried or baked tofu
Mushrooms
Vegetables such as baby bok choy or broccoli crowns, steamed or blanched

Garnishes:
1/2 onion, very thinly sliced
1 lime, cut into wedges
1/2 cup bean sprouts
1 chile pepper (Thai bird, serrano, or jalapeno), sliced
2 scallions, thinly sliced
Large handful of herbs:  cilantro, Thai basil, saw-leaf herb
Sriracha and/or hoisin sauce

Char the onion and ginger over an open flame or directly under a broiler until slightly blackened.  Allow to cool.

In a large pot, dry roast the cinnamon, star anise, cloves, and coriander over medium-low heat, stirring to prevent burning.  When the spices are aromatic, add the water or broth, carrots, celery, fish sauce, and rock sugar.

When the onion and ginger are cool enough to handle, peel both, slice in half, and add to the broth.  Bring the broth to a boil, reduce the heat, and simmer for 30 minutes.  Strain and keep hot until ready to serve, reserving the carrot slices for topping the noodles, if you like.

While the broth is simmering, place the noodles in a large bowl and cover with very hot water.  Let stand for 20-30 minutes or until tender but still chewy.  Drain.  (If soaking does not soften the noodles enough, blanch them in a pot of boiling water for a few seconds).

Divide noodles among the serving bowls.  Taste the broth and add salt, if necessary.  You want the broth to be almost too salty, since the noodles and toppings haven't been cooked with any salt.  Pour the broth into each bowl.  Add the toppings and serve with the garnishes on the side.

https://www.flickr.com/photos/joyosity/14996676183/

Next:  Mochi Donuts and Pon de Rings
Previously:  Nigel Slater's Chocolate Beet Cake

Two Years Ago:  Miso Marinated Black Cod

Thursday, October 23, 2014

Nigel Slater's Chocolate Beet Cake

https://www.flickr.com/photos/joyosity/15604589962/

Everyone once in a while I'll look at my Boston Organics no-list and decide to update it so I can try something new.  That happened last week with beets.  I ended up getting 4 beets and no idea what to do with them after I remembered I don't particularly like beets, which is why they were on the no-list to begin with.  Sigh.  When my friend, Evelyn, suggested that I make red velvet cake I looked up a couple of recipes but didn't feel like making a cream cheese frosting to go along with it.  Then I found Nigel Slater's genius recipe for an extremely moist Chocolate Beet Cake on Food52.  I was sold.

https://www.flickr.com/photos/joyosity/15589730351/

The directions are a little fussy (boiling the beets whole and then peeling after they're cooked, not stirring the chocolate while it's melting, etc.) but I pretty much followed them to a T except I did add the sugar gradually into the egg whites while they were being beaten instead of folding it in afterwards.  Since folding something into egg whites is already such a precarious operation and beating sugar into egg whites helps to stabilize the whites, I figured it was a win-win situation.  I also decided I didn't want to risk dyeing my food processor bright pink and just grated the cooked beets into a coarse purée using a box grater, which David Lebovitz suggested in his post about this same recipe.  While this recipe isn't the quickest or simplest, I agree with David when he says that it tastes better the second day (or even the third, if it lasts that long), so you can totally make this the day before you need it if you're in a time crunch.

https://www.flickr.com/photos/joyosity/15405774579/

Two words of caution:  make sure you do not overmix the batter and make sure you don't overbake.  Overmixing will cause you to lose the precious air pockets you created when whipping the egg whites.  This is what keeps the cake from being a dense brick.  Also, if you overbake the cake, you'll lose all the delicious moistness from the beets. 

https://www.flickr.com/photos/joyosity/15406392827/

Since I didn't have any crème fraîche (who does?!) I topped my cake with Greek yogurt instead.  I imagine sour cream, coconut whipped cream, or a good vanilla ice cream would work just as well.  And since I didn't have any poppy seeds on hand, I sprinkled on some pomegranate arils instead.  I like how the pomegranate echoed the color of the beets used in the cake and also enhanced the tartness of the Greek yogurt.

https://www.flickr.com/photos/joyosity/15418097350/

Nigel Slater's Chocolate Beet Cake (from Food52)
serves 8

8 ounces fresh beets
7 ounces fine dark chocolate (70%)
1/4 cup hot espresso
3/4 cup + 2 tablespoons butter
1 cup + 2 tablespoons all-purpose flour
1 1/4 teaspoons baking powder
3 tablespoons good quality cocoa powder
5 eggs
Scant 1 cup superfine sugar
Crème fraîche or Greek yogurt
Poppy seeds or pomegranate arils, to serve

Lightly butter an 8-inch springform cake pan and line the base with a round of parchment paper. Heat the oven to 350°F.
   
Cook the beets, whole and unpeeled, in boiling unsalted water. Depending on their size, they will be tender within 30 to 40 minutes. Young ones may take slightly less. Drain them, let them cool under running water, then peel them, slice off their stem and root, and grate or process in a blender or food processor until a coarse purée.
   
Melt the chocolate, broken into small pieces, in a small bowl set over a pot of simmering water. Don’t stir.
   
When the chocolate looks almost melted, pour the hot espresso over it and stir once. Cut the butter into small pieces and add to the melted chocolate. Push the butter down under the surface of the chocolate with a spoon (as best you can) and leave to soften.
   
Sift together the flour, baking powder, and cocoa. Separate the eggs, putting the whites in a large mixing bowl. Beat the yolks together.
   
Remove the bowl of chocolate from the heat and stir until the butter has melted into the chocolate. Let sit for a few minutes, then stir in the egg yolks. Do this quickly, mixing firmly and evenly so the eggs blend into the mixture instead of cooking. Fold in the beets.

Whisk the egg whites until they form soft peaks, then add the sugar gradually as you continue to whip until all the sugar has been incorporated and the egg whites form stiff peaks. Fold the beaten egg whites into the chocolate mixture and then fold in the flour and cocoa.
   
Transfer quickly to the prepared cake pan and put in the oven, decreasing the heat immediately to 325°F. Bake for 40 minutes. The rim of the cake will feel spongy, the inner part should still wobble a little when gently shaken. Test with a cake tester or toothpick too -- if it is still gooey in the center, continue baking just until moist crumbs cling to the tester.
   
Set the cake aside to cool, loosening it around the edges with a thin icing spatula after half an hour or so. It is not a good idea to remove the cake from its pan until it is completely cold. Serve in thick slices, with crème fraîche or Greek yogurt and poppy seeds or pomegranate arils.

https://www.flickr.com/photos/joyosity/15415634899/

This cake is definitely on the less sweet side, and because I used the coarse grater to process the cooked beets, there were several moist chunks of beets laced throughout the cake, which I didn't mind.  Other than that, if no one had told me there were beets in this cake, I probably would never have guessed.  If you want to get rid of all traces of beets in this cake, you'll probably want a finer purée.

Next:  Faux Phở
Previously:  Elote-Style Cornbread Waffles
Two Years Ago:  Coconut Whipped Cream and Coconut Dulce de Leche

Monday, October 20, 2014

Elote-Style Cornbread Waffles

https://www.flickr.com/photos/joyosity/15381999597/

In case I haven't mentioned how much I love my church, Highrock, recently, here's another reason:  we recently had a fundraiser for the Tokyo Life Church called Highrocktoberfest.  How awesome is that?  In addition to a competition for the best home brew, there was also a chance to win a prize for the best cornbread.  At first I thought about making a sweet cornbread with honey butter, but then I came up with the idea to make cornbread waffles topped with the seasoned mayonnaise and crumbled cheese that usually goes on elote (Mexican grilled corn)!

https://www.flickr.com/photos/joyosity/15544306646/

I used the crunchy cornbread waffle recipe from King Arthur Flour and made the same mayo I had used before for elote, except I added a squirt of sriracha this time to add a bit more color and flavor.  I couldn't find any cotija cheese so I just substituted with feta.  I'm happy to say I won the cornbread competition with this recipe!

https://www.flickr.com/photos/joyosity/15568007485/

Elote-Style Cornbread Waffles (adapted from King Arthur Flour)
makes about 10 waffles

For the waffles:
1 3/4 cups buttermilk
2 eggs
5 tablespoons butter, melted and cooled
1 1/2 cups all-purpose flour
1 cup yellow cornmeal
2 tablespoons sugar
2 teaspoons baking powder
1 teaspoon baking soda
1 teaspoon salt

For the toppings:
1 cup mayonnaise
2 garlic cloves, minced
Juice from 1/2 a lime
Cayenne pepper
Chili powder
Paprika
Sriracha (optional)
1 cup crumbled cotija or feta cheese

In a medium-sized mixing bowl, whisk together the buttermilk, eggs, and melted butter or oil. In a separate bowl, blend together the dry ingredients, then quickly and gently combine the wet and dry ingredients. Let the batter sit for 10 minutes, to allow the cornmeal to soften.

In the meantime, mix the mayo, minced garlic, and lime juice together.  Add cayenne pepper, chili powder, paprika, and sriracha (if using) to taste. 

Drop the batter by 1/3-cupfuls onto a hot waffle iron and bake until the waffle iron stops steaming.  Top with the spicy mayonnaise and crumbled cheese.  Sprinkle on more cayenne pepper and/or chile powder as desired, and serve with lime wedges.

https://www.flickr.com/photos/joyosity/14947261064/

The waffles are best fresh out of the waffle iron because they start to get soft once they get to room temperature.  You can always reheat them in the oven to get them to crisp up again.  Since I was making these for a lot of people, I ended up cutting each waffle into eighths and serving them nacho-style.  If you have the corn-shaped pans for making cornbread sticks, I think it would be really cute to dress those up elote-style as well!

Next:  Nigel Slater's Chocolate Beet Cake
Previously:  Jeni's Salty Vanilla Frozen Custard
Two Years Ago:  Cranberry Royale Sorbet

Thursday, October 16, 2014

Jeni's Salty Vanilla Frozen Custard

https://www.flickr.com/photos/joyosity/15146148990/

Most homemade ice cream recipes call for using egg yolks to reduce the iciness and increase the body of the ice cream since most consumer ice cream machines can't produce the same texture of commercially produced ice creams.  Then Jeni Britton Bauer came along with her genius eggless ice cream base that used cornstarch to thicken and cream cheese to provide the protein.  Since I don't usually like tasting eggs in the ice creams I make, I've been using her ice cream base for years with amazing results.

https://www.flickr.com/photos/joyosity/15332560542/

So when Jeni came out with a new book which included a recipe for a frozen custard, I knew I had to try it to see if I would like it as much as her other ice creams.  The answer, my friends, is a wholehearted yes!!!  This is basically the French vanilla ice cream of my dreams.  It's rich with vanilla flavor that's deepened with the addition of salt.  Instead of being an unwanted distraction, the egg yolks truly belong here. I couldn't stop eating this by the spoonful while it sat in the freezer to harden after churning.  While it's great by itself, it goes perfect with pies and waffles and anything else you can think of!  Do yourself a favor and try it on a waffle topped with mango passion caramel sauce.  You can thank me later.  ^_^

https://www.flickr.com/photos/joyosity/14928697694/

Jeni's Salty Vanilla Frozen Custard (from Jeni's Splendid Ice Cream Desserts)
makes about 1 quart

2 3/4 cups whole milk
6 large egg yolks
1 tablespoon plus 2 teaspoons cornstarch
2 tablespoons cream cheese, softened
3/4 teaspoon fine sea salt
3 teaspoons vanilla extract
1 cup heavy cream
3/4 cup sugar
2 tablespoons light corn syrup

Mix about 2 tablespoons of the milk, the egg yolks, and cornstarch in a small bowl and set aside. Whisk the cream cheese, salt, and vanilla in a medium bowl until smooth. Fill a large bowl with ice and water.

Combine the remaining milk, the cream, sugar, and corn syrup in a 4-quart saucepan, bring to a boil over medium-high heat, and boil for 4 minutes. Remove from the heat and gradually add about 2 cups of the hot milk mixture to the egg yolk mixture, one ladleful at a time, stirring well after each addition. Pour the mixture back into the saucepan and heat over medium heat, stirring constantly with a heatproof spatula, just until the mixture comes to a boil. Remove from the heat and strain through a sieve if necessary.

Gradually whisk the hot milk mixture into the cream cheese mixture until smooth. Pour the mixture into a 1-gallon Ziploc freezer bag and submerge the sealed bag in the ice bath. Let stand, adding more ice as necessary, until cold, about 30 minutes.

Remove the frozen canister from the freezer, assemble your ice cream machine, and turn it on. Pour the custard base into the canister and spin until thick and creamy.

Pack the custard into a storage container. Press a sheet of parchment directly against the surface and seal with an airtight lid. Freeze in the coldest part of your freezer until firm, at least 4 hours.

https://www.flickr.com/photos/joyosity/15332556612/

Next:  Elote-Style Cornbread Waffles
Previously:  Indonesian Avocado Milkshake
Last Year:  Pão de Queijo (Brazilian Cheese Bread)
Two Years Ago:  Magical Pumpkin Spice Latte

Tuesday, October 14, 2014

Indonesian Avocado Milkshake

I don't usually see avocados used in sweet applications, but it's pretty popular to treat avocados as the fruit that they are in Asian countries.  For instance, take the Indonesian avocado milkshake, which adds chocolate syrup down the sides of the serving glass for an extra special touch.

I had some leftover coconut milk from making the ginger beer sherbet, so I decided to try using some in the milkshake, and the result was incredible.  The milkshake is already really creamy from the addition of the avocado, but adding coconut milk just brings the creaminess to a whole new level!

https://www.flickr.com/photos/joyosity/14676284843/

Indonesian Avocado Milkshake
makes 1 large shake or 2 smaller shakes

For the chocolate syrup:
2/3 cup water
2/3 cup sugar
1/4 cup cocoa powder

For the milkshake:
1 ripe avocado
1 cup milk (or 1/2 cup milk and 1/2 cup coconut milk for extra creaminess)
3 tablespoons sweetened condensed milk
1/2 cup ice cubes

Whisk together the water, sugar, and cocoa powder in a small saucepan and bring to a boil.  Stir until the sugar has all dissolved and allow to cool.  Store in the refrigerator until ready to use.

https://www.flickr.com/photos/joyosity/14656359165/

Cut the avocado in half and remove the pit.  Scoop out the flesh and add to a blender along with the coconut milk, milk, sweetened condensed milk, and ice cubes.  Blend until smooth and frothy.

https://www.flickr.com/photos/joyosity/14656357155/

Pour the chocolate syrup around the inside of a glass and then add the avocado milkshake.  Enjoy!

https://www.flickr.com/photos/joyosity/15480057515

This recipe makes about a cup of chocolate syrup, way more than you need for the milkshake.  You can use the rest for making chocolate milk, drizzling over ice cream, whatever you want!

Next:  Jeni's Salty Vanilla Frozen Custard
Previously: Concord Grape Sorbet
Last Year:  Bahian Style Moqueca (Brazilian Fish Stew)
Two Years Ago:  Crispy Kale Pizza

Monday, October 6, 2014

Concord Grape Sorbet

https://www.flickr.com/photos/joyosity/15265436048/

I mentioned in my last post that my main purpose on my most recent trip to Italy was to eat as much good gelato as I could.  I wasn't joking.  I think the first 9 pictures I shared from the trip were just pictures of all the gelato I was eating.

https://www.flickr.com/photos/joyosity/15192959088/

I started off in Rome with a rice, sesame, and chestnut honey gelato from Il Gelato di Claudio Torce.  I learned later from my cousin that the little cone on top is actually supposed to be used as an edible spoon.  So cute!

https://www.flickr.com/photos/joyosity/15192798699/

Next I wandered into the Trastavere neighborhood for a bit of Fior di Luna's Concord grape sorbetto and fig gelato.  The Concord grape flavor was perfect but overwhelmed the more subtle fig.

https://www.flickr.com/photos/joyosity/15379231242/

Lastly, I stopped by my all time favorite gelateria in Rome, Gelateria del Teatro for their chocolate orange and my favorite flavor, honey rosemary lemon

https://www.flickr.com/photos/joyosity/15175068178/

In Florence, I tried the panna cotta with caramel at Il Triangolo delle Bermuda (where I also had the ribollita).

https://www.flickr.com/photos/joyosity/15361354462/

Right next to the Ponte Vecchio is Gelateria delle Carrozze, where I tried their strawberry and coconut gelato.  Both were very true to flavor.

https://www.flickr.com/photos/joyosity/15174908039/

The next day we stopped by Carabé in between the Accademia and the Duomo for a scoop of pistachio.

https://www.flickr.com/photos/joyosity/15254129589/

After lunch at Cantinetta dei Verrazzano, we went across the street to Perché No? (which means "why not?") for a chocolate sorbet and mint gelato.

https://www.flickr.com/photos/joyosity/15174977500/

The last gelato of the day was an amaretto from Carapina, which ended up being my favorite in Florence because of the texture.  I love that real Italian gelato is kept at a temperature just above freezing so it's always soft and easy to scoop. 

https://www.flickr.com/photos/joyosity/15358490871/

Coincidentally, we just happened to be in Florence the same time as the gelato festival!  After having 5 gelatos for dinner the following day, I was officially done with gelato for a while.  (I didn't have my next scoop until several days later after a 2 hour hike between Monterosso and Vernazza in Cinque Terre!)

Out of all these, the flavor that impressed me the most was the Concord grape sorbetto from Fior di Luna.  I remember trying the Concord grape flavor from San Crispino the year before and not being very impressed, but this time it was the complete opposite.  The sorbet totally captured the full burst of flavor you get when biting into a Concord grape without all the hassle of having to spit out the seeds and skin afterward.  Luckily, Concord grape season is upon us, so I was able to get a couple of quarts from the supermarket to try to recreate the sorbet.

I basically followed the recipe from Gourmet, but instead of adding the full amount of sugar, I started with 1/4 cup, which ended up being enough for me.  Depending on how much purée you end up with and how sweet your grapes are, you'll want to adjust the amount of sugar; it should taste just a little too sweet at room temperature since once it's frozen it'll taste less sweet.  To add a little depth to the sorbet I added a pinch of salt and a tablespoon of red wine, which also helps keep the sorbet from getting too icy.

https://www.flickr.com/photos/joyosity/15448886841/

Concord Grape Sorbet (adapted from Gourmet)
makes about 3 cups

2 quarts Concord grapes, destemmed
1/4 cup sugar, plus more, to taste
1 pinch salt
1 tablespoon red wine

https://www.flickr.com/photos/joyosity/15255635710/

Purée half of grapes in a blender until smooth, then force through a fine-mesh sieve into a bowl, discarding solids.  (If you have a very powerful blender like a Vitamix, you probably don't want to blend on high since you want the seeds to stay whole.)

https://www.flickr.com/photos/joyosity/15255565509/

Repeat with remaining grapes to yield 3 cups purée. (I ended up with a little more than 2 cups.)  Whisk in sugar, salt, and red wine.  Taste and add more sugar if necessary, just until the mixture is a little too sweet at room temperature.  Chill until very cold, 3 to 6 hours.

https://www.flickr.com/photos/joyosity/15439151721/

Freeze in ice cream maker, then transfer to an airtight container and put in freezer to firm up, at least 2 hours.

https://www.flickr.com/photos/joyosity/15265309279/

You can also pour the frozen churned sorbet into popsicle molds to make really awesome Concord grape popsicles!

Next:  Indonesian Avocado Milkshake
Previously:  Ribollita (Tuscan Bread Soup)
Last Year:  Apple Cider Donuts
Two Years Ago:  Magical Cold Brew Coffee