Showing posts sorted by relevance for query crane. Sort by date Show all posts

Monday, October 16, 2017

Crane Rangoons


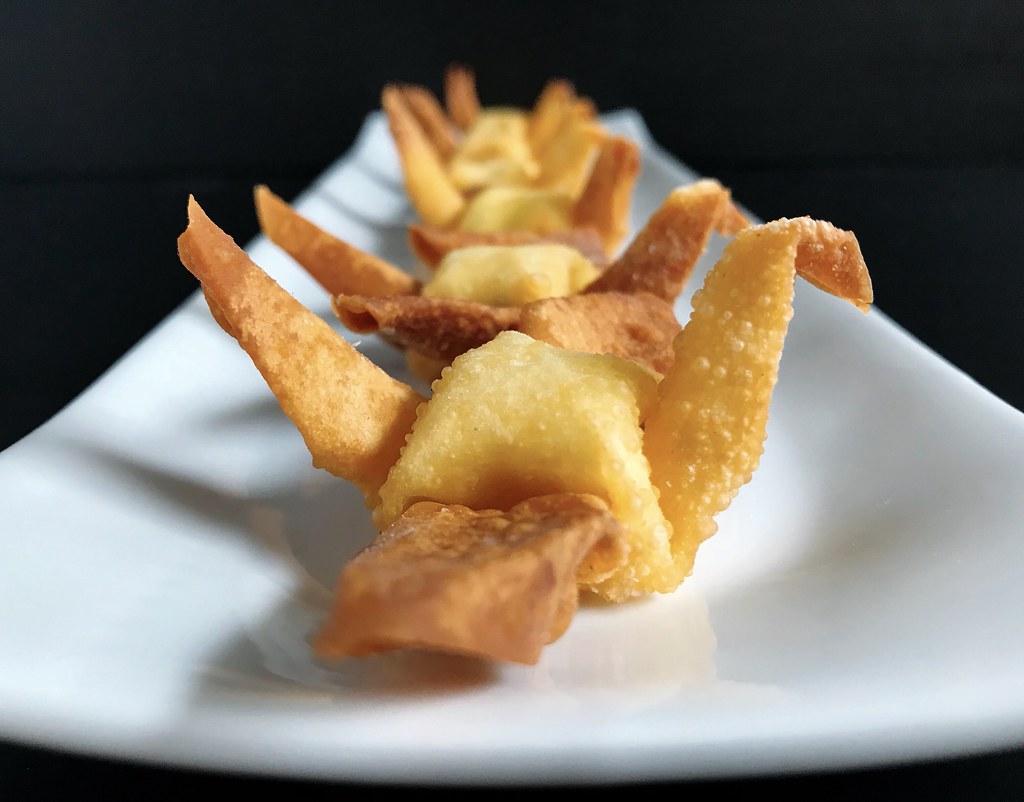
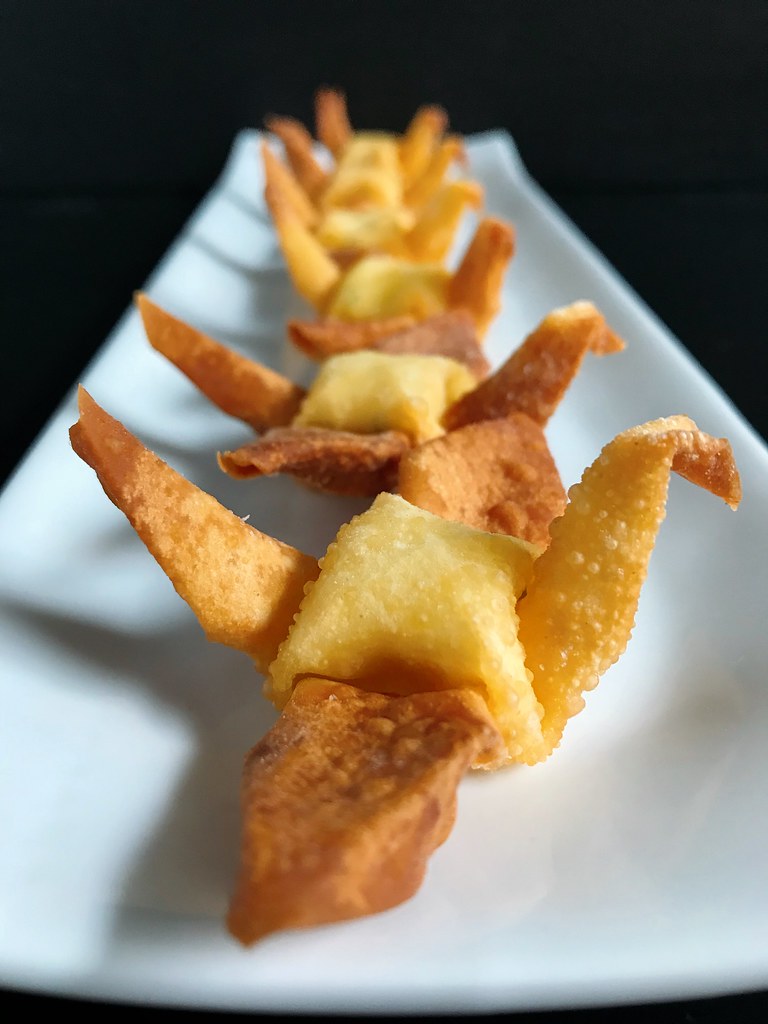
I've been toying with the idea to make these ever since I saw an article on Food52 about someone who folded wonton skins into origami cranes and deep fried them.  Naturally the only logical progression would be to stuff them with cream cheese and make crane rangoons, right?

My mom taught me how to fold paper cranes when I was a kid, and it's basically muscle memory for me, but if you're not familiar with how to fold a crane you'll definitely want to practice with paper first.  One thing I realized as I was doing research for this post is that the way my mom taught me how to fold a paper crane is different than the most popular way on the internet.  In fact, I can't seem to find a single tutorial showing the method my mom taught me!  It's a very disorienting feeling to realize that something that you thought everyone else knew is actually just something only your family knows.

Anyways, for science, I tried both ways with a wonton skin, and there doesn't seem to be too much of a difference.  I think the hollow space in the crane's body may be a tad larger using my mom's method, and the tail and head are a bit fatter so it's a little easier to have a defined head.  Both honestly, I'm not sure those differences are a big enough of a deal to learn a new way to fold a crane, especially since it's hard enough folding one with a wonton skin.
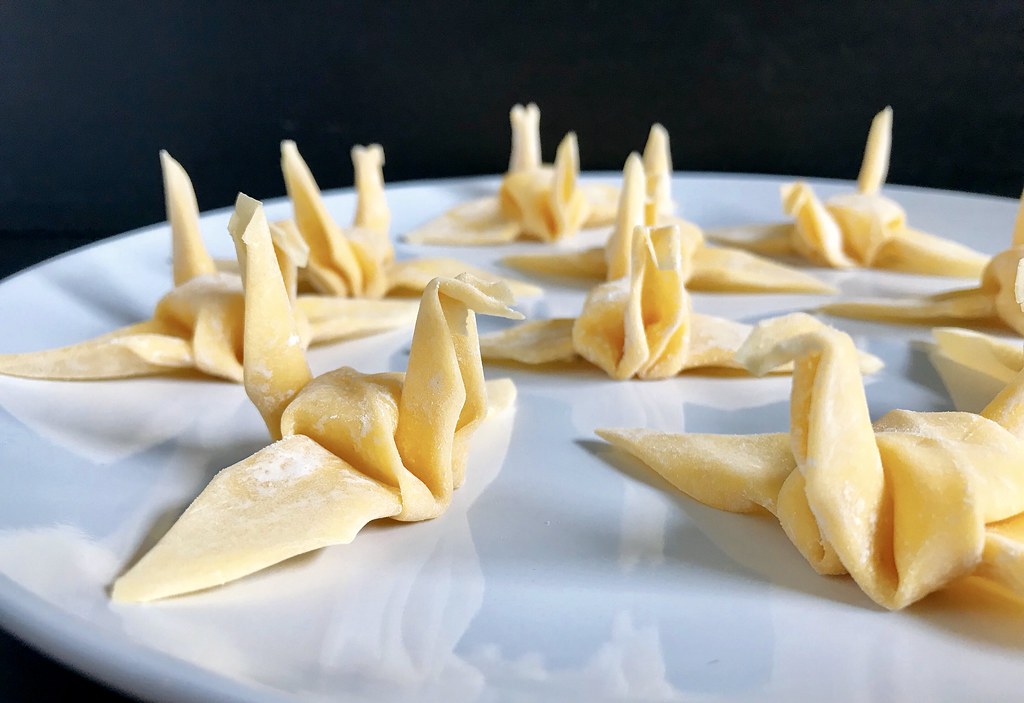

You will want to get the freshest, most pliable wonton skins you can find, and the thinner the better.  The ones I used weren't a perfect square, but you can still get a pretty decent looking crane.  Also, instead of making perfect creases like you'd usually do with paper, you want to try not to press down too hard on any folds so that the wonton skin doesn't break.

After I finished folding the cranes, I microwaved them for 8-10 seconds, just enough to make them a little stiffer, but not totally cooked.  Basically I watched them as they microwaved and pulled them out as soon as they started to distort.  At that point, I was still able to manipulate them back into the desired shape.

Then I whipped up some softened cream cheese with some chopped scallions and a pinch or two of salt.  To fill the cranes, I used a piping bag with a no. 12 round tip.  A slightly smaller tip would probably have been a little better, but you don't want to use a tiny one or else the scallions might get stuck in the tip.

I deep fried the crane rangoons in 375°F oil until they were golden brown.  After some trial and error, it seemed like frying them upside down was the best way to get them to cook as evenly as possible.  When they were done, I let them drain on a paper towel-lined plate.

Tuesday, September 12, 2017

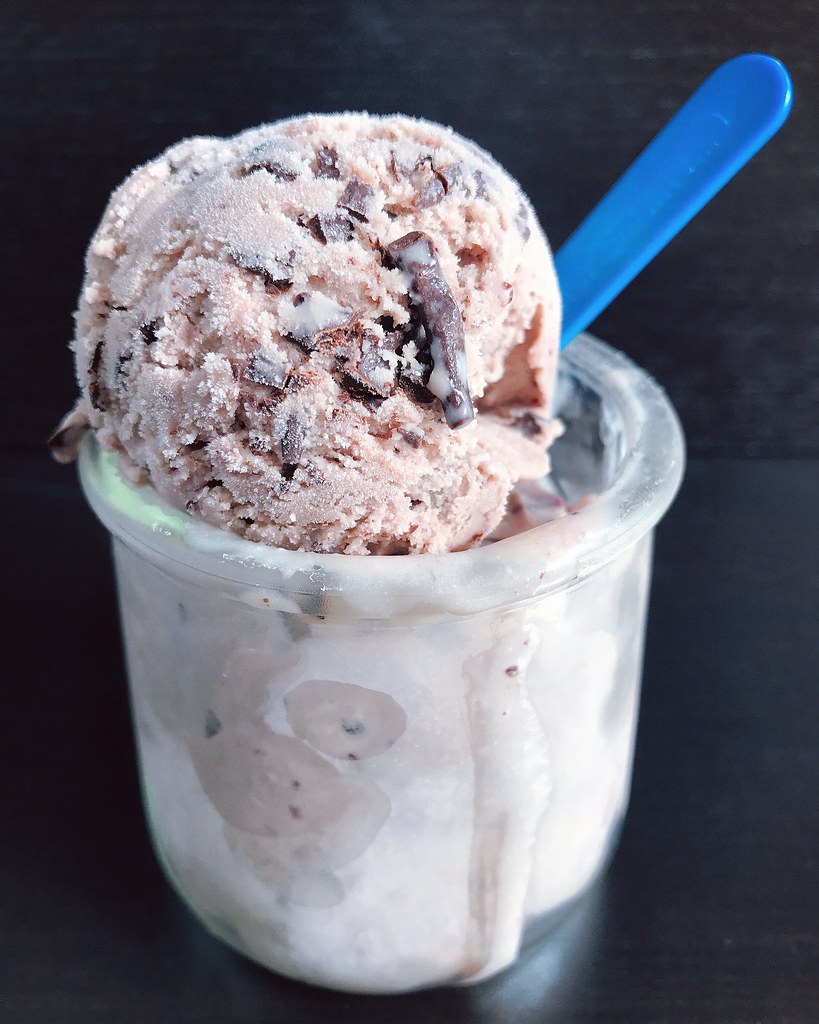
Blueberry Salted Caramel Ice Cream with Chocolate Freckles


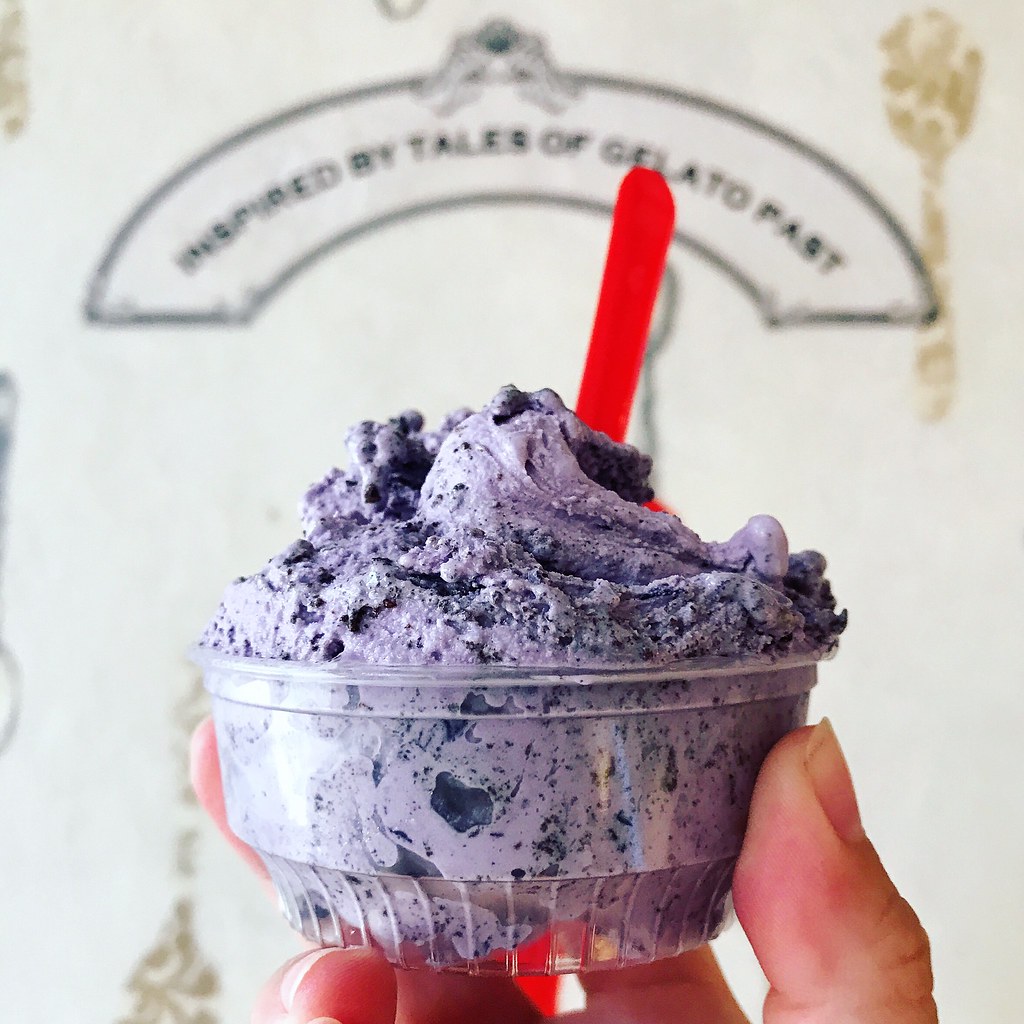
My friend Christine and I have been making a day trip to Portland, ME every summer for the last couple of years and basically spend the day stuffing ourselves.  We always go to Eventide Oysters for my favorite lobster rolls, The Holy Donut for potato donuts, Duckfat for their fries, and Gelato Fiasco for ice cream (the honeycomb ice cream sundae from Honeypaw has made it onto our itinerary for the last 2 years as well).  My favorite flavor is the Maine Wild Blueberry Caramel Sea Salt Stracciatella gelato, but they didn't have it this year so I had to settle for the Blueberry Milk and Cookies flavor which was still really good.


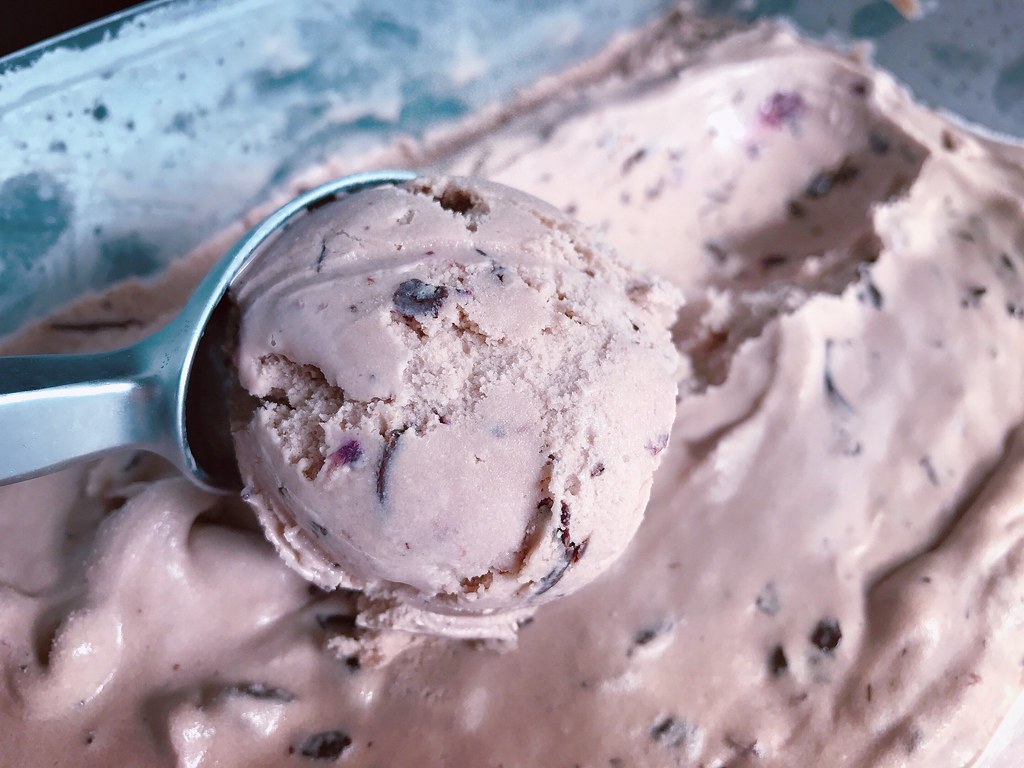
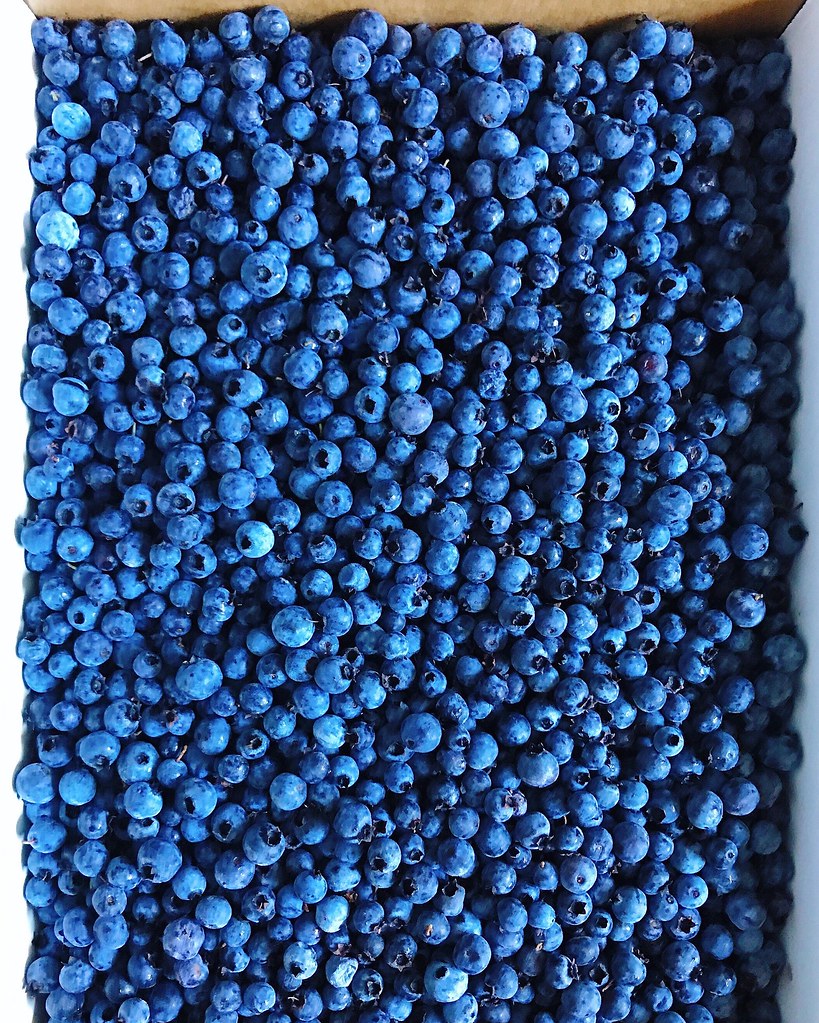
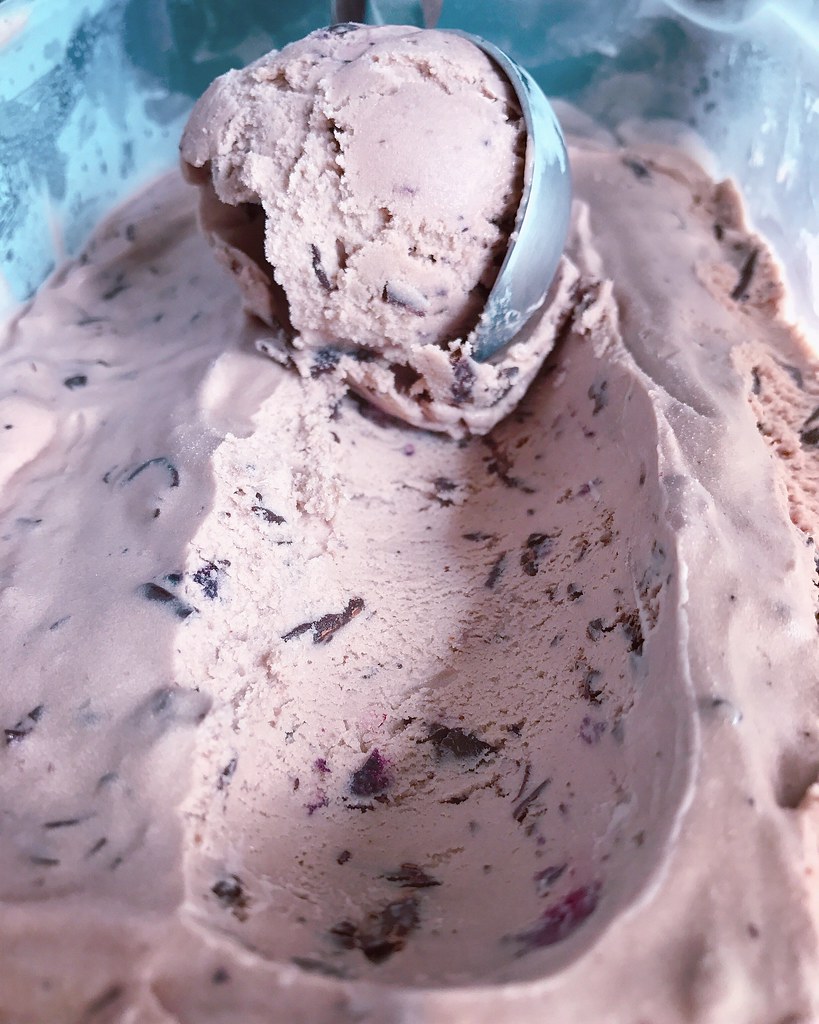
So when Boston Organics contacted me and offered to send me a 5 lb. box of their wild Maine blueberries, I knew the first thing I wanted to make with them.  I consulted with my favorite ice cream cookbook, Jeni's Splendid Ice Creams at Home, and realized I could make something similar using her salty caramel ice cream recipe, adding some blueberry compote, and then swirling in some chocolate freckles when the ice cream was almost done churning.


I also wanted to share some more information about these wonderful blueberries because they're so different from the ones you usually find in the grocery store.  These are from Burke Hill Farm in Cherryfield, ME and come in a compact wax box that will fit perfectly in most freezers.  Known as lowbush blueberries, these wild blueberries grow in northern New England’s naturally acidic soil and are resilient enough to withstand the region's icy winters.  They're smaller and sweeter than the highbush berries you're probably used to, and perfect for freezing, baking, and just snacking on!  You can find more information here on the Boston Organics website.

I wish the ice cream could be as brilliantly colored as the blueberry milk and cookies gelato above, but I was worried that adding too much blueberry compote to the ice cream base might make it too icy.  Regardless, the flavor is incredible; the sweetness of the caramel is tempered by the tartness of the blueberries, and the crackly dark chocolate freckles adds a fun textural component.


Blueberry Salted Caramel Ice Cream with Chocolate Freckles
makes about 1 quart

1 cup wild Maine blueberries (frozen is fine)*
2/3 cup plus 2 tablespoons sugar
2 cups whole milk
1 tablespoon plus 1 teaspoon cornstarch
3 tablespoons cream cheese, softened
1/2 teaspoon kosher salt
1 1/4 cups heavy cream
2 tablespoons light corn syrup
2 teaspoons vanilla extract
4 oz. dark chocolate, chopped

Heat the blueberries and 2 tablespoons of sugar in a small saucepan until it comes to a boil.  Gently mash the blueberries and remove from heat.

Mix a couple tablespoons of the milk with the cornstarch to make a slurry and set aside.  Whisk the cream cheese and kosher salt in a large bowl and set aside.  Mix the heavy cream and corn syrup in a measuring cup with a spout.

Add the remaining 2/3 cup of sugar to a 4-quart saucepan and heat over medium heat.  Wait until a layer of sugar has melted and turned amber before stirring with a heatproof spatula.  Once all the sugar has melted and is a dark amber remove from heat and add about 1/4 cup of the heavy cream mixture while stirring.  It will violently erupt with steam so be careful!  Continue to stir and add more and more of the cream until it is all incorporated.

Return the pan to medium-high heat and add the rest of the milk.  Bring to a boil and cook for 4 minutes.  Whisk in the cornstarch slurry and bring back to a boil.  Continue to cook and stir until slightly thickened, about one minute.

Add a little of the hot cream mixture to the cream cheese and whisk until the cream cheese is dissolved.  Add the rest of the cream mixture, vanilla, and blueberry compote and mix.  Chill the mixture, then churn in an ice cream maker according to the manufacturer's instructions.

While the ice cream is churning, place the chopped chocolate in a plastic sandwich bag, seal it shut, and then place in some very hot water.  Occasionally squeeze the chocolate around until it is all melted.  Remove the bag from the water and dry the outside.  Keep the chocolate melted but not hot.

Once the ice cream is almost done churning, snip a corner off of the sandwich bag and squeeze a steady stream of the melted chocolate into the ice cream while it continues to churn.  Pack the churned ice cream into a storage container and freeze for at least 4 hours.

*If you can't get your hands on wild Maine blueberries, you can use regular blueberries to make the compote, but you may want to boil it longer to reduce it further and add some more sugar as needed.


Next:  Crane Rangoons
Previously:  Greyscale Cream Puffs
Last Year:  Macau-Style Portuguese Chicken Rice
Three Years Ago:  Taiwanese Taro Swirl Mooncakes
Four Years Ago:  Ramen Lobster Rolls
Five Years Ago:  Caramelized Onion and Swiss Chard Quiche

Saturday, October 21, 2017

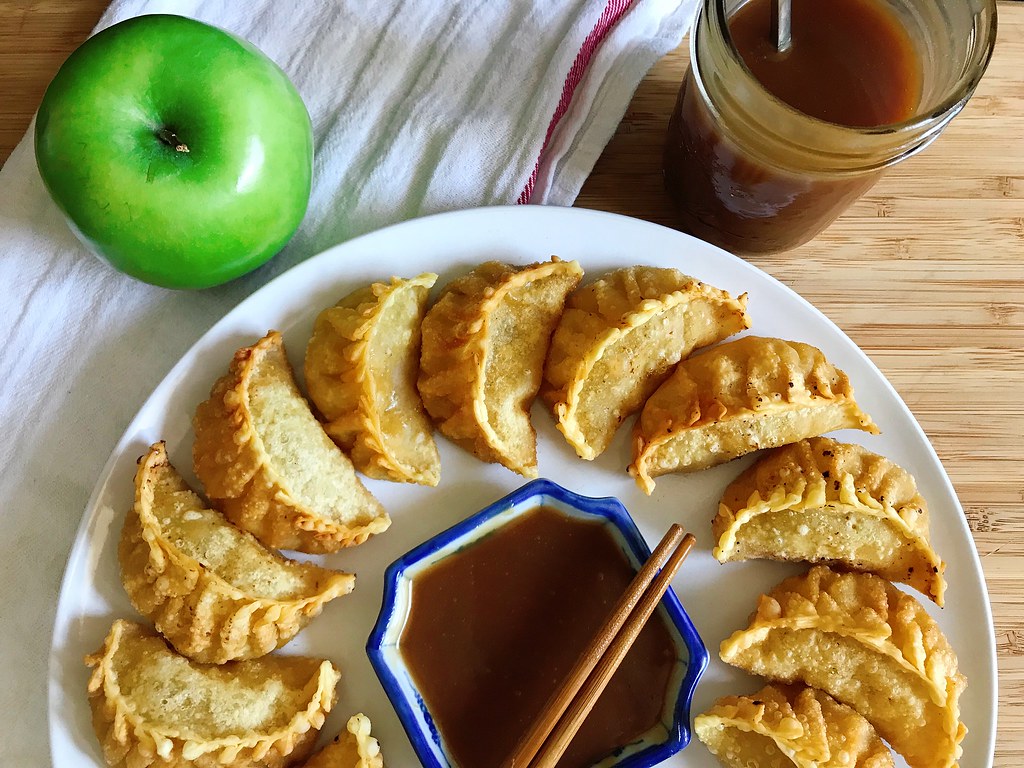
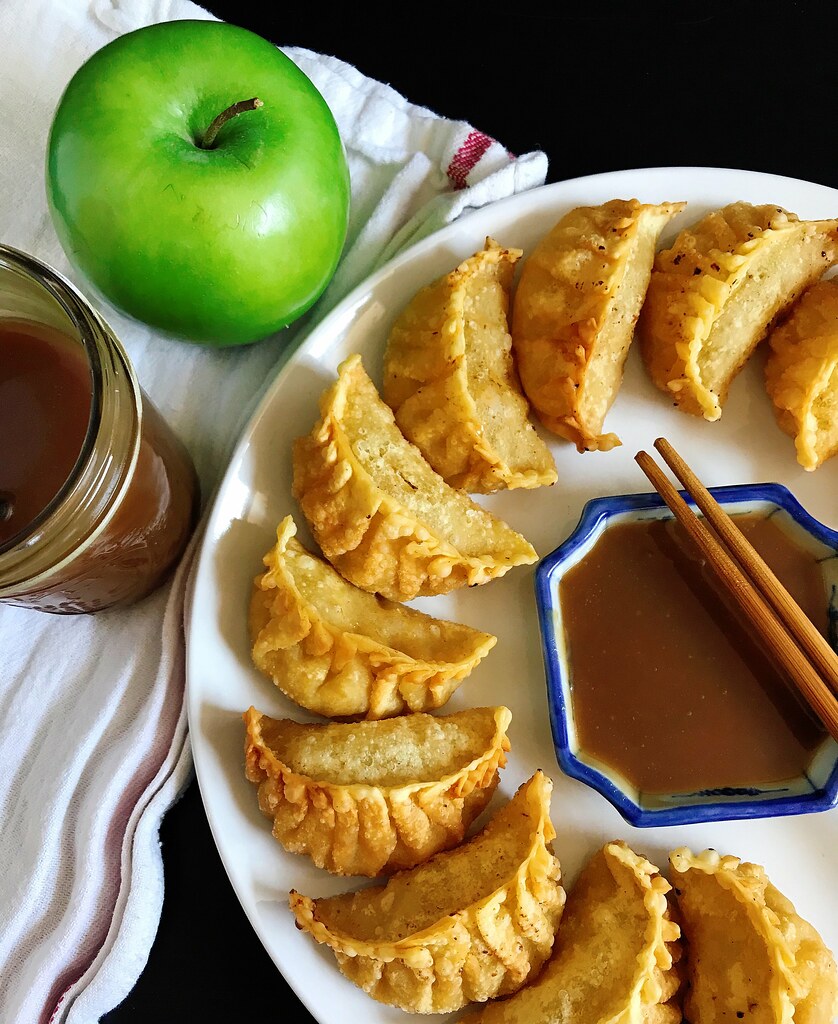
Deep Fried Apple Dumplings with Miso Caramel Dipping Sauce


You know how sometimes something is really, really hyped up and you're just like, "uh huh, okay, but it can't actually be that amazing."  Well, I just wanted to let you know that miso caramel is *actually* that amazing!  I first heard about it on Food52, but then I noticed that some of my favorite food bloggers were also incorporating it into their apple pies and raving about it.  It is rather rich and strong so it might not be for everyone, but if you like salted caramel and miso, you'll probably love this caramel too.  The best way I can describe it is "flavor bomb".  Try it on ice cream, in apple pies, with apple slices, or just straight out of the jar!


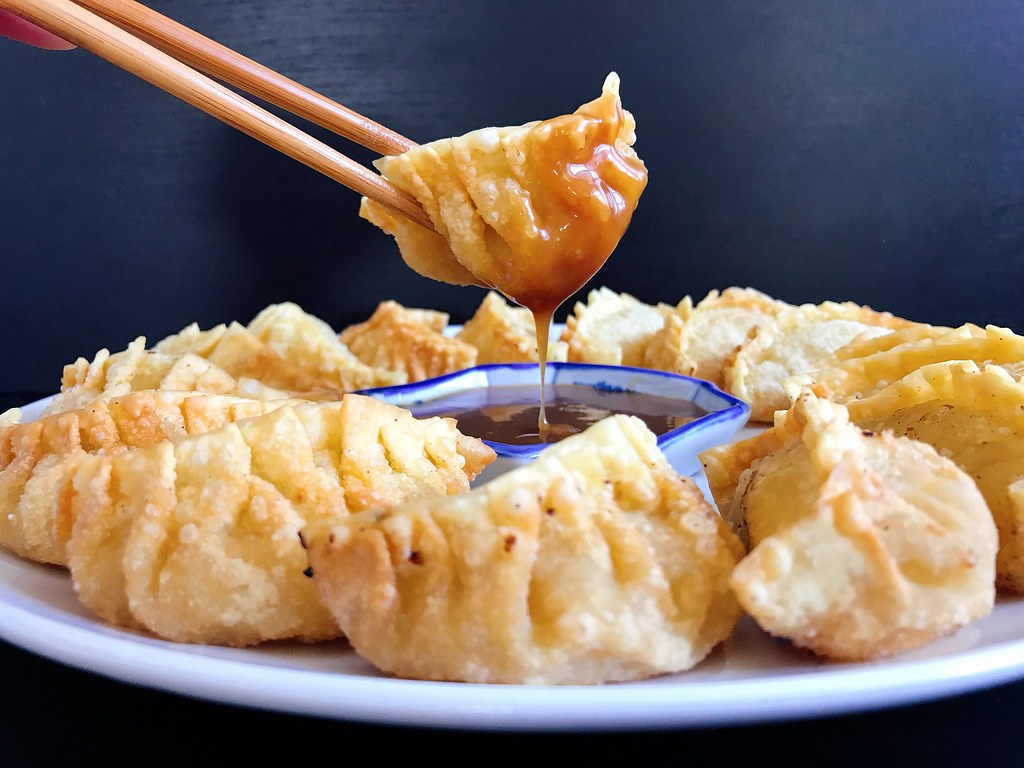
The reason I even decided to make miso caramel is because I was invited by Rebecca and Ruth from Square Meal Round Table to join a fall collaboration with a bunch of other Instagrammers/food bloggers centered around the prompt #Aisforalltheapples.  I had the idea to make apple dumplings, but not the American baked kind using pastry dough; I wanted to make them with Hong Kong style dumpling skins and shape them like pot stickers.  Get it?  Instead of pan-frying them, though, I was going to deep fry them like McDonald's used to fry their apple pies!  And I figured to continue with the Asian twist, I'd pair the apple dumplings with miso caramel sauce.


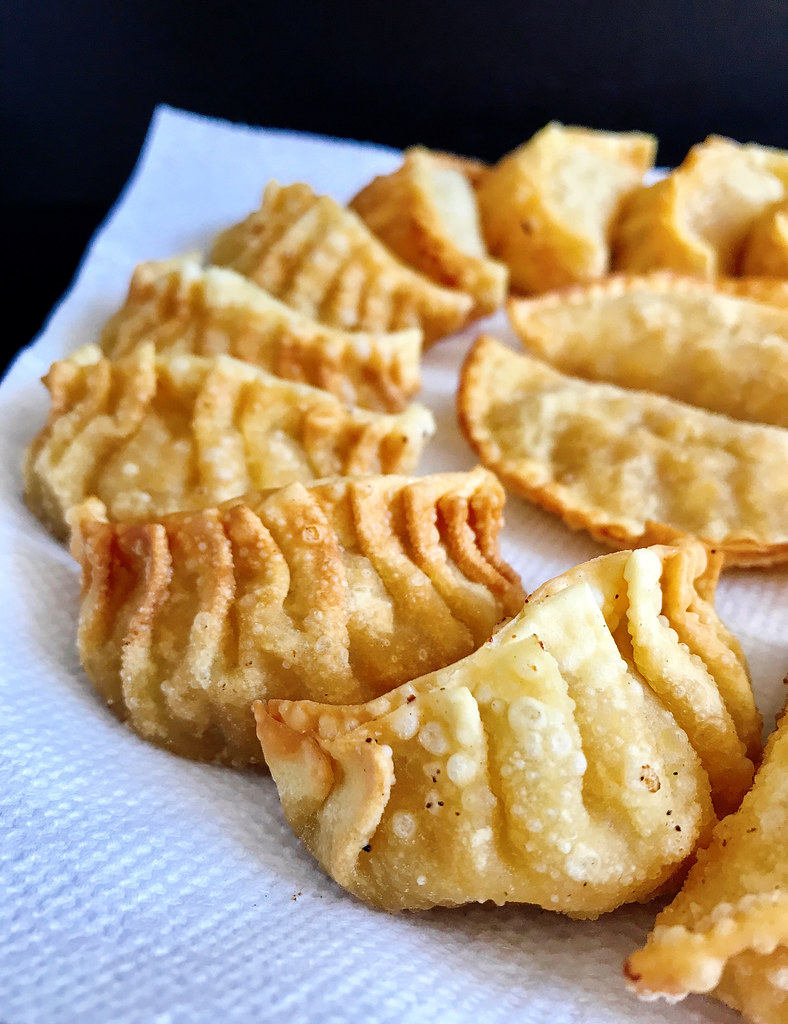
When it came time to shape the dumplings, I decided to go a little crazy with the pleating since I knew I wasn't making that many, but it's entirely unnecessary to do that many pleats.  In fact, I also experimented with making a couple that were just folded in half, sealed, and then crimped with a fork so that the looked like little hand pies (see above).  This shape was actually the easiest to fry evenly and dip in the caramel, so I'd probably make them this way in the future, unless I specifically wanted the pot sticker shape.


Deep Fried Apple Dumplings
makes about 2 dozen

2 apples (I used gala but fuji or pink lady would work too)
3 tablespoons brown sugar, packed
1/2 teaspoon ground cinnamon
1/4 teaspoon cornstarch
Pinch of salt
Dumpling skins
Oil for frying

Peel the apples and finely dice.  Mix with the brown sugar, cinnamon, cornstarch, and salt in a small saucepan.  Heat over medium-low heat for about 5 minutes, until the apples are tender and liquid starts to form.  Transfer to a bowl and allow to cool to room temperature.

Wet the edges of the dumpling skins and fill with the apple mixture.  Seal tightly.

Heat the oil in a pot to 350°F.  Fry the dumplings until golden brown and drain on a paper towel-lined plate.  Serve immediately with the miso caramel dipping sauce (recipe below).

Miso Caramel Dipping Sauce (from Minxeats via Food52)
makes 1 pint

3/4 cup granulated sugar
1/4 cup water
1/2 cup heavy cream
2 tablespoons white miso

Heat the sugar and water over medium-high heat in a medium saucepan.  Bring to a boil and continue to cook without stirring until it turns a medium amber and wisps of smoke just start to appear.  Immediately remove from heat and whisk in the heavy cream.  If the caramel seizes, just return the pan to low heat and continue to whisk until everything is liquid again.  Whisk in the miso.  Pour into a glass jar and store in the refrigerator if not using immediately.  Rewarm briefly in the microwave before using after refrigeration.


Check out the rest of the entries in this collaboration below!

Next:  Slow-Roasted Ginger Scallion Salmon
Previously:  Crane Rangoons
Last Year:  Pear Apple Cranberry Slab Pie
Two Years Ago:  Pad Thai
Three Years Ago:  Mochi Donuts and Pon de Rings
Four Years Ago:  Bahian Style Moqueca (Brazilian Fish Stew)
Five Years Ago:  Magical Pumpkin Spice Latte