Friday, September 26, 2014

Ribollita (Tuscan Bread Soup)

https://www.flickr.com/photos/joyosity/15149977779/

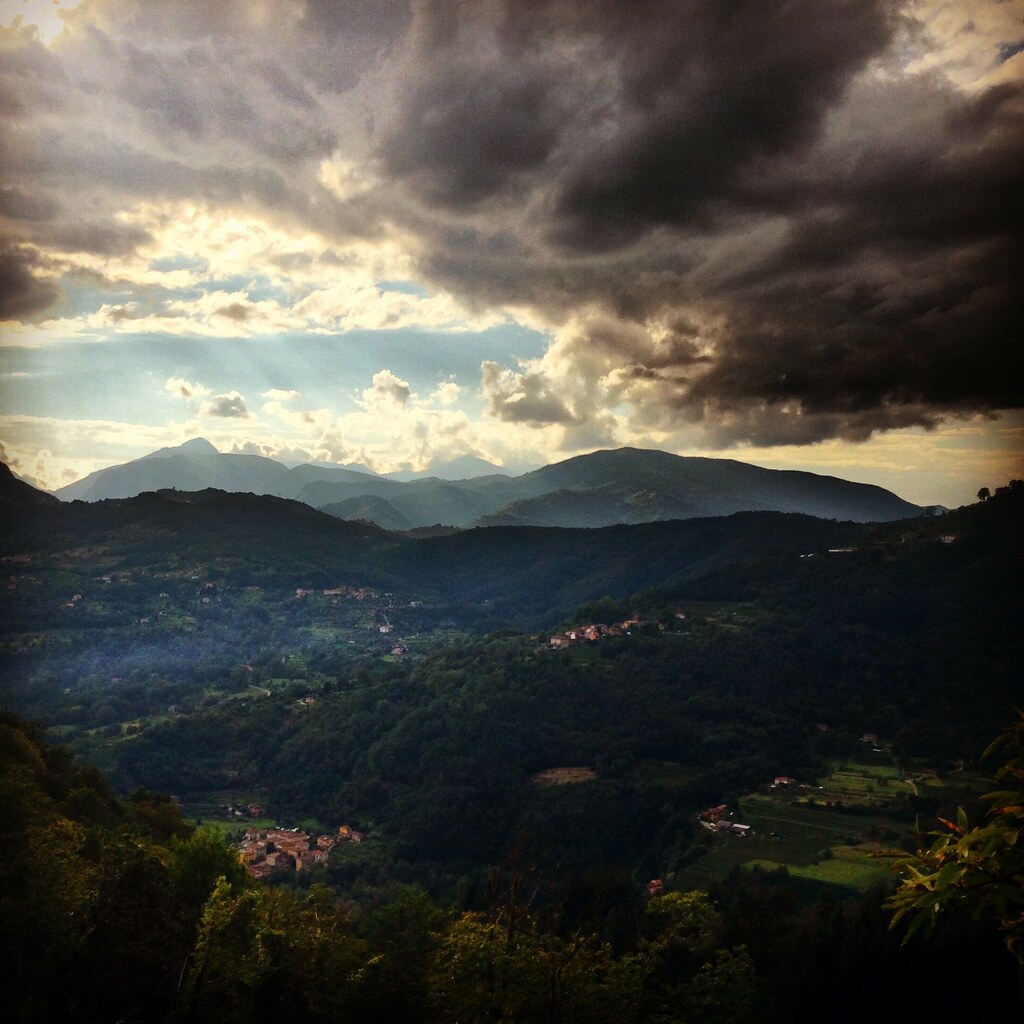
I was lucky enough to go back to Italy again for the third time in 15 months thanks to my cousin, Leslie.  Last time we did Rome and Venice; this time we explored Florence, northern Tuscany (pictured above) and Cinque Terre and were joined by my friend, Sarah Ruth.

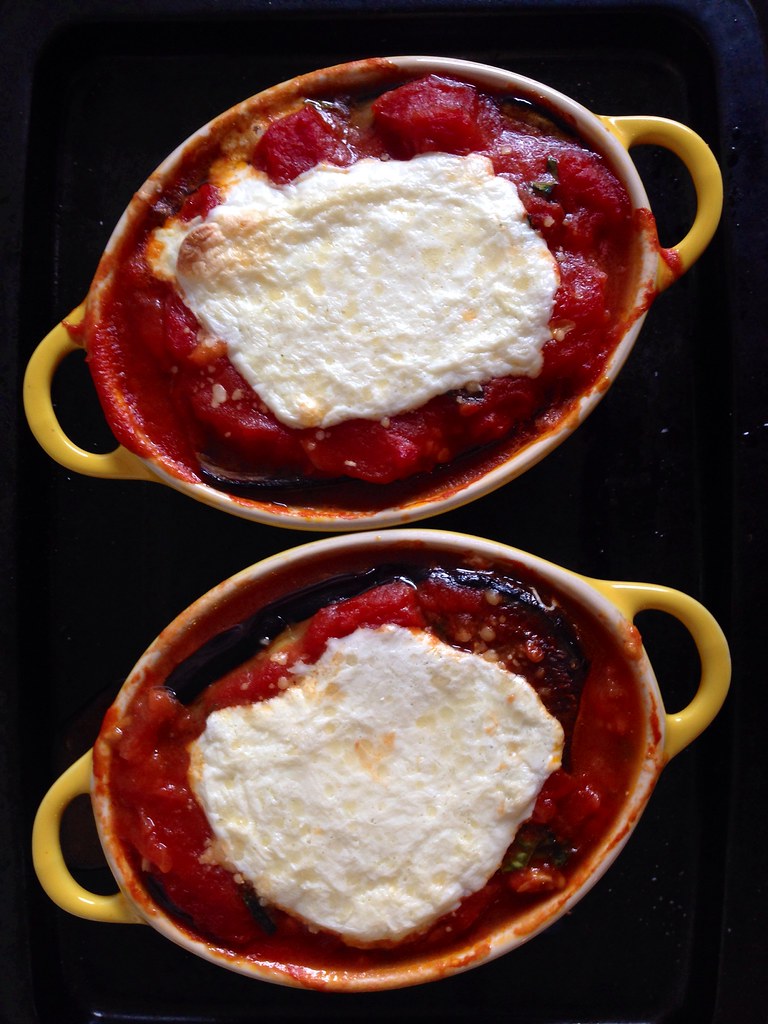
My main purpose in Florence was to eat as much good gelato as I possibly could.  To that effect, our first stop after checking into our hotel was to go to Triangolo delle Bermuda to try their artisanal gelato.  Once we realized they also served food, I figured it would be better to eat lunch before getting our gelato, so I ordered the ribollita, a soup I'd heard was a Tuscan specialty.

https://www.flickr.com/photos/joyosity/15153662490/

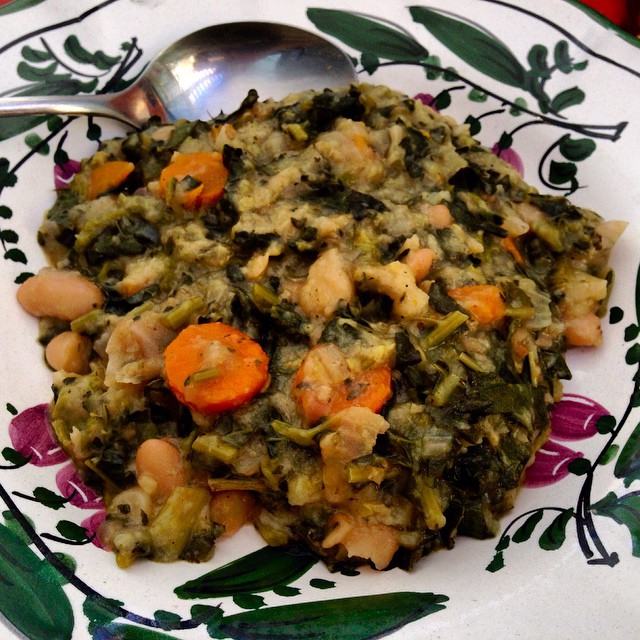
Ribollita translates to "reboiled" and is a result of reheating leftover minestrone-like soup with stale bread to create a thick, hearty potage.  I've read there's actually a three day process where on the second day you layer the leftover soup with the bread and bake it with a layer of thinly sliced red onions on top and then reboil it on the third day.  For simplicity's sake, I skipped the second day and jumped straight to the reboiling.

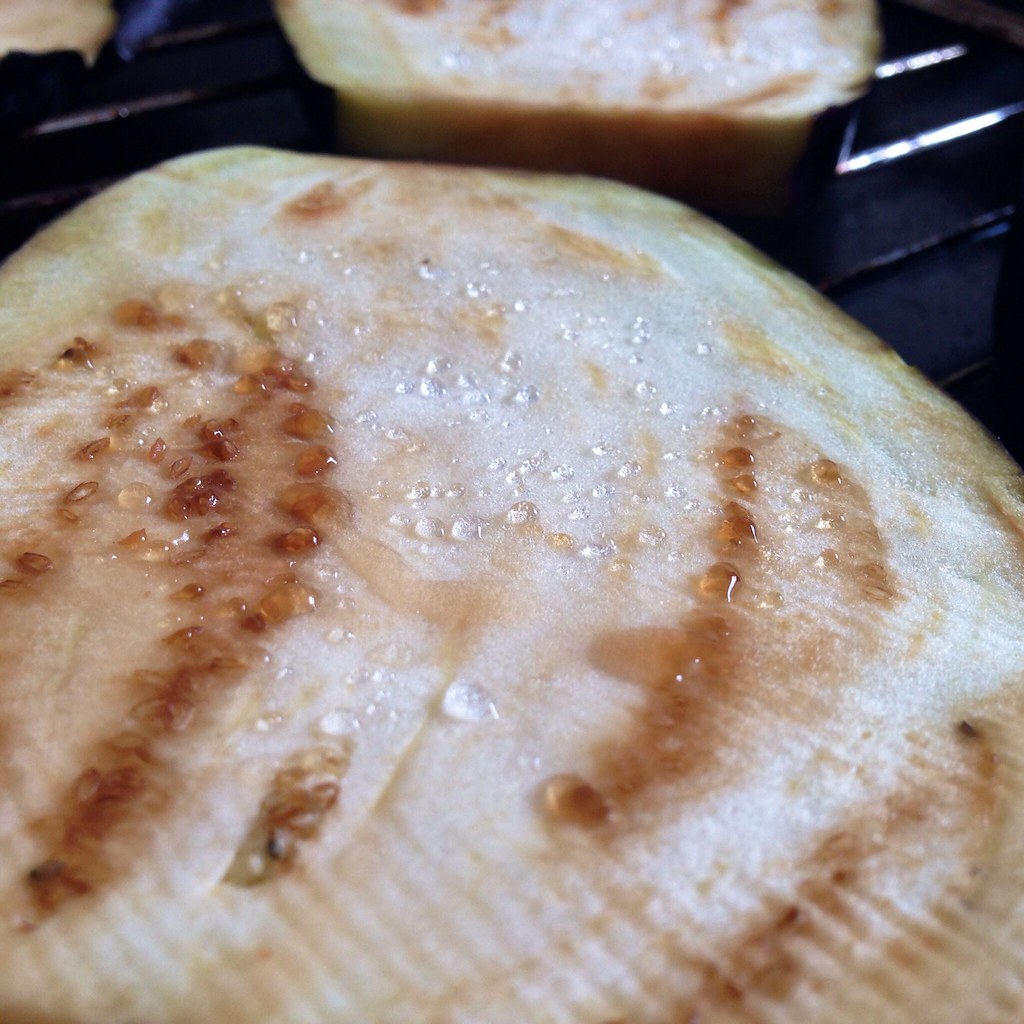
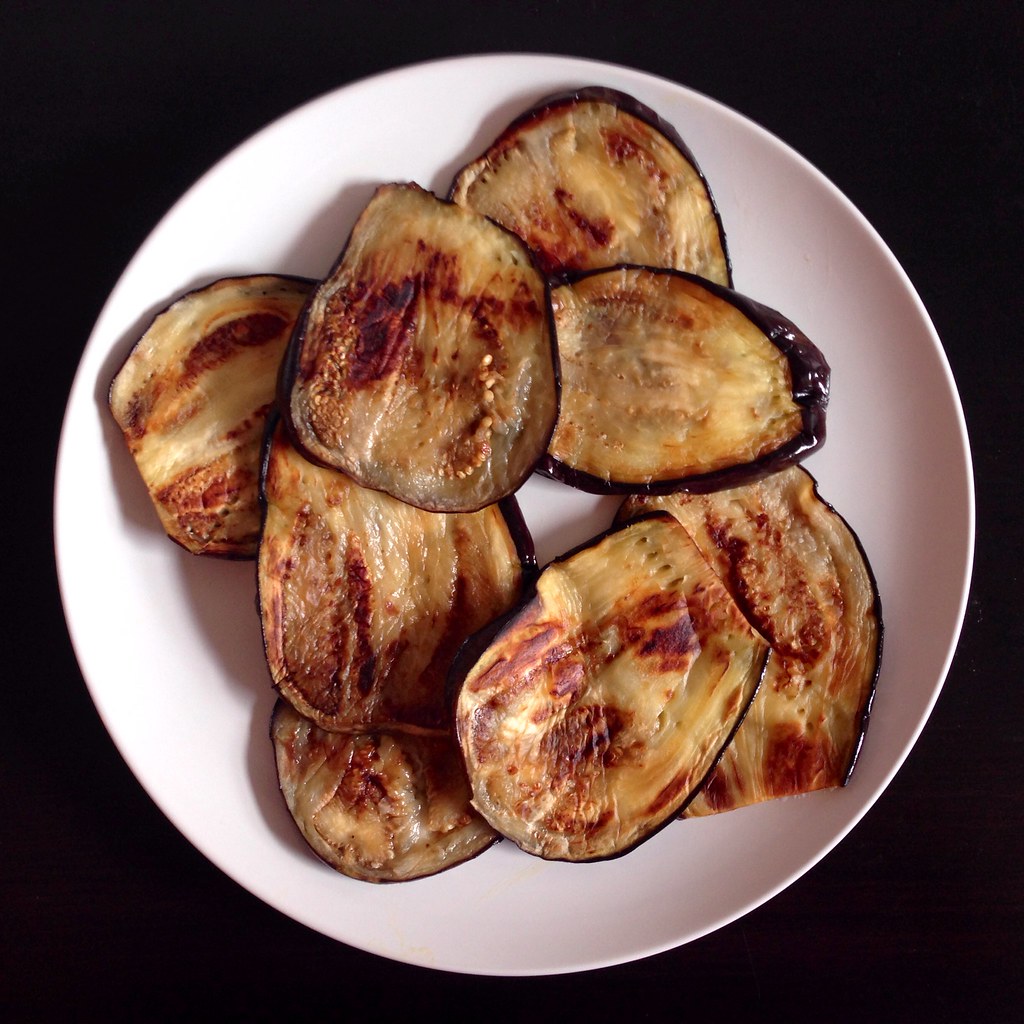
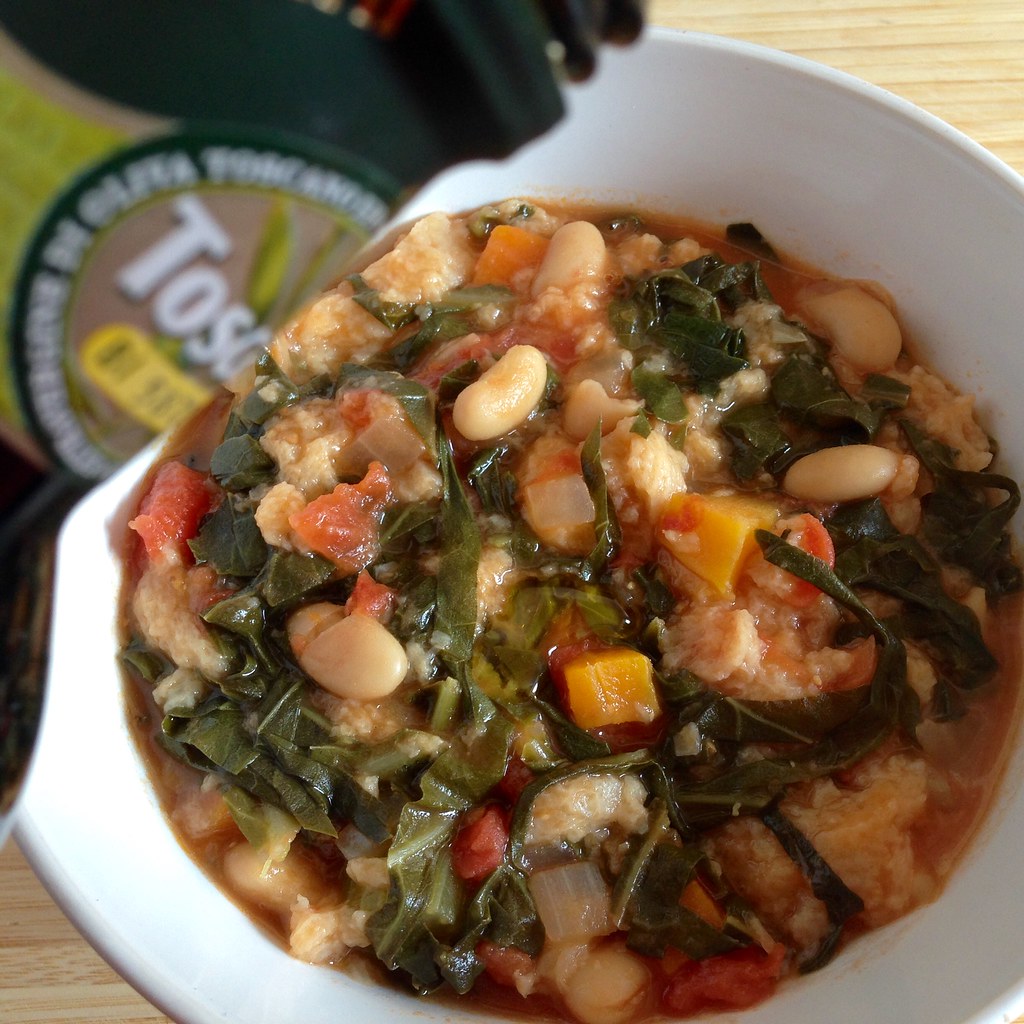
Since ribollita is originally peasant food, there's a multitude of recipes for it (some even argue that since it was created before the advent of tomatoes in Italy, there shouldn't be any tomatoes in it), but traditionally the main ingredients are always cavolo nero (also called lacinato kale or Tuscan kale), cannellini beans, and stale Tuscan bread.  Since I had recently received collard greens in my Boston Organics delivery, I opted to use that instead of the cavolo nero, which I realize is taking great liberties with the dish, but it still ended up tasting really good, if with a slight Southern twist.   You can also another hearty green (like kale or Savoy cabbage) or a combination of a hearty green and a more delicate green (like Swiss chard or spinach).

I learned that Tuscan bread traditionally doesn't contain any salt because the city-state of Pisa used to control the salt trade in that region, and the Florentines hated the Pisans.  I found a loaf of bread labelled "Tuscan bread" at my local grocery store, but when I looked at the label, I wasn't surprised to see salt listed in the ingredients.  It'll probably be impossible to find a loaf of bread without salt in it outside of Tuscany, so just use a hearty, country-style bread.

https://www.flickr.com/photos/joyosity/15336008342/

Back to the ribollita at Triangolo delle Bermuda:  the owner, Vitullio, stopped by to talk to us and explained that the soup needed to be topped with some Tuscan olive oil.  He grabbed a green bottle and liberally poured some all over my bowl.  I took a bite, and and it was like the heavens had opened and I could hear harp music playing.  I had never, ever tasted olive oil like that.  It was bold and bright and fruity and really elevated the other flavors in the soup.  I asked Vitullio for the brand so I could buy that exact bottle, but I think he misunderstood because he just started telling us about the Toscano IGP designation for olive oils and how important it was to buy olive oils with that label.  Alas, I never did find out which brand of olive oil that was, but I was now on the hunt for official Toscano IGP olive oils.

https://www.flickr.com/photos/joyosity/15340346945/

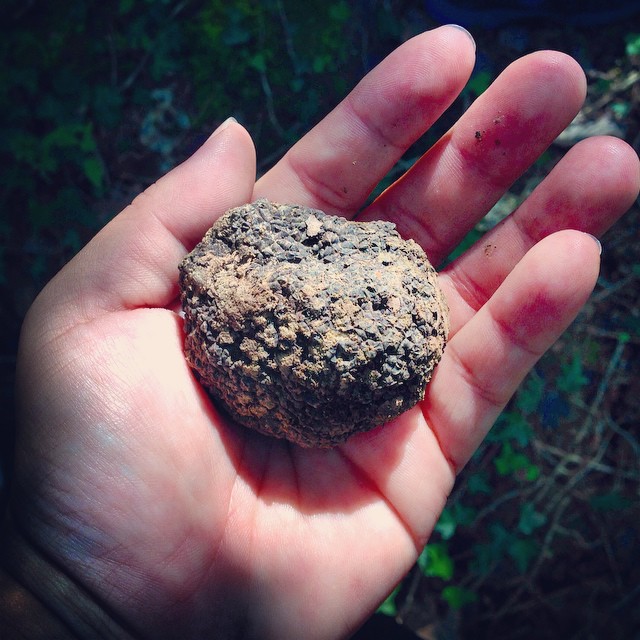
A few days later, I went on a truffle hunting and wine tasting tour, which if you ever get the chance, you should definitely do!  We spent the first part of the tour following Ciocco (short for cioccolata), the truffle hunting puppy, around a hazelnut grove.  He managed to find 5 black summer truffles, which were used in our "light lunch" back at the farm.  The "light lunch" turned out to be a three course meal with a splendid antipasto plate, a main course of truffle pasta, dessert, and lots and lots of local wine.

Afterwards, we drove to Fattoria di San Michele a Torri, an organic farm and winery in the Chianti region, for the wine tasting.  We started off with one of their olive oils, which although beautifully bottled, was way too grassy and spicy for me.  I realized that not all olive oils made in Tuscany were going to taste the same and decided I was going to have to taste test the olive oil before I bought one.

https://www.flickr.com/photos/joyosity/15149734688/

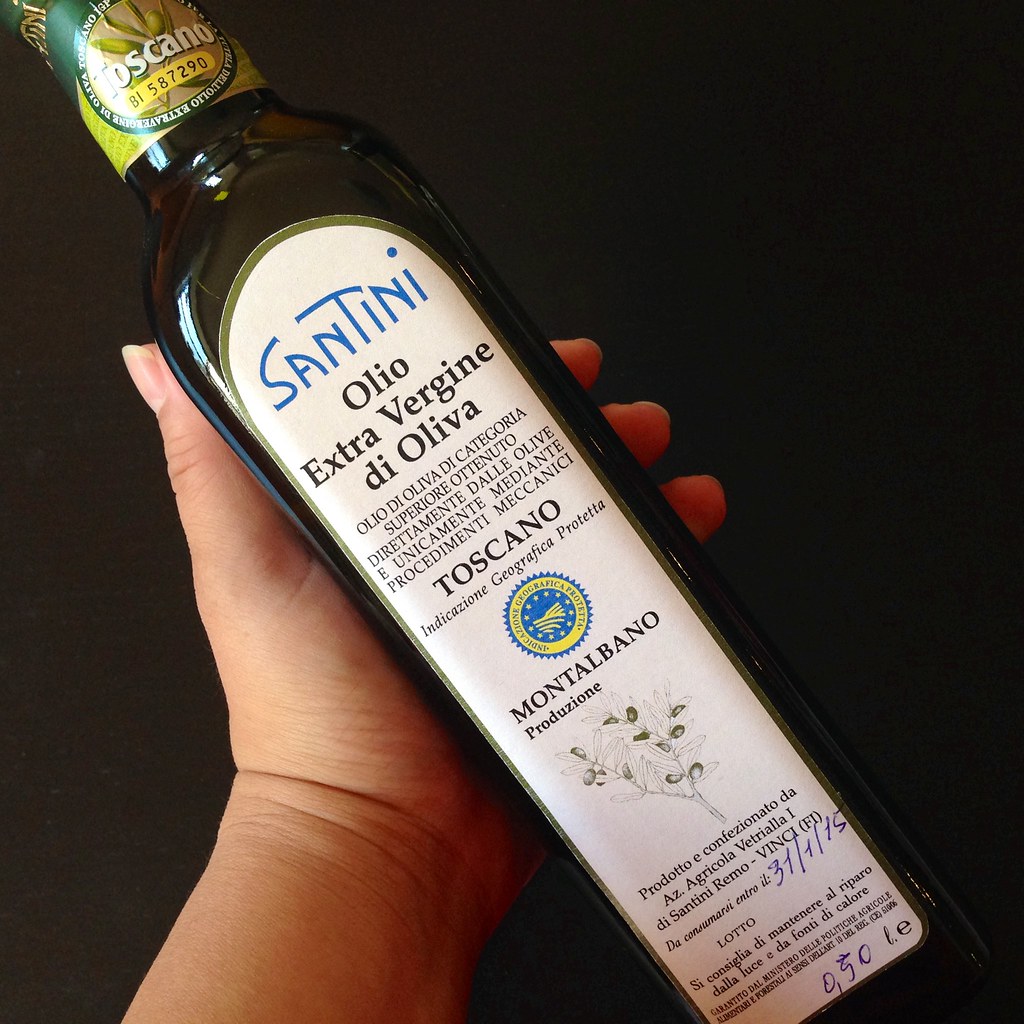
Luckily, I had a chance to do so in the town of Vinci (Leonardo's birthplace).  I ended up picking up this Santini, which although fruity, was a little milder than I remember that first olive oil being.  All this is to say that not all olive oils are the same, and you should try to find one that you really like to use as a finishing oil.

https://www.flickr.com/photos/joyosity/15149604820/

Ribollita (Tuscan Bread Soup)
serves 6

3 tablespoons olive oil
1 large onion, chopped
2 carrots, chopped
2 celery stalks, chopped
2 garlic cloves, thinly sliced
1 tablespoon fresh thyme, chopped
28 oz. can of whole, peeled tomatoes
1 lb. cavolo nero, or a combination of kale, Savoy cabbage, collard greens, Swiss chard, and/or spinach, de-ribbed and sliced
16 oz. can of cannellini beans, drained
3 cups water
Kosher salt and fresh ground pepper
8 slices of day old Tuscan bread, crusts removed
Good quality extra virgin olive oil, to finish

Day 1:  In a large Dutch oven or saucepan, heat the olive oil over medium heat.  Add the chopped onion, carrots, celery, and a pinch of salt and cook until the onion is soft and translucent, about 10-15 minutes.  If the vegetables start to brown, lower the heat.  Add the garlic, thyme, and another pinch of salt and cook for another minute or two, until fragrant.

https://www.flickr.com/photos/joyosity/15336004482/

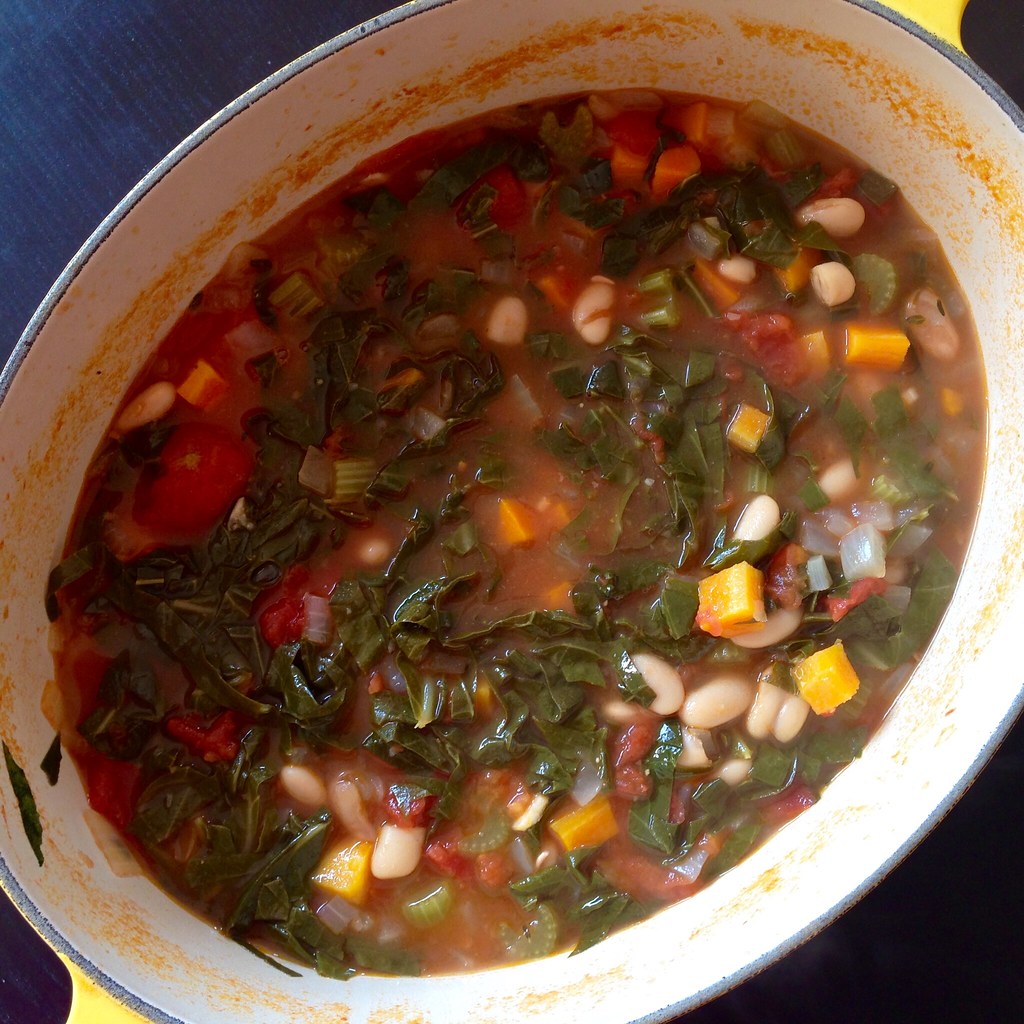
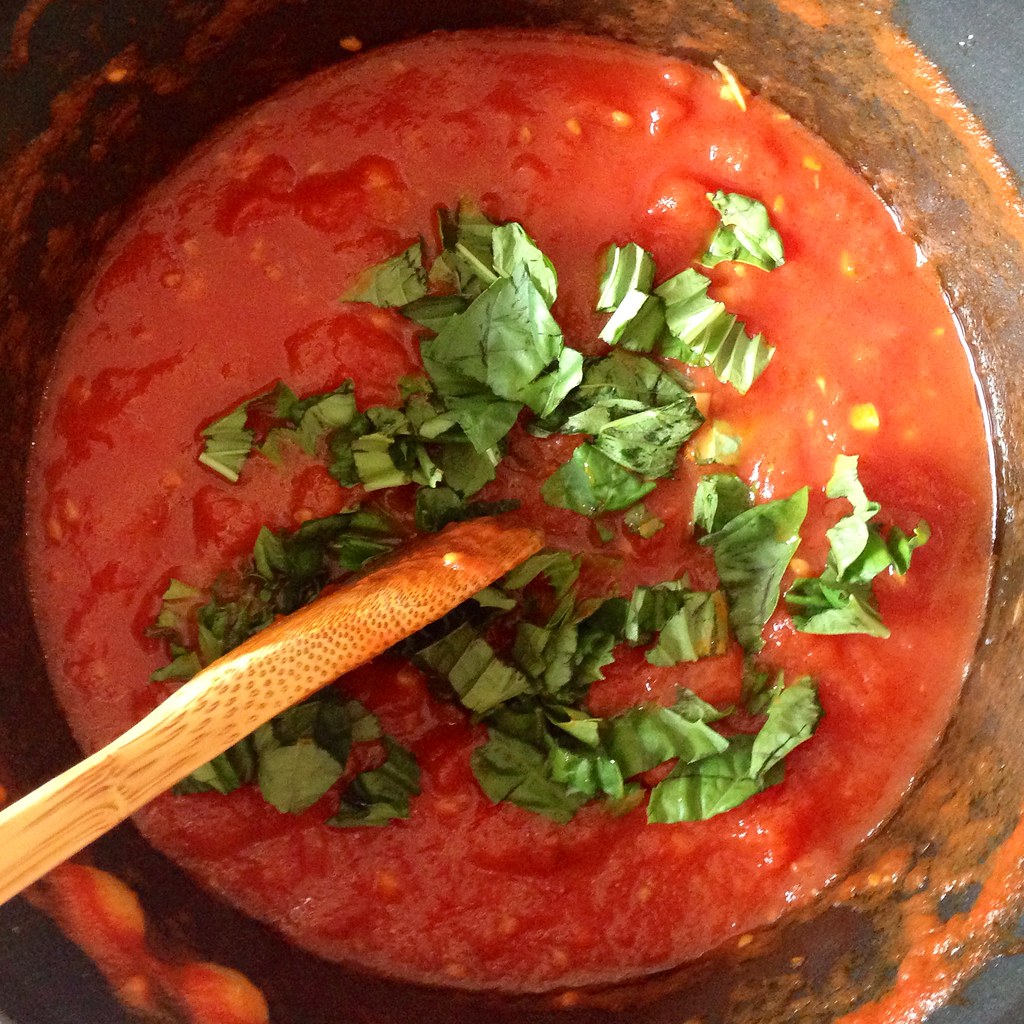
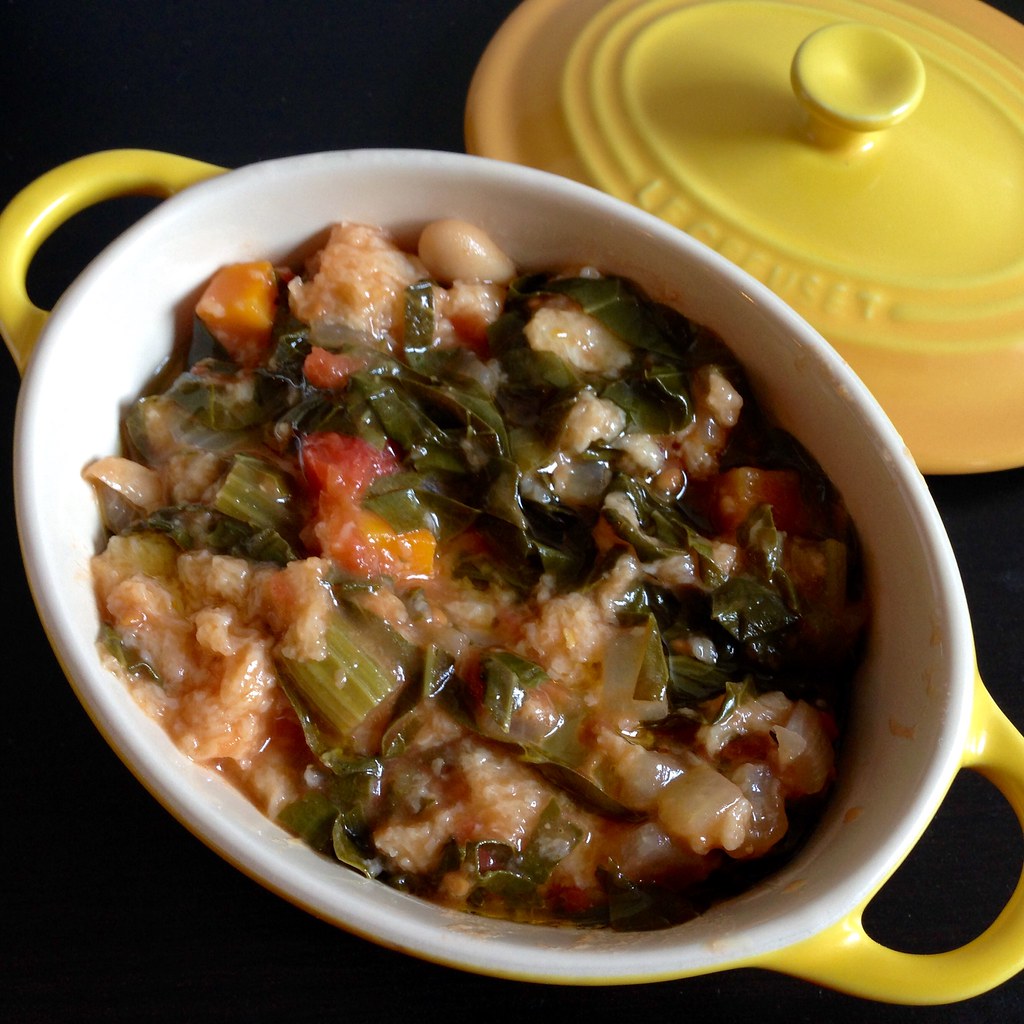
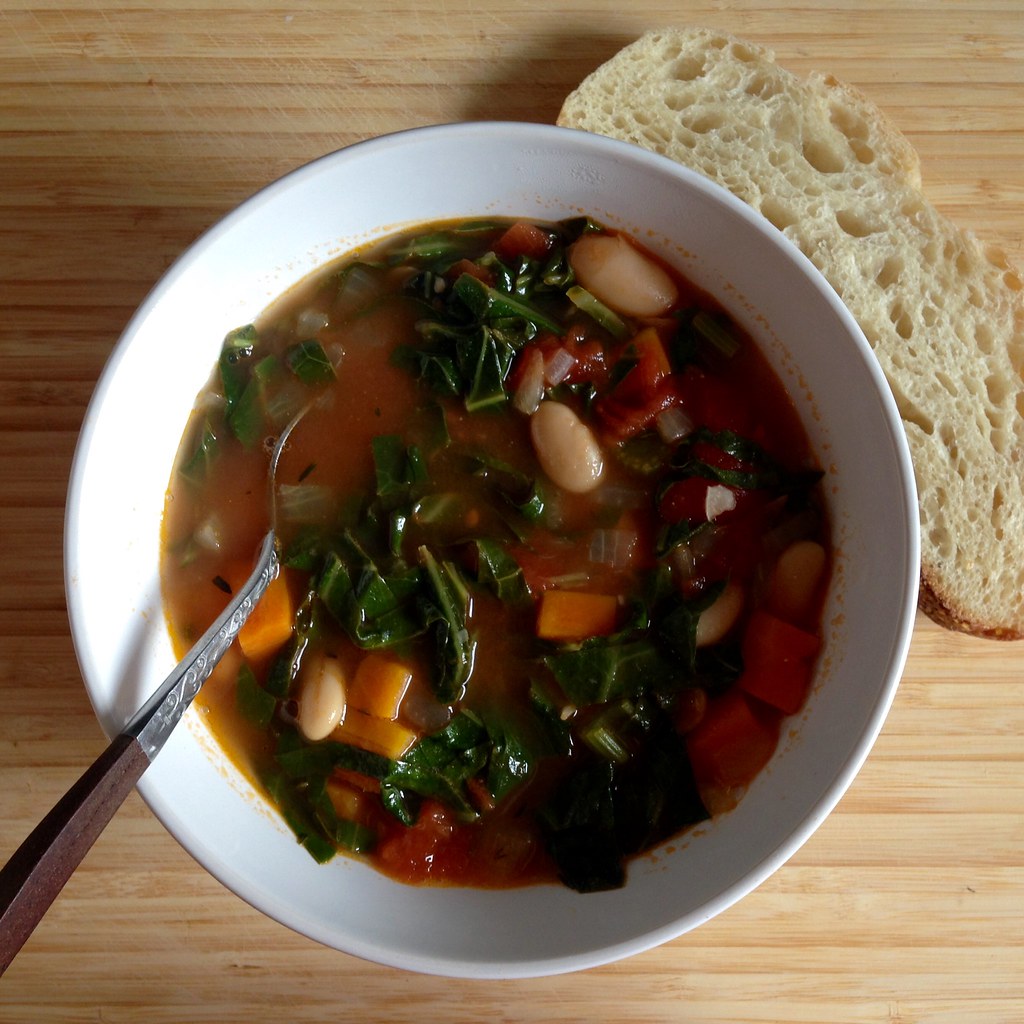
Add the tomatoes and their juices and the sliced greens.  Bring to a boil and keep stirring until the greens are wilted and cooked down.  Add the beans and enough water to just cover all the vegetables, about 3 cups.  Bring to a boil and then lower the heat and simmer until all the vegetables are tender.  Salt and pepper to taste.  You can serve the soup at this point with some fresh Tuscan bread.  Refrigerate the remaining soup.

https://www.flickr.com/photos/joyosity/15336313665/

Day 2:  Tear the bread into small pieces and add to the soup.  Bring to a boil again, and then simmer for 30 minutes, stirring to dissolve the bread into the soup. 

https://www.flickr.com/photos/joyosity/15149782337/

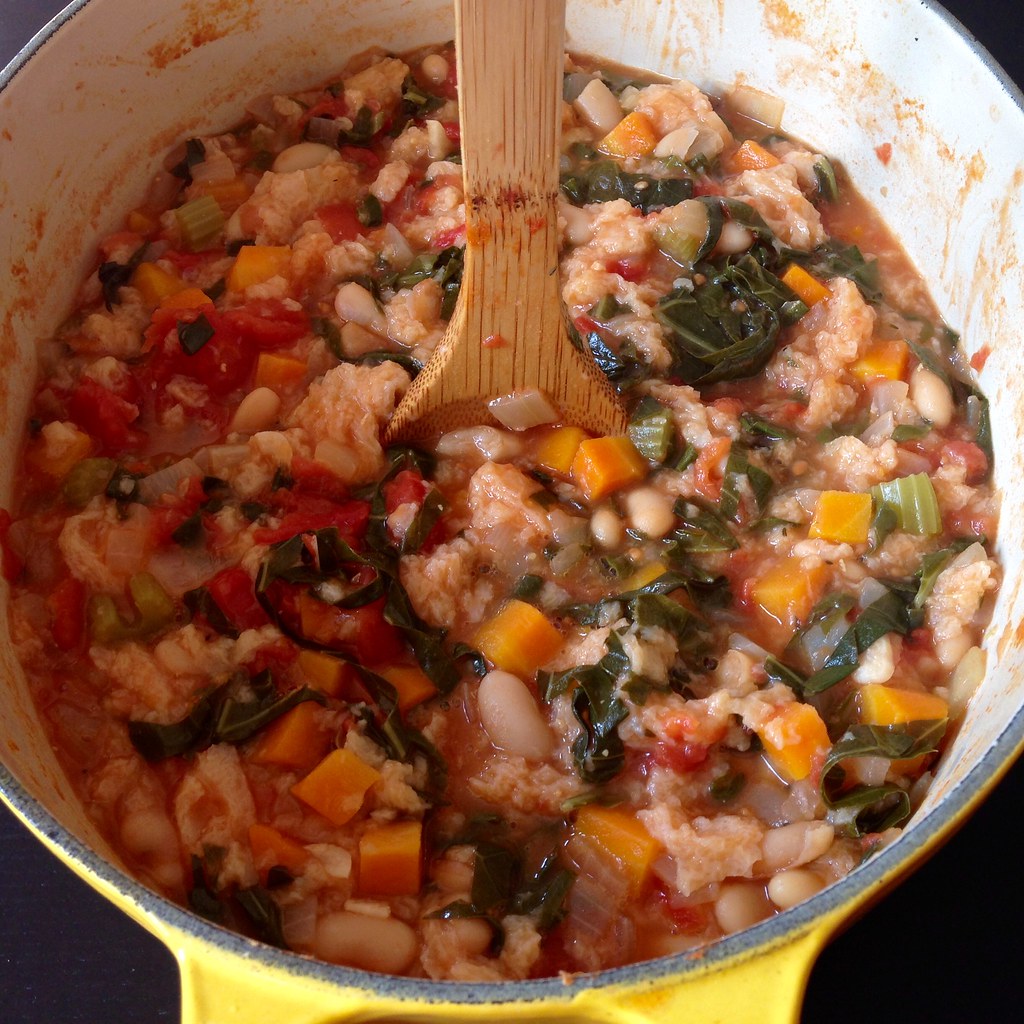
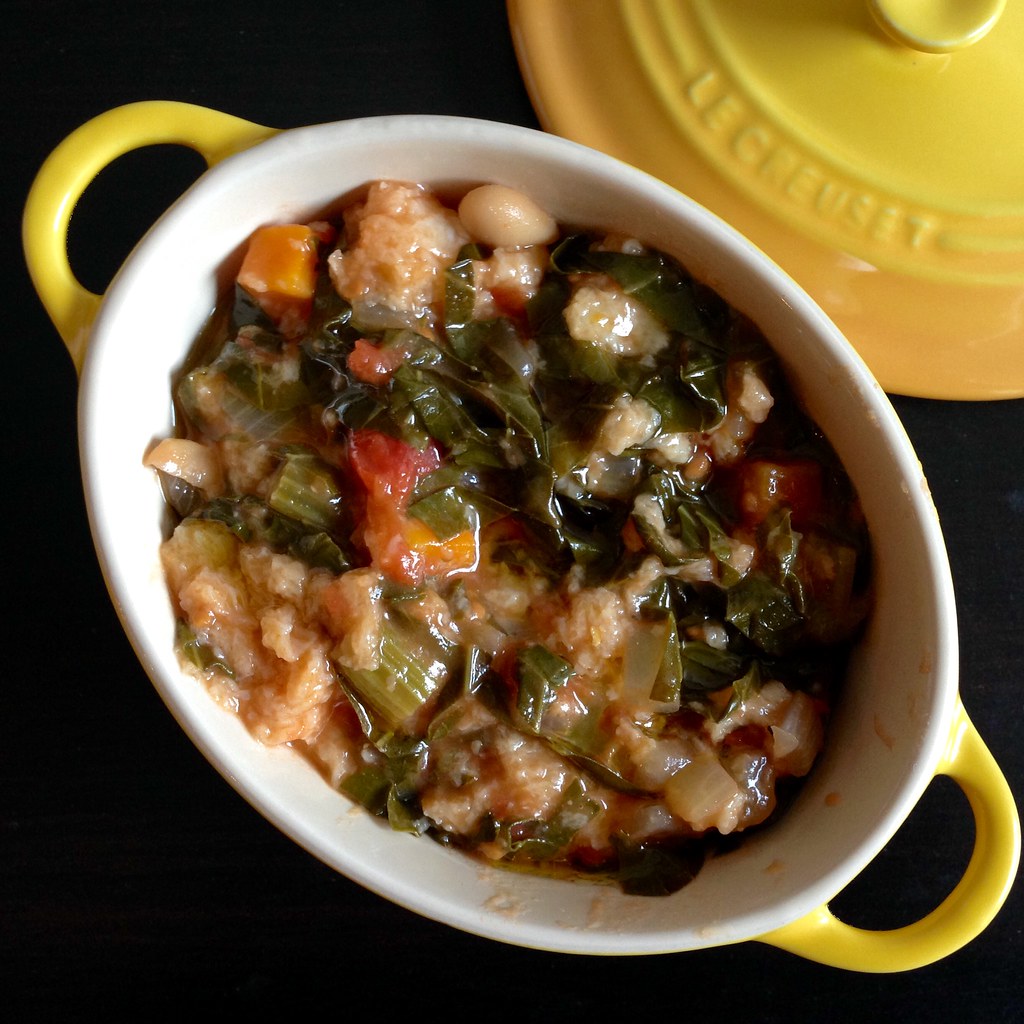
It should be thick enough that you can stand a wooden spoon in the soup.  Ladle the soup into bowls and drizzle with a generous amount of your favorite finishing olive oil.

https://www.flickr.com/photos/joyosity/15149605670/

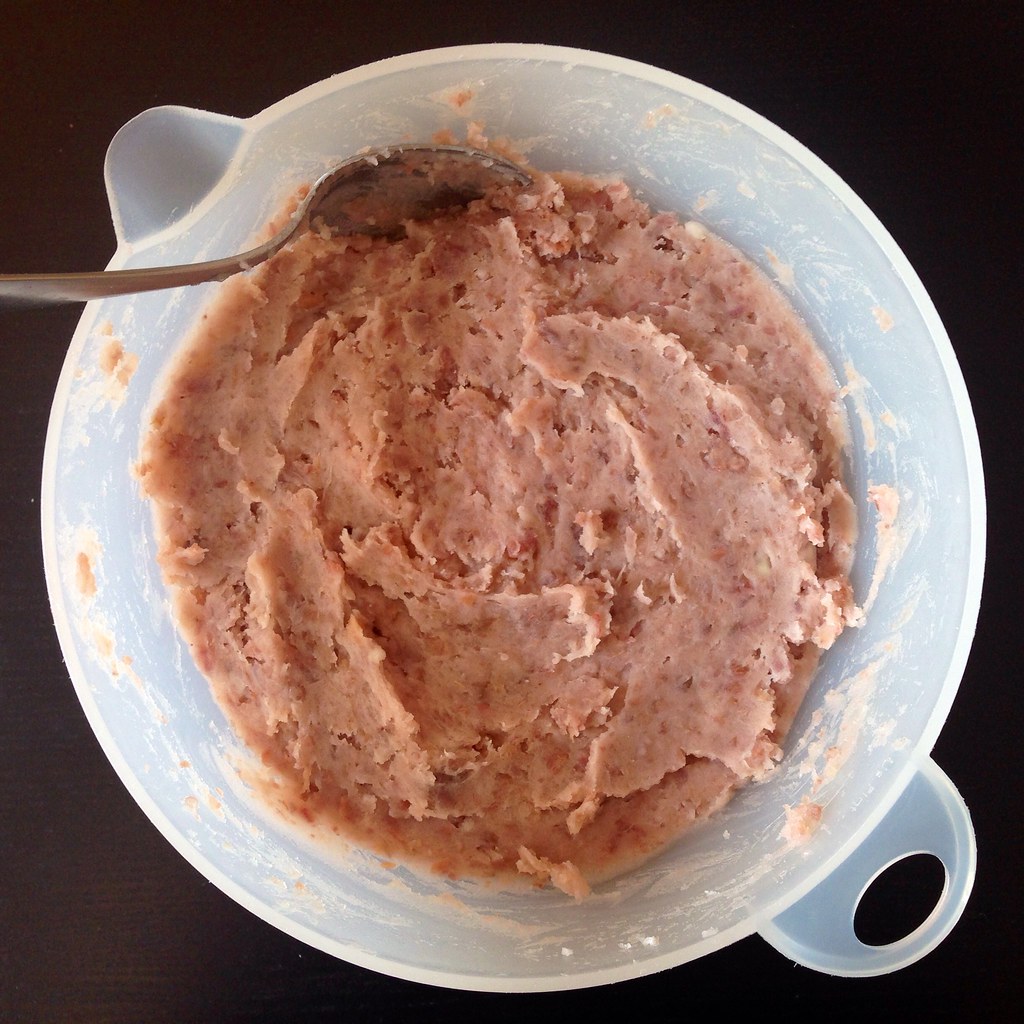
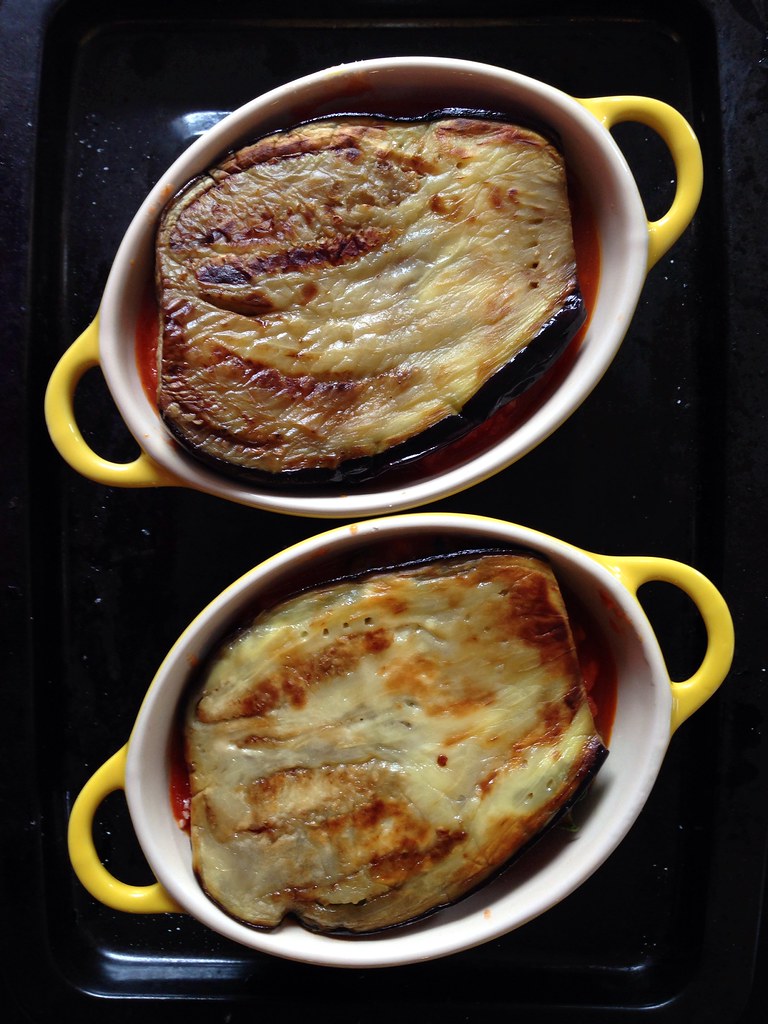
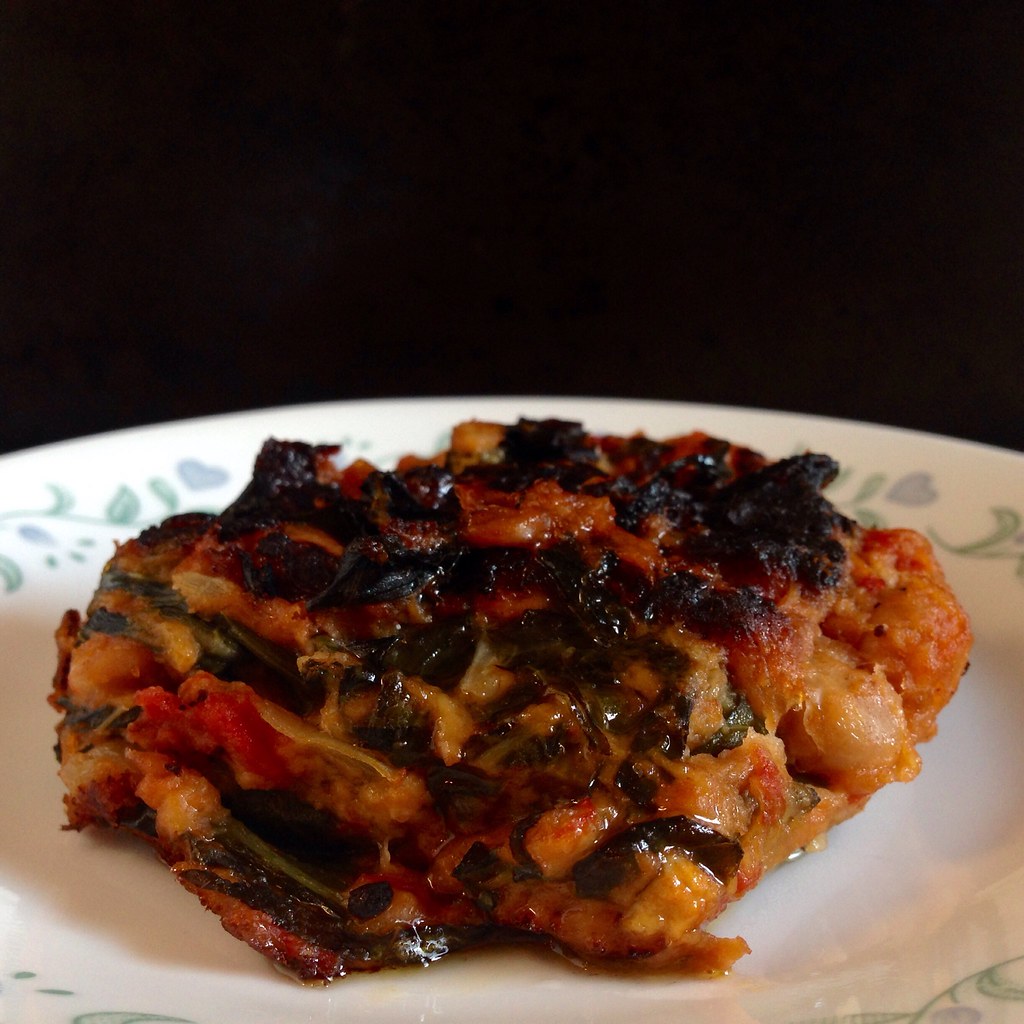
I've also read about Ribollita "Da Delfina" where they make a super thick ribollita and then form patties out of the soup and pan-fry them.  I tried doing that with my ribollita on day 3, but it was still a little too watery to keep its shape when I tried to flip the patties.  Still, it was an interesting experiment, distilling all the flavors of the soup into a solid form with the added dimension of the caramelization that occurs during the frying.

https://www.flickr.com/photos/joyosity/15340303362/

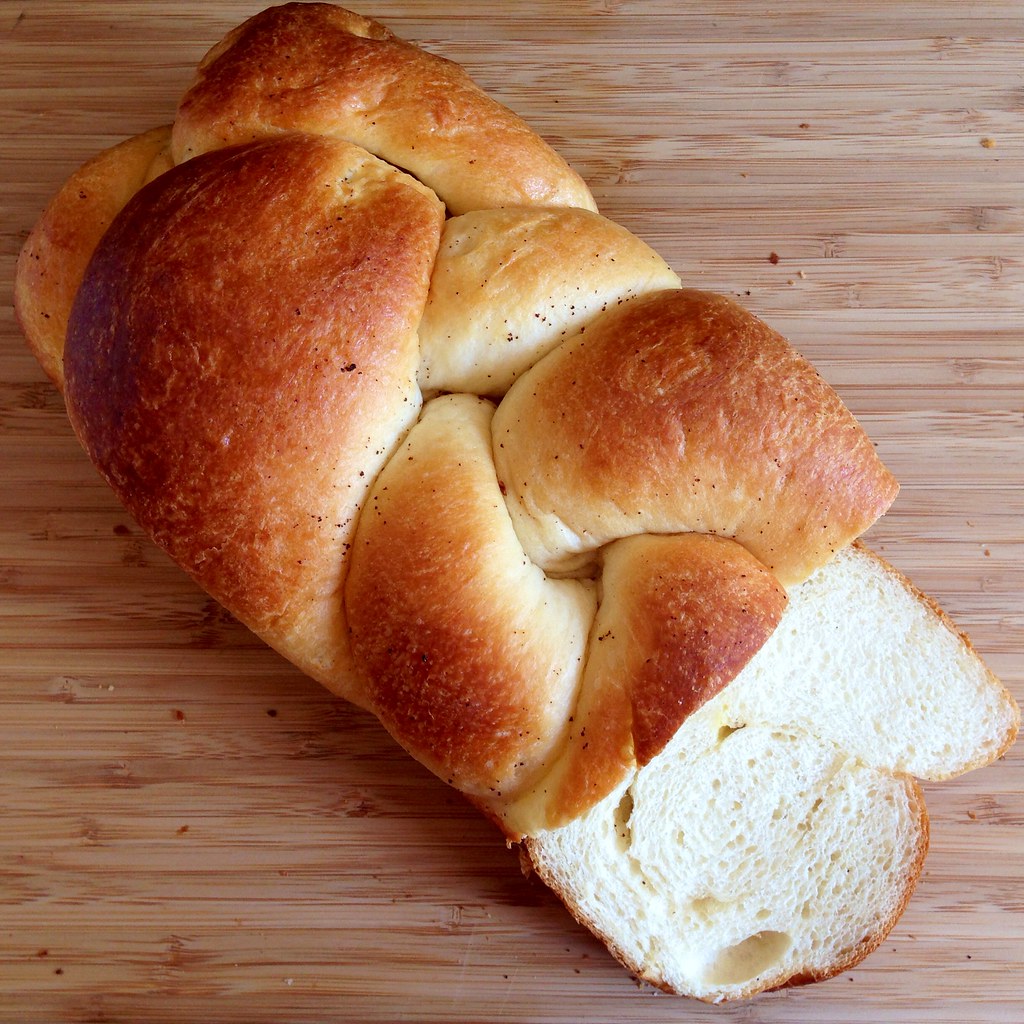
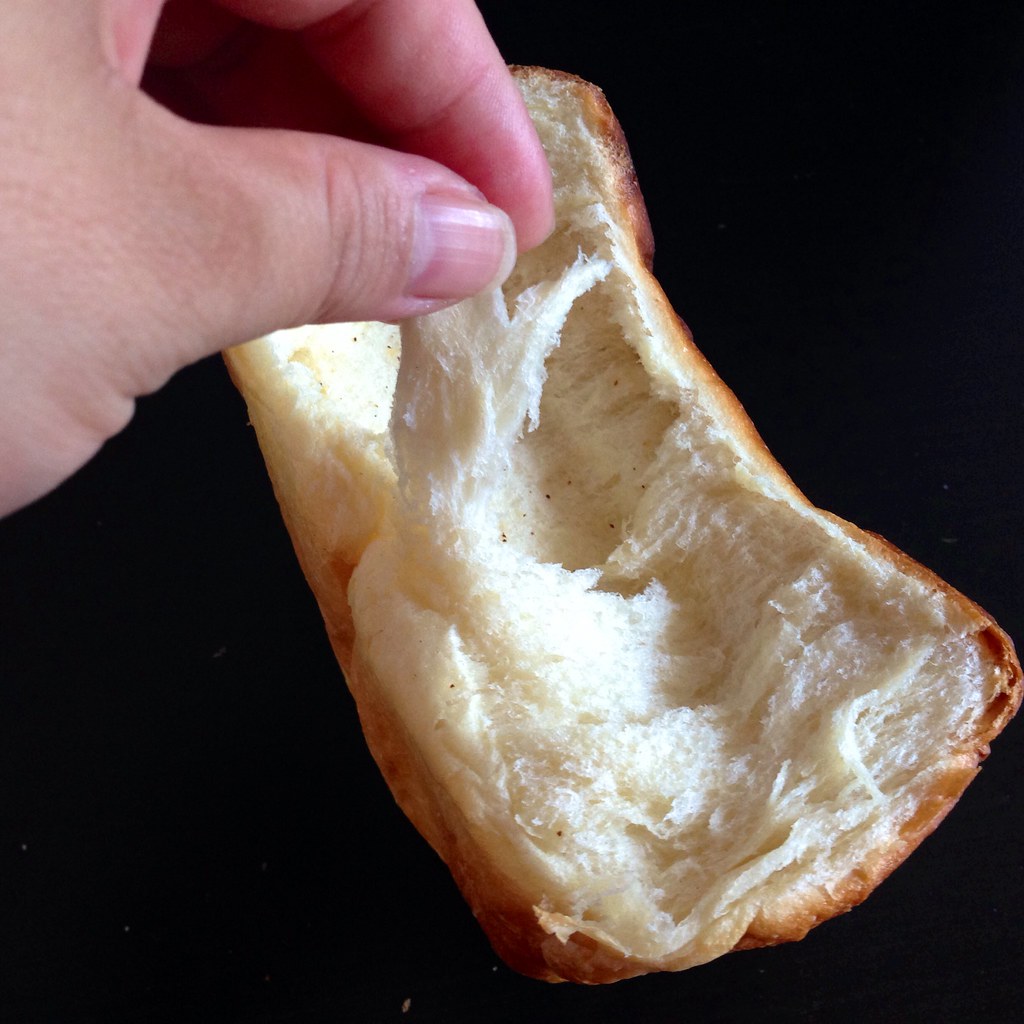
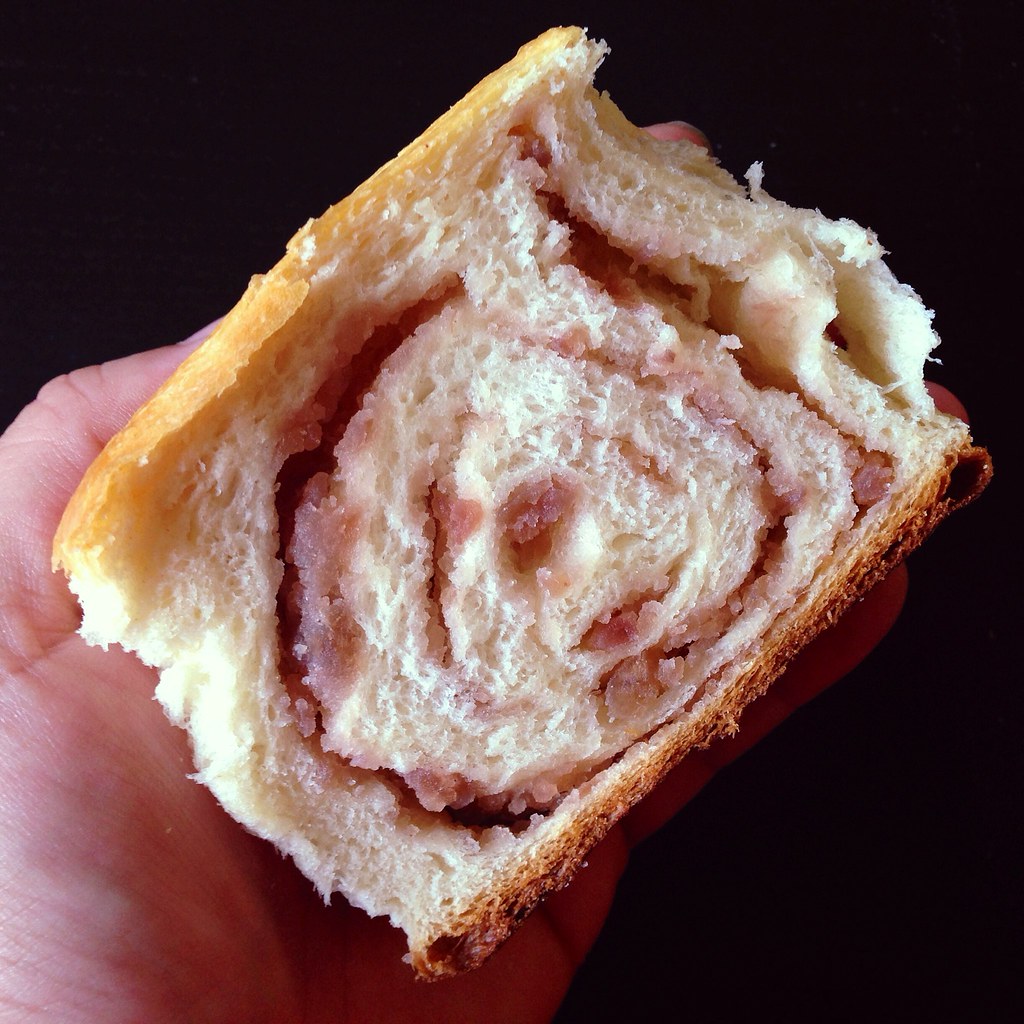
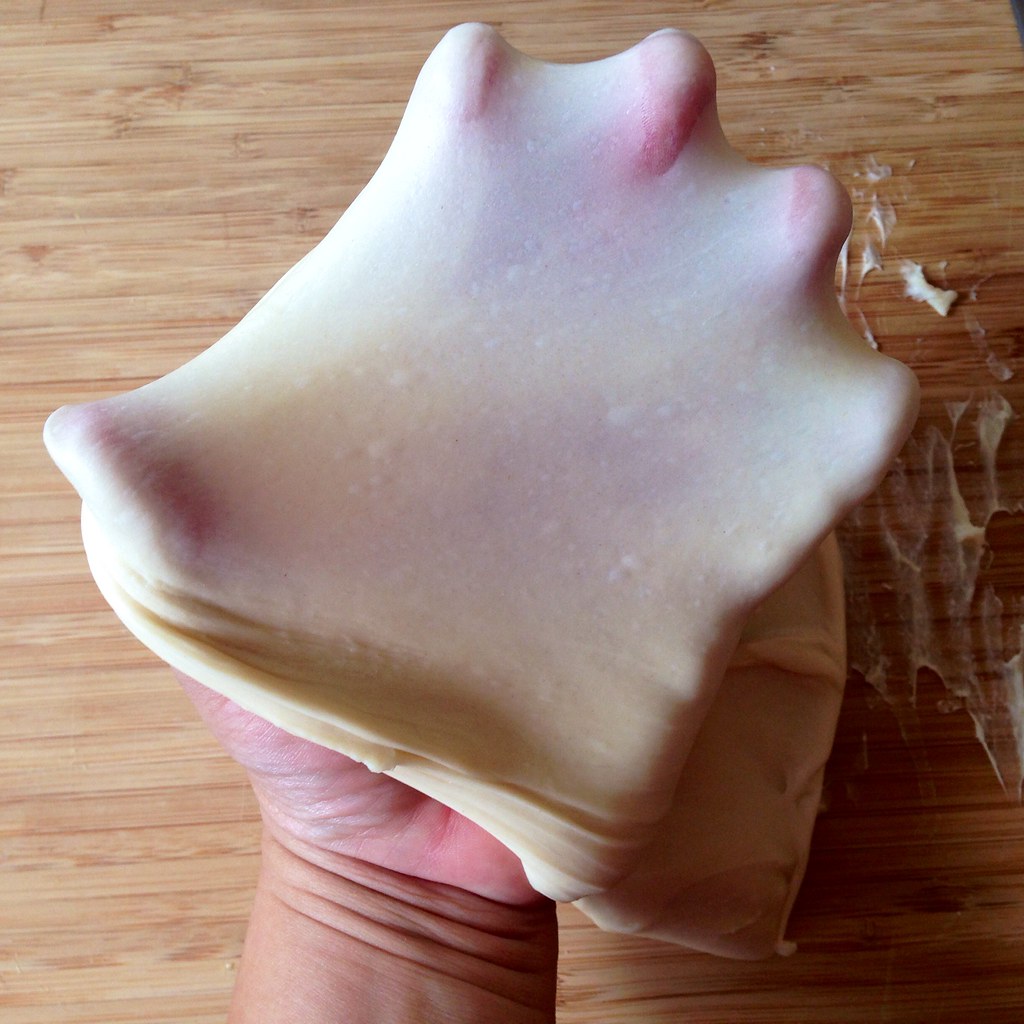
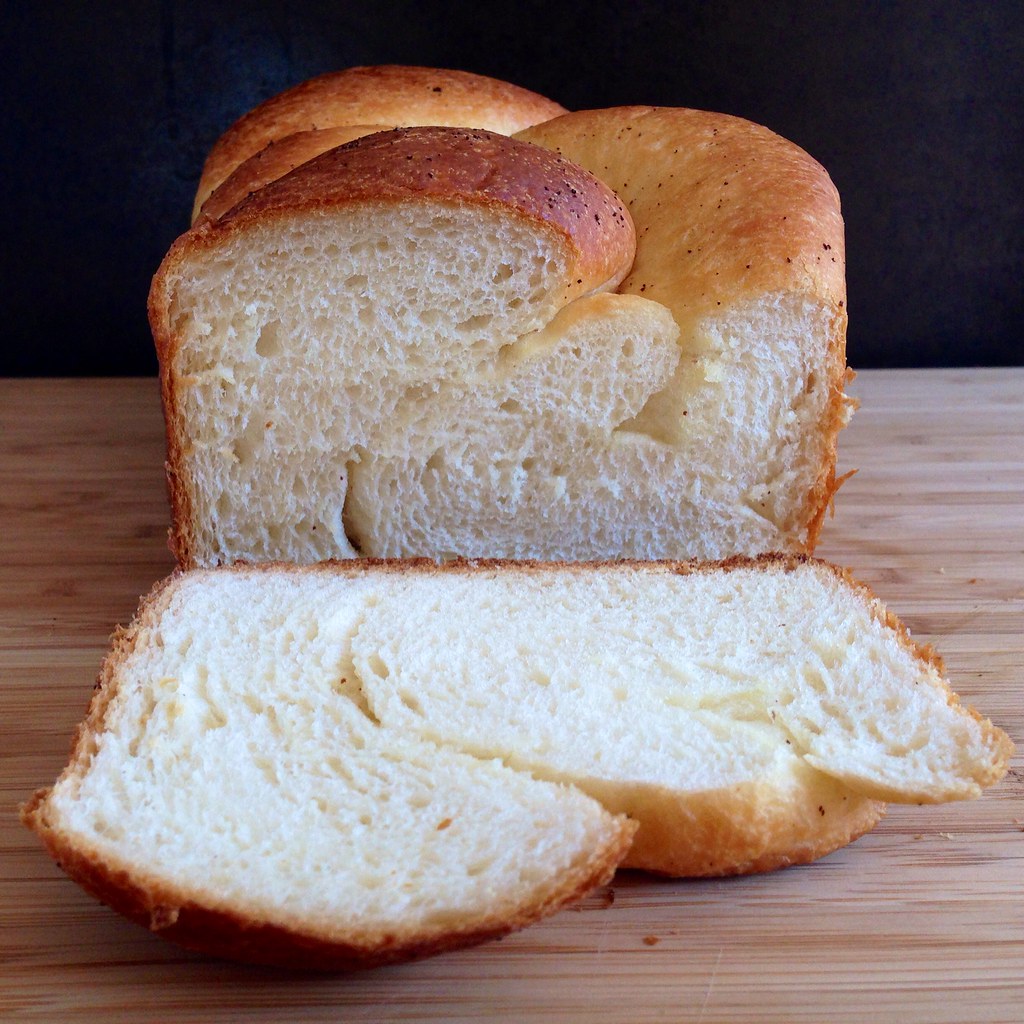
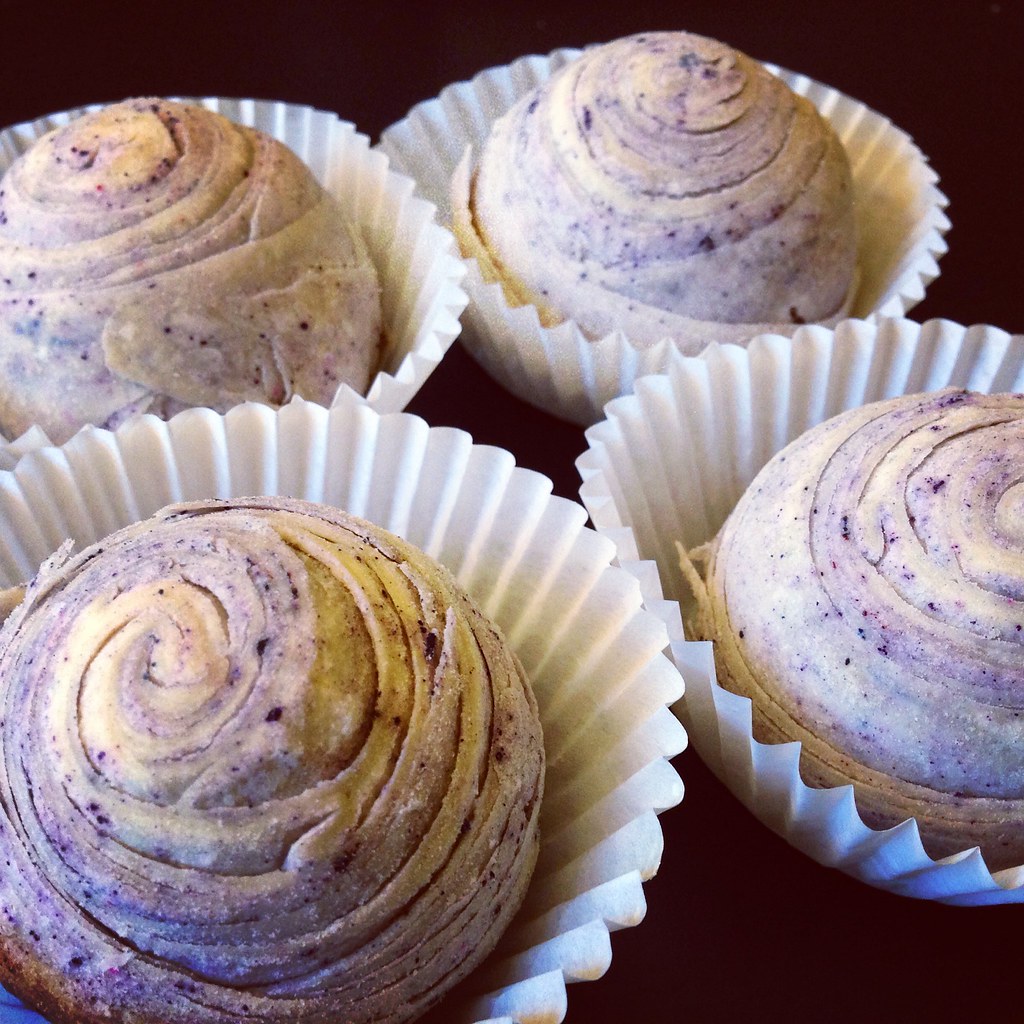
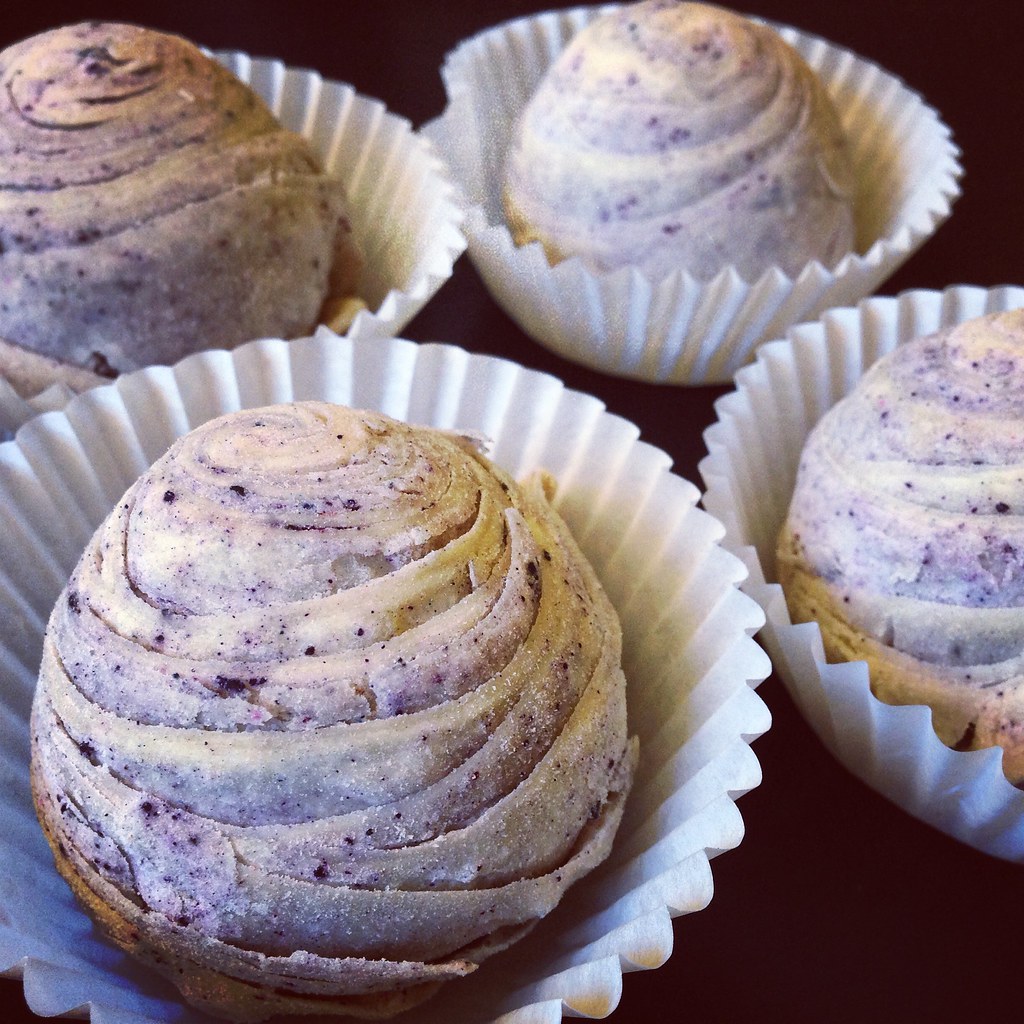
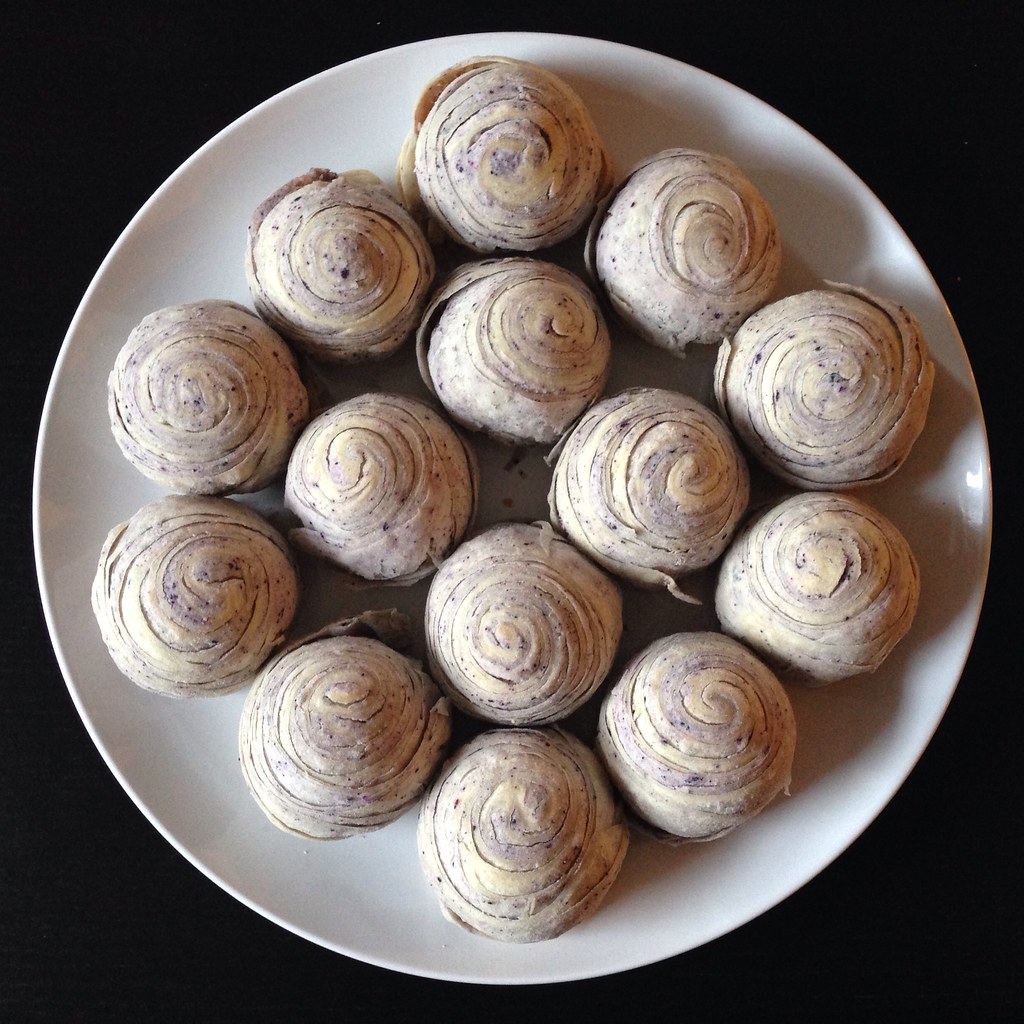
Previously:  Hokkaido Milk Bread Three Ways (Traditional, Braided, and Taro Swirl)
Last Year:  Salted Butter Caramel Apple Pie with Vodka Pie Crust
Two Years Ago:  Caramelized Onion and Swiss Chard Quiche

Monday, September 22, 2014

Hokkaido Milk Bread Three Ways (Traditional, Braided, and Taro Swirl)

https://www.flickr.com/photos/joyosity/15292302481/

If you're not familiar with Hokkaido milk bread, it's that super soft, sweet bread you can get at Asian bakeries.  You know how when you walk into an Asian bakery there's this awesome smell?  It's buttery, milky, and sweet, but more than just the sum of those things.  Well, I just discovered that making this bread will basically recreate that smell in your kitchen.  It's incredible.

https://www.flickr.com/photos/joyosity/15108861047/

This bread is pretty much on the opposite end of the spectrum from no-knead bread.  It involves a multitude of steps and lots of kneading, but the end result is like eating a fluffy cloud of bread.  I think it's best when fresh, but after a few days, you can toast it for the best toast of your life, or even better, make French toast with it!

Since I had some leftover taro paste from making the Taiwanese taro swirl mooncakes, I decided to wrap some in the dough and make Taro Swirl Milk Bread.  The bread didn't end up rising quite as much as I would like; I think next time I'll keep the dough a bit thicker before I add the taro and roll it up so that there's a higher bread to taro paste ratio.

https://www.flickr.com/photos/joyosity/15295081462/

Hokkaido Milk Bread Three Ways (Traditional, Braided, and Taro Swirl) (adapted from Lady and Pups)
makes 2 loaves

For first proofing:
600 grams bread flour
42 grams egg white
7 grams yeast
168 grams heavy cream
190 grams whole milk
12 grams unsalted butter, at room temperature
18 grams of sugar

For second proofing:
7 grams salt
5 grams yeast
90 grams sugar
50 grams egg whites
3 grams milk powder
12 grams unsalted butter, at room temperature

To finish:
40 grams butter
Kosher salt
1 egg

Combine the heavy cream, whole milk, butter, and sugar and warm it in the microwave to 110°F.  In a stand mixer with the dough hook attachment, combine the bread flour, yeast, egg whites, and warm milk mixture.  Knead until smooth on medium speed.  Cover and proof in the refrigerator for 18-24 hours until doubled.

Once the dough has doubled, punch out the air.  Cut the dough into small "bite-size" pieces and return it to the stand mixer.  Add the salt, yeast, sugar, and egg whites and turn the mixture on medium.  Work the dough until smooth and elastic (about 5 minutes), then add the butter.  Keep the mixer on medium and work for another 3 minutes.  Then turn the mixer on medium high and work the dough for another 6-10 minutes.  The dough should pull away from the bowl and make "slapping sounds" against the bowl.

https://www.flickr.com/photos/joyosity/15108701120/

At this point, the dough shouldn't be too sticky but still moist and have developed enough gluten that you could slowly stretch it into a thin, translucent film without breaking it.  Divide the dough into 2 equal portions and let rest for 30 minutes.

In the meantime, brown the 40 grams of butter in a small saucepan over medium-low heat.  The butter will start to foam, then turn brown and smell nutty.  Turn off the heat and set the browned butter aside.

Once the dough is rested, divide each half into 3 equal parts.  Roll each part into an long oval shape, then fold the sides toward the center (like folding a letter) and roll it out again into a long rectangle.  Roll the long rectangle up into a spiral.  Repeat for the other portions and let rest for another 15 minutes.

https://www.flickr.com/photos/joyosity/15295418635/

Variation #1:  The traditional way is to take the 3 portions and roll each into a long oval.  Brush with the browned butter and sprinkle with a little salt, then roll up into a spiral.  Place the 3 spirals seam side down in a loaf pan.

https://www.flickr.com/photos/joyosity/15295453685/

Variation #2:  If you want to make a braided loaf, after brushing on the butter and salt, roll each of the portions lengthwise into a long snake.  Braid the three snakes, tuck the ends underneath, and set into a loaf pan.

https://www.flickr.com/photos/joyosity/15108865578/

Variation #3:  For the taro swirl bread, shape the dough the traditional way, but instead of brushing with butter and salt, spread a thin layer of sweetened taro paste on top of the long oval before rolling up into a spiral.

https://www.flickr.com/photos/joyosity/15108653109/

At this point, you can freeze the shaped dough if you want and just let it come to room temperature before moving on when you're ready to bake the bread.

Preheat the oven to 360°F.  Let the dough proof to 80% full (not doubled, which would be 100%); this will probably take 60-90 minutes.  Make an egg wash by beating the egg with a tablespoon of water.  Once the dough is proofed, brush the top with the egg wash and cover with aluminum foil.  Bake for 20 minutes, then remove the foil and back another 10-20 minutes until golden brown on top.

https://www.flickr.com/photos/joyosity/15108738410/

While the braided loaf turned out pretty well, I was a little disappointed with the final look of the traditional loaf (see the second picture from the top).  I think since I used a flexible silicon loaf pan, the bread expanded outwards instead of just up so it ended up not rising as high as I would've liked it to.  However, I liked the texture of the traditional loaf more because if you look at the cross sections of the two loaves, the traditional one has a much fluffier, almost stringy (in a good way) consistency.  This is due to the way it is shaped, hence, the reason it is more traditional.

I also noticed that the bottom of my first loaf (third picture down) was pretty brown by the time I took it out of the oven, so for my next loaf I baked it on top of one of those AirBake cookie sheets, and it turned out much better.

https://www.flickr.com/photos/joyosity/15108741120/

Next:  Ribollita (Tuscan Bread Soup)
Previously:  Ginger Scallion Lobster Buns
Last Year:  Sweet Corn Ice Cream with Black Raspberry Swirl

Tuesday, September 9, 2014

Ginger Scallion Lobster Buns

https://www.flickr.com/photos/joyosity/15138821161/

This past Labor Day I went on a road trip to Portland, ME with two of my favorite people in the world.  I insisted that we go to Eventide Oyster Co. since I was still dreaming about their lobster rolls from my trip 2 years ago.  This time the Hollandaise lobster roll had been replaced on their menu by a ginger scallion version, which I just had to try, along with my favorite from last time, the brown butter lobster roll.

https://www.flickr.com/photos/joyosity/14955116369/

I took a bite of the ginger scallion lobster roll first and decided right then and there that it was my favorite lobster roll ever, until I took a bite of the brown butter one.  Both were just so good in their own special way!  I knew I had to try to recreate the ginger scallion lobster roll at home, and this time, I was going to make my own steamed buns.  I used my mom's recipe for making hua juan except I omitted the sesame scallion glaze and just shaped the rolls by rolling the dough into a long snake and cutting them into about 5" logs.  I also made some hua juan to use for buns since I figured it was in the same flavor profile.

After trying both, I really preferred the sandwiches made with the hua juan.  They're just so pretty, and the added flavor and texture really complements the ginger scallion lobster well.  You can also just use store bought steamed buns, but I guarantee that the fresh made ones will be better than anything you can get from a store.

https://www.flickr.com/photos/joyosity/14955254728/

Ginger Scallion Lobster Buns
serves 4-6

3 1.5 lb lobsters, steamed
3/4 cup chopped scallions
1 tablespoon grated ginger
1 tablespoon minced garlic
1 tablespoon sesame oil
1 teaspoon soy sauce
1/2 teaspoon rice wine vinegar
1/2 teaspoon salt
12 hua juan or steamed buns

Remove the meat from from the claws, knuckles, and tail of the lobsters.  Chop or tear into small pieces and mix with the scallions, ginger, garlic, sesame oil, soy sauce, rice wine vinegar, and salt.

Slice the hua juan or steamed buns in half, leaving one side attached.  Fill the buns with the ginger scallion lobster salad and enjoy!

https://www.flickr.com/photos/joyosity/14955253608/

Next:  Hokkaido Milk Bread Three Ways (Traditional, Braided, and Taro Swirl)
Previously:  Taiwanese Taro Swirl Mooncakes
Last Year:  Lobster Bisque

Monday, September 8, 2014

Taiwanese Taro Swirl Mooncakes

https://www.flickr.com/photos/joyosity/14985736599/

Today is the Mid-Autumn Moon Festival, which to me means mooncakes!  Most of my life, when I thought of a mooncake, I pictured a heavy, rich pastry filled with red bean or lotus seed paste and maybe a salted egg yolk inside.  They're good, but you can only eat a couple of bites before it gets to be too much.  Then I discovered Taiwan's version:  light, flaky layers of pastry wrapped around sweetened taro root paste.  Not only are they delicious, they're really gorgeous!

I never imagined they'd be something I could make at home, but then I came across a few recipes and just had to try.  Some of the recipes use unsalted butter or shortening in the dough and/or taro paste, but I personally like the subtle coconut flavor you get from using coconut oil so I used that instead.  Note:  This took way longer than I thought it would take to make.  I made the taro paste the day before, and it still took me over 3 hours to make the mooncakes the day of.

https://www.flickr.com/photos/joyosity/15149442246/

Taiwanese Taro Swirl Mooncakes (adapted from The 350 Degree Oven)
makes 20 pastries

For the taro paste:
2 lb. taro root
1 teaspoon kosher salt
3/4 cup sugar
1/4 cup coconut oil

For the white dough:
1 3/4 cup flour
1/4 cup powdered sugar
1/2 teaspoon kosher salt
6 tablespoons coconut oil
Water

For the purple dough:
1 1/2 cup flour
1/2 teaspoon kosher salt
7 tablespoons oil
Purple food coloring

Peel and cube the taro.  Steam for about 30-40 minutes until the taro is fork tender.  Use a ricer or mash the taro into a paste.  Mix with the the salt, sugar, and coconut oil.  Set aside to cool.

https://www.flickr.com/photos/joyosity/14984930580/

Sift together the flour, powdered sugar, and salt for the white dough in a medium bowl.  Add the coconut oil and 1/4 cup of water.  Stir and add more water if necessary, a tablespoon at a time, until the dough comes together.  Knead for a few minutes until smooth.

In a separate bowl, sift together the flour and salt for the purple dough.  Add the oil and a few drops of purple food coloring.  Add more food coloring as necessary to get a pale but noticeably purple dough.  (I used a gel food coloring, and for some reason it never really spread very well throughout the dough and mostly stayed in little specks.)  This dough will look and act more like wet sand than pastry dough.

Divide both doughs into 10 pieces and refrigerate for about 20 minutes to rest and chill slightly.

Preheat the oven to 350°F.

https://www.flickr.com/photos/joyosity/15148565016/

Roll one of the balls of white dough into a rough circle and wrap it around a ball of the purple dough, sealing it completely.  Roll the combined dough into a long oval and then roll it up into a spiral.  With the seam on the bottom, rotate the dough 90 degrees and roll out again into a long rectangle.  Roll the rectangle up into a spiral again and slice in half.  You'll now have two pieces of dough with beautiful spirals showing on the cut sides.

https://www.flickr.com/photos/joyosity/14985028217/

Place the cut side down and flatten the dough with your hands.  Roll out into a rough circle.  It's okay if the layers tear a little through this whole process.  Take a spoonful of the taro paste and place it in the center of the dough.  Gently pull the dough upward and around the paste to seal it inside.  Don't worry if the edges don't seal all the way; the dough doesn't stick to itself very easily.  Flip the ball over and gently reshape so that the spiral is centered on top and the bottom is slightly flattened.

https://www.flickr.com/photos/joyosity/15168601091/

Place on a Silpat- or parchment-lined baking sheet and bake for 30 minutes.  Remove from oven and allow to cool before eating.

https://www.flickr.com/photos/joyosity/15171225352/

I ended up with a lot of leftover taro paste, so I used it to make taro swirled Hokkaido milk bread!

https://www.flickr.com/photos/joyosity/15154417156/

Next:  Ginger Scallion Lobster Buns
Previously:  Thomas Keller's Caramelized Scallops
Last Year:  Ramen Lobster Rolls

Thursday, September 4, 2014

Thomas Keller's Caramelized Scallops

https://www.flickr.com/photos/joyosity/15084765972/

The first time I made these, it was because one of my friends really, really wanted to make something from Thomas Keller's Ad Hoc at Home cookbook with me.  I picked the caramelized scallops because I've always wanted to learn how to make those beautiful seared scallops you always see TV and it was probably one of the simplest recipes in the book.

Keller's recipe uses size U7 scallops, which means there are 7 scallops per pound.  Those are some ridiculously big scallops.  I asked for the 7 largest scallops at my local grocery store, and they only weighed a little more than half a pound.  =(

To account for the differences in size, I adapted his recipe by decreasing the brine and cooking time slightly.  I also changed the ratio of hot to cold water since I found that I had a hard time getting the salt to dissolve in the amount of hot water specified.  If you can find U7 scallops, bravo.  For the rest of us sad souls, here's how to make normal sized caramelized scallops.

https://www.flickr.com/photos/joyosity/14898538588/

Thomas Keller's Caramelized Scallops (adapted from Ad Hoc at Home)
serves 2

1/2 cup kosher salt
1 cup hot water
1 cold water
12 of the largest sea scallops you can find (about a pound)
About 2 tablespoons clarified butter
1/2 lemon (optional)

Line a small baking sheet with paper towels. Combine the salt with the hot water in a small bowl, stirring to dissolve the salt. Add the cold water and refrigerate until cold.

https://www.flickr.com/photos/joyosity/15082107371/

Add the scallops to the brine and let stand for 8 minutes (no longer, or the scallops may become too salty). Drain the scallops, rinse under cold water, and arrange in a single layer on the paper towels.

https://www.flickr.com/photos/joyosity/14898561047/

Heat the clarified butter in a large stainless steel frying pan over medium-high heat until it ripples and begins to smoke. (Although you may be tempted to use a nonstick pan, a stainless steel pan will produce a more beautiful caramelized exterior.)

https://www.flickr.com/photos/joyosity/15085119315/

Sprinkle the scallops lightly with salt and add them to the pan, without crowding. (If necessary, cook the scallops in two pans or in 2 batches; if they touch, they will steam rather than caramelize.) Cook, without moving the scallops, until the bottoms are a rich golden brown, 2 1/2 - 3 minutes. Turn the scallops and caramelize the second side.

https://www.flickr.com/photos/joyosity/14898483250/

Transfer the scallops to a serving platter and serve with a squeeze of lemon juice on top, if desired.

Previously: Melanzane alla Parmigiana (Eggplant Parmesan)
Last Year:  Brown Butter Vinaigrette Lobster Buns

Tuesday, September 2, 2014

Melanzane alla Parmigiana (Eggplant Parmesan)


When I used to have to go to the Upper East Side for work, I loved going to this little sliver of an Italian restaurant called Tre Otto.  I always ordered the melanzane alla parmigiana, which was actually an appetizer, but quite filling with their awesome bread.  It wasn't the usual eggplant parmesan with fried, breaded eggplants cutlets (although an eggplant parm sub is my go to order at  pizza/deli joints); this was layers of delicate eggplant, fresh basil, and the most delicious tomato sauce topped with fresh mozzarella and baked to perfection.  Sadly, I no longer go to New York for work, and apparently Tre Otto is no more, but luckily, I've been able to recreate the dish at home!

https://www.flickr.com/photos/joyosity/14913653430/

Melanzane alla Parmigiana (Eggplant Parmesan)
serves 2 

1 medium eggplant (about 1 lb.)
Kosher salt
Extra virgin olive oil
2 garlic cloves, minced
28-oz. can of San Marzano whole, peeled tomatoes
Small handful of fresh basil leaves, chopped
2-3 tablespoons grated Parmesan cheese
8 oz. ball of fresh mozzarella, sliced thinly

https://www.flickr.com/photos/joyosity/14913591429/

Slice the eggplant into 1/4"-1/2"slices, either lengthwise or crosswise, whatever will best fit into your baking dish.  Place the slices on a rack over a rimmed baking sheet or on paper towels and lightly salt on both sides.  Set aside while you start the tomato sauce.

Add a tablespoon of olive oil to a large saucepan over medium heat.  When the oil is hot, add the minced garlic and cook for minute or two, until softened but not browned.  Add the tomatoes with their juices (I like to use kitchen shears to cut the tomatoes up in the can before adding them) and bring to a boil.  Lower the heat and simmer while you cook the eggplant, stirring occasionally.

Preheat the oven to 350°F.

https://www.flickr.com/photos/joyosity/15077289796/

By now, the eggplant slices should have started to sweat.  Rinse under cold water and pat dry.  Add enough olive oil to lightly cover the bottom of a large skillet and heat on medium-high.  Add only enough eggplant slices to cover the bottom of the pan in a single layer.  Brush the top of the eggplant slices with olive oil while they are cooking.  Cook each side for a couple of minutes until soft and cooked through.

https://www.flickr.com/photos/joyosity/15097273791/

By now the tomato sauce should be almost done.  Stir and few times and mash any leftover big pieces of tomato.  Salt and pepper to taste.  Stir the chopped basil into the tomato sauce and remove from heat.

https://www.flickr.com/photos/joyosity/15097276831/

Lightly brush the bottom of a small baking dish or two individual sized ramekins with olive oil.  Start with a layer of tomato sauce, then add a layer of eggplant, a sprinkle of grated parmesan cheese, and a layer of fresh mozzarella.

https://www.flickr.com/photos/joyosity/14913728337/

Repeat layers, finishing with a layer of tomato sauce and cheese.  Bake for 30 minutes.  Let sit for 10 minutes before serving with some crusty bread.

https://www.flickr.com/photos/joyosity/15097282811/

You may have leftover sauce and/or mozzarella cheese, which would be perfect for making a margherita pizza!

Next:  Thomas Keller's Caramelized Scallops
Previously:  Salt and Pepper Tofu