Wednesday, January 22, 2014

Sarah Ruth's Saucepan Brownies

http://www.flickr.com/photos/joyosity/11998994916/

I've been looking a while for a good homemade brownie recipe.  I've tried making Smitten Kitchen's favorite brownies, The Kitchn's extra-dark brownies with sea salt and lime, Coconut & Lime's bittersweet cranberry brownies, and even Alice Medrich's Best Cocoa Brownies.  But the thing is, I grew up making brownies from a box, and I haven't been able to find anything that comes close to the chewy, fudgy goodness of my childhood.  Until now.

I first met Sarah Ruth because she was looking for a roommate, and I just happened to have a spare bedroom in my new home.  Little did I know she was exactly what I needed in my life (and my home) these last 5 months.  To date she's killed at least 3 bugs for me, listened to me whine about work, laughed at me when I was being silly, accepted my introverted need for alone time, and last but not least, shared with me this recipe.  Sadly, she moved out yesterday, but I'm going to always be super grateful for the time we were able to live together.

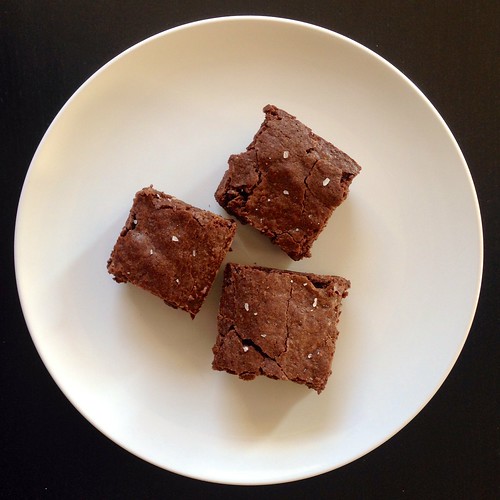
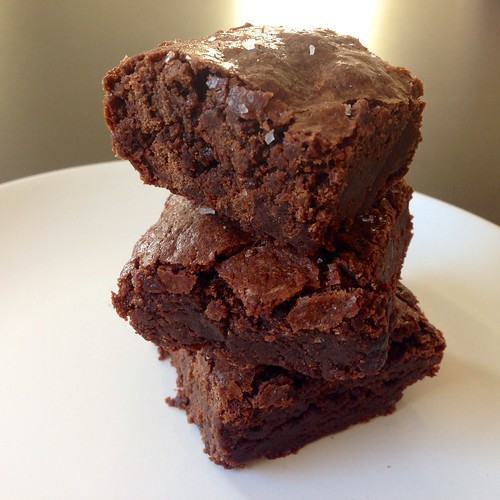
These brownies are moist, dense, and super easy to whip up.  They're called saucepan brownies because you don't even need to use a separate mixing bowl; you just melt the butter in a saucepan and then mix everything in there before pouring it into a greased baking pan.  I highly recommend using a coarse sea salt because it doesn't fully melt in the batter, so when you take a bite you'll get these little nuggets of saltiness that just elevates the rest of the brownie.  If you don't have any coarse sea salt, you can sprinkle some flaky salt on top of the brownies after it's done baking for a similar effect.

http://www.flickr.com/photos/joyosity/11998478903/

Sarah Ruth's Saucepan Brownies
makes 24 brownies

1 cup salted butter*
3/4 cup packed cocoa powder
2 1/2 cup sugar
1 teaspoon vanilla extract
1/2 teaspoon coarse sea salt
3 large eggs
1 1/4 cup flour
1/2 teaspoon baking powder

Preheat oven to 350°F.

Melt the butter in a saucepan over low heat.  Stir in the cocoa and mix until smooth.  Remove from heat and cool slightly.  

Add sugar, vanilla, salt, and eggs.  Stir until combined.  Sift in the flour and baking powder and stir until just combined.  

Spread into greased 9" x 13" pan.  Bake for 30 minutes.  Cool completely before slicing and serving.

*If you only have unsalted butter, add another 1/2 teaspoon of salt to the batter.

Next:  Grilled Cheese Egg in a Hole
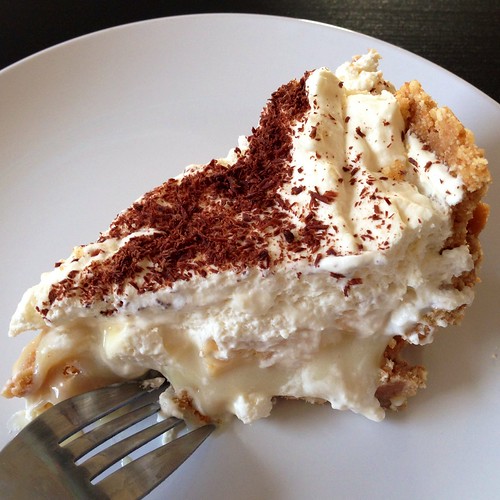
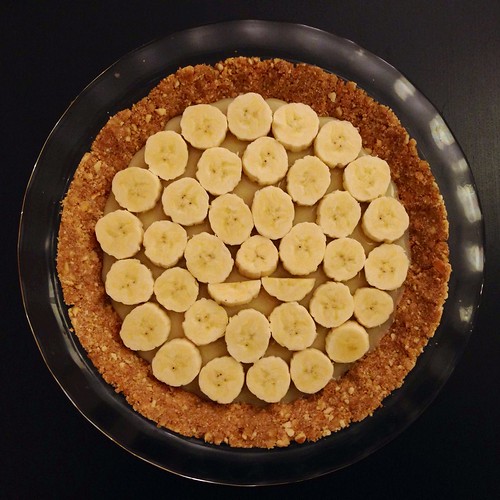
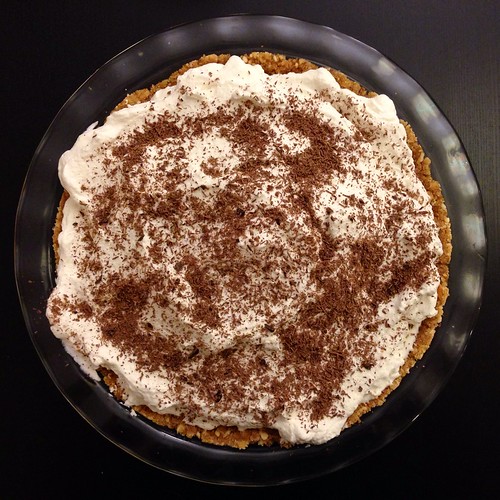
Previously:  Banoffee Pie
Five Years Ago:  Scallion Pancakes

Friday, January 17, 2014

Banoffee Pie


Sherlock is back!*  I discovered BBC's Sherlock last winter and have been impatiently waiting for series 3 for what feels like forever!  What's so great about the show?  The acting, the writing, the mysteries, the chemistry, and of course, Mr. Benedict Cumberbatch himself.  ^_^

I read in an interview that his favorite dessert is banoffee pie, so I decided to try to make one to celebrate the return of Sherlock.  I've been intrigued with this dessert ever since I first saw Juliet offer it to Mark as a sort of peace offering in Love Actually.  With a crust made from crushed digestive biscuits, the pie is filled with layers of creamy toffee, sliced bananas, and lots of whipped cream.  The dessert is British in origin, like the sticky toffee pudding I made previously, and the name comes from an amalgam of "banana" and "toffee".

I couldn't find any digestive biscuits in my local grocery store, so I used good ol' American Nilla wafers.  In a pinch, you could probably use a prepared graham cracker crust.  Some of the recipes I looked up used sweetened condensed milk boiled for hours in the can (essentially homemade dulche de leche) for the toffee layer, but if you don't have hours, you can just make a quick filling using butter, brown sugar, and sweetened condensed milk.

This dessert kind of reminds me of Benny in that it's certainly not the prettiest dessert to look at, but once you've had some, it's irresistible.  ;)


Banoffee Pie (adapted from Saveur)
makes 1 pie

2 sticks unsalted butter
11 oz. box of Nilla wafers
½ cup packed brown sugar
14 oz. can sweetened condensed milk
3 or 4 bananas
1 pint heavy cream
Powdered sugar, to taste
A pinch or two of espresso powder (optional)
Grated chocolate

Melt one of the sticks of butter in a small saucepan.

Crush the wafers in a food processor until you get a fine crumb texture. Transfer to a bowl and stir in the melted butter. Press into a pie pan. Chill the crust in refrigerator for at least one hour.

Melt the other stick of butter in a small saucepan. Stir in the brown sugar and melt over low heat. Add the condensed milk and bring the mixture to a boil for a few minutes, stirring continuously.

Pour the filling into the crust. Cool and chill again for at least one hour until the caramel is firm.

Slice the bananas and place them in a single layer on top of the caramel.

Start whipping the cream.  Sprinkle in some powdered sugar until the whipped cream is barely sweet (the rest of the pie is already insanely sweet).  Whip in the espresso powder if using.


Top the bananas with the whipped cream, sealing the filling in. Sprinkle the top of the pie with grated chocolate.


*Okay, I may or may not have already watched series 3 at the same time it aired in the UK since I just couldn't wait any longer, but for the majority of Americans, it'll be starting this Sunday on PBS after Downton Abbey!

Next:  Sarah Ruth's Saucepan Brownies
Previously:  Flower Pavlovas
Last Year:  Traditional Croissants
Four Years Ago:  Kalua Pork
Five Years Ago:  Mayonnaise Shrimp with Candied Walnuts

Tuesday, January 14, 2014

Flower Pavlovas


I've been holding off on posting about these fruit pavlovas since this summer because I honestly didn't know what to write about them.  They're too pretty not to share though, so I think I'll make this a picture tutorial instead of my normal recipe plus pictures post.

Start off by making the pavlova base, which is basically a meringue with cornstarch added.  You can find a full recipe at The Kitchn.

Beat egg whites until soft peaks form

Gradually add the rest of the ingredients and beat until stiff peaks form

Shape and bake

Using a paring knife, cut out a thin slice

Remove the first slice and continue cutting out thin slices...

...until all you have left is the pit

Start layering the slices in a small dish...

...forming smaller, overlapping rings...

...using smaller and smaller slices...

...until you fill it all in

Grab a pavlova base...

...and carefully slide the fruit slices onto it

Tada!

The pavlovas above were made with nectarines, if I recall correctly.  You'll want to use fruits that will be soft enough to shape into the flower pattern.  I think they're prettiest when there's a contrast between the peel and flesh, but here's one I made with kiwi slices that's quite pretty in its own right.

Reminds me of a succulent plant


Next:  Banoffee Pie
Previously:  Salade Indochinoise
Last Year:  Spicy Tuna with Crispy Sushi Rice
Four Years Ago:  Banana Bread Yeasted Waffles
Five Years Ago:  Nian Gao (Mochi Cake)

Friday, January 10, 2014

Salade Indochinoise

What do you get when you take a perfectly innocent salade Lyonnaise and Thai it up with a fried egg?  A sinfully good salade Indochinoise*!  Okay, I'm done with the puns.  =P

A couple of days ago I saw this Thai fried egg salad on Food 52 and was really intrigued.  I prefer a runny yolk and no raw onions, though, so I looked to the French for inspiration.  A classic salade Lyonnaise consists of a poached egg with crisp bacon over frisée tossed with a warm vinaigrette.  To combine the two, I decided to make the eggs sunny-side up and add fish sauce, lime juice, and garlic to the hot bacon fat to make the dressing.  So yeah, this is a pretty intense salad.  You have been warned.


Salade Indochinoise
serves 2

2 slices thick cut bacon, cut into lardons
1 1/2 teaspoon Thai fish sauce
1 tablespoon fresh lime juice
1/2 teaspoon cane sugar
1 garlic clove, minced
A small squirt of sriracha
2 large eggs
2 large handfuls salad greens

Add the lardons to a pan and place on medium-low heat.

While the bacon is cooking, combine the fish sauce, lime juice, sugar, minced garlic, and sriracha in a small bowl.

Once the bacon is crisp, remove from the pan and add to the fish sauce mixture.

Crack the two eggs onto the hot pan.  Cook until the egg white are just set.  Carefully remove the sunny-side up eggs onto a plate, keeping as much bacon fat as you can in the pan.

Add the fish sauce mixture back to the hot pan.  Lower the heat and swirl the pan to warm up the dressing.


Toss the dressing and salad greens together and plate.  Slide the eggs on top and serve.

The best part is breaking into the yolk and letting that glorious molten gold spill onto the plate.  Divine!


I used a spring mix that I got in my Boston Organics delivery, but next time I'd probably use a sturdier green like escarole or romaine to hold up against the heat and pungency of the dressing.  And if you like cilantro, tossing a handful in would probably be awesome.

*I guess it would be helpful to know that Indochine is the French word for the peninsula on which Thailand sits.

Next:  Flower Pavlovas
Previously:  Sticky Toffee Pudding Ice Cream
Last Year:  Tartine's Lemon Cream Tart
Four Years Ago:  Gaufres de Leige (Belgian Waffles)
Five Years Ago:  Hua Juan (Steamed Scallion Buns)

Tuesday, December 31, 2013

Sticky Toffee Pudding Ice Cream

Häagen-Dazs had a contest years ago for fans to create a new flavor, and the winner was sticky toffee pudding.  I was ecstatic because I absolutely loved sticky toffee pudding!  I first had the dessert when I was in London.  I don't even remember the name of the restaurant, but I remember totally falling in love with the warm, moist cake topped with a toffee caramel sauce and vanilla ice cream.

Alas, the ice cream flavor was a limited edition, and even though I stocked up on it every chance I had, there came a long, dry spell during which I had no sticky toffee pudding ice cream.  =(  I sometimes thought about making it myself but never went through with it until recently when The Kitchn posted a recipe for making sticky toffee pudding sundaes.  I just made a half recipe of the cake and sauce and combined it with a simple base ice cream from Jeni's Splendid Ice Creams enriched with a little vanilla extract.  There was no point in making a gourmet vanilla ice cream with vanilla beans since all the nuances would have been lost under the stronger flavors from the sticky toffee pudding.

Warning:  this is not a quick and easy recipe.  It involves reconstituting dried dates, baking a steamed cake, making a caramel sauce, and churning your own ice cream.  Read through all the steps and make sure you have the time and equipment.  I will say, however, that the results are oh so worth it!  This tastes pretty much exactly like what I remember the Häagen-Dazs version tasted like!

http://www.flickr.com/photos/joyosity/11659379055/

Sticky Toffee Pudding Ice Cream
makes about 1 quart

For the toffee cake:
4 ounces pitted dates, coarsely chopped
1/2 cup water
1/2 teaspoon baking soda
4 tablespoons unsalted butter, room temperature
1/2 cup packed dark brown sugar
1 large egg, room temperature
5 ounces all-purpose flour
1/4 teaspoon baking powder
1/8 teaspoon kosher salt
1/4 teaspoon vanilla extract

Combing the chopped dates and water in a small saucepan and bring to a boil.  Remove from heat.  Stir in the baking soda and let stand for 20 minutes to 2 hours.  Transfer to a food processor or blender and process until mostly pureed.

Preheat oven to 375°F.  Generously grease the bottom and sides of a loaf pan with butter or baking spray.

In the bowl of a stand mixer fitted with a paddle attachment (or with an electric mixer), cream together the butter and sugar on medium speed until light and fluffy, 3-5 minutes.  Reduce speed to low and add the eggs one at a time, fully incorporating after each addition.  Stop the mixer and scrape down the sides of the bowl.

Whisk the dry ingredients together in a separate mixing bowl.  On low speed, alternate adding the dry ingredients with the date mixture, beginning and ending with the dry ingredients.  Stir in the vanilla extract.  Pour the batter into the prepared pan.

Place the pan inside a larger casserole dish or roasting pan and transfer to the oven.  Pour enough hot water to reach halfway up the side of the loaf pan.  Bake until a toothpick pricked into the middle comes out slightly moist, 30-35 minutes.

For the caramel sauce:
4 tablespoons unsalted butter, room temperature
1/2 cup packed dark brown sugar
1/2 cup heavy cream
1/2 tablespoon rum (optional)
1 teaspoon vanilla extract

When the cake has about 10 minutes left of cooking time, make the caramel sauce.  Combine butter, sugar, and cream in a heavy saucepan.  Whisking constantly, bring the mixture to a boil and cook for 3 minutes.  Remove from the heat and whisk in rum (if using) and vanilla extract.

Remove the cake from the oven and allow to cool for 5 minutes.  Prick the cake all over with a skewer or toothpick.  Pour half the sauce over the warm cake and let sit until it reaches room temperature.  Cover and transfer to the refrigerator so that it can chill while you make the ice cream.


For the vanilla ice cream:
2 cups whole milk
4 teaspoons cornstarch
3 tablespoons cream cheese, softened
1/8 teaspoon kosher salt
1 1/4 cups heavy cream
2/3 cups sugar
2 tablespoons light corn syrup
2 teaspoons vanilla extract

Mix about 2 tablespoons of the milk with the cornstarch in a small bowl to make a smooth slurry.  Whisk the cream cheese and salt in a medium bowl until smooth.

Combine the remaining milk, cream, sugar, and corn syrup in a 4-quart saucepan, bring to a rolling boil over medium-high heat, and boil for 4 minutes.  Remove from heat and gradually whisk in the cornstarch slurry.

Return the mixture to a boil over medium-high heat and cook, stirring until the mixture is slightly thickened, about 1 minute.  Remove from heat.

Gradually whisk the hot milk mixture into the cream cheese until smooth.  Stir in the vanilla extract and chill the mixture in the refrigerator.

Pour the ice cream base into an ice cream maker and spin until thick and creamy.

http://www.flickr.com/photos/joyosity/11659621603/in/photostream/

Pack the ice cream into a storage container, alternating it with layers of the cake and caramel sauce; do not mix.  Seal with an airtight lid and freeze until firm, at least 4 hours.


Next:  Salade Indochinoise
Previously:  Miso Pumpkin Soup
Last Year:  Thomas Keller's Lemon Tart
Four Years Ago:  Homemade Waffle Face Off
Five Years Ago:  Curry Turnovers(?)

Friday, December 13, 2013

Miso Pumpkin Soup

I've made this soup 3 times already, so I'm not really sure why it's taken so long for me to post about it.  I first bookmarked this recipe from The Kitchn when I was trying to find ways to use up a sugar pumpkin and sweet potatoes.  Every time I've made it since I've done something a little different--used acorn squash instead of pumpkin, substituted ground ginger for fresh ginger or fried shallots instead of fresh shallots--and it still comes out great.  There's just something so warm and cozy about this combination of flavors and colors.

I like to save the pumpkin seeds and roast them with some olive oil and Old Bay seasoning.  They add a nice crunch if you add them as a topping to the soup but are perfect for just snacking on, too.  I also like the suggestion from The Kitchn of garnishing with chopped scallions, ichimi togarashi, and toasted sesame seeds.  The red pepper flakes kick up the warming factor of the soup without being obnoxiously spicy.


Miso Pumpkin Soup (adapted from The Kitchn)
serves 4

2 lbs. sugar pumpkin or acorn squash
1 lb. sweet potatoes
4 garlic cloves, peeled
2 tablespoons olive oil
Salt and freshly ground black pepper, to taste
1 tablespoon fried shallots
1 teaspoon powdered ginger
3 tablespoons white miso
6 cups vegetable or chicken stock

Preheat oven to 450°F.

Cut the pumpkin or squash in half and remove the seeds and pulp with a metal spoon.  Peel the pumpkin and cut into 2-inch pieces.

Peel and cut the sweet potatoes into 2-inch pieces.


Combine the pumpkin, sweet potatoes, and garlic on a baking sheet, toss with 2 tablespoons of olive oil, and sprinkle with salt and pepper.  Roast in the oven until the pumpkin and sweet potatoes are tender when pierced, about 30 minutes, tossing halfway through.


Add the fried shallots, ground ginger, miso, and vegetable stock to a large pot and stir until dissolved.  Add the roasted vegetables and simmer for 15 minutes.  Turn down the heat if necessary to avoid boiling, as this can impair the flavor of the miso.

Puree the soup using an immersion blender.  To serve, garnish with roasted pumpkin seeds or with chopped scallions, ichimi togarashi, and toasted sesame seeds.


Next:  Sticky Toffee Pudding Ice Cream
Previously:  Thai Coconut Sticky Rice with Mango
One Year Ago:  Momofuku Ramen Broth
Four Years Ago:  Wah Guay (Taiwanese Rice Cake with Meat Sauce)
Five Years Ago:  Pork and Cabbage Dumplings

Monday, December 2, 2013

Thai Coconut Sticky Rice with Mango

Trader Joe's used to carry this dessert, and I loved it:  chewy sticky rice infused with coconut milk and topped with mangoes and even more coconut goodness.  It had the sweet and salty flavor profile that makes you keep coming back for bite after bite.  I've been missing this dessert ever since it was discontinued, but when I saw that mangoes were on sale at my local grocery store, I decided to learn how to make it myself.

I followed this recipe from The Kitchn, but since I didn't have a steamer basket, I improvised with some parchment paper and the pasta strainer insert for my stock pot.  You could also maybe try using cheesecloth with a metal colander or strainer in a large enough pot with a lid--anything with holes in which you could steam the rice in.  I also suggest chilling the can of coconut milk in the fridge before opening because I find that it makes it easier to scoop the coconut cream from the top off if it's more solid. 

http://www.flickr.com/photos/joyosity/11139103514/in/photostream/

Thai Coconut Sticky Rice with Mango
serves 2-4

1 cup sweet rice
1 can coconut milk, unshaken and chilled in the refrigerator
3 tablespoons sugar, divided
1 teaspoon salt, divided
1/2 teaspoon cornstarch
2 ripe mangos
Toasted sesame seeds, to garnish

Soak the sweet rice in room temperature water for 1-2 hours.  Cut a piece of parchment paper out about 3 inches wider in diameter than the bottom of the pasta strainer insert for a stockpot.  Tuck the paper into the insert so it fits in the bottom like a bowl.

Drain the rice and rinse thoroughly.  Pour about 1 cup of water into the stockpot and place the rice in the parchment paper "bowl" and place the pasta strainer insert in the pot. Cover tightly and steam over low to medium heat for 20 minutes.

While the rice is steaming, open the can of coconut milk and spoon out the thick cream on top into a small bowl.

Pour the thinner, lighter coconut milk left in the can into a small saucepan.  Stir in 2 tablespoons of sugar and 3/4 teaspoon salt.  Warm over medium heat, stirring frequently, for 5 minutes. Do not let the sauce boil.

When the rice is done, transfer it to a mixing bowl (it will be clumpy).  Slowly pour the warm coconut milk over the rice in the bowl, stirring frequently. You want the milk to coat the rice but not leave puddles. Keep stirring, and stop pouring in coconut milk when it looks like the rice is saturated. You may not use all of the milk.  Set the rice aside to finish absorbing the coconut milk; after 15 minutes or so it should have soaked up any milk that is still liquid.

While the rice is standing, make the coconut topping sauce. Rinse out the coconut milk saucepan and pour in the coconut cream that you took off the top of the can. Stir in 1 tablespoon of sugar and 1/4 teaspoon salt. In a separate bowl, whisk together a few teaspoons of water and the cornstarch.

Whisk this cornstarch slurry into the coconut cream and cook over low heat for about 3 minutes, or until the mixture thickens considerably. Set aside.

Peel the mangoes and then slice the flesh into 1 inch wide strips.

To serve, place about 1/3 cup cooked sticky rice on each plate, and arrange mango slices around it. Drizzle with the coconut topping sauce and sprinkle with a few toasted sesame seeds.

http://www.flickr.com/photos/joyosity/11139105454/in/photostream/

Next:  Miso Pumpkin Soup
Previously:  Cheese Fondue Stuffed Roasted Pumpkin
Last Year:  Mashed Potato Pizza with Roasted Garlic and Bacon
Four Years Ago:  Kettle Corn
Five Years Ago:  Salted Butter Caramel Ice Cream