Monday, November 30, 2009

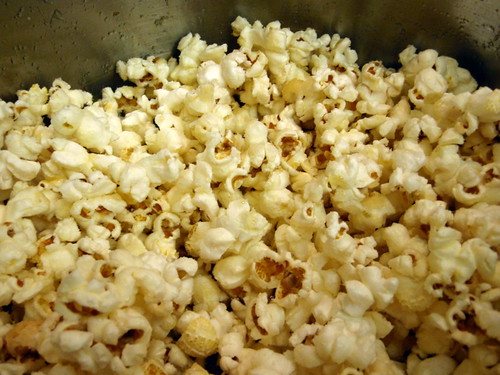
Kettle Corn

Each spring, I look forward to my first game of the season at Fenway Park. The last three years in a row, I've been lucky enough to get tickets to Opening Day, thanks to my wonderful, beautiful friends who really, really love me. And while the quality of food offered there is sorely lacking, I can never resist the kettle corn sold in the Grand Concourse. The aroma of the fresh popped corn plus the melted sugar is all the advertisement it needs. Of course, it's best when it's still hot, or at least warm, but sometimes all you get is the already-bagged kind which, let's face it, just doesn't compare.

I was craving some the other day, and since it is no longer baseball season, I figured I'd try making some, following Jen's recipe on Tiny Urban Kitchen. If you haven't read her food blog before, you should definitely check it out. I knew her personally before either of us started food blogging, and her pictures and the recipes she attempts are leagues beyond my own. Thankfully, this recipe is really quite simple!

PB272304

Kettle Corn (from Tiny Urban Kitchen)
makes one big bowl, a little too much for one hungry, popcorn-loving girl, but probably not enough for two ;)

1/4 cup canola oil
1/3 cup popcorn kernels
1/4 cup sugar
Salt to taste

Put the oil in a pot (ideally a pot with handles and a cover!) and heat to medium high.

Put 3 kernels in the oil and wait for the three kernels to pop. When this happens, you know the oil is hot enough.

Add the rest of the kernels. They should be spread out in one thin layer at the bottom of the pot.

Cover and let pop; it should start popping almost immediately. Start shaking the covered pot around to let the kernels shake around so that the un-popped kernels can get to the bottom where it's hot and also so the popped popcorn doesn't burn.

When the popping seems to have slowed down a bit, carefully lift the lid and dump the sugar in.

Continue shaking the covered pot around, distributing the sugar and letting the rest of the kernels pop.

When it seems like the popping has slowed considerably (1-2 minutes), remove the pot from heat and let it cool. Add salt and stir the popcorn around to make sure the sugar and salt is evenly distributed.

PB272302

Jen mentions that you can use more oil if you want (up to 1/3 cup) and more sugar if you like, but one of the things I like about kettle corn is how the little kiss of sweet and salty makes you crave more. Too much sugar and you might as well make caramel corn.

Thursday, November 26, 2009

Apple-Pear-Cranberry Crisp

Happy Thanksgiving, everyone! What are you thankful for this year? Me, I'm thankful that I got to travel to a lot of different countries (Czech Republic, Bolivia, Aruba, Italy, Greece, Turkey, and Egypt!), for new friends that I've made, and that my brother got married to a wonderful girl!

I almost always staying in Boston for Thanksgiving since my home in Ohio is really too far away to drive to and too expensive to fly to for such a short break. But it's become tradition to celebrate with other Thanksgiving "orphans", and this year I went over to Oeimae, Yumi (thanks for the invite!), and Judy's apartment in Brookline for yet another potluck. This time, I wanted to use up the two pears and two apples I had gotten in my Boston Organics delivery, so I decided to make a apple-pear crisp. But just those 4 fruits didn't seem to be enough for the 9"x13" pan, so I bought a bag of fresh cranberries to add to the mix for some color and tartness.

PB262293

Apple-Pear-Cranberry Crisp
makes 24 servings

2 apples, peeled, cored, and sliced (I used Fuji apples)
2 pears, peeled, cored, and sliced (I used one Bosc and one Concord pear)
1 bag fresh cranberries
1 teaspoon cinnamon
1 dash nutmeg
1 1/2 cups flour and 1 tablespoon flour, divided
1 teaspoon vanilla extract
1 cup sugar
1 1/2 cups oats
1 1/2 cups brown sugar
1/2 teaspoon baking powder
1/2 teaspoon baking soda
3/4 cups butter, cut into pieces

Preheat oven to 350°F.

PB262282

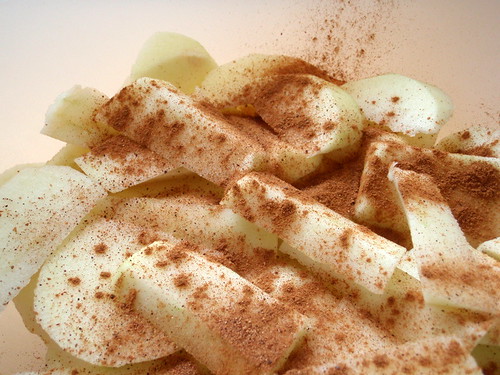
Toss the apple and pear slices with the cinnamon, nutmeg, and 1 tablespoon flour. Add the cranberries and sugar. Toss to mix. Place in a 9"x13" baking dish.

PB262288

In a large bowl, add the remaining ingredients and cut the butter into the dry ingredients until it resembles a coarse meal. You can also use a food processor to do this, but I enjoy doing it with my hands.

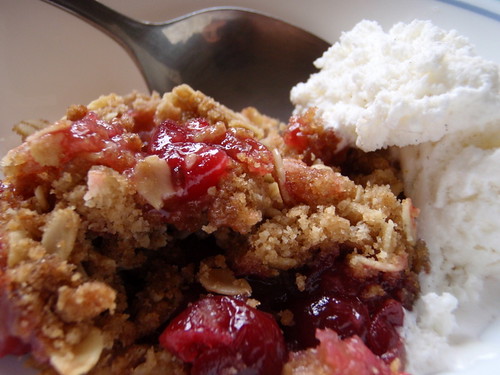
Spread the topping evenly over the fruit. Bake for 45 minutes. Serve with vanilla ice cream!

PB262297

That last part of the recipe is key. Even though there's a whole cup of sugar in the fruit filling, the fresh cranberries are really quite tart. Eating this crisp with ice cream mellows out the fruit so that the sum is much greater than its parts.

This recipe can be adapted to other fruits as well. You can omit the cranberries and use more of the apples or pears. A peach or cherry crisp is another possibility, but you'd have to adjust the amount of sugar since those fruits are already quite sweet.

Monday, November 23, 2009

Nanaimo Bars

Hi everyone. Yes, yes, I know. It's been almost 5 whole months since I posted. It's unforgivable really. But you see, the reason I started this blog in the first place was because my second love, the Red Sox, were taking their winter break and I wasn't traveling as much for work anymore so I needed something to occupy my time. And well, what do you know, it's that time of the year again! So please forgive me, and get ready to start drooling again!

08-11-09 022

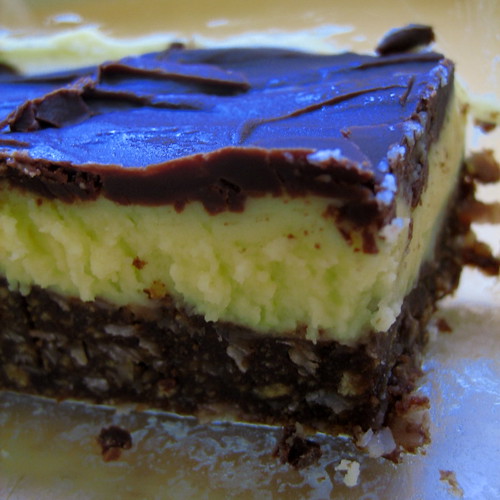
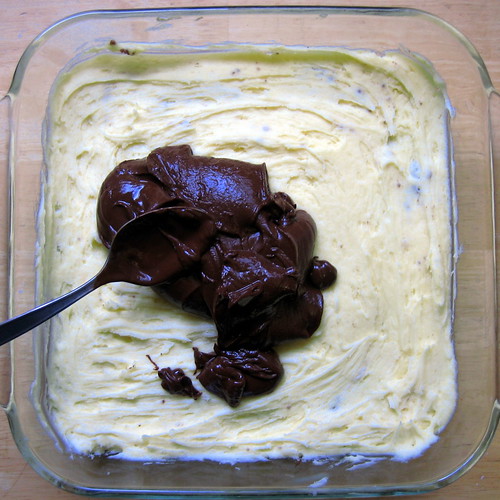
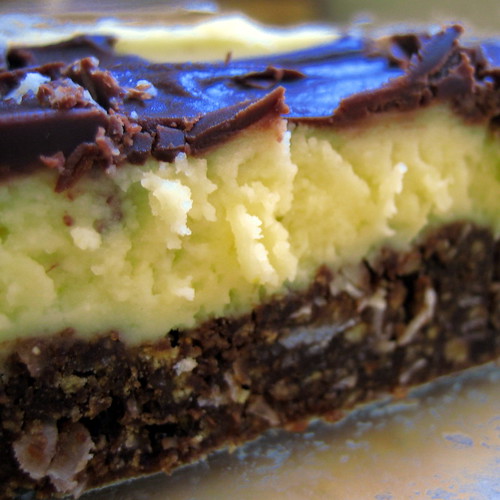
Last week The Kitchn had a post on nanaimo bars (apparently pronounce nah-NAI-mo): a three-layer dessert bar with a cocoa coconut crust, vanilla custard middle, and chocolate top. With over 2 whole sticks of butter in the recipe, what's not to love? And I just happened to have all the ingredients except for the cream in my fridge and cupboard so I decided to make a batch for a pre-Thanksgiving potluck dinner.

Nanaimo Bars (adapted from City of Nanaimo via Eclectic Cook and The Kitchn)
makes 40+ bars

Bottom Layer
½ cup unsalted butter
¼ cup sugar
5 tablespoons cocoa powder
1 egg beaten
1 ¼ cups graham cracker crumbs
½ cups finely chopped almonds*
1 cup coconut*

Melt first 3 ingredients in top of double boiler. Add about a third of the hot mixture to the beaten egg a spoonful at a time to temper. Add the egg mixture to the pot and stir to cook and thicken (roughly 3 minutes). Pay careful attention to the mixture when cooking so that the egg does not curdle. If you start seeing any lumps, immediately remove from heat and keep stirring. Stir in crumbs, coconut, and almonds. Press firmly into an ungreased 8" x 8" pan.

IMG_4563

Second Layer
½ cup unsalted butter
2 tablespoons and 2 Tsp. cream*
2 tablespoons vanilla custard powder*
2 cups icing sugar

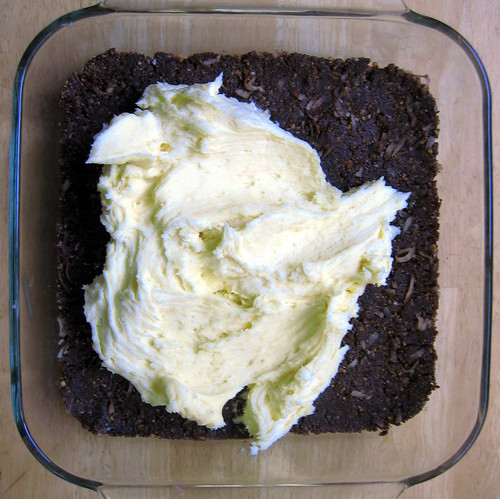
Cream butter, cream, custard powder, and icing sugar together well. Beat until light. Spread over bottom layer.

IMG_4565

Third Layer
4 ounces semi-sweet chocolate
2 tablespoons unsalted butter

Melt chocolate and butter over low heat. Cool. Once cool, but still liquid, pour over second layer and chill in refrigerator. Cut into 1 inch squares and serve slightly chilled.

08-11-09 020

*A note about the ingredients: the type of cream and coconut was not specified, and I ended up using light cream and sweetened, shredded coconut. And instead of using vanilla custard powder, I substituted with French vanilla instant pudding powder. Also, instead of using finely chopped almonds, I substituted with almond meal. I've never had one of these bars before, so I'm not sure if you could tell a difference in texture.

I found that the quantity of ingredients that the recipe calls for in the third layer to be barely enough to cover the middle layer. And even though the recipe calls for the third layer to cool before spreading over the second layer, I found that even when it was still warm it was getting quite viscous. I was afraid that if I waited for it to cool too much I wouldn't be able to spread it out so I ended up using it while it was still warm. Of course, then I found out the reason why you want to wait until it is cool is because the second layer can melt and start blending with the third layer. =(

At the potluck, everyone seemed to like the bars, and it was agreed that a 1 inch square bar was enough. As rich as the recipe is, I thought the bars were otherwise a little bland. Personally, I could have used a little salt in the recipe to round out the richness. I think either using salted butter or sprinkling the top with sea salt would've done the trick. Another direction I would go is to add almond extract to the custard layer to brighten it up a bit.

One year ago:  Homemade Crystallized Ginger

Monday, July 6, 2009

Curried Carrot Soup

I got yet another bag of baby carrots in my Boston Organics delivery last week and suddenly remembered one way (other than carrot cake or carrot cake ice cream) that I've enjoyed carrots: in a curried soup. I don't even remember where I first tried it; I think it was either at Au Bon Pain or in one of the soup cartons from Trader Joe's. I just remembered that I couldn't really taste the carrots, which is exactly what I was looking for.

A quick google search gave me Rachael Ray's version as the first hit. It looked simple enough, but I added a few tweaks. I used half an onion and replaced the other half with a shallot since it was all I had. I also halved the amount of butter, added 2 teaspoons of fresh, chopped ginger, and replaced the sour cream with nonfat plain yogurt.

Curried Carrot Soup

Curried Carrot Soup (adapted from Rachael Ray's recipe here)
makes 4-6 servings

1 tablespoon extra virgin olive oil
1 tablespoon butter
1/2 medium onion, chopped
1 shallot, chopped
2 teaspoons fresh peeled ginger, finely chopped
1 pound packaged baby carrots
2 (13.5 oz.) cans chicken broth
1 1/2 tablespoons curry powder
1/4 to 1/2 teaspoon ground cayenne pepper
Kosher salt
Nonfat plain yogurt
Snipped scallions (optional)

Preheat medium pot over medium high heat. Add olive oil, butter, onions, shallots, ginger, and carrots and saute 5 minutes.

Add the chicken broth, curry and cayenne, and about 1 teaspoon salt to the pot. Bring to a boil, cover and cook until carrots are very tender, about 15 minutes.

Using an immersion blender, carefully puree the soup. Alternatively, you can use a blender to puree the soup in small batches.

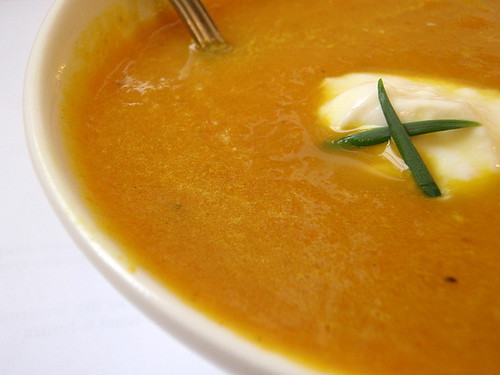
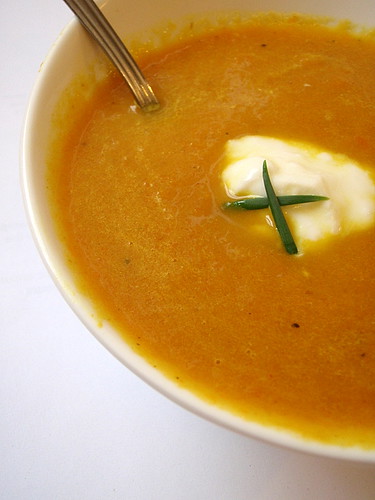
Ladle into bowls and top with a heaping spoonful of yogurt (or sour cream) and scallions.

Curried Carrot Soup

If you don't have yogurt or sour cream, you can also add a swirl of cream into the soup to balance out the spices, but you'll lose the tanginess of the yogurt.

Sunday, June 14, 2009

Daring Cooks Challenge #2: Homemade Bulgogi Dumplings

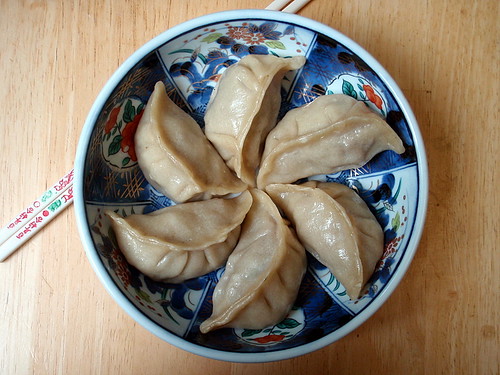
Bulgogi dumplings

My first thought after seeing the second Daring Cook's challenge was, "Why mess with perfection?" Jen from Use Real Butter had chosen Chinese dumplings as the challenge, which coincidentally, was one of my first posts on The Cooking of Joy. I've been making my mom's recipe for dumplings for as long as I can remember not only because it's my mom's but quite simple because it is the best-tasting dumpling I've ever had. In my opinion, it has the perfect ratio (1:1) of meat to vegetable and is just seasoned enough that you can serve it boiled with only some sriracha sauce for heat, if you want. So seriously, why mess with perfection?

But Jen's request to "try something different" if we'd made Chinese dumplings before echoed in my head as a challenge. Then when I came up with the idea to make kalbi using the kiwi, pear, and apple I had gotten in my Boston Organics delivery, I started thinking about making a beef dumpling filling with the same marinade. And using Romaine lettuce instead of napa cabbage as the vegetable since Romaine is traditionally eaten with kalbi and bulgogi (Korean marinated barbecued sirloin beef). And ssamjang (seasoned soybean paste) as the condiment. And thus, the bulgogi dumpling was born.

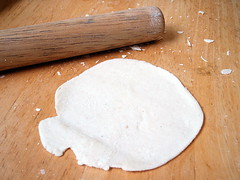
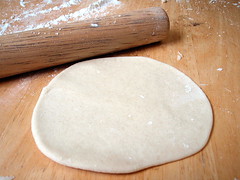
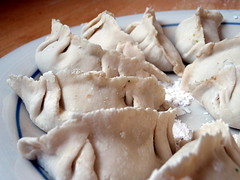
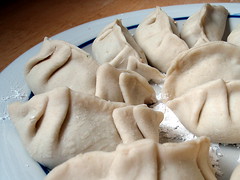
One of the other requirements for the Daring Cook's challenge was to make your own wrappers. Jen had posted a recipe that used warmed water instead of the boiling water recipe I was used to. Since I was doing something different anyways, I figured I'd try her recipe (using her mom's version to mix the dough) but I soon realized that I much preferred the boiling water version. The warm water version gave a really stiff dough that was much harder to work with. At first I thought that maybe I hadn't added enough water, but the recipe only called for 1/2 cup water for 2 cups of flour, and I had already added about 2/3 cup of water. So I ended up scrapping half of the warm water dough and making a half batch of the boiling water dough, which I've reprinted here. Using the boiling water and kneading the dough for a good five minutes allows the dough to develop a lot of gluten. Resting it for 20 minutes makes it even more pliable so that you should have no problems rolling out your wrappers and stretching them while wrapping.

Warm water wrapper Boiling water wrapper
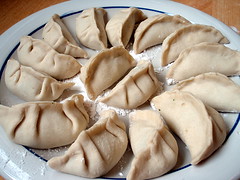
Wrapped dumplings Wrapped dumplings
Wrapped dumplings P5231205-1

Above is a side by side visual comparison of the two wrappers with the boiling water ones on the right. The reason for the color discrepancy is simply because I ran out of bleached all-purpose flour after making the warm water wrappers and used unbleached all-purpose flour for the boiling water ones.


Bulgogi Dumplings

makes about 56 dumplings

1 bundle bean thread vermicelli
1 lb. ground beef (I used 80% lean meat)
1/2 head romaine lettuce, washed and roughly chopped
3 scallions, roughly chopped
1/2 cup kalbi marinade
1/2 tablespoon sesame oil
56 homemade dumpling wrappers (recipe below)

Soak the bean thread vermicelli in a bowl filled with hot water for 15 minutes.

While the vermicelli is soaking, use a food processor to mince the lettuce and scallions. Transfer to a large mixing bowl.

Squeeze out the excess water in the vermicelli and use the food processor to chop into about 1/2" pieces. Add to the mixing bowl.

Add the ground beef, marinade, and sesame oil and mix well. Cover and refrigerate until ready to use.

Once you have your dumpling wrappers ready, prepare plates or trays with flour for dipping. Put a spoonful of the filling in the middle of a wrapper and fold in half. Seal center portion of the joined edges. Make two pleats on both the left and right side of the dumpling. Make sure that the whole thing is totally sealed and then dip the bottom in the flour and place on the tray. Here are step-by-step photos to show you how it's done, or you can check out this video, but ignore the part about wetting the edges. Since we are using fresh dumpling wrappers here, you can skip that step.

To pan-fry the dumplings, heat a frying pan on high and add oil once it is hot. Once the oil is hot, add the dumplings one at a time so that they are sitting upright. Once the bottoms are browned, add about a 1/2 cup of water (for 8 dumplings, my usual serving size). If you like your dumplings extra crispy, add 1 tablespoon of flour or cornstarch to the water and mix to get rid of the lumps before you add it to the pan. Be very careful as the steam coming off the pan may burn you. Cover and let cook for a few minutes until the water is almost all gone. Remove the lid and let the rest of the water cook off.

Homemade Dumpling Wrappers (adapted from here)
makes about 56 wrappers

3 cups all-purpose flour
1 cup boiling water
4 tablespoons cold water
Flour for dusting

Pour boiling water into the flour, quickly stir with a fork or chopstick, mix well, then add the cold water. Mix and knead into a soft dough about 5 minutes.

Cover with damp cloth or paper towel. Set aside and rest for 20 minutes.

Knead the dough for 1 minute and divide into 4 quarters. Roll one quarter into a long snake and pinch into about 1 inch lengths.

Dust flour on work surface. Roll each piece into a circle of about a 3 inch diameter. Try to make the edges thinner than the middle.
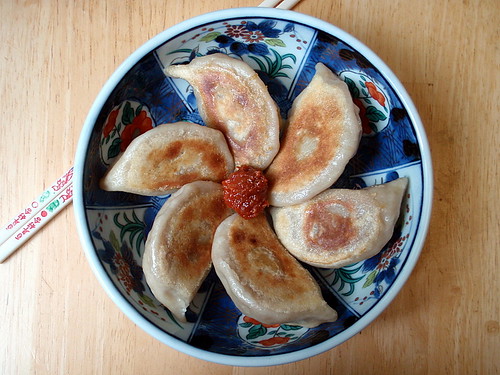
Bulgogi dumplings with gochujang

Instead of the usual soy sauce, vinegar, sesame oil, and sugar dipping sauce I like to have with my dumplings, I just served it with ssamjang. The intense saltiness of the season soybean sauce complemented the sweetness of the marinade, but I have to admit both flavors were a little too strong, so I tried wrapping some Romaine lettuce around a dumpling, similar to how I like to eat my kalbi.

Bulgogi dumpling wrap

This combination ended up being perfect as now there was a balance of all the oral senses: taste (sweet and salty), temperature (hot and cold), and texture (crunchy and soft).

Bulgogi dumpling wrap

So once again, the Daring Cooks Challenge forced me to try something I normally wouldn't have made, which is the point of a challenge, I suppose. To be honest, I'll probably continue to stick with my mom's dumpling recipe and store bought wrappers, but it was pretty fun to make these, and I'm looking forward to next month's challenge!

Wednesday, June 10, 2009

Kale Chips

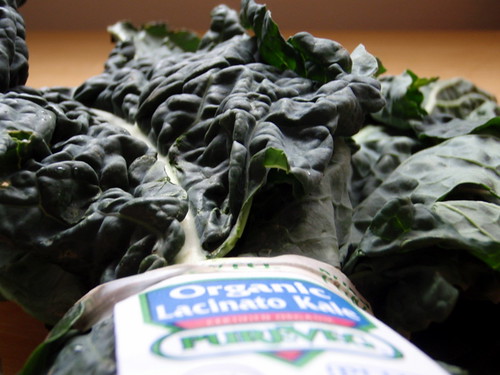
Organic Kale from Boston Organics

I was lucky enough to score tickets to all three Red Sox Yankees games this week, which also meant I'd have three days of Fenway food temptation to deal with. I mean, I love those Fenway franks as much as the next girl, but three days in a row of hot dogs for dinner is a little overboard, even for me. So I decided to use up the kale I'd gotten in my last Boston Organics delivery and make a little snack for myself (and the 2 vegetarians I was going with).

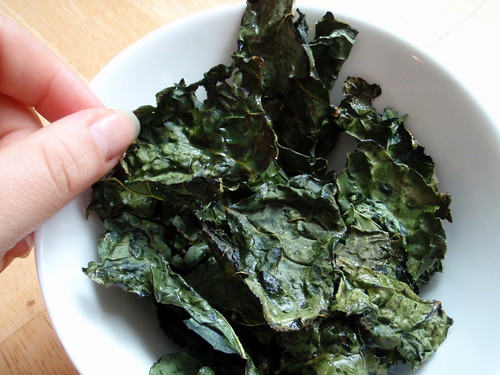
This recipe is super duper simple, and I've even pared it down from the first time I made them. The first time I'd read somewhere that you could toss the kale in a vinaigrette before baking them, but I found that it was too much liquid and ended up having to bake the chips a lot longer just to get them crispy. Yesterday I tried making them with only oil and salt, and they came out perfect. They kind of remind me of Korean roasted seasoned seaweed, only not as pretty.

Making kale chips

Kale Chips
makes a sandwich bagful

1 bunch kale
Cooking spray
Sea salt

Preheat the oven to 350 °F.

Wash the kale and tear into bite-sized pieces. Dry well in a salad spinner.

Line a baking sheet with aluminum foil and spray liberally with cooking spray. Add the kale pieces in an even layer and spray with more cooking spray. Sprinkle sea salt on top to taste (I used about a teaspoon) and toss.

Bake kale for 10-15 minutes, tossing at least once, until crispy. Do not let them get too brown or else they will be bitter.

Kale chips

The only sad thing about making kale chips is that they shrink so much so you only end up with a baggie-ful when you started off with a whole bunch. And they're pretty addictive, so they only last a half inning or so. Unless it's the inning where Papi hits his third homerun of the year and the Red Sox went on to score two more runs. Because that was a pretty long inning. Just sayin'.

I think I'll make some wok-fried edamame with garlic to bring to tonight and tomorrow's game. They'll be like the healthier, Asian version of peanuts at a ballgame since I can just toss the shells onto the ground! =)

Friday, June 5, 2009

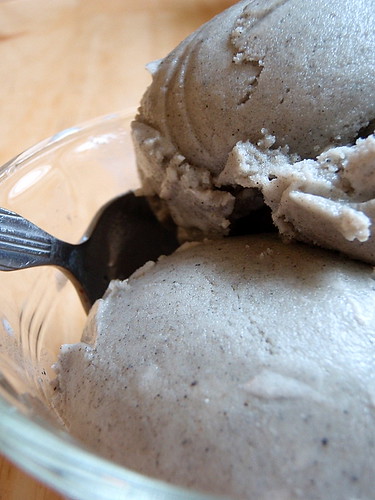
Black Sesame Ice Cream

Black Sesame Ice Cream

And here is the promised recipe for black sesame ice cream. I basically used the same recipe I created for the red bean black and sesame ice cream but left out the sweetened red beans. At Annie's party I started talking to jglee about making ice creams, and she mentioned that she also makes this, but from real black sesame seeds and with a frozen custard base. I realized I have found myself moving away from the frozen custard recipes, maybe in part because it requires a lot more effort and also because it means a lot of left over egg whites. But I did just bookmark this recipe for "self-frosting angel cake" that uses egg whites (and as a bonus it bakes in a pan instead of a bundt pan, which I don't own) so maybe I'll try another frozen custard recipe in the near future.

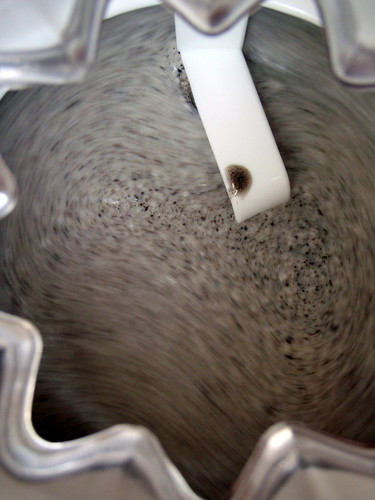
Churning Black Sesame Ice Cream


Black Sesame Ice Cream
makes about 1 quart

1 can (14 oz.) sweetened condensed milk
3 1/2 cups half and half
2 pouches (about 1/2 cup) black sesame instant powder mix

Whisk all the ingredients together and let chill completely in the refrigerator.

Freeze in ice cream maker according to manufacturer's instructions. Transfer to an airtight container and let harden in freezer overnight.

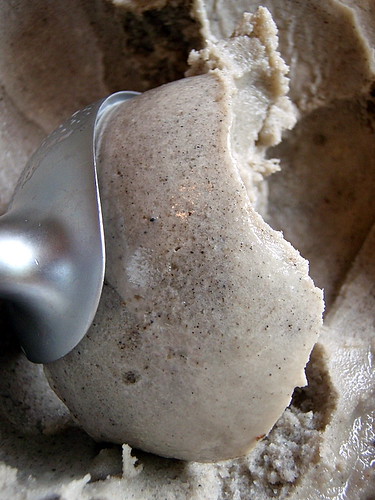
Black Sesame Ice Cream

Wasn't that easy? Three ingredients and three sentences! =) Which reminds me, I should get around to making my coconut lime sorbet soon. That recipe only has two ingredients, and I bet I can get the directions down to two sentences.....

This is my entry to the Homemade #5 Challenge - Ice Cream.